How to Paint a Legio Sinister Freehand on the Adeptus Titanicus Warlord Titan

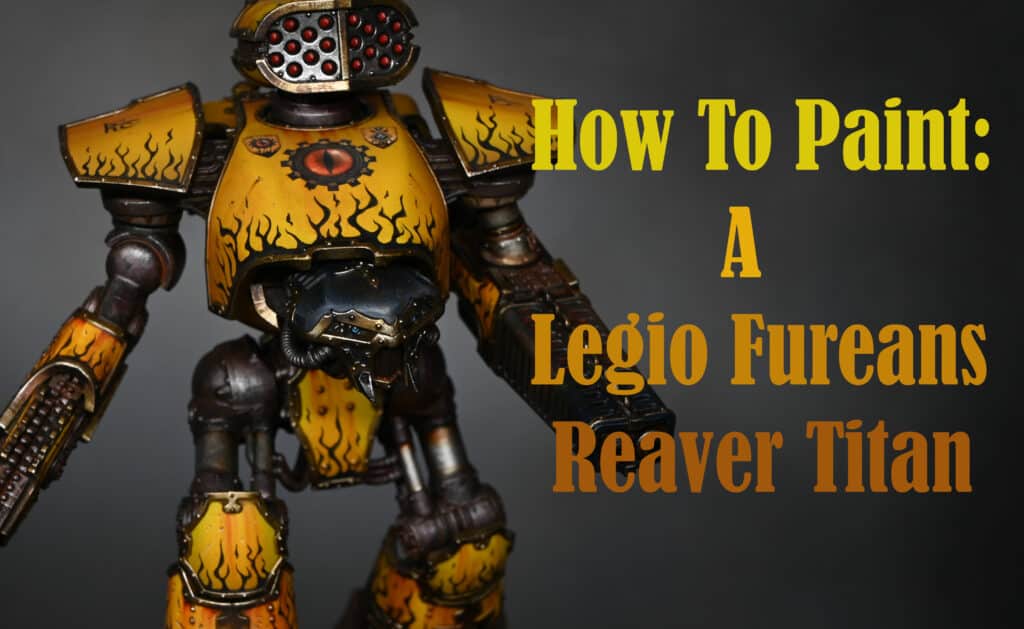
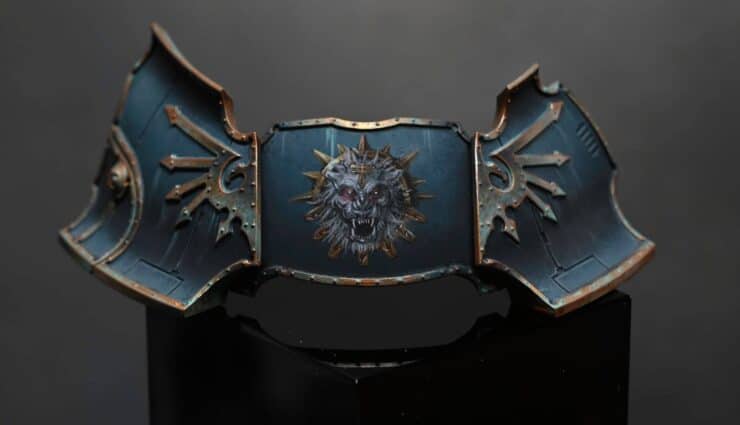
Welcome to this detailed guide on how to paint the Legio Sinister freehand symbol for a Warlord Titan. I will be using various Games Workshop and Vallejo paints to achieve a polished and striking look. This guide is suitable for intermediate to advanced hobbyists due to the precision required in freehand painting.

Video – Legio Sinister Freehand

Please make sure that you are logged into the website to watch this video! It’s a free tutorial, so a “friend” membership or above will unlock it.

All videos are recorded in HD 720p or higher – use full screen for the full effect and let the video load completely.

Paints Used

  • Vallejo Model Colour Black
  • Games Workshop Paints: Mechanicus Standard Grey, Slaanesh Grey, Grey Seer, Mephiston Red, Mournfang Brown, XV-88, Dorn Yellow, Screaming Skull

Steps and Tips for the Legio Sinister Freehand

  1. Mapping Out the Position: Begin by using Vallejo Model Colour Black to roughly outline where the symbol will be placed. Start with a small circle at the centre, gradually expanding outwards. Include a line at the top of the curve to centralise the image.
  2. Refining the Shape: Progressively enlarge the symbol, focusing on refining its shape. Paint an approximate circle with spikes extending outward. Ensure even distribution of the black paint to provide a solid base for subsequent layers.
  3. Applying Initial Colours: Commence with Games Workshop’s Mournfang Brown, applying it as a foundation for the non-metallic parts of the symbol. Layer on XV-88 next, followed by Dorn Yellow, with a focus on the top-left for the lighting direction. Remember, moderate use of Dorn Yellow prevents oversaturation.
  4. Adding Highlights: Employ Screaming Skull to introduce highlights. Be judicious in this step, concentrating on the top left to evoke a lustrous appearance. The XV-88 should remain the predominant colour for the metallic aspects.
  5. Painting the Lion’s Face: Utilise a range of greys (Mechanicus Standard Grey, Slaanesh Grey, Grey Seer) to depict the lion’s face. Start with basic shapes, refining them progressively. Pay special attention to the eyes, nose, and mouth, building depth with shadows and highlights.
  6. Detailing with Red: Apply a glaze of Mephiston Red for a subtle red glow around the eyes and other facial areas. This step enhances the lion’s fierce visage.
  7. Adding Fur Details: Use greys to render fur details, commencing with darker shades and progressing to lighter highlights. Focus on creating a three-dimensional effect with varied brushstrokes.
  8. Final Details: Paint the Titanicus symbol on the lion’s forehead using black as a base. Layer greys for the non-metallic metal effect, ensuring a thinner central line for a precise appearance. Use Dorn Yellow and Screaming Skull for the highest highlights, ensuring they are well-placed to create a realistic metallic sheen.
  9. Refining and Adjusting: As you near completion, revisit areas that require refinement. This may include sharpening edges, deepening shadows, or enhancing highlights. The key is to achieve a balance between contrast and harmony in the symbol’s details.
  10. Final Touches: Examine the overall piece for any last-minute adjustments. This might involve intensifying certain colours, smoothing transitions, or adding small details to bring the symbol to life. Ensure the lighting direction is consistent and the symbol stands out against the background.

Step By Step Image Guide

The team at Warhammer Community approached me for some tips on freehand and I created an article with step by step imagery for the tutorial above – to view it, visit:


More Freehand Tutorials on the Website

Freehand
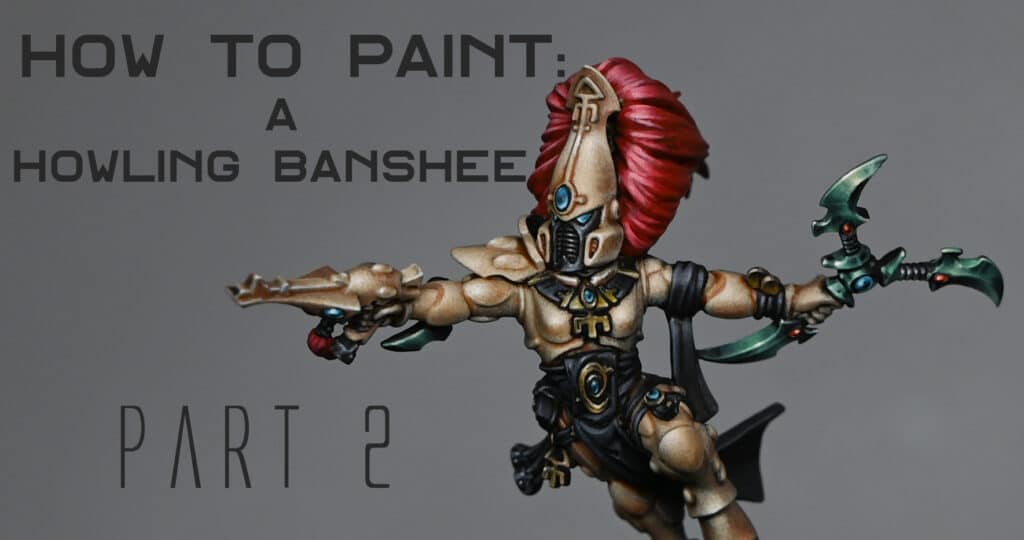
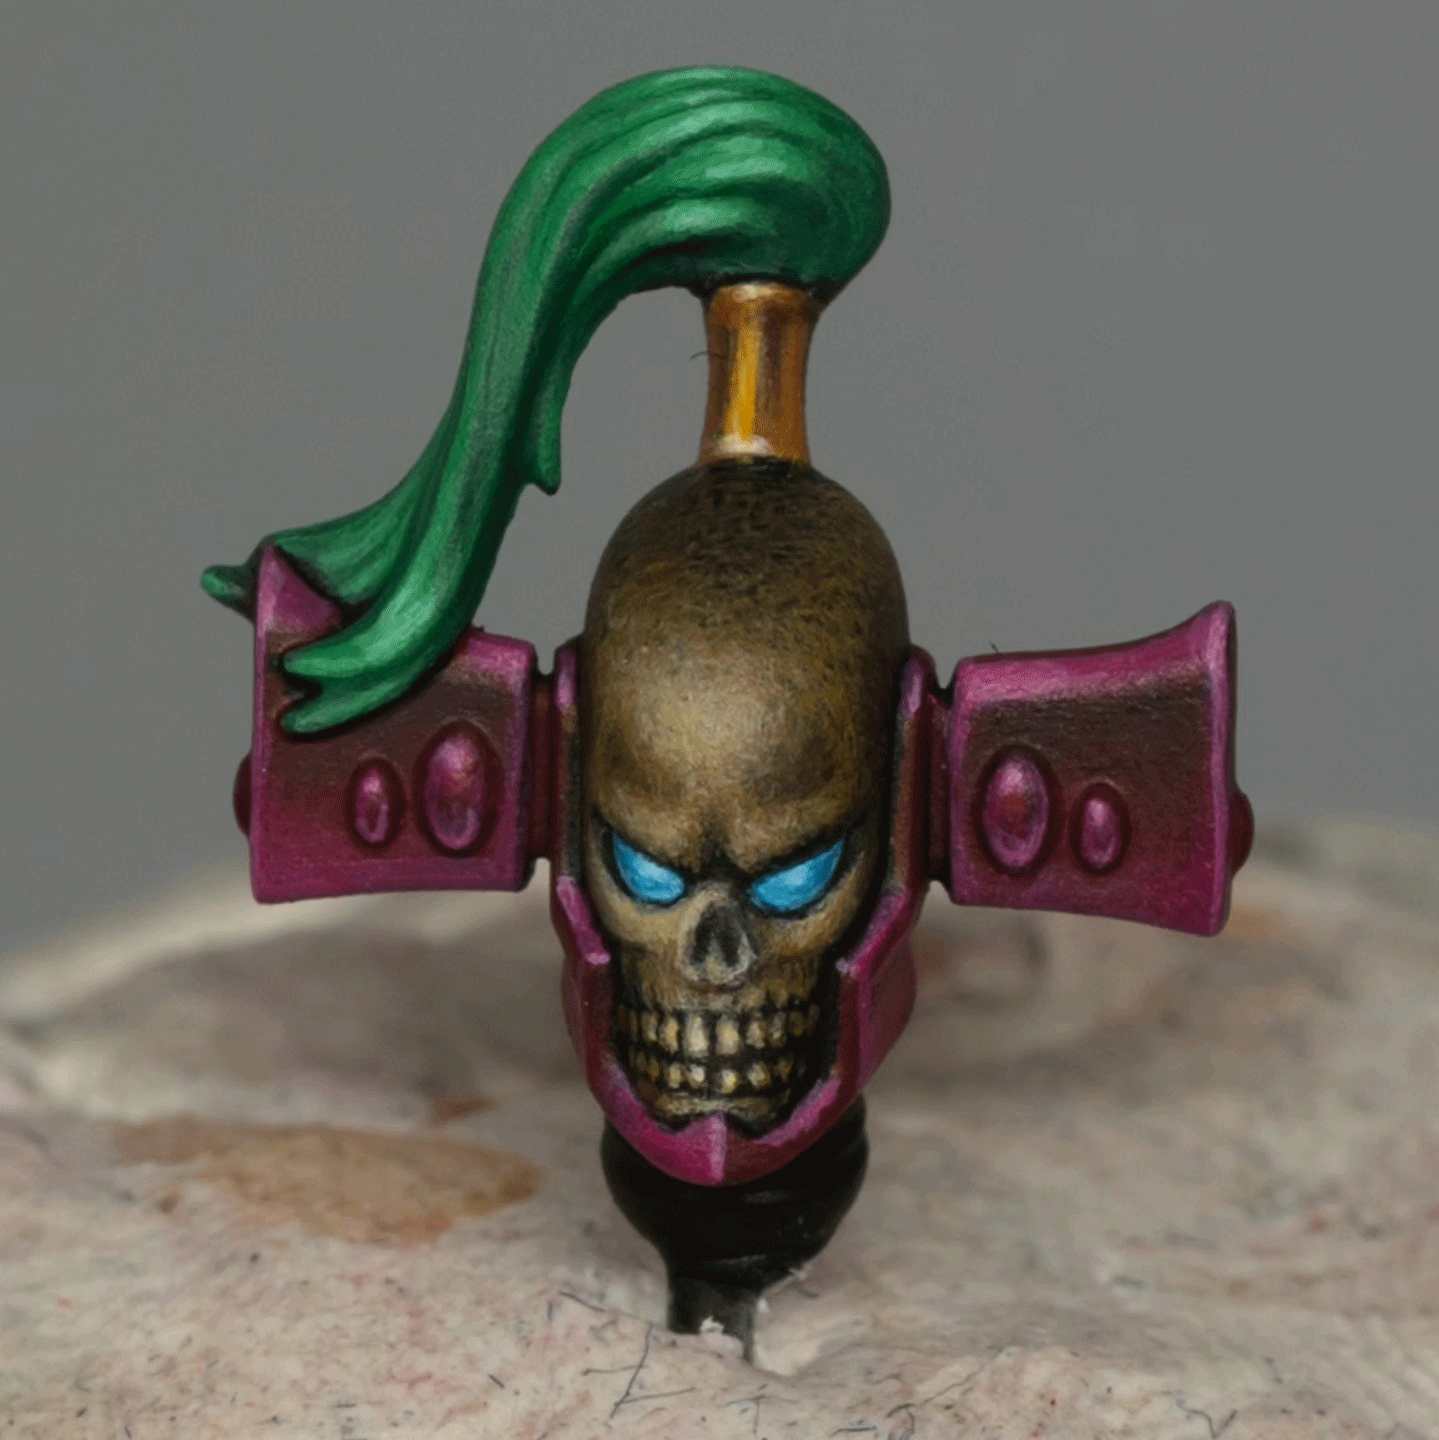
How to Paint a Freehand Skull on an Aeldari Dark Reaper Helmet
In this guide, I’ll walk you through the entire process of painting a freehand skull on an Aeldari Dark Reaper helmet. This tutorial is ideal for intermediate to advanced painters looking to add some atmospheric detail to their Dark Reaper unit. Let’s get started! Video: How to Paint a Freehand Skull on an Aeldari Dark Reaper Helmet Materials Needed Paints: Games Workshop: Rhinox Hide, XV-88, Morghast Bone, Sotek Green P3: Morrow White (or any white paint) Vallejo: Model Colour Black Other Supplies: Sculpting putty (for filling face details) Tamia Extra Thin Cement (optional, for smoothing putty edges) Sharp scalpel for scraping Wet palette for paint mixing Step 1: Prepare the Surface Fill in Sculpted Details: To ensure a smooth surface for the skull, use sculpting putty to fill in the nose and teeth details on the face. Apply a generous amount to cover gaps. Let it Dry Fully: Allow the putty to dry overnight. Scrape any excess with a scalpel for a smooth finish, avoiding key areas like the chin and brow to retain sharpness. Step 2: Prime the Model Apply Primer: Prime the model with black primer to enhance contrast and set the base for painting. Use Pins for Easy Handling: Attach pins to the model’s head and limbs to make it easier to handle and reposition during the painting process. Step 3: Painting the Eyes Base Colour: Start with Sotek Green as the base for the eye lenses. Layering Highlights: Gradually add white to Sotek Green for each successive layer, creating depth in the eye lenses. Focus highlights on the bottom edge of the lenses, where light naturally hits. Add Depth with Shadows: If desired, darken the top corner of each lens to achieve a soulless, reflective look. This effect is achieved by carefully adding black to the darkest areas, giving the eyes a sharp, eerie quality. Step 4: Begin the Skull Outline Base Colour with XV-88: Use XV-88 to outline the skull shape across the helmet’s face. This will act as the base colour for the skull, creating a solid foundation for further detail. Shadow Layer with Rhinox Hide: Mix XV-88 with Rhinox Hide to deepen shadows in certain areas, like the cheekbones and under the brow ridge. Step 5: Adding Skull Highlights Transition Layer with Morghast Bone: After blocking out the skull shape with XV-88, begin adding highlights with Morghast Bone. Apply this colour around the raised areas, like the forehead, cheekbones, and jaw. Create Smooth Transitions: Mix XV-88 and Morghast Bone to bridge the tones, softening transitions between shadows and highlights. Stippling for Texture: For a realistic bone texture, stipple Morghast Bone across the forehead and cheekbones. This adds a slight roughness, giving the impression of natural bone. Step 6: Fine Details and Teeth Teeth Outline: Using Morghast Bone, paint the teeth by creating slightly exaggerated outlines. This allows for sharper definition when refining with black later. Refining with Vallejo Black: Use Vallejo Black to cut into the teeth and refine their shape, narrowing them where necessary for a natural look. Vallejo Black’s smooth flow makes it ideal for creating crisp lines. Emphasising Depth: Rhinox Hide can be used as a softer alternative to pure black for adding shadows around the teeth and along cheekbone lines, giving a more subtle definition. Step 7: Highlighting and Final Refinements Add Bright Highlights: Mix Morghast Bone with Morrow White for the final highlights, concentrating on high points like the brow, the tip of the nose, and the edges of the cheekbones. Focus on Forehead Shine: For an extra focal point, add a slightly larger bright highlight to the forehead’s centre to mimic natural light reflection. Tweak Subtle Details: Adjust any final areas as necessary, ensuring the highlights and shadows balance well across the skull. This can be done by adding small touches of colour or blending transitions further. Step 8: Optional Final Touches If you wish to increase contrast, especially under high display lighting, revisit the forehead and cheekbone highlights, pushing the lighter areas with a touch more Morrow White. Videos Not Showing? To view any of my paid tutorials, you need to be a member of the website – please click below to log in or join the site. Not sure about joining just yet? Check out my Youtube for all my free tutorials or sign up as a free “friend” member on this site and visit the free videos page! If you’d prefer to support me on Patreon, please visit: https://www.patreon.com/RichardGray [...]
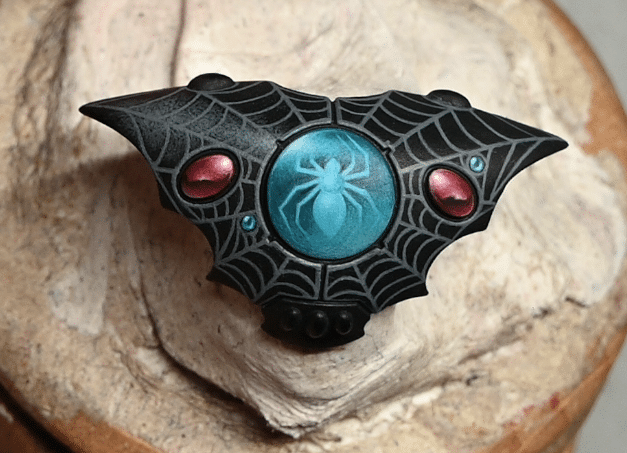
How to Paint an Aeldari Autarch Jump Pack with Spider Web and Gems
Welcome to this detailed guide on How to Paint an Aeldari Autarch Jump Pack, including freehand spider web designs, volumetric highlights, and painting red gems with horizon lines. In this tutorial, we’ll walk through the key techniques used in the process, as well as the specific paints required. Video: How to Paint an Aeldari Autarch Jump Pack with Spider Web and Gems Materials Needed: Paints: Games Workshop: Khorne Red, Wazdakka Red, Pink Horror Vallejo: Neutral Grey, Black, Game Colour Turquoise P3: Morrow White Brushes: Size 00 brush (Artis Opus or similar) Wet palette Water for thinning paint Step by Step Guide – How to Paint an Aeldari Autarch Jump Pack with Spider Web and Gems Step 1: Blocking in the Spider Web Design Basecoat the jump pack in black primer. This will be the foundation upon which all the other layers will sit. Mark the anchor points for the web lines. Start by identifying four reference points around the spider gem in the centre of the jump pack. These lines will radiate outward, so place one line on each side of the spider to ensure symmetry. Draw the initial lines. Using Vallejo Neutral Grey, draw thin lines extending from the spider gem to the outer edges of the jump pack. It’s crucial to space these lines evenly to maintain the illusion of symmetry. Add in-between lines. After the four main lines are in place, draw connecting lines between them, creating a spider web pattern. Keep these lines neat and consistent. Refine the lines. Once all lines are blocked in, clean up any mistakes with Vallejo Black. You can sharpen the edges of the web lines by gently “cutting in” with the black paint to make them ultra crisp. Step 2: Adding Asymmetry to the Design Introduce asymmetry deliberately. To avoid the spider web looking too perfect, introduce small inconsistencies. Paint some sections slightly off to add a natural, web-like randomness. This will also help mask any small imperfections. Create asymmetrical details. On either side of the web, you can add small circles or other decorative elements to break up the symmetry. These will later be painted as gems, so feel free to add small, interesting features that balance the design. Step 3: Volumetric Highlights on the Web Apply volumetric highlights. Use Vallejo Neutral Grey to create highlights on certain parts of the web. Focus on areas where light would naturally hit the design, such as the topmost parts of the jump pack. Blend the highlights. Thin the paint to a roughly 60/40 mix of water to paint and lightly stipple the grey onto the surfaces, blending it smoothly into the black basecoat. This will give the web a realistic shine and depth. Step 4: Painting the Gems with Horizon Lines Start with the basecoat. Use Games Workshop Khorne Red to paint the base of the gems. Cover the gem surfaces evenly, ensuring no black primer shows through. Add shadows. Mix Khorne Red with a bit of Vallejo Black to create a dark red and apply this in the middle section of the gem, creating a “horizon line” effect. This gives the illusion of depth. Highlight with Wazdakka Red. Apply Wazdakka Red to the lower portion of the gem. Blend the transition between the darker red and Wazdakka Red to create a smooth gradient. Create the final highlight with Pink Horror. On the bottom section of the gem, apply Pink Horror to make it pop. Use a thin, translucent layer to ensure a subtle transition between the colours. Add the white specular highlight. Use P3 Morrow White to place a tiny dot on the top left of each gem. This should be the brightest point, simulating light reflection. Step 5: Painting the Blue Gems Basecoat the small gems in Vallejo Game Colour Turquoise. Ensure the coverage is smooth. Create a shadow. Mix the turquoise with black for the upper portion of the gem. This dark section will help the highlight stand out later. Add highlights. Gradually mix white into the turquoise and apply it to the lower right of the gem, following the same method as the red gems. Finish with a white highlight. Place a small white dot on the upper left of each blue gem to represent the light source, matching the technique used on the red gems. Step 6: Final Adjustments Tidy up the design. Go back with Vallejo Black or Neutral Grey to sharpen any lines that may have been blurred during the process. Blend further if needed. If the transitions in the gems or the volumetric highlights seem too stark, glaze over them with thinned down versions of the base colours to smooth things out. And that’s it! You’ve now completed the spider web design with volumetric highlights and stunning gems on your Aeldari Autarch jump pack. This method requires patience and refinement, but with these techniques, you’ll achieve a competition-level finish. Enjoy your painting! Want to know how to paint the freehand spider? How to Paint a Freehand Spider Gem How to paint a freehand spider gem on a round section of a backpack. The goal is to create a smooth, detailed finish using the right colours, applying stippling and glazing techniques, and ensuring sharp, clean lines in the freehand design. Watch Now If you don’t have an account here on my website, please sign up here! I have over 350 video tutorials with steps and tips, plus a selection of PDFs. If you are not sure about joining, you can explore my free videos with a free membership, or take the plunge and become a full subscriber for full access. If you’d prefer to support me on Patreon, please visit: https://www.patreon.com/RichardGray [...]
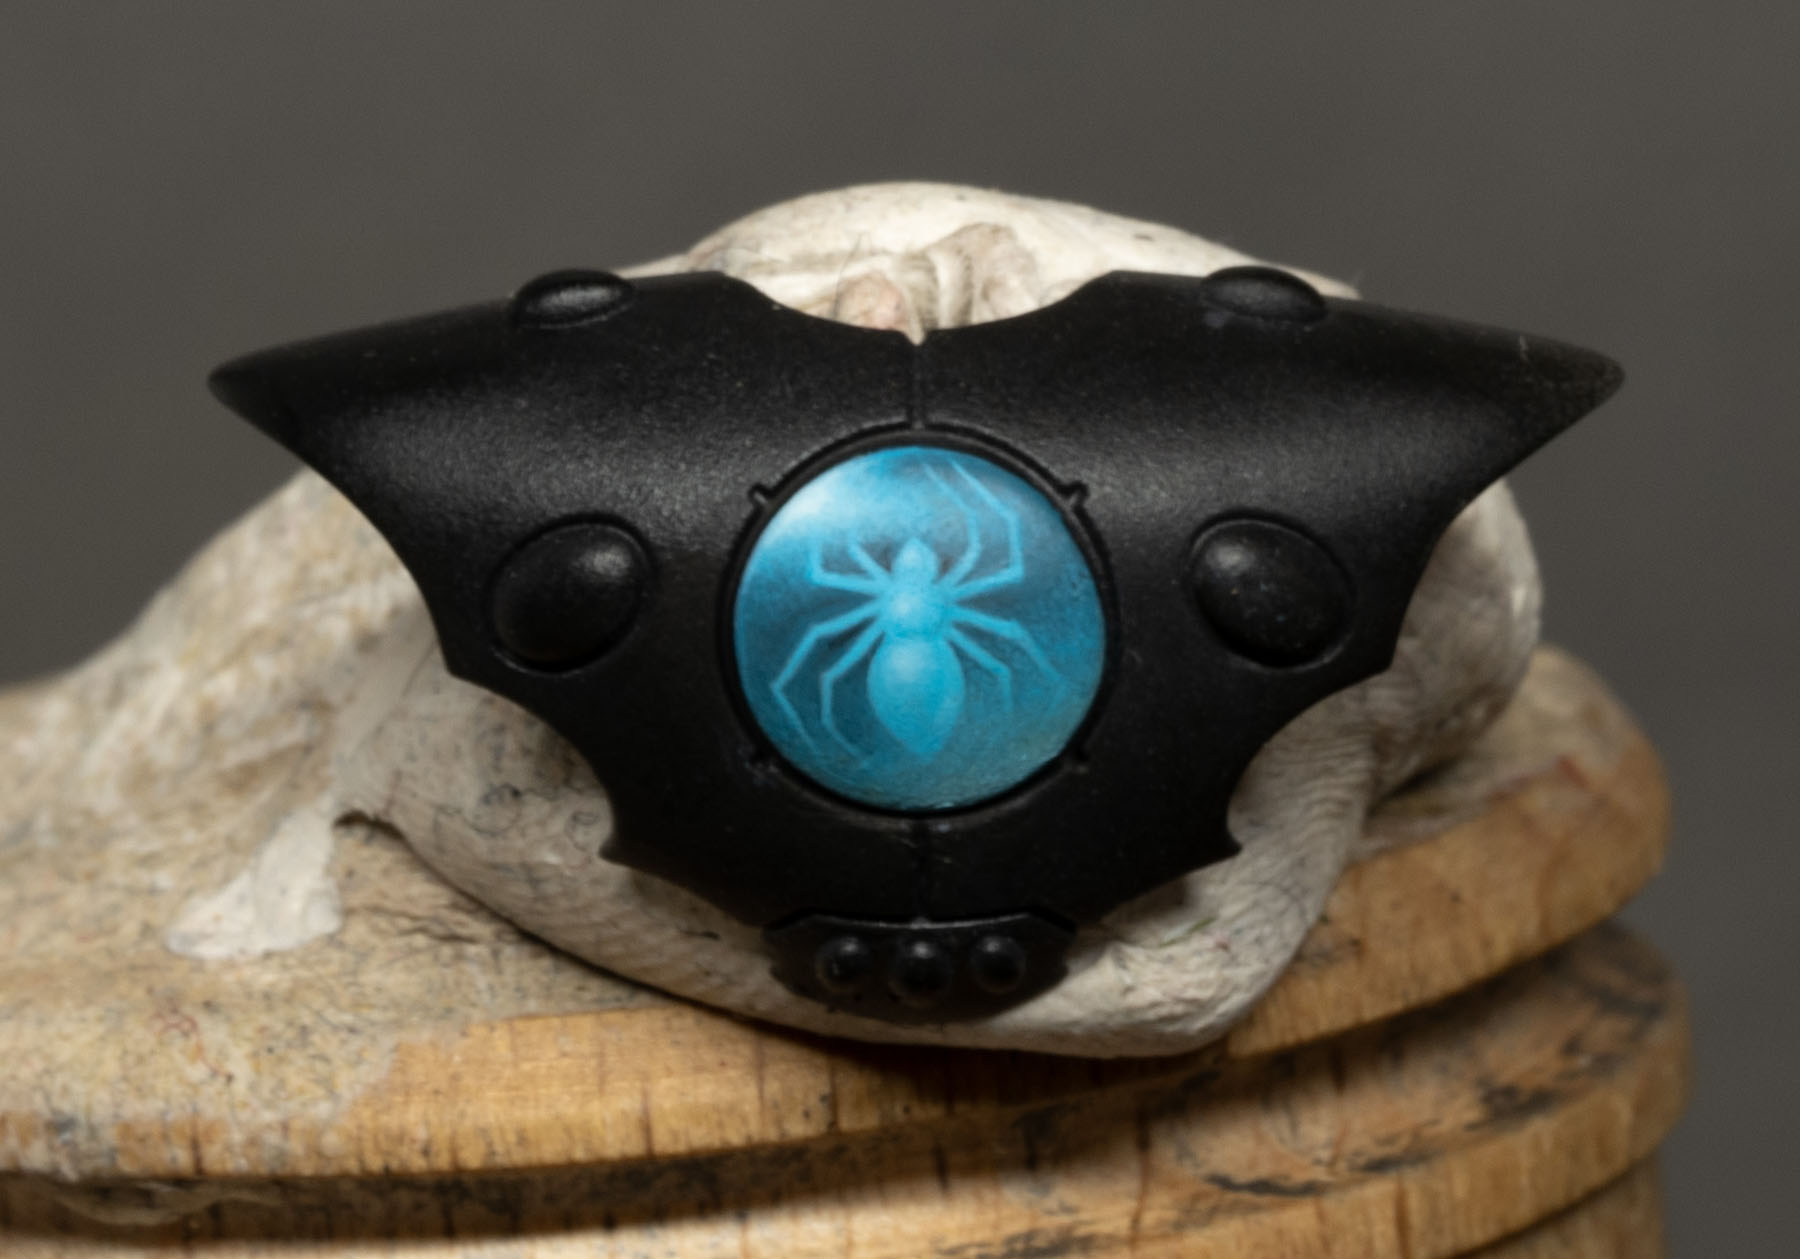
How to Paint a Freehand Spider Gem
In this video tutorial and step by step guide, I’ll walk through how to paint a freehand spider gem on a round section of a backpack. The goal is to create a smooth, detailed finish using the right colours, applying stippling and glazing techniques, and ensuring sharp, clean lines in the freehand design. Video: How to Paint a Freehand Spider Gem Materials Needed: Vallejo Game Color Turquoise Vallejo Model Color Black P3 Morrow White Cyber Green (optional) Fine Detail Brush (I used Artis Opus Size 00) Wet Palette Thin Sandpaper or a file (for smoothing any rough textures) Kitchen Roll (for cleaning your brush) Step 1: Prepare the Base Mix the Base Colour: Begin by mixing Vallejo Game Color Turquoise with a small amount of Vallejo Model Color Black. The mix should be slightly darker than pure Turquoise but not overwhelmingly dark. Apply the Base Coat: Paint the entire round section with this base mix. Ensure an even coverage and let it dry completely. Adjust the Colour: If the initial base appears too dark or too light, adjust by adding more Turquoise or Black until you achieve the desired shade. This layer will be the foundation for the freehand spider. Step 2: Freehand the Spider Rough Outline: Start by lightly sketching the spider shape onto the base layer using a thinned version of the base colour. This is just to block in the general shape and position, so don’t worry about precision at this stage. Refine the Outline: Once the rough sketch is in place, begin refining the edges using P3 Morrow White mixed with Turquoise (add more white to the mix as needed). This mix should be lighter than the base colour but not too stark. Sharpen the edges to define the spider’s legs and body clearly. Symmetry Consideration: It’s difficult to achieve perfect symmetry, especially with freehand work. Consider making the spider asymmetrical to avoid the stress of perfect alignment. Small variances will make the design look more natural. Step 3: Add Highlights and Shading Stippling Technique: Use a stippling technique to gradually build up highlights. Dip your fine detail brush into the lighter mix (Turquoise + more white), and apply tiny, controlled dots across the spider and the background gem surface. Start with lighter pressure to achieve smaller dots. Transition Shading: For the edges of the spider, use a mix with slightly more white added to the Turquoise. Gradually build up the brightness by adding more stipples. Focus on the areas where the light would naturally hit, such as the top of the spider’s legs and body. Soft Shading: Introduce a small amount of Cyber Green into the stippling process for added depth and interest. Use this sparingly to avoid overpowering the original colour scheme. Step 4: Glazing for Smoothness Thin Glaze: Mix a very thin glaze using the base colour or slightly lighter mix. Apply this glaze over the entire spider and gem area to soften the stippling effect and blend the highlights smoothly. Be careful not to obscure the details you’ve painstakingly created. Glazing the Spider: If desired, add a final glaze of Cyber Green over the spider to enhance the depth and give a slight variation to the shine. Ensure the glaze is very thin, so it doesn’t overpower the design. Step 5: Final Touches and Edging Edge Highlighting: Use the side of your brush and apply a very fine line of the lightest mix (nearly white) to the edges of the round gem to create a sharp, defined boundary. This step will make the gem pop visually. Enhance the Spider Details: Add small highlights to the spider’s legs and body with a fine tip brush using the lightest mix. This will give the spider a more three-dimensional appearance. Check for Consistency: Review the entire section for any inconsistencies in stippling or shading. Add additional stipples or glazes as needed to ensure a smooth, cohesive finish. Step 6: Finishing Up Smooth Any Imperfections: If there are any rough spots or texture issues, gently sand them with fine sandpaper or a file. Final Inspection: Take photos or view the model under different lighting to check for any imperfections. Make any last adjustments to ensure the spider gem looks polished and consistent. Seal the Work: Once you’re satisfied with the result, consider applying a thin layer of matte or satin varnish to protect your work. Now move on to the next step! Spider Web and Gems on the Jump Pack Moving on from the above tutorial to include freehand spider web designs, volumetric highlights, and painting red gems with horizon lines. Watch Now If you don’t have an account here on my website, please sign up here! I have over 350 video tutorials with steps and tips, plus a selection of PDFs. If you are not sure about joining, you can explore my free videos with a free membership, or take the plunge and become a full subscriber for full access. If you’d prefer to support me on Patreon, please visit: https://www.patreon.com/RichardGray [...]
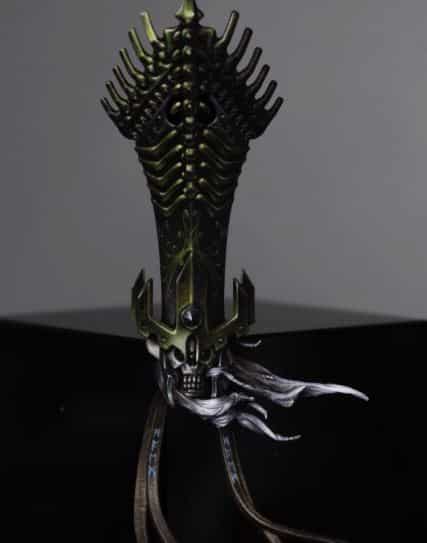
How to Paint the Nagash Helmet
My detailed how to paint the Nagash helmet tutorials, with videos plus step by step guide and tips with full paints used. Video – How to Paint the Nagash Helmet Part OnePaints and Materials UsedPaintsBrushesOther MaterialsSteps and Tips on How to Paint the Nagash HelmetVideo – How to Paint the Nagash Helmet Part TwoPaintsSteps and Tips on How to Paint the Nagash Helmet (Part Two)Video – How to Paint the Nagash Freehand Swirls/FiligreePaintsTips for the Freehand FiligreeVideo – How to Paint the Nagash Helmet Leather Strips and RunesPaintsStep and Tips on How to Paint the Nagash Helmet Leather Strips and RunesFor all of my Nagash Tutorials in one place, go hereExplore More Nagash Technique Tutorials Video – How to Paint the Nagash Helmet Part One In this tutorial, we’ll focus on painting the metallic areas of Nagash, specifically the head. The colours used for this tutorial are a bit different from the standard, and in the video I discuss techniques in more detail to achieve a textured, refined finish. Paints and Materials Used Paints Vallejo: English Uniform (VX-88) Golden Olive (Elysian Green mixed with Yriel Yellow) Yellow Green (Dorn Yellow mixed with Moot Green) Ice Yellow (Dorn Yellow) Ivory (Screaming Skull) Games Workshop: Rhinox Hide Abaddon Black Naggaroth Night (for future use) Brushes Fine detail brush (suitable for intricate work and small highlights) Medium-sized brush (for larger areas and base coating) Wet palette (to keep paints fresh and workable) Other Materials Wet palette Green stuff (for sculpting additional details, if desired) Painting lamp (for consistent lighting during the painting process) Miniature holder (for ease of handling and painting) Steps and Tips on How to Paint the Nagash Helmet Prepare the Model: Ensure your miniature is assembled and primed appropriately for painting. I’ve used a black primer for my Nagash. Block in the Base Colour: Start by blocking in the main highlights using Vallejo’s English Uniform (VX-88). Apply this colour where you want the primary light source to hit, focusing on a top-left orientation.Be mindful not to make the colour too opaque; a slight texture is desirable for the metallic effect. Understanding Colour Choices: The choice of metallic colours doesn’t have to be conventional. For this model, I went for a dark and moody theme inspired by the artwork of Nagash.My chosen metallic shades include Golden Olive, Yellow Green, and Ice Yellow from Vallejo, along with Rhinox Hide and Abaddon Black from Games Workshop. Building Layers of Colour: Use Golden Olive to build layers on top of the English Uniform, focusing on areas that require additional depth and shading.The opacity of Vallejo paints allows for strong, defined marks, ideal for creating small details and textures. Creating Texture and Depth: With each layer, gradually introduce lighter shades such as Yellow Green and Ice Yellow to enhance highlights and add dimension to the metallic surfaces.Keep in mind the direction of light and focus on maintaining a balance between light and shadow. Understanding Volume and Light: Highlighting metallic surfaces requires understanding how light interacts with volume. Unlike standard blending techniques, aim for distinct contrasts between light and shadow. Make sure you consider how light reflects off different surfaces, creating highlights and shadows of varying intensities. I like to use lots of real-life references of metal to study as I paint. Achieving a Moody Atmosphere: For an undead character like Nagash, aim for a dark, desaturated overall appearance. Use strong, small highlights strategically to draw attention to focal points. Avoid smooth blending; purposefully textured painting adds depth and character to the model. Experimenting with Glazing TechniquesExperiment with glazing techniques to blend colours seamlessly and soften transitions between different areas of the model.Glazing allows for subtle colour adjustments and can help unify the overall color scheme, creating a harmonious visual effect. Video – How to Paint the Nagash Helmet Part Two In this part, we’ll focus on painting the skull face, hair, and bone structures atop the hat. Paints Vallejo Model Colour: English Uniform (VX-88), Golden Olive (Elysian Green mixed with Yriel Yellow), Yellow Green (Dorn Yellow mixed with Moot Green), Ice Yellow (Dorn Yellow), Ivory (Screaming Skull), Neutral Grey (Mechanicus Standard Grey), Pale Grey Blue (Grey Seer mixed with Blue Horror) Games Workshop: Rhinox Hide, Warpstone Green Contrast, Deathclaw Brown P3: Morrow White Steps and Tips on How to Paint the Nagash Helmet (Part Two) Paint the Bone Structures: Using Vallejo’s English Uniform (VX-88), begin by painting the bone structures on top of the hat. Focus on picking out the highlights, keeping in mind the top-left orientation of the light source. Apply the paint carefully to emphasize the edges and contours of the bones.Enhance the Bone Texture: Utilise Golden Olive (a mix of Elysian Green and Yriel Yellow) to add depth and shading to the bone structures. Concentrate on areas that require additional definition, such as the joints and sockets. Remember to maintain a balance between light and shadow to create a realistic, textured effect.Add Highlights: With Yellow Green (a mix of Dorn Yellow and Moot Green), further highlight the bone structures, focusing on the areas where light would naturally hit. Pay attention to the left-hand side of the model to create a stronger contrast and emphasise the lighting direction.Refine the Highlights: Using Ice Yellow (Dorn Yellow), continue to build up the highlights on the bone structures, especially on the left-hand side. Gradually increase the brightness of the highlights towards the center of the model to draw attention to focal points.Adjusting with Rhinox Hide: If necessary, use Rhinox Hide to refine any areas where you’ve made mistakes or to add depth to the shadows. The translucency of this paint allows for easy blending and adjustment while maintaining a natural look.Painting the Skull Face: For the skull face, start with Deathclaw Brown, focusing on creating a weathered, textured appearance. Apply the paint in a rough, uneven manner to mimic the natural wear and tear of ancient bones.Highlighting the Skull: Gradually add highlights to the skull using Morghast Bone. Concentrate the highlights towards the left-hand side of the face to maintain consistency with the overall lighting scheme. Ensure the highlights stand out against the darker base colour to create depth and dimension.Adding Detail to the Eyes: Use a small amount of Morghast Bone to pick out the details around the eyes, emphasising the cheekbones and brow ridge. Be mindful of the sculpted eye sockets and adjust the highlights accordingly to enhance the overall appearance.Painting the Hair: Begin painting the hair with Neutral Grey, focusing on the large, clumpy strands. Keep the highlights towards the top side of the hair to simulate light hitting the surface. Apply the paint in a rough, textured manner to achieve a realistic look.Adding Texture to the Hair: Continue to build up the texture of the hair using Pale Grey Blue. Emphasize the highlights on the top side of the hair while leaving the underside darker to create depth and volume.Refining the Highlights: Using Morrow White sparingly, refine the highlights on the hair strands to add contrast and dimension. Focus on the areas closest to the face to draw attention to the focal points. Video – How to Paint the Nagash Freehand Swirls/Filigree Paints Vallejo: English Uniform (VX-88), Golden Olive (Elysian Green mixed with Yriel Yellow), Yellow Green (Dorn Yellow mixed with Moot Green), Ivory (Screaming Skull), Neutral Grey (Mechanicus Standard Grey), Pale Grey Blue (Grey Seer mixed with Blue Horror)Games Workshop: Warpstone Green Contrast, Abaddon BlackP3: Morrow White Tips for the Freehand Filigree Base Coat: Apply a base coat of Vallejo English Uniform (VX-88) to start the filigree on the Nagash hat. Ensure even coverage and allow it to dry completely. Highlighting with Yellow-Green: Mix Vallejo Yellow Green (Dorn Yellow mixed with Moot Green) with a small amount of white to increase opacity. Use a fine tip brush to apply highlights to what would be the raised areas of the filigree. Focus on creating sharp lines and highlights to enhance the detail. Adding Ivory Highlight Dots: Using Vallejo Ivory (Screaming Skull), create small highlight dots on the filigree. These dots should be strategically placed on curves and extreme curve points to simulate shine and reflectivity. Ensure consistency in placement for a cohesive look. Enhancing Contrast with Black: With Games Workshop Abaddon Black, carefully outline the filigree details to enhance contrast and definition. Use a fine tip brush and steady hand to create clean lines and borders. Glazing with Warpstone Green Contrast: Thin Games Workshop Warpstone Green Contrast with water (about two parts water to one part paint) to create a glaze. Apply the glaze over the filigree to enhance shading and highlights. Final Touches: Use P3 Morrow White to add final highlights to the filigree, focusing on the most raised and reflective areas. Ensure consistency and restraint with the white highlights to avoid overpowering the overall effect. Video – How to Paint the Nagash Helmet Leather Strips and Runes By following these steps and techniques, you can effectively paint leather strips and runes on your Nagash (or any other model, really!) adding depth, texture, and character. Paints Games Workshop: Rhinox Hide, Mournfang Brown, Cadian Fleshtone, Temple Guard Blue, Barroth Blue. Step and Tips on How to Paint the Nagash Helmet Leather Strips and Runes Base Coat: Ensure that the leather strips on the Nagash helmet are properly primed with black primer. Once primed, apply a base coat of Games Workshop Mournfang Brown to the leather strips. This will serve as the foundation for the leather texture. Highlighting with Mournfang Brown: Using Games Workshop Mournfang Brown, begin highlighting the curves and raised areas of the leather strips. Apply the paint in a textured manner, focusing on creating depth and dimension to simulate the appearance of weathered leather. Don’t worry about perfect blending; imperfections add to the realism. Layering with Cadian Fleshtone: Next, switch to Games Workshop Cadian Fleshtone and continue highlighting the leather strips. Apply this paint more sparingly, focusing on the most raised areas and curves to enhance the texture. The tonal contrast between Mournfang Brown and Cadian Fleshtone will create depth and visual interest. Glazing with Rhinox Hide: Thin Games Workshop Rhinox Hide with water to create a glaze. Apply the glaze over the highlighted areas to tone down the highlights and add depth to the leather texture. Focus on applying the glaze in the shadowed areas and along the edges of the leather strips for a realistic look. Painting Runes: Using Games Workshop Temple Guard Blue and Barroth Blue, paint the runes onto the leather strips. Ensure that the runes are clearly visible and neatly painted. Use a fine tip brush and steady hand to create clean lines and shapes. Less is more; avoid overcrowding the leather strips with too many runes to maintain balance. Touching Up: Review the painted leather strips and runes, making any necessary touch-ups or adjustments. Ensure consistency in highlighting placement and rune design throughout the miniature model. For all of my Nagash Tutorials in one place, go here Nagash, Supreme Lord of the Undead Nagash, Supreme Lord of the Undead is the father of necromancy.  I created a series of detailed tutorials on how I painted him. Watch Now Explore More Nagash Technique Tutorials If you don’t have an account here on my website, please sign up here! I have over 350 video tutorials with steps and tips, plus a selection of PDFs. If you are not sure about joining, you can explore my free videos with a free membership, or take the plunge and become a full subscriber for full access. If you’d prefer to support me on Patreon, please visit: https://www.patreon.com/RichardGray [...]
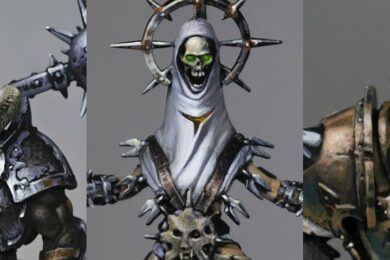
How to Paint Chaplain Ribs Freehand
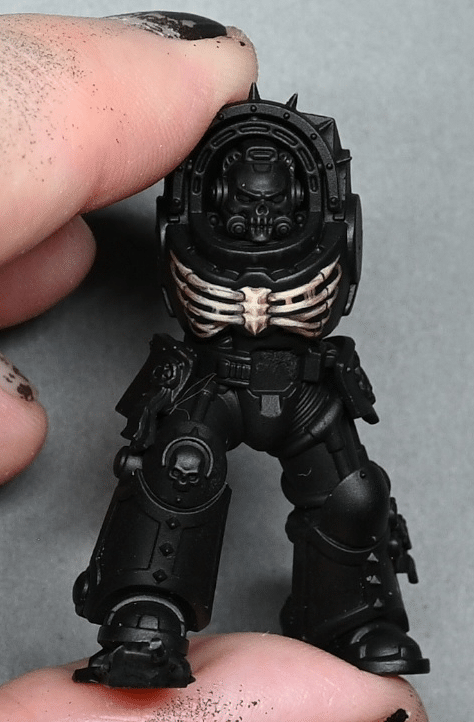
How to freehand ribs on the new Terminator Chaplain that Games Workshop sent me for review. I know some people were disappointed that it didn’t have sculpted on ribs, so this should fix it! This guide should help you add a striking rib detail to your Chaplain Terminator, enhancing its visual impact and bringing it closer to the iconic Chaplain imagery. Video: How to Paint Chaplain Ribs Freehand Materials Required: Paints: Games Workshop XV-88, Morghast Bone, Screaming Skull, Rhinox Hide; Vallejo Neutral Grey; P3 Morrow White; Kimera Colours Black Brushes: A variety of sizes for detailed work Milliput or Sprew Glue: For filling and smoothing the chest area Sandpaper: For sanding down the filled areas Palette and Water: For paint mixing and brush cleaning Steps for Freehanding Ribs: 1. Preparation: Fill the chest holes with Milliput or Sprew Glue. Sand down to create a smooth surface. Be patient and allow adequate drying time to avoid issues. 2. Base Painting: Begin with a base coat of XV-88. This will be your primary rib colour. Ensure the background remains a flat black for high contrast. Chimera Black is recommended for its matte finish and good coverage. 3. Adding the Ribs: With XV-88, sketch out the shape of the ribs. Remember, space is limited, so it’s more about suggesting ribs rather than anatomical accuracy. For human-like ribs, remember that Space Marines are portrayed with fused ribs, but standard human ribs are usually depicted on Chaplains for visual impact. 4. Shading and Detailing: Use Rhinox Hide to create shadows and define the separation between ribs and sternum. This paint can be applied translucently to allow underlying colours to show through, adding depth. 5. Highlighting: Progressively add highlights with Morghast Bone. Focus on the front of the ribs, gradually reducing intensity towards the sides. Add fine details and further highlights with Screaming Skull, but use sparingly to avoid excessive brightness. 6. Refining: Use Neutral Grey and Morrow White for subtle colour variations and additional highlights. Keep refining the details until you achieve the desired level of depth and realism. Use black paint to clean up any errors and sharpen the edges of the ribs. 7. Finishing Touches: For the sternum, devise a suitable design that complements the ribs. This might include fused elements or socket-like features. Tips: Asymmetry: Deliberately make the ribs asymmetric for ease of painting and to avoid the challenge of perfect symmetry. Light Source: Consider the model’s overall lighting when placing highlights to maintain consistency. Take Your Time: With freehanding, patience is key. Build up layers gradually and refine as needed. By following my “How to Paint Chaplain” guide, you’ve now mastered the art of freehanding rib details, enhancing the iconic look of your miniature. Check out more of my freehand tutorials, below, for more ideas for your next project. More Freehand Videos If you don’t have an account, please sign up here! The website currently has over 350 video tutorials with steps and tips, plus a selection of PDFs. If you are not sure about joining, you can explore my free videos with a free “freebies” membership, or take the plunge and become a full subscriber for full access. If you’d prefer to support me on Patreon, please visit: https://www.patreon.com/RichardGray [...]
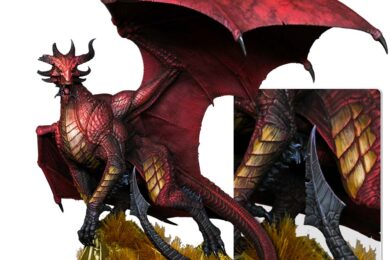
How to Paint a Simple Freehand Dragon
This video shows how to paint a simple freehand dragon on the inside of a shield, in this case I did it to add extra detail to a Golden Demon entry. Video – How to Paint a Simple Freehand Dragon Paints and Materials The following paints were used:Games Workshop: Rhinox Hide, Mournfang Brown Vallejo: German Grey, Neutral Grey, Ice Yellow, White Step-by-Step Guide and Tips for the Freehand Dragon Prepare the Surface: Begin by roughly painting the inside of the shield with a mixture of Mournfang Brown and Rhinox Hide from Games Workshop. These paints should be heavily thinned with approximately two parts water to one part paint. Use a large brush, like a size 2 artist opus brush, for quick and broad coverage. This base coat doesn’t need to perfectly match the shield’s front colour, as it will largely be covered. Apply Texture: The texture on the back of the shield differs from the front to differentiate it from the armor. Apply the paint in a scratchy manner to simulate wear and tear. For this, use Neutral Grey from Vallejo, mixed with Ice Yellow for highlights, and German Grey for darker areas. Remember, this part doesn’t have to be perfectly blended, as some roughness adds character. Glazing: If needed, glaze over the scratchy texture with more diluted Rhinox Hide and German Grey. Glazing helps to soften the texture and can hide any imperfections in the painting. Freehanding the Dragon: When painting the dragon, start with a reference photo of the dragon design on the shield’s front. This helps maintain consistency across the model. Use Vallejo Model Color Black for the dragon outline, ensuring the paint is well-diluted for fine lines. Brush Selection: Use a fine brush for detailed work. A worn-out brush might not give the sharp lines needed for intricate details. A newer, sharper brush is recommended for finer details and corrections. Highlighting the Dragon: Start with Neutral Grey for initial highlights. For more pronounced highlights, mix Neutral Grey with Ice Yellow, leaning more towards Ice Yellow for brighter highlights. Apply these highlights only to the upper edges of the dragon design, where light would naturally catch. Adjusting for 3D Effect: Paint the inside of the dragon with a darker grey, such as a mix of German Grey and Neutral Grey, to create depth and avoid a flat black appearance. Final Touches: Add fine highlights to the dragon, especially along the edges and raised areas, to enhance the 3D effect. Use a mix of Neutral Grey and Ice Yellow, and pure Ice Yellow for the brightest points. Be mindful of the shield’s orientation to ensure that highlights correspond to the light source. Painting the Shield Trim: Finally, paint the shield’s trim, likely in a gold or metal colour. This trim frames the dragon and gives a polished look to the shield, enhancing the overall appearance. More Tutorials and Tips on Freehand If you don’t have an account, please sign up here! The website currently has over 350 video tutorials with steps and tips, plus a selection of PDFs. If you are not sure about joining, you can explore my free videos with a free membership, or take the plunge and become a full subscriber for full access. If you’d prefer to support me on Patreon, please visit: https://www.patreon.com/RichardGray [...]
How to Paint a Nurgle Shield with Freehand and Shine
These videos show how to a paint a Nurgle shield with freehand for an Ogroid from the Slaves to Darkness army box.The freehand is if a Nurgle Plaguebearer head and is intended as a potential Golden Demon entry. Scroll down to explore the tutorials and steps in order, or click the below to quick jump to a technique or section. Video One: How to Paint a Nurgle Shield with FreehandPaints and Materials UsedPaintsBrushesOther MaterialsStep-by-Step Guide: PreparationBase PaintingFreehand SketchingRefining and DetailingFinal TouchesImportant NotesVideo Two: How to Paint the Shield Shine and NMM TrimPaints and Materials UsedPaintsBrushesOther MaterialsStep-by-Step GuidePreparing the PalettePainting the ShinePainting the NMM TrimFinal TouchesImportant NotesMore Freehand Tutorials to Explore Video One: How to Paint a Nurgle Shield with Freehand Paints and Materials Used Paints Games Workshop Paints: Rhinox Hide Bugman’s Glow Mournfang Brown Morghast Bone Deathworld Forest Yriel Yellow Khorne Red Ushabti Bone Vallejo Paints: Black Ice Yellow P3 Paint: Morrow White Brushes Artist Opus: Size 00 brushes (both a newer brush for finer details and an older brush for blending) Other Materials Wet Palette: To keep paints moist and workable. Scalpel: For removing details from the shield. Sandpaper: For smoothing the shield after using the scalpel. Primer: Ultimate primer (specifically thinned with X20A for this project). Mixing Water: For thinning paints on the palette. Matte Varnish: To even out the surface and finish of the paint job. Step-by-Step Guide: Preparation Prep the Nurgle Shield with Freehand: Remove intricate details from the shield using a scalpel and sand it slightly. Keep some battle damage for authenticity, if you wish. Prime the Shield: Use Ultimate primer, thinned with X20A, applied in 4-5 thin coats. Base Painting Wet Palette Setup: Prepare a wet palette with the following Games Workshop colours: Ice Yellow, Bugman’s Glow, Rhinox Hide, Mournfang Brown, Morghast Bone, Deathworld Forest, Yriel Yellow, Khorne Red, and Ushabti Bone. Also, have Vallejo Black and P3 Morrow White ready. Mixing Colours: Create various mixes of these colours on the palette, adjusting with water for a thinner consistency (approximately 50/50). Freehand Sketching Initial Sketch: Start sketching the Nurgle face on the shield using Bugman’s Glow. This doesn’t have to be symmetrical or realistic. Adding Details: Gradually add more details like eyes, horns, and facial deformations using the mixed colours. Use Rhinox Hide for shading. Background Technique: Use Vallejo Black as a ‘rubber’ to tweak and correct the sketch as needed. Refining and Detailing Light and Shadow: Use the lighter and darker mixes to create depth, focusing on the facial features. Ensure a balance between highlights and shadows. Adding Texture: Pay attention to the direction of brushstrokes to replicate skin texture and facial creases. Final Touches Metallic Effects: For a Golden Demon entry, ensure to incorporate light volumes and reflective effects on the shield, as well as on the freehand. Glazing: You may need to glaze over the freehand to integrate it with the shield’s overall shine and metallic effect. Varnishing: Finish the shield with a matte varnish to even out different paint finishes. Important Notes Brush Technique: Use the very tip of your brush for detailed work. Switch between an older brush for blending and a newer one for sharp details. Colour Importance: While exact colour mixes are flexible, ensure to maintain the overall desaturated, moody look characteristic of Nurgle. Patience and Layers: Build up the image with multiple thin layers, allowing for smooth transitions and a detailed finish. Personal Style: Remember, this guide is a base. Feel free to adjust and experiment according to your style. Video Two: How to Paint the Shield Shine and NMM Trim Paints and Materials Used Paints Vallejo Paints: Black German Grey Neutral Grey Ice Yellow White Games Workshop Paints: Mournfang Brown Brushes Size 00 Brush: Ideal for detailed work and fine textures. Used for most of the work including the shine and trim. Size 2 Brush: Used for broader strokes and glazing, especially over larger areas. Other Materials Wet Palette: To keep the paints moist and workable. Lamp: For observing how natural light falls on the model, crucial for accurate highlight placement. Blu Tack or Similar Adhesive: To temporarily attach the shield to the model for correct angle assessment. Step-by-Step Guide Preparing the Palette Setup Wet Palette: Prepare a wet palette with Vallejo Black, German Grey, Neutral Grey, Ice Yellow, White, and Games Workshop Mournfang Brown. Create a gradient of grey shades from black to white, mixing in Ice Yellow and White with Neutral Grey for various mid-tones. Painting the Shine Analyzing Light Direction: Position the model under a lamp to observe natural light fall. This will guide the placement of the shine. Initial Highlights: Start with a Neutral Grey or a mix of Neutral Grey and German Grey to block in the primary highlight areas on the shield. Building Up Layers: Gradually increase the brightness of the highlights, focusing on the top left as the primary light source. Remember, the paint will appear brighter when wet and duller when dry. Textured Effect: Use scratchy and stipple brushstrokes with minimal paint for a textured shine effect. Use the very tip of your brush. Bounce Highlight: Add a bounce highlight at the bottom of the shield, reflecting light from the ground. This should be less bright than the primary highlight. Use a watered-down Mournfang Brown for a glaze over this area. Painting the NMM Trim Blocking in Highlights: Use Neutral Grey to block in primary highlights on the trim, focusing on the top area. Adding Variation: Create a variety of light grey blocks along the trim, ensuring they get darker and more spaced out as they move away from the top highlight. Refining Highlights: Gradually add lighter tones, culminating in white for the brightest parts. Ensure these highlights align with the shield’s central highlight. Detailing Scratches: Use white to pick out tiny dots on sculpted scratches for added realism and depth. Bounce Highlight on Trim: Similar to the shield, add a less intense bounce highlight at the bottom of the trim. Final Touches Glazing: Apply a thin glaze of Mournfang Brown over certain areas for colour integration and smooth transitions. Detail Checks: Make any necessary adjustments to neaten the highlights and ensure consistency in lighting and texture across the shield and trim. Important Notes Consistency and Control: Maintain a good balance in paint consistency – not too thick for opaque marks and not too watery to avoid spreading. Brush Technique: Always pull the brush towards yourself for control and precision, especially important when working near the freehand area. Learning and Experimentation: Remember, this technique is both challenging and rewarding. Don’t be afraid to experiment and learn from the process. These guides should provide a clear roadmap to achieving a high-standard finish for your freehand on shields, suitable for display or competition. Remember, practice and patience are key to mastering these techniques and don’t be afraid to do your own thing and add your own personal touch or style to your freehand! More Freehand Tutorials to Explore If you don’t have an account, please sign up here! The website currently has over 350 video tutorials with steps and tips, plus a selection of PDFs. If you are not sure about joining, you can explore my free videos with a free membership, or take the plunge and become a full subscriber for full access. If you’d prefer to support me on Patreon, please visit: https://www.patreon.com/RichardGray [...]
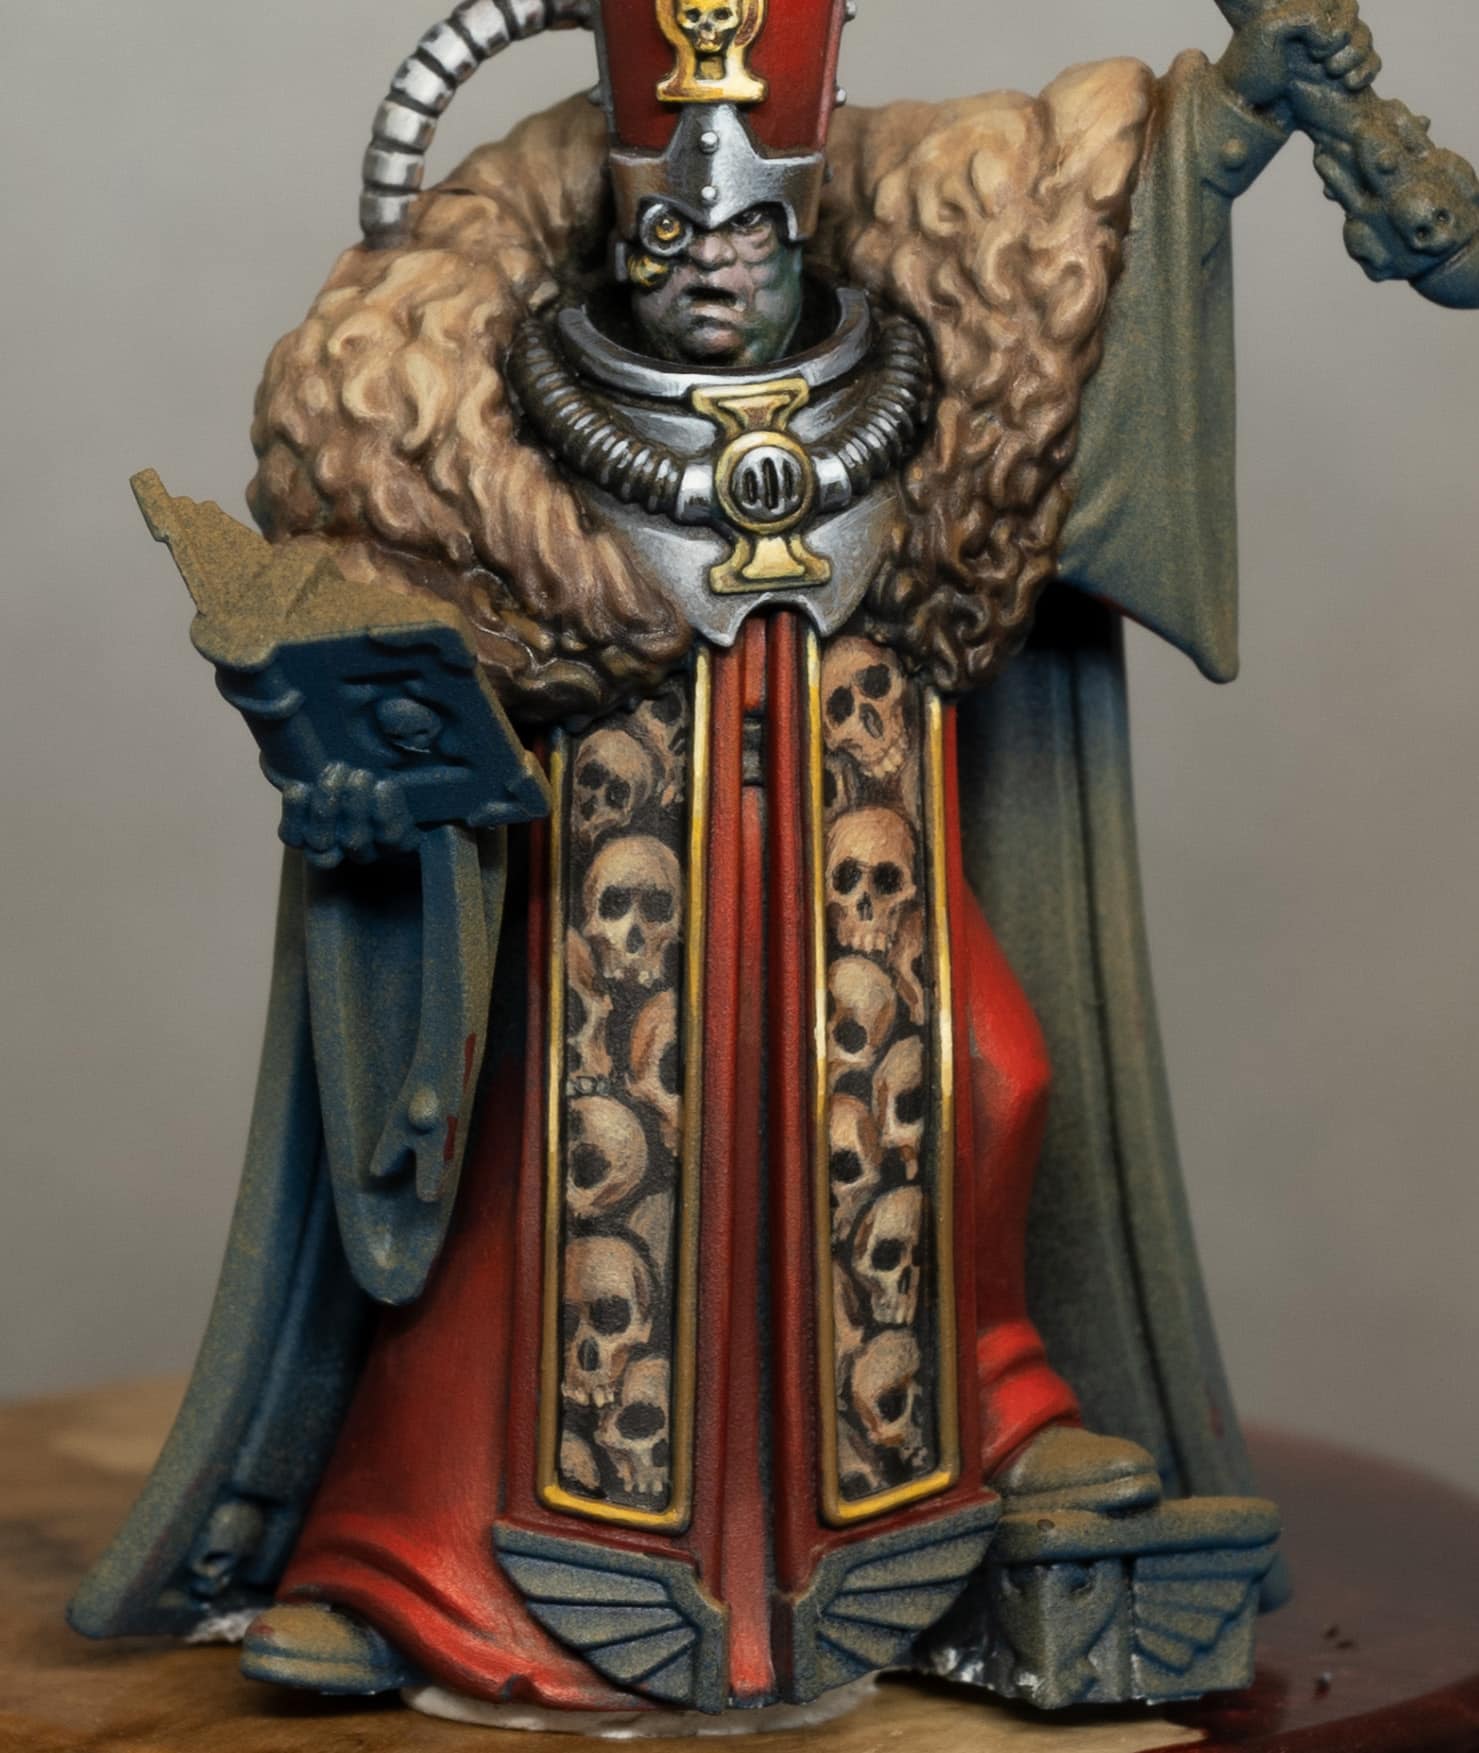
How to Paint a Tiny Freehand Skull – Emperor’s Champion
This video shows you how to paint a tiny freehand skull for the tilt shield on the Emperor’s Champion. This method allows for a detailed, expressive freehand skull on a very small area. The key to success is starting with a central, smaller shape and gradually expanding and refining it, using thin layers and careful highlights to bring out the details. Video Tutorial : How to Paint a Tiny Freehand Skull Materials Needed The following paints were used:Games Workshop: XV-88, Balor Brown, Morghast Bone, Screaming Skull, Rhinox Hide, Mournfang Brown, Mephiston RedVallejo: BlackP3: Morrow White (Any White will do) Step-by-Step Guide Preparing the Shield Start with the tilt shield painted black. Use Mephiston Red to create a dividing line across the shield for a more knightly appearance and to provide a base for the freehand skull.Blocking in the Skull with XV-88 Use XV-88 to block in a rough lightbulb shape for the skull. Start smaller than needed, allowing room for adjustments. Focus on getting the skull centrally placed. Defining Eye and Nose Sockets Paint rough placements for the eye and nose sockets with a darker colour like Rhinox Hide. It’s okay if these aren’t perfect; they can be refined later. Adjusting and Refining Details Use XV-88 to adjust and refine the shape of the skull, especially the eye sockets. Pay attention to symmetry and expression. Shading with Rhinox Hide Thin down Rhinox Hide to apply subtle shading, enhancing the depth and texture of the skull. Focus on areas like brow ridges and cheekbones. Adding Highlights with Balor Brown Move to Balor Brown for the first stage of highlights. This should be done carefully to define key areas of the skull without overwhelming the small scale. Further Highlights with Morghast Bone and Screaming Skull Continue highlighting with Morghast Bone and Screaming Skull. These lighter colours bring out the details and add dimension to the skull. Detailing Teeth and Final Touches Paint the teeth, focusing on the front two as key features. Remember, at this scale, not all teeth need to be defined individually. Use the darker colours (like Rhinox Hide) to refine and adjust the shape and expression of the skull. Add final bright highlights with P3 Morrow White or similar, focusing on the most prominent parts of the skull. Painting a Halo (Optional) For additional flair, paint a small halo around the skull using Balor Brown and adding highlights with lighter colours, finishing with a dot of white for reflection. Finishing the Shield Once the skull is complete, use the armour colours to finish the shield’s background. This step includes weathering and adding transitions to blend the skull into the rest of the model. More Emperors Champion Tutorials If you don’t have an account, please sign up here! The website currently has over 350 video tutorials with steps and tips, plus a selection of PDFs. If you are not sure about joining, you can explore my free videos with a free membership, or take the plunge and become a full subscriber for full access. If you’d prefer to support me on Patreon, please visit: https://www.patreon.com/RichardGray [...]
How to Paint the Lady Annika Freehand Skull (and Boots)
In one of my previous videos I did a pattern on the dress for Lady Annika, The Thirsting Blade, but decided I wanted to change it to something a little bit creepier. Here is how to paint the Lady Annika Freehand Skull that replaced it! It includes tips on folds and how I did the weathering at the bottom of the cloth. Plus, I’ve also been working on her boots! Scroll to watch these tutorials with complete paints and materials used, and step-by-step tip Video: How to Paint the Lady Annika Freehand Skull All videos are recorded in HD 1080p or higher – use full screen for the full effect and let the video load completely. You can also click the little “cog” and change the speed of the video, if I am going too fast (or slow!). Materials Needed Primer: Black (if you started with a black primer base). Base Paints: Vallejo Black, German Grey, Neutral Grey, Dark Sea Grey. Highlight Paints: 50/50 mix of Neutral Grey and Dark Sea Grey. Weathering Paints: Vallejo Heavy Grey (appears green), Games Workshop Rhinox Hide, Cadian Fleshtone, Monfang Brown. Fine Detail Brushes Wet Palette Reference Image: A realistic skull from a science book (or the Internet!) for accuracy. Design Sketching: Sketch the skull design lightly on the skirt. Consider the folds and curves of the fabric; your design must follow these contours to look natural. The skull should be positioned considering the fabric’s folds, especially around tricky areas like deep creases or hard lines. Base Painting: Using Vallejo Black as your darkest shade, begin blocking in the skull and its surroundings. Gradually build up the mid-tones using German Grey and Neutral Grey. For highlights, use a 50/50 mix of Neutral Grey and Dark Sea Grey. Keep the contrast lower than other elements (like the boots) to ensure the skirt’s design doesn’t overpower the miniature’s other focal points. Adding Details: Focus on defining the skull’s features, adjusting for the fabric’s folds. Use your mixed greys to paint in the finer details, such as the teeth and eye sockets, considering the underlying fabric’s shape and the skull’s anatomy. For the headdress, spikes, and cobweb details, apply the same grey tones, ensuring they blend seamlessly into the skull. Final Highlights and Shadows: Revisit the highlights and shadows, emphasizing the skull’s curvature and the fabric’s texture. Use the lighter greys to enhance the design’s three-dimensionality, paying special attention to areas that catch the light or recede into shadow. Weathering: Start with Rhinox Hide, diluted significantly with water. Apply it to the lower third of the skirt, building up layers until you achieve a subtle, brown tint. Follow with Monfang Brown for a richer tone, focusing more intensely at the very bottom. This creates a gradient effect, simulating dirt accumulation. Final Touches: Use a mix of the weathering colours to add texture and depth to the weathered area, mimicking the appearance of mud or dust caught in the fabric’s texture. This step enhances the realism of your miniature, grounding it in its environment. Review and Adjust : Examine your work closely, making any necessary adjustments to the weathering to ensure a natural transition from the painted design to the simulated dirt. If needed, glaze over parts of the skull or weathering with thinned paint to adjust the contrast or saturation. Video: How to Paint Lady Annikas Boots Painting shiny leather boots requires patience and attention to detail. By carefully building up highlights, adjusting them as needed, and using techniques like stippling and glazing, you can achieve a realistic leather effect that stands out. The key to success is experimenting with light and shadow to create depth and texture that mimics real leather. Materials Needed to Paint Lady Annikas Boots: Vallejo Paints: Black, Neutral Grey P3 Paint: Morrow White (or any white paint) Wet palette Fine detail brushes (sizes 0 and 00 recommended) Kitchen roll or paper towel Lamp for highlighting guidance Preparation and Painting Process: Prepare Your Palette: On your wet palette, mix a variety of greys using Black from Vallejo, Neutral Grey from Vallejo, and P3 Morrow White. The goal is to create a spectrum of grey shades. You can adjust the quantities to get lighter or darker shades as needed. Base Coating: Start with a base coat of Neutral Grey on the boots. You can adjust the shade by mixing in either more black or white to darken or lighten the grey, respectively. This base coat serves as the foundation for building up highlights and shadows. Highlight Mapping: Using a slightly lighter grey, begin mapping out where the highlights on the boots will be. Don’t worry about being too precise; the goal is to identify where light naturally hits the boots. Use a lamp to observe how light interacts with the surface and mimic this on the model. Remember, we aim for a shiny leather look, so some highlights will be exaggerated. Adjusting Highlights: If you over-highlight, it’s fine. You’ll refine these highlights later in the process. The key is to create contrast and depth, making the boots appear shiny. Lady Annika’s slender design means space is limited, so choose your highlight areas wisely, focusing on making them visible from the primary viewing angle. Glazing and Fine Tuning: Once you’re satisfied with the highlight placement, it’s time to blend and smooth out the transitions. This is where the stippling technique comes into play. Dilute your paint with water (around a 50:50 ratio, but adjust as necessary for a finer stipple) and gently apply to the edges of highlights to create a gradual transition. Glaze over the boots with a thin layer of black to enrich the colour and add depth. This will also help to knock back any over-highlighted areas, ensuring they blend seamlessly into the overall finish. Reflective Highlights: For added realism, incorporate some reflective highlights. These should be small and placed strategically to mimic how light reflects off a shiny surface. Use the brightest grey or even white for these highlights but apply them sparingly. Final Adjustments: Review the model under different angles and lighting conditions. You might need to go back and adjust some highlights or shadows to ensure the boots look good from all perspectives. The goal is for the boots to have a high contrast, shiny appearance, indicative of leather. Finishing Touches: As a final step, use glazing to unify all the elements. A thin glaze of black can help to tie together the highlights and shadows, making the transition between them smoother and more natural. This step also adds a satin finish to the boots, enhancing the leather effect. For all the videos on how I painted Lady Annika, the Thirsting Blade, in one place, follow this link!: Lady Annika, The Thirsting Blade Golden Demon Entry – Lady Annika’s thirst for blood is legendary, even amongst the Soulblight vampires! I really enjoyed painting her and made a few tweaks to the model. Watch Now If you don’t have an account, please sign up here! The website currently has over 350 video tutorials with steps and tips, plus a selection of PDFs. If you are not sure about joining, you can explore my free videos with a free membership, or take the plunge and become a full subscriber for full access. If you’d prefer to support me on Patreon, please visit: https://www.patreon.com/RichardGray [...]
How to Paint Sigvald The Magnificent – Shield Freehand
Here is a close up of the freehand on the shield I painted for Sigvald the Magnificent! It was quite a fun piece, right up until adding the light at the end when it got a bit stressful! Read on for my tutorial videos on how I painted it, with step by step tips and full paints list. How to Paint: Shield and Freehand The following paints were used: Games Workshop: Daemonette Hide, Cadian Fleshtone, Vallejo: Black, Ice Yellow How to Paint: Shield and Freehand Part Two The following paints were used: Games Workshop: Daemonette Hide, Cadian Fleshtone, Mephiston Red Vallejo: Black, Ice Yellow, Pale Grey blue P3: Morrow White Top Tips: Shield and Freehand Wet Palette Preparation: Begin with a wet palette to keep your paints hydrated.Utilise a variety of colours, including Daemonette Hide, Daemonette Hide and Flesh Tone mix, Cadian Fleshtone, Cadian Fleshtone mixed with Ice Yellow, and Ice Yellow.Base Work and Background: Commence by roughly blocking in the main shapes for the shield freehand. Don’t worry about perfection at this stage.Use a flat black background to provide a canvas for your work.Freehand Technique: When painting freehand, it’s recommended to start with a messy application, focusing on getting the shapes in the right place.Consider the androgynous nature of the face and add subtle demonic elements.Work on defining features like cheekbones, eyes, and forehead gradually.Lighting Considerations: Plan for top-left lighting and be mindful of how it interacts with the background and the freehand.Avoid pre-painting the background shine to maintain consistency when adding lighting later.Refinement Process: Refine the face by adjusting shapes and proportions as you progress.Pay attention to the texture and subtleties in the paintwork, allowing for variations and imperfections.Use reference images of faces and lighting to enhance realism.Layering and Thinning Paint: Thin your paints to ensure smooth layering, especially as you’ll be applying multiple layers.Experiment with thinning ratios, but generally, aim for about one and a half to two times water to one part paint.Brush Techniques: Utilise different brushes for specific tasks. A newer brush for softer marks and an older one for larger, softer applications.Pay attention to the size of the brush tip for finer details.Adding Subtle Details: Introduce subtle details by lifting the brush to create dots where the paint is thinner, adding character to the piece.Experiment with depositing tiny dots of paint to create texture and shadows.Shading and Shadow Definition: Use darker colours like Daemonette Hide mixed with black for shadow definition.Consider the natural shadowing on curved surfaces, like the bottom of the chin.Final Touches and Tweaks: Continuously refine and tweak elements while the paint is still wet.Use excess paint dots to your advantage by pushing them around to achieve desired effects. Have you got a Sigvald to paint? Follow my full Sigvald the Magnificent painting guide: How to Paint Sigvald the Magnificent with NMM All of the tutorials for Sigvald the Magnificent, including how to paint NMM (gold) armour, face and horns, freehand shield, NMM silver sword and hilt and more! Watch Now If you don’t have an account, please sign up here! The website currently has over 350 video tutorials with steps and tips, plus a selection of PDFs. If you are not sure about joining, you can explore my free videos with a free membership, or take the plunge and become a full subscriber for full access. If you’d prefer to support me on Patreon, please visit: https://www.patreon.com/RichardGray [...]
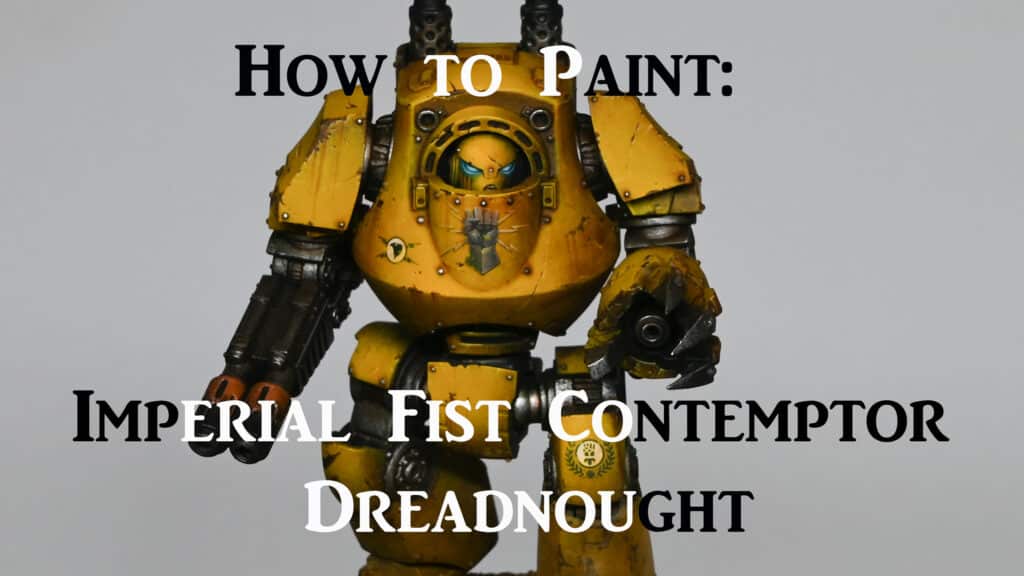
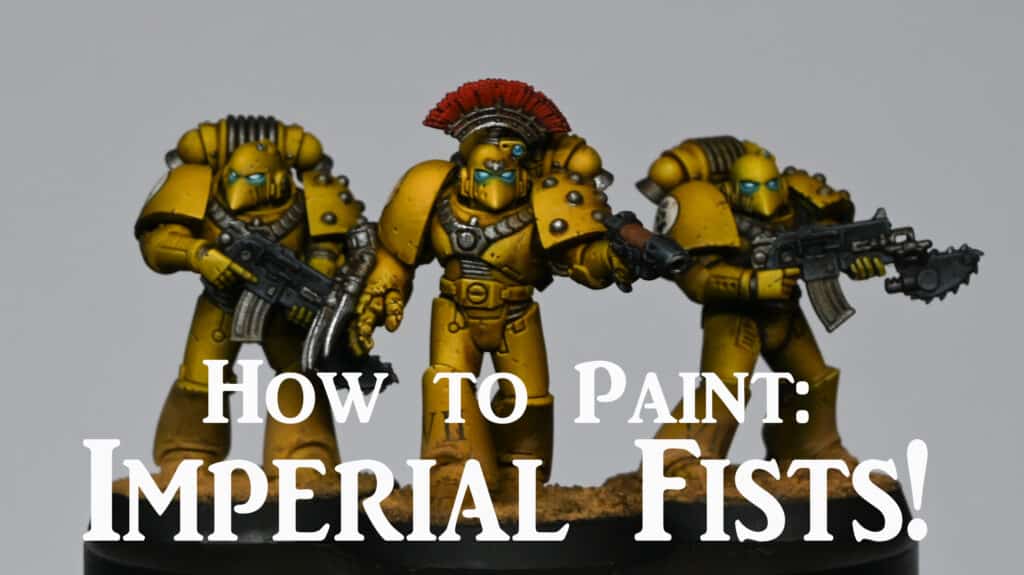
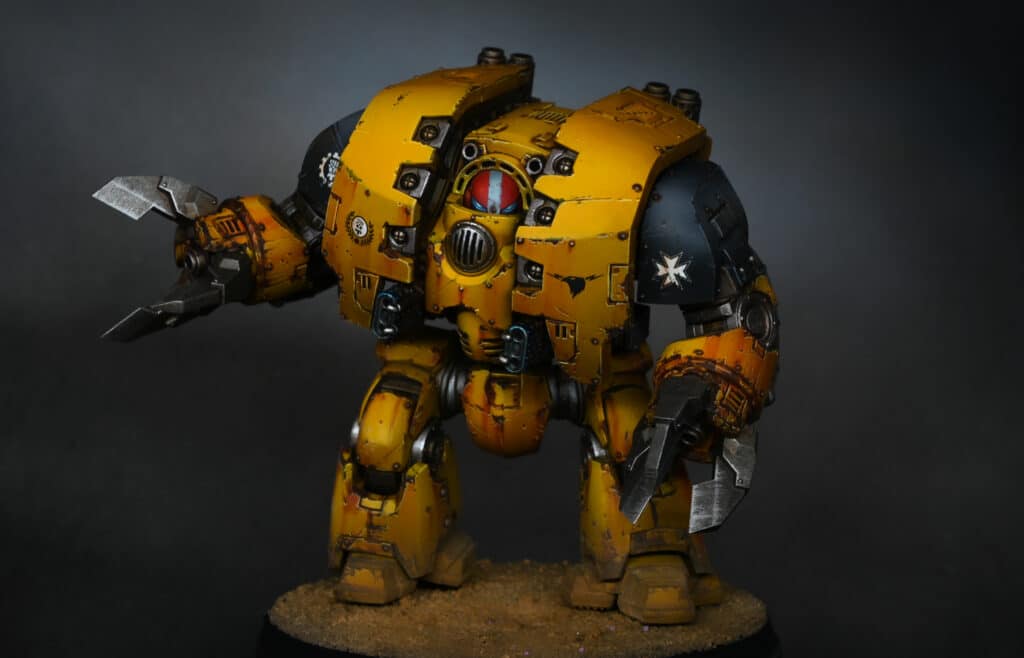
How to Paint Freehand on Imperial Fists Redemptor Dreadnought
Learn how to paint freehand on a Imperial Fists Redemptor Dreadnought, with a fist design and a guide on neat, freehand text in a ribbon. These videos come with paints and a step-by-step guide. Scroll down to get started or click the below to quick jump to a specific technique. Quick Jump: Video: Imperial Fist Freehand SymbolPaints and MaterialsHow to Paint Freehand on Imperial Fists – Step-by-Step GuideVideo: Imperial Fist Freehand TextPaints and MaterialsHow to Paint Freehand on Imperial Fists – Step-by-Step GuideExplore more Freehand Tutorials! Video: Imperial Fist Freehand Symbol Paints and Materials Vallejo: German Grey, Neutral Grey, Pale Blue Grey, Black P3: Morrow White Games Workshop: Balor Brown, Naggaroth Night Fine detail brush How to Paint Freehand on Imperial Fists – Step-by-Step Guide Prepare the Surface: Begin with a clean, primed chest plate of the Redemptor Dreadnought. Outline the Fist: Start with Vallejo Model Colour Black. Sketch a rough outline of the fist. At this stage, focus on general placement rather than detail. Ensure the fist is centralised to avoid asymmetry. Blocking in Basic Shapes: Using Neutral Grey, block in the shapes of the fingers and thumb. Keep the shapes simple. Use the grey to sketch out the basic anatomy of the fist, ignoring finer details for now. Adding Depth with Grey Shades: Use a mix of Neutral Grey, German Grey, and Pale Blue Grey for varying shades. Gradually define the fingers and palm, focusing on the curvature and how light would naturally hit these surfaces. Remember, fingers are cylindrical, not flat. Detailing with Lighter Colours: Progressively lighten the greys as you add more detail. The aim is to create a sense of depth and three-dimensionality in the fist. Highlighting: Use P3 Morrow White for the highest highlights. Focus these highlights where the light would be strongest, creating a shiny, metallic effect. Balance is key; too much white can reduce the shiny appearance. Refining and Correcting: Go back with Vallejo Model Colour Black to refine and correct the shape. Use black to sharpen edges and deepen shadows, enhancing the three-dimensional look. Weathering and Final Touches: For weathering, apply Balor Brown to create chips and scratches, blending them into the overall design. Use Naggaroth Night to glaze and add a subtle contrast to the yellow armour. Finish by ensuring the highlights and shadows are well balanced and the symbol integrates seamlessly with the rest of the model. Tips: Use your own hand as a reference for the fist, but remember, the Space Marine gauntlet will differ in shape. Ensure your brush is finely pointed for the intricate details. Keep your hand steady. Resting your painting hand on a stable surface can help. Work in good lighting to accurately see the effects of your shading and highlighting. Video: Imperial Fist Freehand Text Paints and Materials Games Workshop: Baneblade Brown, Rhinox Hide, Morghast Bone, Screaming Skull, Balor Brown Vallejo: Model Colour Black Fine detail brush Well palette How to Paint Freehand on Imperial Fists – Step-by-Step Guide Outline the Ribbon: Start by sketching the basic shape of the banner with Morghast Bone. Use a smaller brush for detailed edges and a larger brush for the main section to achieve a smoother finish. Detailing the Ribbon: Paint the stringy ends of the ribbon with Morghast Bone. For shadowing, mix Baneblade Brown and Rhinox Hide (about 50/50). Apply the shadow mix along the edges and folds of the ribbon to create depth. Remember, the colour dries lighter, so adjust accordingly. Refining and Shading: For the curled sections, ensure they are darker than the main ribbon for a three-dimensional effect. Use a thin brush for smooth edges and avoid bumps. If necessary, go over the edges to sharpen them with Morghast Bone. Weathering the Ribbon: Apply Balor Brown for weathering and chipping effects. Focus on creating an aged and worn look but avoid overdoing it. Final Touches: Add highlights using Screaming Skull to the main parts of the ribbon for contrast. Blend carefully to achieve a natural look. Steps for Painting the Text: Initial Lettering: Use Vallejo Model Colour Black for the text. Start by typing simple letters for spacing. Use the first and last letters as anchors, and ensure even spacing in between. Refining the Font: Once the basic lettering is done, refine the font. Make corrections and enhance the letters using Screaming Skull. Aim for sharp, clear lettering. Finalising the Text: Once you have the letters shaped, thicken and define them for legibility. Keep the line weight consistent throughout for a uniform look. Use Morghast Bone or Screaming Skull to make corrections and sharpen the edges. Weathering the Text: If desired, weather the text lightly with Balor Brown. Be cautious not to distort the letters too much. Applying a Filter: For a worn effect, apply a heavily watered-down glaze of Mournfang Brown and Yriel Yellow over the entire freehand area. This softens the colours and blends the text with the banner. Tips: Use a well-supported posture for steady hand movements. Ensure your brushes are in good condition. A sharper brush is essential for fine details. Be patient and allow layers to dry before applying more paint. Consistency in your brushwork is key to achieving a professional look. Explore more Freehand Tutorials! If you don’t have an account, please sign up here! The website currently has over 350 video tutorials with steps and tips, plus a selection of PDFs. If you are not sure about joining, you can explore my free videos with a free membership, or take the plunge and become a full subscriber for full access. If you’d prefer to support me on Patreon, please visit: https://www.patreon.com/RichardGray [...]
How to Freehand Paint a Skull
A tutorial on how to freehand paint a skull onto a clear surface, in this case the shoulder of a Titan. All videos are recorded in HD 1080p or higher – use full screen for the full effect and let the video load completely. Materials Required Your miniature for the freehand to be painted on! Mine is a Warlord Titan, Brushes (various sizes, including a size 0 for fine details) Vallejo Model Color Black Games Workshop paints: Rhinox Hide, Ceramite White, Balor Brown, Ushabti Bone, Mephiston Red, Wild Rider Red Vallejo paints: Pale Grey Blue, Dark Sea Grey Step 1: Preparing the Area Begin with a flat area on your model. Make sure it is clean and free of any mould lines, dirt or grease. Apply a black primer base, then airbrush layers of grey, a glaze of purple, and grey again to create a dynamic background. Step 2: Sketching the Freehand Design Start by blocking in the rough shape of a skull in the centre. Use Vallejo Model Color Black for strong coverage and a matte finish. Ensure the initial shape is smaller so you can adjust the size as needed without difficulty. Step 3: Adding Details as You Freehand Paint a Skull Add the eye sockets and nose hole, focusing on making the skull slightly asymmetrical to add interest. Use Rhinox Hide to block in shadows and define the shape of the skull, especially around the cheekbones and beneath the eye sockets. Step 4: Refining the Skull Gradually build up the skull’s details using a mix of Balor Brown and Ushabti Bone. This process involves adding highlights and shadows to create depth and texture. Pay attention to the top-down lighting, ensuring the highlights and shadows correspond to this light source. Step 5: Painting the Blindfold and Chains Paint the blindfold using Mephiston Red, ensuring it wraps realistically around the contours of the skull. For the chains, start with Vallejo Model Color Black to outline the shapes, then use Pale Grey Blue and Dark Sea Grey to add highlights and shadows, creating a metallic look. Step 6: Finishing Touches Use Ceramite White for the highest highlights, focusing on areas like the forehead and teeth to enhance the skull’s dimensional effect. Apply small amounts of shading and texture throughout the skull to refine its appearance. Step 7: Adding Atmospheric Effects To give the skull a darker, moodier feel, consider using a water mixable oil color like burnt umber around the edges and in the recesses. This step is optional but can add a significant impact to the final look. Remember, the key to successful miniature painting, especially when dealing with freehand designs, lies in patience, practice, and attention to detail. More Freehand Tutorials If you don’t have an account, please sign up here! The website currently has over 350 video tutorials with steps and tips, plus a selection of PDFs. If you are not sure about joining, you can explore my free videos with a free membership, or take the plunge and become a full subscriber for full access. If you’d prefer to support me on Patreon, please visit: https://www.patreon.com/RichardGray [...]
How to Paint Weathered Armour Plate and Freehand Text
Two videos on how to paint weathered armour plate, complete with rust, scratches and chips and a simple freehand banner. You won’t need an airbrush for this tutorial. Video: Part One – Armour and Weathering Materials and Paints Needed Games Workshop Paints: Balor Brown, Yriel Yellow, Mournfang Brown, Rhinox Hide Vallejo Paints: Neutral Grey, Pale Grey Blue, White Brushes: Large dry brush (or makeup brush), fine detail brush, glazing brush (size 4 or similar) Accessories: Water for thinning paints, kitchen towel for wiping brushes, well palette Preparing the Model Clean and prime your Redemptor Dreadnought model. A light grey or white primer is recommended for bright colours like yellow. Base Coating with Stippling Technique Mix Balor Brown with water in a roughly 50/50 ratio. This will be your base layer. Stipple Balor Brown onto the armour panels using a large, round, flat brush. Aim for gentle touches to build up the texture without creating pronounced, three-dimensional brush marks. Allow the paint to dry fully before adding more layers. This creates a worn, battlefield-ready appearance. Glazing for Colour Depth Create glazes in your well palette by mixing Mournfang Brown and Yriel Yellow separately with water, using about 6-7 parts water to 1 part paint. Apply Mournfang Brown glaze to shade areas, starting from lighter areas and moving the brush towards darker regions. This adds warmth to the shadows. Apply Yriel Yellow glaze over the entire panel, focusing more paint towards the centre for a vibrant effect. Ensure to remove excess paint from your brush to avoid pooling. Chipping for Weathered Effect Use Rhinox Hide with a fine detail brush to create chipping along the edges of the armour panels where wear would naturally occur. Remember, less is more; avoid overdoing it with lines and crosses. Highlight the lower edge of each chip with Yriel Yellow to simulate the armour’s wear and tear, making the chips stand out more against the base layers. Detailing and Finishing Touches Rivets: Paint each rivet with a dot of Pale Grey Blue on the top left and a tiny line on the bottom right to simulate light reflection. Metal Exposure: Use Neutral Grey to paint areas where the metal beneath the yellow paint would show through, particularly around chips and edges. This technique helps redefine the model’s shape and adds dimensionality to the weathering. Final Highlights: Add a final touch by placing a small dot of White on the most prominent parts of the chips and rivets to enhance the reflective effect. Video: Part Two – Freehand Banner Materials and Paints Needed: Games Workshop Paints: Baneblade Brown, Rhinox Hide, Morghast Bone, Screaming Skull, Balor Brown Vallejo Paints: Model Colour Black Brushes: A smaller brush for initial sketching and detailing, and a larger brush for smoother finishes on larger sections. Other Supplies: Water for thinning paints, a palette for mixing, and kitchen towel for wiping off excess paint. Preparing the Banner: Base Layer with Morghast Bone: Begin by sketching the basic shape of the banner on the shoulder pad using Morghast Bone. This step involves creating the outline and filling in the banner. For larger sections, use a larger brush to achieve a smoother finish. Refining Edges: Use a smaller brush to refine the edges and the trailing ends of the banner. Aim for a shape that complements the space available on the shoulder pad, keeping in mind the overall design and avoiding overly stubby ends. Applying Shadow with Baneblade Brown and Rhinox Hide Mix: Mix approximately 50/50 Baneblade Brown and Rhinox Hide to create a shadow colour. Apply this mixture to add depth and shadow to the banner, especially along the edges and the banner’s folds. Highlight with Screaming Skull: To highlight the main body of the banner and give it a three-dimensional appearance, apply Screaming Skull, focusing on the central and raised areas. This step brings out the details and makes the banner stand out. Painting the Text: Sketching Text with Vallejo Model Colour Black: Using a fine detail brush and Vallejo Model Colour Black, begin sketching the text onto the banner. Start with basic shapes for letters and focus on spacing. The chosen word for this tutorial is “MORTIS.” Refining Letters: Once the basic spacing and shape are down, refine each letter for clarity and style. Adjust the thickness of the lines and add any stylistic flourishes to match the desired font. Consistency in line weight and style across all letters is crucial for readability. Correcting and Sharpening Edges: Use Morghast Bone and Screaming Skull to correct any overshoots or to sharpen the edges of the letters. This step allows for cleaner lines and more precise letter shapes. Final Touches: Weathering: To integrate the text and banner naturally with the rest of the model, apply weathering. Use Balor Brown to simulate chipped paint and wear on the banner and text. This step adds realism and character to the model. Applying Filters: A filter of heavily diluted Mournfang Brown and Yriel Yellow can be applied over the entire freehand work. This unifies the colours, softens the contrast, and gives the banner and text a worn look, blending them seamlessly with the model’s overall weathered appearance. More Free Video Tutorials More Free videos are available for for logged in members – just sign up as a ‘friend’ to view and click any of the thumbs.To explore all of these, visit this page! If you don’t have an account, please sign up here! The website currently has over 350 video tutorials, plus step by step guides and PDFs. You can explore more free videos with a free membership, or take the plunge and become a full subscriber for full access. If you’d prefer to support me on Patreon, please visit: https://www.patreon.com/RichardGray [...]
Freehand Skull on Castellan Knight
A video tutorial with step-by-step guide on how to freehand a skull on Castellan Knight legplate, with advanced shading and patterns. This guide will take you through painting a detailed skull freehand on the shin panel of a Castellan Knight miniature from Games Workshop. We’re focusing on creating a striking skull design amidst a vivid background, with a two-part process that lays the groundwork for intricate background details to be added later. The process begins with modifying the shin panel for a smooth painting surface, followed by base colouring, sketching, and detailing the skull. Video: Freehand Skull on Imperial Knight Part One Materials Needed Brushes: Size 1 Artis Opus Brush (used throughout the video for detailed work) Paints: Games Workshop (Citadel): Rhinox Hide: Base sketching of the skull Balor Brown: Refining skull details Ushabti Bone: Highlighting the skull Ceramite White: Final highlights on the skull Wild Rider Red: Used for airbrushing the background (mentioned as part of the orange base) Troll Slayer Orange: Part of the airbrushed background Mournfang Brown: Used in shadows and for airbrushing background details Privateer Press (P3): Battlefield Brown: Alternative to GW Scorched Brown, used for shading Vallejo: Model Colour Black: For defining eye sockets and other dark areas on the skull Other Materials: Airbrush: For applying the base layer of the shin panel Scalpel: For modifying the shin panel to create a smooth surface Fine Grit Sandpaper: For smoothing the modified shin area Wet Palette: To keep paints hydrated and workable Water Container: For rinsing brushes Paper Towels: For brush cleaning and paint dabbing Preparation Tools: Filling Material: To fill in gaps after modifying the shin panel for a smooth painting surface Step-by-Step Guide Preparing the Surface Modify the Shin Panel: Begin by carefully removing excess detail from the shin panel using a scalpel. Fill in any gaps to create a smooth surface for your freehand painting. Although minor dimples might remain, they will be covered by the paintwork. Base Colouring Airbrush Background: Apply an airbrushed base layer using Wildrider Orange, Troll Slayer Orange, and a touch of Mournfang Brown for shadows. This creates a vibrant orange backdrop, setting a stark contrast for the skull. Sketching the Skull Outline with Rhinox Hide: Start sketching the skull using Rhinox Hide, focusing on getting the overall shape rather than detailed features like eye sockets or teeth. This stage doesn’t require perfection in symmetry or detail, as adjustments can be made later. Refine with Balor Brown: With Balor Brown, begin refining the skull’s structure, particularly around the temples, nose, and eye sockets. This layer adds dimension and prepares for detailed work. Detailing the Skull Highlight with Ushabti Bone: Use Ushabti Bone to start bringing out the highlights of the skull. This step involves building up from the darkest shadows to the lightest areas, considering the light source will be from the top left. Deepen Shadows: Apply Vallejo Model Colour Black to define the eye sockets and other deep shadows within the skull, enhancing the contrast and depth. Add Texture and Fine Details: Continue with Balor Brown and Ushabti Bone, applying very light, fine strokes to create texture and detail across the skull’s surface. Focus on asymmetry and imperfections for a more realistic appearance. Final Highlights with Ceramite White: Use Ceramite White sparingly to add the brightest highlights, concentrating on areas that would catch the most light. This step dramatically increases the contrast and brings the skull to life. Starting the Background Pattern Outline Pattern with Black: Begin outlining the background pattern, starting with simple geometric shapes and lines to create a non-symmetrical, maze-like design. This base pattern sets the stage for further detailing. Apply Initial Highlights: Initially, experiment with Fire Dragon Bright for highlights but plan to integrate the skull’s colours (Balor Brown, Ushabti Bone, Ceramite White) into the background for consistency. Finishing Touches Adjust and Refine: As the background pattern develops, continuously adjust and refine the design. Incorporate shadows and highlights to create depth and interest, using P3 Battlefield Brown for shading. Merge Skull and Background: Begin to subtly blend elements of the skull into the background pattern, ensuring the entire piece feels cohesive. Video: Freehand Skull on Imperial Knight Part Two Where we focus on refining the maze-like background detail introduced in Part 1, enhancing the overall visual appeal and integrating the skull into the pattern for a cohesive look. Materials Required: Brushes: A fine detail brush, ideally size 0 or 1. Paints: Games Workshop’s Wild Rider Red, Rhinox Hide, Ceramite White, Zamersi Desert, Ushabti Bone, Firedragon Bright, Abaddon Black, and P3’s Battlefield Brown (or Baneblade Brown as a GW alternative). Other Supplies: A wet palette for mixing paints, water for thinning paints, and kitchen paper for brush cleaning. Step-by-Step Guide: Review and Refine the Existing Pattern: Begin by assessing the pattern laid out in Part 1. Identify areas that require refining or adjustments to ensure a unified appearance across the entire shin armour. Adjusting the Pattern: Use a mix of Rhinox Hide and Battlefield Brown to refine areas needing adjustments. This may involve smoothing transitions between different sections of the pattern or altering shapes to better integrate with the overall design. Focus particularly on areas around the white dots and sections that appeared overly bright or disjointed in Part 1. The aim is to create seamless transitions between the skull and the background pattern. Enhancing Contrast and Depth: Apply thin glazes of Rhinox Hide in areas needing more depth, helping to highlight details and make the pattern more intricate. Increase contrast by selectively brightening areas with Zamersi Desert, followed by Ushabti Bone and Ceramite White for the highest highlights. This step is crucial for giving the pattern a three-dimensional look. Blending the Skull into the Pattern: To integrate the skull into the background, extend pattern elements over the edges of the skull. Use a fine detail brush and steady hand to draw lines and shapes that flow from the skull into the surrounding areas, unifying them. Final Highlights and Touch-Ups: Add final highlights with Ceramite White to the highest points of the pattern, enhancing the illusion of depth and detail. Review the piece for any areas requiring further refinement or additional highlights before sealing your work. Glazing for Cohesion: Create a glaze with Firedragon Bright and water for a thin consistency. Apply this over the entire pattern, especially where transitions need softening or colours unifying. The glaze will blend highlights and shadows for a cohesive look. Finishing Touches: Once the glaze has dried, reassess the effect. If necessary, redefine any details with base colours that may have been softened too much by the glazing. Sealing the Work: After ensuring the paint is completely dry, apply a matte varnish to protect your work. This also helps unify the finish across different textures and layers. More Free Video Tutorials More free videos for logged in members – just sign up as a ‘friend’ to view and click any of the thumbs.To explore all of these, visit this page! If you don’t have an account, please sign up here! The website currently has over 350 video tutorials, plus step by step guides and PDFs. You can explore more free videos with a free “friend” membership, or take the plunge and become a full subscriber for full access. If you’d prefer to support me on Patreon, please visit: https://www.patreon.com/RichardGray [...]
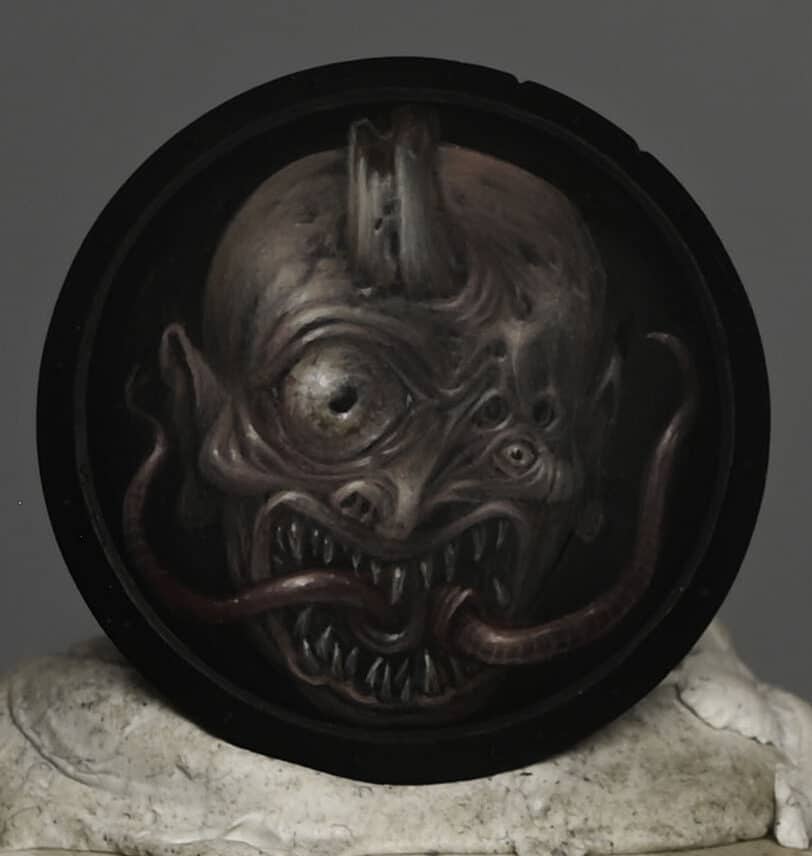
How to Paint Abaddon Cloak with Freehand and Leather Textures
In my How to Paint Abaddon Cloak video series, we’ll be taking a deep dive into painting the cloak of Abaddon the Despoiler—one of the most iconic and menacing figures in the Warhammer 40K universe. From creating a rich, weathered leather effect to the intricate freehand designs symbolising the four Chaos Gods, this tutorial will guide you through every step. We’ll be using a mix of Games Workshop and Vallejo paints to bring out the dark, foreboding atmosphere of Abaddon’s cloak while ensuring it matches his brutal, battle-hardened aesthetic. Video – How to Paint Abaddon Cloak (Leather Effect)Paints neededPainting the Inside of the Cloak Video – How to Paint Abaddon Cloak Freehand Part OnePaints and materials neededPreparing the CloakStarting the Freehand Video – How to Paint Abaddon Cloak Freehand Part TwoPaints needed:Refining the Slaanesh HeadDetailing and TexturingVideo – How to Paint Abaddon Cloak Freehand Part ThreePaints neededPainting the Khorne Head Video – How to Paint Abaddon Cloak Freehand Part FourPaints and materials neededPainting the Nurgle Head Video – How to Paint Abaddon Cloak Freehand Part FivePaints needed:Video – How to Paint Abaddon Cloak Freehand Final PartPaints neededWhy I Chose to Paint the Cloak This Way:All Abaddon TutorialsVideos Not Showing? Video – How to Paint Abaddon Cloak (Leather Effect) Paints needed Paints: Vallejo: Heavy Sienna, Dwarf Skin, Scab Red Games Workshop: Rhinox Hide, Mournfang Brown Painting the Inside of the Cloak Base Coating: Prime the cloak black. This will serve as the base for the following layers. Apply a rough coat of Rhinox Hide. Use a scrubbing motion with your brush to create an uneven, patchy texture. This coat should be about 1.5 parts paint to 1 part water. The goal is to have a base colour that isn’t perfectly smooth, as this will add to the weathered effect. First Layer of Texture: Use Vallejo Heavy Sienna to add the first layer of texture. This paint is extra opaque, which makes it ideal for creating highlights and adding detail. Apply the paint using the tip of your brush, creating very rough, random marks all over the cloak. Use a cross-hatching and squiggling technique to add a sense of worn leather. This coat should be around 50/50 paint to water for better flow. Second Layer of Texture: Once the first layer is dry, use Cadian Fleshtone to add more refined texture marks. These marks should be thinner and more considered than the previous layer. Focus on the highlight areas but make sure to add some detail in the shadowed areas as well. Highlight Detailing: With Dwarf Skin (or a similar light flesh tone), add fine highlights to the cloak. These highlights should be placed carefully to enhance the texture and add depth. Use very thin paint (more than 50/50 water to paint) and minimal paint on the brush to achieve subtle, translucent marks. Glazing: Prepare three colors on your wet palette: Mournfang Brown, Rhinox Hide, and Scab Red. Using heavily thinned Mournfang Brown (around 6 parts water to 1 part paint), glaze over the cloak, focusing on the mid-tones and recesses. This will add a warm tone and help unify the previous layers. Apply Rhinox Hide glaze to the shadow areas to enhance depth. This glaze should also be very thin. Use Scab Red to add some variation and interest, especially in the darker areas. Fading the Edges: To create a faded effect at the bottom of the cloak, use Scab Red mixed with Rhinox Hide. Thin the paint significantly and apply multiple layers, building up the color gradually. Make sure the transitions are soft by using long strokes that follow the flow of the cloak. Final Touches and Varnishing: After completing the texturing and glazing, apply a coat of matte varnish to protect your work and reduce shine. This will also help to soften the overall effect and integrate all the layers. Video – How to Paint Abaddon Cloak Freehand Part One Paints and materials needed Paints: Games Workshop: Emperor’s Children, Fulgrim Pink, Rhinox Hide, Kantor Blue Vallejo: Black, Heavy Grey, Sunset Red Brushes: Detail brush with a fine tip (size 00 or 0) Standard brush Palette: Wet palette recommended Tools: Clean cloth or paper towel Magnifying visor (optional for fine details) Ultramar Varnish (for a protective layer) Preparing the Cloak Visualizing the Design: Before starting the freehand, visualize your design. You can use a photo editing tool to superimpose a rough sketch on a picture of the cloak to align your design. This helps in understanding the flow and positioning of the elements. Base Preparation: Ensure the texture work on the cloak is complete. This includes the heavy weathering and crack effects as detailed in the previous videos. Applying a Protective Layer: Apply a thin coat of Ultramar Varnish to the cloak. This provides a slight protective layer that can make it easier to correct mistakes without damaging the underlying paint. Starting the Freehand Marking Guidelines: Use a thinned black paint to draw a cross on the cloak. This helps in aligning your design elements and ensuring symmetry. Blocking in Colors: Start by blocking in rough shapes for each of the Chaos Gods. Use the following colors for the base blocks: Slaanesh: Fulgrim Pink Nurgle: Rhinox Hide Khorne: Sunset Red Tzeentch: Kantor Blue Detailed Blocking for Slaanesh: Focus on the Slaanesh section first. Block in the basic face shape using Fulgrim Pink. Remember, this is just the base layer, so it doesn’t need to be perfect. Refining the Shape: Add basic facial features with a darker pink or purple mixed with Fulgrim Pink. This includes the rough position of the eyes, nose, and mouth. Adjusting and Correcting: Use Rhinox Hide to correct and refine the shapes. Rhinox Hide is great for this purpose due to its translucency, which allows you to darken areas without completely obscuring the details underneath. Video – How to Paint Abaddon Cloak Freehand Part Two Paints needed: Paints: Games Workshop: Emperor’s Children, Fulgrim Pink, Mephiston Red Vallejo: Black, Sunset Red P3: Morrow White Refining the Slaanesh Head Starting with the Horns (Optional): Initially, I planned to add horns to the Slaanesh head, but later decided against it for compositional reasons. If you prefer to include horns, start by blocking them in with Fulgrim Pink or a similar color. Remember, details on such a small scale can become cluttered quickly. Painting Over Mistakes: If you decide against an element (like the horns), don’t worry. Paint over it with the base color of the cloak (Rhinox Hide) to blend it back in. Mistakes are part of the process and can be easily fixed. Adding Black Hair: Using Vallejo Black, paint in the hair for the Slaanesh head. Keep the hair wavy and flowing to add movement and dynamism. Focus on keeping the strokes soft and thin. Refining Facial Features: Continue refining the face. Use Emperor’s Children mixed with Morrow White for highlights, and Sunset Red mixed with Black for shadows. Work slowly and build up the layers gradually. Pay special attention to the eye sockets, nose, and mouth. These areas define the expression and overall look of the face. Balancing Highlights and Shadows: It’s important to balance your highlights and shadows. Ensure the lighting is consistent across the face to maintain a three-dimensional look. Use Fulgrim Pink and Emperor’s Children for lighter areas and mix in more white for the brightest highlights. Detailing and Texturing Teeth and Tongue: For the teeth, use Morrow White. Since the teeth are very small, it’s challenging to add transitions. Focus on making them look sharp and slightly pointy without over-emphasizing. For the tongue, start with Sunset Red and add shading with a darker red. Add subtle highlights with Emperor’s Children mixed with Sunset Red. Softening the Edges: Around the eyes and mouth, use diluted Rhinox Hide to soften the edges and blend the features into the face. This helps avoid a cartoony look and makes the face appear more natural. Adding Red Tones: Use Mephiston Red diluted with water (2.5 parts water to 1 part paint) to add red tones to the face. Apply this glaze lightly to enhance the overall color without overpowering the existing details. Video – How to Paint Abaddon Cloak Freehand Part Three Paints needed Paints: Games Workshop: Mephiston Red, Evil Sunz Scarlet, Wild Rider Red, Balor Brown, Rhinox Hide, Morghast Bone, Blue Horror Vallejo: Model Colour Black Painting the Khorne Head Base Colours: Start with Mephiston Red to block in the base color of the Khorne head. Ensure even coverage. Use Evil Sunz Scarlet to add highlights, focusing on areas that catch the most light. Outlining with Black: Use Vallejo Black to outline the features of the face. This helps define the shapes and make them stand out against the brown leather background. Focus on outlining the eyes, nose, and mouth areas to start shaping the face. Shading and Highlighting: For shadows, use Rhinox Hide mixed with Mephiston Red. This helps deepen the shadows without losing the red tone. Use Balor Brown for the first layer of highlights, especially on the raised areas like the cheekbones and forehead. For more pronounced highlights, use Wild Rider Red mixed with Morghast Bone. Apply these sparingly to maintain the red color. Detailing the Horns: Paint the horns with Balor Brown as the base color. Add highlights using Morghast Bone, focusing on creating a ribbed texture to give the horns a natural look. Use Rhinox Hide to add shadows and define the ribs on the horns. The goal is to create a cylindrical appearance. Adding Facial Features: Paint the eyes black, then add a small dot of Balor Brown to represent the iris. Add details to the teeth using Morghast Bone. The teeth should be sharp and prominent. Use Blue Horror for final highlights on the face and horns. This helps tie all the heads together with a consistent light source. Additional Details: Add small horns or spikes on the Khorne head to fill in empty spaces and add more detail. Paint these with Balor Brown and highlight with Morghast Bone. Use Mephiston Red to paint the gums around the teeth, adding Rhinox Hide for shading. Video – How to Paint Abaddon Cloak Freehand Part Four Paints and materials needed Paints: Games Workshop: Rhinox Hide, Deathworld Forest, Warboss Green (optional), Balor Brown, Morghast Bone, Screaming Skull, Mournfang Brown, Bugman’s Glow, Cadian Fleshtone Vallejo: Black, Heavy Grey (optional), Golden Olive, Pale Grey Blue Painting the Nurgle Head Base Coloirs: Start by sketching the rough shape of the Nurgle head with Deathworld Forest. Use Rhinox Hide to outline and add shadows to define the initial shape of the head. Building Up Details: Use Warboss Green and Golden Olive to add highlights, focusing on areas that catch the most light. For a less vivid color, minimize the use of Warboss Green. Apply Vallejo Black to outline the eyes, nose, and mouth, adding definition to the facial features. Adding Wrinkles and Texture: Paint wrinkles and lines using Golden Olive mixed with Deathworld Forest. Follow the natural flow of the face to make the lines look more realistic. Use Rhinox Hide to deepen the shadows and add more depth to the wrinkles. Painting the Mouth and Teeth: Use Bugman’s Glow and Cadian Fleshtone for the gums. Start with Bugman’s Glow for the base and highlight with Cadian Fleshtone. Paint the teeth with Morghast Bone, and add highlights with Screaming Skull. Outline the teeth with Vallejo Black for better definition. Highlighting and Shading: Use Balor Brown and Morghast Bone for additional highlights on the face and horn. Blend the highlights using Rhinox Hide for smooth transitions. This helps in maintaining the three-dimensional look of the head. Painting the Horn: Base coat the horn with Balor Brown. Add highlights using Morghast Bone and Screaming Skull. Create a ribbed texture on the horn using fine lines and blend with Rhinox Hide. Detailing the Eyes: Paint the eyes with Vallejo Black for the pupils and Balor Brown for the iris. Add a small white dot for the light reflection. Adding the Tongue: Paint the tongue with Bugman’s Glow and highlight with Cadian Fleshtone. Add depth and shadows using Rhinox Hide and Pale Grey Blue. Adjust the shape of the tongue as needed for better composition. Video – How to Paint Abaddon Cloak Freehand Part Five Paints needed: Paints: Games Workshop: Rhinox Hide, Balor Brown, Morghast Bone, Ushabti Bone, Mournfang Brown, Bugman’s Glow, Cadian Fleshtone, Blue Horror, Night Lords Blue, Temple Guard Blue Vallejo: Black Painting the Tzeentch Head Base Colours: Start by blocking in the rough shape of the Tzeentch head with Night Lords Blue. This dark background will help define the initial shape. Use Temple Guard Blue to add initial highlights and define the contours of the head. This contrast will make the shape more visible despite the translucency of the paint. Refining the Shape: Use Vallejo Black to outline and add bold details. This will help define the facial features and add depth. Apply Balor Brown to areas that will represent the beak and other prominent features of the head. Detailing the Beak: Use Balor Brown as the base for the beak. Add highlights with Morghast Bone and Ushabti Bone to create a gradient effect. Paint the inside of the mouth with Vallejo Black to create depth. Add details to the beak, such as small teeth, using Morghast Bone. Highlight with Ushabti Bone for a more pronounced effect. Creating Texture: Use Blue Horror and Temple Guard Blue to create a feathery texture on the head. These marks should be softer and more translucent to blend well with the darker base. Add small tendrils or feathery protrusions using the same colors to differentiate the Tzeentch head from the other Chaos heads. Painting the Eye: Paint the eye with Balor Brown. Use multiple layers to build opacity, focusing on the lower part of the iris for a highlighted effect. Add the pupil with Vallejo Black and a small white reflection dot with Morghast Bone. Adding the Tongue: Use Bugman’s Glow and Cadian Fleshtone to paint the tongue. Start with Bugman’s Glow for the base and highlight with Cadian Fleshtone. Add depth and shadows using Rhinox Hide and Blue Horror. Adjust the shape of the tongue as needed to fit the overall design. Final Touches: Use Mournfang Brown to add subtle shading and transitions on the beak and other areas. This colour’s low opacity will help create smooth blends. Add small details, such as saliva or other organic textures, with Blue Horror. Ensure the marks are thin and subtle for a more natural look. Video – How to Paint Abaddon Cloak Freehand Final Part This final part of the freehand painting series brings together the intricate design on Abaddon’s cloak, highlighting the iconic eight-pointed star of chaos and adding weathering effects for a unified, detailed finish. Paints needed Paints: Games Workshop: XV-88, Balor Brown, Mournfang Brown, Rhinox Hide, Mephiston Red, Evil Sunz Scarlet, Wild Rider Red, Cadian Fleshtone, Temple Guard Blue, Kantor Blue (for additional eyes – iris) Vallejo: Black, Pale Grey Blue, Neutral Grey, Ice Yellow P3: Morrow White Painting the Eight-Pointed Star of Chaos Base Color: Start by painting the base of the eight-pointed star with XV-88. This will serve as the foundation for a non-metallic gold effect. Sketch the star and its arrows lightly, ensuring they fit around the four Chaos Gods’ heads without overpowering the design. Refining the Star: Add detail to the arrows, making them irregular in size and shape for a chaotic effect. Be mindful of the faces you have already painted. Incorporate the star into the existing design by blending it into the heads and the background. Painting the Eye of Chaos: In the center of the star, paint an oval shape with Vallejo Black for the eye. Add highlights around the eye using Neutral Grey and Pale Grey Blue, leaving a black outline for definition. Paint the iris with Mephiston Red, then layer Evil Sunz Scarlet and Wild Rider Red towards the bottom for a glowing effect. Add a highlight shine with Pale Grey Blue and a small dot of Morrow White for a realistic eye. Adding Non-Metallic Gold Effects Highlighting and Shading: Add highlights to the star using Balor Brown, Mournfang Brown, and Rhinox Hide for depth. Use Ice Yellow for sharp highlights. Focus on creating a three-dimensional look by highlighting edges and adding shadow in the appropriate areas. Use small dots of Morrow White for the brightest points to simulate metallic reflections. Integrating the Design: Paint subtle connecting lines from the star to the heads using the same gold colors. This helps unify the design. Blend some of the gold into the heads, especially around the edges, to show that they are part of a single piece. Weathering Effects Adding Wear and Tear: Use Cadian Fleshtone to add fine scratches and wear marks over the entire design. These should be thin and subtle to avoid overpowering the details. Focus on the edges and high points of the design where natural wear would occur. Glazing: Create glazes with Rhinox Hide and Mournfang Brown by diluting them with water (7:1 or 10:1 ratio). Apply these glazes over the scratches and around the heads to tone down the highlights and add depth. Use Mournfang Brown to add warmth back to the gold areas where needed. Final Touches Additional Eyes: Paint small additional eyes throughout the design using the same technique as the main eye, but using Temple Guard Blue and Kantor Blue for the iris. These eyes add a creepy, chaotic element to the design. Final Review: Step back and review the entire cloak to ensure the design is cohesive and balanced. Make any final adjustments to highlights, shadows, and details to ensure the freehand looks integrated and realistic. Why I Chose to Paint the Cloak This Way: When painting Abaddon’s cloak, I wanted to reflect both his status and the weight of his millennia-spanning crusades. The inside of the cloak features a worn, leather texture, which I chose to represent the endless battles Abaddon has fought—this cloak has been through as much war as the Warmaster himself. The scrubbing and layering techniques help give it a rich, aged look, adding a sense of history and character to the model. The freehand design on the back is a visual homage to the four Chaos Gods—Slaanesh, Nurgle, Khorne, and Tzeentch—who each play a critical role in Abaddon’s rise to power. Each head is painted with its own unique style and colour scheme to represent their distinct personalities, but I also aimed to blend them into the chaotic flow of the cloak, reflecting how intertwined their influences are in Abaddon’s life. The eight-pointed star of Chaos ties it all together, symbolising Abaddon’s mastery over the forces of Chaos Undivided. It’s not just about painting the symbols, but about integrating the chaos of these gods into the fabric of his existence, making the cloak more than just a piece of his armour—it’s a canvas for his dark legacy. All Abaddon Tutorials There are lots more tutorials for painting Abaddon! Follow the link below to watch them all, or scroll town to explore them by model part. Abaddon the Despoiler A series of videos on how to paint Abbadon the Despoiler to competition standard – (new step-by-step guides included!) Watch Now Videos Not Showing? To view any of my paid tutorials, you need to be a member of the website – please click below to log in or join the site. Not sure about joining just yet? Check out my Youtube for all my free tutorials or sign up as a free “friend” member on this site and visit the free videos page! If you’d prefer to support me on Patreon, please visit: https://www.patreon.com/RichardGray [...]
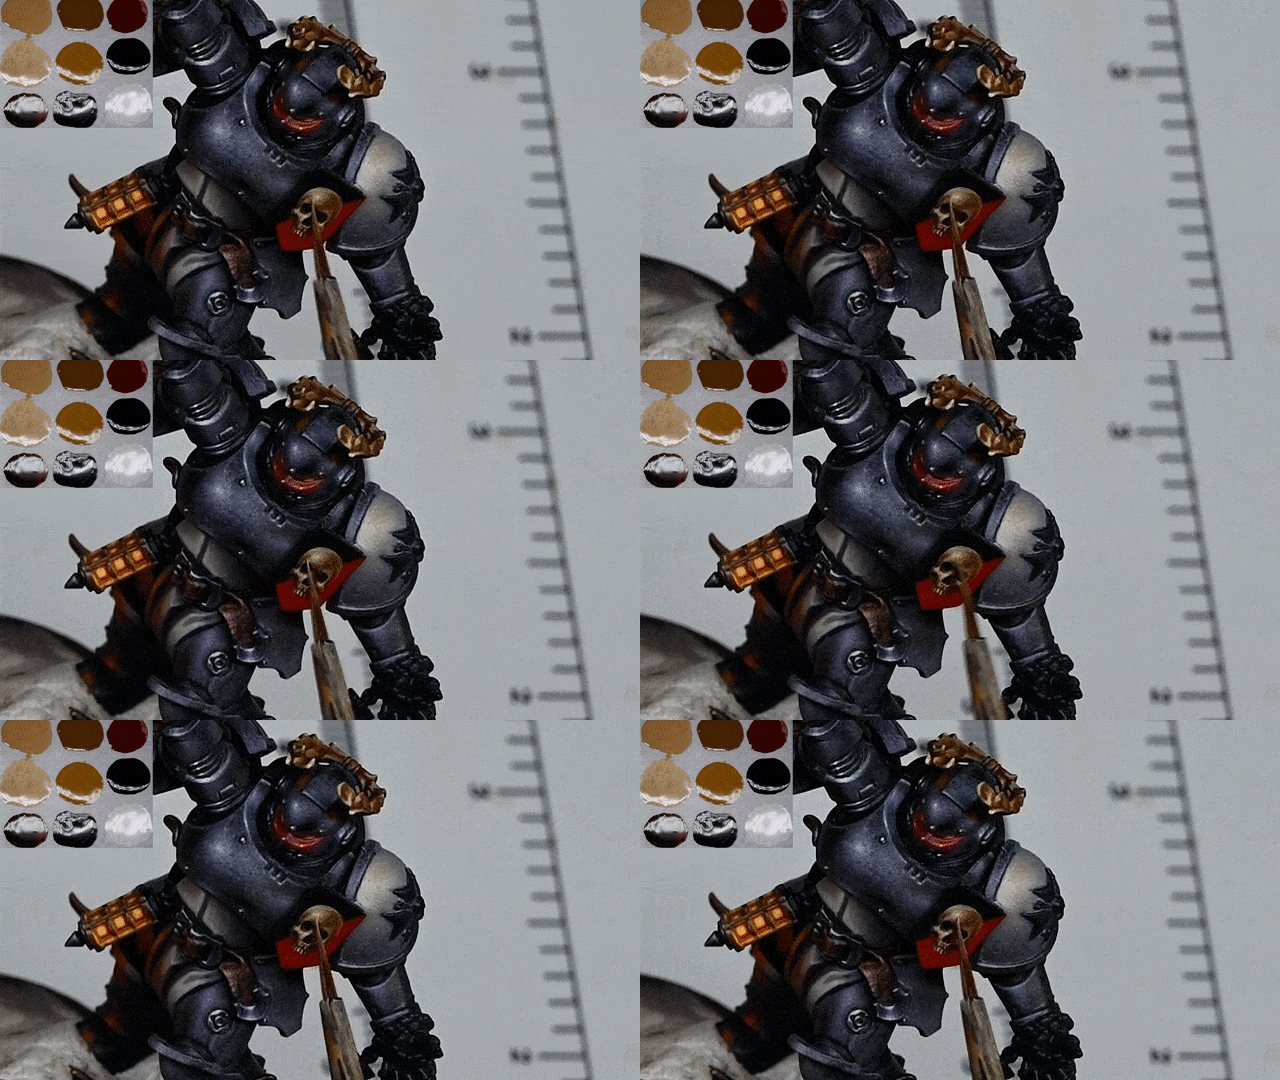
How to Paint Master Lazarus’ Cloak
A selection of tutorials on how to paint Master Lazarus’ Cloak. In these we explore simple freehand with bold, clean lines, then move onto the more complex custom Dark Angel symbol on the rear of Master Lazarus of the Dark Angels. Video: Simple Freehand Cloak – Front This video shows how to paint the simple Dark Angel freehand symbol on the inside of the cloak of Master Lazarus The following paints were used: Games Workshop: Mephiston Red Vallejo: Ice Yellow, Neutral Grey, Pale Grey Blue Step-by-Step – How to paint the cloak of Master Lazarus of the Dark Angels Step 1: Preparation Ensure that you have already glued the cloak onto the model.Have Mephiston Red paint ready for the freehand work.Make sure you’ve applied texture work to the cloak before starting the freehand.Step 2: Starting the FreehandBegin with a drag motion using Mephiston Red along the edge of the cloak. This will be your first guideline.Maintain consistent pressure while painting to ensure an even line.Step 3: Lower EdgeRepeat the process for the lower edge.Step 4: Creating Simple ShapesPaint a line equidistant from horizontal and vertical lines, forming the basis for the sword part of the wing.Be cautious with thickness and avoid making it too thick.Step 5: Painting WingsPaint the wings by going straight up towards the guideline, making your life easier.Focus on leaving space at the top for the hilt of the sword.Feel free to paint curves for feathers, keeping in mind the hilt’s space.Step 6: Painting the HiltPaint a line straight across for the hilt, extending it to touch the wings.Use neutral gray and pale gray blue to define the diamond shapes on the hilt.Cut into the edges with the appropriate gray colours to make it sharp.Step 7: Adding Details to FeathersUse neutral gray and pale gray blue to define individual feathers on the wing.Make them as sharp as possible, and don’t worry if they look slightly patchy.Step 8: Adding Lighting EffectsMix ice yellow with the base colour to create a gradient for the highlights.Paint a gradient up towards the lightest part on the cloak, following the natural flow of light.Ensure neat painting, using the tip of the brush and bracing your arms for stability.Step 9: Final TouchOptionally, add a touch of ice yellow to the line underneath the hand for a subtle transition.Soften the contrast and make the lighting more cohesive with the overall model. Video: Complex Cloak – Back Freehand Part One This video shows the difficulty of painting a design for the cloak of Master Lazarus and how to paint the freehand. The following paints were used: Vallejo: Black, Pale Grey Blue, Dark Blue Pale, Dark Grey, Black P3: Morrow White Step-by-Step – How to paint the cloak of Master Lazarus of the Dark Angels Step 1: Prepare the BaseMake sure your model has been previously stippled and glazed, creating a smooth surface for the freehand work.If needed, adjust the base colours by adding white and gray-blue to achieve a smoother finish.Step 2: Outline the DesignBegin by using Vallejo model colour black to outline the freehand design on the rear of Master Lazarus’s cloak.Take note of any folds or challenges in the cloak’s sculpt, as these may impact the symmetry and centralization of the design.Step 3: Adjust PlacementAddress any issues with the cloak’s fold or bias to one side by adjusting the placement of the design.Consider the visibility of the main focal points, such as a sword, and ensure they are not hidden within creases.Step 4: Start the Freehand WorkUse black as a base colour for the freehand work, focusing on creating the overall shapes and outlines of the design.The black background allows for easier corrections, but the details should be lighter than black to ensure visibility.Step 5: Refine the DesignRefine the shapes and details by using a 50/50 mix of dark blue pale and dark gray.Take your time with the refining stage, using the tip of the brush to add intricate details to feathers and other elements.Step 6: Add Organic DetailsIntroduce organic details, such as veins in the feathers, to make the freehand design look more natural.Make small tweaks to enhance the overall appearance, ensuring the design is visually appealing.Step 7: Focus on Feather HighlightsHighlight the feathers using a 50/50 mix of dark blue pale and dark gray, focusing on the tips and edges.Avoid making the edge highlights too obvious, maintaining the illusion of feathers.Step 8: Work on Sword HiltMove on to the detailed and complex freehand on the hilt of the sword, planning for a non-metallic effect.Use various shades, starting with dark blue pale and gradually adding pale gray blue for highlights.Step 9: Create Texture and HighlightsBuild texture by creating small marks and bumps on the hilt, paying attention to the shapes and transitions.Add dots with white on the brightest parts to enhance contrast and create a more dynamic effect.Step 10: Final TouchesMake final adjustments as needed, ensuring that the freehand complements the overall model without overshadowing it.Take breaks when necessary to maintain focus and avoid painting when fatigued.Note: Keep an eye on the wet palette, especially in warmer conditions, to prevent paint from thickening and affecting the painting process. Video: Complex Cloak – Back Freehand Part Two This video is part 2 for how to paint the custom Dark Angel symbol on the rear of Master Lazarus of the Dark Angels. The following paints were used: Vallejo: Dark Grey, Blue Grey Pale, Pale Grey Blue, Heavy Goldbrown, Ice Yellow, English Uniform, Black Games Workshop: Mournfang Brown P3: Morrow White Step-by-Step – How to paint freehand on Master Lazarus of the Dark Angels Step 1: PreparationEnsure you have the necessary paints ready: Dark Grey, Blue Grey Pale, Pale Grey Blue, Heavy Goldbrown, Nuln Oil, Pale Grey Blue, P3 Morrow White, and a 50/50 mix of Heavy Gold Brown and Ice Yellow.Step 3: Start with Skull and CircleUse English Uniform to roughly block in the skull and circle in the center of the cloak.Use Nuln Oil to define eye sockets and nose hole.Cut into shapes with black paint to refine details.Step 4: Gold Non-Metallic SkullHighlight skull with a mix of Heavy Goldbrown and Ice Yellow.Emphasize high contrast, especially on the forehead for a non-metallic look.Step 5: Detailing the BladePaint the blade using Blue, Blue Grey Pale, a 50/50 mix of Dark Gray and Pale Blue, and Pale Gray Blue.Consider the highlights on the blade separately to ensure clarity.Step 6: Refining the DesignCut back into the design with fluid black paint for sharper edges and finer highlights.Emphasize the central section of the blade, adjusting highlights accordingly.Add random highlights with Blue Grey Pale to enhance the non-metallic look.Step 7: Wings and TrimPaint the second wing with slight variations, maintaining an organic feel.Cut into black edges for sharpness, especially at the bottom of the cloak.Highlight the gold trim, aligning it with the natural highlights on the cloak.Step 8: Final TouchesCheck for any faults or blobs and address them.Avoid making highlights too bright, maintaining a realistic feel.Consider adding small details for visual interest without overshadowing the main design. All videos are recorded in HD 1080p or higher – use full screen for the full effect and let the video load completely. More Freehand tips: Videos Not Showing? To view any of my paid tutorials, you need to be a member of the website – please click below to log in or join the site. Not sure about joining just yet? Check out my Youtube for all my free tutorials or sign up as a free “friend” member on this site and visit the Freebies video page! If you’d prefer to support me on Patreon, please visit: https://www.patreon.com/RichardGray [...]
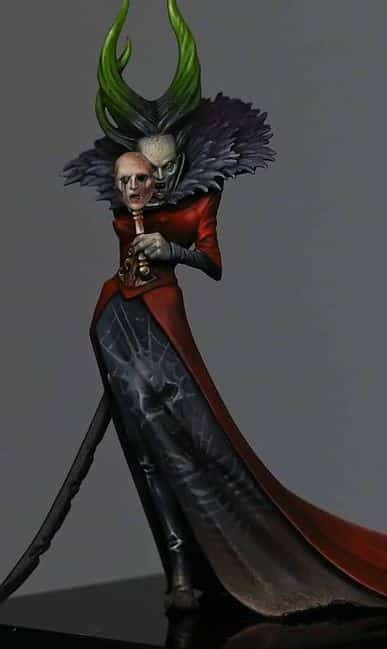
Video Tutorials : How to Paint Mortarions Wings
A set of video tutorials on How to Paint Mortarions Wings, with paints and step-by-step guides on freehand. Demon Wing Details First steps and basics For a pdf on how I cleaned the wing ready for painting, visit : https://richardgraycreations.com/mortarion-wing-prep-pdf/ ) All videos are recorded in HD 1080p or higher – use full screen for the full effect and let the video load completely. Demon Wing Details: Part One The following paints were used:Games Workshop: Rhinox Hide, Yriel Yellow, Kislev Flesh, Cadian Fleshtone, Moot Green, Xereus Purple, Evil Sunz Scarlet*note, in the video I show Emperor’s Children and Death Guard Green. These were not used in this video. Vallejo: Ivory Demon Wing Details: Part Two The following paints were used:Games Workshop: Mournfang Brown, Cadian Fleshtone, Kislev Flesh, Xereus Purple, Valejo: Ivory Demon Wing Details: Part Three The following paints were used:Games Workshop: Cadian Fleshtone, Kislev Flesh, Rhinox Hde, Xereus Purple, Vallejo Model Colour: Ivory Step by Step Tips: How to Paint Mortarions Wings – Demon Wing Details Part One: Prepare the Model: Confirm that the model has been properly primed, and any base colors, such as carmine, have been applied. Take a moment to inspect the model and identify any pre-painted outlines or details. Outline with Rhinox Hide: Utilise Rhinox Hide to start painting the outlines on the wings. This step involves creating the base pattern and initial details. Opt for Rhinox Hide over black to match the desired fleshy tone of the wings. Paint Veins with Xereus Purple: Select Xereus Purple to paint the vein-like details on the wings. Use a larger brush for broader coverage and to establish the initial structure. The combination of Xereus Purple and Rhinox Hide will give a dark, diseased appearance to the veins. Add Variation to Veins: Pay attention to the thickness and variation of the veins. Make deliberate wiggles and different shapes to create depth and interest. Ensure that the veins go over some of the previously painted thick lines for a more realistic effect. Consider Viscosity of Paint: Observe the viscosity of the paint; it should be thick enough to allow for fine lines. This is crucial for painting detailed and thin veins. You can load the brush more freely when using a thicker paint. Add Vein Details: Paint thin lines of purple coming out from certain areas, resembling veins spreading out. Use the thickness of the brush to your advantage, allowing for both longer lines and finer details. Introduce Spot Colours: Incorporate spot colours using Moot Green from Games Workshop. These spots will contrast with the purple, adding visual interest to specific areas, like craters on the wings. Highlight Veins: Highlight the veins by using Kislev Flesh, creating a raised vein effect. This will add depth and dimension to the wing. Soften Edges and Add Shadows: Use glue to soften edges and make the veins appear less pustule-like. Introduce shadow areas around the veins to enhance the three-dimensional look. Plan Lighting Directions: Consider the lighting directions on the model. Reflective lights and multiple light sources can contribute to a realistic 3D effect. Think about how the light interacts with the various elements on the wings. Part Two: Set Up Your Palette: Arrange your paints on the wet palette, as shown in the top right corner of the video. Let them mix a bit for added variation in your application. Begin with Cadian Fleshtone: Using Cadian Fleshtone, highlight the small segments between the veins. Focus on the upper areas to mimic light hitting from above. Use Reasonable Dilution: Ensure the paint is reasonably diluted, allowing for smoother application. As you’re highlighting, create the impression of shadows by avoiding direct application on dark vein edges. Utilise Mournfang Brown and Xereus Purple: Outline details with Mournfang Brown, and use Xereus Purple to add depth. These details may evolve organically as you progress. Fine-tune with a Sharp Brush: For fine details, use a sharp-tipped brush. Paint slightly thicker than usual, taking advantage of the wet palette to maintain consistency. Create Organic Look: Emphasise the fleshy and organic feel by avoiding a precise pattern. Moths and butterflies inspire the style, but the focus is on a fleshy appearance. Observe Light Source: Keep the light source in mind while highlighting. Work on veins to create shadows, ensuring a dynamic and realistic look. Add Transition Colours: Utilise mixed-up areas on the palette for transition colours. This adds depth and enhances the shadow effect, especially on larger, rounder areas. Experiment with Xereus Purple Outlining: Experiment with Xereus Purple outlining to enhance details. Remember, fine details may evolve as you progress, creating a unique and organic look. Balance the Details: Constantly tweak and balance details as you go. Ensure the veins, fleshy areas, and fine details complement each other for a cohesive appearance. Keep Consistency: Maintain consistency in the colour palette but vary the ratio of colours. This provides variation while adhering to a cohesive theme. Avoid Exaggeration: While enhancing details, avoid exaggeration. The goal is to create an organic, fleshy look without turning it into a three-dimensional eyeball. Part Three: Understand the Existing Freehand Progress: Examine the progress of the freehand on the model, especially the veins and patterns. Note that Rhinox Hide comes in two versions, with the thinner one used for glazes and quick transitions. Begin Painting the Veins: Start with Rhinox Hide to paint veins, emphasizing the connections and flow between them. Be mindful of curves and avoid making the veins look too straight or jarring. Create Veins as Eyelashes: Connect the veins to the eye, using them as eyelashes. This adds a unique and natural touch to the model, representing an organic connection between the eye and wing. Add Variation to Veins Around Holes: Paint veins around holes using Xereus Purple, varying the pattern to avoid repetition. Darken the area around the hole for contrast and tonal variation. Adjusting Freehand for a Cohesive Look: As the freehand progresses, ensure that the details flow well with each other, avoiding a disconnected appearance. Veins should follow the natural contours of the wing. Layering for Depth: Layer veins to create depth, using Kislev Flesh and Ivory for highlights. This technique makes the veins appear more 3D and layered. Darken and Outline: Darken certain areas using Rhinox Hide to create shadows and depth. Outline veins and details to make them stand out clearly. Highlighting and Refining: Use Vallejo Ivory to highlight specific sections, creating contrast and emphasizing the shapes. Continuously refine and tweak details, keeping an eye on the overall picture. Glazing for Smooth Transitions and Shapes: Use glazing to create smooth transitions between different paint layers. This is particularly useful for blending colours seamlessly. Apply glazes to emphasise the shapes of painted sections, ensuring a smooth and coherent look. Final Touches: Continue refining details, emphasising shapes, and making any final adjustments. Take your time to ensure a high-quality finish. How To Paint Mortarions Wings: Blue Eye The following paints were used:Games Workshop: Cybarite White, Flayed One Flesh, Doombull Brown, Balor Brown, Evil Sunz Scarlet, Lothern Blue, Ahriman Blue (optional) Rhinox Hide Vallejo: Ultramarine Blue, Night Blue (optional) Black, Pale Grey Blue P3: Ryn Flesh Step by Step Tips: How to Paint Mortarions Wings – Blue Eye Start with the Blue Detail on the Eyes: Commence the process by using Ultramarine Blue to paint a circle in the center of the existing black circle on the wing. Precision isn’t crucial at this point; you can refine it later. Refine the Blue Circle: Utilize black paint to clean up and refine the edges of the blue circle, serving as a guideline for the forthcoming details. Add Fine Details with Ultramarine Blue: Apply Ultramarine Blue to create fine lines and intricate details within the circle, representing the complex features of the eye. Allow the lines to follow the organic nature of the wing. Highlight the Blue Details: Use Flayed One Flesh to highlight selected blue details, creating a smooth transition between colours and enhancing the eye’s three-dimensional appearance. Introduce Pale Brown for Depth: Apply Pale Brown to add depth to the eye, concentrating on the lower section of the white. Be cautious not to use excessive paint to preserve the details from earlier steps. Create Highlights with Flayed One Flesh: Revisit Flayed One Flesh to introduce highlights on the blue details, enhancing the overall aesthetic of the eye. Glaze with Pale Grey Blue: Create a glaze using Pale Grey Blue and apply it to specific areas of the eye. This will help blend colours and add a layered effect to the strands and details. Add Red Veins and Details: Carefully reintroduce red veins, resembling eyelashes from the bottom of the eye. Utilize a dragging motion with the brush for precise lines. Correct Mistakes and Refine Detail: If any mistakes occur, use black paint to rectify errors and refine the intricate details, maintaining attention to the shape and flow of the lines. Final Touches on Reflections: Add reflections to the eye using semi-white to highlight the central part of the reflection. Consider the light source and aim for a realistic and captivating result. How To Paint Mortarions Wings: Demon Eye The following paints were used:Games Workshop: Mephiston Red, Wild Rider Red, Rhinox Hide Doombull Brown, Zamesi Desert, Yriel Yellow, Moot Green Temple Guard Blue, Sotek Green, Abaddon Black, Cadian Fleshtone, Kislev Flesh, Ceramite WhiteVallejo Model Colour: Ivory, BlackP3: Iosen Green (GW Warpstone Glow alternative) Ryn Flesh Step by Step Tips: How to Paint Mortarions Wings – Demon Eye Outline the Pupil: Begin by outlining the pupil of the eye. Focus on the inner shape rather than the outer, as you can fix any wonkiness later. Paint the Iris: Using a spread-out pattern, carefully paint the lines of the iris, starting from the center and moving outwards. Use a lighter colour to highlight some imperfections and indentations on the wing. Refine the Lines: Separate the lines, especially around the Nurgle symbol. Use Abaddon Black as a rubber to create a rough outline and add depth to the design. Introduce Different Colours: Experiment with different colours such as Temple Guard Blue and Wild Rider Red to add layers and details. Don’t be afraid to mix colours on the brush for a varied effect. Paint the Sclera: Apply Temple Guard Blue to the sclera, ensuring a smooth transition from the red, and be cautious not to paint over the detailed lines. Enhance Highlights: Use Ceramite White to brighten the eyes, creating a strong contrast. Paint carefully, following the shape of the eye for a rounded and natural look. Add Veins: Use Mephiston Red to paint veins onto the white of the eye, creating a realistic effect. Keep the lines subtle and centered for a natural appearance. Apply Glazes: Use glazes to soften transitions and tie the piece together. Deploy glazes by loading the brush from the wet palette. Final Highlights: Highlight with Ivory to emphasize details on the veins and enhance the overall look. Add Reflections: Apply White to the reflections on the eye to give it a lifelike and 3D effect. Create Wetness Effect: Using a small amount of Kislev Flesh or a similar colour, add small irregular dots to represent the wetness of the eye. Need more Mortarion? Check out the other tutorial videos, below: Free Video Tutorials Free videos (for logged in members – just sign up as a ‘friend’ to view and click any of the thumbs.To explore all of these, visit this page! If you don’t have an account, please sign up here! The website currently has over 350 video tutorials, plus step by step guides and PDFs. You can explore more free videos with a free “friend” membership, or take the plunge and become a full subscriber for full access. If you’d prefer to support me on Patreon, please visit: https://www.patreon.com/RichardGray [...]
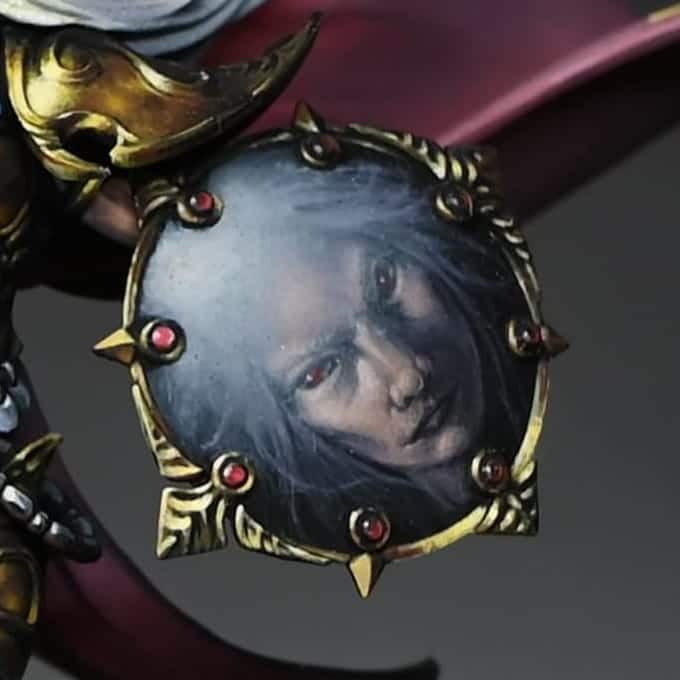
Video Tutorial : How to Paint Mortarions Blue Eye
A video tutorial with paints and a step-by-step guide on How to Paint Mortarions Blue Eye on his wings. How to Paint Mortarions Blue Eye The following paints were used:Games Workshop: Cybarite White, Flayed One Flesh, Doombull Brown, Balor Brown, Evil Sunz Scarlet, Lothern Blue, Ahriman Blue (optional) Rhinox Hide Vallejo: Ultramarine Blue, Night Blue (optional) Black, Pale Grey Blue P3: Ryn Flesh Step by Step Tips: How to Paint Mortarions Blue Eye Start with the Blue Detail on the Eyes: Commence the process by using Ultramarine Blue to paint a circle in the center of the existing black circle on the wing. Precision isn’t crucial at this point; you can refine it later. Refine the Blue Circle: Use black paint to clean up and refine the edges of the blue circle, serving as a guideline for the forthcoming details. Add Fine Details with Ultramarine Blue: Apply Ultramarine Blue to create fine lines and intricate details within the circle, representing the complex features of the eye. Allow the lines to follow the organic nature of the wing. Highlight the Blue Details: Use Flayed One Flesh to highlight selected blue details, creating a smooth transition between colours and enhancing the eye’s three-dimensional appearance. Introduce Pale Brown for Depth: Apply Pale Brown to add depth to the eye, concentrating on the lower section of the white. Be cautious not to use excessive paint to preserve the details from earlier steps. Create Highlights with Flayed One Flesh: Revisit Flayed One Flesh to introduce highlights on the blue details, enhancing the overall aesthetic of the eye. Glaze with Pale Grey Blue: Create a glaze using Pale Grey Blue and apply it to specific areas of the eye. This will help blend colours and add a layered effect to the strands and details. Add Red Veins and Details: Carefully reintroduce red veins, resembling eyelashes from the bottom of the eye. Utilize a dragging motion with the brush for precise lines. Correct Mistakes and Refine Detail: If any mistakes occur, use black paint to rectify errors and refine the intricate details, maintaining attention to the shape and flow of the lines. Final Touches on Reflections: Add reflections to the eye using semi-white to highlight the central part. All videos are recorded in HD 1080p or higher – use full screen for the full effect and let the video load completely. Need more Mortarion? Check out the other tutorial videos, below: Free Video Tutorials Free videos (for logged in members – just sign up as a ‘friend’ to view and click any of the thumbs.To explore all of these, visit this page! If you don’t have an account, please sign up here! The website currently has over 350 video tutorials, plus step by step guides and PDFs. You can explore more free videos with a free “friend” membership, or take the plunge and become a full subscriber for full access. If you’d prefer to support me on Patreon, please visit: https://www.patreon.com/RichardGray [...]
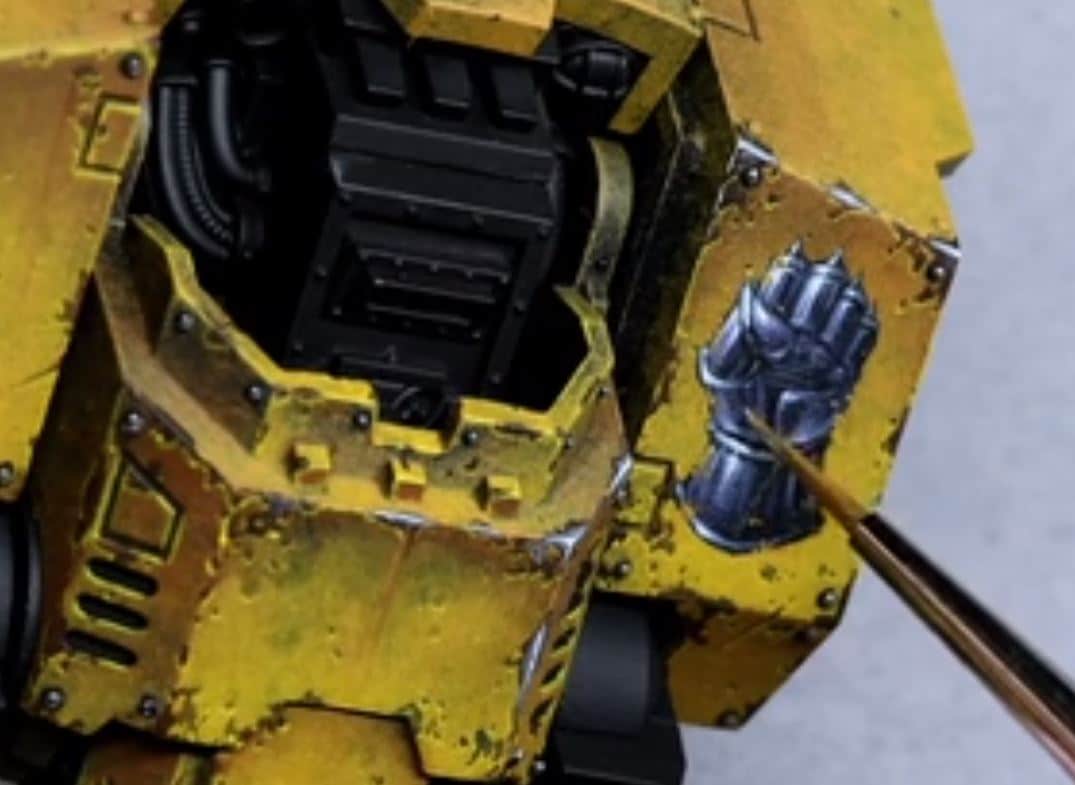
How to Paint Deathshroud Terminator Cloak Freehand
How to paint a Deathshroud Terminator Cloak using freehand. This model won me a Golden Demon in 2017! These models represent the grotesque and decay-themed warriors of Nurgle, a faction known for their resilience and corrupted, plague-ridden aesthetics. So, in these tutorials we are aiming to enhance the models’ appearance with detailed faces and textures on their cloaks! Quick note here – these are some of my earliest tutorial videos, so are not of the same quality as my current tutorials visually and sound-wise. My apologies for this.Richard Video: Deathshroud Terminator Red Cloak This process results in a textured, worn cloak suitable for a Death Shroud Terminator, using a simple but effective painting technique. Materials and Paints Used Gal Vorbak Red (Forge World) Cadian Fleshtone (Games Workshop) Eldandil Violet (Scalecolour Fantasy) Step by Step Guide Base Coat: Start with Gal Vorbak Red as the primary colour. Detailing and Texture: Use Cadian Fleshtone for adding highlights and texture, creating a worn and mouldy appearance. Shading: Apply Eldandil Violet for shading in the recesses, enhancing depth and wear. Glazing with Evil Sunz Scarlet: Use it as a glaze to add warmth to the cloak. Refining Texture: Focus on cross-hatching movements to build texture, emphasizing the worn look. Final Touches: Add further glazes and highlights to refine the texture and depth, tailoring the effect to your desired level of detail. Video: Deathshroud Terminator Cloak Freehand Materials and Paints Used The following paints were used:Games Workshop: Rhinox Hide Vallejo: Heavy Brown, Cork Brown, Ice Yellow, Black P3: Battlefield Brown *Note, Morrow White was not actually used in this video, but is used in part 2. Step by Step Guide Preparation: I used a test model to experiment with my design concept. This approach allows you to refine the freehand pattern before applying it to the main models. Base Colours: Apply Vallejo Heavy Brown as a foundational colour. Enhance the base with Cork Brown for a richer texture. Use Rhinox Hide to outline the design, ensuring the lines are crisp and distinct. Detailing: Carefully mark the eye sockets with black paint, paying attention to the cloak’s folds. These details will add depth and character to the freehand design. Highlighting: Utilize Ice Yellow for highlights. This step involves blending the highlights with the base colors to achieve a natural, integrated look. The highlights should accentuate the topography of the cloak and enhance the freehand design. Shading: Use Battlefield Brown to deepen the shadows and add complexity to the design. This shade will create a more dynamic and realistic appearance on the cloak. Finishing Touches: Review the entire design, making final adjustments for consistency and balance. Focus on refining the freehand artwork, ensuring it harmonizes with the cloak’s texture and the overall theme of the model. Video: Deathshroud Terminator Cloak Freehand Refinement Materials and Paints Used The following paints were used: Games Workshop: Cadian Fleshtone, Pallid Wych Flesh, Bugman’s Glow, Rhinox Hide, Loren Forest, Nurgling Green, Vallejo: Ice Yellow, Cork Brown, Black, Neutral Grey, Pale Grey Blue, Heavy Brown P3: Battlefield Brown, Morrow White Step by Step Guide Base Preparation: Start by painting a rough base of fleshy shapes using Cadian Fleshtone. This initial layer doesn’t need to be perfect or smooth. Detailing Ears and Face: Add ears to distinguish the image from a skull, creating a more zombie-like face. Use Kadeem Flesh Tone for this step. Sketching Flesh and Bone: Sketch out areas where flesh appears torn or missing, revealing bone underneath. This technique enhances the undead appearance and integrates the existing skull highlights. Adding White Highlights: Use Pallid Wych Flesh to accentuate bone areas, making them stand out from the flesh tone. Painting the Eyes: Employ Neutral Grey, followed by Pale Grey Blue for the eyes. Add white dots in the center and top left corner of each eye for a lifelike effect. Mouth and Teeth Details: Refine the mouth and teeth using Rhinox Hide and Ice Yellow for highlights. Focus on defining the teeth shapes and adding depth to the mouth. Adding Texture to Flesh: Use Bugman’s Glow and other flesh tones to create textured, worn skin. Apply these tones in layers, allowing the underlying skull details to peek through. Final Touches: Finish by adding fine details and additional highlights to enhance the depth and realism of the freehand design. The key to this process is building up the layers gradually, refining the details as you go, a More Deathshroud Tutorials How to Paint Deathshroud ArmourDeathshroud Scythe Handle WrappingDeathshroud Terminator Cloak FreehandHorn Painting Guide All Deathshroud Bodyguard Video Tutorials Death Guard Deathshroud Bodyguard A series of video tutorials on how I painted my set of Golden Demon winning Death Guard Deathshroud Bodyguard! This includes nurgly armour, weathering, rust, metals, tentacles, freehand and more! Watch Now More Freehand Tips: If you don’t have an account, please sign up here! The website currently has over 350 video tutorials with steps and tips, plus a selection of PDFs. If you are not sure about joining, you can explore my free videos with a free membership, or take the plunge and become a full subscriber for full access. If you’d prefer to support me on Patreon, please visit: https://www.patreon.com/RichardGray [...]
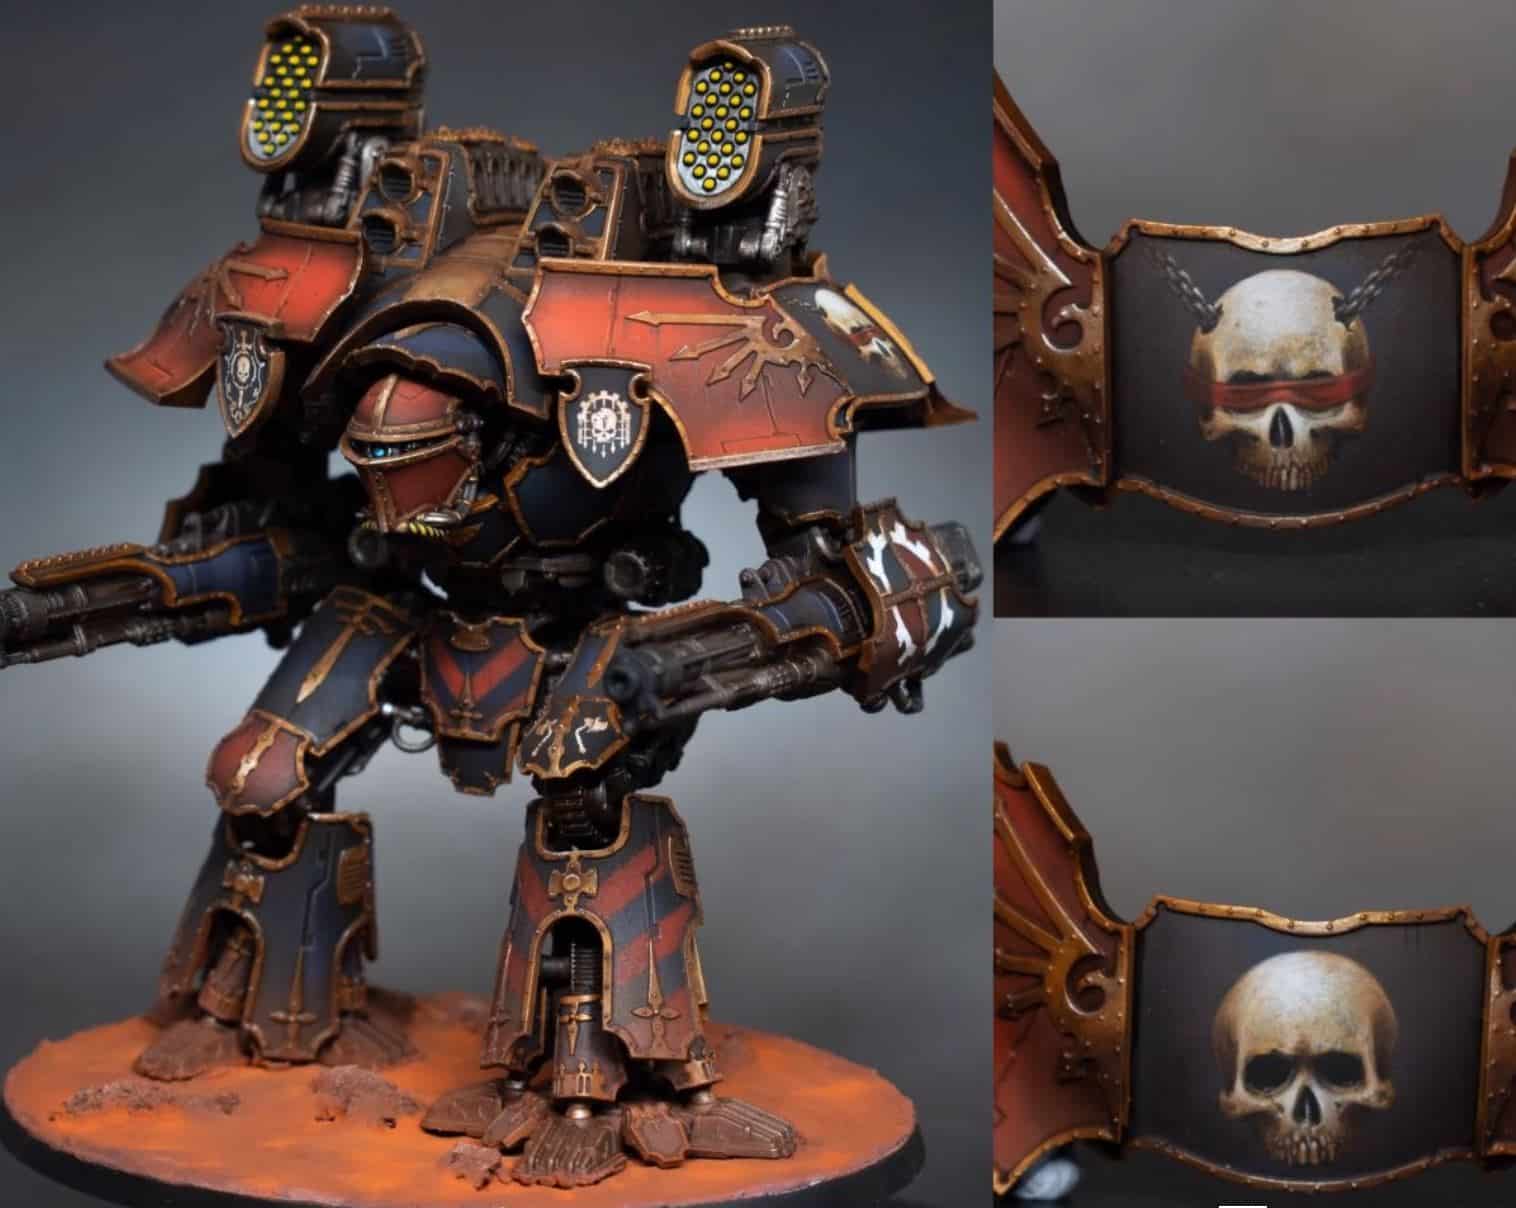
How to Paint Wing Freehand on a Space Marine Shoulder Pad
Learn how to paint wing freehand on a Space Marine shoulder pad in this tutorial, with step-by-step guide including paints and materials needed. This marine has lots more videos to follow, if you’d like to follow the link below! Or, if you are just interested in the freehand, scroll down to explore. Black Marine A set of video tutorials on how I painted this black marine, including small freehand tips, subtle weathering, leather and nmm gold detailing. Watch Now Video: How to Paint a Freehand on a Space Marine (bird skull and wings) Materials Needed Games Workshop paints: Balor Brown, Ushabti Bone Vallejo paints: German Grey, Neutral Grey, Heavy Bluegrey Fine detail brushes for the intricate work (I use the Artist Opus range). A wet palette to keep your paints thinned and workable A Space Marine model with a shoulder pad primed and base coated Step by Step Guide to Freehand on a Space Marine Step 1: Base Sketch – Start with a rough sketch of the raven skull in the centre of the shoulder pad using Balor Brown. Aim for an upside-down teardrop shape for the skull, keeping the paint light and not worrying about solid color or precise shape at this stage. Step 2: Highlighting Background – Before detailing the freehand, ensure the shoulder pad is highlighted properly. This includes spot highlights and broader highlights to emulate light reflection. These will later integrate with the highlights on the freehand design. Step 3: Painting the Wings – Using Neutral Grey by Vallejo, paint the rough shape of the wings flaring from the sides of the skull. The wings should be asymmetrical but balanced, with feathers ruffling outward. Utilize German Grey to add depth and shading, creating a transition between the colours and the black of the armour. Step 4: Detailing the Skull – Refine the raven skull, paying special attention to its beak and eye sockets. Use German Grey to outline and add depth, ensuring the skull retains its distinct shape against the black armour. For the tip of the beak, maintain a dark but slightly contrasted tone to distinguish it from the background. Step 5: Feather Texture – Gradually build up the feather texture on the wings using a combination of Neutral Grey and German Grey. Paint the feathers with a fine brush, starting from the base of the wing and working outwards, increasing in size. This creates a natural feathered effect. Step 6: Final Highlights and Details – Use Ushabti Bone to add highlights to the skull, focusing on the top edges and the eye sockets to enhance its dimensional appearance. Apply Heavy Bluegrey for the final highlights on the wings, blending them into the armour’s highlights for a cohesive look. Step 7: Finishing Touches – Review the entire piece, adding final adjustments to the skull and wings as necessary. You may need to retouch some areas to ensure a smooth gradient and correct any overspill. The aim is to have a clear, recognisable raven symbol that integrates well with the armour’s existing highlights and shadows. Step 8: Sealing the Work – Once you’re satisfied with the painting, allow it to dry thoroughly. Consider sealing the model with a matte varnish. All videos are recorded in HD 1080p or higher – use full screen for the full effect and let the video load completely. Latest Freehand Tutorials: If you don’t have an account here on my website, please sign up here! I have over 350 video tutorials with steps and tips, plus a selection of PDFs. If you are not sure about joining, you can explore my free videos with a free membership, or take the plunge and become a full subscriber for full access. If you’d prefer to support me on Patreon, please visit: https://www.patreon.com/RichardGray [...]
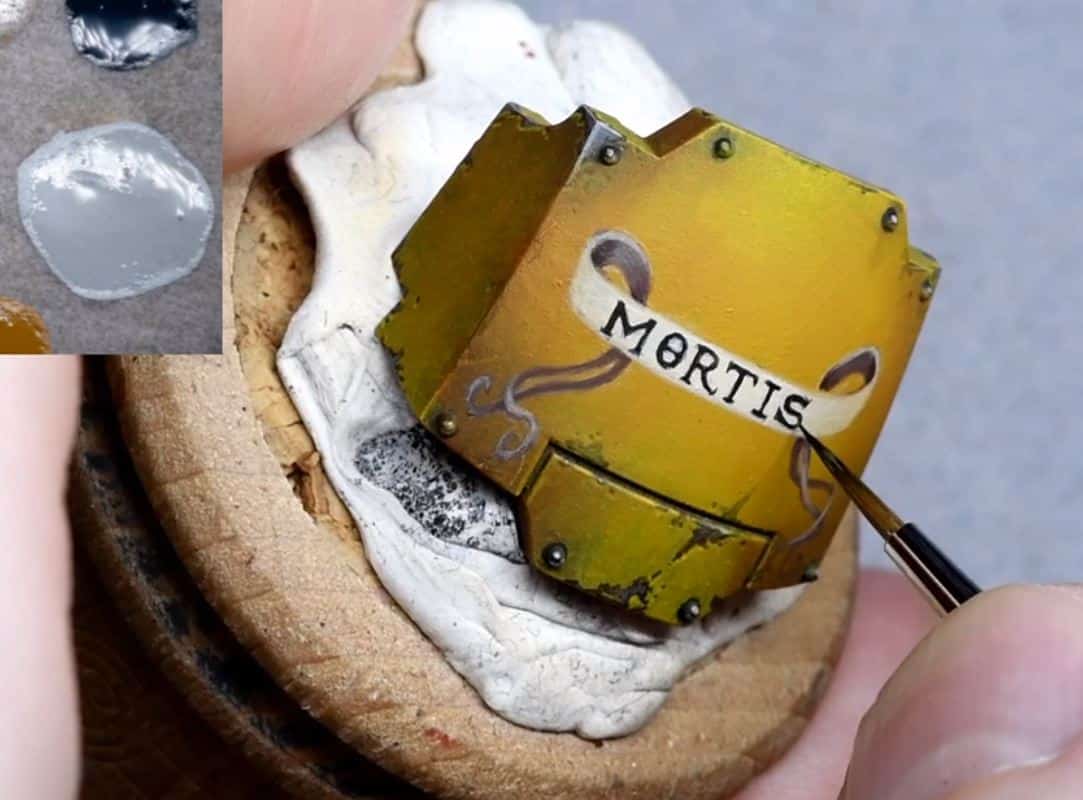
How to Paint Scorpion Freehand on the Ogroid Myrmidon Shield
Video guides and step-by-steps on how to paint the Warcry Ogroid Myrmidon shield with this Scorpion Freehand. Video: Scorpion Freehand First Steps This first part of the tutorial covers the preparation and beginning stages of scorpion freehand painting on the Ogroid Myrmidon’s shield Materials Needed: Primer: Black Base Colours: XV-88, Mournfang Brown, Zandri Dust, Morghast Bone (All Games Workshop) Detailing: Model Colour Black (Vallejo) Tools: Scalpel, fine-grit sandpaper, large and fine brushes, wet palette Preparation: Preparing the Shield: Remove the model’s original shield detail using a scalpel and fine-grit sandpaper to create a smooth surface for freehand painting. This process ensures a flat canvas for your artwork. Priming: Prime the entire model, including the shield, in black to provide a uniform base coat. If desired, apply an underglow effect with Mephiston Red using an airbrush on the model’s underside for atmospheric lighting. Painting the Shield’s Background: Base Layer: Start by applying XV-88 in multiple thin layers to achieve an opaque finish. Mix approximately one part water to one part paint, using a fairly large brush for broad strokes. Patience is key; allow each layer to dry thoroughly. Blending: While the XV-88 base is still workable, begin blending Mournfang Brown from the bottom of the shield upwards. This technique creates a gradient effect that adds depth to the shield’s background. Highlighting and Texture: Use Zandri Dust and Morghast Bone to introduce highlights, particularly focusing on the top of the shield where light naturally hits. This process also starts to introduce the worn, textured look desired for the shield. Brush Techniques: To achieve a smoother blend and avoid harsh brush marks, employ cross-hatching and other texturing techniques with your brush. This approach will help create a more natural transition between colours. Glazing for Smoothness: After the initial layering and texturing, apply glazes of the same colours (XV-88, Mournfang Brown, Zandri Dust, Morghast Bone) diluted with water (about six or seven parts water to one part paint). Glazing helps smooth out transitions and enrich the colour depth. Starting the Scorpion Freehand: Design Placement: Before starting the scorpion freehand, consider the shield’s round shape and ensure your design aligns properly with the model’s orientation. Use the back of the shield as a reference to determine the top and bottom. Sketching the Design: With Model Colour Black, begin sketching your scorpion freehand design. For this tutorial, a scorpion motif is used. Start with basic shapes and outlines, keeping the lines thin and manageable. This stage is about laying down the design’s foundation, so precision is more important than coverage. Refining the Design: Gradually thicken and refine the outlines of your scorpion freehand design, paying close attention to symmetry and proportion. Adjust the thickness of the lines to create depth and interest. Correcting Mistakes: If you make any errors or wish to adjust the design, you can cover mistakes with the base colours (XV-88, Mournfang Brown, Zandri Dust, Morghast Bone). This step may require reapplying glazes to blend the corrections into the background. Video: Scorpion Freehand Refinement and Details Looking at rendering the freehand scorpion to achieve a three-dimensional appearance and then weathering the shield for a battle-worn look. Additional Materials: A wet palette to keep paints hydrated and to mix custom colours. Fine grit sandpaper for smoothing the shield surface after modifications. A scalpel or hobby knife for removing details from the shield. Water container for rinsing brushes. Paper towels or a clean cloth for brush drying and paint removal. Mixing palette for creating custom colours and diluting paints for glazing. Hairdryer (optional) for speeding up the drying process between layers. Sponge (optional, not used but mentioned) for creating textured weathering effects. What do These Techniques Mean?: Pointillism and Stippling: For creating textured effects on the scorpion’s carapace. Glazing: Thin layers of paint applied to subtly shift colours or blend transitions. Fine Detail Work: Using the very tip of a fine brush to outline and add intricate details to the scorpion. Weathering: Applying chips, scratches, and wear to both the scorpion and the shield’s surface to create a battle-worn look. Paints: Games Workshop (Citadel): Mournfang Brown XV-88 Zandri Dust Morghast Bone Naggaroth Night Khorne Red Corax White (for mixing and creating lighter tones) Vallejo: Neutral Grey Dark Grey Warm Grey Pale Grey Blue Model Colour Black (for outlining and fine details) P3 (Privateer Press): Morrow White Iyanden Yellow (mentioned as a substitute for Iosen Green for brighter effect) Rendering the Scorpion Base Layer: Begin with Neutral Grey for stippling and pointillism across the scorpion, creating texture and initial shadows. This technique simulates the scorpion’s shiny carapace. Changing Techniques: Partway through, you might find the style needs adjustment to better represent the scorpion on a smaller scale. While aiming for realism, ensure the final look is visually appealing on the model. Colour Palette Adjustment: Add Warm Grey and Pale Grey Blue to introduce subtle tonal variations, enhancing the scorpion’s three-dimensional appearance. Highlighting: Use Morrow White sparingly for the highest highlights, focusing on areas like the pincers, the body segments, and the stinger to emphasize their importance and shininess. Colour Glazing: Apply thin glazes of Naggaroth Night and Iyanden Yellow (substituted for Iosen Green for a brighter effect) to add colour depth without overpowering the grey tones. This step subtly alters the scorpion’s colour while maintaining its overall grey appearance. Weathering the Shield Preparation: Use the base colours (Mournfang Brown, XV-88, Zandri Dust, Morghast Bone) to match the weathering effects to the shield’s underlying tones. Technique: Apply small, opaque marks with Dark Grey and Neutral Grey to simulate chips and wear, focusing on areas that would naturally receive more damage. Use a fine brush for precision. Detailing: Enhance the weathering with thin lines and stippling, simulating scratches and abrasions. This creates a realistic effect of battle damage across the shield, including over the scorpion design. Integration: To integrate the scorpion with the shield’s weathered look, apply thin glazes of Mournfang Brown over the entire design. This unifies the scorpion with the shield’s background, softening contrasts and blending the freehand work into the overall shield design. Colour Highlights: For areas requiring correction or emphasis, use the shield’s base colours, adjusted one shade lighter, to subtly highlight edges and details, ensuring the scorpion remains the focal point. How to Paint an Ogroid from Games Workshop – Step-by-step guides: Ogroid Myrmidon A selection of detailed videos including red OSL, NMM, fur effect, horns and freehand on his shield. Watch Now More Freehand Tutorials If you don’t have an account, please sign up here! The website currently has over 350 video tutorials with steps and tips, plus a selection of PDFs. If you are not sure about joining, you can explore my free videos with a free membership, or take the plunge and become a full subscriber for full access. If you’d prefer to support me on Patreon, please visit: https://www.patreon.com/RichardGray [...]
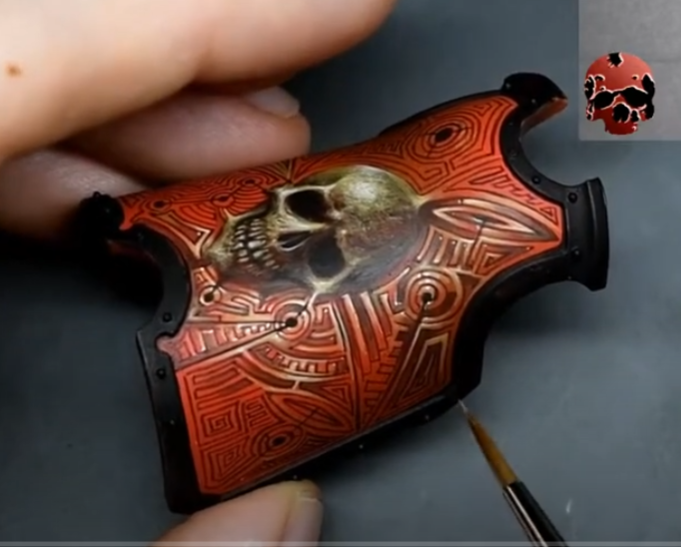
How to Paint a Legio Sinister Freehand on the Adeptus Titanicus Warlord Titan
Welcome to this detailed guide on how to paint the Legio Sinister freehand symbol for a Warlord Titan. I will be using various Games Workshop and Vallejo paints to achieve a polished and striking look. This guide is suitable for intermediate to advanced hobbyists due to the precision required in freehand painting. Video – Legio Sinister FreehandPaints UsedSteps and Tips for the Legio Sinister FreehandStep By Step Image GuideMore Freehand Tutorials on the WebsiteFree Video Tutorials Video – Legio Sinister Freehand All videos are recorded in HD 720p or higher – use full screen for the full effect and let the video load completely. Paints Used Vallejo Model Colour Black Games Workshop Paints: Mechanicus Standard Grey, Slaanesh Grey, Grey Seer, Mephiston Red, Mournfang Brown, XV-88, Dorn Yellow, Screaming Skull Steps and Tips for the Legio Sinister Freehand Mapping Out the Position: Begin by using Vallejo Model Colour Black to roughly outline where the symbol will be placed. Start with a small circle at the centre, gradually expanding outwards. Include a line at the top of the curve to centralise the image. Refining the Shape: Progressively enlarge the symbol, focusing on refining its shape. Paint an approximate circle with spikes extending outward. Ensure even distribution of the black paint to provide a solid base for subsequent layers. Applying Initial Colours: Commence with Games Workshop’s Mournfang Brown, applying it as a foundation for the non-metallic parts of the symbol. Layer on XV-88 next, followed by Dorn Yellow, with a focus on the top-left for the lighting direction. Remember, moderate use of Dorn Yellow prevents oversaturation. Adding Highlights: Employ Screaming Skull to introduce highlights. Be judicious in this step, concentrating on the top left to evoke a lustrous appearance. The XV-88 should remain the predominant colour for the metallic aspects. Painting the Lion’s Face: Utilise a range of greys (Mechanicus Standard Grey, Slaanesh Grey, Grey Seer) to depict the lion’s face. Start with basic shapes, refining them progressively. Pay special attention to the eyes, nose, and mouth, building depth with shadows and highlights. Detailing with Red: Apply a glaze of Mephiston Red for a subtle red glow around the eyes and other facial areas. This step enhances the lion’s fierce visage. Adding Fur Details: Use greys to render fur details, commencing with darker shades and progressing to lighter highlights. Focus on creating a three-dimensional effect with varied brushstrokes. Final Details: Paint the Titanicus symbol on the lion’s forehead using black as a base. Layer greys for the non-metallic metal effect, ensuring a thinner central line for a precise appearance. Use Dorn Yellow and Screaming Skull for the highest highlights, ensuring they are well-placed to create a realistic metallic sheen. Refining and Adjusting: As you near completion, revisit areas that require refinement. This may include sharpening edges, deepening shadows, or enhancing highlights. The key is to achieve a balance between contrast and harmony in the symbol’s details. Final Touches: Examine the overall piece for any last-minute adjustments. This might involve intensifying certain colours, smoothing transitions, or adding small details to bring the symbol to life. Ensure the lighting direction is consistent and the symbol stands out against the background. Step By Step Image Guide The team at Warhammer Community approached me for some tips on freehand and I created an article with step by step imagery for the tutorial above – to view it, visit: Tips on Freehand – Step-By-Step Image Guide : Adeptus Titanicus More Freehand Tutorials on the Website Free Video Tutorials Free videos for logged in members – just sign up as a ‘friend’ to view and click any of the thumbs. If you don’t have an account, please sign up here! The website currently has over 350 video tutorials, plus step by step guides and PDFs. You can explore more free videos with a free “friend” membership, or take the plunge and become a full subscriber for full access. If you’d prefer to support me on Patreon, please visit: https://www.patreon.com/RichardGray [...]
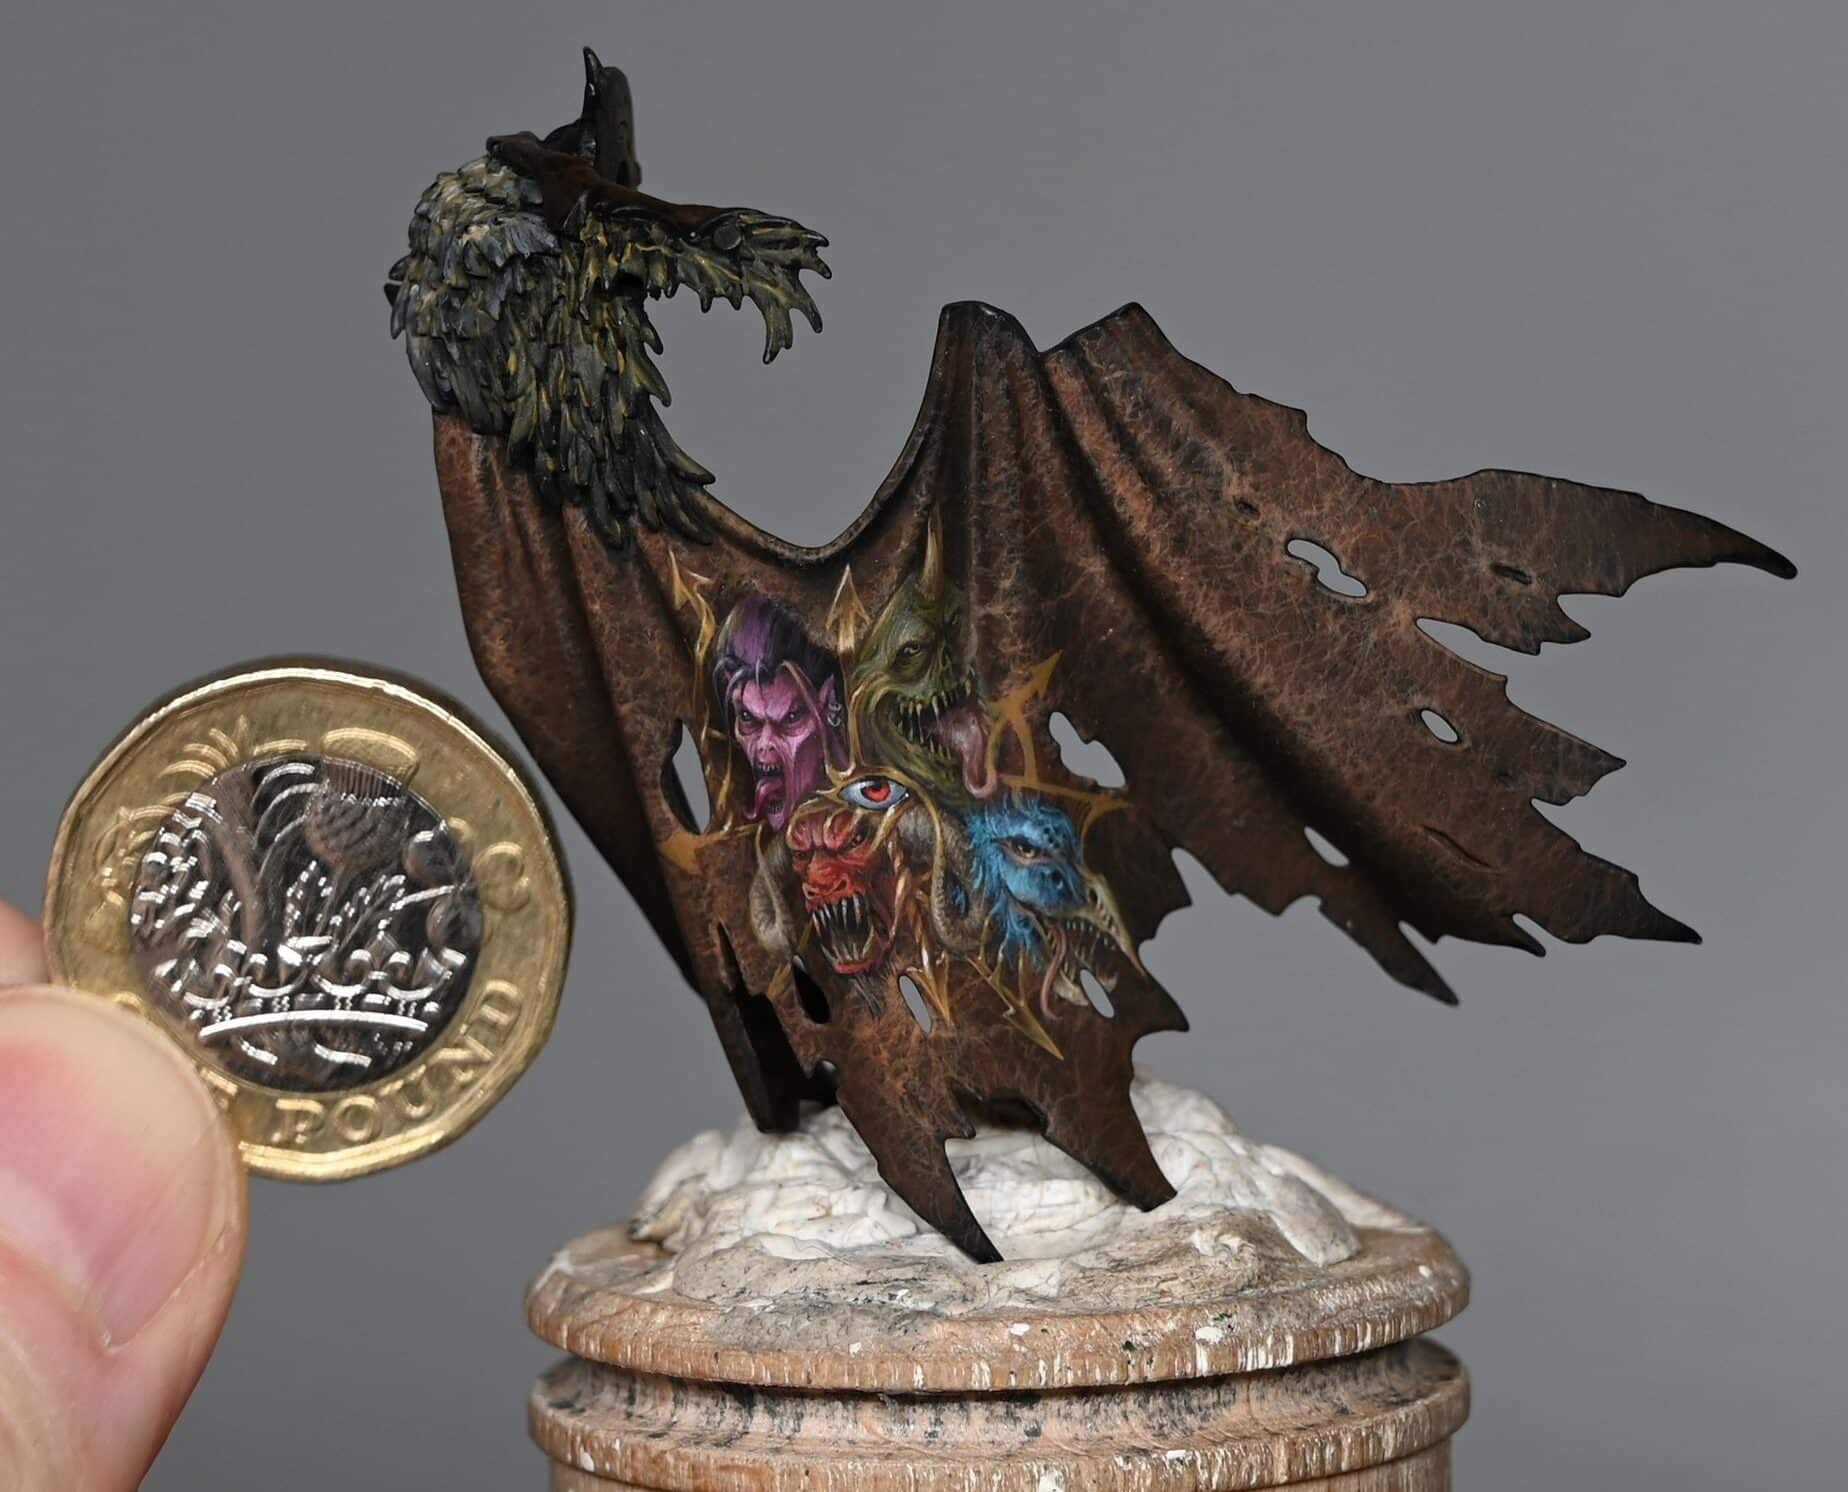
How to Paint a Shoulder Pad Tactical Marking for a Space Marine
In my latest freehand for space marines tutorial “How to Paint a Shoulder Pad Tactical Marking for a Space Marine” we delve into the intricate process of painting the iconic shoulder pad marking for your Raven Guard Space Marine miniature from Games Workshop. Follow along as I break down each step, from laying down the base colour to adding highlights and battle damage, ensuring your model stands out on the battlefield! Video: How to Paint a Shoulder Pad Tactical Marking for a Space Marine All videos are recorded in HD 1080p or higher – use full screen for the full effect and let the video load completely. Step-by-Step: How to Paint a Shoulder Pad Tactical Marking for a Space Marine Prepare the Model – Ensure your Raven Guard Space Marine model is assembled and primed. Make sure to paint the highlights on the shoulder pad before starting on the tactical arrow marking. Painting the Base Colour – Dip your fine detail brush into Vallejo Heavy Greyblue (Celestra Grey) paint. Begin by painting a line straight down the middle of the shoulder pad. Then, work outwards from this line to map the basic shape of the arrow. Focus on neat edges and use the tip of the brush for sharp lines. Refining the Shape – Continue to refine the shape of the arrow, adjusting as needed to ensure symmetry and neatness. Pay attention to the edges, making sure they are clean and precise. Don’t worry too much about perfection, as minor mistakes can be covered with later detailing. Adding Highlights – Using P3 Morrow White (Ceramite White), apply highlights to the arrow. Be cautious not to overlap onto the grey base too much. Focus on creating smooth transitions, blending the white into the grey gradually. Work from the centre of the arrow outwards for better control. Glazing for Smoothness – To achieve a smoother finish, apply glazes of white paint towards the highlight areas. This helps to blend the colours seamlessly and enhances the overall appearance of the marking. Be mindful of brushstrokes and apply the glazes sparingly. Adding Battle Damage – For a weathered look, use Vallejo German Grey (Skavenblight Dinge with a touch of black) to add battle damage to the arrow. Apply tiny marks and scratches strategically, focusing on areas that would naturally wear over time. Be careful not to go overboard, as realism is key. Painting the Red Cord – Switch to painting the red cord that goes over the shoulder. Use Vallejo Amarantha Red (Evil Sunz Scarlet) to carefully paint the cord, layering it to achieve a rich colour. Be mindful not to get any red paint on areas you’ve already finished. Adding Details to the Cord – For added realism, paint on some details such as individual strands on each notch of the cord. Use Citadel Wild Rider Red (Evil Sunz Scarlet) for this, applying thin lines to represent the strands. Take your time and focus on precision. Final Highlights – Finish off the red cord by adding final highlights with Citadel Fire Dragon Bright (Wild Rider Red mixed with a touch of white). Apply these highlights sparingly to the top parts of the cord to maintain consistency. Finishing Touches If needed, do some final touch-ups and adjustments. Use black paint for glazing to tidy up any areas where needed, ensuring a clean and polished look. Step back and admire your painted Shoulder Pad Tactical Marking for a Space Marine! More Space Marine Tutorials! If you don’t have an account here on my website, please sign up here! I have over 350 video tutorials with steps and tips, plus a selection of PDFs. If you are not sure about joining, you can explore my free videos with a free membership, or take the plunge and become a full subscriber for full access. If you’d prefer to support me on Patreon, please visit: https://www.patreon.com/RichardGray [...]
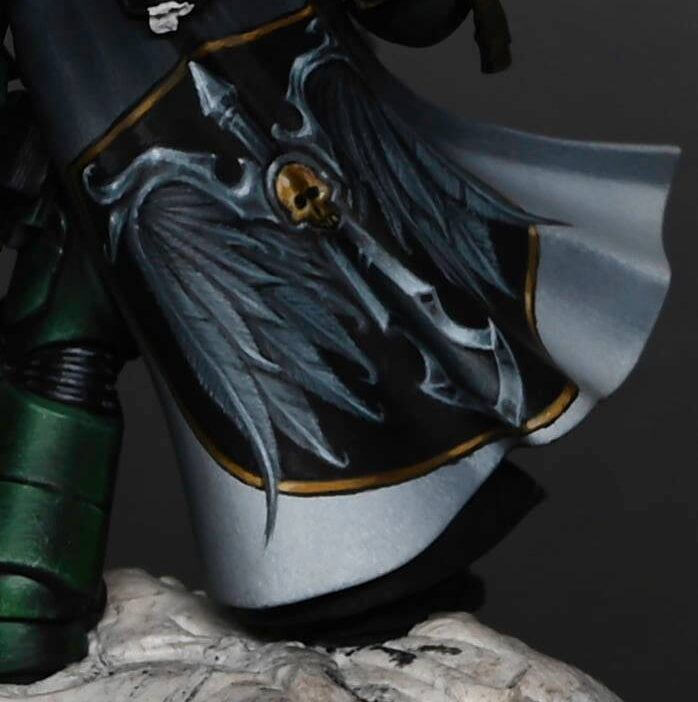
Turquoise Knight Shield Guide – PDF
Building and Painting a Shield for a Knight Lancer By Richard Gray Unleash your creativity with this comprehensive guide to Building and Painting a Shield for a Knight Lancer model. Discover how to create a traditional-looking shield instead of the cut-out style of the original, that perfectly complements your model’s aesthetic with intricate freehand designs and weathering effects. What’s Inside the Building and Painting a Shield for a Knight Lancer Guide: Creating the Shield: Learn how to trace and cut a shield shape from plasticard, and attach detailed resin corner sections from the original shield using a Dremel tool for precision. Customising the Rear of the Shield: Find out how to modify the rear of the shield to connect seamlessly with the Knight Lancer’s fist, using circular connectors and additional stabilising pieces. Priming and Base Coating: Prime the shield with Vallejo Black Surface Primer and apply base coats using Vallejo Game Colour Turquoise, Scalecolour Hiril Blue, and Games Workshop Mournfang Brown to achieve a vibrant, weathered look. Freehand Design: Step-by-step instructions on painting a striking black circle and a bone fish design inspired by the symbol of Tzeentch, using a range of Vallejo and Games Workshop paints for detailed shading and highlights. Eye Detailing: Expert tips for painting a realistic eye with intricate iris details, utilising Vallejo Game Colour Ultramarine Blue, Games Workshop Troll Slayer Orange, and more. Rose Design: Techniques for creating a soft, blended rose design, with highlights and shadows to add depth and realism, using colours like Vallejo Model Colour Cork Brown and P3 Battlefield Brown. Stem and Background Elements: Guidance on painting a detailed stem with curls and thorns, along with tiny skulls to balance the composition, using Games Workshop and P3 paints. Adding Blood and Weathering: Instructions for adding realistic blood effects and weathering, including chipping and rust details, to enhance the shield’s battle-worn appearance. Metallic Corner Sections: Tips for creating green metallic corners using Scale 75 metallic paints mixed with inks, and adding final touches with Rhinox Hide and metallic silver highlights. This guide is ideal for hobbyists looking to elevate their Knight Lancer models with customised shields and advanced painting techniques. Follow along to transform your model into a masterpiece with a traditional yet cohesive look. Download the full Building and Painting a Shield for a Knight Lancer guide, below, and start crafting your unique Knight Lancer shield today! Turquoise-Knight-Shield-for-Patreon-FINAL-1 If the above link doesn’t work, visit this link to download the PDF directly: https://richardgraycreations.com/wp-content/uploads/2017/07/Turquoise-Knight-Shield-for-Patreon-FINAL-1.pdf Explore my latest video tutorials! If you don’t have an account here on my website, please sign up here! I have over 350 video tutorials with steps and tips, plus a selection of PDFs. If you are not sure about joining, you can explore my free videos with a free membership, or take the plunge and become a full subscriber for full access. If you’d prefer to support me on Patreon, please visit: https://www.patreon.com/RichardGray [...]
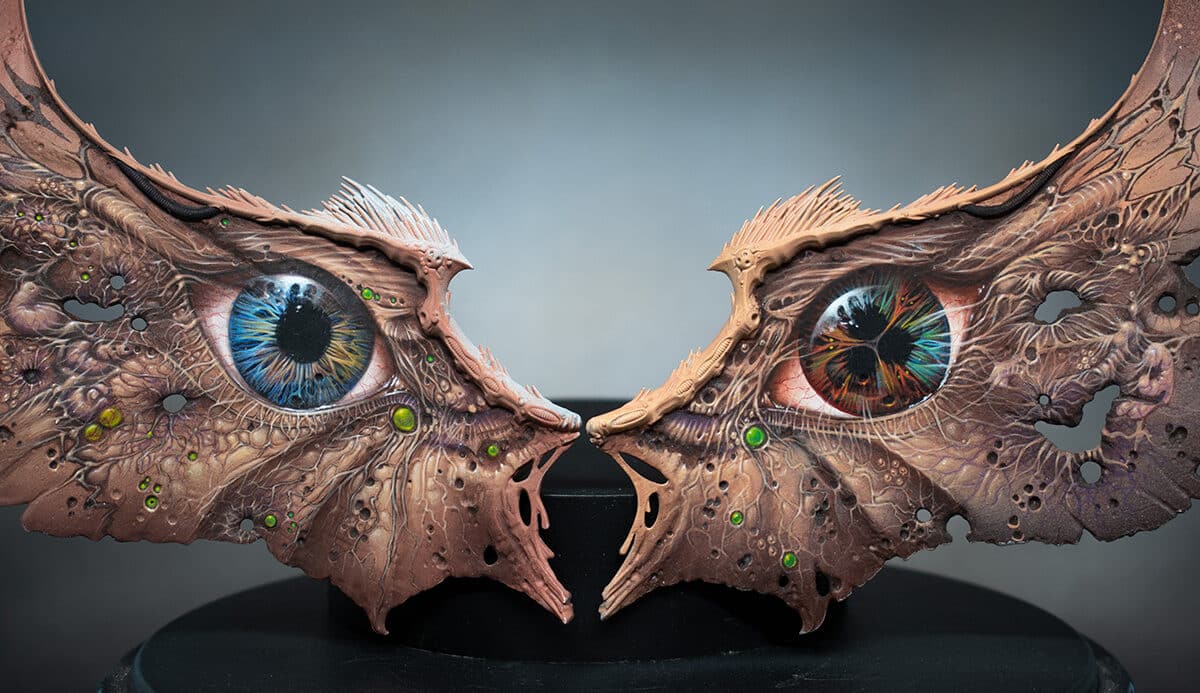
Free Video Tutorials

Free videos for logged in members – just sign up as a ‘friend’ to view and click any of the thumbs.

Free Tutorials
I don’t usually paint true metals as I find them irritating and the metallic particles get everywhere like a glitter bomb. I get a lot of requests for how to paint them though, so I thought I’d record this How to Paint an Iron Warrior in True Metallic Metals and Contrast Paint for you, below! Video – How to Paint an Iron Warrior in True Metallic Metals and Contrast Paint Paints Used The following paints were used: Games Workshop Contrast: Snakebite Leather, Black Templar Games Workshop: Averland Sunset, Ushabti Bone Vallejo: Air Chrome, Air Gunmetal Grey (large pots), Neutral Grey, German Grey, Black (substitute Mechanicum Codex Grey and Abaddon Black) Step-by-Step : How to Paint an Iron Warrior in True Metallic Metals and Contrast Paint Initial Preparation Begin by assembling your Iron Warrior model, ensuring all parts are properly attached except for the head, which should be left unattached for easier painting. Your primary paints will be Vallejo Metal Colour Airbrush Colours, specifically Gunmetal Grey and Chrome, and Games Workshop’s Contrast paints like Snakebite Leather and Black Templar. Applying the Base Coat Start with Vallejo’s Air Gunmetal Grey. It’s a true metallic colour, enriched with botanic flakes to achieve a genuine metallic effect. This is in contrast to non-metallic metals which use standard colours to simulate metal. Apply Gunmetal Grey evenly, using a brush for a more organic, less sterile look. This approach maintains the natural shadows in recesses and adds interesting brush strokes. Highlighting with Chrome Enhance the model’s metallic sheen by highlighting with Vallejo Air Chrome. Focus on areas where light naturally falls, such as elevated surfaces and curves. The chrome will accentuate these spots, creating a dynamic contrast with the darker Gunmetal Grey. It’s crucial to observe the light interaction with the model to identify the best areas for chrome highlights. Adding Shadows with Contrast Paint For deepening shadows and adding depth, use Black Templar Contrast paint. This is particularly effective over metallic paints due to its translucent nature, adding depth without obscuring the metallic shine. Apply carefully to avoid overwhelming the metallic effect. Detailing with Snakebite Leather Snakebite Leather Contrast paint is excellent for adding warmth and a tint of colour to the metallics. It’s particularly useful for areas you want to appear weathered or less shiny. Apply sparingly and blend well to maintain a natural look. Hazard Stripes on Shoulder Pads Painting hazard stripes requires a steady hand and patience. Start by painting the shoulder pads with Neutral Grey and German Grey, blending these colours to create a mid-tone. Once the base is ready, use Averland Sunset for the yellow stripes. Ensure this paint is thin enough for smooth application but dense enough for good coverage. Carefully paint straight lines, keeping the spacing consistent. Avoid using masking techniques as they can complicate the process and don’t always yield cleaner results. Finishing Touches Once the main painting is complete, focus on adding small details like weathering effects, especially on the hazard stripes. Use black paint to simulate chips and scratches, creating a battle-worn look. Also, remember to paint the non-metallic parts, like the ribbing between armour plates, using appropriate grey tones. Final Assembly and Clean-Up After painting, reattach the head and any other separate parts. Be sure to clean your brushes thoroughly, especially when switching between metallic and non-metallic paints, to avoid unwanted cross-contamination More Contrast Paint projects and tutorials: More Free Video Tutorials Free videos for logged in members – just sign up as a ‘friend’ to view and click any of the thumbs.To explore all of these, visit this page! If you don’t have an account, please sign up here! The website currently has over 350 video tutorials, plus step by step guides and PDFs. You can explore more free videos with a free membership, or take the plunge and become a full subscriber for full access. If you’d prefer to support me on Patreon, please visit: https://www.patreon.com/RichardGray [...]
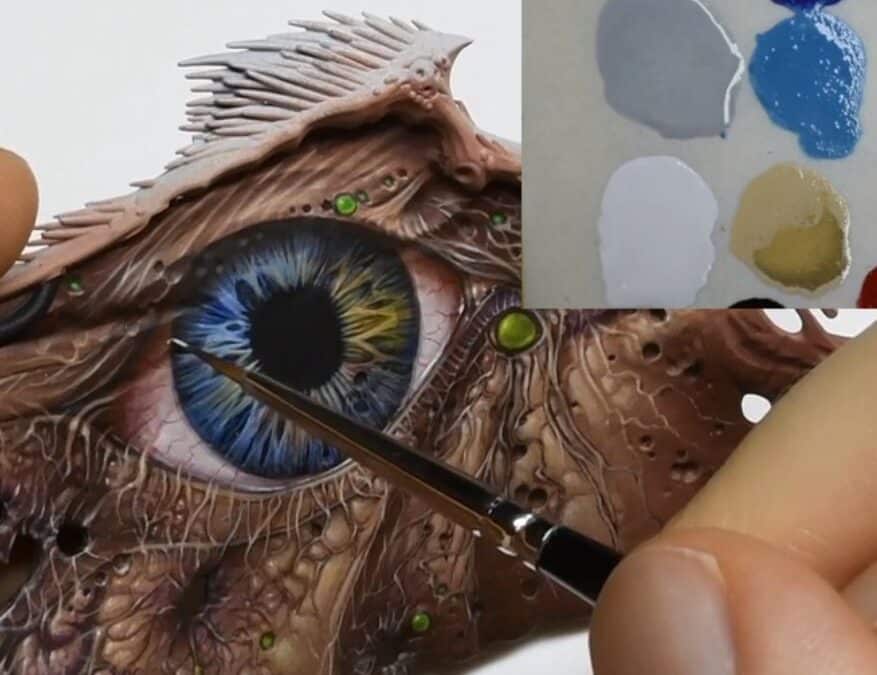
I have to teach you how to paint NMM gold, especially after Games Workshop kindly sent me a review copy of the Age of Sigmar Dominion box, which is full of these golden boys! The first model I decided to paint was this chonky Annihilator! NMM means (Non Metallic Metal) – so it looks like gold paint, but is painted with “normal” paints. Read on and see! How to Paint NMM Gold Video : Part One All videos are recorded in HD 1080p or higher – use full screen for the full effect and let the video load completely. There are also speed controls, click the little cog and choose a faster speed, if you’d like to speed it up a bit! How to Paint NMM Gold Video : Part Two Paints and Tools The following paints were used: Games Workshop: Yriel Yellow, XV-88, Mournfang Brown, Zamesi Desert, Rhinox Hide Vallejo: Ice Yellow, Black P3: Morrow White (Any brand of white is fine) Step By Step Guide: How to Paint NMM Gold Step 1: Base Layer – Zamesi Desert: Start by applying the base layer using Zamesi Desert. Be careful with the application, as it can build up like a dusty layer if you’re sloppy. Use thin layers and consider dry brushing or stippling for a textured effect. Step 2: Highlights with Scrappy Marks: Apply the highlights by holding the model under a light source and quickly blocking in where the highlights hit. Use a chunky stippling style for blocking colours on the armour. Quick transitions work well for a better look. Don’t worry about brush marks; the focus is on selling the non-metallic effect. Step 3: Light Volumes and Reflections: Focus on getting the light volumes right for the non-metallic metal effect. Reflect other lights around you, similar to how a mirror reflects light. Be aware that some parts may not catch light as desired, but you can tweak it as you go along. Step 4: Adding White Highlights: Add white highlights using P3 Morrow White or any white paint of your preference. These highlights will enhance the non-metallic effect. Be mindful of the thickness of the paint, and if needed, glaze over for a refined and neater look. Step 5: Balancing Highlights: Maintain consistency in the highlights by holding the model under a light source and blocking in where the highlights hit. Balance is crucial for selling the non-metallic metal effect. Step 6: Layering and Glazing: Consider using glazing techniques with colours like Balor Brown or Japanese Uniform to add depth and colour variation. Thin your paints for later stages to achieve refined and smaller marks. Glazing helps neaten and soften the overall look. Step 7: Additional Details and Contrast: Add additional details using Rhinox Hide for larger areas to push contrast. Use watered-down Rhinox Hide for subtlety, and consider adding white highlights for reflections. Step 8: Stippling and Scratching: Stipple and scratch with a watered-down mix of Rhinox Hide and Mournfang Brown for larger areas. This technique adds texture and a brushed look to the non-metallic gold. Step 9: Final Touches and Glazing: Continue blending and refining the paint with scratchy marks. Towards the end, consider glazing to further enhance and refine the non-metallic gold effect. Adjust as needed for a balanced finish. Learn NMM Like a Pro! Liked this video? Check out all my latest subscriber videos with Non-Metallic Metal techniques by clicking the thumbnails below, or explore more freebies by clicking here. Free Video Tutorials Free videos (for logged in members – just sign up as a ‘friend’ to view and click any of the thumbs.To explore all of these, visit this page! If you don’t have an account, please sign up here! The website currently has over 350 video tutorials, plus step by step guides and PDFs. You can explore more free videos with a free “freebies” membership, or take the plunge and become a full subscriber for full access. If you’d prefer to support me on Patreon, please visit: https://www.patreon.com/RichardGray [...]
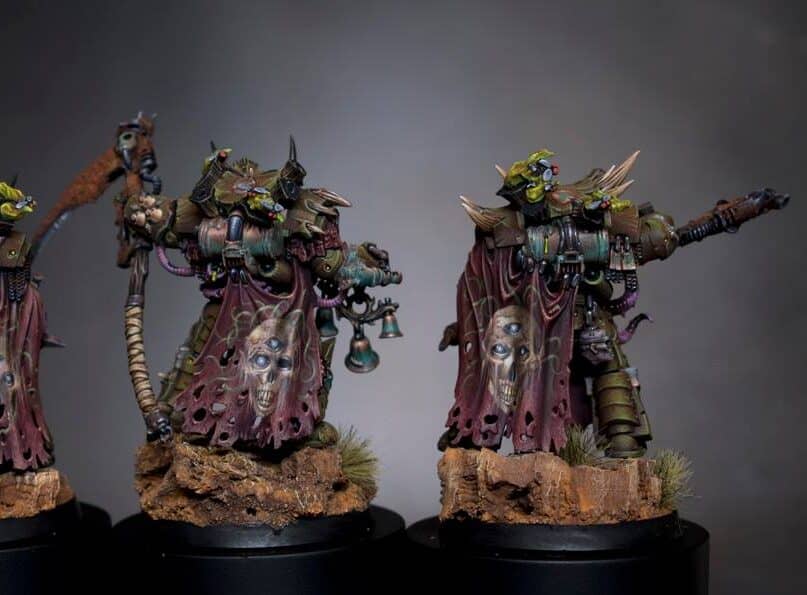
Richard was sent the new Warhammer 40,000 Leviathan box set from Games Workshop, and of course had to pick out his favourite model to paint up for a tutorial video for you guys. This is up on the website, ad free for freebie members and above, but also on Youtube – follow the link below or click in the embed to watch: The following paints were used: Games Workshop: Black Templar (Contrast), Darkoath Flesh (Contrast), Contrast Medium, XV-88, Morghast Bone, Ushabti Bone, Screaming Skull, Mephiston Red, Evil Sunz Scarlet, Wild Rider Red, Yriel Yellow Vallejo: Game Colour Dark Green, Neutral Grey, German Grey, Black, Gunmetal Grey (Metallic), Chrome (Metallic) P3: Morrow White About the Leviathan box set – (Review by Rebecca) The “launch box” contains two armies (Space Marines and Tyranids), a limited edition book, and lots of other treats. However, if you’re a newbie to this hobby, brace yourself for a slightly steeper learning curve. Unlike some dedicated starter sets, Leviathan skips the dice, measuring tools, and handy “get started” guide. The box also contains a set of transfers covering a host of Space Marine Chapters.In the video Richard says that there are no Dark Angel ones, but there are, (sorry). In addition to this, while the rules for every Warhammer 40k unit will be available for free download from Warhammer Community, be aware that the box itself does not include physical cards. Instead, you’ll find basic profiles tucked away in the back of the instruction manual. Richard enjoyed painting a Terminator for the video above, and was impressed by the level of detail. They’ve managed to retain the classic charm of their predecessors while seamlessly blending into the ranks of the latest Space Marine models. In this new edition, the Terminators boast some nifty tricks up their power-armoured sleeves. Imagine being able to plant a teleport marker anywhere on the battlefield right from the get-go, courtesy of these bad boys. And the best part? You can use Rapid Ingress without spending a single resource to appear right next to that marker. Finally, they give a resounding “no thanks” to any negative hit modifiers. That means they’re practically unstoppable in combat. For beginners and those who stick themselves together more than their miniatures, the models in the Leviathan box set are push fit, requiring no glue. Despite their easy assembly, they stand strong against intricate multi-part kits, however and still boast a great level of detail and good customisability. I, personally, love the books that comes with the sets, especially when they are as full of background information as the rule book that comes with the Leviathan set.This exclusive book encompasses a whopping 200 pages of background information, hobby details, and lore. Not only does it provide insights into every Combat Patrol available, but it also showcases stunning images of painted models. In short, the Leviathan box set is a great set if you are looking to get a lot of very cool models plus some great lore! Rebecca Gray This website showcases lots of Warhammer tutorial videos by Richard Gray! If you don’t have an account on the website, please sign up here! In total, the website currently has over 350 video tutorials with steps and tips, plus a selection of PDFs. If you are not sure about joining, you can explore the free videos with a free membership, or take the plunge and become a full subscriber for full access. If you’d prefer to support me Richard on Patreon, please visit: https://www.patreon.com/RichardGray [...]
Ready to try some Grimdark Ultramarines? This how to paint a Grimdark Ultramarine tutorial’s got you covered. We’ll be using an airbrush and some cool oil weathering tricks to turn a plain model into a gritty Ultramarine warrior. From slapping on the base colour to adding those fine details, we’re keeping it real and straightforward. The following paints were used:Games Workshop: Macragge Blue, Calgar Blue, Blue Horror, Mephiston Red, Wild Rider Red, Ushabti Bone Vallejo: Basalt Grey, Neutral Grey, Pale Grey Blue, Black, (Metal Colour Magnesium, Gold, Chrome) Scale 75: Dwarven Gold Winsor & Newton Oil Colour: Burnt Sienna, Black (Burnt Umber!) Forge World: Dark Sand How to paint a Grimdark Ultramarine Steps and Tips Base Coat:Apply Macragge Blue from Games Workshop using an airbrush.Use a small arch surface dry brush for a stippling technique to add colour and texture.Focus on covering all armour panels, avoiding non-blue elements like guns and chainsaws. Highlighting:Mix airbrush thinner and water.Highlight specific areas (shoulders, head, chest, backpack) using the airbrush.Use Scale 75 Dwarven Gold for golden trim, fixing any mistakes with black paint. Additional Detailing:Add scratches and dents using a fine brush.Apply subtle highlights using blue and blue horror, keeping it restrained.Avoid excessive highlighting for a balanced appearance. Purity Seals and Small Details:Optionally detail purity seals and other small features.Experiment with paint mixes for variety. Oil, Transfers and Weathering:Use micro set to soften transfers and apply them to the model.Coat with gloss varnish and let it dry.Apply oil paints for weathering by dabbing or gently rubbing.Highlight specific areas (knee, shoulder pads, head, hip plate, backpack) with the oil wash. Final Touches:Paint the eyes using white and carefully add additional highlights.Address any mistakes or mishaps.Reapply highlights using the same colours to make certain areas pop.Use weathering powder for a grounded look on the base. Free Video Tutorials Free videos for logged in members – just sign up as a ‘friend’ to view and click any of the thumbs.To explore all of these, visit this page! If you don’t have an account, please sign up here! The website currently has over 350 video tutorials, plus step by step guides and PDFs. You can explore more free videos with a free “freebies” membership, or take the plunge and become a full subscriber for full access. If you’d prefer to support me on Patreon, please visit: https://www.patreon.com/RichardGray [...]
The team at Warhammer Community approached me for some tips on freehand, especially for Adeptus Titanicus. The whole interview can be found here. Richard: As a massive fan of Adeptus Titanicus, I knew I had to have the Warlord-Sinister Psi-Titan as soon as I saw it. After I built the model, I realised I would have to figure out how to add the Legio Sinister icon to the shoulder pads. With no transfers available, this would make an ideal project to show my freehand process. The first thing to do when you want to freehand is a little research and planning. It’s very tempting to jump straight in and wing it. What usually happens if you do is that you run out of space, get details wrong and wish you had a transfer! With this in mind I looked for artwork of the Legio Sinister icon and managed to find a nice, large image. This tends to be when the true horror hits that you have a very detailed, large image that you need to fit in to a teeny tiny area. Before you get started on your freehand piece itself, paint the background armour panel completely. It’s much easier to paint it now rather than trying to get nice highlights and transitions around your carefully painted freehand.  The colours I’m going to use for the freehand are as follows: For the non-metallic metal (NMM) sections, I’ll use Rhinox Hide, Mournfang Brown, XV-88, Dorn Yellow, and Screaming Skull. For the lion itself I will be using Mechanicus Standard Grey, Slaanesh Grey, Grey Seer, Abaddon Black and Mephiston Red. To get started, I first map out the shape and position of the freehand in black. Start in the centre and work your way outwards to allow you to make small corrections as you go. If you try painting the outline straight off there’s a good chance you’ll get the position wrong, and then it’s very hard to change! For the spikes just make small marks for each position to make sure they are spaced correctly. The reason for using black as a base colour is that it’s much easier to build up the highlight positions and use the black as shading, to keep your tonal contrast high. It also means you can use black to correct any mistakes you make.  Once the outline is complete it’s time to move on to the next layer – NMM trim. Start with Rhinox hide and make very large highlight blocks. Remember that the highlights will get smaller and smaller with each layer. I didn’t make a straight copy of the reference artwork, but rather made the lighting come from the top left. This made it look a bit more dramatic and allowed me to build stronger highlights and shadows.  Hard edges and curves reflect the light more strongly, so focus on those areas for the brighter highlights. After the Rhinox Hide, continue adding highlight layers with the remaining NMM colours in the order listed previously. Save the XV-88 for the finest edge highlights. After all of the trim is painted it’s time to start on the lion. This is where things get tricky! You should have a black, round hole in the middle of the design. Roughly block in the shape of the lion face using Mechanicus Standard Grey. This allows you to get the positioning correct without going over any of the work you’ve just done. Next begin refining the details of the face with Slaanesh Grey – be careful not to corrupt your Psi-Titan! Imagine the face as a 3D object and try to think where the highlights would naturally fall. I kept the light direction coming from the top left to match the trim. Now it’s time to start painting the lion’s mane. This is the scary part as it goes over all of the NMM that you’ve carefully painted. I strongly recommend that you take your time and try to be selective with your positioning. Avoid covering the bright point in the top left, as this feature helps make the NMM look metallic and shiny. I used watered down Mephiston Red to paint in the eye sockets, this makes the lion look extra angry. You should pick out the eyes in Grey Seer, plus any other details can be finished up in this step. By this stage everything should be starting to come together. One thing I strongly recommend is to take photos of your piece, and look at those rather than the painted model. The freehand is so small that it’s easy to miss mistakes, but on an enlarged photograph, your mistakes will look massive (and terrible)! This might be a difficult step, but it will be much easier to correct your work. Once the lion’s complete, it’s time for the symbol to be painted on the forehead. Again, start with black to block in the shape, then use the same colours for the NMM. As this area is so small, you don’t need to bother with Rhinox Hide. Finally, take one last photograph to check everything on the model and then give the whole panel a coat of matte varnish. This will remove any variances in the finish and will make the freehand look like it’s a part of the armour panel. I hope you liked my tips on freehand and if you’d like to learn more tips on freehand techniques from me, please scroll down to explore some videos, like the guide I created alongside this one, or explore the site! I did a tutorial video alongside this guide, click below to view it! Freehand Tutorials If you don’t have an account, please sign up here! The website currently has over 350 video tutorials with steps and tips, plus a selection of PDFs. If you are not sure about joining, you can explore my free videos with a free membership, or take the plunge and become a full subscriber for full access. If you’d prefer to support me on Patreon, please visit: https://www.patreon.com/RichardGray [...]
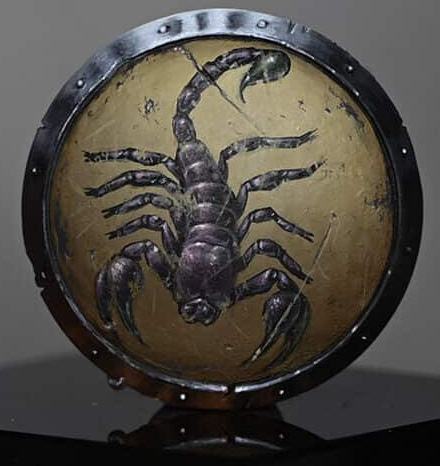
This free video shows how to paint a Grimdark Black Templar to tabletop standard (make sure you are logged in to view!) All videos are recorded in HD 1080p or higher – use full screen for the full effect and let the video load completely. You can also click the little “cog” and change the speed of the video, if I am going too fast (or slow!). Materials and Paints: Paints: Games Workshop (Mephiston Red, Evil Sunz Scarlet, Yriel Yellow, Morghast Bone, Screaming Skull), Vallejo (Basalt Grey, Neutral Grey, Pale Grey Blue, German Grey, Metal Colour Exhaust Manifold, Metal Colour Gunmetal Grey), Scale 75 (Necro Gold), P3 (Morrow White) Oil Colours: Winsor & Newton (Black, Burnt Sienna) Odorless Mineral Spirit: Winsor & Newton Sansodor Primer: Badger Ultimate Primer in Black Brushes: Artis Opus Series S size 1 and 00, Small Drybrush Varnish: Vallejo Mecha Matt Varnish (optional Mecha Gloss Varnish) How to Paint a Grimdark Black Templar – Step-by-Step Guide: 1. Base Preparation: Prime the model black, leaving the head with blue tack for easier eye painting. 2. Armour Texture and Highlights: Stipple German Grey (or a dark grey mix) over the armour, focusing on the edges and avoiding leather pouches and shoulder pads. This creates a textured base for highlighting. Progress with lighter greys, like Basalt and Neutral Grey, using a similar stippling technique. This builds up the highlights and adds depth. 3. Shoulder Pads: Paint shoulder pads with Neutral Grey. This area will eventually be white but start with a grey base to create a grimy look. 4. Masking for Airbrushing: Use putty to mask off areas and airbrush a mix of Morrow White and a touch of Abaddon Black on the shoulder pads, creating a gradient effect. 5. Detailing Black Areas: Use black paint to touch up any overspray from airbrushing, particularly on the armour trim and the Black Templar cross. 6. Leather and Skull: Apply Mournfang Brown to leather areas and the skull. The oil wash will later help blend and shade these parts. 7. Gold Details: Paint gold areas with Necro Gold, watering down the metallics for a smooth finish. 8. Metallics: Fill in all metallic parts with Gunmetal Grey. Oil wash will later enhance these metallics, providing depth and shading. 9. Skull Highlight: Add a quick highlight of Morghast Bone to the skull to make it stand out against the dark base. 10. Verdigris Effect: Apply a mix of Sotek Green and White for a verdigris effect on gold areas, focusing on recesses and crevices. 11. Oil Wash: Mix Burnt Sienna and Black oil paint with mineral spirit and apply generously over the model. This step dramatically alters the model’s look, blending and toning down highlights and adding a weathered effect. 12. Touching up Highlights: Redo the highlights in smaller areas using Neutral Grey, Dark Sea Grey, and Pale Blue Grey. This step refines the highlights post-oil wash. 13. Lenses: Paint the lenses starting with Mephiston Red, followed by layers of Evil Sunz Scarlet, Fire Dragon Bright mixed with Yriel Yellow, and finally pure Yriel Yellow for a glowing effect. 14. Final Touches: Reapply metallic paints to certain areas for a contrast boost. Apply final highlights and adjust any last-minute details to your liking. Explore more of the latest free videos! If you don’t have an account, please sign up here! The website currently has over 350 video tutorials, plus step by step guides and PDFs. You can explore more free videos with a free “freebies” membership, or take the plunge and become a full subscriber for full access. If you’d prefer to support me on Patreon, please visit: https://www.patreon.com/RichardGray [...]
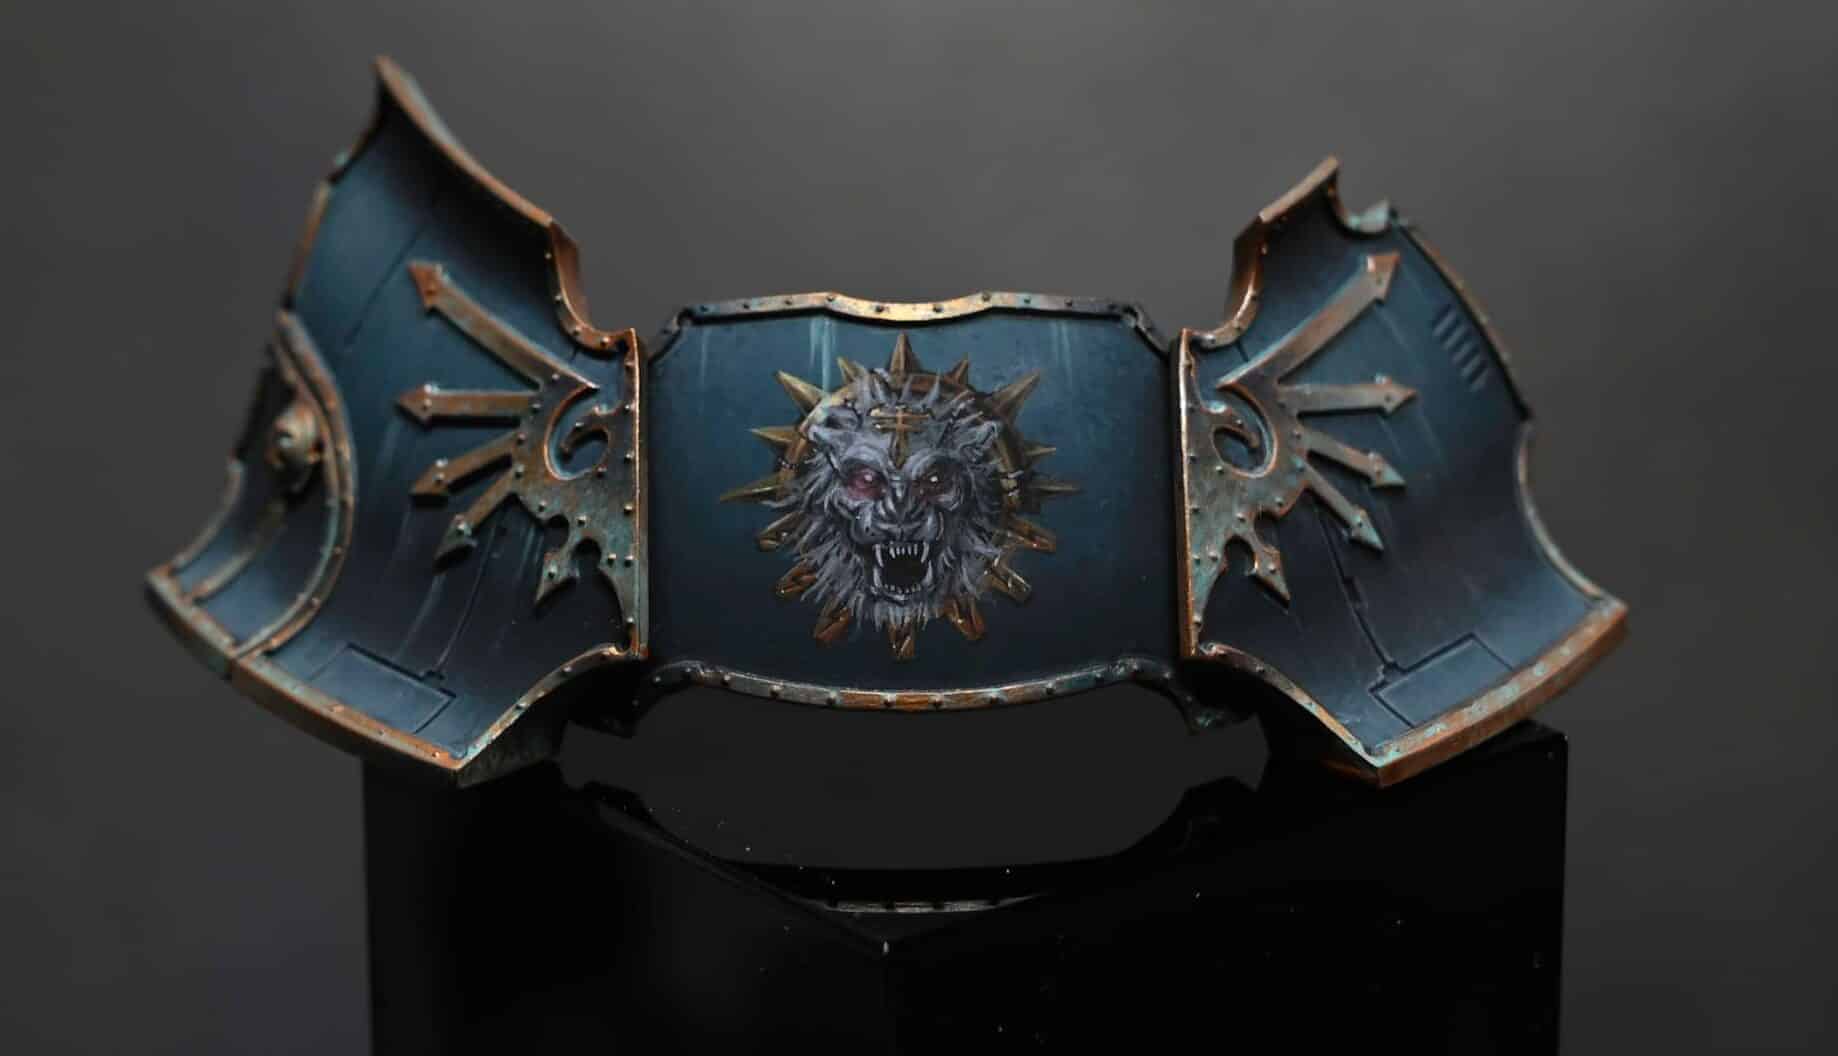
This mould lines tutorial shows you how to build and convert Mephiston of the Blood Angels and end up with a result that has no mould lines or gaps. Tools You Will Need The following tools were used in the video: Tamiya Extra Thin Cement Revell Contacta Plus Glue Greenstuff 2 Part Yellow and Blue epoxy Scalpel Clippers (I used Tamiya 300074123 – Diagonal Cutter) Step By Step Mould Lines Tutorial Prepare your ToolsSee above list! Foot Modification for Custom Base:If planning a custom base, clip off Mephiston’s foot from the base to allow for easier base building later! Tackle Mould Lines:Identify and remove mould lines using Tamiya Extra Thin, ensuring a smooth and clean surface. Take your time! Scalpel Precision:Utilise the full length of the scalpel for better control, especially in challenging areas like fabric creases. Handle Tricky Details:Address challenges with tubes and concave shapes, taking your time to avoid cutting into the model.Inspect and remove mould lines diligently, paying attention to hidden areas like armpits and hair. Sprue Connection Removal:Cut off tags where the model connects to the sprue and use Tamiya Extra Thin to blend the cut areas seamlessly. Model Assembly:Use Revel glue for assembly, overloading edges for a strong bond.Scrape away excess glue with a scalpel, mimicking the process of removing mould lines. Dry Fitting and Final Touches:Perform a dry fit to ensure proper part alignment.Address gaps or imperfections with green stuff for larger spaces. Adding Movement and Detail:Add movement to elements like Mephiston’s hair using Vallejo model putty for dynamic strands. Final Inspection:Clean up any excess putty or glue.Inspect the model for visible mould lines or gaps, ensuring a flawless finish. Keep Learning Videos Not Showing? To view any of my paid tutorials, you need to be a member of the website – please click below to log in or join the site. Not sure about joining just yet? Check out my Youtube for all my free tutorials or sign up as a free “friend” member on this site and visit the freebies video page! If you’d prefer to support me on Patreon, please visit: https://www.patreon.com/RichardGray [...]
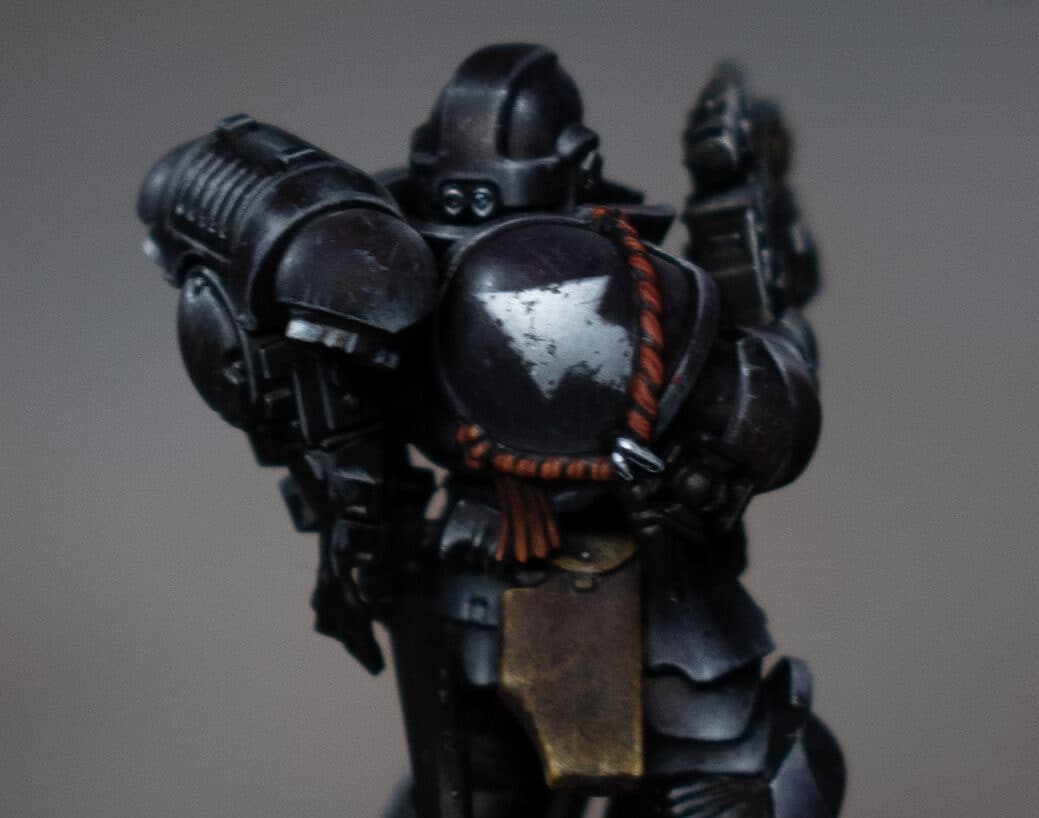
These videos will show you how to paint a Death Guard Space Marine, specifically from the Space Marine Heroes collection. These guides will focus on creating a textured, decayed look characteristic of the Death Guard, using various stippling techniques. Video – How To Paint: Death Guard Space Marine : Part OneMaterials NeededStepsTipsVideo – How To Paint: Death Guard Space Marine : Part TwoAdditional Painting StepsAdditional TipsMore Death Guard Tutorials to Explore!Free Video Tutorials Video – How To Paint: Death Guard Space Marine : Part One Materials Needed Paints: Games Workshop: Balor Brown, Rhinox Hide, Morghast Bone, Screaming Skull, Khorne Red, Volupus Pink, Fire Dragon Bright, (alternatively Bugman’s Glow and Cadian Fleshtone for copper effect) Vallejo: Ice Yellow, (alternatively Old Rose and Salmon Rose) Brushes: A variety of sizes, including stippling brushes (Artist Opus dry brush or makeup brushes can be used) Primer: Black primer (Ultimate Primer recommended) Palette: For mixing colours Water pot: For thinning paints and cleaning brushes Steps Priming and Base Texture: Prime the model in black. Start stippling texture onto the armour using Balor Brown. Ensure the paint is diluted (about 50% water) to achieve translucency and avoid excessive build-up. Layering the Texture: Continue building texture with Morghast Bone, focusing on areas where light naturally hits. Aim for a top-left light perspective. Dilute your paints as you stipple, gradually building up layers for a controlled, textured effect. Detailing with Contrast Paint: Apply Volupus Pink to recesses and bubbly areas on the armour for quick coverage. This helps in defining those decayed spots distinct to Death Guard armour. Base Colour for Trims and Metals: Paint all trims and metal areas with watered-down Rhinox Hide. This acts as a base for later metallic effects. Non-Metallic Metal (NMM) Effect: For a non-metallic metal look, mix Old Rose with Rhinox Hide and Salmon Rose with Ice Yellow. Layer these mixes to create a copper-like effect, adding Mournfang Brown for warmth. Highlighting Armour and Details: Use Screaming Skull to push highlights on the armour. Concentrate on areas like the chest, head, and shoulder pads to draw focus. Stippling Screaming Skull provides a more opaque highlight. For the pus boils, start with Balor Brown and build up layers with Fist Red for veins. Add Morghast Bone and Screaming Skull for highlights, creating a shiny, reflective surface. Painting Fungus and Red Details: Base the fungus-like growths with Khorne Red. Create a gradient effect by mixing Khorne Red with Fire Dragon Bright, then highlight with Ice Yellow for a vibrant contrast against the armour. Tips Patience is Key: Death Guard models are detailed, so take your time to add depth and texture. Light Source Consistency: Ensure the light source remains consistent across the model for a cohesive look. Layering: Gradual layering helps create a more realistic texture, particularly for the decayed look of the Death Guard. Brush Care: Clean brushes thoroughly between colours, especially when working with stippling techniques. Video – How To Paint: Death Guard Space Marine : Part Two Continuing from Part 1, let’s delve into completing the Death Guard Space Marine with a focus on the gun, additional weathering effects, and other details. We’ll be using a variety of techniques to add depth and character to the model. Additional Painting Steps Gun and Metallics: Start with Bugman’s Glow and Cadian Fleshtone for a coppery effect. Apply these colours to the gun, focusing on light placement and creating non-metallic metal effects. Use Mournfang Brown and Ice Yellow for richer copper tones. Ensure smooth transitions and consistent light reflection. Weathering and Verdigris Effect: For added realism, apply verdigris using Sotek Green. Mix with water (approx. 6-7 parts water to 1 part paint) and apply it to recessed areas and around details for an oxidized look. Add layers of Sotek Green mixed with white for a more pronounced effect. Apply sparingly to avoid overpowering the metallic sheen. Highlighting and Details: Highlight the gun and metallic parts with Ice Yellow and a touch of white for glare effects. Be cautious with paint consistency to avoid unwanted textures. Address the back of the model similarly, but you can opt for brighter highlights as this part is often in shadow during gameplay. Painting the Backpack and Tentacles: For the backpack’s tentacle-like extensions, use a mix of Pink Horror, Emperor’s Children, and Fulgrim Pink. Stipple on these colours to create a mottled, organic texture. Use Averland Sunset or a similar yellow for raised pustules, adding depth and contrast to the tentacles. Green Goo Effect: Paint any dripping goo with Moot Green, applying in layers to create a luminous, toxic effect. Highlight edges with Ice Yellow for added vibrancy. Finishing Touches: Utilize Corvus Black for deepening shadows and refining details. Water down the paint and apply it as a glaze to enhance contrast and soften textures. For the final highlights, focus on the model’s focal points, such as the head, chest, and weapon, ensuring they draw the viewer’s attention. Additional Tips Layering: Build up your colours gradually for a more natural and controlled effect. Light Source: Keep the light source consistent across the model for a cohesive appearance. Weathering Techniques: Experiment with weathering to add character. Verdigris and rust effects can significantly enhance the decayed look of the Death Guard. Patience: Take your time with details, especially on focal points, to make them stand out. Brush Care: Maintain your brushes, especially when working with techniques that can be hard on them, like stippling and dry brushing. More Death Guard Tutorials to Explore! Free Video Tutorials Free videos for logged in members – just sign up as a ‘friend’ to view and click any of the thumbs.To explore all of these, visit this page! If you don’t have an account, please sign up here! The website currently has over 350 video tutorials, plus step by step guides and PDFs. You can explore more free videos with a free “freebies” membership, or take the plunge and become a full subscriber for full access. If you’d prefer to support me on Patreon, please visit: https://www.patreon.com/RichardGray [...]
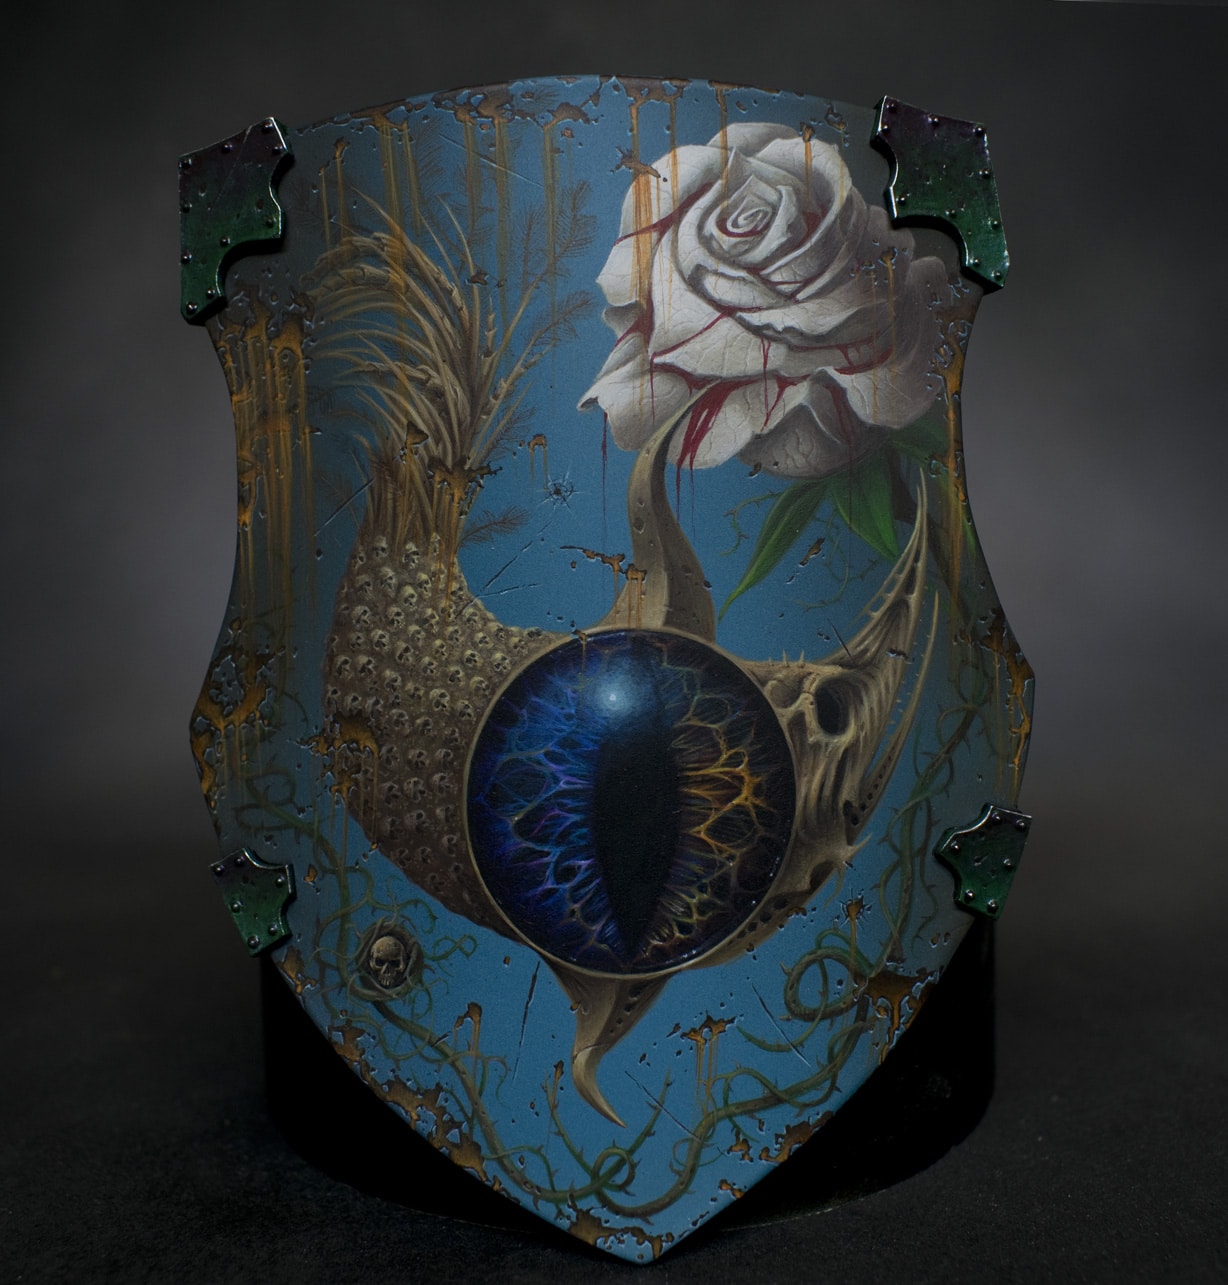
This video looks at How to Paint Snikrot the Ork! The model is painted to a high tabletop standard and Contrast paints are used heavily. Tools and Paints: Games Workshop Contrast: Black Legion, Mantis Warriors Green, Aggaros Dunes, Skeleton Horde, Garaghak’s Sewer Vallejo Game Colour (New): White Ink, Mecha Matt Varnish, Neutral Grey, Black, Desert Yellow, Bile Green, Grunge Brown, Dead Flesh, Turquoise, Aquamarine, Dead White, Airbrush Thinner Step By Step: How to Paint Snikrot the Ork Priming and Highlighting Begin with a primed model and apply a highlight using an airbrush and white ink from Vallejo. Thin the white ink with airbrush thinner for a smooth finish. Ensure the focal points, such as the face and chest, receive extra brightness during airbrushing. The contrast paint naturally enhances shadows and highlights. Applying Contrast Paints Use contrast paints for a high tabletop standard. Apply contrast paint to the model, focusing on loading up the brush with a generous amount to let it run into crevices and create shadow effects. Choose contrast colours based on personal preference, as they all work similarly. I’ve used contrast black (Templar Black) for metal areas. Leather and Metal Details Paint leather areas with desert yellow, avoiding excessive thinning as it complements the contrast paints. For metal areas, use contrast black or any black color of choice. Leave teeth and tongue unpainted, applying a coat of skeleton horde or a chosen pink colour for the tongue. Matte Varnish Apply matte varnish to reduce the shiny finish of contrast paints. Vallejo’s matte varnish is recommended for its balanced matte effect. Use a Wet Palette to Organise Your Paints Arrange neutral gray, neutral gray mixed with white, black, and dead white for easy access during painting. Detailing and Highlights Use grunge brown for detailing and add highlights with desert yellow. Experiment with different water-to-paint ratios for varied effects. Metallic Effects Achieve a metallic effect by using opaque white sparingly. Focus on creating highlights on edges and surfaces, making the metal look scratched and darkened. Creating Texture Experiment with brushes to create texture on the model. Stipple with an older, worn brush for a more textured effect on specific areas. Lenses and Final Touches Paint lenses using turquoise as the base colour and add highlights with Aquamarine or a mix of turquoise and white. Follow a common technique for gem-like effects. Looking for the Rebecca version? My wife did an April Fools version of this video, with her voice-over. It can be found below!: More free video tutorials Free videos for logged in members – just sign up as a ‘friend’ to view and click any of the thumbs.To explore all of these, visit this page! If you don’t have an account, please sign up here! The website currently has over 350 video tutorials, plus step by step guides and PDFs. You can explore more free videos with a free “freebies” membership, or take the plunge and become a full subscriber for full access. If you’d prefer to support me on Patreon, please visit: https://www.patreon.com/RichardGray [...]
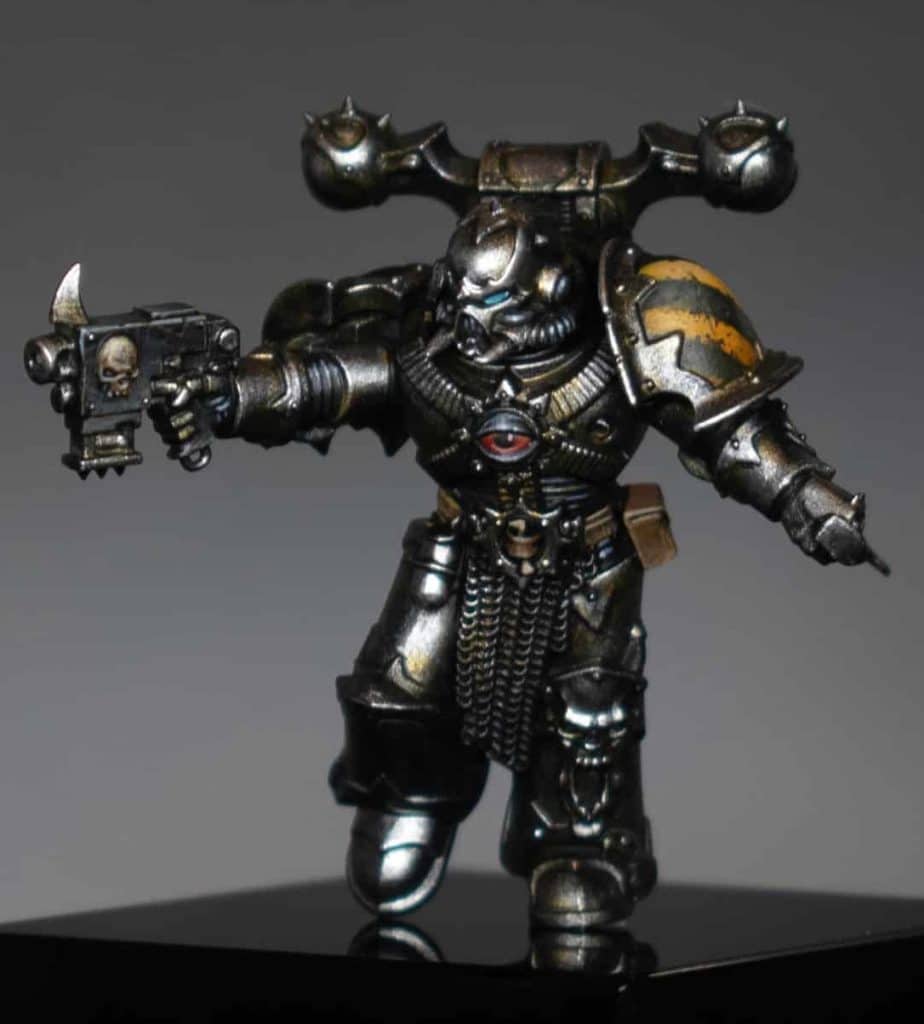
A quick and simple video tutorial in how to paint this friendly little Gloomspite Gitz Grot with Contrast paints and apply varnish to bring the colours together and finish the piece. The key is to work fast with Contrast paints, allowing their properties to create natural shadows and highlights, and then refining with traditional paints for a more polished finish. Video Tutorial – Gloomspite Gitz Grot in Contrast Paint All videos are recorded in HD 1080p or higher – use full screen for the full effect and let the video load completely. Materials List for Painting Gloomspite Gitz with Contrast Paint Brushes: Various brushes suitable for applying contrast paints and doing detail work – I use Artist Opus range for details, with a standard general brush for applying the paint more roughly. Primer: Vallejo Surface Primer Black: For the initial priming of the models. Games Workshop Wraithbone spray can: Used for zenithal highlights. Contrast Paints (Games Workshop) Black Templar: For dark areas like robes. Plaguebearer Flesh: For skin. Iyanden Yellow: For ropes and feet. Nazdreg Yellow: Alternative option for ropes and feet. Flesh Tearers Red: For red elements on the models. Additional Paints: Games Workshop Daemonette Hide: For highlighting black areas. Games Workshop Dorn Yellow: For enhancing yellow areas. Games Workshop Blue Horror: For brighter highlights. Games Workshop Ceramite White: For final, brightest highlights. Games Workshop Skavenblight Dinge: For non-metallic metal effects. Varnish: AK Interactive Ultra Matte Varnish: For finishing and protecting the painted models. Other Materials: Water for thinning paints and cleaning brushes. A palette for mixing paints. Kitchen roll or a similar material for wiping and adjusting brush moisture. Airbrush (Optional): Recommended for a smoother zenithal highlight application compared to using a rattle can. Step-by-Step Guide Priming and Base Highlights: Prime the models with Vallejo Surface Primer Black. Use Games Workshop’s Wraithbone spray for zenithal highlights, creating a directional light effect to enhance contrast paint application. Applying Contrast Paints: Start with the skin using Games Workshop’s Plaguebearer Flesh. Be relatively quick and don’t worry excessively about neatness. For darker areas like robes, use Black Templar. Apply it straight out of the pot, allowing it to flow into recesses. Paint the ropes and feet with a brown contrast paint like Iyanden Yellow or Nazdreg Yellow. Use Flesh Tearers Red for red elements, considering multiple coats for a smoother finish. Additional Details: For weapons, you can opt for a simple black base and metallic highlights, or try a non-metallic metal (NMM) approach using neutral grays. To enhance yellow areas that are translucent and show speckles, use Dorn Yellow for edge highlights and additional coats. Refining and Enhancing: Use Daemonette Hide to pick out highlights, particularly on black areas. Vertical strokes can emphasize cloth folds. Add brighter highlights with Blue Horror, focusing on raised areas and edges for a sharper look. Finalize the highlights with Ceramite White, adding small touches to the most prominent areas. Correcting Mistakes and Blending: If you make mistakes or need to blend areas, use appropriate contrast paints or a mix with water for glazing and tinting. Varnishing: Once painting is complete, apply an ultra-matte varnish (like AK Interactive Ultra Matte) to unify the finish and protect the paint. This can be done by hand or with an airbrush. Be cautious of pooling and bubbles. More Free Video Tutorials Free videos for logged in members – just sign up as a ‘friend’ to view and click any of the thumbs.To explore all of these, visit this page! If you don’t have an account, please sign up here! The website currently has over 350 video tutorials, plus step by step guides and PDFs. You can explore more free videos with a free “friend” membership, or take the plunge and become a full subscriber for full access. If you’d prefer to support me on Patreon, please visit: https://www.patreon.com/RichardGray [...]
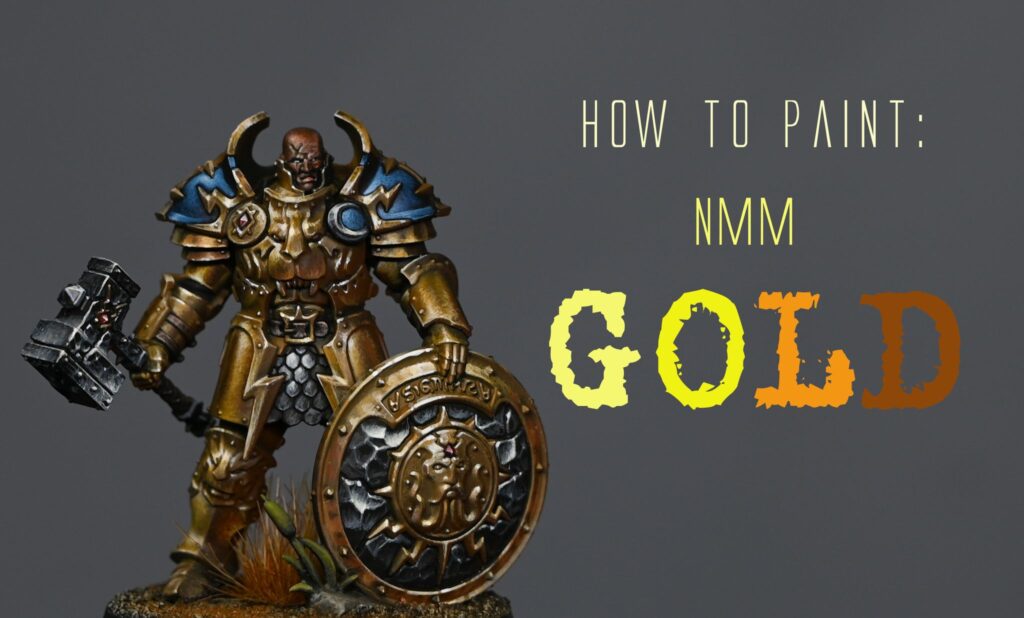
This video shows the complete process of how to paint an Ulfenwatch Skeleton from the Cursed City boxed game by Games Workshop. The tutorial covers techniques for achieving a worn, non-metallic metal look and provides insights into brush handling, highlighting, and detailing. The following paints were used in the video:Games Workshop: Rhinox Hide, Mournfang Brown, Balor Brown, Ushabti Bone, Cadian Fleshtone, Baharroth Blue, Yriel Yellow Vallejo: Ice Yellow, Neutral Grey, Basalt Grey, Pale Grey Blue, Black, Heavy Grey P3: Morrow White, Iosen Green Steps And Tips to Paint an Ulfenwatch Skeleton Preparation and Priming:Use Scale 75 surface primer for a matte finish on the Ulfenwatch Skeleton from the Cursed City box game.Remove the tab from the feet for basing without risking damage to your paintwork. Armour Painting Technique:Start with Vallejo Basalt Gray for non-metallic metal-style armour painting.Use a worn-out brush for a rough look, applying lighter shades on prominent areas and gradually decreasing paint for darker sections.Start on the brightest points for effective highlighting. Highlighting and Detailing:Apply successive highlights using Basalt Gray, Neutral Gray, Pale Grey Blue, and White to create neater and more defined details on the armourHighlight worn spots, holes, and dents on the armour to add character, ensuring that the marks become neater with each successive highlight. Shield Painting:Use Mournfang Brown for a bronze/copper look on the shield, focusing on one primary shine point.Highlight points where the light hits the shield, including spikes and creases, using a controlled blobbing technique for added definition. Face and Eye Painting:Paint the face with Balor Brown, focusing on small, intricate details.Use Yriel Yellow to add a bright edge around the eye sockets for a realistic effect, but keep an eye (ha ha) to ensure you are keeping your lighting consistent throughout the model.Do the process for painting other parts like arms and legs, but beware of overly bright highlights that may distract from focal points. Watch more of my tutorials by clicking the links below: Videos Not Showing? To view any of my paid tutorials, you need to be a member of the website – please click below to log in or join the site. Not sure about joining just yet? Check out my Youtube for all my free tutorials or sign up as a free “friend” member on this site and visit the free videos page! If you’d prefer to support me on Patreon, please visit: https://www.patreon.com/RichardGray [...]
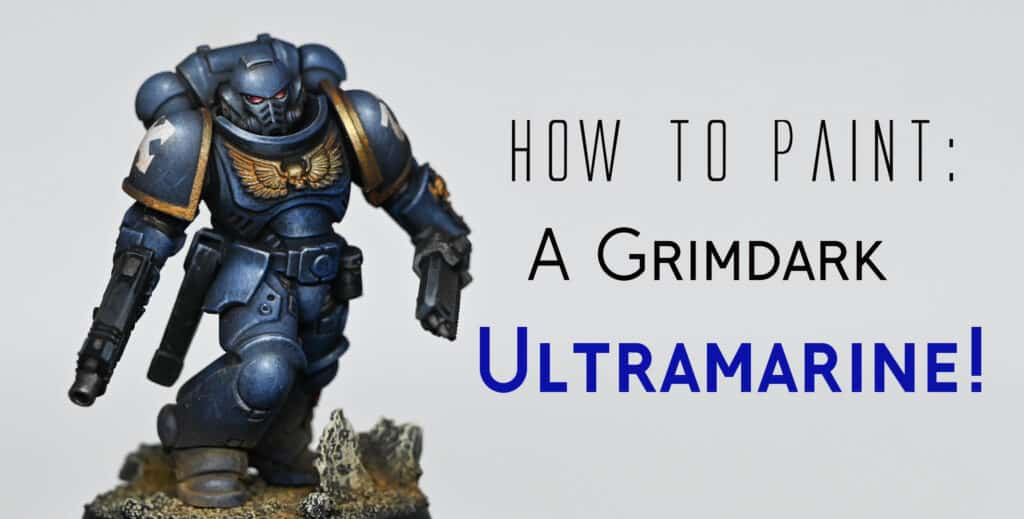
This free video shows how to paint a Warmaster Iconoclast Titan for the Legio Astorum (Warp Runners) from the Adeptus Titanicus game. The following paints were used: Games Workshop: Night Lords Blue, Calgar Blue, Mephiston Red, Balor Brown, Hashut Copper, Yriel YellowVallejo: Dark Sea Grey, White, Metal Colour Burnt Iron, Metal Colour Gold, Metal Colour Chrome, Mecha Gloss VarnishScale 75: Necro GoldAmmo: Ultra-Matt Lucky VarnishWinsor and Newton: Sansodor mineral spirit, oil colour Black, oil colour Burnt Sienna Badger: Ultimate Primer Black Steps to Follow on How to Paint a Warmaster Iconoclast Titan Preparing the Model Build the Model: Assemble your Warmaster Iconoclast Titan, leaving off the armour plates for separate painting. This allows easier access to the skeleton for painting in metallic colours. Painting the Skeleton Base Coat in Metallic: Start with Vallejo Metal Colour Burnt Iron applied with a large soft brush or a dry brush for a smooth metallic base on the skeleton. Detailing with Copper: Use Games Workshop Hashut Copper for the hips and other details, applying multiple coats as necessary for even coverage. Thin with water if the paint is too thick. Verdigris Effect: Mix oil paints on cardboard to create a light green verdigris colour. Stipple this onto the copper parts with an old brush, focusing on crevices and rivets. Thin with white spirit for a more natural effect. Weathering the Metal Oil Wash: Create an oil wash with black and burnt sienna oil paints thinned with mineral spirits. Apply over the entire metal skeleton, excluding verdigris areas, to add depth and an oily finish. Highlighting: Highlight edges and raised details with Vallejo Metal Colour Chrome for a sharp contrast. Painting the Armour Panels Base Coat in Blue: Airbrush the panels with Games Workshop Night Lords Blue, followed by highlights with Calgar Blue focusing on upper sections and curves. Detailing Stripes and Flames: For striped areas, use Tamiya masking tape and Vallejo Dark Sea Grey. For flames, start with Balor Brown as a base, building up to lighter tones and finally white for the hottest parts. Applying Decals: Use Forge World or Games Workshop decals for additional detailing, sealing them with Microset or Microsol. I’ve put a link to another free video on how to do that, below! Final Weathering: Apply oil washes for weathering effects, focusing on creating streaks and grime accumulation that fits with the battlefield-worn look. How to Apply Forge World Decals and Weather Them A beginners guide on how to apply Forge World decals and weather them so they look a natural part of the painting on your model. Painting and applying decals to your models adds significant details and realism, making it stand out during tabletop gaming. It’s also a lot easier than freehand! I still use decals a lot in my models, despite also enjoying freehand work. Watch and Read Now Finishing Touches Painting Trim and Details: Use Scale 75 Necro Gold for gold trim, applying carefully around edges and details. For a brighter highlight, apply Vallejo Metal Colour Gold. Matte Varnish: Seal the entire model with an ultra-matte varnish to tie together the different finishes and protect the paintwork. Optional Ribbon Streamers: Create custom ribbon streamers from plastic card, painted and detailed to match the Titan’s colour scheme, adding dynamism and a personalised touch to your model. Additional Tips Always thin your paints to ensure smooth application and avoid obscuring fine details. When working with oil paints for weathering, allow ample drying time between layers to prevent smudging. Use a hairdryer to speed up drying times cautiously, avoiding too much heat on plastic parts. Experiment with lighting and colour modulation on the armour panels for a dynamic appearance. If you don’t have an account, please sign up here! The website currently has over 350 video tutorials with steps and tips, plus a selection of PDFs. If you are not sure about joining, you can explore my free videos with a free membership, or take the plunge and become a full subscriber for full access. If you’d prefer to support me on Patreon, please visit: https://www.patreon.com/RichardGray [...]
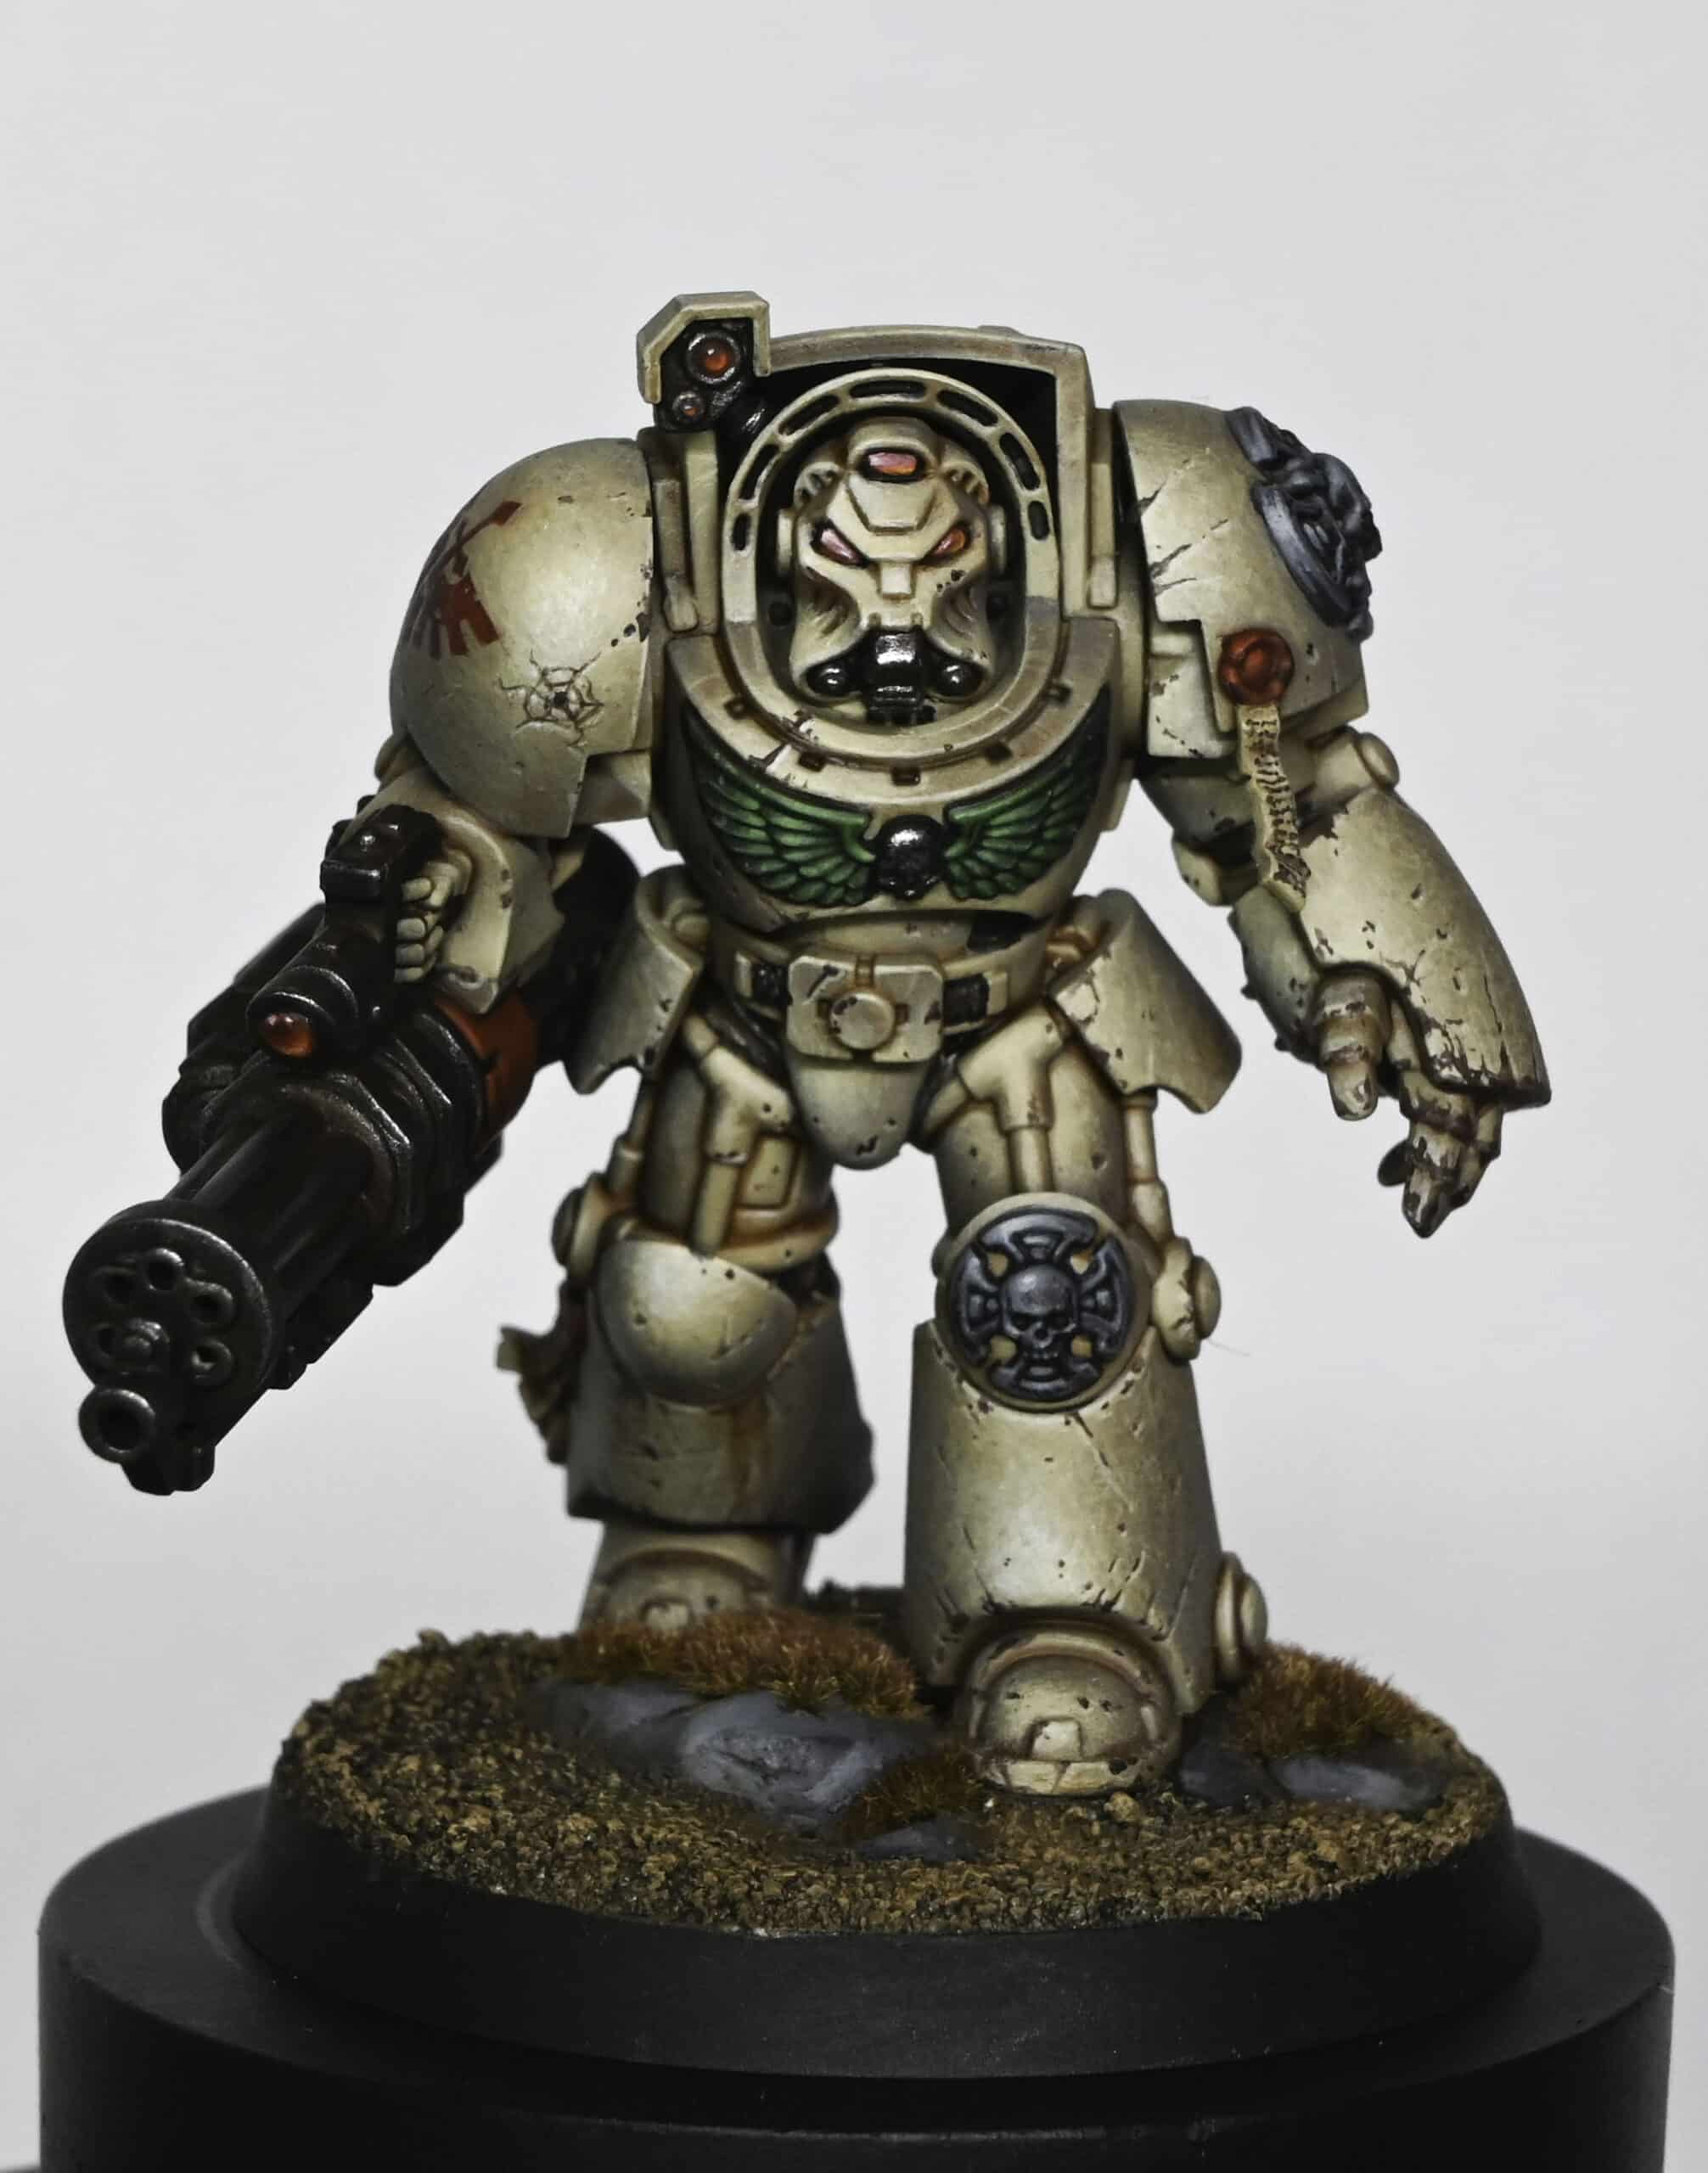
This video looks at how to paint a Deathwing Terminator from the new Leviathan boxed set, which Games Workshop sent to me as an early review copy. Video – How to Paint a Deathwing Terminator The following paints were used Games Workshop: Black Templar (Contrast), Darkoath Flesh (Contrast), Contrast Medium, XV-88, Morghast Bone, Ushabti Bone, Screaming Skull, Mephiston Red, Evil Sunz Scarlet, Wild Rider Red, Yriel Yellow Vallejo: Game Colour Dark Green, Neutral Grey, German Grey, Black, Gunmetal Grey (Metallic), Chrome (Metallic) P3: Morrow White Step by Step Guide Preparation and Priming: Assemble the Deathwing Terminator, modifying as desired (e.g., swapping weapons). Prime the model in black. Base Coat and Airbrush Highlighting: Apply a base coat of XV-88. Highlight with Morghast Bone using an airbrush, focusing on natural light areas. Applying Contrast Paint: Mix Darkoath Flesh with Contrast Medium and cover the Deathwing Terminator, emphasising recesses over large, smooth areas. Highlighting and Texturing: Hand apply highlights and textures using Ushabti Bone and Screaming Skull, targeting brighter airbrushed areas. Detailing with Black Paint: Paint areas destined for other colours (metal, red, green) with Black Templar Contrast or thinned black paint. Metallic Parts: Apply Vallejo Gunmetal Grey to metal parts. Use Agrax Earthshade for a matte effect. Add highlights with Chrome. Red Areas (Eyes, Lenses, Purity Seals): Base with Mephiston Red mixed with a small amount of black. Progressively highlight with Mephiston Red, Evil Sunz Scarlet, and Wild Rider Red. Green Areas (Chest Eagle): Base in Vallejo Game Colour Dark Green. Add highlights by progressively mixing in white. Bone Armour Texturing and Detailing: Further texture and scratch effects using Morghast Bone, Ushabti Bone, and Screaming Skull. Mix Morghast Bone with a bit of Mournfang Brown for shadows. Chest Eagle and Purity Seal Text: Use fine brushwork for text effects on purity seals with black paint. Final Highlights and Details: Apply final highlights with Screaming Skull or white, focusing on areas for maximum contrast. Blend and soften with Neutral Grey glazing. Basing: Base the Deathwing Terminator as preferred, employing sand texturing, painting rocks in German Grey and Neutral Grey, and adding grass tufts. Finishing Touches: Add chips and scratches across the armour with Rhinox Hide and Screaming Skull. Enhance details and edge highlights to complete your Deathwing Terminator! Show it off! As you progress, feel free to adapt and tweak techniques to suit your style. Good luck! When you’ve finished, why not pop into our Discord and show it off to other website members? 🙂 More Free Video Tutorials Free videos for logged in members – just sign up as a ‘friend’ to view and click any of the thumbs.To explore all of these, visit this page! If you don’t have an account, please sign up here! The website currently has over 350 video tutorials, plus step by step guides and PDFs. You can explore more free videos with a free “freebies” membership, or take the plunge and become a full subscriber for full access. If you’d prefer to support me on Patreon, please visit: https://www.patreon.com/RichardGray [...]
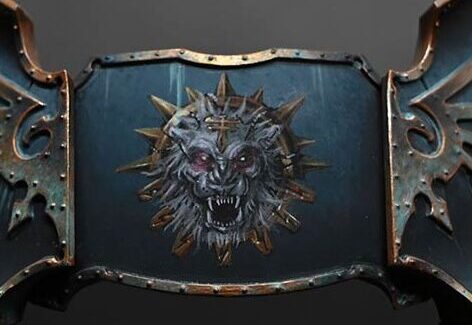
This video looks at how to paint the Ork special character, Snikrot, which Games Workshop sent to me as an early review copy.The model is painted to a high tabletop standard and Contrast paints are used heavily. Quick Jump to: Video Tutorial – How to Paint Snikrot the Ork!Steps and TipsPriming and HighlightingApplying Contrast PaintPainting DetailsNon-Metallic Metal (NMM) TechniqueSkin HighlightsLeather and StrapsFinal Touches on Metallic AreasLenses and EyesVideo Tutorial – (Richard Version)More Free Video Tutorials Video Tutorial – How to Paint Snikrot the Ork! The following paints were used: Games Workshop Contrast: Black Legion, Mantis Warriors Green, Aggaros Dunes, Skeleton Horde, Garaghak’s Sewer Vallejo Game Colour (New): White Ink, Mecha Matt Varnish, Neutral Grey, Black, Desert Yellow, Bile Green, Grunge Brown, Dead Flesh, Turquoise, Aquamarine, Dead White, Airbrush Thinner Steps and Tips Priming and Highlighting Prime the model.Apply white ink using an airbrush, thinned with Vallejo airbrush thinner, focusing on the face and chest for natural light effects. Applying Contrast Paint Start with Mantis Warriors Green for the skin. Use a large brush for efficient coverage, allowing the paint to settle in the recesses.For trousers, use Aggaros Dunes, a dark brown contrast paint.Apply another brown contrast paint for the leather areas.Paint all metal areas with Black Legion contrast paint, without worrying about neatness as black will cover any overlapping paint.For bone areas, use Skeleton Horde. Painting Details Paint teeth and tongue with Skeleton Horde, and use a pink colour for the tongue.Apply a coat of matte varnish (Mecha Matt Varnish by Vallejo) to reduce the sheen from the contrast paints. Non-Metallic Metal (NMM) Technique Start with Vallejo Game Colour Neutral Grey for the metallic areas.Create a palette with Neutral Grey, mixed with white and black, and use Dead White for the brightest highlights. Skin Highlights Mix Bile Green with white for brighter skin highlights. Focus on the areas where natural light wouldhit, such as the tops of muscles and face. Leather and Straps For additional texture and highlights on leather, use Grunge Brown.Apply Desert Yellow for final highlights on leather, following the sculpted creases and stress points. Final Touches on Metallic Areas Enhance the metal parts with additional Grunge Brown, focusing on recesses and flat surfaces for a grimy look.Use Dead Flesh for final highlights on metallic areas, achieving a high contrast non-metallic metal effect. Lenses and Eyes Paint the lenses starting with Turquoise, followed by Aquamarine for the first highlight.Add a small dot of Dead White at the bottom for a reflective effect.Throughout the process, remember to let each layer dry before applying the next. Video Tutorial – (Richard Version) Yep – it was an April Fools! 😀 This was my wife and she wanted to have some fun doing a voice over.She has her own channel here, if you’d like to check out more of her Warhammer New Release unboxings and voice overs, or you can explore them below. More Free Video Tutorials Free videos for logged in members – just sign up as a ‘friend’ to view and click any of the thumbs.To explore all of these, visit this page! If you don’t have an account, please sign up here! The website currently has over 350 video tutorials, plus step by step guides and PDFs. You can explore more free videos with a free “”friend” membership, or take the plunge and become a full subscriber for full access. If you’d prefer to support me on Patreon, please visit: https://www.patreon.com/RichardGray [...]
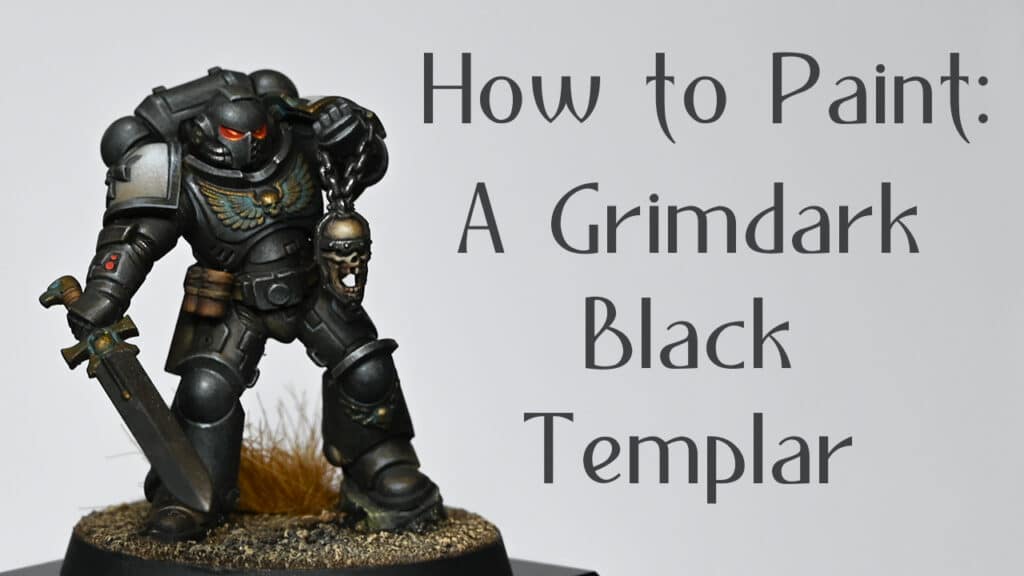
Welcome to this detailed guide on how to paint the Legio Sinister freehand symbol for a Warlord Titan. I will be using various Games Workshop and Vallejo paints to achieve a polished and striking look. This guide is suitable for intermediate to advanced hobbyists due to the precision required in freehand painting. Video – Legio Sinister FreehandPaints UsedSteps and Tips for the Legio Sinister FreehandStep By Step Image GuideMore Freehand Tutorials on the WebsiteFree Video Tutorials Video – Legio Sinister Freehand All videos are recorded in HD 720p or higher – use full screen for the full effect and let the video load completely. Paints Used Vallejo Model Colour Black Games Workshop Paints: Mechanicus Standard Grey, Slaanesh Grey, Grey Seer, Mephiston Red, Mournfang Brown, XV-88, Dorn Yellow, Screaming Skull Steps and Tips for the Legio Sinister Freehand Mapping Out the Position: Begin by using Vallejo Model Colour Black to roughly outline where the symbol will be placed. Start with a small circle at the centre, gradually expanding outwards. Include a line at the top of the curve to centralise the image. Refining the Shape: Progressively enlarge the symbol, focusing on refining its shape. Paint an approximate circle with spikes extending outward. Ensure even distribution of the black paint to provide a solid base for subsequent layers. Applying Initial Colours: Commence with Games Workshop’s Mournfang Brown, applying it as a foundation for the non-metallic parts of the symbol. Layer on XV-88 next, followed by Dorn Yellow, with a focus on the top-left for the lighting direction. Remember, moderate use of Dorn Yellow prevents oversaturation. Adding Highlights: Employ Screaming Skull to introduce highlights. Be judicious in this step, concentrating on the top left to evoke a lustrous appearance. The XV-88 should remain the predominant colour for the metallic aspects. Painting the Lion’s Face: Utilise a range of greys (Mechanicus Standard Grey, Slaanesh Grey, Grey Seer) to depict the lion’s face. Start with basic shapes, refining them progressively. Pay special attention to the eyes, nose, and mouth, building depth with shadows and highlights. Detailing with Red: Apply a glaze of Mephiston Red for a subtle red glow around the eyes and other facial areas. This step enhances the lion’s fierce visage. Adding Fur Details: Use greys to render fur details, commencing with darker shades and progressing to lighter highlights. Focus on creating a three-dimensional effect with varied brushstrokes. Final Details: Paint the Titanicus symbol on the lion’s forehead using black as a base. Layer greys for the non-metallic metal effect, ensuring a thinner central line for a precise appearance. Use Dorn Yellow and Screaming Skull for the highest highlights, ensuring they are well-placed to create a realistic metallic sheen. Refining and Adjusting: As you near completion, revisit areas that require refinement. This may include sharpening edges, deepening shadows, or enhancing highlights. The key is to achieve a balance between contrast and harmony in the symbol’s details. Final Touches: Examine the overall piece for any last-minute adjustments. This might involve intensifying certain colours, smoothing transitions, or adding small details to bring the symbol to life. Ensure the lighting direction is consistent and the symbol stands out against the background. Step By Step Image Guide The team at Warhammer Community approached me for some tips on freehand and I created an article with step by step imagery for the tutorial above – to view it, visit: Tips on Freehand – Step-By-Step Image Guide : Adeptus Titanicus More Freehand Tutorials on the Website Free Video Tutorials Free videos for logged in members – just sign up as a ‘friend’ to view and click any of the thumbs. If you don’t have an account, please sign up here! The website currently has over 350 video tutorials, plus step by step guides and PDFs. You can explore more free videos with a free “friend” membership, or take the plunge and become a full subscriber for full access. If you’d prefer to support me on Patreon, please visit: https://www.patreon.com/RichardGray [...]
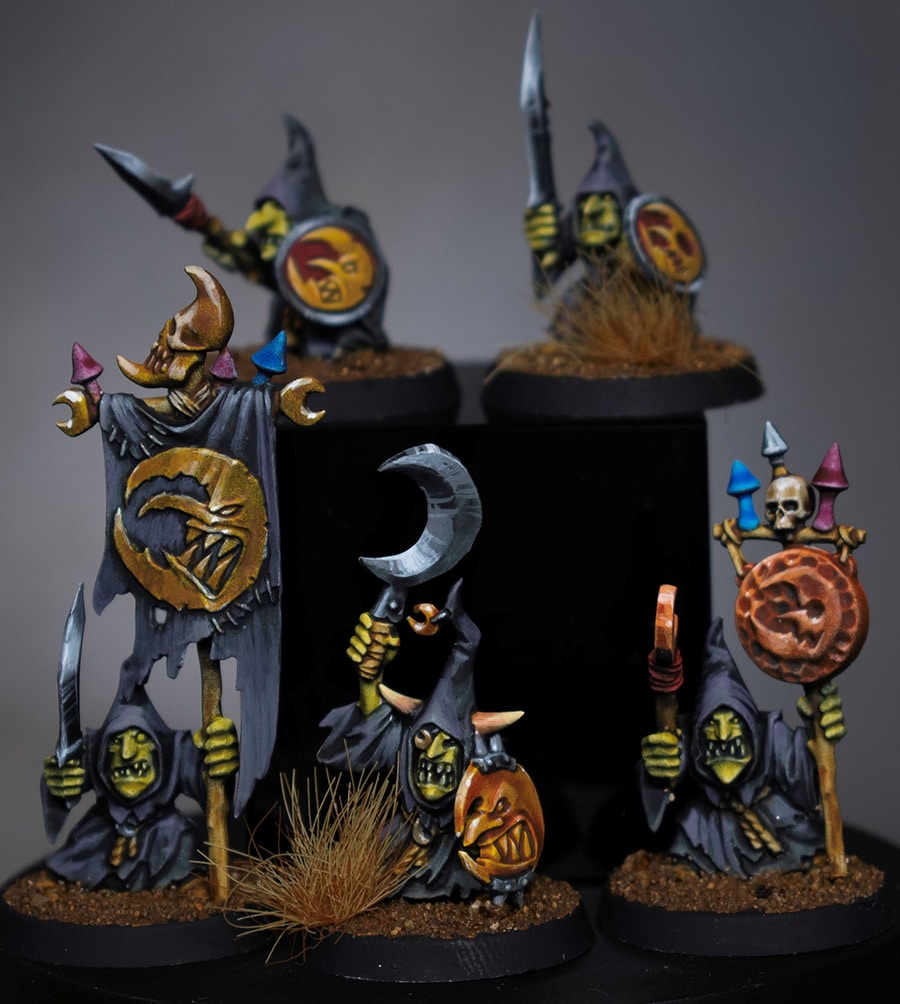
This video shows the whole process of how to paint a Grimdark Imperial Fist for Warhammer 40,000, plus a step by step text guide. Tool and Paints The following paints were used: Games Workshop: Mephiston Red, Wild Rider Red, Cadian Fleshtone, Ushabti Bone, Yriel Yellow, Sotek Green, Balor Brown, XV-88 Vallejo: Neutral Grey, Ice Yellow, Black, (Metal Colour Magnesium) P3: Morrow White (Any brand of white is fine) Scale 75: Dwarven Gold, Neco Gold Winsor & Newton: Oil Colour: Burnt Sienna, Black, Sansodoor solvent Step by Step Guide : How to Paint a Grimdark Imperial Fist Step 1: Base Coating with XV-88 Start with a model primed in black and assembled (except for head and backpack). Use XV88 paint directly from the pot and scrunch it onto a piece of paper towel. Stipple the paint onto the model with a large brush to cover all armour panels. Stab the marine harshly with the stippling brush to create texture. Don’t worry about getting paint on other parts; focus on covering armour panels thoroughly. Step 2: Adding Baylor Brown Highlights Switch to a smaller brush for precision. Use Balor Brown paint and continue stippling, focusing on areas with prominent curves (shoulder pads, backpack, head). Highlight the model by emphasizing the curves for a top-down lighting effect. Step 3: Airbrushing with Yriel Yellow and Ice Yellow Thin Yriel Yellow paint with airbrush thinner in a wet palette. Apply a thin coat with an airbrush, blending and smoothing the texture. Use Ice Yellow with the airbrush to highlight specific metal areas (gun, joints, recesses). Step 4: Red Trim with Mephiston Red Paint the trim on the marine in red using Mephiston Red paint. Avoid painting directly from the pot; thin the paint with water to achieve the right consistency. Focus on essential highlights rather than painting every edge. Step 5: Final Highlights and Stippling Use worn-out brushes for final highlights, adding details to areas with texture or leftover stippling. Stipple lightly to blend and enhance highlights. Step 6: Weathering with Sotek Green and Verdigris Apply Sotek Green for verdigris weathering on the chest piece. Water down the paint and run it into recesses for a weathered effect. Step 7: Apply Decals and Micro Set Glue the head on to avoid wobbly head issues. Apply decals using Micro Set for adhesion. Skip Micro Sol; Micro Set alone is sufficient for shaping decals. Step 8: Oil Wash with Agrax Earthshade Thin Agrax Earthshade with some Sansodor to create a wash. Apply the wash generously over the model, allowing it to settle in recesses. Wipe off excess if needed. Step 9: Final Touches and Stippling Stipple over highlights again to clean up and enhance contrast. Use Metal Colour Magnesium paint on lower areas (shin, foot) for a dirty, textured effect. Focus on making the knee pad stand out and eliminating unwanted highlights. Step 10: Eyes and Final Details Paint eyes with a mix of Sotek Green and Metal Colour Magnesium for a glowing effect. Add final details as needed, keeping the overall grimy and weathered appearance. Free Video Tutorials More free videos for logged in members – just sign up as a ‘friend’ to view and click any of the thumbs.To explore all of these, visit this page! If you don’t have an account, please sign up here! The website currently has over 350 video tutorials, plus step by step guides and PDFs. You can explore more free videos with a free “freebies” membership, or take the plunge and become a full subscriber for full access. If you’d prefer to support me on Patreon, please visit: https://www.patreon.com/RichardGray [...]
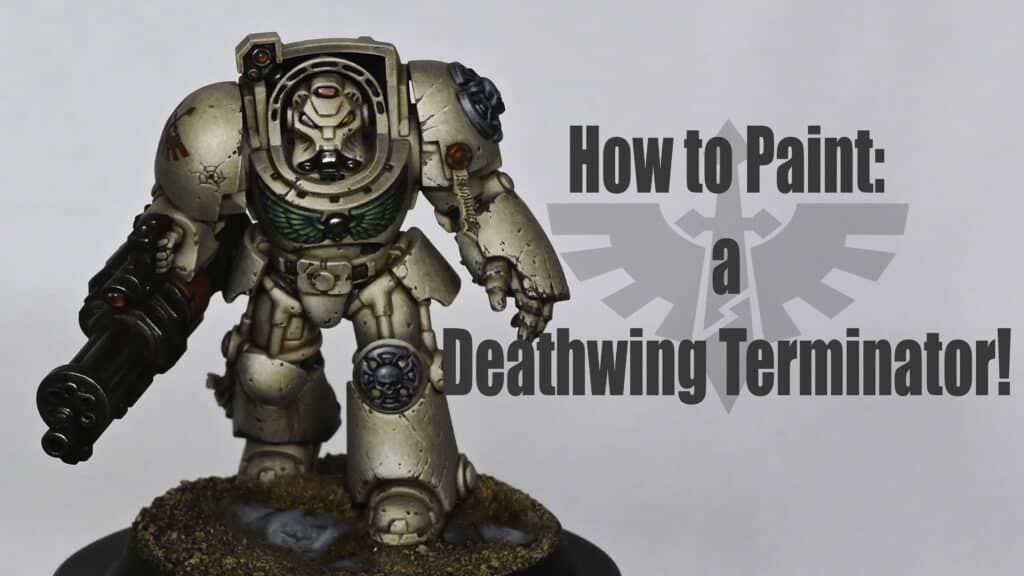
This video tutorial looks at how to paint Imperial Fists with Contrast Paints, using a couple of the new Contrast paints from Games Workshop and specifically using ‘Imperial Fist’ paint! I also go through top techniques and tips you can use on all your Space Marines. Video Tutorial: How to Paint Imperial Fists with Contrast Paint All videos are recorded in HD 1080p or higher – use full screen for the full effect and let the video load completely. You can also click the little “cog” and change the speed of the video, if I am going too fast (or slow!). The following paints and materials were used: Games Workshop: Mournfang Brown, Yriel Yellow, Sotek Green, Forge World Weathering Powder Dark Sand, Imperial Fist (Contrast), Garaghak’s Sewer (Contrast), Contrast Medium, Morghast Bone, Screaming Skull Vallejo: German Grey, Neutral Grey, Black Vallejo: Mecha Varnish Gloss, Mecha Varnish Matt, Metal Exhaust Manifold P3: Morrow White (Any White will do) Micro Set BrushesArtis Opus: Series S size 1 and 00, Step by Step Guide – How to Paint Imperial Fists with Contrast Paint Preparing the Base Coat Start with Mournfang Brown as the base coat. This provides a solid foundation and eliminates black elements that might affect the final colour. Apply a thin, even layer to ensure a smooth finish. Creating a Pre-Shade Effect To create a pre-shade effect, mix P3 Morrow White with Mournfang Brown. This technique helps in achieving both highlights and shadows in one go. Avoid taking the pre-shade highlight all the way up to pure white unless you desire a very bright yellow. Applying Imperial Fist Contrast Paint Use the Imperial Fist contrast paint, a bright yellow, over the pre-shaded model. This contrast paint is translucent and needs a light base for optimal results. Apply it evenly, focusing on the model’s raised areas to enhance the pre-shade effect. If the first coat appears too orange, apply a light layer of P3 Morrow White on the desired areas and reapply the contrast paint for a brighter yellow. Enhancing Highlights with White For areas requiring a more vibrant yellow, directly apply P3 Morrow White using an airbrush. This step significantly brightens up the yellow tones, providing a more striking appearance to the model. Adding Depth with Contrast Paints Experiment with Rattling Grime contrast paint for adding depth. If it appears too dark, dilute it with Contrast Medium. Apply it sparingly, especially in recessed areas, to create natural shadows. Applying Matte Varnish Once the contrast paints are dry, apply a coat of Vallejo Mecha Varnish Matt. This helps to dull any unwanted shine and sets the base for further detailing. Glazing with Yriel Yellow Create a glaze by heavily thinning down Yriel Yellow with water. Apply this glaze selectively to the model’s raised areas, building up the colour in thin layers. This process enhances the vibrancy of the yellow and adds more dimension. Detailing with Additional Colours Use Morghast Bone and Screaming Skull for detailing elements like scroll work. These colours contrast well with the yellow and bring out the finer details. For battle damage, use Rhinox Hide or a similar dark colour to create chips and scratches. Highlighting Battle Damage Mix Yriel Yellow with a bit of white (or use Dawn Yellow) for highlighting the lower edges of the battle damage. This creates a more realistic chipped paint effect. Painting the Weapon For the bolter or other weapons, use a combination of German Grey and Neutral Grey from Vallejo. Apply them in a gradient for a realistic metallic effect, and use black to blend and soften transitions. Lenses and Eyes Paint lenses and eyes using Sotek Green, gradually adding white to the mix for successive highlights. Ensure the brightest highlights are off-centre for a natural glow effect. Finishing Touches Finally, apply Forge World Weathering Powder Dark Sand to the base and lower parts of the legs for a gritty, battle-worn look. Seal with a matte varnish to fix the powder in place. More Contrast Paint Tutorial and Projects If you don’t have an account, please sign up here! The website currently has over 350 video tutorials with steps and tips, plus a selection of PDFs. If you are not sure about joining, you can explore my free videos with a free membership, or take the plunge and become a full subscriber for full access. If you’d prefer to support me on Patreon, please visit: https://www.patreon.com/RichardGray [...]
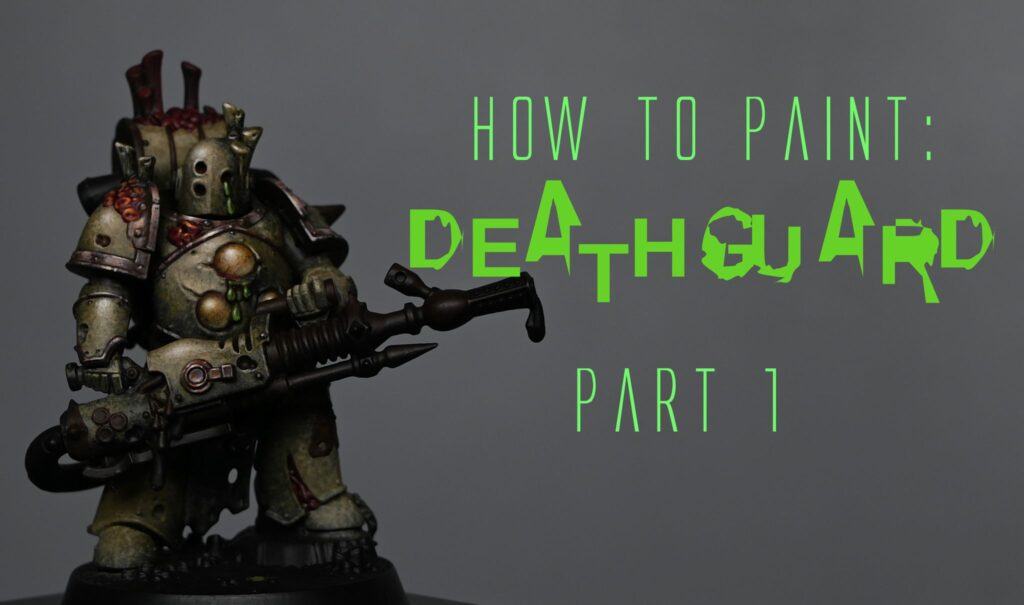
This video looks at how to paint the head of the Tomb Kings Bone Dragon. The video looks at the textured bone, how to add colour and interest and then how to add verdigris and NMM to the bronze trim. Video – How to Paint the Tomb Kings Bone Dragon Head Paints and Materials Used on the Tomb Kings Bone Dragon Paints: Games Workshop Paints: Mournfang Brown, XV-88, Morghast Bone, Screaming Skull, Skavenblight Dinge, (Skeleton Horde Contrast optional) Kimera Colours: Fallen Grass (Sybarite Green as an alternative) Two Thin Coats: Dark Sun (Balor Brown alternative) Brushes and Tools: Artis Opus Small Dry Brush: Used for stippling the base coat and first highlights. Size 2 Brush (Old): Ideal for glazing with Scavenblight Dinge and applying the verdigris effect on metallic elements. An older brush is recommended as the techniques used can be rough on the bristles. Size Z00 Brush: Used for finer detail work, such as adding texture to the verdigris effect. However, a larger brush may be more efficient for larger areas. Size 1 Brush: Recommended for applying non-metallic metal highlights. An older brush is suitable as long as it maintains a good point. Wet Palette: Handy for keeping your paint mixes workable and blending colours. Kitchen Roll: For dabbing off excess paint and ensuring the right consistency on the brush. Water Pot: For thinning paints and cleaning brushes. Step-by-Step Guide to Painting the Tomb Kings Bone Dragon Step 1: Base Coat Create a mix of Mournfang Brown and XV-88 in approximately a 50/50 ratio. The exact mix isn’t crucial, but aim for a reddish-brown shade. Thin this mixture with water (about two parts water to one part paint). Using an Artist Opus small dry brush, apply this mixture to the dragon head using a stippling method. Ensure the brush is damp, not wet, to avoid a dusty look. Cover the entire surface, allowing the small dots of paint to create texture. This might require two to three layers for opaque coverage. Step 2: First Highlight Switch to Morghast Bone for the next layer of highlight. Again, thin the paint (similar ratio as before) and dab off excess paint on kitchen roll before applying. Stipple Morghast Bone more selectively, focusing on creating a transition from darker to lighter areas. Pay special attention to the metal crests and teeth-like protrusions, ensuring they are light enough for later glazing. Step 3: Final Highlight Move on to Screaming Skull for the highest highlights. Apply this colour even more sparingly and delicately, focusing on the most raised areas and textures. Remember, this is not dry brushing. Dab the brush straight onto the model to create the desired texture. Step 4: Painting the Teeth Start with the base colours used for the bone and apply them with a normal brush for a smoother finish. For the top teeth, paint from the bottom upwards. This creates a shiny effect, with the brightest part of the tooth at the top. Use Screaming Skull for the very top section of the teeth to enhance the shiny look. Step 5: Softening Textures Use Scavenblight Dinge to soften the texture on the skull. Thin the paint significantly (about three to four parts water to one part paint). Apply with a large brush, focusing on midtones to shadows to enhance depth and contrast. Step 6: Glazing and Highlighting Return to the mixture of XV-88 and Mournfang Brown, now very watered down. Glaze around the teeth and other areas to add warmth and contrast, separating different elements like teeth from the skull. Step 7: Additional Details and Glazing Use Morghast Bone and Screaming Skull to pick out details, focusing on areas like the eye sockets and brow for added focus. For the bone spikes, start glazing with Rhinox Hide, thinned down. Progress from Rhinox Hide to a black colour (like Vallejo Model Color Black), applying from halfway down the bone spike towards the tip, creating a dark gradient. Step 8: Metallic Elements Base the metal parts with Mournfang Brown. Apply a wash of Fallen Grass, heavily watered down (five parts water to one part paint), focusing on recesses. Follow up with black lining for added definition, using watered-down black paint. Step 9: Non-Metallic Metal Highlights Create a palette with Mournfang Brown, a 50/50 mix of Mournfang Brown and Dark Sun, Dark Sun, Dark Sun mixed with white, and pure white. Start with the darker mixes and progressively highlight with lighter mixes, focusing on edges and areas where wear would naturally occur. Add finer highlights and scratches with the lightest mixtures. Step 10: Finishing Touches Revisit areas with Scavenblight Dinge for further softening and definition. Optionally, add warmth with a glaze of Mournfang Brown and XV-88, or Skeleton Horde Contrast for subtlety. Explore more Old World and Bone Tutorials! If you don’t have an account, please sign up here! The website currently has over 350 video tutorials with steps and tips, plus a selection of PDFs. If you are not sure about joining, you can explore my free videos with a free membership, or take the plunge and become a full subscriber for full access. If you’d prefer to support me on Patreon, please visit: https://www.patreon.com/RichardGray [...]
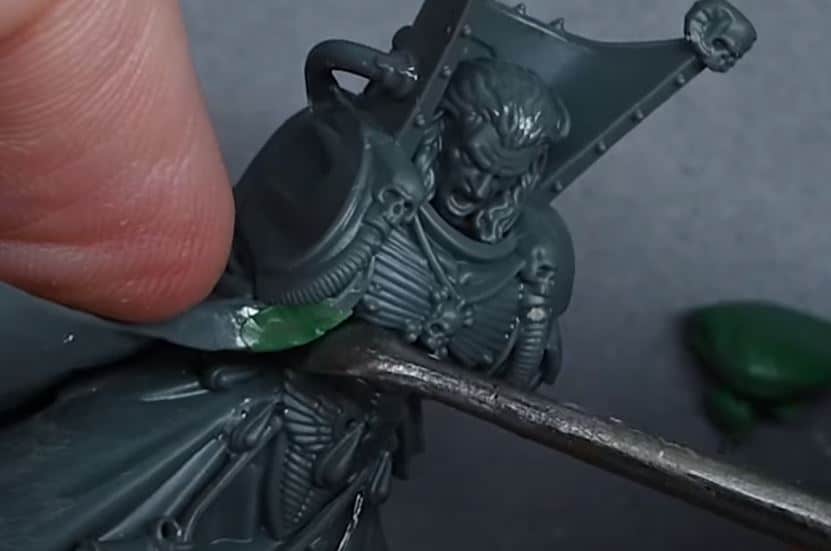
This video shows how to paint some tanks for the Solar Auxilia faction of Legions Imperialis. Plus, I’ve included a little step-by-step guide underneath on the key points of the video! The following paints were used: Games Workshop: Agrax Earthshade, Skeleton Horde Contrast, Sotek Green, Moot Green, Evil Sunz Scarlet, Rhinox HideVallejo: Neutral Grey, Black, Metal Colour Exhaust Manifold, Metal Colour Copper P3: Morrow White Winsor and Newton: Burnt Sienna (series 1 oil paint), Black, Sansodoor mineral spirit For melting decals onto models : Micro Set Step-by-Step Guide: Prepare the Base Coat:Use an airbrush for efficiency in batch painting for your large Legions Imperialis faction.Mix Vallejo Neutral Gray with airbrush thinner (30 PSI, 50/50 ratio with thinner).Apply the base coat evenly to the entire tank. Consider using gray primer for a quicker and better result.Layering for Opaque Finish:Apply two or three layers of paint, especially for lighter colours like Pale Blue Gray Blue and Morrow White.Account for the drying effect, as colours may appear brighter when wet and darker when dry.Ensure a smooth and opaque finish by layering. Weathering Techniques:Stipple Rhinox Hide for additional details, using a foam piece held by tweezers.Apply weathering heavily to achieve a worn and battle-hardened look.Consider the impact areas for realistic weathering, such as edges and front sections. Adding Red Markings:Use Evil Suns Scarlet for red markings.Differentiate leader tanks by adding a red turret.Apply the red markings consistently across Legions Imperialis tanks for uniformity. Metallic and Lens Details:Use Exhaust Manifold by Vallejo for metallic parts.Apply Agrax Earthshade for a wash over the metallic sections.Paint lenses black and highlight with a mix of black and white in three stages. Final Touches:Add decals before applying any oil wash to blend them with the weathering.Consider adding additional details like hazard stripes or cables for higher-level detailing.Apply a final matte varnish or Games Workshop fixative to set the weathering powder and prevent rubbing off. Optional Colour Variations:Experiment with different colours based on personal preferences.Lighter colours with heavy weathering can enhance contrast and visibility in smaller scale models.Customise the Legions Imperialis tanks according to your gaming preferences. Final Assessment and Variations:Assess the overall look of the Legions Imperialis tank for any additional highlighting or weathering needed.Consider variations in colours and markings for a diverse tank fleet.Keep in mind that the level of detail can be adjusted based on personal preferences and the purpose of the painted tanks (e.g., gaming).! More videos! Click on the thumbnails below to explore more Legions Imperialis videos, or visit the All Videos page to browse all of my latest tutorials! If you don’t have an account, please sign up here! The website currently has over 350 video tutorials with steps and tips, plus a selection of PDFs. If you are not sure about joining, you can explore more of my free videos with a free “freebies” membership, or take the plunge and become a full subscriber for full access. If you’d prefer to support me on Patreon, please visit: https://www.patreon.com/RichardGray [...]
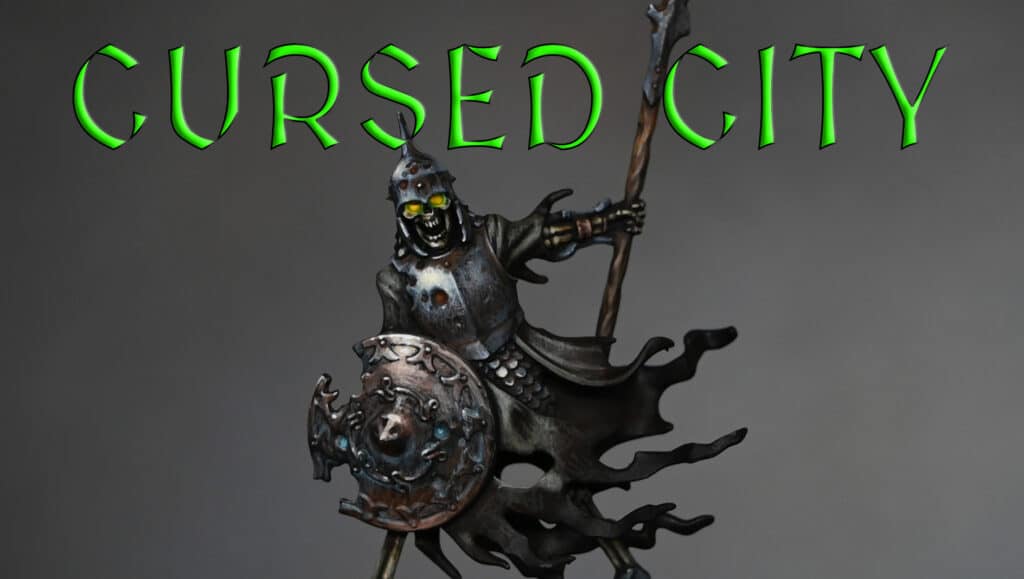
In this guide you will be shown how to paint Rogal Dorn’s armour in NMM (non-metallic metal) gold. This is a higher level technique, suitable for the mighty Primarch of the Imperial Fists! Paints and Materials Games Workshop: Rhinox Hide, Mournfang Brown, XV-88, Balor BrownP3: Morrow White (Any White will do) BrushesArtis Opus: Series S size 1 and 00, Small Drybrush Step-by-Step Guide Want more? Download the detailed PDF guide! If you’ve enjoyed the video and want to take your painting to the next level, don’t forget to download the accompanying PDF guide. This extra resource provides step-by-step instructions, close-up insights, and useful tips to help you perfect the Non-Metallic Metal (NMM) gold technique on Rogal Dorn’s armour. Whether you’re watching the video or painting at your own pace, the guide is here to ensure you achieve the best results. Download the PDF Guide and master the art of NMM gold! Read Now More Free Video Tutorials Free videos for logged in members – just sign up as a ‘friend’ to view and click any of the thumbs.To explore all of these, visit this page! If you don’t have an account, please sign up here! The website currently has over 350 video tutorials, plus step by step guides and PDFs. You can explore more free videos with a free membership, or take the plunge and become a full subscriber for full access. If you’d prefer to support me on Patreon, please visit: https://www.patreon.com/RichardGray [...]
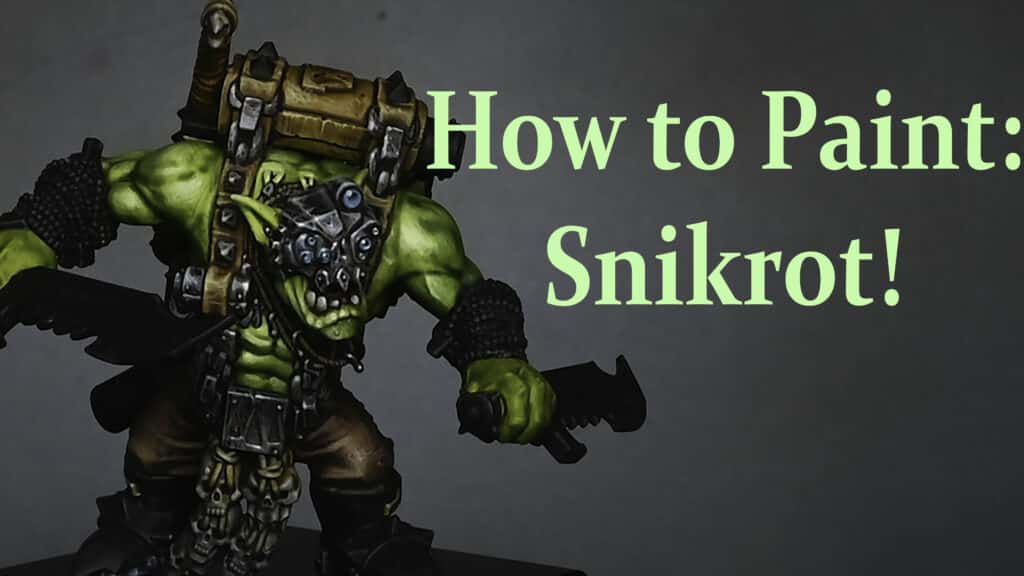
In this free video you will be shown how to paint a Night Lords Praetor in terminator armour, from the Horus Heresy (make sure you are logged in to view!) All videos are recorded in HD 1080p or higher – use full screen for the full effect and let the video load completely. You can also click the little “cog” and change the speed of the video, if I am going too fast (or slow!). The following paints were used: Games Workshop: Night Lords Blue, Kantor Blue, Macragge Blue, Calgar Blue (optional), Mephiston Red, Evil Sunz Scarlet, Wild Rider Red, Firedragon Bright, Baneblade Brown, Cadian Fleshtone, Balor Brown, Mournfang Brown, Morghast Bone, Screaming Skull, Forge World Weathering Powder Dark Sand. Windsor and Newton oil paints: Burnt Siena, Black, Sansodor mineral spiritVallejo: Mecha Varnish Gloss, Mecha Varnish Matt, Metal Colour Burnt Iron Scale 75: Elven Gold (optional)P3: Morrow White (Any White will do)BrushesArtis Opus: Series S size 1 and 00, Small Drybrush Step by Step : How to paint a Night Lords Praetor Painting Steps: Priming and Assembly: Assemble your model fully and prime it in black. In this case, the head is already glued in, making it slightly more challenging to paint. Base Layering: Start with Night Lords Blue, diluted roughly 50:50 with water. Use a small dry brush or makeup brush to stipple the paint onto the model, ensuring to get into all the recesses. Progressive Highlights: Apply subsequent layers of Kantor Blue, then Macragge Blue. With each layer, be less vigorous and focus more on areas where light naturally hits. Detailing with a Small Brush: For hard-to-reach areas like the chest, use a small brush to apply highlights. Final Highlighting: If desired, add a final stage of highlighting with Calgar Blue, although its translucency can be less satisfying. A mix of Macragge Blue and white can be more effective. Blocking in Other Colours: Apply base colours for other parts of the model, such as Mephiston Red for red areas, Baneblade Brown for leather straps, and Balor Brown for skulls and bones. Metallics and Golds: Paint metallic areas with Vallejo Metal Colour Burnt Iron and golden areas with Scale 75 Elven Gold. Gloss Varnish and Oil Wash: Once all base colors are blocked in, apply Vallejo Mecha Gloss Varnish. Follow this with a mix of Burnt Sienna and Black oil paint thinned with mineral spirits. Apply it liberally over the model and then remove excess with a clean brush dipped in mineral spirits. Matte Varnish: After the oil wash has dried, apply Vallejo Mecha Matt Varnish to prepare the model for further acrylic painting. Refining Highlights: Revisit areas with acrylic highlights, enhancing details and cleaning up where necessary. Lightning Effect: Use a mix of Macragge Blue and white, then pure white, to paint lightning effects on armor panels. Finishing Touches: Add final details to the model such as eye lenses, further skull highlighting, and final metallic edge highlights. Base Detailing: For the base, use Forge World Weathering Powder Dark Sand over glued sand for a realistic texture. Additional Tips on how to paint a Night Lords Praetor: Keep the paint consistency thin to avoid losing details. Use stippling and careful brushwork to create texture and depth. Be patient with the oil wash and varnish steps, as they significantly enhance the final look. Experiment with the lightning effect to create dynamic visual interest on the armor. Free Video Tutorials Free videos (for logged in members – just sign up as a ‘friend’ to view and click any of the thumbs.To explore all of these, visit this page! If you don’t have an account, please sign up here! The website currently has over 350 video tutorials, plus step by step guides and PDFs. You can explore more free videos with a free “freebies” membership, or take the plunge and become a full subscriber for full access. If you’d prefer to support me on Patreon, please visit: https://www.patreon.com/RichardGray [...]
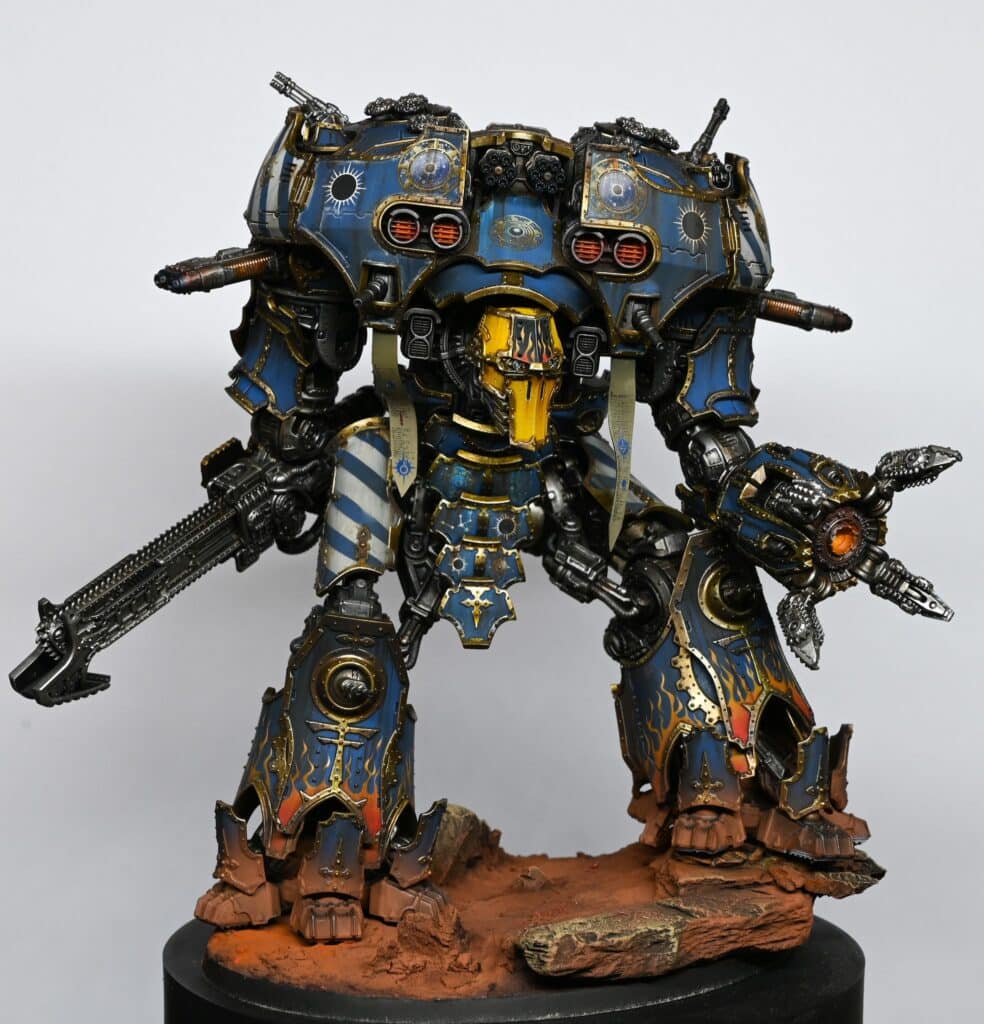
This video takes a look at the distortion on the marines and tries to fix the issue. Legions Imperialis was sent to me by Games Workshop as an early review copy. In this video, I’m tackling a little issue with the Legions Imperialis Marines from the latest game. These guys are small, about 9 millimeters tall and they’ve got some quirks… So, in this tutorial, I’m walking you through how I clean them up. I grab a trusty scalpel, trim off the excess plastic, and then work some magic with Tamia extra thin glue to make it all smooth and polished. Steps to Fix the Legions Imperialis Step 1: Identify IssuesStart by examining the Legions Imperialis Marines for any deformities or excess plastic.Note specific areas that need attention, such as the back of the gun, gaps between limbs, or any other noticeable imperfections.Step 2: Gather MaterialsObtain a scalpel, ensuring it is sharp for precision.Prepare Tamiya extra thin glue or a similar product for smoothing and blending the cut areas.Have your choice of paints ready for later stages.Step 3: Cut Excess PlasticCarefully use the scalpel to cut away excess plastic, following the natural lines of the model.Focus on areas where the deformities are most prominent, like the back of the gun or gaps between limbs.Be careful, as the models are small, and small, deliberate movements are essential.Step 4: Clean Up the CutsUse the scalpel to clean up the cut areas, creating a neat and smooth finish.Don’t worry too much about perfect precision, as the Tamiya glue will help blend and soften the edges later.Step 5: Address Specific IssuesPay extra attention to problematic areas, such as gaps between limbs or any distorted sections.Address these issues with precise cuts and clean-ups to improve the overall appearance.Step 6: Apply Tamiya Extra Thin GlueRun Tamiya extra thin glue over the cut areas to soften and blend the plastic.This step is crucial for achieving a seamless look and hiding any imperfections from the cuts.Step 7: PaintingOnce the glue has dried, proceed with painting the Legions Imperialis Marines! Why not follow one of my tutorials? While this process may seem meticulous, it’s essential to note that the level of detail and effort put into fixing the models is a personal choice. Not everyone may find it necessary, especially for gaming purposes. However, for those who are particular about the appearance of their models, these steps offer a solution to improve the overall look of the Legions Imperialis Marines. Free Video Tutorials Free videos (for logged in members – just sign up as a ‘friend’ to view and click any of the thumbs.To explore all of these, visit this page! If you don’t have an account, please sign up here! The website currently has over 350 video tutorials, plus step by step guides and PDFs. You can explore more free videos with a free “freebies” membership, or take the plunge and become a full subscriber for full access. If you’d prefer to support me on Patreon, please visit: https://www.patreon.com/RichardGray [...]
Here is a kit review for the New Trugg the Troggoth King from the Gloomspite Gitz army. I also show how to fill in gaps in the plastic using Sprue Glue. Tools Used on Trugg the Troggoth King Sprue glue (made from Tamia extra thin glue and waste sprue) Tamiya extra thin glue Tamiya sanding pads Modelling putty (optional, mentioned as an alternative to sprue glue for a longer but more detailed process) Sandpaper Step by Step Guide Begin by assembling the model, focusing on its open design to make painting easier.Glue the model together, leaving only the head separate for more detailed painting. Notice join lines, especially on areas like horns, where the gaps are obvious and need attention Prepare sprue glue by cutting waste sprue from a plastic kit.Place the sprue pieces into a container with Tamiya extra thin glue, ensuring the consistency is not too thin. Use the sprue glue to fill join lines by blobbing it onto the gaps.Ensure the sprue glue is thick enough, containing sufficient plastic material. After applying sprue glue, use Tamiya extra thin glue to blend and smooth the surface.Work the extra thin glue to create a seamless transition, eliminating hard, bumpy edges. Cut off excess sprue glue after it has been applied and blended.Allow the model to dry overnight for the sprue glue to set completely.If desired, go back and sand over the top for a smoother finish.Use Tamiya sanding pads or similar tools for flexibility, especially on organic shapes Prime the model after gap-filling to see how well the join lines have vanished.Note any minor indentations, which can be painted over as part of the organic shape. If there are concerns with the sculpting of rock parts or moss details, sneakily mask them by adding additional textures using materials like sand or other textured elements. More Assembly Tutorials Lots More Tutorials! Free Video Tutorials Free videos for logged in members – just sign up as a ‘friend’ to view and click any of the thumbs.To explore all of these, visit this page! If you don’t have an account, please sign up here! The website currently has over 350 video tutorials, plus step by step guides and PDFs. You can explore more free videos with a free “freebies” membership, or take the plunge and become a full subscriber for full access. If you’d prefer to support me on Patreon, please visit: https://www.patreon.com/RichardGray [...]
Two videos on how I painted this Rockgut Troggoth quickly using Contrast Paints, with step by step guides to the methods I used with which paints. Read on and good luck! Video One – How to Paint a Troggoth in Contrast PaintsPaints and Materials NeededStep by Step GuideVideo Two – How to Paint a Troggoth in Contrast PaintsMaterials and Paints:StepsShow it off!More Free Video Tutorials Video One – How to Paint a Troggoth in Contrast Paints All videos are recorded in HD 1080p or higher – use full screen for the full effect and let the video load completely. Paints and Materials Needed Black Primer Wraithbone (Games Workshop) Contrast Paints (Magos Purple, Skeleton Horde, Wyldwood, Aethermatic Blue, Black Templar – all from Games Workshop) P3 Morrow White (or any alternative white paint) Fine Brushes Airbrush (optional) Wet Palette Step by Step Guide Base Coating with Contrast Paints: After priming your Rockgut Troggoth with black and then applying a zenithal highlight of Wraithbone (using an airbrush or rattle-can), start applying contrast paints. Focus on using Magos Purple for the skin, being generous with the paint to ensure proper flow and coverage. Handling Overpainting and Pooling: If you accidentally overpaint or encounter pooling, use a clean brush to soak up the excess. Remember, contrast paints are designed to settle in recesses, so a heavier application is acceptable. Painting Other Elements: Use different contrast paints for various parts of the model. Apply Skeleton Horde for the teeth, toenails, and wrappings, and Wildwood for the hammer’s handle. The nature of contrast paints means they will flow into crevices and recesses, creating natural shadows. Applying Contrast to the Rocky Skin: For the rocky skin and other stone-like textures, use Aethermatic Blue. The contrast paints will naturally create a depth effect, with darker areas in recesses and brighter highlights on raised surfaces. Utilising Black Templar for Darker Areas: Apply Black Templar contrast paint for the rock elements and the loincloth. This step will provide a solid base and emphasise the darker regions of the Troggoth. Review and Adjust: Once all the contrast paints are applied, review your model. The use of different contrast paints should have already created a variety of tones and shades on the model. If necessary, touch up any areas where the paint may have pooled excessively or where coverage is uneven. Enhancing Highlights on the Skin: To enhance the skin, mix some P3 Morrow White with Magos Purple to create a light purple hue. Apply this mixture to the skin’s raised areas, following the zenithal highlights you established earlier. This step will add more depth and dimension to the Troggoth’s skin. Adding Detail to Crystal Skin: For the crystal-like skin, create a mixture of Wraithbone and Aethermatic Blue. Focus on painting the flat, upward-facing surfaces of the crystals to mimic the appearance of hard, reflective edges. Video Two – How to Paint a Troggoth in Contrast Paints Materials and Paints: Games Workshop: Magos Purple (Contrast), Plaguebearer Flesh (Contrast), Slaanesh Grey, Daemonette Hide, Balor Brown, Moot Green, XV-88, Zandri Dust, Ushabti Bone, Naggaroth Night Vallejo: Ice Yellow (or Dorn Yellow) P3: Morrow White (or White Scar) Steps Rock-Like Skin Textures: Mix Aethermatic Blue with white for a greeny-grey shade. Apply to the flat surfaces and edges of the rocky textures. Highlight with pure white (Morrow White/White Scar). Skin Highlights: Use pre-mixed Magos Purple and white for primary skin highlights. Add secondary highlights with Slaanesh Grey and Daemonette Hide, focusing on reflective light areas. Wood Detailing: Apply Balor Brown for the base wood grain on the mallet. Highlight progressively with XV-88 and Zandri Dust. Final highlights with Ushabti Bone. Rock and Wood Texturing: Glaze rock textures with Naggaroth Night to deepen shadows. Lightly glaze wood with Plaguebearer Flesh for a mossy effect. Loincloth and Trinkets: Base the loincloth with XV-88, highlight with Zandri Dust, and then Ushabti Bone. Paint trinkets starting with XV-88, highlight with Balor Brown, then Ice Yellow for brightest points. Final Highlights and Adjustments: Reapply Magos Purple and white mix on skin for final highlights. Highlight rock textures with Morrow White. Apply Moot Green selectively for contrast, especially in shadows. Unify with Naggaroth Night glaze to smooth transitions and deepen shadows. Troggoth Eyes and Claws: Base eyes with Yriel Yellow, add a white dot for the pupil. Claw highlights with Ushabti Bone for depth. Show it off! As you progress, feel free to adapt and tweak techniques to suit your style. Good luck! When you’ve finished, why not pop into our Discord and show it off to other website members? 🙂 More Free Video Tutorials Free videos for logged in members – just sign up as a ‘friend’ to view and click any of the thumbs. If you don’t have an account, please sign up here! The website currently has over 350 video tutorials, plus step by step guides and PDFs. You can explore more free videos with a free “friend” membership, or take the plunge and become a full subscriber for full access. If you’d prefer to support me on Patreon, please visit: https://www.patreon.com/RichardGray [...]
These videos shows how to paint an Ork Beastboss to a high level tabletop standard.In them, we are aiming to achieve a rugged, battle-worn look, emphasising strong contrasts and weathered metallics. Quick Jump to: Video – How to Paint an Ork Beastboss : Part OneMaterials NeededStep-by-step Guide on How to Paint the Ork BeastbossVideo – How to Paint an Ork Beastboss : Part TwoPaints UsedStep-by-step Guide on How to Paint the Ork BeastbossPDF GuideFree Video Tutorials There is also a detailed 26 page PDF guide for this model, which can be found here. Video – How to Paint an Ork Beastboss : Part One All videos are recorded in HD 1080p or higher – use full screen for the full effect and let the video load completely. You can also click the little “cog” and change the speed of the video, if I am going too fast (or slow!). Materials Needed Ork Beastboss Miniature Brushes: Various sizes for different techniques Paints (Games Workshop): Mournfang Brown, Contrast Medium, Balor Brown, Trollslayer Orange, Yriel Yellow, Ork Flesh (Contrast), Skeleton Horde (Contrast), Black Templar (Contrast), Blood Angel Red (Contrast), Gryph-Hound Orange (Contrast), Flesh Tearers Red (Contrast), Volupus Pink (Contrast) Vallejo Paints: Dark Sea Grey, Pale Grey Blue, Ice Yellow P3 Paint: Morrow White (or any white will do) Step-by-step Guide on How to Paint the Ork Beastboss Priming and Zenithal Highlighting: Prime the model black and apply a zenithal highlight using Vallejo Pale Grey Blue. This creates natural shadows and highlights, guiding future paint layers. Skin Tones: Paint the Ork’s flesh using a 50/50 mix of Ork Flesh Contrast and Contrast Medium. This enables some of the grey from the zenithal highlighting to show through, providing a guide for later highlights. Fur and Details: Apply Skeleton Horde Contrast directly for fur, ensuring highlights are visible. Use Volupus Pink Contrast for lizard-like skin textures and Blood Angel Red Contrast for the top knot and tassel. Armour and Metallics: Paint areas intended to be bronzy or gold with Gryph-Hound Orange Contrast. This creates a dark orange base over the light grey zenithal highlights. For black areas or parts you want darker, mix Black Templar Contrast with Contrast Medium and apply. Bronze Metallics: Start painting the skeleton head and other bronzy parts. Use scratchy, rough strokes to build up layers, starting from a darker base and gradually adding lighter colours for highlights. Highlight Placement: Follow the guide provided by the zenithal priming for light placement, enhancing it with further highlights where needed. Steel Armor: For a steel-like finish on certain armour parts, use a similar scratchy technique, starting with Vallejo Dark Sea Grey and building up to lighter greys and whites. Weathering and Rust: Add weathering using Mournfang Brown and Trollslayer Orange, focusing on recessed areas, rivets, and parts where rust naturally accumulates. Video – How to Paint an Ork Beastboss : Part Two Paints Used Games Workshop: Mournfang Brown, Contrast Medium, Balor Brown, Trollslayer Orange, Yriel Yellow, Ork Flesh (Contrast), Skeleton Horde (Contrast), Black Templar (Contrast), Blood Angel Red (Contrast), Gryph-Hound Orange (Contrast), Flesh Tearers Red (Contrast), Volupus Pink (Contrast) Vallejo: Dark Sea Grey, Pale Grey Blue, Ice Yellow P3: Morrow White (Any white will do) Step-by-step Guide on How to Paint the Ork Beastboss Picking up from where we left off in the first guide… 1. Sword (Big Chopper) with Rusty Texture Base Layer: Start with Rhinox Hide, using a scribbly and scratchy technique similar to the armour’s style. This creates a dark base for the flat of the blade. If Rhinox Hide is unavailable, mix Mournfang Brown with Black for a close approximation. Stippling Technique: Apply Mournfang Brown with stippling, creating a rusty texture. Remember, the paint can be a bit thicker here to add texture. Additional Rust Effect: Use Trollslayer Orange for more rust detail, focusing on areas like the top hook of the blade. This paint is slightly translucent, so you might need to layer it for a stronger effect. 2. Highlighting the Blade Scratches and Cutting Edge: Use lighter colours like Pale Grey Blue and White to highlight and define scratches and the cutting edge of the blade. This gives a contrasting effect to the rusty areas. Bounce Highlights: Consider adding bounce highlights to reflect the battlefield’s environment, like green reflections for a green terrain. 3. Horns and Fur Base Colours: Use the same colours as the blade for consistency. Start with a mix of Rhinox Hide and Morghast Bone. Highlighting: Gradually lighten the base with pure Morghast Bone and then Screaming Skull, focusing more on the base of the horns and the top of the fur for a natural gradient. 4. The Face Initial Layers: Begin with a base of Warboss Green. You might need several layers due to its translucency. To reduce the shine from contrast paints, apply an ultra-matte varnish partway through the painting process. Detailing: Add more detail than is sculpted, especially around the temple and eyes, to create a more menacing look. Use Warboss Green mixed with Screaming Skull for highlights, making the face a focal point. 5. Teeth and Bone Decorations Base Colour: For teeth and bone-like decorations, start with a base of Balor Brown. Texture Technique: Use a stippling and scratchy technique for texture, similar to the horns and fur. 6. Red Hair Base and Highlights: Start with a base of Evil Sunz Scarlet. For highlighting, mix in a bit of white for a slightly pinkish hue, but be careful not to overdo it. Detailing: Use vertical strokes to highlight, focusing on the strands without overly brightening the recesses. 7. Loin Cloth (Lizard Skin) Base Layer: Use Xereus Purple over a base that was previously primed and given a coat of Volupus Pink. Highlighting: Highlight selectively, focusing on larger scales and facets. Use lighter shades of purple mixed with white for the highlights, but remember to keep the overall area dark for contrast. 8. Verdigris Effect on Bronze Areas Base Colour: Apply Sotek Green, watered down for a flowing effect into recesses. Layering: Add white to Sotek Green for progressive highlights, focusing on the darker areas and avoiding the brightest highlights to maintain the metallic sheen. 9. Back to the Face Detailed Texturing: Add more detailed textures to the face using the lighter green mixture, emphasizing areas where light hits directly. Balancing Highlights: Alternate between highlighting and shading to balance the contrast and maintain the focus on the face. 10. Finishing the Eyes Initial Layers: Start with a base of Pearl Grey Blue, then define the iris with Sotek Green. Highlighting: Use lighter shades of blue for the lower parts of the eyes. For the final highlights, map out the placement with the first highlight blue, focusing on the top left to represent the light source. 11. Final Touches Teeth and Tongue: Paint teeth in Balor Brown and adjust the tongue if needed. Bone Decorations: Add final touches to bone decorations, ensuring they stand out against the hair. Red Hair: Refine the highlights and ensure they blend well with the base colour. And there you have it, your Ork Beastboss is now ready for battle, boasting a range of textures and colours, all contributing to its fierce and battle-worn appearance. For more detailed instruction, check out the PDF Guide! PDF Guide I have also created a detailed 26 page PDF guide on painting this model, that can be found here for full website members: How to Paint an Ork Beastboss – PDF Free Video Tutorials Free videos for logged in members – just sign up as a ‘friend’ to view and click any of the thumbs.To explore all of these, visit this page! If you don’t have an account, please sign up here! The website currently has over 350 video tutorials, plus step by step guides and PDFs. You can explore more free videos with a free “freebies” membership, or take the plunge and become a full subscriber for full access. If you’d prefer to support me on Patreon, please visit: https://www.patreon.com/RichardGray [...]
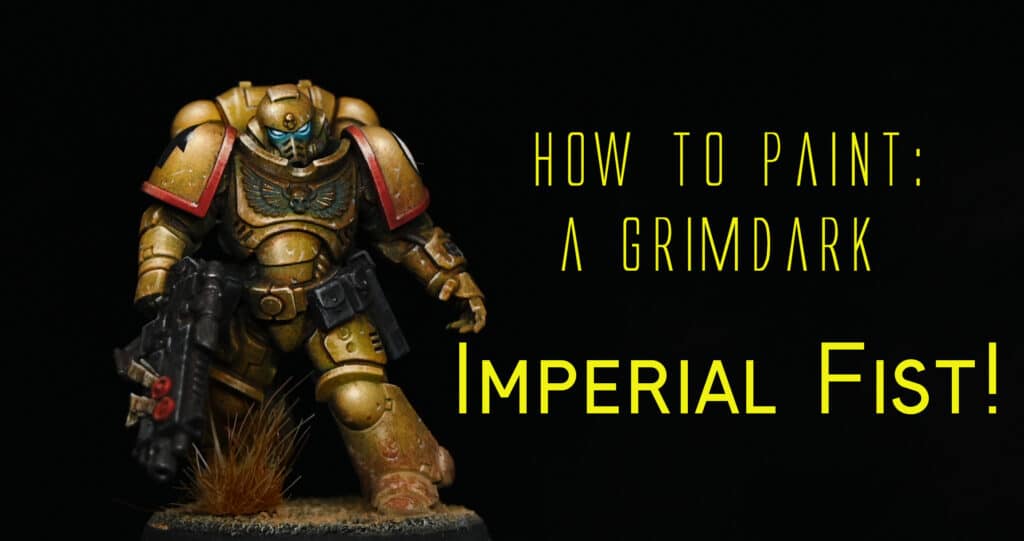
This video guide and full instructions will walk you how to paint a Castellax model from the Mechanicum Battle Force box set. The goal is to achieve a high-quality tabletop standard using quick, repeatable techniques—no airbrush required! The process focuses on achieving a grimy, weathered look that complements a Death Guard army. Video – How to Paint a Castellax from the Mechanicum Battle Force Box Paints and Materials Needed Paints: Games Workshop: Balor Brown, Morghast Bone, Screaming Skull, Darkoath Flesh (Contrast), Contrast Medium, Sotek Green, Sybarite Green, Warpstone Glow, Moot Green, Flash Gitz Yellow Vallejo: Model Colour Black Scalecolour: Necro Gold Pro Acryl: Light Bronze Metallic P3: Morrow White Brushes: Artis Opus Size 4 (Worn-out brush for stippling) Artis Opus Size 3M (Shorter bristle brush for dry brushing) Size 0 brush (for detailing) Size 00 brush (for fine details) A piece of dense foam (for sponge chipping) Step 1: Preparation Begin by assembling the model, leaving the legs separate from the torso to make painting easier. This is a common technique to manage sub-assemblies, allowing easier access to harder-to-reach areas and making the model more manageable to hold. All I’ve done there is put some sprue glue and I’d left that to dry so I hadn’t sanded that down perfectly smooth here because the shoulder pad’s coming two parts and you can clearly see how one part connects to the other, but they are glued onto the model at the moment. While it’s possible to leave the shoulder pads off to make painting easier, it’s up to personal preference. Some may find that too many sub-assemblies can result in scattered parts and unfinished projects. If you do decide to leave them off, it will make painting these parts slightly easier, especially when it comes to avoiding overspill. Step 2: Base Coat Prime the model with a black base coat using Vallejo Model Colour Black. This forms a solid foundation for the metallic and armour colours, ensuring good coverage and depth in subsequent layers. “The first thing we’re doing is using some scale colour necro gold… I haven’t really watered it down too much… you want it reasonably runny but not too runny.” Ensure the base coat is smooth and even, as this will help the metallics and other layers adhere better and produce a cleaner finish. Step 3: Metallic Base Use Scalecolour Necro Gold to cover all metal areas of the model. Apply this using a stippling technique with a worn-out Artis Opus Size 4 brush. The goal here is to create a textured, weathered look on the metallic areas. Be cautious with the thickness of the paint to avoid unwanted texture buildup, as you only want the paint to create a visual texture, not a physical one. “You’re just doing that all over all the metal areas on the model… be careful of physical texture buildup… the only texture you want really on the model is painting texture, not three-dimensional thick paint texture.” Next, use Pro Acryl Light Bronze Metallic to highlight raised areas. Focus on prominent features like the dome of the head, flamer nozzles, and the edges of the armour. Switch to a Size 3M Artis Opus brush for more control, as its shorter bristles help achieve a smooth application with this dry brushing technique. “This is a little bit thinner than the Necro Gold and the idea with this is you’re doing a very similar kind of process with it… don’t go too crazy with the light bronze because it is a very light colour; it almost looks silver when you apply it.” Step 4: Clean Up Once the metallics are dry, use Vallejo Model Colour Black to go back over any areas where metallic paint has spilled onto the armour panels. This clean-up step is crucial for keeping the final look neat and avoiding metallic flakes showing through when painting the armour colours. “When I was painting the metal I didn’t care where the paint got onto armour panels… it makes the process much quicker, and you don’t have to worry… just keeps everything looking neat.” Take your time with this step to ensure all overspill is covered, particularly in recesses and around edges where the metallics might have spread. Step 5: Armour Panels Start by applying Games Workshop Balor Brown, thinned with water in a 1:1 ratio. Stipple this over all armour panels using the Size 3M brush. This technique creates a textured, weathered effect that forms the base layer for the armour. “You’re basically covering all of the armour panels with that stippling effect… a large brush makes it hard to paint in some of these recess areas without getting the paint onto the metal.” Next, apply Games Workshop Morghast Bone in the same manner, focusing on the curves and raised areas of the armour. The goal here is to start building up lighter areas, enhancing the depth and contrast on the model. “You want the area to look darker in the recesses anyway… making sort of like a very soft light volume onto the armour.” Finally, highlight the most prominent areas with Screaming Skull. As you progress to lighter colours, apply the paint more carefully, focusing on areas where light naturally hits the model, such as the tops of the shoulder pads, the chest, and the front-facing parts of the armour. “We’re trying to get those highlight positions and be a little bit more accurate with it… you want to rotate the brush around a little bit and you also want to make sure that when you dab the brush onto the model you have it straight on.” Remember to dab off any excess paint on kitchen roll before applying it to the model to avoid blobs or streaks. Step 6: Applying Wash Mix Darkoath Flesh Contrast with Contrast Medium in a 1:1 ratio. Apply this wash over the entire model, covering both the armour and metallic areas. This step is essential for toning down the highlights, blending the colours, and adding a grimy effect that suits the model’s aesthetic. “If you use water, you will actually destroy the effect the way that the contrast paint works… it will give a very smooth, clean finish all over.” Be mindful of pooling, especially in recesses. Use a clean brush to wick away any excess wash from these areas to maintain the model’s detail. Contrast paint is slightly thick, so if you have a big pool of contrast paint, it will dry and it will just start to kind of gloss over some of the details. Step 7: Decals and Further Weathering If using decals, apply them at this stage. Use Micro Set to position them and ensure they blend seamlessly with the surface. For a more integrated look, consider applying the decals before the Darkoath Flesh wash so that they naturally blend into the model’s finish. After the decals are in place, stipple Morghast Bone along their edges to simulate chipping and wear, especially around the corners and where the decals might receive the most damage. Finally, apply another layer of the Darkoath Flesh wash over the decals to blend them further and reduce the starkness of the decal’s edges. Step 8: Sponge Chipping Thin Games Workshop Rhinox Hide with water in a 1:1 ratio. Use a piece of dense foam (such as that from old Warhammer clamshell packs) to sponge this onto the edges and areas likely to receive wear and tear. Focus on creating an irregular, natural pattern, with more chipping towards the front and the edges of the armour. “You want to pay attention to the position of the weathering… it’s very easy to rub an edge against something, whereas the flat surface is less likely to get any damage.” Before applying, dab the sponge on kitchen roll to remove excess paint. This prevents the foam from dumping too much paint onto the model, which could create an unwanted texture buildup. “When you put the foam into the paint, you need to dab it off on some kitchen roll… you want to remove the excess paint.” Step 9: Detailing Using a Size 00 brush, paint fine scratches and streaks with Rhinox Hide. Place these near areas likely to see heavy use or impact, such as around weapons or sharp edges. This step adds realism and depth to the model by simulating wear and tear. For larger chips created during the sponge chipping, consider adding a highlight line with Morghast Bone on the lower edge of the chip to simulate light catching the edge of the flaked paint. “Picking out a few edges here and there… it makes it look like a chip and the light’s catching the flake of paint.” Run the side of your brush along the edges of the armour to create subtle highlights, but focus primarily on upward-facing edges where light would naturally hit. Step 10: Grimy Weathering For added grime, especially around weapons and heavily used areas, use undiluted Darkoath Flesh. Apply this carefully, building up layers to simulate dirt, grease, and other battlefield detritus. Focus this application near the front of the model, Step 11: Further Grimy Weathering For added grime, especially around weapons and heavily used areas, use undiluted Darkoath Flesh. Apply this carefully, building up layers to simulate dirt, grease, and other battlefield detritus. Focus this application near the front of the model, particularly around the chainsaw blade hands, where the most action would occur. If desired, you can mix a bit of red into the Darkoath Flesh to create a fresher, bloodier effect, adding another layer of realism to the model’s grimy appearance. Step 12: Verdigris (Optional) To add a verdigris effect to the metal areas, mix Sotek Green and Sybarite Green in a 50:50 ratio, then thin it heavily with water (4:1). Apply this wash into the recesses and areas where water might naturally collect, simulating the patina of aged copper. If you want to push the verdigris further, add a touch of white to the mix for the most extreme recesses, but be careful not to overdo it as it can make the effect too opaque. Step 13: Metallic Highlights Reapply the Light Bronze Metallic sparingly to the highest points of the metallic areas to restore some shine lost during the wash step. This should be done with a very fine brush and thinned paint (2:1 water to paint) to maintain control and avoid overpowering the subtle weathering. Step 14: Lenses (Optional) For the lenses, start with Warpstone Glow, then layer Moot Green, followed by a final highlight with Flash Gitz Yellow. This creates a gradient effect that mimics light shining through the lens. “This makes it slightly less shiny… it just depends on how you want to do it; I just like the way this looks personally.” Finish by adding a small white dot in the top left corner of each lens for a reflective effect, bringing the lenses to life and adding a focal point to the model. Final Touches and Further Tips As you finish your Castellax, take a moment to review your work and touch up any areas that may need it. Focus on ensuring your highlights are consistent, your grime looks natural, and that the overall effect is cohesive and fitting with the rest of your army. Further Tips: Patience with Stippling: When stippling, less is often more. Build up your layers gradually and step back occasionally to check the overall effect. This prevents overworking the model and keeps the texture subtle and realistic. Experiment with Washes: The mix of Contrast Medium with Darkoath Flesh can be adjusted to suit your preference. A thicker wash will give a grimier look, while a thinner wash will maintain more of the underlying colour. Don’t be afraid to experiment on a test model or a hidden part of the figure. Edge Highlighting: For a clean and professional finish, take your time with edge highlighting. While it may seem tedious, careful edge highlighting can significantly enhance the depth and definition of your model, making it stand out on the tabletop. Free Video Tutorials Free videos for logged in members – just sign up as a ‘friend’ to view and click any of the thumbs.To explore all of these, visit this page! If you don’t have an account, please sign up here! The website currently has over 350 video tutorials, plus step by step guides and PDFs. You can explore more free videos with a free “freebies” membership, or take the plunge and become a full subscriber for full access. If you’d prefer to support me on Patreon, please visit: https://www.patreon.com/RichardGray [...]
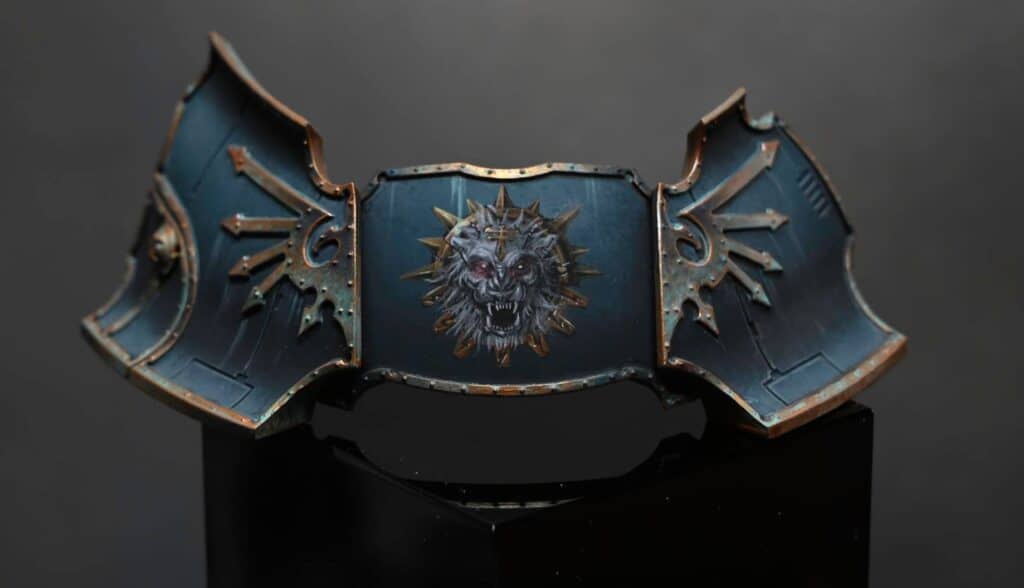
The most powerful model from the Age of Sigmar Dominion box! I thought it was time that I painted the most powerful model from the new Age of Sigmar Dominion box! It’s the mighty Stab-Grot! Materials Required: Stab Grot miniature, fully assembled and primed with Scale 75 Surface Black Primer Paints: Games Workshop (Mournfang Brown, Rhinox Hide, Cadian Fleshtone, Ushabti Bone, Firedragon Bright, Daemonette Hide, Sotek Green, XV-88, Moot Green, Mephiston Red, Evil Sunz Scarlet), Vallejo (Ice Yellow, Black, Neutral Grey, White, German Grey, Pale Grey Blue) Brushes, including a fine detail brush (size 00 recommended) Painting Process: Base Layers: Begin with Vallejo German Grey, applying it to the armoured parts using a scratchy technique. Concentrate on lighter points where light naturally falls (shoulder, forearm), but ensure even coverage. Adding Tones: Apply Daemonette Hide for a subtle hint of colour. Use the same method as with German Grey but in smaller areas, allowing the underlying grey to show through for texture. Highlights and Shading: Combine Pale Grey Blue and Daemonette Hide for highlights. Aim for a grimy, non-polished metal appearance. Use white sparingly to highlight edges and dents. Skin Tones: Start with Sotek Green, progressively adding Moot Green and white for highlights. Focus on creating soft transitions with diluted paint for a realistic skin effect. Leather Details: Base with Rhinox Hide, then layer with XV-88 and Cadian Fleshtone, concentrating on edges and scratches. Use watered-down Mournfang Brown for a glazing effect, softening the highlights. Red Cloth: Base with Mephiston Red, layering for opacity. Highlight with Evil Sunz Scarlet, careful not to overdo it to preserve the red’s vibrancy. Final Touches: Add final details such as rust on the blade with Mournfang Brown and scratches with Ice Yellow. Remember, moderation is key for a realistic weathered look. Tips for Success: Pay attention to natural light fall for realistic highlights and shadows. Use a scratchy technique for armour to create texture and a weathered appearance. Thin your paints for smoother transitions, especially on the skin. Avoid over-highlighting reds to prevent a pink or orange shade. Patience and attention to detail are vital for a small, detailed model like Stab Grot. Free Video Tutorials Free videos for logged in members – just sign up as a ‘friend’ to view and click any of the thumbs.To explore all of these, visit this page! If you don’t have an account, please sign up here! The website currently has over 350 video tutorials, plus step by step guides and PDFs. You can explore more free videos with a free “friend” membership, or take the plunge and become a full subscriber for full access. If you’d prefer to support me on Patreon, please visit: https://www.patreon.com/RichardGray [...]
Here is the shorter version of my Alchemite Warforger video, which is available to watch on here or Youtube for free. For more detail, check out the longer version! The following paints were used: Games Workshop: Rhinox Hide, Mournfang Brown, Balor Brown, Daemonette Hide, Slaanesh Grey, Mephiston Red, Yriel Yellow, Wild Rider Red, Troll Slayer Orange, Bugman’s Glow, Cadian Fleshtone, Morghast Bone, XV88.Vallejo: Ice Yellow, German Grey, Neutral GreyP3: Morrow White Grass: Mininatur Spring Moss Pads Step-by-Step Guide to the Alchemite Warforger Preparation: Assemble your Cities of Sigmar Alchemite Warforger model from the Cities of Sigma box set. Prime the model with black primer. Omit the cube with smoke for easier painting (add it back when you’ve painted the model!) Helmet Painting: Use XV88 to block in highlights for a bronzy colour on the helmet. Apply the paint loosely with a size 2 Artist Opus brush, focusing on where light naturally falls. Thin the paint to around 1.5 parts water to 1 part paint for easy layering. Metal Painting: Use a gray base colour (Neutral Gray or Mechanicum Standard Gray) for most steel-colored objects. Optionally, add colour with Daemonette Hide for a purpley-gray tone. Apply the paint loosely and scribbly to create texture. Use smaller brushes for refined marks in specific areas. Consider adding Daemonette Hide and Slaanesh Gray for additional colour on metal pieces for reflections. Leather Parts: Base the leather apron and other leather parts with Rhinox Hide. Apply the paint loosely with a mix of around 1.5 parts water to 1 part paint. Keep the paint flowing with the shape of the sculpt for a harmonized look. Highlighting: Highlight the metal parts with Slaanesh Gray, applying smaller and more refined marks. For leather, use Mornfang Brown for additional layers, creating a distinct color difference. Glaze with Mourning Brown on top of the highlights for added contrast. For leather straps, use larger black marks at the edges and smaller marks towards the core. Skin Painting: Base the skin with Rhinox Hide and layer with Mornfang Brown. Highlight using the following sequence: XV88, Guardian Flesh Tone mixed with Baneblade Brown and a bit of white. Keep the skin texture smooth, differentiating it from the heavily textured leather. Final Details: Apply Verdigris to metal clasps for a weathered look. Add OSL (Object Source Lighting) with plain flesh tone for the rune effect. Optionally, use Rhinox Hide for a runic effect. Consider the placement of the cube with smoke for potential obstructions. Remember, these steps are a guide, and you can adjust them based on your preferences and painting style. Happy painting! More Full Character Tutorials Free Video Tutorials Free videos (for logged in members – just sign up as a ‘friend’ to view and click any of the thumbs.To explore all of these, visit this page! If you don’t have an account, please sign up here! The website currently has over 350 video tutorials, plus step by step guides and PDFs. You can explore more free videos with a free “freebies” membership, or take the plunge and become a full subscriber for full access. If you’d prefer to support me on Patreon, please visit: https://www.patreon.com/RichardGray [...]
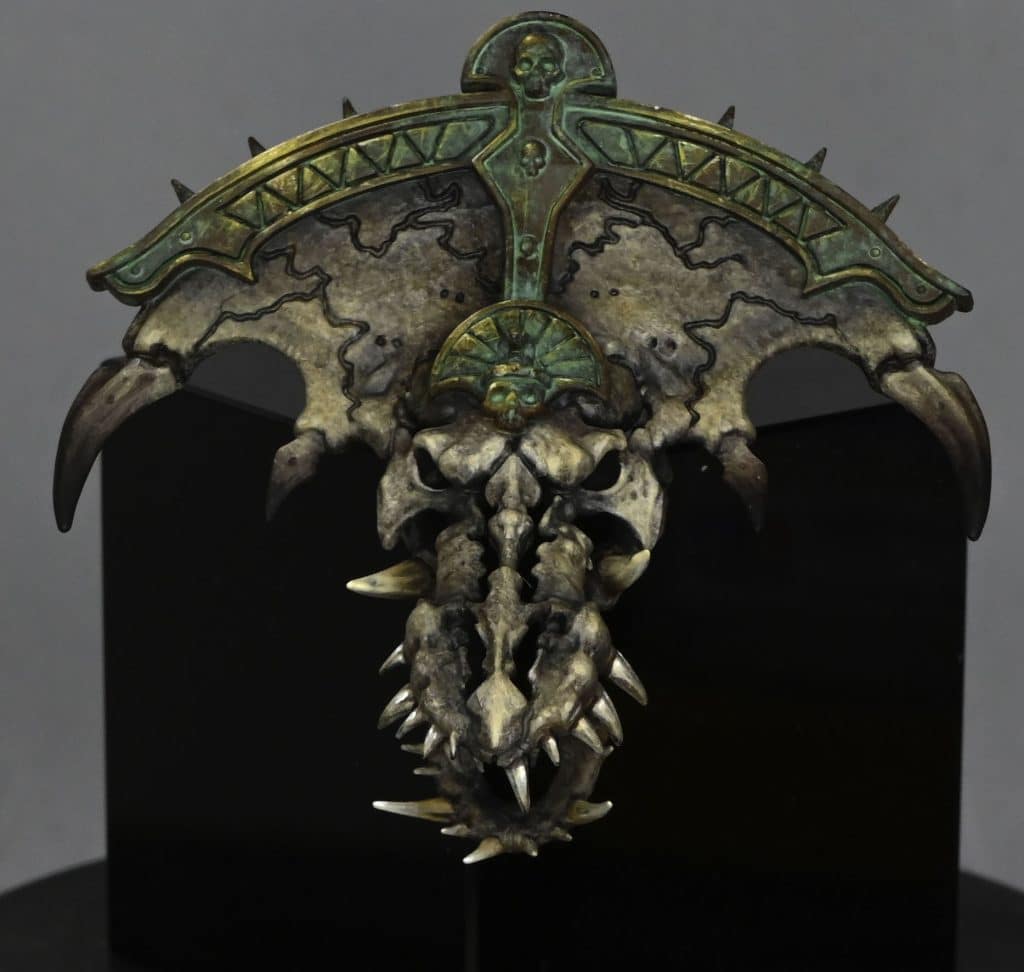
These videos show how to paint an Aeldari Howling Banshee to a high level tabletop standard, ideal for a commanding presence in your army or for smaller game systems like Kill Team. Part One – How to Paint a Howling BansheeMaterials NeededPaints NeededStep-by-Step Tips and GuidePart Two: How to Paint a Howling Banshee WeaponMaterials NeededStep-by-Step Tips and Guide – Green NMMMore Video Tutorials Part One – How to Paint a Howling Banshee This session focuses on achieving a detailed, bone-coloured armour synonymous with Howling Banshees. All videos are recorded in HD 1080p or higher – use full screen for the full effect and let the video load completely. You can also click the little “cog” and change the speed of the video, if I am going too fast (or slow!). Materials Needed Aeldari Howling Banshee Miniature Brushes: Various sizes, including a size two for base coating and size 00 Artist Opus (or equivalent) for detail work. Paints Needed Games Workshop Paints: Base Colours: Morghast Bone, Ushabti Bone, Screaming Skull, Mephiston Red, Sotek Green Shades and Glazes: Mournfang Brown, Darkoath Flesh (Contrast), Contrast Medium Highlight and Detail Colours: Evil Sunz Scarlet, Corvus Black (for black areas) Vallejo Paints: Basalt Grey, Pale Grey Blue, Ice Yellow (for non-metallic metals) P3 Paint: Morrow White (or any white for extreme highlights) Step-by-Step Tips and Guide Base Coating and Stippling: Prime the miniature and begin with a stippling technique using Morghast Bone and Ushabti Bone. Apply the paint thinly and evenly with a dry brush for a smooth base. Adding Depth with Contrast Paint: Mix Darkoath Flesh (Contrast) with Contrast Medium and apply over the stippled areas for added depth. Refining Armour with Stippling: Progressively build up highlights with Ushabti Bone, Screaming Skull, and Morrow White. Focus on light placement to enhance features, keeping the paint watered down for a soft finish. Glazing for Shadows: Thin down Mournfang Brown considerably and apply in recesses to deepen shadows. Painting the Eyes and Non-Metallic Metals: Use Sotek Green, Ice Yellow, and Basalt Grey for non-metallic metal areas, ensuring the correct placement of light and reflections. Hair and Cloth Details: Base the hair with Mephiston Red, building up highlights with Evil Sunz Scarlet and white. For the black areas, create subtle highlights with Basalt Grey and Pale Grey Blue, avoiding an overly grey appearance. Final Touches: Refine details, adjust highlights, and ensure a balanced, cohesive look. Part Two: How to Paint a Howling Banshee Weapon The Aeldari Howling Banshee’s power weapon will have a non-metallic, yet luminous green effect. This method involves intricate layering and stippling to simulate reflection. We’ll primarily utilise Cybrite Green from Games Workshop, blended with various quantities of black for shadows, and Vallejo’s Ice Yellow for the highlights. Materials Needed Cybrite Green (Games Workshop) Black (Vallejo Model Colour) Ice Yellow (Vallejo) Evil Sunz Scarlet (Games Workshop) Wild Rider Red (Games Workshop) Fire Dragon Bright (Games Workshop) Morrow White (P3 or any alternative white) A fine brush A wet palette Step-by-Step Tips and Guide – Green NMM Base Layer: Firstly, coat the power weapon in black, creating a pristine base. Green Layering: Blend Cybrite Green with a touch of black. Apply this darker green shade to parts of the weapon less exposed to light. Incrementally integrate more black into the mixture for creating deeper shadows, ensuring smooth transitions. Highlight Application: Form lighter shades by mixing Cybrite Green with small increments of Ice Yellow. Gradually apply these on the weapon’s raised and edge areas, depicting where light naturally strikes. Keep your paint mix slightly thinned for better control during layering. A recommended mix is two parts water to one part paint. Texture via Stippling: With the lighter green mixes, stipple the surface to generate a textured, reflective look. The density of the dots correlates with the opacity. Reflections Definition: Under a lamp, observe the natural light reflections on the blade. Mimic these on the blade’s upper portion using lighter green shades, ensuring they’re the most luminous parts. Finalising Highlights: Employ white or the palest green mix for the highest light points. Apply these sparingly as minute dots or slender lines to achieve a sparkling effect. Gemstone Painting: For red gems: Start with Evil Sunz Scarlet, augment with highlights using Wild Rider Red and Fire Dragon Bright, mainly on the gems’ lower areas. Cap off with an Ice Yellow or white dot atop each gem for reflection. For the blue gem: Adopt a similar approach, starting with Sotek Green and progressively incorporating white for highlights. Refinement and Adjustment: If needed, use glazes (diluted paint) to soften transitions or reintroduce colour in areas where over-highlighting may have occurred. Continuously evaluate and tweak the intensity and positioning of highlights to achieve a balanced and realistic reflective appearance. More Video Tutorials Free videos for logged in members – just sign up as a ‘friend’ to view and click any of the thumbs.To explore all of these, visit this page! If you don’t have an account, please sign up here! The website currently has over 350 video tutorials, plus step by step guides and PDFs. You can explore more free videos with a free “friend” membership, or take the plunge and become a full subscriber for full access. If you’d prefer to support me on Patreon, please visit: https://www.patreon.com/RichardGray [...]
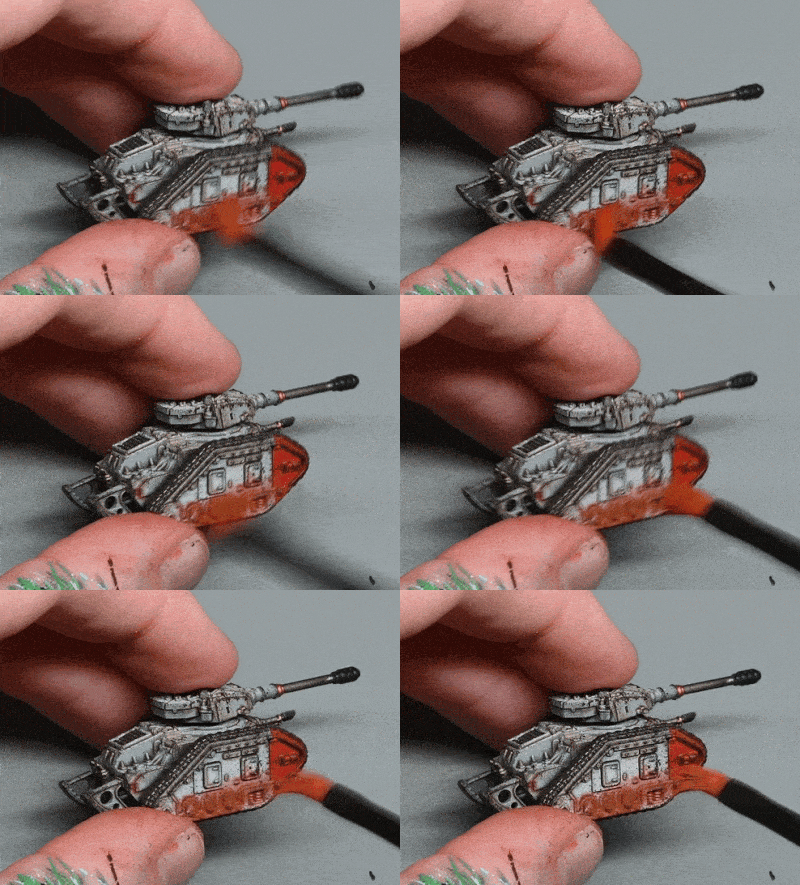
This video shows the complete process for How to Paint a Nighthaunt Krulghast Cruciator from Games Workshop including a step by step text guide and full list of colours needed. Paints and Tools The following paints were used:Games Workshop: Warpstone Glow, Yriel Yellow, Sotek Green, Lothern Blue, Blue Horror, XV-88, Balor Brown, Rhinox Hide, Abaddon Black, Mournfang Brown, Mephiston Red, Evil Sunz Scarlet, Wild Rider Red, Fire Dragon Bright, Ushabti Bone Vallejo: Neutral Grey, Black, Pale Grey Blue, White Grey, Ice Yellow How to Paint a Nighthaunt Krulghast Cruciator Step 1: Base Coating with Airbrush Ensure the model is completely built and primed. Separate the model into two sections for easier painting. Use an airbrush with a 0.4 sized nozzle to apply a base coat of red at the top and blue at the bottom. Mask off areas to avoid overspray and focus on highlighting towards the head and shoulders. Step 2: Adding Highlights with Airbrush Use Mephiston Red for the red sections and Fire Dragon Bright for the blue sections. Be cautious with lighter colours as they can be challenging to airbrush without speckles. Pay attention to angles to avoid overspraying onto other parts of the model. Gradually build up the highlights, especially on the tips of the tendrils. Step 3: Transitioning Colours Use White or Fire Dragon Bright for highlights, but be mindful not to turn the red into pink. Consider the translucency of the paint and how it interacts with layers. Be strategic in highlighting to maintain the desired colour intensity. Step 4: Detailing with Brushes Switch to a smaller brush for fine details and lines. Use Vallejo’s White Gray or a similar colour for opaque and solid highlights. Follow the sculpted details and angles on the model for a stylised effect. Step 5: Creating Contrast and Highlights on the Helmet Apply XV88 and Balor Brown to create contrast and define shapes. Add edge highlights to enhance details and create shine spots. Use Vallejo’s White Gray for additional highlights. Step 6: Adding Filigree Details Add filigree details to areas like the cross for a shiny effect Reinforce the glare by going over edges with a blob of paint. Ensure consistency and follow the sculpting direction for a polished look. Step 7: Refining Highlights and Shadows Glaze over the model to blend highlights and shadows. Tidy up and pick out additional details using Blue Horror. Use Wild Rider Red for final touches on certain areas. Step 8: Painting Wood Effect Cover everything with Rhinox Hide for the wood effect. Be rough and don’t worry about spikes; paint over them and pick them out in black later. Focus on pushing lightness towards the edges of each wood plank. Step 9: Adding Green Flame Use Warpstone Glow for the green flame. Be aware of the paint’s bad coverage and apply multiple coats for saturation. Add a small bright yellow dot for high contrast. Step 10: Applying Matte VarnishFinish by applying a coat of ultra-matte varnish to even out the surface and remove shine. Explore more tutorials Liked this video? Check out all my latest subscriber videos by clicking the thumbnails below, or explore more freebies by clicking here [...]
This video tutorial and step-by-step guide shows how to paint a Desolation Dark Angel, one of the new Desolation Marines from the Strike Force Agastus, which was sent to me by Games Workshop. Read on for a full video, lots of tips and full materials and paints list. Video Tutorial – Desolation Dark Angel Materials: Vallejo Model Colour (New): Angel Green, Charcoal, Toxic Yellow, Black, Turquoise, Aquamarine, Grunge Brown, Orange Fire, Nocturnal Red, Scarlet Blood Games Workshop: Darkoath Flesh (Contrast), Contrast Medium Two Thin Coats: Plate Armour, Dragon’s Gold P3: Morrow White Steps: Base Coat:Mix Angel Green and Charcoal (50:50 ratio).Apply this mix over the entire model using a large dry brush or makeup brush.Water the paint down slightly for a smoother application, aiming for a 50:50 water-to-paint ratio. Layering:Apply straight Angel Green on top, using a kitchen roll to dab off excess paint for a thin layer.Focus on light volumes, covering flat surfaces more than edges. Metallics:Paint metallic areas using Two Thin Coats’ Plate Armour and Dragon’s Gold.Thin these slightly for better flow and coverage. Red Details:Use Nocturnal Red and Scarlet Blood for red areas, like the gun.Mix them for a base layer, then use Scarlet Blood mixed with a bit of white for highlights. Adding Depth:Use Vallejo Black for shading and defining darker areas. Highlighting Armour:Create three mixes on your palette: pure Angel Green, a 50:50 mix of Angel Green and Toxic Yellow, and a majority Toxic Yellow with a small amount of Angel Green.Apply these mixes progressively, starting with the darkest and moving to the lightest for highlights. Use a brush control technique similar to edge highlighting. Contrast and Washes:Apply Darkoath Flesh (Contrast) selectively, followed by Contrast Medium for dilution in specific areas.Use Nuln Oil for metallic parts to create depth. Detailing Metallics:Add highlights to metallic areas using a mix of Plate Armour and white. Eyes and Lenses:Paint eyes with a base of Nocturnal Red, adding highlights with a mix of Scarlet Blood and white.Use a small white dot for reflection. For lenses, use Turquoise mixed with Charcoal, then highlight with Aquamarine and pure white. Final Touches:Add fine scratches and details using lighter shades of the base colours.For the belt, use Grunge Brown base and Orange Fire for highlights. Basing:Apply PVA glue and sand.Once dry, wash with Agrax Earthshade and apply weathering powder. More Free Video Tutorials Free videos for logged in members – just sign up as a ‘friend’ to view and click any of the thumbs.To explore all of these, visit this page! If you don’t have an account, please sign up here! The website currently has over 350 video tutorials, plus step by step guides and PDFs. You can explore more free videos with a free “freebies” membership, or take the plunge and become a full subscriber for full access. If you’d prefer to support me on Patreon, please visit: https://www.patreon.com/RichardGray [...]
This video looks at the new Contrast paints from Games Workshop and I use them to paint a very colourful Sylvaneth Gossamid Archer. Read on to watch and follow along with a detailed step-by-step paints and steps guide. Video Tutorial: How to Paint a Sylvaneth Gossamid Archer The following paints were used: Games Workshop: Mantis Warriors Green (Contrast), Striking Scorpion Green (Contrast), Karandras Green (Contrast), Garaghak’s Sewer (Contrast), Magmadroth Flame (Contrast), Baal Red (Contrast), Doomfire Magenta (Contrast), Sigvald Burgundy (Contrast), Seraphim Sepia (Shade), Flash Gitz Yellow, Rhinox Hide, XV-88, Balor Brown, Xereus Purple Vallejo: Mecha Varnish Matt P3: Morrow White (Any White will do) Step-by-Step Guide: How to Paint a Sylvaneth Gossamid Archer Priming and Preparing the Model Start by assembling and priming your Gossamid Archer model. Use Wraithbone as a base colour, which helps in achieving brighter, cleaner colours. If you want an even brighter finish, you can spray the whole model white. A zenithal highlight can be applied to create natural focal points on the head and chest, allowing for more dynamic shading. Applying Base Colours with Contrast Paints Begin painting with a variety of contrast paints to achieve a vibrant and varied colour scheme. Use a large brush like an Artist Opus size 4 for quick application. Key contrast paints to use are Striking Scorpion Green, Karandras Green, and Garaghak’s Sewer. While the paints are still wet, you can blend them together on the model for a smooth transition. However, be cautious of drying times to avoid streaking. Correcting and Refining with Airbrush If needed, refine areas with an airbrush. For instance, overpainting with Striking Scorpion Green can provide a more opaque and smoother finish, especially on the wings. Mixing Contrast Paints with Acrylics Contrast paints can be mixed with regular acrylics for more versatility. Mix Striking Scorpion Green with P3 Morrow White to create various shades for highlighting. This method allows for smooth transitions and a semi-translucent finish. Painting Wings with Dragonfly Effect For a dragonfly-like effect on the wings, use a mix of Striking Scorpion Green and white to paint vein-like lines, emulating a dragonfly’s wing pattern. Start with basic lines, then create four-sided shapes like rectangles or squares, resembling the vein structure. The lines don’t need to be perfect, as the organic nature of the wings allows for some variation. Ensure your brush isn’t overloaded with paint for finer lines. Skin and Body Details For the skin, use Magmadroth Flame contrast paint, which provides a strong, vibrant base while still allowing for natural shading in recesses. For the arm and other body parts, apply Sigvald Burgundy, Baal Red, Doomfire Magenta, and other contrast colours, blending while they are wet for a smooth transition. Use smaller brushes for detailed areas, and ensure you cover all surfaces. Highlighting and Detailing Highlight the skin by mixing Magmadroth Flame with Kislev Flesh, gradually adding more Kislev Flesh and white for higher highlights. Apply these mixes to the raised areas like shoulders, chest, and arms. For the hair, start with a vibrant base of Flash Gitz Yellow, dulled down with a Seraphim Sepia wash. Highlight by adding white to Flash Gitz Yellow for a striking effect. Bow and Other Accessories Paint the bow using Rhinox Hide, XV-88, and Balor Brown, adding white for final highlights. Keep the painting simple, avoiding overly intricate freehand patterns unless desired. Remember to mix and match colours to add more interest to the model. Finishing Touches with Matt Varnish Once the painting is complete, apply a coat of Vallejo Mecha Varnish Matt. This will unify the finish of the model, reducing any unwanted shine from the contrast paints and enhancing the overall appearance. More Contrast Paint Projects and Tutorials More Free Video Tutorials Free videos for logged in members – just sign up as a ‘friend’ to view and click any of the thumbs.To explore all of these, visit this page! If you don’t have an account, please sign up here! The website currently has over 350 video tutorials, plus step by step guides and PDFs. You can explore more free videos with a free membership, or take the plunge and become a full subscriber for full access. If you’d prefer to support me on Patreon, please visit: https://www.patreon.com/RichardGray [...]
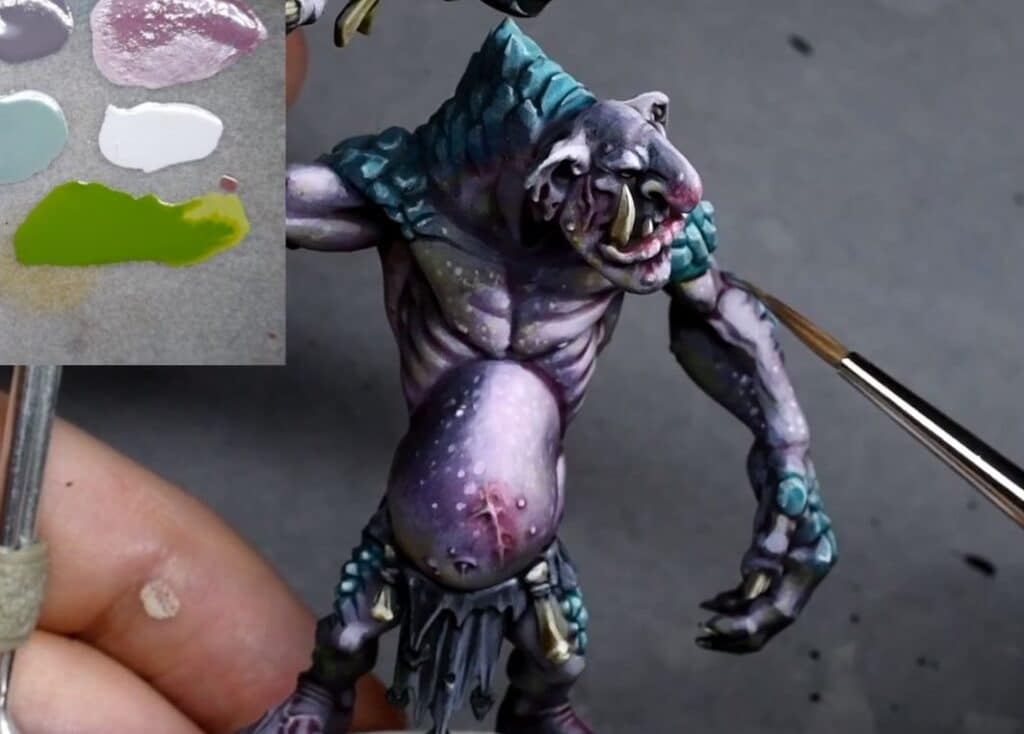
This video shows you how to paint a Squigboss from the Gloomspite Gitz army for Age of Sigmar. The model was painted exclusively using Two Thin Coats paints.In this how to paint a Squigboss video, we’ll be doing something a bit different. I’ll guide you through the process of painting the Squig boss, generously sent to me by Games Workshop. Alongside, I’ll be reviewing a set of paints I personally purchased, intrigued by reviews—the Two Thin Coats series by Duncan Rhodes. These paints will exclusively adorn our Squigboss, and I’ve procured them independently. So, no sponsorships or freebies; it’s all about exploring these paints. Now, let’s get started! All videos are recorded in HD 1080p or higher – use full screen for the full effect and let the video load completely. You can also click the little “cog” and change the speed of the video, if I am going too fast (or slow!). The following paints were used:Two Thin Coats: Two Thin Coats: Doom Death Black, White Star, Etheral Green, Carcharodon Grey, Dark Sun Yellow, Skulker Yellow, Skeleton Legion, Demon Red, Scorched Earth, Dragon Fang, Boar Hide, Sanguine Scarlet, Dwarven Skin, Marine Blue, Orange Flare, Emerald Green, Wolf Grey, Fanatic Orange, Cuirass Leather, Berserker Red Tips on how to paint a Squigboss with these paints! Base Coat with Boar Hide Colour:Initiate with the “Boar Hide” shade, akin to Games Workshop’s Mournfang Brown, serving as the foundational coat for the entire Squig boss model. Non-Metallic Metal Gold Face Mask:I’ve gone for a non-metallic gold style for the goblin’s face mask, utilising the unique properties of the Duncan Rhodes Two Thin Coats series.Apply the same colours used for the face mask on the staff, creating a non-metallic metal effect. Note differences in technique for different areas. Adapting to Paint Properties:The paints seem quite nice to work with. Thinning is essential, however, and adapting to the colours’ strength becomes a creative challenge. Use Translucent Marks for Subtle Effects:Experiment with translucent or softer marks by thinning the paint more. This technique can be effective for creating subtle details but requires precision in application. Be Mindful of Paint Strength:As mentioned, the colour strength might be stronger than anticipated, so be cautious when adding subtle marks. Adjust as needed to avoid overpowering the model with vibrant colours. Varied Application Techniques:Explore different application techniques for varied textures and effects. The angular features of the model complement the paints’ adaptability very well and allows for creative highlighting and detailing Matte Finish and Dark Tones:Consider a matte finish for the model to achieve a pastel look. Embrace the dark and yellow tones for added depth and character. Diverse Colour Palette for Highlights:Incorporate a diverse colour palette, such as Dark Sun Yellow, for highlighting and detailing, providing a unique touch to gold and other elements. The matte finish and the richness these paints bring to dark and yellow tones is great. Quick Scratches and Detailing:Create quick, sharp scratches and detailing, adding interest to specific areas without the need for extensive blending. Quick and sharp detailing becomes a breeze with these paints, making them ideal for adding interesting detail without the need for laborious blending. Highlighting with Translucent White:Use translucent white for highlighting, applying small amounts to achieve a subtle effect. Ensure quick application to prevent drying before reaching the model. Colour Variations for Textures:Experiment with different colours for textures, adapting to the model’s features. Allow the varied palette to enhance details and bring out the intricacies. The paints are good at bringing out intricate details. Teeth Detailing:Detail the teeth with simple lines, complementing the skin fold creases. Use the extra detailing to fill spaces and add interest without smoothing transitions. Remember, the beauty lies in adapting and exploring the properties of the paints. Happy painting! Free Video Tutorials More free videos for logged in members – just sign up as a ‘friend’ to view and click any of the thumbs.To explore all of these, visit this page! If you don’t have an account, please sign up here! The website currently has over 350 video tutorials, plus step by step guides and PDFs. You can explore more free videos with a free membership, or take the plunge and become a full subscriber for full access. If you’d prefer to support me on Patreon, please visit: https://www.patreon.com/RichardGray [...]
In this video and step-by-step guide, I’ll walk you through the process of building and preparing a Grey Seer miniature for painting. We’ll cover everything from essential tools and materials to step-by-step assembly instructions, ensuring you achieve a flawless finish on your model. Video: How to Build a Skaventide Grey Seer How to Build a Skaventide Grey Seer – Step by Step Gather Your Tools: You’ll need Godhand clippers (or similar), a scalpel, Tamiya Extra Thin Cement, and sprue glue (Tamiya Extra Thin Cement mixed with plastic sprue bits).Clean Your Model: Carefully clip out all the model pieces. Use your scalpel to scrape away any mould lines, always angling the blade away from the direction you’re moving to avoid cutting into the model. Take your time with this step.Remove Push-Fit Connections: Even though the model is push-fit, I cut off the connection points to avoid gaps and make painting easier. This makes for a cleaner fit. Assembly: Dry Fit: Before gluing, dry fit the pieces together to make sure everything lines up correctly.Glue Main Body: Apply a small amount of Tamiya Extra Thin Cement to the connection points and join the pieces together. Use gentle pressure to ensure a tight fit.Leave the Head: Don’t glue the head yet, as this will make painting easier. Gap Filling: Identify Gaps: Look for any gaps or seams in the model where the pieces join.Apply Sprue Glue: Carefully apply sprue glue to the gaps, being careful not to get any on areas you don’t want to fill. Use the tip of your scalpel to guide the glue and remove any excess.What’s Sprue Glue? Follow this link to learn more.Smooth Out: Once the sprue glue is dry, use a fine file or sandpaper to smooth out any rough edges.Your Grey Seer model is now ready for priming and painting! Additional Tips: Work in a well-ventilated area as the glues and paints can be toxic. If you accidentally get sprue glue somewhere you don’t want it, you can try to quickly remove it with extra thin cement. Take your time and don’t rush the process. The more care you take in the preparation stages, the better the final result will be. If you’re painting a whole army, consider cutting some corners to save time, but still aim for a neat and tidy finish. Now you’ve learnt How to Build a Skaventide Grey Seer, why not get started painting him? How to Paint a Skaventide Grey Seer My series of video tutorials on How to Paint a Skaventide Grey Seer! Watch Now If you don’t have an account here on my website, please sign up here! I have over 350 video tutorials with steps and tips, plus a selection of PDFs. If you are not sure about joining, you can explore my free videos with a free membership, or take the plunge and become a full subscriber for full access. If you’d prefer to support me on Patreon, please visit: https://www.patreon.com/RichardGray [...]
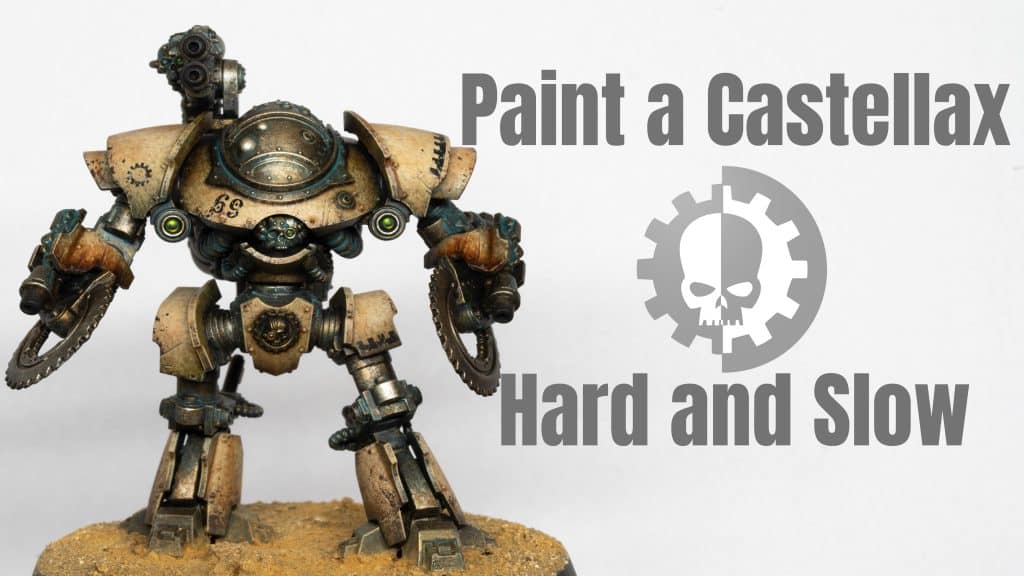
In this tutorial, we’re diving into the wonderfully grim world of Nurgle as we explore how to bring the Rotbringer Sorcerer from Age of Sigmar to life with vivid detail. Whether you’re a seasoned painter or just starting out, this step-by-step guide will equip you with techniques and tips to get going. Video: How to Paint a Rotbringer Sorcerer – Part One: All videos are recorded in HD 1080p or higher – use full screen for the full effect and let the video load completely. You can also click the little “cog” and change the speed of the video, if I am going too fast (or slow!). Video: How to Paint a Rotbringer Sorcerer – Part Two Materials and Paints Primer: Badger’s Ultimate Primer Black Games Workshop Paints: Mephiston Red, Balor Brown, Yriel Yellow, Mournfang Brown, Corvus Black, Bugman’s Glow, Cadian Fleshtone, Morghast Bone, Screaming Skull, Trollslayer Orange, Rhinox Hide, Skeleton Horde Contrast Vallejo Paints: Basalt Grey, Ice Yellow, Neutral Grey, Pale Grey Blue (optional) P3 Paints: Morrow White Step-by-Step Guide to the Rotbringer Sorceror: Preparation and Priming: Fully assemble your Rotbringer Sorcerer and prime it with a black primer. For easier access to intricate areas, consider leaving the arm that holds the scythe detached during priming. Base Coating: Apply base coats using Mournfang Brown for wooden elements and Basalt Grey for the cloak and scythe blade. Bugman’s Glow is ideal for flesh areas. Apply these base coats roughly, aiming for coverage rather than precision. Skin Tones: Enhance skin areas with Bugman’s Glow, providing a rosy, dark flesh tone. Progress with Cadian Fleshtone for highlights, ensuring to thin your paints for a smooth finish. Wood and Metal Detailing: Utilise Balor Brown for initial wood highlights, transitioning to Mournfang Brown for added depth. For metallic areas like the scythe blade, start with Rhinox Hide, building up to Neutral Grey mixed with white for higher highlights. Create rust effects using Trollslayer Orange. Shading: Employ Corvus Black, adequately thinned, to add depth through shading across the model, focusing on recesses and shadowed areas. Detail Enhancement: Use Screaming Skull for edge highlights and detail work on scrolls and similar features. Maintain thin paint layers for refinement. Textures and Freehand Elements: Incorporate freehand elements like Nurgle symbols using Mephiston Red. Apply textures such as rust and wood grain using stippling techniques with Trollslayer Orange for rust and Morghast Bone for wood grain. Verdigris Effect: On copper elements, create a verdigris effect with Sotek Green mixed with white. Apply this judiciously to areas that would naturally show oxidation, steering clear of bright highlights. Candle Flames: Paint candle flames using Yriel Yellow, adding Trollslayer Orange to the tips. Blend these colours for a realistic flame appearance. Model Basing: Prepare a base that complements the model, using a mix of sand, poly filler, and paint it with XV-88, Morghast Bone, and weathering powder. Introduce grass patches for added realism. Final Adjustments: Revisit the Rotbringer Sorcerer for any last highlights or corrections. Use a precise brush for fine details, ensuring the paint consistency is suitable. Model Sealing: Once satisfied with the painting, apply a matte varnish to protect your work. Tips: Thin your paints for smoother layers and better control. Utilise an older brush for base coating and a newer, finer brush for detailed work. Regularly assess your work from a distance for adjustments. Experiment with light placement for dynamic highlighting and shadowing effects on your Rotbringer Sorceror. Initial layers don’t need perfection as they will be layered over with more detail. Show it off! As you progress, feel free to adapt and tweak techniques to suit your style. Good luck! When you’ve finished, why not pop into our Discord and show it off to other website members? 🙂 More Nurgle Tutorials More Free Video Tutorials Free videos for logged in members – just sign up as a ‘friend’ to view and click any of the thumbs.To explore all of these, visit this page! If you don’t have an account, please sign up here! The website currently has over 350 video tutorials, plus step by step guides and PDFs. You can explore more free videos with a free “freebies” membership, or take the plunge and become a full subscriber for full access. If you’d prefer to support me on Patreon, please visit: https://www.patreon.com/RichardGray [...]
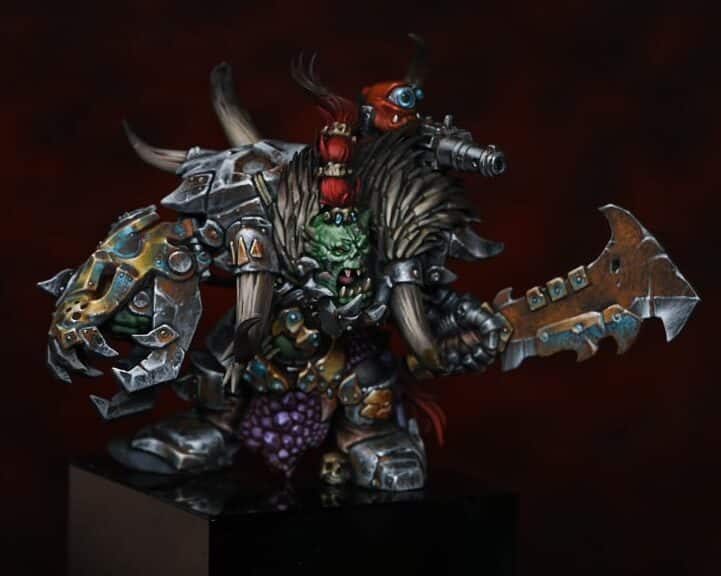
This video shows How to Paint Darkstrider, who is a Tau special character for 40k.We’re aiming for a stealthy and moody look, differing from the standard bright and clear artwork. Because of that, it’s essential to prime the figure in black for the deep, shadowy effect we’re going for. How to Paint Darkstrider – Video All videos are recorded in HD 1080p or higher – use full screen for the full effect and let the video load completely. You can also click the little “cog” and change the speed of the video, if I am going too fast (or slow!). Materials Needed: Primer: Badger Ultimate Primer Black Paints: Games Workshop (XV-88, Balor Brown, Mephiston Red, Evil Sunz Scarlet, Macragge Blue, Yriel Yellow), Vallejo (German Grey, Black, White, Ice Yellow, Neutral Grey) Painting Steps: Priming: Begin by priming your miniature in black. This will enhance the darker, stealthy look of the character. Base Colours: Use XV-88 and Macragge Blue mixed with German Grey to create a desaturated base for the armour and cloth. This creates a dull, muted base, essential for the later stages of highlighting. Blocking In: Apply Vallejo Neutral Grey to areas that will become white. For black regions, use German Grey as your initial highlight. Remember not to overdo it, or you’ll end up with grey instead of black. Highlighting Armour: Start building highlights on the armour using a mix of XV-88 and German Grey, gradually adding less grey to each mix. Use a thin, 50:50 water-to-paint mix for a smooth transition. Focus on the chest and head for the brightest highlights, as they are the focal points. Face and Detailing: For the face, start with a base of Macragge Blue mixed with German Grey. Gradually add more blue and then white for highlights. Pay attention to the unique features of the Tau’s face, using the sculpt as a guide. Add detail and texture through your brushwork. Non-Metallic Gold Elements: Use XV-88 as a base for gold elements, highlighting progressively with Balor Brown and Ice Yellow. Remember, the brighter and larger your highlight, the shinier the gold will appear. How to Paint Darkstrider Lenses and Eyes: For the lens on the gun, start with Mephiston Red, adding Evil Sunz Scarlet and white for highlights. For Darkstrider’s eye, consider black with a yellow iris, as per the Warhammer animation. Final Touches: Check the overall miniature for balance in colour and highlights. Adjust and add final details as necessary. Remember, the model should look cohesive from all angles. Finishing: Once satisfied, you can finish your miniature with a suitable varnish to protect your work. Tips: Keep your brushwork consistent and controlled. Use a wet palette to keep your paints workable. Regularly step back and review your work for a balanced look. This process should give you a Darkstrider miniature with a stealthy, dark look, different from the standard bright Tau colour schemes. Enjoy your painting! More Free Video Tutorials Free videos for logged in members – just sign up as a ‘friend’ to view and click any of the thumbs.To explore all of these, visit this page! If you don’t have an account, please sign up here! The website currently has over 350 video tutorials, plus step by step guides and PDFs. You can explore more free videos with a free “freebies” membership, or take the plunge and become a full subscriber for full access. If you’d prefer to support me on Patreon, please visit: https://www.patreon.com/RichardGray [...]
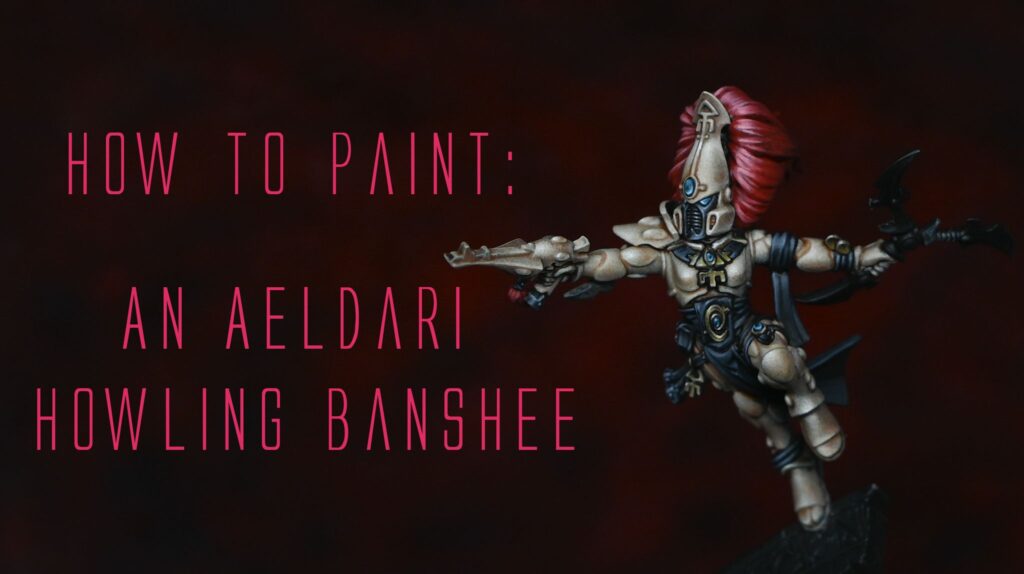
This free video shows how to paint OSL on the Vargskyr from the Cursed City boxed game by Games Workshop with some easy to follow tips. The following paints were used on the modelGames Workshop: Warpstone Glow, Moot Green, Yriel Yellow, Baharroth Blue, Blue Horror, Contrast Skeleton Horde Vallejo: Basalt Grey, Neutral Grey, Black, Pale Grey Blue Top Tips on How to paint OSL on the Vargskyr Priming and Base Coat: Start by priming the model with an ultimate primer, like Badger primer, for a slightly satin finish.Use a black base coat for the OSL (Object Source Lighting) effect, as it provides high contrast.Begin with Warpstone, applying a couple of coats with an airbrush for the green glow. Adding OSL Effect: For a sickly look, hold the airbrush a bit further and add yellow to the warp stone glow.Rotate the model to ensure lighting works from multiple angles.Reduce the spray area and focus on the back with Baharroth Blue to enhance the OSL effect. Matte Varnish and Detail Restoration: Apply a coat of ultra matte varnish, like Lucky Varnish by Mig, to eliminate shine – this brings back detail lost in the varnishing process.Consider using multiple layers for a transition effect as layers build up. Fur Texture: Use Baharroth Blue for fur, but be cautious as it may create a high-contrast jump.Blend Pale Grey Blue into the fur for a smoother transition, applying thinner coats for textured effects. Face Highlights: Highlight the face, a major focal point, using Skeleton Horde as a guide for placement.Don’t worry about neatness; embrace the furry, textured nature of the model. Texture Effect Painting: Use a small brush for texture effect painting, but feel free to experiment with brush sizes.Maintain a wet paint mixture for precise dry brushing on fur, enhancing the model’s expressive nature.Accept some roughness in the paint as it adds character to a gaming model. Green Glow and Final Touches: Continue working on the green glow side, following the same process as the light side.Avoid excessive airbrushing for a clinical look; embrace expressive marks.Add a slightly darker gray colour to enhance details on non-glowing areas. Frame with Black Rim: Paint the model’s base with a black rim to frame and enhance the overall neatness.Consider the model’s orientation and adjust the painting accordingly to avoid missing details. Blue Light from the Other Side: Using Baharroth Blue, dry brush in the direction of the light to create a blue light effect.Maintain a consistent direction, capturing angles that highlight the green glow, face, and arm. Free Video Tutorials Free videos for logged in members – just sign up as a ‘friend’ to view and click any of the thumbs.To explore all of these, visit this page! If you don’t have an account, please sign up here! The website currently has over 350 video tutorials, plus step by step guides and PDFs. You can explore more free videos with a free “friend” membership, or take the plunge and become a full subscriber for full access. If you’d prefer to support me on Patreon, please visit: https://www.patreon.com/RichardGray [...]
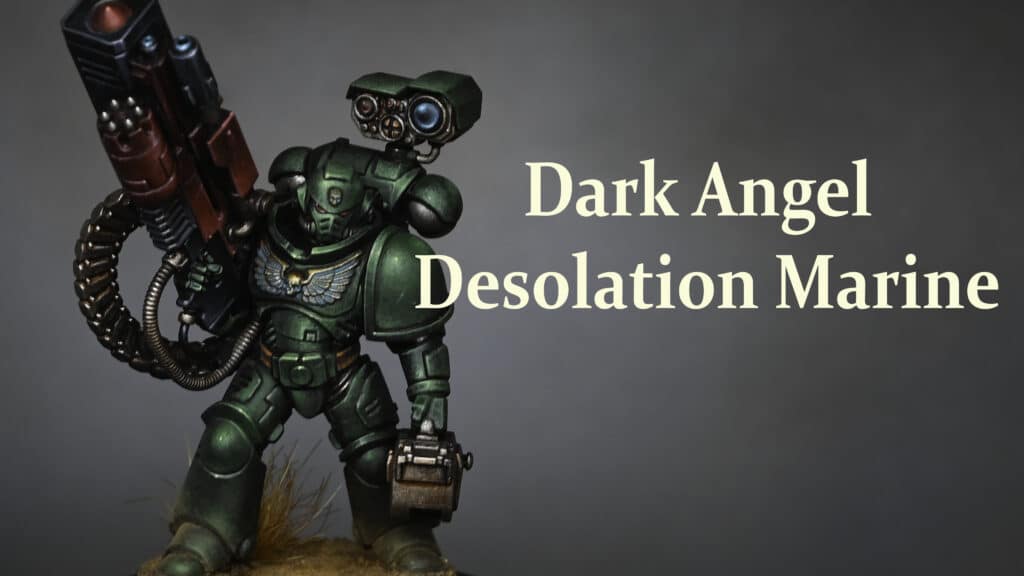
This free video shows how to paint a Blood Angel in new Mark VI armour, from the Horus Heresy (make sure you are logged in to view!) Video: How to Paint A Blood Angel in MKVI Armour All videos are recorded in HD 1080p or higher – use full screen for the full effect and let the video load completely. You can also click the little “cog” and change the speed of the video, if I am going too fast (or slow!). Paints and Materials: Games Workshop: Mephiston Red, Evil Sunz Scarlet, Wild Rider Red, Warboss Green, Moot Green, Mournfang Brown, Darkoath Flesh (Contrast), Contrast Medium, Forge World Weathering Powder Dark Sand. Vallejo: Black, Mecha Varnish Gloss, Mecha Varnish Matt, Metal Colour Burnt IronP3: Morrow White (Any White will do)BrushesArtis Opus: Series S size 1 and 00, Small Drybrush Step-by-Step: How to Paint A Blood Angel in MKVI Armour Preparation Clean Model: Ensure the model is cleaned of mold lines and primed. Drill the barrel for added realism if it hasn’t been done already. Assembly: Fully assemble the model before starting to paint. Base Coating Red Armor: First Layer: Start with Mephiston Red, diluting it to a 50/50 mix with water. Apply with a small drybrush or a large round soft brush, using a stippling motion to cover the armor. Second Layer: Apply Evil Sunz Scarlet to areas where light naturally falls, like shoulders and helmet, using a gentler stippling motion. Final Layer: Add Wild Rider Red to the brightest areas, but be careful as it’s a pinky-orange hue. This layer is just for the very highlights. Detailing Metallics: Paint metallic areas with Vallejo Metal Colour Burnt Iron. These metallics have good coverage, so there’s no need for a black undercoat. Once dry, apply a coat of gloss varnish (optional). Eyes: Start with Warboss Green for the base of the eye lenses. Add Moot Green over the Warboss Green, leaving some of the darker green visible around the edges. Mix Moot Green with a bit of white for the next layer, focusing on the central part of the lenses. Finish with a small dot of white in the center for the glowing effect. Black Areas: Paint any black parts like the bolter and the eyes. Shading Wash: Mix Darkoath Flesh (Contrast) with a bit of Contrast Medium and apply liberally over the model for shadows and depth. Use a clean brush to remove excess wash, especially in recesses. Highlights and Finishing Touches Red Armor: Revisit with Evil Sunz Scarlet and Wild Rider Red, focusing on areas where light hits to enhance the red color. For chips and scratches, use Rhinox Hide with a fine brush, adding tiny dots and lines to simulate battle damage. Metallics: Re-highlight with Burnt Iron to restore the metallic sheen. Base Cover with PVA glue and sand. Once dry, apply a brown wash and let it dry. Apply Forge World Weathering Powder Dark Sand for a dusty, battle-worn look. Varnishing Finish with a coat of Vallejo Mecha Varnish Matt for protection and a matte finish. Final Touches Detailing: Add any final details like highlighting edges or correcting overspills. Decals (Optional): If you have Blood Angels decals, apply them after the shading stage. More Free Video Tutorials Free videos for logged in members – just sign up as a ‘friend’ to view and click any of the thumbs.To explore all of these, visit this page! If you don’t have an account, please sign up here! The website currently has over 350 video tutorials, plus step by step guides and PDFs. You can explore more free videos with a free membership, or take the plunge and become a full subscriber for full access. If you’d prefer to support me on Patreon, please visit: https://www.patreon.com/RichardGray [...]
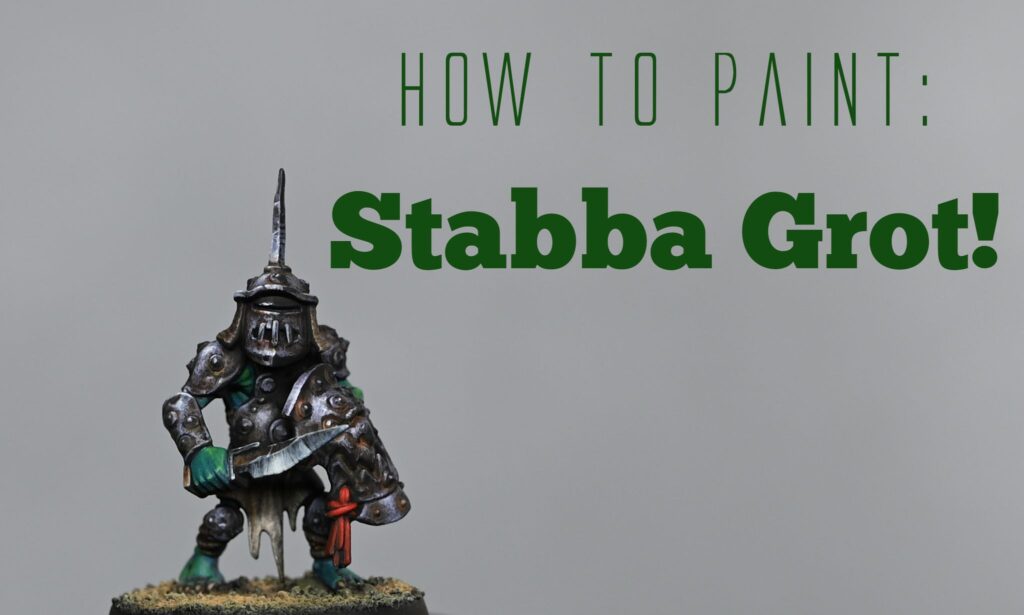
A video tutorial with step-by-step guide on how to freehand a skull on Castellan Knight legplate, with advanced shading and patterns. This guide will take you through painting a detailed skull freehand on the shin panel of a Castellan Knight miniature from Games Workshop. We’re focusing on creating a striking skull design amidst a vivid background, with a two-part process that lays the groundwork for intricate background details to be added later. The process begins with modifying the shin panel for a smooth painting surface, followed by base colouring, sketching, and detailing the skull. Video: Freehand Skull on Imperial Knight Part One Materials Needed Brushes: Size 1 Artis Opus Brush (used throughout the video for detailed work) Paints: Games Workshop (Citadel): Rhinox Hide: Base sketching of the skull Balor Brown: Refining skull details Ushabti Bone: Highlighting the skull Ceramite White: Final highlights on the skull Wild Rider Red: Used for airbrushing the background (mentioned as part of the orange base) Troll Slayer Orange: Part of the airbrushed background Mournfang Brown: Used in shadows and for airbrushing background details Privateer Press (P3): Battlefield Brown: Alternative to GW Scorched Brown, used for shading Vallejo: Model Colour Black: For defining eye sockets and other dark areas on the skull Other Materials: Airbrush: For applying the base layer of the shin panel Scalpel: For modifying the shin panel to create a smooth surface Fine Grit Sandpaper: For smoothing the modified shin area Wet Palette: To keep paints hydrated and workable Water Container: For rinsing brushes Paper Towels: For brush cleaning and paint dabbing Preparation Tools: Filling Material: To fill in gaps after modifying the shin panel for a smooth painting surface Step-by-Step Guide Preparing the Surface Modify the Shin Panel: Begin by carefully removing excess detail from the shin panel using a scalpel. Fill in any gaps to create a smooth surface for your freehand painting. Although minor dimples might remain, they will be covered by the paintwork. Base Colouring Airbrush Background: Apply an airbrushed base layer using Wildrider Orange, Troll Slayer Orange, and a touch of Mournfang Brown for shadows. This creates a vibrant orange backdrop, setting a stark contrast for the skull. Sketching the Skull Outline with Rhinox Hide: Start sketching the skull using Rhinox Hide, focusing on getting the overall shape rather than detailed features like eye sockets or teeth. This stage doesn’t require perfection in symmetry or detail, as adjustments can be made later. Refine with Balor Brown: With Balor Brown, begin refining the skull’s structure, particularly around the temples, nose, and eye sockets. This layer adds dimension and prepares for detailed work. Detailing the Skull Highlight with Ushabti Bone: Use Ushabti Bone to start bringing out the highlights of the skull. This step involves building up from the darkest shadows to the lightest areas, considering the light source will be from the top left. Deepen Shadows: Apply Vallejo Model Colour Black to define the eye sockets and other deep shadows within the skull, enhancing the contrast and depth. Add Texture and Fine Details: Continue with Balor Brown and Ushabti Bone, applying very light, fine strokes to create texture and detail across the skull’s surface. Focus on asymmetry and imperfections for a more realistic appearance. Final Highlights with Ceramite White: Use Ceramite White sparingly to add the brightest highlights, concentrating on areas that would catch the most light. This step dramatically increases the contrast and brings the skull to life. Starting the Background Pattern Outline Pattern with Black: Begin outlining the background pattern, starting with simple geometric shapes and lines to create a non-symmetrical, maze-like design. This base pattern sets the stage for further detailing. Apply Initial Highlights: Initially, experiment with Fire Dragon Bright for highlights but plan to integrate the skull’s colours (Balor Brown, Ushabti Bone, Ceramite White) into the background for consistency. Finishing Touches Adjust and Refine: As the background pattern develops, continuously adjust and refine the design. Incorporate shadows and highlights to create depth and interest, using P3 Battlefield Brown for shading. Merge Skull and Background: Begin to subtly blend elements of the skull into the background pattern, ensuring the entire piece feels cohesive. Video: Freehand Skull on Imperial Knight Part Two Where we focus on refining the maze-like background detail introduced in Part 1, enhancing the overall visual appeal and integrating the skull into the pattern for a cohesive look. Materials Required: Brushes: A fine detail brush, ideally size 0 or 1. Paints: Games Workshop’s Wild Rider Red, Rhinox Hide, Ceramite White, Zamersi Desert, Ushabti Bone, Firedragon Bright, Abaddon Black, and P3’s Battlefield Brown (or Baneblade Brown as a GW alternative). Other Supplies: A wet palette for mixing paints, water for thinning paints, and kitchen paper for brush cleaning. Step-by-Step Guide: Review and Refine the Existing Pattern: Begin by assessing the pattern laid out in Part 1. Identify areas that require refining or adjustments to ensure a unified appearance across the entire shin armour. Adjusting the Pattern: Use a mix of Rhinox Hide and Battlefield Brown to refine areas needing adjustments. This may involve smoothing transitions between different sections of the pattern or altering shapes to better integrate with the overall design. Focus particularly on areas around the white dots and sections that appeared overly bright or disjointed in Part 1. The aim is to create seamless transitions between the skull and the background pattern. Enhancing Contrast and Depth: Apply thin glazes of Rhinox Hide in areas needing more depth, helping to highlight details and make the pattern more intricate. Increase contrast by selectively brightening areas with Zamersi Desert, followed by Ushabti Bone and Ceramite White for the highest highlights. This step is crucial for giving the pattern a three-dimensional look. Blending the Skull into the Pattern: To integrate the skull into the background, extend pattern elements over the edges of the skull. Use a fine detail brush and steady hand to draw lines and shapes that flow from the skull into the surrounding areas, unifying them. Final Highlights and Touch-Ups: Add final highlights with Ceramite White to the highest points of the pattern, enhancing the illusion of depth and detail. Review the piece for any areas requiring further refinement or additional highlights before sealing your work. Glazing for Cohesion: Create a glaze with Firedragon Bright and water for a thin consistency. Apply this over the entire pattern, especially where transitions need softening or colours unifying. The glaze will blend highlights and shadows for a cohesive look. Finishing Touches: Once the glaze has dried, reassess the effect. If necessary, redefine any details with base colours that may have been softened too much by the glazing. Sealing the Work: After ensuring the paint is completely dry, apply a matte varnish to protect your work. This also helps unify the finish across different textures and layers. More Free Video Tutorials More free videos for logged in members – just sign up as a ‘friend’ to view and click any of the thumbs.To explore all of these, visit this page! If you don’t have an account, please sign up here! The website currently has over 350 video tutorials, plus step by step guides and PDFs. You can explore more free videos with a free “friend” membership, or take the plunge and become a full subscriber for full access. If you’d prefer to support me on Patreon, please visit: https://www.patreon.com/RichardGray [...]
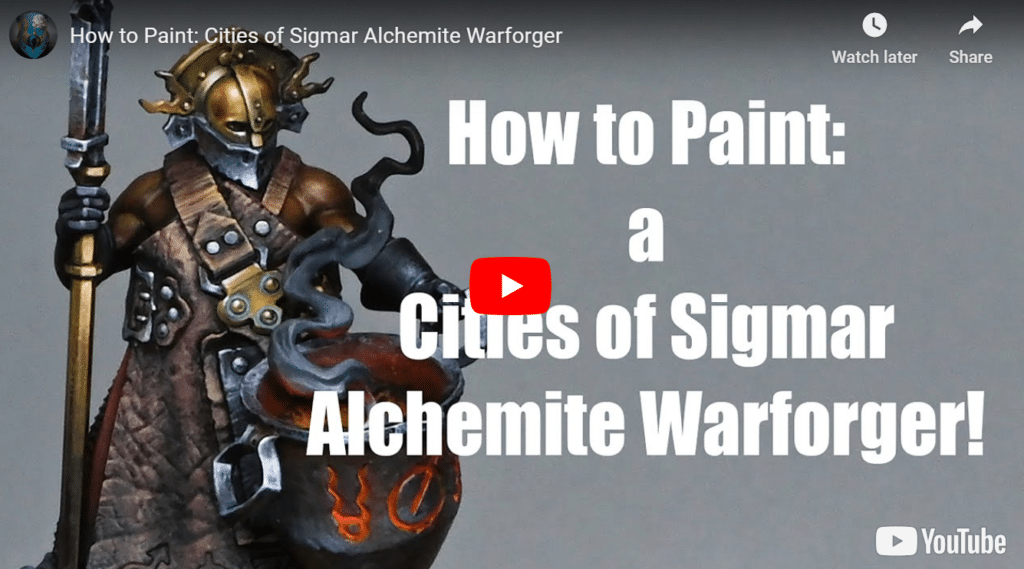
How to Paint a Blood Bowl Bronze Mummy with weathered NMM bronze effects, bandages, clothing, NMM Skull and Skin! Scroll town to explore the two video tutorials in order, or quick jump to specific techniques and materials you might need. Video One – How to paint NMM Bronze with VerdigrisPaints and Materials NeededStep-by-Step Guide on How to Paint a Blood Bowl Bronze MummyVideo Two: Bandages, Clothing, NMM Skull, Skin and BasePaints and Materials NeededStep-by-Step GuideBandagesSkull (Non-Metallic Metal Gold)Clothing (Trousers/Pants)BeltSkinBase and Finishing Touches Video One – How to paint NMM Bronze with Verdigris All videos are recorded in HD 1080p or higher – use full screen for the full effect and let the video load completely. You can also click the little “cog” and change the speed of the video, if I am going too fast (or slow!). Paints and Materials Needed Games Workshop: Mournfang Brown, Rhinox Hide, XV-88, Balor Brown, Sybarite Green, Gauss Blaster Green Vallejo: Ice Yellow, Pure White Step-by-Step Guide on How to Paint a Blood Bowl Bronze Mummy 1. Priming and Base Coating: Start with the model already primed in black. Apply Mournfang Brown (Games Workshop) roughly on the armour, focusing on areas that would naturally catch light. The application at this stage can be quite loose and liberal. 2. Layering for Texture: Proceed with XV-88 (Games Workshop), this time being more careful and refined in your brushwork. Focus on creating a weathered texture, interpreting the previous layer’s marks as damage or wear. Use the very tip of the brush for finer lines and stippling. 3. Detailing with Lighter Tones: Use Balor Brown (Games Workshop) to further enhance the details. At this stage, focus on the edges, rivets, and any other raised details on the armour. Remember, the aim is to create a three-dimensional effect, highlighting the lower edges of dents or imperfections to create depth. 4. Highest Highlights: Introduce Ice Yellow (Vallejo) for the brightest parts of the armour. Apply it sparingly and only on the most raised areas to create the illusion of light reflecting off metal. Be cautious with this step to maintain a realistic metallic look. 5. Glazing for Depth: If needed, mix Rhinox Hide (Games Workshop) with water to create a glaze. Apply this over areas that are in shadow or need to be toned down. This step helps integrate the highlights and creates a more cohesive look. 6. Applying Verdigris: For the verdigris effect, use Sybarite Green and Gauss Blaster Green (both Games Workshop). Thin these paints down considerably. Apply them mainly in recessed areas, joints, and crevices where verdigris would naturally accumulate. Avoid covering the highest highlights to maintain the metallic sheen. Technique Tips: Work in layers, building up from dark to light to create depth and realism. Focus on where light naturally hits the model, creating highlights that follow the form and curvature of the armour. In the verdigris step, less is more. It’s easier to add more verdigris effect than to remove it, so start with a light application and build up as neede Video Two: Bandages, Clothing, NMM Skull, Skin and Base All videos are recorded in HD 1080p or higher – use full screen for the full effect and let the video load completely. You can also click the little “cog” and change the speed of the video, if I am going too fast (or slow!). Paints and Materials Needed Paints (Games Workshop): Mournfang Brown Rhinox Hide XV-88 Balor Brown Morghast Bone Ushabti Bone Death Korps Drab Hobgrot Hide (not recommended) Trollslayer Orange Paints (Vallejo): Ice Yellow Pure White Neutral Grey Brushes: Size 00 Artis Opus Brush (for detailed work) Size 2 Artis Opus Brush (for broader strokes and glazing) Other Materials: MiniNatur Moss Pads (for the base grass effect) Step-by-Step Guide Bandages Base Layer: Start with Mournfang Brown (Games Workshop) as a base layer for the bandages. Main Colour: Apply Balor Brown (Games Workshop) over the bandages. It’s recommended to use this instead of Hobgrot Hide for better coverage and a more desired effect. Highlighting: Use Morghast Bone and Ushabti Bone (both from Games Workshop) for highlighting. Focus on creating lines parallel to the bandages’ direction, paying special attention to the upper edges around the face for more detail. Shadows and Grubby Effect: Apply a thinned down Rhinox Hide (Games Workshop) in shadowed areas and to add a grubby effect to the bandages. Skull (Non-Metallic Metal Gold) Base Layer: Use Rhinox Hide (Games Workshop) as the base. Layering: Progressively layer with Mournfang Brown, XV-88, Balor Brown, Ice Yellow (Vallejo), and Pure White (Vallejo). Each layer should be smaller than the previous, creating a bright highlight effect. Refinement: Feather the edges of each layer for a smooth transition between shades. Clothing (Trousers/Pants) Base Colour: Mix Rhinox Hide (Games Workshop) with Neutral Grey (Vallejo) and apply as the base colour. Texture and Highlight: Create a scratchy, rough texture using a mix of Rhinox Hide, Grey, and Ice Yellow (Vallejo). Add white to the mix for final highlights. Belt Base Layer: Apply Rhinox Hide (Games Workshop) as the base colour. Detailing: Use Trollslayer Orange (Games Workshop) for the detailing, ensuring the paint is not too thick. Skin Base Layer: Use Death Korps Drab (Games Workshop) as the base layer for exposed skin areas. Highlighting: Gradually add white to Death Korps Drab for highlighting, focusing on the knuckles, fingertips, and muscle definition. Base and Finishing Touches Grass Application: The base is painted with Mournfang Brown (Games Workshop) and decorated with MiniNatur Moss Pads for grass. Final Adjustments: Ensure the consistency of the lighting and colour theme across the model. If you don’t have an account, please sign up here! The website currently has over 350 video tutorials with steps and tips, plus a selection of PDFs. If you are not sure about joining, you can explore my free videos with a free membership, or take the plunge and become a full subscriber for full access. If you’d prefer to support me on Patreon, please visit: https://www.patreon.com/RichardGray [...]
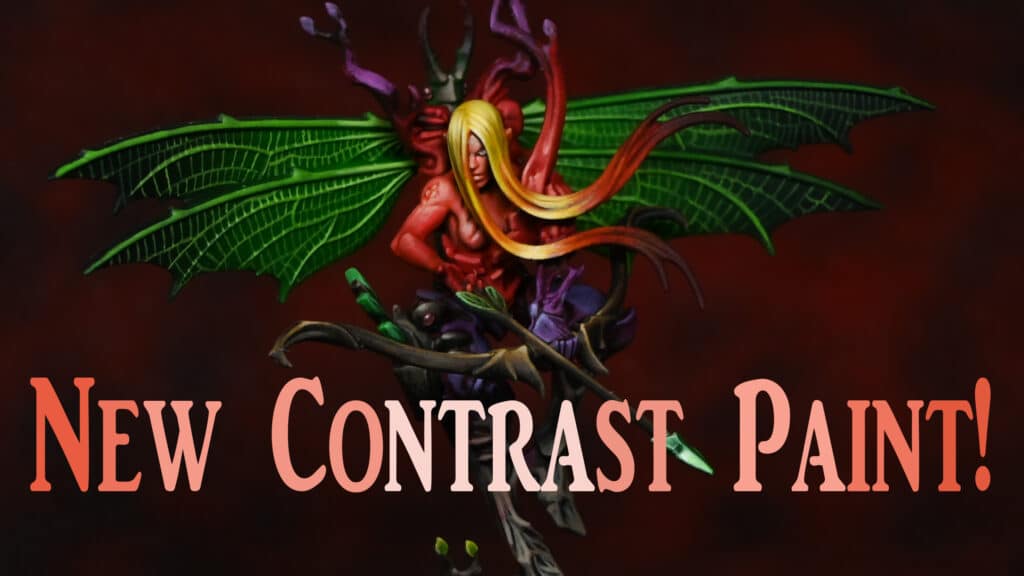
Two videos on how to paint weathered armour plate, complete with rust, scratches and chips and a simple freehand banner. You won’t need an airbrush for this tutorial. Video: Part One – Armour and Weathering Materials and Paints Needed Games Workshop Paints: Balor Brown, Yriel Yellow, Mournfang Brown, Rhinox Hide Vallejo Paints: Neutral Grey, Pale Grey Blue, White Brushes: Large dry brush (or makeup brush), fine detail brush, glazing brush (size 4 or similar) Accessories: Water for thinning paints, kitchen towel for wiping brushes, well palette Preparing the Model Clean and prime your Redemptor Dreadnought model. A light grey or white primer is recommended for bright colours like yellow. Base Coating with Stippling Technique Mix Balor Brown with water in a roughly 50/50 ratio. This will be your base layer. Stipple Balor Brown onto the armour panels using a large, round, flat brush. Aim for gentle touches to build up the texture without creating pronounced, three-dimensional brush marks. Allow the paint to dry fully before adding more layers. This creates a worn, battlefield-ready appearance. Glazing for Colour Depth Create glazes in your well palette by mixing Mournfang Brown and Yriel Yellow separately with water, using about 6-7 parts water to 1 part paint. Apply Mournfang Brown glaze to shade areas, starting from lighter areas and moving the brush towards darker regions. This adds warmth to the shadows. Apply Yriel Yellow glaze over the entire panel, focusing more paint towards the centre for a vibrant effect. Ensure to remove excess paint from your brush to avoid pooling. Chipping for Weathered Effect Use Rhinox Hide with a fine detail brush to create chipping along the edges of the armour panels where wear would naturally occur. Remember, less is more; avoid overdoing it with lines and crosses. Highlight the lower edge of each chip with Yriel Yellow to simulate the armour’s wear and tear, making the chips stand out more against the base layers. Detailing and Finishing Touches Rivets: Paint each rivet with a dot of Pale Grey Blue on the top left and a tiny line on the bottom right to simulate light reflection. Metal Exposure: Use Neutral Grey to paint areas where the metal beneath the yellow paint would show through, particularly around chips and edges. This technique helps redefine the model’s shape and adds dimensionality to the weathering. Final Highlights: Add a final touch by placing a small dot of White on the most prominent parts of the chips and rivets to enhance the reflective effect. Video: Part Two – Freehand Banner Materials and Paints Needed: Games Workshop Paints: Baneblade Brown, Rhinox Hide, Morghast Bone, Screaming Skull, Balor Brown Vallejo Paints: Model Colour Black Brushes: A smaller brush for initial sketching and detailing, and a larger brush for smoother finishes on larger sections. Other Supplies: Water for thinning paints, a palette for mixing, and kitchen towel for wiping off excess paint. Preparing the Banner: Base Layer with Morghast Bone: Begin by sketching the basic shape of the banner on the shoulder pad using Morghast Bone. This step involves creating the outline and filling in the banner. For larger sections, use a larger brush to achieve a smoother finish. Refining Edges: Use a smaller brush to refine the edges and the trailing ends of the banner. Aim for a shape that complements the space available on the shoulder pad, keeping in mind the overall design and avoiding overly stubby ends. Applying Shadow with Baneblade Brown and Rhinox Hide Mix: Mix approximately 50/50 Baneblade Brown and Rhinox Hide to create a shadow colour. Apply this mixture to add depth and shadow to the banner, especially along the edges and the banner’s folds. Highlight with Screaming Skull: To highlight the main body of the banner and give it a three-dimensional appearance, apply Screaming Skull, focusing on the central and raised areas. This step brings out the details and makes the banner stand out. Painting the Text: Sketching Text with Vallejo Model Colour Black: Using a fine detail brush and Vallejo Model Colour Black, begin sketching the text onto the banner. Start with basic shapes for letters and focus on spacing. The chosen word for this tutorial is “MORTIS.” Refining Letters: Once the basic spacing and shape are down, refine each letter for clarity and style. Adjust the thickness of the lines and add any stylistic flourishes to match the desired font. Consistency in line weight and style across all letters is crucial for readability. Correcting and Sharpening Edges: Use Morghast Bone and Screaming Skull to correct any overshoots or to sharpen the edges of the letters. This step allows for cleaner lines and more precise letter shapes. Final Touches: Weathering: To integrate the text and banner naturally with the rest of the model, apply weathering. Use Balor Brown to simulate chipped paint and wear on the banner and text. This step adds realism and character to the model. Applying Filters: A filter of heavily diluted Mournfang Brown and Yriel Yellow can be applied over the entire freehand work. This unifies the colours, softens the contrast, and gives the banner and text a worn look, blending them seamlessly with the model’s overall weathered appearance. More Free Video Tutorials More Free videos are available for for logged in members – just sign up as a ‘friend’ to view and click any of the thumbs.To explore all of these, visit this page! If you don’t have an account, please sign up here! The website currently has over 350 video tutorials, plus step by step guides and PDFs. You can explore more free videos with a free membership, or take the plunge and become a full subscriber for full access. If you’d prefer to support me on Patreon, please visit: https://www.patreon.com/RichardGray [...]
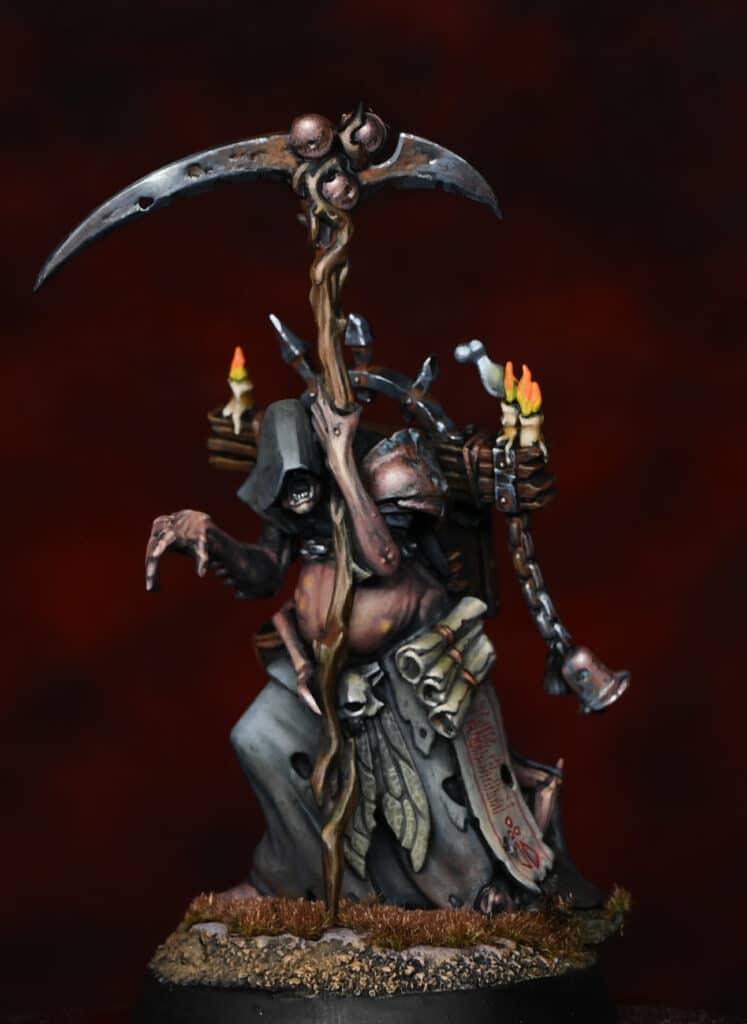
This video shows you how to paint a Death Guard marine for the Horus Heresy. This guide incorporates a mix of airbrushing and traditional painting techniques, ideal for achieving a weathered, battle-hardened look. Death Guard Horus Heresy – Video All videos are recorded in HD 1080p or higher – use full screen for the full effect and let the video load completely. You can also click the little “cog” and change the speed of the video, if I am going too fast (or slow!). Materials Required: Death Guard Marine miniature, primed black Airbrush and Tamiya X20A thinner Paints: Games Workshop’s Mournfang Brown, Ionrach Skin, Yriel Yellow, Mephiston Red, Troll Slayer Orange, Rhinox Hide, Moot Green, Mortarion Grime (Shade), Vallejo’s Black, Burnt Iron Metal Colour, Pure White, and P3’s Iosen Green Brushes, including a large brush for applying washes and a fine detail brush Painting Steps: Base Coat: Apply Mournfang Brown using an airbrush, thinned with Tamiya X20A to ensure smooth application. If an airbrush is unavailable, a brown primer can be used as an alternative. Secondary Coat: Airbrush Ionrach Skin over the model. If the paint speckles, add more thinner to achieve a smooth finish. Focus on armour panels, allowing some brown to show in recesses for depth. Highlighting: Use Vallejo Pure White, thinned more heavily than the previous layers, to highlight areas such as the head, chest, and shoulder pads. Be selective, as the right shoulder pad will be painted green later. Metallic Parts: Paint all metal parts with Vallejo Burnt Iron Metal Colour. For better control and to prevent the paint from flowing into unwanted areas, let it thicken slightly in a palette before use. Black Areas: Use a black contrast paint to cover areas like the shoulder pad. This can be done with a large brush for speed and efficiency. A couple of coats may be needed for full coverage. Green Shoulder Pad: Airbrush Iosen Green onto the left shoulder pad, gradually adding Yriel Yellow to the mix for a bright front highlight, creating a transition from bright to dark. Shading: Saturate the model with Mortarion Grime shade using a large brush. Ensure an even coat and avoid pooling. The shade will naturally darken recesses and enhance details. Chipping Effect: Apply Rhinox Hide to simulate chips and wear on the armour. Focus on edges and surfaces that would naturally see wear and tear. This step adds realism to the model. Highlighting Chips: Using Vallejo Pure White, highlight the lower edges of the chips to create a three-dimensional effect. This step is particularly effective in making the chipping stand out. Weapon Details: Highlight the gun with Neutral Grey by Vallejo, focusing on upward-facing edges and adding scratches for realism. This adds contrast and depth to the weapon. Glowing Red Eyes: Start with Mephiston Red, followed by Troll Slayer Orange, and then highlight with Yriel Yellow. Finish with a small dot of Pure White in the centre for a glowing effect. Final Touches: Apply light highlights of Vallejo Burnt Iron Metal Colour on metallic surfaces for extra sheen. Use Forge World Dark Sand weathering powder on the feet for a dusty look. Tips for Success: Ensure smooth transitions when airbrushing by adjusting paint consistency. Use the chipping technique to add character and age to the model. Focus on focal points like the head and chest for your brightest highlights. Experiment with the thickness of your paint for different effects; thicker paint can achieve sharper lines and highlights. Be mindful of the lore and aesthetic of the Death Guard when choosing colours, especially for details like the eye lenses. Remember, the goal is to create a visually striking model that embodies the rugged and corroded nature of the Death Guard. Show it off! As you progress, feel free to adapt and tweak techniques to suit your style. Good luck! When you’ve finished, why not pop into our Discord and show it off to other website members? 🙂 Free Video Tutorials Free videos for logged in members – just sign up as a ‘friend’ to view and click any of the thumbs.To explore all of these, visit this page! If you don’t have an account, please sign up here! The website currently has over 350 video tutorials, plus step by step guides and PDFs. You can explore more free videos with a free “friend” membership, or take the plunge and become a full subscriber for full access. If you’d prefer to support me on Patreon, please visit: https://www.patreon.com/RichardGray [...]
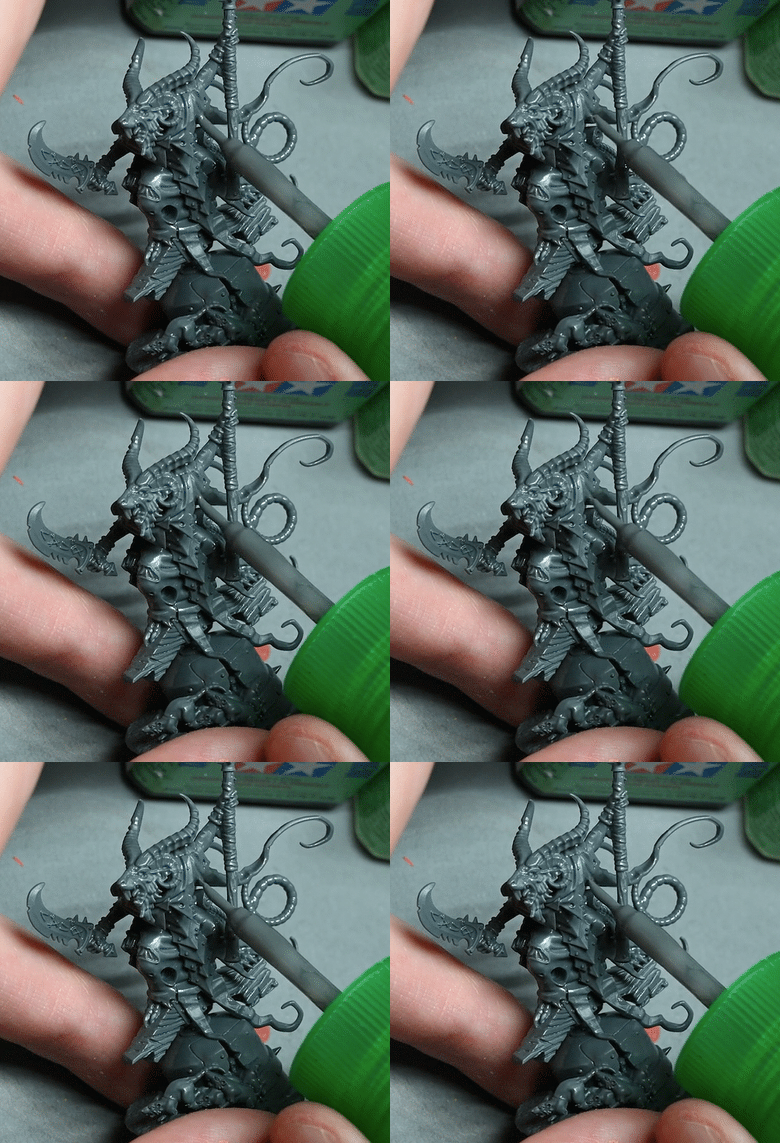
This video tutorial shows How to Paint a Legio Fureans Reaver (Tiger Eyes) from the Adeptus Titanicus game. I’ve done it as a gaming piece, but I’ll be doing a Warlord for a potential Golden Demon entry. All videos are recorded in HD 1080p or higher – use full screen for the full effect and let the video load completely. You can also click the little “cog” and change the speed of the video, if I am going too fast (or slow!). Materials and Paints: Paints from Games Workshop (Yriel Yellow, Flash Gitz Yellow, Mournfang Brown, XV-88, Magos Purple Contrast, Technical Stormshield, Corvus Black, Sotek Green, Rhinox Hide), Vallejo (Dark Sea Grey, German Grey, Black, Metal Colour Burnt Iron, Metal Colour Chrome, Ice Yellow, White), and Scale 75 (Necro Gold). Oil Colours: Winsor and Newton’s Sansodor mineral spirit, Black, and Burnt Sienna. Primer: Badger Ultimate Primer in Black. Airbrush: Infinity CR Plus, set at about 30-35 PSI. Additional Tools: Mixing cups, a selection of brushes and a magnifying headset. Step-by-Step Guide: Priming: Start with a base coat of black primer. Airbrushing the Carapace: Dilute Yriel Yellow with Vallejo airbrush thinner. Apply several coats for a solid finish. Optionally, start with a base of XV-88 for a quicker yellow hue. Add depth with Mournfang Brown in recessed areas. Reapply Yriel Yellow for a smooth blend. Highlight the edges with Flash Gitz Yellow. Mix a bit of Mournfang Brown with Yriel Yellow for a gentler transition. Trim Painting: Apply Necro Gold, thinned down to about a 50/50 mix with water. Add depth with a wash of Aggrex Earthshade. Detailing with Black Flames: Hand-paint black flames using Model Color Black. Start with simple S-curves, then refine. Applying Decals: Apply a gloss varnish, then the decals with microset. Seal with matt varnish after drying. Oil Weathering: Apply Burnt Sienna oil paint for realistic streaking effects. Scratches and Dents: Use Rhinox Hide for scratches, followed by Ice Yellow on the lower edges for a 3D effect. Highlighting and Shading Trim: Reapply Necro Gold, then blend with Vallejo Chrome for brighter highlights. Use Wild Wood contrast paint for shading. Main Structure Painting: Stipple on Burnt Iron metallic colour. Add depth with a Magos Purple wash, followed by a diluted Mournfang Brown wash. Painting the Head and Lenses: Start with a black base, then layer up highlights with German Grey and Dark Sea Grey. Glaze over with Corvus Black to tone down and blend highlights. Paint the lenses with Sotek Green and white highlights. Finishing Touches: Apply final weathering, varnishing, and any additional detailing as needed. Richard’s Pro Tips: Patience is key when airbrushing. Build up the layers gently for a more professional finish. Experiment with brush strokes and blending to achieve your desired effect. Each miniature is a canvas for creativity – don’t be afraid to add your own flair! Always thin your paints for smoother application and a more refined look. Take breaks! Detail work can be taxing on the eyes and hands. More Free Video Tutorials Free videos for logged in members – just sign up as a ‘friend’ to view and click any of the thumbs.To explore all of these, visit this page! If you don’t have an account, please sign up here! The website currently has over 350 video tutorials, plus step by step guides and PDFs. You can explore more free videos with a free “freebies” membership, or take the plunge and become a full subscriber for full access. If you’d prefer to support me on Patreon, please visit: https://www.patreon.com/RichardGray [...]
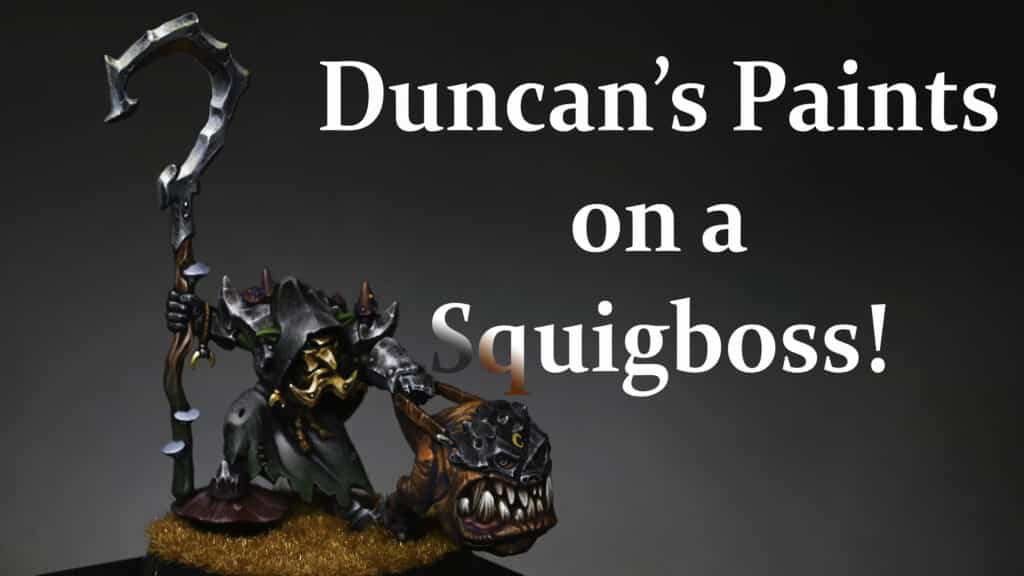
In this guide you will be shown how to paint a Plastic Contemptor Dreadnought in Imperial First colours from the new Horus Heresy boxed game. Many of you were asking for help painting a model in this style without using an airbrush or oils – so here he is! Video: How to Paint a Plastic Contemptor Dreadnought All videos are recorded in HD 1080p or higher – use full screen for the full effect and let the video load completely. You can also click the little “cog” and change the speed of the video, if I am going too fast (or slow!). The following paints were used: Games Workshop: Mournfang Brown, Yriel Yellow, Darkoath Flesh (Contrast), Contrast Medium, Sotek Green, Forge World Weathering Powder Dark Sand. Vallejo: Black, Mecha Varnish Gloss, Mecha Varnish Matt, Metal Colour Burnt Iron P3: Morrow White (Any White will do) Step by Step Guide: How to Paint a Plastic Contemptor Dreadnought Initial Preparation Begin with assembling the Plastic Contemptor Dreadnought. Keep arms and backpack separate for easier painting. Prime your Plastic Contemptor Dreadnought in black to set the stage for the upcoming colours. Base Coating with Mournfang Brown Start with Mournfang Brown, heavily diluted with water for a translucent effect. Using a large brush, apply the paint in a stippling motion. This technique creates a mottled, weathered look on the model. Multiple thin coats are needed, around three or four, to achieve the desired coverage. Creating Highlights Mix P3 Morrow White (or any available white paint) with Mournfang Brown. This mixture is used for creating highlights on the model. Apply with a smaller dry brush for more controlled and precise placement of highlights, especially on areas like the chest and upper stomach. Adding Layers and Textures Progress with the painting by layering and texturing the model. Focus on building up colours gradually. Use the stippling method to apply these layers, which enhances the weathered and battle-worn appearance. Incorporating Uriel Yellow Uriel Yellow, diluted in a similar fashion to Mournfang Brown, is used next. It’s important to keep the brush damp, not wet, to avoid the paint running. Apply in a dabbing motion, focusing on areas where light naturally falls. This stage is crucial for developing the yellow hue characteristic of the Imperial Fist. Glazing and Fine Details Move to glazing layers using Uriel Yellow. This involves a thinner consistency and focuses on the model’s focal points like the head and chest. Pay attention to edges and hard lines, using a fine brush for precise application. Weathering and Final Touches For weathering effects, employ Rhinox Hide for chipping and damage marks. Apply these strategically across the model to create a realistic battle-damaged effect. Focus on edges and areas likely to receive wear. Enhancing Eyes and Metal Details Sotek Green is used for the eyes, creating a layered effect with a transition from green-blue to pure white. For metal parts, use Vallejo Metal Color Exhaust Manifold and Copper, applying carefully due to their fluid nature. Applying Transfers and Final Varnishing After applying decals or transfers, coat them with gloss varnish to blend them seamlessly into the model. Use Micro Set for applying and setting the transfers. Base Details Finish by creating a cohesive base using Forge World Weathering Powder Dark Sand. Apply multiple layers, interspersed with matte varnish, to build up a textured, grimy effect that complements your Contemptor Dreadnought Show it off! As you progress, feel free to adapt and tweak techniques to suit your style. Good luck! When you’ve finished, why not pop into our Discord and show it off to other website members? 🙂 More Free Video Tutorials Free videos for logged in members – just sign up as a ‘friend’ to view and click any of the thumbs.To explore all of these, visit this page! If you don’t have an account, please sign up here! The website currently has over 350 video tutorials, plus step by step guides and PDFs. You can explore more free videos with a free “freebies” membership, or take the plunge and become a full subscriber for full access. If you’d prefer to support me on Patreon, please visit: https://www.patreon.com/RichardGray [...]
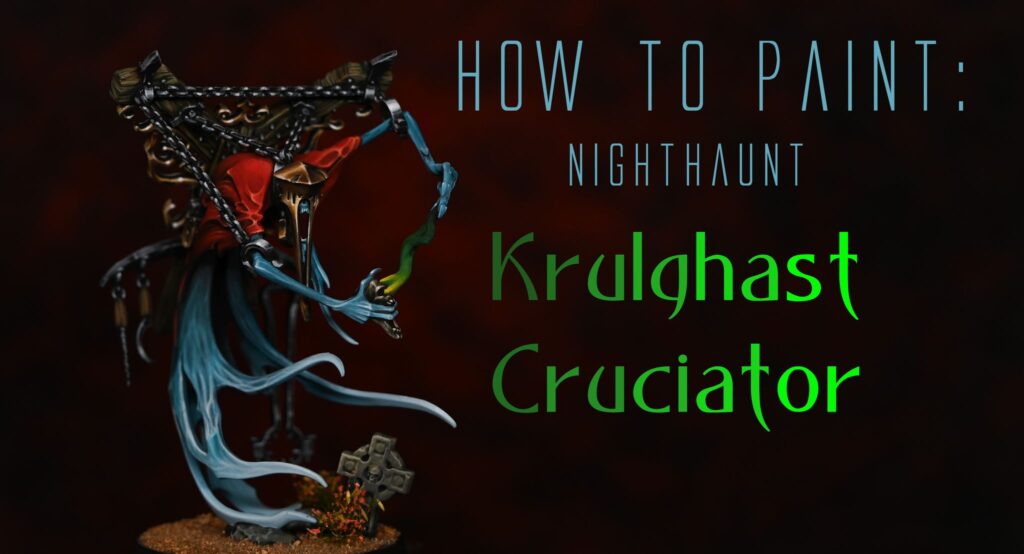
This video shows how to paint an Aeldari Howling Banshee Triskele Weapon to a high level tabletop standard. The Aeldari Howling Banshee’s power weapon (the ‘triskele’ weapon) will have a non-metallic, yet luminous green effect. This method involves intricate layering and stippling to simulate reflection. We’ll primarily utilise Cybrite Green from Games Workshop, blended with various quantities of black for shadows, and Vallejo’s Ice Yellow for the highlights. Materials Needed Cybrite Green (Games Workshop) Black (Vallejo Model Colour) Ice Yellow (Vallejo) Evil Sunz Scarlet (Games Workshop) Wild Rider Red (Games Workshop) Fire Dragon Bright (Games Workshop) Morrow White (P3 or any alternative white) A fine brush A wet palette Step-by-Step Tips and Guide – Green NMM Base Layer: Firstly, coat the triskele weapon in black, creating a pristine base. Green Layering: Blend Cybrite Green with a touch of black. Apply this darker green shade to parts of the triskele weaponless exposed to light. Incrementally integrate more black into the mixture for creating deeper shadows, ensuring smooth transitions. Highlight Application: Form lighter shades by mixing Cybrite Green with small increments of Ice Yellow. Gradually apply these on the triskele weapon’s raised and edge areas, depicting where light naturally strikes. Keep your paint mix slightly thinned for better control during layering. A recommended mix is two parts water to one part paint. Texture via Stippling: With the lighter green mixes, stipple the surface to generate a textured, reflective look. The density of the dots correlates with the opacity. Reflections Definition: Under a lamp, observe the natural light reflections on the blade. Mimic these on the blade’s upper portion using lighter green shades, ensuring they’re the most luminous parts. Finalising Highlights: Employ white or the palest green mix for the highest light points. Apply these sparingly as minute dots or slender lines to achieve a sparkling effect. Gemstone Painting: For red gems: Start with Evil Sunz Scarlet, augment with highlights using Wild Rider Red and Fire Dragon Bright, mainly on the gems’ lower areas. Cap off with an Ice Yellow or white dot atop each gem for reflection. For the blue gem: Adopt a similar approach, starting with Sotek Green and progressively incorporating white for highlights. Refinement and Adjustment: If needed, use glazes (diluted paint) to soften transitions or reintroduce colour in areas where over-highlighting may have occurred. Continuously evaluate and tweak the intensity and positioning of highlights to achieve a balanced and realistic reflective appearance on the triskele weapon. Explore more Non-Metallic Metal Tutorials If you don’t have an account, please sign up here! The website currently has over 350 video tutorials with steps and tips, plus a selection of PDFs. If you are not sure about joining, you can explore my free videos with a free “freebies” membership, or take the plunge and become a full subscriber for full access. If you’d prefer to support me on Patreon, please visit: https://www.patreon.com/RichardGray [...]
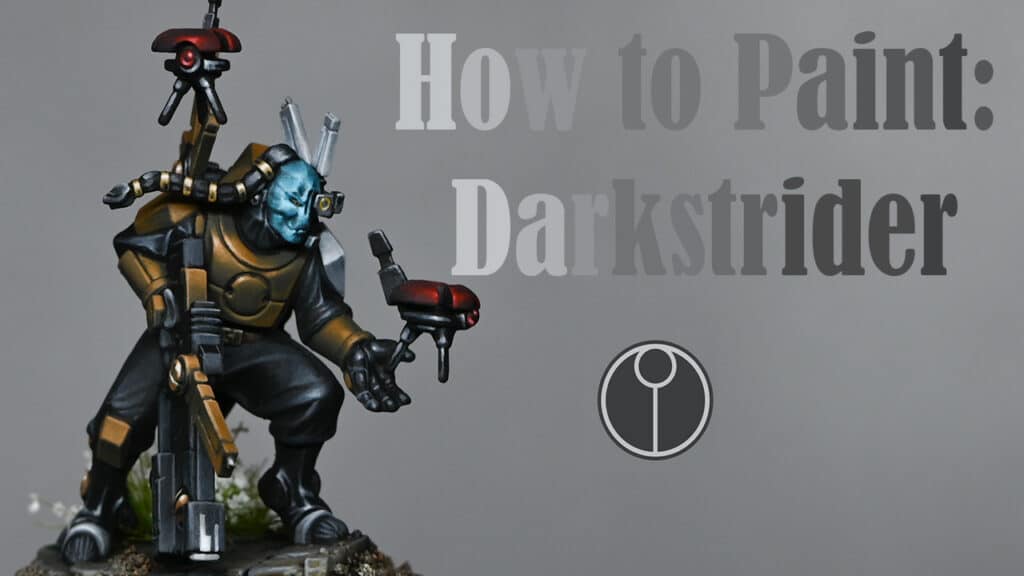
In this guide you will be shown how to paint MKVI Imperial Fists in Beakie armour, from the Horus Heresy. Video – How to Paint MKVI Imperial Fists All videos are recorded in HD 1080p or higher – use full screen for the full effect and let the video load completely. You can also click the little “cog” and change the speed of the video, if I am going too fast (or slow!). Materials and Paints Used Games Workshop: Mournfang Brown, Balor Brown, Yriel Yellow, Mephiston Red, Wild Rider Red, Sotek Green, Forge World Weathering Powder Dark Sand. Vallejo: German Grey, Neutral GreyWindsor and Newton oil paints: Burnt Siena, Black, Sansodor mineral spiritVallejo: Mecha Varnish Gloss, Mecha Varnish Matt, Metal Exhaust ManifoldP3: Morrow White (Any White will do). BrushesArtis Opus: Series S size 1 and 00. Step by Step Guide – How to Paint MKVI Imperial Fists Base Coating with Mournfang BrownBegin by airbrushing or hand painting Mournfang Brown onto the miniatures, creating a solid base for subsequent layers. Highlight Placement Lighten Mournfang Brown with a bit of white, applying it to areas of natural highlights like upward-facing surfaces. Applying Yriel Yellow Over the pre-shaded miniatures, apply thinned Yriel Yellow, bringing out the Imperial Fists’ iconic yellow. Detailing with Mephiston Red Use Mephiston Red for the sergeant’s red head stripe, distinguishing the squad leader. Eyes and Weapons Paint eyes and weapon details black, setting the stage for later detailing. Metallic Elements Apply Vallejo Metal Exhaust Manifold to metallic areas, focusing on weapon coils and armour studs. Gloss Varnishing for Decals Apply a coat of gloss varnish over the miniatures to smooth the surface for decal application. Decal Application Carefully apply Imperial Fist decals, using microset for proper adherence and fit. Oil Washes for Depth Create a wash with Burnt Sienna, Black, and Sansodor mineral spirit, enhancing depth and worn appearance. Matte Varnishing After the oil wash dries, apply a coat of matte varnish to seal previous layers and prepare for final detailing. Enhancing Yellow Highlights Revisit yellow areas with thinned-down Yriel Yellow, creating bright focal points. Eyes and Plasma Effect Create glowing effects with Sotek Green mixed with white, applying to eyes and plasma details. Weathering with Rhinox Hide Add a battle-worn effect using Rhinox Hide for scratches and chips across the armour. Final Touches Add highlights to the red plume, enhance yellow details, and complete any final touches. Base Decoration Decorate the base with sand, PVA glue, Agrax Earthshade, and weathering powder for a realistic ground effect. Final Sealing Seal the model with a final layer of matte varnish to protect your work. Show it off! As you progress, feel free to adapt and tweak techniques to suit your style. Good luck! When you’ve finished the how to paint MKVI Imperial Fists tutorial, why not pop into our Discord and show it off to other website members? 🙂 More Free Video Tutorials Free videos for logged in members – just sign up as a ‘friend’ to view and click any of the thumbs.To explore all of these, visit this page! If you don’t have an account, please sign up here! The website currently has over 350 video tutorials, plus step by step guides and PDFs. You can explore more free videos with a free membership, or take the plunge and become a full subscriber for full access. If you’d prefer to support me on Patreon, please visit: https://www.patreon.com/RichardGray [...]
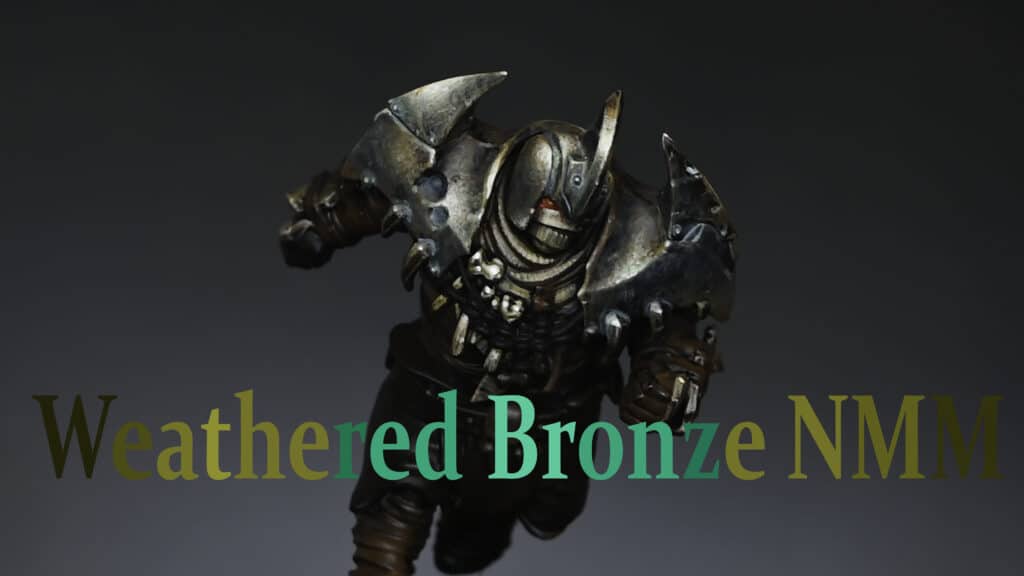
This video and step by step guide shows you how to paint a Death Guard Scorpius Missile Tank, blending traditional brushwork with optional airbrush techniques, ensuring a deeply weathered, battle-hardened appearance. Whether you’re a seasoned painter or just starting, this tutorial should and leave you with a striking addition to your Death Guard army. Quick Jump to: Video: How to Paint a Death Guard Scorpius Missile TankPaints UsedStep-by-Step GuidePreparation and PrimingStippling the Base LayersBuilding LayersAirbrushing (Optional)Detailing and WeatheringChipping EffectLenses and Vision SlitsFinal Weathering Video: How to Paint a Death Guard Scorpius Missile Tank All videos are recorded in HD 1080p or higher – use full screen for the full effect and let the video load completely. You can also click the little “cog” and change the speed of the video, if I am going too fast (or slow!). Paints Used Games Workshop: XV-88, Hobgrot Hide, Morghast Bone, Ushabti Bone, Yriel Yellow, Mephiston Red, Troll Slayer Orange, Mournfang Brown, Rhinox Hide, Moot Green, Darkoath Flesh (Contrast), Contrast Medium, Athonian Camoshade Vallejo: Black, Ice Yellow, Burnt Iron Metal Colour P3: Morrow White, Iosen Green Step-by-Step Guide Preparation and Priming Model Assembly: Assemble the Scorpius missile tank but leave the missile pods and top unglued for ease of painting. Priming: Prime the model black. For an easier approach, consider starting with a brown primer. Stippling the Base Layers Stippling Technique: Use a large dry brush, like Artist Opus, to stipple on the paint. Start with a color like XV-88 from Games Workshop, diluted to about 50% with water. Application: Ensure the stippled paint reaches recesses but expect some natural variation in tone. Apply two coats for adequate coverage Building Layers Lightening the Base: Apply successive lighter shades of brown and bone colors (like Morghast Bone and Ushabti Bone), each time covering a smaller area to create a natural, textured fade from dark to light. Focus on Raised Areas: With each lighter layer, focus more on the raised areas, leaving recesses darker for contrast. Airbrushing (Optional) Airbrush Use: If desired, use an airbrush for a smoother finish on the lower two-thirds of the tank. Start with a light brown and gradually transition to white for a clean look. Detailing and Weathering Contrast Shading: Use Darkoath Flesh contrast paint mixed with contrast medium for shading. Apply it carefully, focusing on recesses and high contrast areas. Metallic Parts: Paint all metal areas with Vallejo Burnt Iron Metal Colour and then apply Athonian Camoshade for shading. Chipping Effect Chipping Technique: Use Rhinox Hide to create chips and scratches, focusing on edges and surfaces where wear is likely. Highlighting Chips: For added depth, highlight the lower edges of each chip with a lighter color like P3 Morrow White. Lenses and Vision Slits Painting Lenses: Start with a base color like Iosen Green, then add layers of progressively lighter shades, focusing on creating a reflective effect. Vision Slits: Begin with Mephiston Red, followed by layers of Troll Slayer Orange and Yriel Yellow for a glowing effect. Final Weathering Streaking: Create streaks with a heavily diluted brown paint, using vertical strokes for a natural rain-streaked effect. Weathering Powder: Apply dark sand weathering powder mixed with matte varnish for a realistic, powdery finish on lower sections. More Tank Tutorials! Free Video Tutorials Free videos for logged in members – just sign up as a ‘friend’ to view and click any of the thumbs.To explore all of these, visit this page! If you don’t have an account, please sign up here! The website currently has over 350 video tutorials, plus step by step guides and PDFs. You can explore more free videos with a free membership, or take the plunge and become a full subscriber for full access. If you’d prefer to support me on Patreon, please visit: https://www.patreon.com/RichardGray [...]
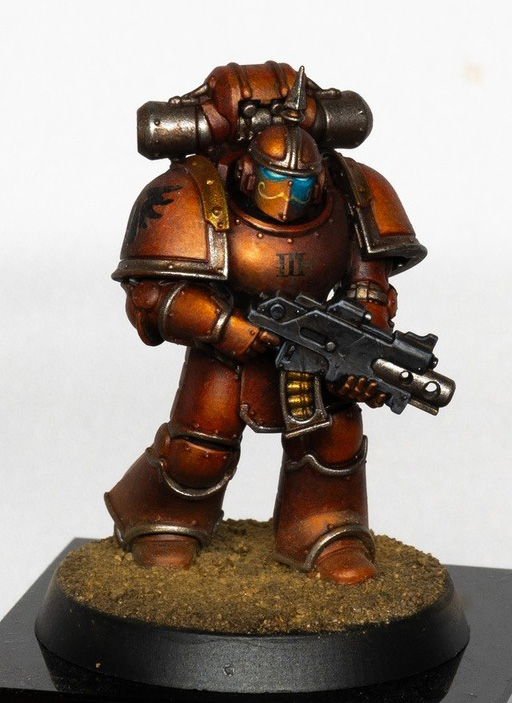
This video shows you how to paint an Imperial Guard Armoured Sentinel (Astra Militarium), which Games Workshop sent me as part of the new Army Box. Quick Jump to: Video Tutorial: How to Paint An Imperial Guard Armoured Sentinel Paints Used Step by Step Guide – How to Paint An Imperial Guard Armoured Sentinel Initial Setup Airbrushing the Base Coat Enhancing Highlights Weathering and Details Missile and OSL (Object Source Lighting) Final Touches and Highlights Metal Work and Final Weathering Video Tutorial: How to Paint An Imperial Guard Armoured Sentinel All videos are recorded in HD 1080p or higher – use full screen for the full effect and let the video load completely. You can also click the little “cog” and change the speed of the video, if I am going too fast (or slow!). Paints Used Games Workshop: Daemonette Hide, Sotek Green, Yriel Yellow, Mephiston Red, Troll Slayer Orange, Mournfang Brown, Rhinox Hide, Moot Green Vallejo: Black, Ice Yellow P3: Morrow White, Iosen Green Step by Step Guide – How to Paint An Imperial Guard Armoured Sentinel Initial Setup Model Assembly: This Sentinel from the Imperial Guard Astra Militarum Army box can be built in various ways. Our focus is on the armored version with a plasma cannon and hunter-killer missile. The weapons aren’t glued for easier painting. Airbrushing the Base Coat Airbrush Settings: Use a 0.4 needle with PSI around 30. Thin ‘Daemonette Hide’ paint with Tamiya X-20A thinner. Application Technique: Aim for dramatic lighting with stronger opacity on the front cabin, top left, fading towards bottom right. Ensure smooth transitions, but don’t worry too much about perfection as weathering will cover minor flaws. Enhancing Highlights Mixing for Highlights: Gradually mix ‘Morrow White’ into the ‘Daemonette Hide’ mixture for highlighting, focusing on the dramatic light effect. Highlighting Method: Create a realistic lighting effect, brighter on the top left of each section. Weathering and Details Base Coating Metal Areas: Apply ‘Burnt Iron’ Vallejo metal color on metal parts and ‘Viking Gold’ from Scale 75 on decorations like aquilas. Weathering: Use ‘Mournfang Brown’ for rust-style weathering. Apply ‘Cyberite Green’ on gold areas for a Verdigris effect. Missile and OSL (Object Source Lighting) Missile Painting: Originally red, but later changed to black for better contrast with the OSL. OSL Technique: Start with ‘Mephiston Red’ for the plasma glow, then layer with ‘Troll Slayer Orange’ and ‘Yriel Yellow’ for intensity. Final Touches and Highlights Adding Details: Paint lenses using a progression from ‘Sotek Green’ mixed with white for a glowing effect. Armor Panel Highlights: Use the brightest highlight mix used earlier, focusing on the top left areas and incorporating into scratches for a realistic effect. Metal Work and Final Weathering Metallic Highlights: Reapply ‘Burnt Iron’ on metal parts for brighter edges. Final Weathering: Add rust effects with thinned down ‘Rhinox Hide’ and ‘Troll Slayer Orange’, focusing on edges and recesses. More Free Video Tutorials Free videos for logged in members – just sign up as a ‘friend’ to view and click any of the thumbs.To explore all of these, visit this page! If you don’t have an account, please sign up here! The website currently has over 350 video tutorials, plus step by step guides and PDFs. You can explore more free videos with a free membership, or take the plunge and become a full subscriber for full access. If you’d prefer to support me on Patreon, please visit: https://www.patreon.com/RichardGray More of my latest videos: [...]
This free video shows the Plastic Leviathan Dreadnought from Games Workshop and shows how to paint it using Imperial Fist Contrast paint and oil paint. Video: How to Paint the Leviathan Dreadnought All videos are recorded in HD 1080p or higher – use full screen for the full effect and let the video load completely. You can also click the little “cog” and change the speed of the video, if I am going too fast (or slow!). Materials and Paints Used: Airbrush with a 0.4 needle Paints from Games Workshop (GW), Vallejo, Winsor and Newton, and P3 Winsor and Newton Sansodoor mineral spirit Vallejo Mecha Varnish (Gloss and Matt) Abteilung 502 Desert and Sand Pigment set Micro Set for decals Various brushes, including a small dry brush and a size 2 brush Water jar and wet palette Paints: GW: Mournfang Brown, Yriel Yellow, Sotek Green, Mephiston Red, Evil Sunz Scarlet, Wild Rider Red, Imperial Fist (Contrast), Rhinox Hide, Abaddon Black Vallejo: Neutral Grey, Black, Dark Blue Pale, Exhaust Manifold, Chrome Winsor and Newton: Burnt Sienna (oil paint), Black P3: Morrow White Step by Step Guide to Painting the Leviathan Dreadnought 1. Base Coating: Start by airbrushing Mournfang Brown on all armor panels. Thin the paint with Tamiya X-20A thinner for better flow. Airbrush at around 30 PSI. 2. Adding Highlights: Mix some P3 Morrow White into the Mournfang Brown along with a bit more thinner. Airbrush areas you want to appear brighter. This will affect the final yellow hue after applying Imperial Fist contrast paint. Precision is key for this step. 3. Final Highlights: Use P3 Morrow White (thinned) for the last layer of highlights. Aim for a smooth application, although some speckling is tolerable as the contrast paint will cover minor imperfections. 4. Applying Contrast Paint: Apply Imperial Fist Contrast paint over the armor. This will tie in all the layers and give a vibrant yellow finish. 5. Painting Black Areas: Start with Abaddon Black, gradually adding small amounts of white and thinner for highlights. Focus on curved areas for a natural lighting effect. 6. Metallic Sections: Paint all metallic areas with Vallejo Metal Color Exhaust Manifold. Apply it directly without undercoating in black to save time. 7. Adding Decals and Chipping: Apply decals using Micro Set on gloss-varnished areas. Then, paint chipping using Rhinox Hide. Be mindful of the order; it’s easier to apply yellow glazes before adding decals and chipping. 8. Weathering with Oils: Use Burnt Sienna oil paint for streaking effects. Apply the paint in blobs and streak down using a brush dampened with mineral spirits. For pin washing, use a mix of Burnt Sienna and Black thinned with mineral spirits. Focus on recesses and rivets. 9. Painting the Head: Airbrush the head with Mephiston Red. Freehand a stripe using Vallejo Dark Blue Pale mixed with white. Highlight the red areas with Evil Sunz Scarlet and Wild Rider Red. 10. Eye Lenses: Paint the lenses with Sotek Green, followed by a mix of Sotek Green and white for highlights. 11. Glazing Yellow Highlights: Use a glaze of Yriel Yellow mixed with water (4-5 parts water to 1 part paint) for bright highlights on the top of shoulders and other upward-facing surfaces. 12. Highlighting Chips: Mix Yriel Yellow with white and highlight the lower edges of chips. This is time-consuming but adds depth. 13. Claw and Exhaust Weathering: Dry brush the claw using a mix of Vallejo Chrome and Exhaust Manifold. Focus on the blade edges. Apply the same mix to the exhaust sections. 14. Applying Weathering Powder: Use the Abteilung 502 Desert and Sand Pigment set for the base and lower parts of the Leviathan Dreadnought. 15. Sealing with Varnish: Finish by covering the entire model with Vallejo Mecha Matt Varnish for a uniform and protected finish on your Leviathan Dreadnought. More Free Video Tutorials Free videos for logged in members – just sign up as a ‘friend’ to view and click any of the thumbs.To explore all of these, visit this page! If you don’t have an account, please sign up here! The website currently has over 350 video tutorials, plus step by step guides and PDFs. You can explore more free videos with a free “freebies” membership, or take the plunge and become a full subscriber for full access. If you’d prefer to support me on Patreon, please visit: https://www.patreon.com/RichardGray [...]
I’m excited to share my journey of painting the Warmaster Iconoclast Titan, a majestic model sent to me by Games Workshop. My focus is to highlight the crucial role of airbrushing in bringing this titan to life with the vibrant colours of the Legio Astorum, also known as the Warp Runners. Watch the Video The Importance of Airbrushing: Airbrushing is a game-changer in miniature painting, offering unparalleled smoothness and efficiency. It’s especially valuable when painting large models like the Iconoclast Titan, where traditional brushing might fall short. The fluidity of airbrush paints, like Vallejo’s Metal Color series, is perfect for both airbrushing and regular brushwork. The following paints were used: Games Workshop: Night Lords Blue, Calgar Blue, Mephiston Red, Balor Brown, Hashut Copper, Yriel YellowVallejo: Dark Sea Grey, White, Metal Colour Burnt Iron, Metal Colour Gold, Metal Colour Chrome, Mecha Gloss VarnishScale 75: Necro GoldAmmo: Ultra-Matt Lucky VarnishWinsor and Newton: Sansodor mineral spirit, oil colour Black, oil colour Burnt Sienna Badger: Ultimate Primer Black Initial Steps: Before diving into painting, it’s essential to prepare the model. I left off the armor plates of the titan to separately paint the skeleton with metallic colours and the armor panels with the distinctive Warp Runner scheme. Airbrushing Techniques: Base Coating: Starting with Vallejo’s Burnt Iron, I applied the base coat to the skeleton. Despite being formulated for airbrushing, its fluid nature worked well with a large, soft brush for a non-textured finish. Detailing with Copper: For the hips, I used Games Workshop’s metallic colour, applying it straight from the pot. This step required multiple thin coats for a consistent finish. Creating Verdigris Effects: I used oil paints to simulate the verdigris effect on the copper parts. Stippling the paint onto the model, I focused on crevices and rivets, where oxidation naturally occurs. Oil Washes: An overall wash of oil paints, mixed with spirits, added depth to the metallic parts. This technique requires patience, as it’s essential to allow the wash to dry completely, typically 24 hours. Highlighting with Chrome: Vallejo’s Chrome, another airbrush-focused paint, was used for highlights. Its liquid consistency demanded careful application to avoid flooding recessed areas. Colouring the Armor Panels: The real challenge and joy of airbrushing came alive while painting the armor panels. I started with Night Lords Blue, followed by Macragge Blue, both thinned with Vallejo airbrush thinner. The process involved covering entire panels with the darker blue, then focusing on upper sections and curves for the lighter blue, creating a pleasing visual gradient. Stripe and Flame Patterns: For detailed patterns like stripes and flames, I relied on masking techniques and freehand painting. Tamiya tape helped in creating crisp, clean lines for stripes, while freehanding flames allowed for a more organic and fitting look on the armor panels. Applying Decals and Weathering: After the base colours and patterns, I applied decals for additional detailing. This step required a steady hand and patience, especially when dealing with folded decals. Weathering was achieved with oil paints, enhancing the realism of the titan. Final Touches: Matte varnishing the model brought all elements together, providing a uniform look and protecting the paint job. For the trim, I chose to paint it with Scale 75’s Necro Gold, followed by weathering and sealing with a matte varnish. Airbrushing the Iconoclast Titan was a rewarding experience, showcasing the versatility and efficiency of this painting method. The ability to layer colours, create gradients, and apply washes and weathering with ease made airbrushing an indispensable tool in my painting arsenal. Whether you’re a seasoned veteran or a beginner, incorporating airbrushing into your miniature painting can elevate your models to new heights. More Free Video Tutorials More free videos for logged in members – just sign up as a ‘friend’ to view and click any of the thumbs.To explore all of these, visit this page! If you don’t have an account, please sign up here! The website currently has over 350 video tutorials, plus step by step guides and PDFs. You can explore more free videos with a free “freebies” membership, or take the plunge and become a full subscriber for full access. If you’d prefer to support me on Patreon, please visit: https://www.patreon.com/RichardGray [...]
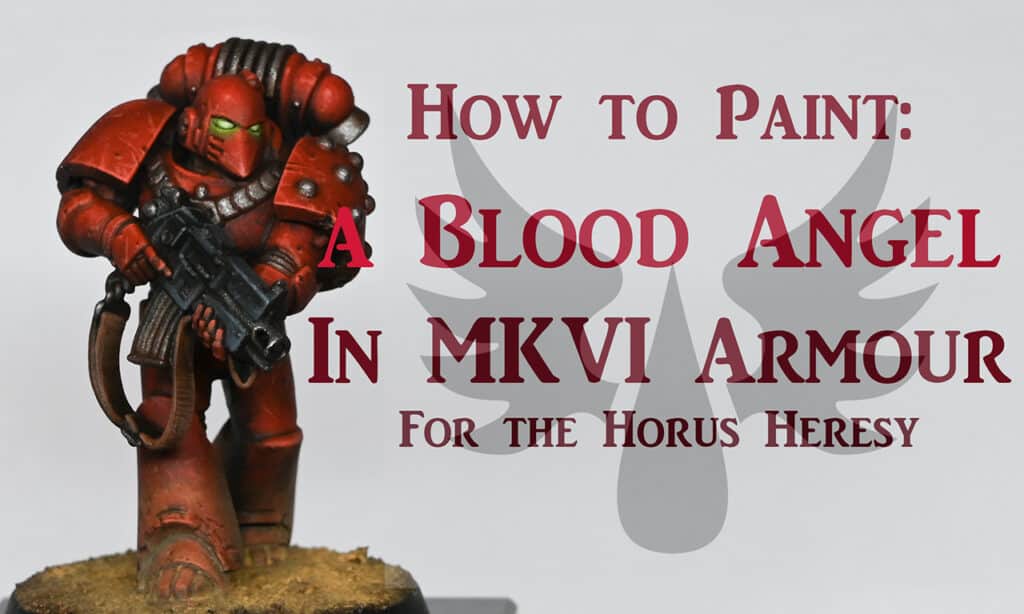
This tutorial with video will guide you through how to paint an orange Blood Angel Space Marine with a unique orange twist to his armour. Painted as part of Movember for mental health awareness, this model also features a freehand moustache as a quirky homage to the cause. One of the key challenges of this project was working with Troll Slayer Orange—an infamously tricky paint—and blending it into the Blood Angels’ classic aesthetic, reminiscent of their older colour schemes. Video: How to Paint an Orange Blood Angel Paints Used Games Workshop Mephiston Red Rhinox Hide Balor Brown XV-88 Troll Slayer Orange Sotek Green Contrast Medium Contrast Dark Oath Flesh Vallejo Ice Yellow Black Neutral Grey Metal Colour Exhaust Manifold Game Colour Scarlet Blood Scale 75 Necro Gold P3 Morrow White AK 3rd Gen (Optional) Golden Brown Light Brown Step-By-Step – How to Paint an Orange Blood Angel 1. Basecoat with Mephiston Red Method: Begin by stippling Mephiston Red over a black-primed model using a small drybrush. This base layer ensures smoother transitions when applying the Troll Slayer Orange later, as orange paint is notoriously translucent over black. Consistency: Thin the Mephiston Red with a 50/50 mix of water and paint for better flow. Use a damp brush for stippling to achieve a consistent texture. Tips: Regularly clean and dry your brush to avoid flooding the model with excess paint. Use a smaller, chunky brush to fill in hard-to-reach areas to eliminate visible primer in the recesses. 2. Add Scarlet Blood for Vibrancy Paint: Vallejo Scarlet Blood Method: Stipple this matte red paint over the basecoat, focusing on areas that catch light, such as the chest, shoulder pads, and helmet. This adds richness to the tone while subtly transitioning towards orange. Placement: Apply with precision, keeping the brush perpendicular to the model to avoid drybrush streaks. Alternatives: Evil Sunz Scarlet can be used instead if you prefer GW paints, but Scarlet Blood offers excellent coverage and vibrancy. 3. Highlight with Troll Slayer Orange Paint: Troll Slayer Orange Method: Thin the orange paint (1:1 water to paint) and apply it to the raised areas in multiple thin layers. Its translucency works in your favour, blending naturally with the red beneath. Technique: Work around the model, allowing sections to dry before returning for additional layers. This prevents muddy transitions and creates a soft gradient. Pro Tip: For a less orange look, mix Scarlet Blood with small amounts of white or yellow to lighten highlights without veering too far into orange territory. 4. Shade with Contrast Dark Oath Flesh Paint: Contrast Dark Oath Flesh + Contrast Medium Method: Apply a diluted wash of Dark Oath Flesh over the entire model. This acts as a filter, unifying the tones, shading the recesses, and reducing the vibrancy of the orange. Consistency: Use Contrast Medium instead of water to maintain the wash’s properties. Check for pooling and wick away excess with a clean, damp brush. 5. Painting Details and Metallics Metallic Paints: Vallejo Metal Colour Exhaust Manifold, Scale 75 Necro Gold (or Viking Gold) Method: Pick out the trim, weapon details, and any embellishments. Silver: Use Vallejo Exhaust Manifold for weaponry. Gold: Apply Necro Gold on selected trims (e.g., shoulder pads). Highlight with a lighter gold for emphasis. Pro Tip: To create a weathered look, glaze Dark Oath Flesh over metallics for a patina effect. 6. Adding Glow to the Eyes Paints: Sotek Green, Ice Yellow, and White Steps: Paint the eye lenses with Ice Yellow to create a bright base. Glaze over with Sotek Green to establish the colour. Highlight the centre of the lens with Ice Yellow and pure White for the brightest point. Add Object Source Lighting (OSL): Thin Sotek Green and lightly glaze the surrounding areas to simulate a glow effect. Tips: Focus OSL on areas in shadow for the most dramatic effect. If the surrounding armour is well-lit, the glow will appear less intense. 7. The Moustache As a nod to Movember, the model features a freehand moustache on its faceplate. Basecoat: Use Golden Brown for the initial design. Highlight: Build up with Ice Yellow for a metallic gold appearance. Symmetry: For best results, face the model head-on while painting and use short, confident brush strokes. Pro Tip: If you make a mistake, mix Rhinox Hide and Troll Slayer Orange to “erase” errors and blend corrections seamlessly. 8. Final Touches and Base Decals: Apply transfers with Micro Set to conform them to the armour, then stipple over with basecoat colours for a weathered look. New to Decals, or need some tips? Use this handy step by step guide and video! Watch Now Base: Keep it simple—sand painted with Agrax Earthshade, finished with a touch of weathering powder. This project was a fun challenge, blending unconventional colours into a Blood Angels scheme while supporting an important cause. Whether you tackle the freehand mustache or adapt the colour palette for your own chapter, the techniques here can add character and vibrancy to any Space Marine. If you want to support the Movember mental health campaign, check out the link below: https://movember.com/m/15175299 Videos Not Showing? To view any of my paid tutorials, you need to be a member of the website – please click below to log in or join the site. Not sure about joining just yet? Check out my Youtube for all my free tutorials or sign up as a free “friend” member on this site and visit the free videos page! If you’d prefer to support me on Patreon, please visit: https://www.patreon.com/RichardGray [...]

If you don’t have an account, please sign up here! The website currently has over 350 video tutorials, plus step by step guides and PDFs. You can explore more free videos with a free “friend” membership, or take the plunge and become a full subscriber for full access.

Legio Sinister Freehand

If you’d prefer to support me on Patreon, please visit: https://www.patreon.com/RichardGray