


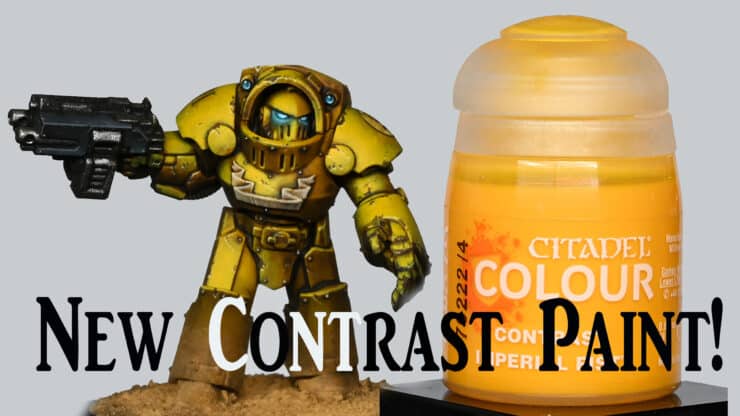
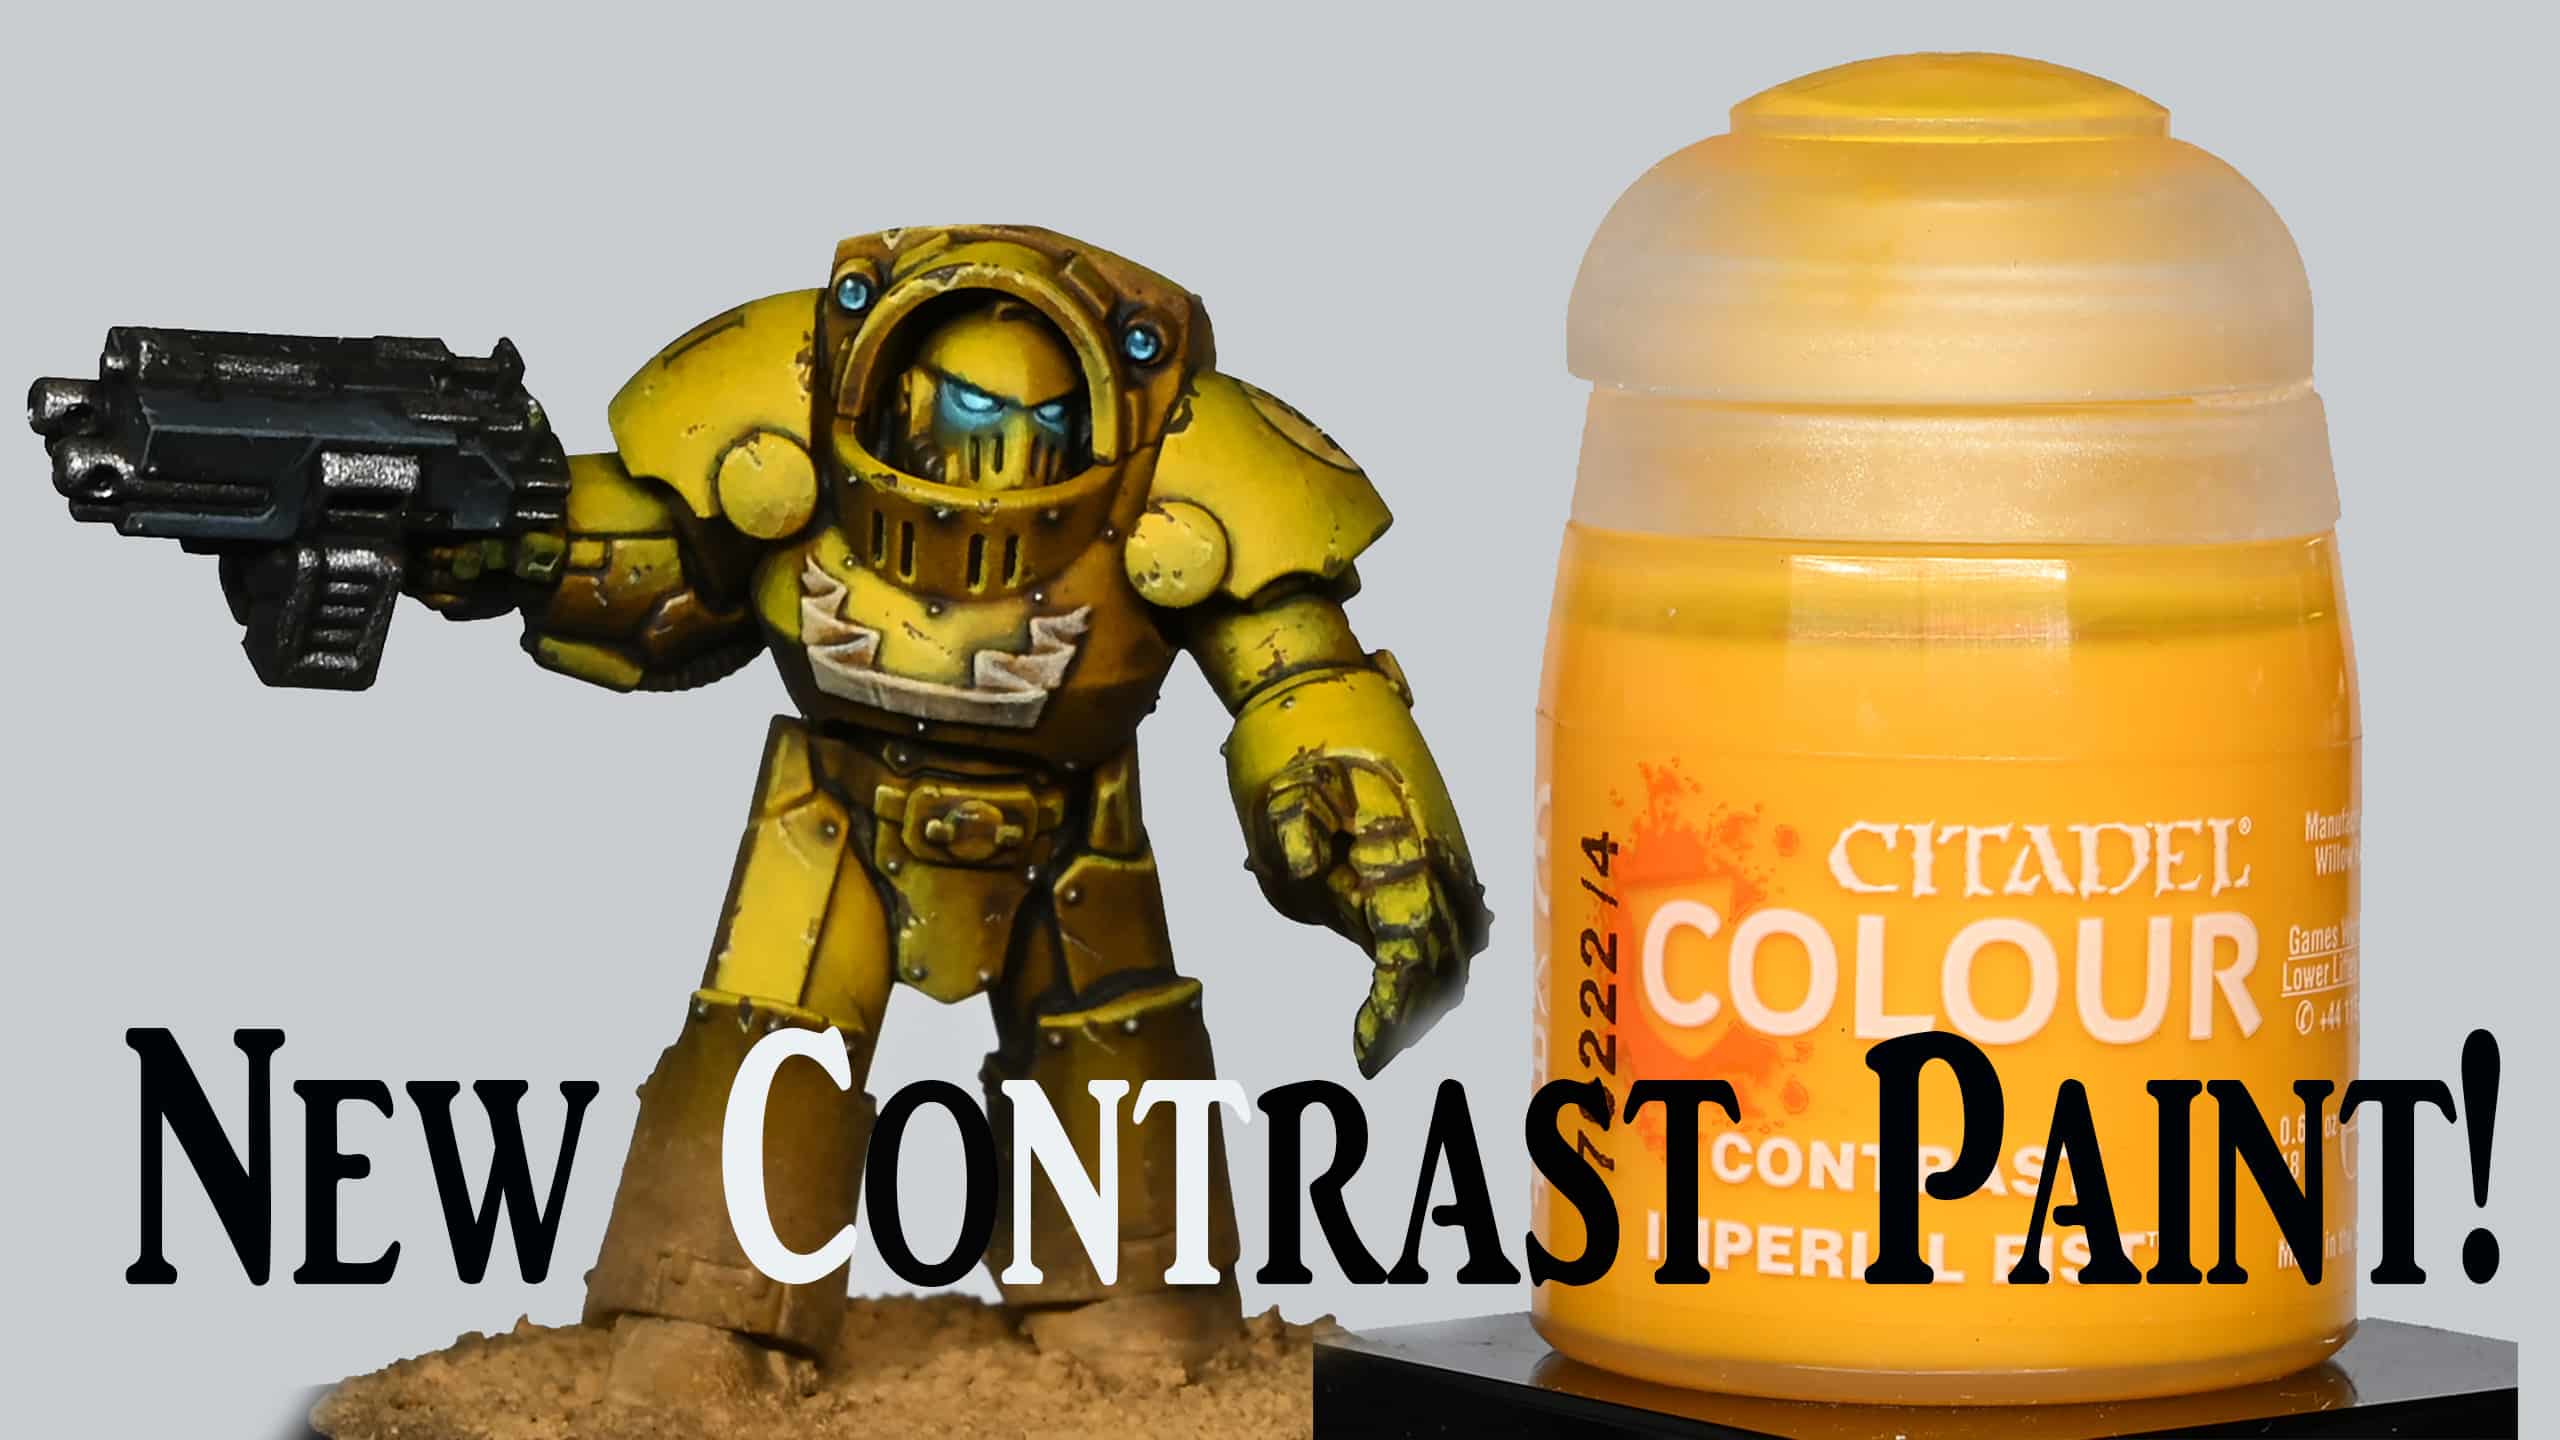
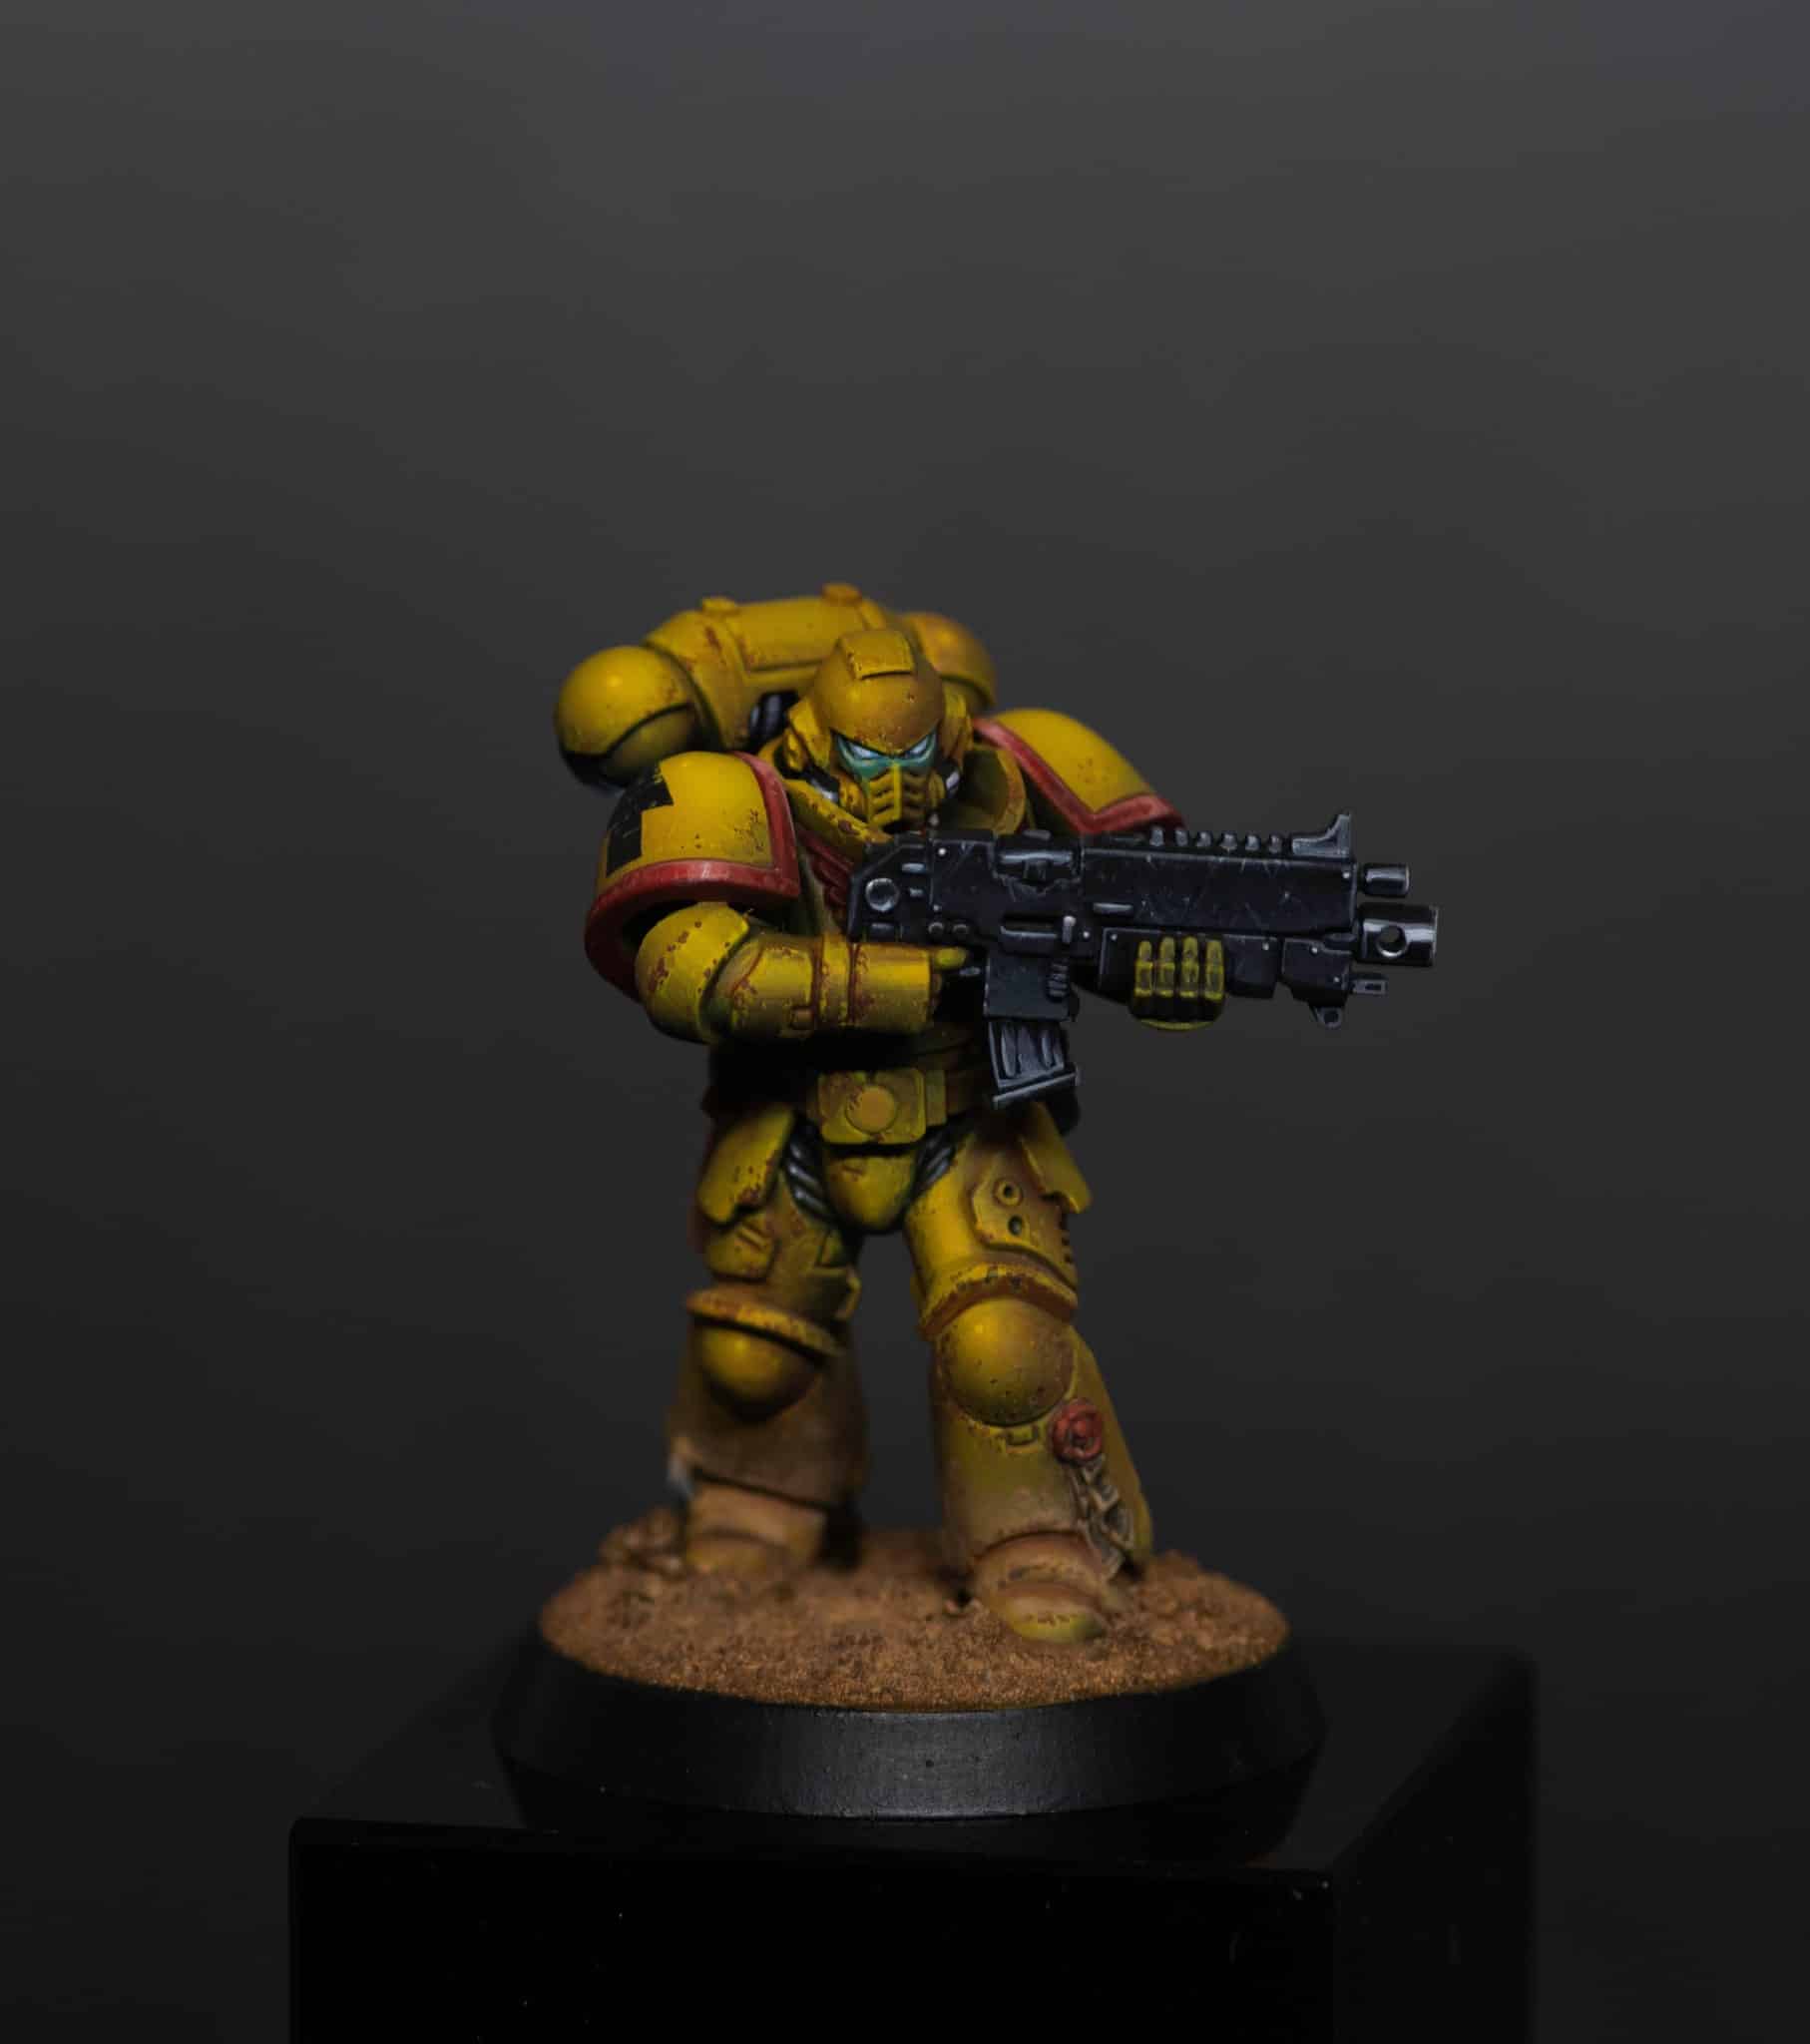
This video tutorial looks at a couple of the new Contrast paints from Games Workshop and I see if I can paint an Imperial Fist using ‘Imperial Fist’ paint! I also go through top techniques and tips you can use on all your Space Marines.
Video Tutorial: How to Paint Imperial Fists with Contrast Paint
The following paints and materials were used:
Games Workshop: Mournfang Brown, Yriel Yellow, Sotek Green, Forge World Weathering Powder Dark Sand, Imperial Fist (Contrast), Garaghak’s Sewer (Contrast), Contrast Medium, Morghast Bone, Screaming Skull
Vallejo: German Grey, Neutral Grey, Black Vallejo: Mecha Varnish Gloss, Mecha Varnish Matt, Metal Exhaust Manifold
P3: Morrow White (Any White will do)
Micro Set
Brushes
Artis Opus: Series S size 1 and 00,
Step by Step Guide – How to Paint Imperial Fists with Contrast Paint
Preparing the Base Coat
Start with Mournfang Brown as the base coat. This provides a solid foundation and eliminates black elements that might affect the final colour. Apply a thin, even layer to ensure a smooth finish.
Creating a Pre-Shade Effect
To create a pre-shade effect, mix P3 Morrow White with Mournfang Brown. This technique helps in achieving both highlights and shadows in one go. Avoid taking the pre-shade highlight all the way up to pure white unless you desire a very bright yellow.
Applying Imperial Fist Contrast Paint
Use the Imperial Fist contrast paint, a bright yellow, over the pre-shaded model. This contrast paint is translucent and needs a light base for optimal results. Apply it evenly, focusing on the model’s raised areas to enhance the pre-shade effect. If the first coat appears too orange, apply a light layer of P3 Morrow White on the desired areas and reapply the contrast paint for a brighter yellow.
Enhancing Highlights with White
For areas requiring a more vibrant yellow, directly apply P3 Morrow White using an airbrush. This step significantly brightens up the yellow tones, providing a more striking appearance to the model.
Adding Depth with Contrast Paints
Experiment with Rattling Grime contrast paint for adding depth. If it appears too dark, dilute it with Contrast Medium. Apply it sparingly, especially in recessed areas, to create natural shadows.
Applying Matte Varnish
Once the contrast paints are dry, apply a coat of Vallejo Mecha Varnish Matt. This helps to dull any unwanted shine and sets the base for further detailing.
Glazing with Yriel Yellow
Create a glaze by heavily thinning down Yriel Yellow with water. Apply this glaze selectively to the model’s raised areas, building up the colour in thin layers. This process enhances the vibrancy of the yellow and adds more dimension.
Detailing with Additional Colours
Use Morghast Bone and Screaming Skull for detailing elements like scroll work. These colours contrast well with the yellow and bring out the finer details. For battle damage, use Rhinox Hide or a similar dark colour to create chips and scratches.
Highlighting Battle Damage
Mix Yriel Yellow with a bit of white (or use Dawn Yellow) for highlighting the lower edges of the battle damage. This creates a more realistic chipped paint effect.
Painting the Weapon
For the bolter or other weapons, use a combination of German Grey and Neutral Grey from Vallejo. Apply them in a gradient for a realistic metallic effect, and use black to blend and soften transitions.
Lenses and Eyes
Paint lenses and eyes using Sotek Green, gradually adding white to the mix for successive highlights. Ensure the brightest highlights are off-centre for a natural glow effect.
Finishing Touches
Finally, apply Forge World Weathering Powder Dark Sand to the base and lower parts of the legs for a gritty, battle-worn look. Seal with a matte varnish to fix the powder in place.
More Contrast Paint Tutorial and Projects


If you don’t have an account, please sign up here! The website currently has over 350 video tutorials with steps and tips, plus a selection of PDFs. If you are not sure about joining, you can explore my free videos with a free membership, or take the plunge and become a full subscriber for full access.


If you’d prefer to support me on Patreon, please visit: https://www.patreon.com/RichardGray