Exploring the new models from Legions Imperialis!

A quick video review of some of the models from the new Legions Imperialis game that Games Workshop sent me as an early review copy.

In my latest video, I had the exciting opportunity to delve into the world of the new Legions Imperialis models sent to me by Games Workshop. As a longtime fan of the Space Marine and epic game system, I’ve eagerly awaited the release of a new version of Space Marine, especially since the relaunch of Adeptus Titanicus. Today, I’ll share my thoughts on these impressive models in this comprehensive Legions Imperialis Review.
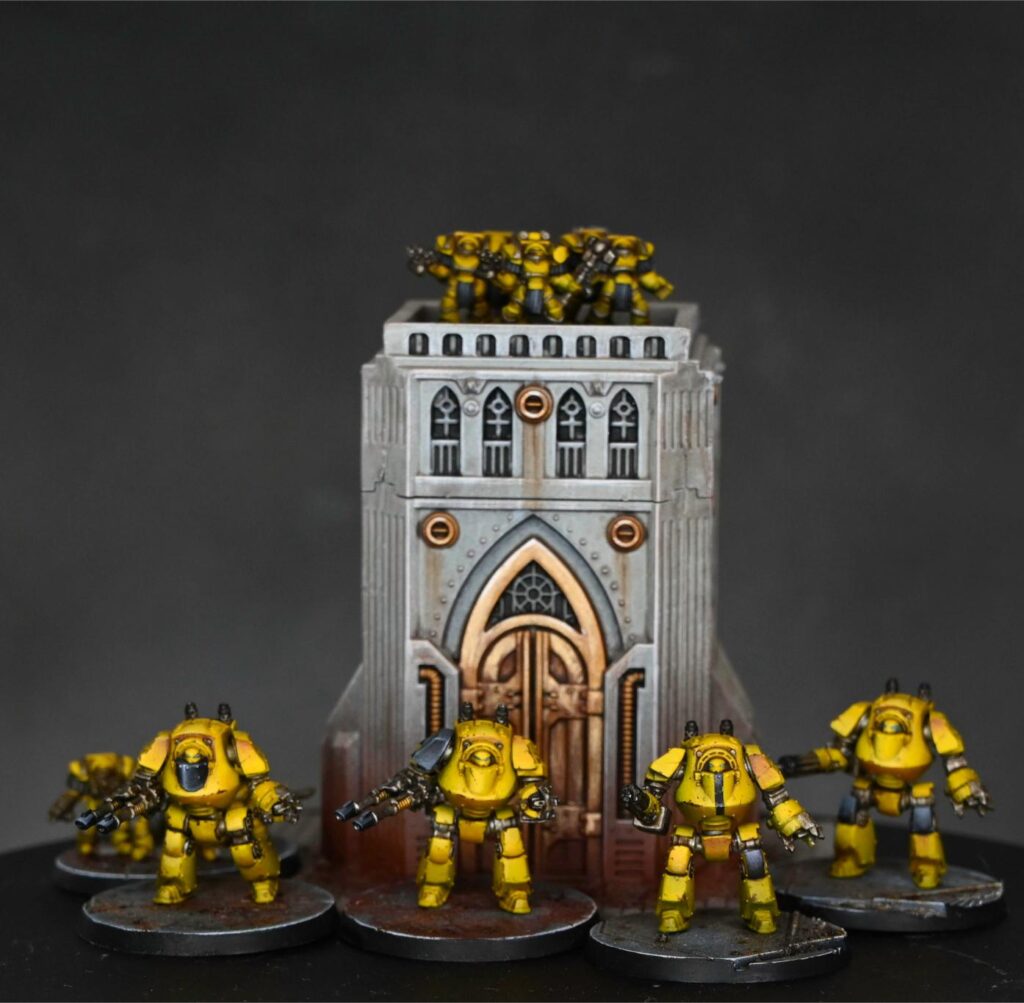
Legions Imperialis

Scale and Detail

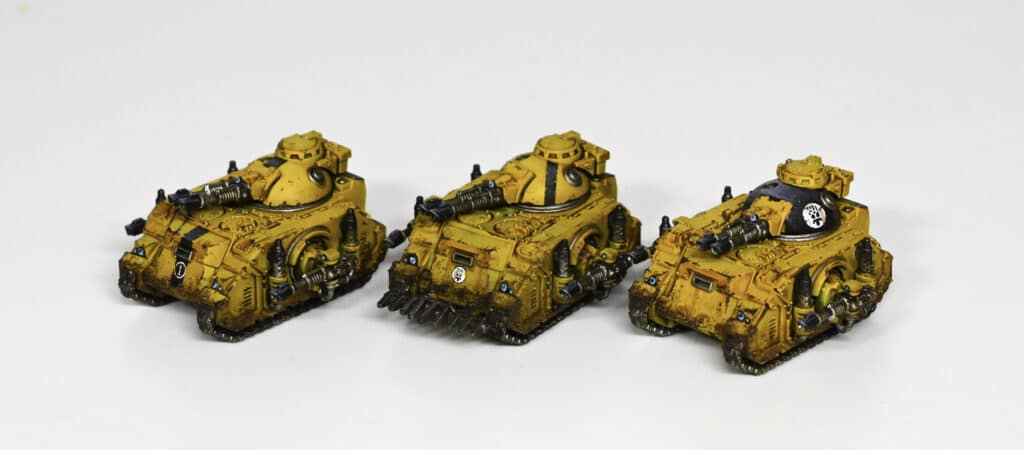
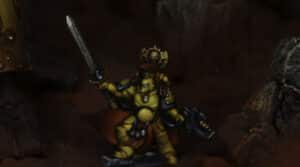
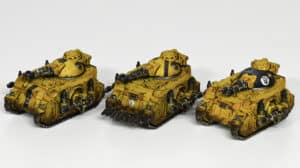
The first thing that caught my eye was the scale of these models. Larger than the old epic Space Marine ones, they sit around the 8mm mark. Games Workshop hasn’t provided an official scale, but the increase in size adds a new level of grandeur to the models. The detail on the tanks, especially the Kattos tanks and Predators, is nothing short of fantastic. The level of intricacy allows for hours of painting enjoyment, even if you opt for a quick and basic paint job.

Legions Imperialis Kit Variety and Customisation

The kit variety is impressive, featuring Kratos tanks, Contemptors, Predators, Sicararons, Terminators, Baneblade, Leman Russ Vanquisher, and more. The kits offer a high degree of customization, with posable components for certain models. While Marines come mostly as one or two pieces, larger models like dreadnoughts offer more flexibility in creating unique poses. The tank kits, with options for different weapons and turrets, are particularly noteworthy. The attention to detail on the tanks, from sponson weapons to open hatches, adds depth to the modelling experience.

Legions Imperialis

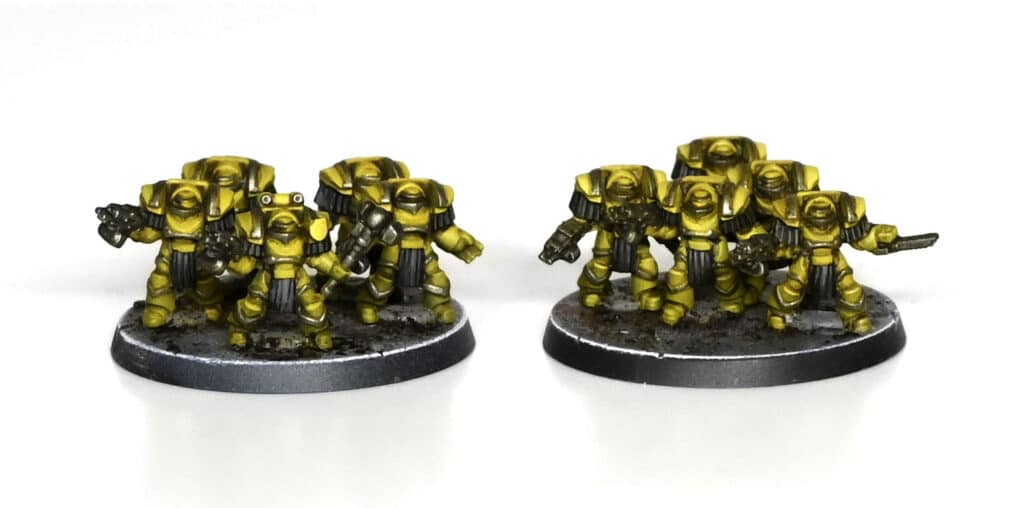
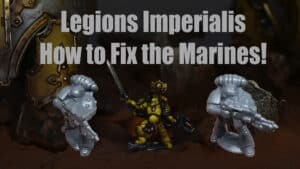
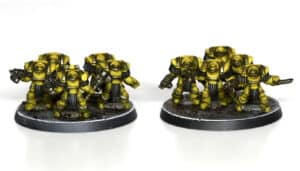
Disappointment in Marine Poses

As much as I appreciate the variety in Marine poses, there is a bit of disappointment in the distortion when viewed from the top-down perspective. The bolter-armed Legions Imperialis Marines, in particular, exhibit some stretching between the gun and the shoulder. While not a game-breaking issue, it’s a noticeable detail that could have been addressed by adjusting the poses or making the models more two-dimensional.

Legions Imperialis

Impressive Legions Imperialis Terminators and Vehicles

The Terminators, however, stand out with their impressive detail and minimal distortion. The inclusion of a commander with a unique weapon adds variety to the unit. The vehicles, including the Baneblade and Leman Russ Vanquisher, showcase magnetised options for weapon swaps, providing additional versatility on the battlefield.

Legions Imperialis

Gaming Potential and Formations

The gaming potential with Legions Imperialis is extensive. The tanks, in particular, can form a tank company, allowing for unique army compositions. The disappointment lies in the absence of rules for asymmetrical battles involving Titans only, but creative players can certainly devise their own scenarios. The formations and detachments add strategic depth to army building, preventing the creation of overly absurd armies.

In conclusion, the new Legions models offer a captivating journey into the Warhammer 40,000 universe. While there are minor disappointments, the overall quality and customisation options make these models a worthy addition to any hobbyist’s collection. Stay tuned for upcoming painting videos, where I’ll explore different Legions and showcase various painting techniques. Thank you for joining me in this exploration of the Legions, and until next time, happy hobbying!

Learn To Paint Legions Imperialis!

Follow my tutorials to paint your Legions Imperialis models like a pro.

Legions Imperialis
February 19, 2024I was lucky enough to be sent the teeny tiny little Leviathan Dreadnoughts from the Legiones Astartes and couldn’t wait to paint them up. Follow along with my tutorial on how to paint a Leviathan Dreadnought yourself, below. Video: How to Paint a Tiny Leviathan Dreadnought This video looks at the new Leviathan model for Legions Imperialis and looks at an alternate method of painting the model as Imperial Fists. The same painting method can be used for other Legion models, but instead of the base red, just airbrush the off-white colour over the black primer and select an appropriate Legion Contrast Paint colour. Materials Needed: Primer: Black Base Paints: Wild Rider Red (Games Workshop) Highlight Paints: Chimera Colours Sunray (or Vallejo Ice Yellow as alternative), Imperial Fists Yellow (Contrast), Uriel Yellow (Games Workshop) Shading: Winsor & Newton Artist’s Oil Colour Burnt Umber, Agrax Earthshade (Games Workshop) Metallics: Metal Colour Exhaust Manifold (Vallejo) Additional Colours: Mournfang Brown, Rhinox Hide, Sotek Green, Morgast Bone, Skeleton Horde (Contrast), Black (Vallejo), Neutral Grey (Vallejo) Finishing: Decals, Coffee Granules, MIG Sand and Gravel Glue Tools: Airbrush, various brushes including a very worn-out old brush for oil washes, wet palette Steps: Preparation: Assemble your model ensuring to correctly match the pieces as per instructions to avoid misfitting parts. Prime the entire model in black to prepare for painting. Base Coating: Airbrush the model with Wild Rider Red as the base layer. Ensure a solid, even coat by applying two or three layers if necessary. Highlighting: Apply a zenithal highlight using Chimera Colours Sunray or Vallejo Ice Yellow. Focus on areas where sunlight naturally hits to create a sense of volume and depth. For further highlights, transition to a lighter shade using Uriel Yellow mixed with a bit of white for the brightest points on the model. Contrast Layering: Over the prepared base, apply Imperial Fists Yellow contrast paint. The red undercoat will enrich the yellow, providing a vibrant, intense colour suitable for Imperial Fists. Shading: Create depth using a wash of Winsor & Newton Artist’s Oil Colour Burnt Umber thinned with Sansodor. Apply this carefully to recesses and shaded areas to enhance details. Metallic Details: Paint metallic parts with Vallejo Metal Colour Exhaust Manifold. Transfer this paint to a pot for easier access and to avoid spillage. Use Agrax Earthshade to add depth to the metallic areas. Additional Details: For areas requiring darker tones or additional shading, use Mournfang Brown and Rhinox Hide. This includes adding weathering effects and battle damage. Eyes and lenses can be detailed using Sotek Green, with highlights added by mixing the green with white. Use Morgast Bone for highlighting edges and details subtly. Skeleton Horde contrast paint can be used for additional shading and to add variety to the base. Base Decoration: Prime the base in black, then airbrush with Neutral Grey. Apply coffee granules (fresh, not sticky or old) to simulate dirt or rubble, securing them with MIG Sand and Gravel Glue. Highlight the texture with Morgast Bone and add weathering powder for further detail. Decals: Apply decals as needed, using a small brush to position them. Set them with Micro Set and ensure they conform to the model’s surface. If necessary, seal with matte varnish to remove any glossiness. Finishing Touches: Finalise your model with any additional weathering, highlighting, or detailing as desired. This may include further battle damage, streaking effects using thinned-down Mournfang Brown, or reinforcing highlights on the most prominent features. Varnishing: Once satisfied with the painting, apply a matte varnish to protect your work and reduce any unwanted shine, especially over decals. More Legions Imperialis Tutorials and Videos! If you don’t have an account, please sign up here! The website currently has over 350 video tutorials with steps and tips, plus a selection of PDFs. If you are not sure about joining, you can explore my free videos with a free membership, or take the plunge and become a full subscriber for full access. If you’d prefer to support me on Patreon, please visit: https://www.patreon.com/RichardGray [...] Read more...
December 28, 2023This video shows how to paint some tanks for the Solar Auxilia faction of Legions Imperialis. Plus, I’ve included a little step-by-step guide underneath on the key points of the video! The following paints were used: Games Workshop: Agrax Earthshade, Skeleton Horde Contrast, Sotek Green, Moot Green, Evil Sunz Scarlet, Rhinox HideVallejo: Neutral Grey, Black, Metal Colour Exhaust Manifold, Metal Colour Copper P3: Morrow White Winsor and Newton: Burnt Sienna (series 1 oil paint), Black, Sansodoor mineral spirit For melting decals onto models : Micro Set Step-by-Step Guide: Prepare the Base Coat:Use an airbrush for efficiency in batch painting for your large Legions Imperialis faction.Mix Vallejo Neutral Gray with airbrush thinner (30 PSI, 50/50 ratio with thinner).Apply the base coat evenly to the entire tank. Consider using gray primer for a quicker and better result.Layering for Opaque Finish:Apply two or three layers of paint, especially for lighter colours like Pale Blue Gray Blue and Morrow White.Account for the drying effect, as colours may appear brighter when wet and darker when dry.Ensure a smooth and opaque finish by layering. Weathering Techniques:Stipple Rhinox Hide for additional details, using a foam piece held by tweezers.Apply weathering heavily to achieve a worn and battle-hardened look.Consider the impact areas for realistic weathering, such as edges and front sections. Adding Red Markings:Use Evil Suns Scarlet for red markings.Differentiate leader tanks by adding a red turret.Apply the red markings consistently across Legions Imperialis tanks for uniformity. Metallic and Lens Details:Use Exhaust Manifold by Vallejo for metallic parts.Apply Agrax Earthshade for a wash over the metallic sections.Paint lenses black and highlight with a mix of black and white in three stages. Final Touches:Add decals before applying any oil wash to blend them with the weathering.Consider adding additional details like hazard stripes or cables for higher-level detailing.Apply a final matte varnish or Games Workshop fixative to set the weathering powder and prevent rubbing off. Optional Colour Variations:Experiment with different colours based on personal preferences.Lighter colours with heavy weathering can enhance contrast and visibility in smaller scale models.Customise the Legions Imperialis tanks according to your gaming preferences. Final Assessment and Variations:Assess the overall look of the Legions Imperialis tank for any additional highlighting or weathering needed.Consider variations in colours and markings for a diverse tank fleet.Keep in mind that the level of detail can be adjusted based on personal preferences and the purpose of the painted tanks (e.g., gaming).! More videos! Click on the thumbnails below to explore more Legions Imperialis videos, or visit the All Videos page to browse all of my latest tutorials! If you don’t have an account, please sign up here! The website currently has over 350 video tutorials with steps and tips, plus a selection of PDFs. If you are not sure about joining, you can explore more of my free videos with a free “freebies” membership, or take the plunge and become a full subscriber for full access. If you’d prefer to support me on Patreon, please visit: https://www.patreon.com/RichardGray [...] Read more...
December 6, 2023This video shows how to paint a Legions Imperialis Praetor to a very high tabletop standard and discusses some of the important aspects to consider when painting at this scale. *note that the Legions Imperialis Praetor was first primed black, very strong airbrush zenithal layer of Screaming Skull and then an Airbrush coat of Contrast Imperial Fist, followed by a wash of 1:1 mix of Contrast Medium and Contrast Darkoath Flesh. You can get a very similar result just by hand painting the model with an off-white colour and hand painting the Imperial Fist Contrast Wash and thinned Darkoath Flesh Contrast wash. The following paints were used: Games Workshop: Yriel Yellow, Sotek Green, Mephiston Red, Evil Sunz Scarlet, Wild Rider Red, Agrax Earthshade Vallejo: Neutral Grey, Model Colour Black Two Thin Coats: Sir Coates Silver, Dragon’s Gold Top Tips for painting the Legions Imperialis Praetor: Use a Headset: When painting small models like Legions Imperialis Praetor, wearing a headset can help you pick out tiny details more easily, especially if you aim for a higher standard. Start with a Solid Base: Prime the model with black spray, cover it in a bone colour, airbrush with Imperial Fist contrast, and wash with a 50/50 mix of contrast and contrast medium for a good base. Opt for a Small Brush: Use a size 0000 brush or even smaller for precision when painting details. This is crucial for the tiny model, and you don’t need a lot of paint on your brush. Focus on Contrast and Highlights: Pay attention to contrast and highlights, especially for areas like red armour, metallics, eyes, and gems. The small size requires well-defined details to make the model stand out. Careful with Metallics: When painting metallics, consider using a black base first to enhance shine. Be mindful of the thickness of metallic paints on small models, as they can be trickier to work with. Experiment with Washes: Try different wash colours to enhance contrast and add interest to the model. Experimenting with washes can help bring out specific colours and details. Highlight with Caution: When highlighting yellow, be cautious not to turn it into non-metallic metal gold. The vibrancy of colours, especially red, can stand out against desaturated areas, creating a visually appealing contrast. Keep Gems and Eyes in Sync: Paint gems and eyes with the same colours simultaneously since they require a small amount of paint. This ensures consistency in the model’s overall appearance. Final Touches for Distinction: Add final touches like highlights and details to make the model stand out as a command model compared to generic troops. This distinction is crucial for leadership models in the army. More Legions Imperialis Tutorials! If you don’t have an account, please sign up here! The website currently has over 350 video tutorials, plus step by step guides and PDFs. You can explore free videos with a free “freebies” membership, or take the plunge and become a full subscriber for full access. If you’d prefer to support me on Patreon, please visit: https://www.patreon.com/RichardGray [...] Read more...
November 28, 2023This video takes a look at the distortion on the marines and tries to fix the issue. Legions Imperialis was sent to me by Games Workshop as an early review copy. In this video, I’m tackling a little issue with the Legions Imperialis Marines from the latest game. These guys are small, about 9 millimeters tall and they’ve got some quirks… So, in this tutorial, I’m walking you through how I clean them up. I grab a trusty scalpel, trim off the excess plastic, and then work some magic with Tamia extra thin glue to make it all smooth and polished. Steps to Fix the Legions Imperialis Step 1: Identify IssuesStart by examining the Legions Imperialis Marines for any deformities or excess plastic.Note specific areas that need attention, such as the back of the gun, gaps between limbs, or any other noticeable imperfections.Step 2: Gather MaterialsObtain a scalpel, ensuring it is sharp for precision.Prepare Tamiya extra thin glue or a similar product for smoothing and blending the cut areas.Have your choice of paints ready for later stages.Step 3: Cut Excess PlasticCarefully use the scalpel to cut away excess plastic, following the natural lines of the model.Focus on areas where the deformities are most prominent, like the back of the gun or gaps between limbs.Be careful, as the models are small, and small, deliberate movements are essential.Step 4: Clean Up the CutsUse the scalpel to clean up the cut areas, creating a neat and smooth finish.Don’t worry too much about perfect precision, as the Tamiya glue will help blend and soften the edges later.Step 5: Address Specific IssuesPay extra attention to problematic areas, such as gaps between limbs or any distorted sections.Address these issues with precise cuts and clean-ups to improve the overall appearance.Step 6: Apply Tamiya Extra Thin GlueRun Tamiya extra thin glue over the cut areas to soften and blend the plastic.This step is crucial for achieving a seamless look and hiding any imperfections from the cuts.Step 7: PaintingOnce the glue has dried, proceed with painting the Legions Imperialis Marines! Why not follow one of my tutorials? While this process may seem meticulous, it’s essential to note that the level of detail and effort put into fixing the models is a personal choice. Not everyone may find it necessary, especially for gaming purposes. However, for those who are particular about the appearance of their models, these steps offer a solution to improve the overall look of the Legions Imperialis Marines. Free Video Tutorials Free videos (for logged in members – just sign up as a ‘friend’ to view and click any of the thumbs.To explore all of these, visit this page! If you don’t have an account, please sign up here! The website currently has over 350 video tutorials, plus step by step guides and PDFs. You can explore more free videos with a free “freebies” membership, or take the plunge and become a full subscriber for full access. If you’d prefer to support me on Patreon, please visit: https://www.patreon.com/RichardGray [...] Read more...
November 24, 2023This video shows How to Paint Tiny Legions Imperialis Terminators quickly, to get them on the table for gaming, while still looking fancy! The following paints were used: Games Workshop: Screaming Skull, Contrast Imperial Fist, Agrax Earthshade Two Thin Coats: Sir Coates Silver Vallejo: Model Colour Black, Neutral Grey Winsor & Newton: Black, Burnt Sienna, Sansodoor Thinner Top Tips: Keep them on the sprue: These models are small and can easily be lost. Leave them on the plastic sprue while painting to make your life easier. Choose a light base colour: Use a light colour like Screaming Skull for the base. It helps the yellow contrast paint (Imperial Fist contrast) to adhere better. Airbrush technique: Apply the base colour using a zenithal spray technique. This involves spraying from above to create subtle shading. Oil wash for shading: Use oil paints for shading. Mix black and burnt sienna (or burnt umber) in equal parts, thin it with Sansodoor Thinner, and apply it generously. This method is quicker but takes longer to dry. Detailing with black paint: Use a matte black paint (Vallejo Model Colour Black) to paint leather straps on the model. Be cautious with contrast paints, as they can obscure details. Metallic trim: Apply Sir Coates Silver or any silver colour paint to the metallic trim. Other metallic paints like Games Workshop’s or Vallejo’s are also suitable. Simple highlights: Use Neutral Grey to highlight, keeping in mind the small size of the models. Avoid intricate details that may not be visible at a distance. Individualisation: Feel free to experiment with different colours for details like leather straps, shoulder pads, and weapons. Legions in the setting have various chapters with unique variations. Shading with Agrax Earthshade: Apply Agrax Earthshade to all metallic areas to add shading. Use this step to define recesses and enhance contrast. Basework: Attach models to bases using super glue. Use coffee granules and fixative to blend and camouflage the attachment points. Remember, speed and simplicity are key when painting large armies. These tips aim to get your Tiny Legions Imperialis Terminators tabletop-ready quickly. Learn how to paint more Legions Imperialis! If you don’t have an account, please sign up here! The website currently has over 350 video tutorials, plus step by step guides and PDFs. If you are not sure about joining, you can explore my free videos with a free membership, or take the plunge and become a full subscriber for full access. If you’d prefer to support me on Patreon, please visit: https://www.patreon.com/RichardGray [...] Read more...
November 24, 2023This video shows how to paint the predators from the new game, Legions Imperialis. The tanks are painted as the Imperial Fists Legion and the video shows how to add simple weathering and paint the tiny lenses. The following paints were used: Games Workshop: Contrast Imperial Fist, Contrast Darkoath Flesh, Rhonox Hide, Mournfang Brown, Sotek Green, Yriel Yellow, Daemonette Hide, Slaanesh Grey (or add white to Daemonette Hide) Vallejo: Black, (Optional Neutral Grey) Two Thin Coats: Sir Coates Silver Top Tips and Steps: Priming:Utilise white primer for a smoother base. If unavailable, prime black and then spray white.Base Coat:Apply Contrast Imperial Fist Yellow on your Legions Imperialis Predators using an airbrush. Yellow ink or thinned yellow paint can also suffice.Washing:Mix Contrast Darkoath Flesh with Contrast Medium (50/50 ratio).Wash the entire model, ensuring the contrast paint flows into recesses for shading.Cleanup:Use a large brush (Artis Opus size two) to wick off excess contrast paint from flat surfaces.Focus on neatness, but know that chipping will cover minor imperfections.Metallics:Use Sir Coates Silver for metallic parts of the Legions Imperialis Predators like tracks and details.Optionally, consider Vallejo Black or Neutral Grey for additional depth.Blocking In Details:Use Yriel Yellow (watered down, almost glaze consistency) for blocking in large open areas.Focus on turret, side track covers, and top of the vision slot area.Edge Highlighting:Highlight edges with a 50/50 water to paint mix using a small brush.Focus on large, empty spaces for a quick and effective highlight.Chipping:Create chipping effects using a stippling brush dipped in black paint.Have fun and jab the brush onto the model, focusing on areas prone to wear and tear.Weathering (Optional):Apply watered-down Mournfang Brown to create streaks for a dirty effect.Lens Painting:Paint lenses black, fill them with Sotek Green, and add a highlight dot in the top left corner.Final Touches:Consider adding a black turret for added visual interest.Experiment with different weathering techniques for variety. More tutorial videos for Legions Imperialis! If you don’t have an account, please sign up here! The website currently has over 350 video tutorials with steps and tips, plus a selection of PDFs. If you are not sure about joining, you can explore my free videos with a free membership, or take the plunge and become a full subscriber for full access. If you’d prefer to support me on Patreon, please visit: https://www.patreon.com/RichardGray [...] Read more...
July 26, 2023This video looks at how to paint a tiny Thunderhawk Gunship. I painted it in anticipation for the new Legions Imperialis, but is from Aeronautica Imperialis as both scales are the same and the model will be used for the new game. Paints and Materials Games Workshop: Sotek Green, Imperial Fist (Contrast), Rhinox Hide, Yriel Yellow, Corvus Black Vallejo: German Grey, Black Winsor and Newton: Burnt Sienna (series 1 oil paint), Black, Sansodoor mineral spirit Vallejo: Mecha Varnish Gloss, Mecha Varnish Matt, Metal Burnt IronP3: Morrow White (Any White will do) Micro Set Steps to Paint a Tiny Thunderhawk Gunship Preparing the Model Start by assembling the model, priming it black, and giving it a base coat of Corn Red. This initial red layer helps in avoiding a grimy, olive drab look when applying yellow over black. Airbrushing White Spray the model with white paint (P3 Morrow White thinned with Vallejo airbrush thinner), creating a light-dark-light modulation effect. This step adds contrast and sets the stage for the yellow layer. Applying Yellow Coat the model with Imperial Fist yellow contrast paint. You can also use yellow ink for a similar effect. This step enhances the pre-shading effect done with the white. Decals and Varnishing Apply gloss varnish (Vallejo Mecha gloss varnish) to create a smooth surface for decal application. Place the decals, using Microset for better adhesion, and leave to dry. Post drying, cover the model with another layer of gloss varnish. Metallics and Matte Varnishing Paint the metallic parts of the model while waiting for the decals to dry. Following this, cover the entire model with a coat of matte varnish. This helps even out the model’s look and prepares it for oil washes. If you want a cleaner appearance for your model, apply a gloss varnish before panel lining. Canopy and Windows Block in the windows on the canopy with black. Paint the frames and windows with Sotek Green, gradually adding white to create lighter shades. For a more varied look, paint each panel differently to suggest varied light reflections. Detailing and Chipping Carefully apply chipping effects using Rhinox Hide. Focus on the edges and areas where wear would naturally occur. For a more three-dimensional look, highlight the lower edges of the chips with a mix of Yriel Yellow and white. Oil Wash for Panel Lining Mix Burnt Sienna and Black oil paints with Sansodor mineral spirit to create an oil wash. Carefully apply this wash to the panel lines. This step adds depth and a weathered look to the model. Final Touches Finish by edge highlighting the details using a mix of Yriel Yellow and white. This brings out the model’s features and adds depth to its appearance. Show it off! As you progress, feel free to adapt and tweak techniques to suit your style. Good luck! When you’ve finished, why not pop into our Discord and show it off to other website members? 🙂 Explore more Legions Imperialis Tutorials If you don’t have an account, please sign up here! The website currently has over 350 video tutorials with steps and tips, plus a selection of PDFs. If you are not sure about joining, you can explore my free videos with a free membership, or take the plunge and become a full subscriber for full access. If you’d prefer to support me on Patreon, please visit: https://www.patreon.com/RichardGray [...] Read more...

Videos Not Showing?

To view any of my paid tutorials, you need to be a member of the website – please click below to log in or join the site.

warhammer painting tutorials

Not sure about joining just yet? Check out my Youtube for all my free tutorials or sign up as a free “friend” member on this site and visit the Freebies video page!

If you’d prefer to support me on Patreon, please visit: https://www.patreon.com/RichardGray