Tutorials and Register

On this website you will find hi-res videos with step by step audio commentary guides plus paint lists, tool tips and written tips. I also have created a selection of PDFS.

For just £8.50/month (about $11) you will gain access to all my video and PDF guides.

This includes all of my Patreon tutorials! With a library of hundreds of videos, I am starting to outgrow the Patreon interface and am getting messages asking where things are.

All tutorials are hosted on Vimeo, so there is no loss of resolution (all are filmed in HD), or annoying advertising.


Click on the below to sign up:

Friend Tier – Free

  • Access to all the free videos on this site, in high-res.
  • Tips, tools, paint guides and steps to the models painted, under the videos. (Where available)
  • Email newsletter with sneak peeks at new projects, freebies, tips and information for events.
  • Regular, high resolution photographs including images which will include competition entries and their progress.
  • My deep gratitude for helping to support my artwork.

Full Membership – £8.50/month subscription.

  • Hi-resolution, ad-free videos of me painting with audio commentary of how I achieved the effects.
  • Tips, tools, paint guides and steps to the models painted, under the videos.
  • Access to the PDF guides, with step by step instructions on the techniques and paints I use.
  • Regular email newsletter with extra tips, all the new videos, previews of new models, info of competitions and events and more.
  • Regular, high resolution photographs including images which will include competition entries and their progress.
  • My deep gratitude for helping to support my artwork.


Day Pass– £2.50 one-off for daily membership.

Don’t want to commit, or just want to watch a couple of videos?

  • Hi-resolution, ad-free videos of me painting with audio commentary of how I achieved the effects.
  • Tips, tools, paint guides and steps to the models painted, under the videos.
  • Access to the PDF guides.
  • Regular email newsletter with extra tips, previews of new models, the latest free videos, info of competitions and events and more.
  • My deep gratitude for helping to support my artwork.

Tutorial Plan – £95/month (SORRY, NO MORE PLACES)

Unfortunately due to demand I’m not able to take on more tutorial members, where I give individual members feedback and advice on their modelling projects. To be notified of when spots open up again, please sign up here.

Already a member?


Tutorial Examples
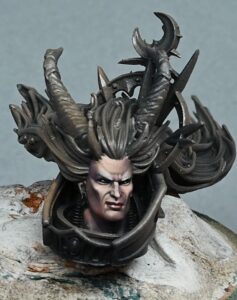
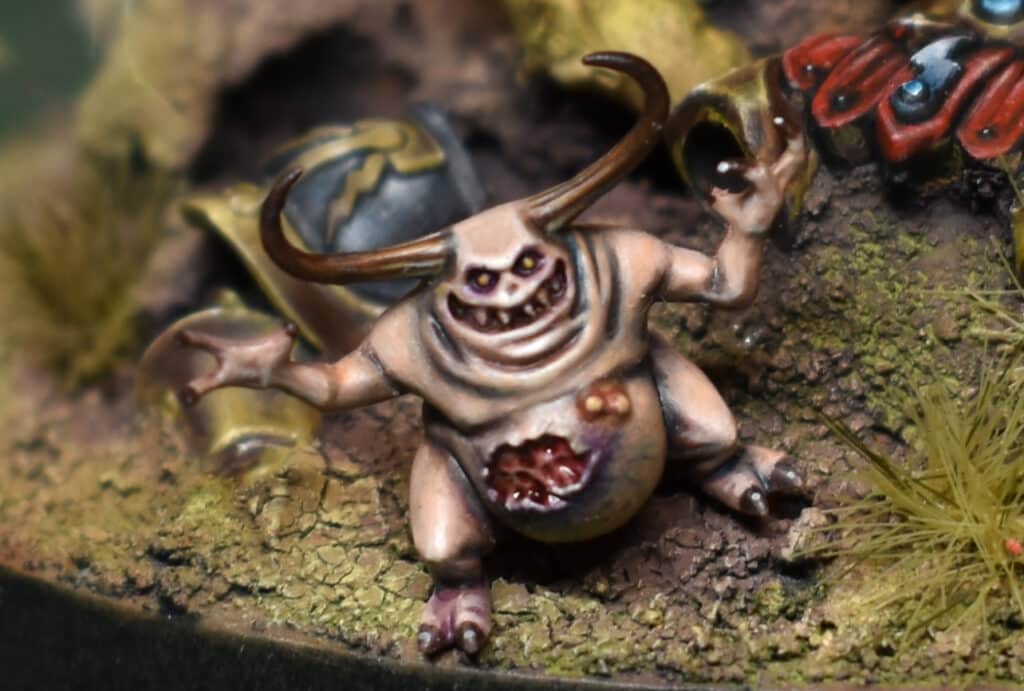
This is part 1 in a series for how to paint the Wilderfiend from the Darkoath army, which Games Workshop sent me. The first video looks at the skin, lips, teeth, eyes and horns. We’ll focus on creating a heavily textured look! Video: How to Paint a Wilderfiend – Skin, teeth, eyes and horns Paints Vallejo Neutral Grey – Used for base coating and initial layers. Vallejo Heavy Grey – Applied for shading and adding depth. Citadel XV-88 – Used for stippling detailed textures. Citadel Balor Brown – For additional layering over XV-88. Corvus Black (Games Workshop) – Used thinned down for shading and deepening recesses. Citadel Pink Horror – For specific details like the inner mouth and gums. Mephiston Red (Games Workshop) – Used for glazing and enhancing red areas. Balor Brown (Games Workshop) – Applied on horns and spikes. Morghast Bone (Games Workshop) – For highlighting teeth and bone-like structures. Screaming Skull (Games Workshop) – Additional highlighting, especially on bones and teeth. Two Thin Coats Dark Sun Yellow – For eyes and specific bright details. Kimera Colours White – Used to lighten other colours for highlighting. Brushes Artis Opus (small size) – Mainly used for stippling the base coat. Modified Old Brush – Cut to half-size for fine stippling and detailed texture work. Standard Size 1 Brush – Used for general painting and finer details. Size 0 Brush – For very fine details, especially on smaller areas like teeth and eyes. Large Dry Brush – For broad strokes and quick coverage on larger areas. How to Paint a Wilderfiend Step 1: Preparation Before you start painting, ensure that all gaps and line gaps on the model, particularly between the muscles, are filled to prevent visible lines. Use sprue glue or putty as detailed in my other videos (you can watch one, here). This step is crucial for a clean finish once painted Objective: Prepare the model by filling any gaps to ensure a smooth surface. Materials: Sprue glue or sculpting putty. Method: Identify gaps, particularly between muscle joints or overlapping armor. Apply sprue glue or putty to fill these gaps. Use a small tool or toothpick for precision. Smooth the putty or glue with a moistened finger or tool to ensure it blends seamlessly into the surrounding area. Allow it to dry completely before proceeding to painting. Step 2: Base Coating Objective: Establish a uniform base layer and start building texture. Materials: Vallejo Neutral Grey, Artist Opus small brush. Method: Thin the Neutral Grey slightly with water for a workable consistency. Use the brush to stipple the paint onto the model, creating a textured base. This method helps the paint adhere better and provides a base for subsequent layers. Ensure complete coverage, avoiding pooling of the paint. Step 3: Adding Shades Objective: Add depth and dimension by shading recesses. Materials: Vallejo Heavy Grey. Method: Apply Heavy Grey into recesses and shadow-prone areas such as under limbs, behind equipment, and between muscles. Use a detail brush for precise application, avoiding over-application to maintain the integrity of the base texture. This step is not for detailed shading but to provide a variation in base tones. Step 4: Detailing with Stippling Objective: Enhance texture and prepare for detailed painting. Materials: Citadel XV-88, modified old brush. Method: Stipple XV-88 on areas where additional texture is desired, like spikes, horns, or heavily detailed armor. The modified brush allows for finer, more controlled stippling, which is crucial for building up texture on smaller, detailed areas. Focus on achieving a random, natural-looking texture rather than uniform coverage. Step 5: Additional Colour Layers Objective: Build up colour intensity and prepare for highlights. Materials: Citadel Bor Brown. Method: Apply Bor Brown over areas previously worked with XV-88, using the same stippling technique but with slightly thicker paint. This layer enhances the texture by adding a darker tone, which will add depth beneath the highlights. Ensure that this layer complements the textures and shadows already established. Step 6: Corrections and Enhancements Objective: Clean up any imperfections and refine the model’s details. Materials: Scalpel. Method: Inspect the model closely under good lighting. Use the scalpel to gently remove any stray bristles, dust particles, or excess putty that may have been overlooked. Make any necessary corrections to ensure the smoothest and most detailed surface possible before proceeding. Step 7: Highlighting Objective: Highlight to emphasize raised areas and textures. Materials: Mix of Heavy Grey, Neutral Grey, and white. Method: Gradually mix in white with the base grey mixture to create various stages of lighter shades for highlighting. Use a fine brush to apply highlights along edges, ridges, and on top of textured areas to simulate light reflection and enhance detail. This step requires a steady hand and a good eye for light placement, focusing on areas that would naturally catch light. Step 8: Deepening Shadows Objective: Deepen the shadows to enhance the 3D effect. Materials: Watered-down Corvus Black. Method: Apply this dark grey mixture into the deepest recesses and around the base of raised textures to create an illusion of depth. Use a fine brush for control and avoid flooding the details. The paint should flow into recesses but not cover the raised textures. This step enhances the contrast between the highlighted areas and the shadows, adding to the realism of the model. Step 9: Final Details Objective: Address small, fine details such as eyes, teeth, and intricate decorations. Materials: Specific colours for details like Pink Horror, Mephiston Red, etc. Method: Use the smallest brushes to carefully paint eyes, teeth, and other minute details. These details require precision and should be handled patiently to avoid errors that can detract from the overall appearance. Step 10: Finishing Touches Objective: Protect the paint job and adjust the finish according to preference. Materials: Matte or satin varnish. Method: Choose a varnish based on the desired finish (matte for less shine, satin for a slight sheen). Apply the varnish evenly to protect the paint from wear and tear and to unify the appearance of the model. Maintenance Tips: Always keep your brushes clean and well-shaped. Regularly check and mix your paints on a wet palette to maintain consistency. Adjust paint thickness based on the detail and texture desired. If you don’t have an account here on my website, please sign up here! I have over 350 video tutorials aside from my How to Paint a Wilderfiend with steps and tips, plus a selection of PDFs. If you are not sure about joining, you can explore my free videos with a free membership, or take the plunge and become a full subscriber for full access. If you’d prefer to support me on Patreon, please visit: https://www.patreon.com/RichardGray [...]
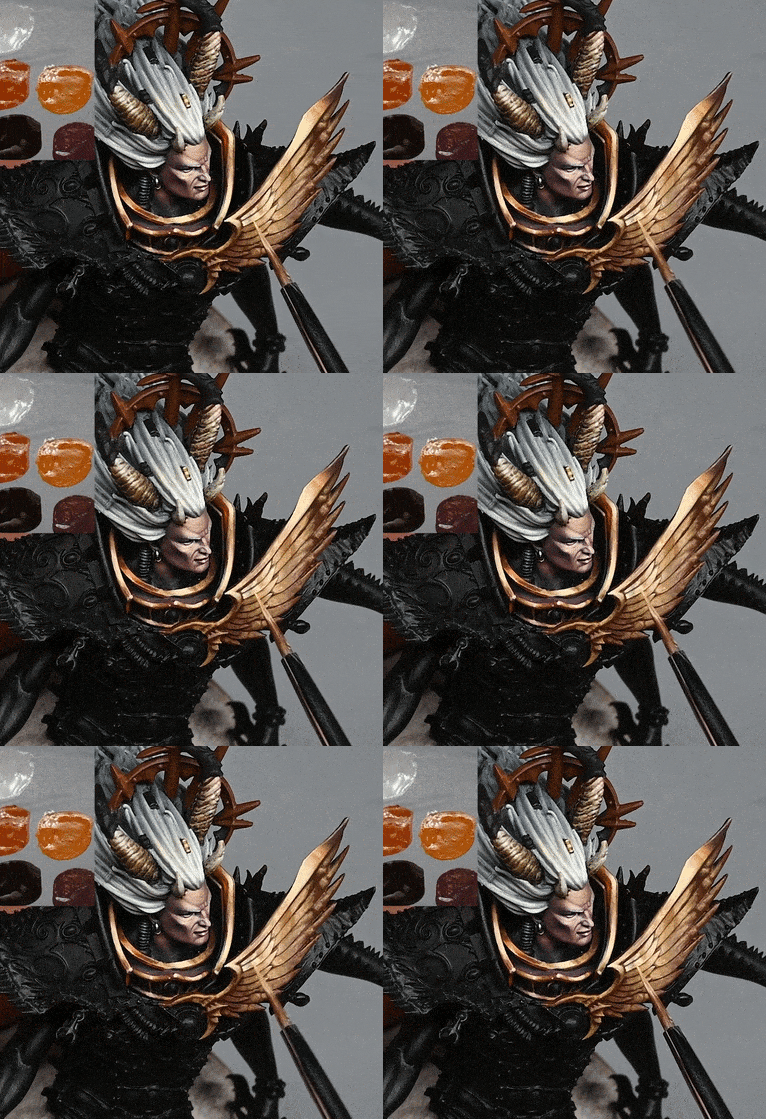
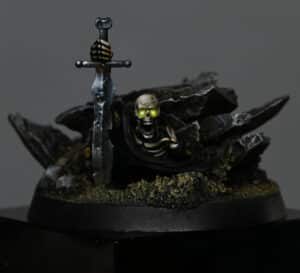
This is another video looking at Sekhar the vampire, this time focusing on how to paint a skeleton with glowing eyes for the model on her base. This video looks at the skeleton, how to paint his glowing eyes, sword and bones etc. The whole model is covered! Video: How to Paint a Skeleton with Glowing Eyes Materials needed: Skeleton ModelPriming spray (I’ve used black!) Brushes:I use the Artist Opus range of brushesFine detail brushMedium-sized brushLarge brush (optional, for basecoating larger areas) Wet Palette (for mixing and thinning paints)Varnish (to protect the finished paint job) Paints:All paints mentioned are from Games Workshop’s Citadel range. Yriel Yellow Moot Green Balor Brown Morghast Bone Screaming Skull Mournfang Brown XV-88 Rhinox Hide Other Materials: Rocks or pebblesFoliage (such as static grass or miniature leaves)Sand or texture paste (for ground texture)Super glue (for attaching basing materials)Water (for thinning paints)Paper towels or cloth to ensure your brushes are totally clean! How to Paint a Skeleton with Glowing Eyes – Step 1: Priming Prime your model with a suitable undercoat. Black is recommended as it provides a good base for both the glowing effects and the shadowed recesses of the skeleton. Step 2: Base Coating Skeleton: Apply a thin base coat of XV-88 over the entire skeleton. Ensure the paint is thinned with water to maintain detail. Eyes: Start by painting the eye sockets with Kimera White. Given the deep recesses, apply multiple thin layers to build up a solid white base. Patience is key here to avoid a textured look. Step 3: Adding Depth to Eyes Mix Yriel Yellow with Kimera White to create a pale yellow. Carefully fill in the eye sockets, leaving the deepest part still white to simulate glow. Gradually add more Yriel Yellow towards the front of the eye sockets, intensifying the colour as you move forwards. Define the edges of the sockets with Moot Green to enhance the glow effect, blending it slightly into the yellow for a smooth transition. Step 4: Skeletal Detailing General Bone Texture: Lightly dry brush the skeleton with a mixture of Mournfang Brown and XV-88 to bring out the texture. Enhanced Details: Use Morghast Bone to highlight edges and raised details across the bones. Deepening Shadows: Mix Rhinox Hide with a small amount of black to create shadows in the deeper recesses and under the bones for added depth. Step 5: Sword and Metallic Effects Base Coat: Apply Neutral Grey as a base for the sword and any metallic elements. Weathering: Add scratch effects using Troll Slayer Orange mixed with Mournfang Brown to simulate rust and age. Highlights: Use Screaming Skull to pick out edges and features, giving the impression of worn, yet still sharp, metal. Step 6: Final Touches Refining Glows: Go back to the eyes, adding pure Yriel Yellow to the centres and intensifying the green at the edges if necessary. Blending and Smoothing: Use glazes of the base colours to smooth out transitions and unify the appearance, particularly around the eye sockets and on the sword to blend the rust effects. Contrasting Details: For a final layer of detail, use Screaming Skull to highlight teeth, knuckles, and other small bone protrusions, adding a subtle layer of Rhinox Hide for ageing. Step 7: Sealing the Model Once fully satisfied with your painting, seal the model with a matte varnish to protect your work and reduce any unwanted shininess, ensuring the skeletal figure looks as haunting in the display case as it does on the battlefield. Explore more of my Golden Demon entry tutorials If you don’t have an account here on my website, please sign up here! I have over 350 video tutorials in addition to my How to Paint a Skeleton with Glowing Eyes, with steps and tips, plus a selection of PDFs. If you are not sure about joining, you can explore my free videos with a free membership, or take the plunge and become a full subscriber for full access. If you’d prefer to support me on Patreon, please visit: https://www.patreon.com/RichardGray [...]
A small series on how to paint Rodney Roachbait, the new Blood Bowl star player for their Gnome team! In these videos we will explore lots of different textures and techniques a lot different to my usual moody and dark style. I hope you enjoy following along as much as I enjoyed painting him. Video Part One: How to paint Rodney Roachbait – Base colours, skin, beard and jumper. Although the model is painted to a high standard the techniques can still be used for tabletop gaming. This first part looks at preparing all of the base colours for the model, the skin, beard and jumper. Materials List Brushes:Fine Detail Brush, Standard Brush, Drybrush – I use the Artist Opus range of brushes. Paints:Games Workshop: Rhinox Hide, Mournfang Brown, Bugman’s Glow, Cadian Fleshtone, Morghast Bone, Contrast Dark Oath Flesh, Sotek GreenKimera Colours: Fallen GrassWhite (or P3 Morrow White)Sun Ray (or Vallejo Ice Yellow)Vallejo: Neutral GreyOther Materials: PVA Glue, Gloss Varnish, Magnifying Headset Steps and Tips on How to Paint Rodney Roachbait Preparation and Base Colour: I recommend using a headset to enhance visibility on this model as he is very, VERY small. I’ve based coated him black to begin. Base Colour Application: Begin by applying a base colour to the entire model to avoid the prominence of black from the primer. Use Rhinox Hide to block in areas like the hat and the ball. However, upon closer inspection, I realised he wore waders instead of boots, so I switched to Mournfang Brown as the base colour for the waders to avoid excessive brown tones. Paint the strap holding the fish carcass onto the hat using Mournfang Brown. When painting resin models like this one, you may notice slight lines, but these are easily obscured with paint. Addressing Imperfections: However, there are more pressing imperfections on this model – if you have some, like resin air bubbles, fill them with PVA glue and painting over. For the strap over the hat, use Fallen Grass from Chimera Colors. These paints are single-pigment, avoiding separation issues common with other paints. Mixing them with Games Workshop paints adds a satin finish to maintain colour vibrancy while avoiding using varnish, which can interfere with the model’s look. Painting Specific Areas: For specific areas like the jumper, use Sotek Green for a matte finish, while the leather hat has a satin finish achieved by mixing in Games Workshop paints. Paint the fish head and tail using Sotek Green and Balthasar Gold for the bony parts. Adding Depth: After basic block-ins, apply a thinned-down contrast paint, Dark Oath Flesh, over the model to give it a slight filter effect. This helps tie the colours together and softens harsh lines, especially on resin models with sharp details. Take care when using contrast paint, as it may pool in recesses, requiring careful cleanup. Once dry, it adds depth and subtle shading to the model. Correcting Imperfections: Apply gloss varnish to smooth out any unwanted textures, like creases on the cheeks, providing a polished finish. More tutorials for him to follow! In the mean time, why not explore my other videos? If you don’t have an account here on my website, please sign up here! I have over 350 video tutorials with steps and tips, plus a selection of PDFs. If you are not sure about joining, you can explore my free videos with a free membership, or take the plunge and become a full subscriber for full access. If you’d prefer to support me on Patreon, please visit: https://www.patreon.com/RichardGray [...]
My detailed how to paint the Nagash helmet tutorials, with videos plus step by step guide and tips with full paints used. Video – How to Paint the Nagash Helmet Part OnePaints and Materials UsedPaintsBrushesOther MaterialsSteps and Tips on How to Paint the Nagash HelmetVideo – How to Paint the Nagash Helmet Part TwoPaintsSteps and Tips on How to Paint the Nagash Helmet (Part Two)Video – How to Paint the Nagash Freehand Swirls/FiligreePaintsTips for the Freehand FiligreeVideo – How to Paint the Nagash Helmet Leather Strips and RunesPaintsStep and Tips on How to Paint the Nagash Helmet Leather Strips and RunesFor all of my Nagash Tutorials in one place, go hereExplore More Nagash Technique Tutorials Video – How to Paint the Nagash Helmet Part One In this tutorial, we’ll focus on painting the metallic areas of Nagash, specifically the head. The colours used for this tutorial are a bit different from the standard, and in the video I discuss techniques in more detail to achieve a textured, refined finish. Paints and Materials Used Paints Vallejo: English Uniform (VX-88) Golden Olive (Elysian Green mixed with Yriel Yellow) Yellow Green (Dorn Yellow mixed with Moot Green) Ice Yellow (Dorn Yellow) Ivory (Screaming Skull) Games Workshop: Rhinox Hide Abaddon Black Naggaroth Night (for future use) Brushes Fine detail brush (suitable for intricate work and small highlights) Medium-sized brush (for larger areas and base coating) Wet palette (to keep paints fresh and workable) Other Materials Wet palette Green stuff (for sculpting additional details, if desired) Painting lamp (for consistent lighting during the painting process) Miniature holder (for ease of handling and painting) Steps and Tips on How to Paint the Nagash Helmet Prepare the Model: Ensure your miniature is assembled and primed appropriately for painting. I’ve used a black primer for my Nagash. Block in the Base Colour: Start by blocking in the main highlights using Vallejo’s English Uniform (VX-88). Apply this colour where you want the primary light source to hit, focusing on a top-left orientation.Be mindful not to make the colour too opaque; a slight texture is desirable for the metallic effect. Understanding Colour Choices: The choice of metallic colours doesn’t have to be conventional. For this model, I went for a dark and moody theme inspired by the artwork of Nagash.My chosen metallic shades include Golden Olive, Yellow Green, and Ice Yellow from Vallejo, along with Rhinox Hide and Abaddon Black from Games Workshop. Building Layers of Colour: Use Golden Olive to build layers on top of the English Uniform, focusing on areas that require additional depth and shading.The opacity of Vallejo paints allows for strong, defined marks, ideal for creating small details and textures. Creating Texture and Depth: With each layer, gradually introduce lighter shades such as Yellow Green and Ice Yellow to enhance highlights and add dimension to the metallic surfaces.Keep in mind the direction of light and focus on maintaining a balance between light and shadow. Understanding Volume and Light: Highlighting metallic surfaces requires understanding how light interacts with volume. Unlike standard blending techniques, aim for distinct contrasts between light and shadow. Make sure you consider how light reflects off different surfaces, creating highlights and shadows of varying intensities. I like to use lots of real-life references of metal to study as I paint. Achieving a Moody Atmosphere: For an undead character like Nagash, aim for a dark, desaturated overall appearance. Use strong, small highlights strategically to draw attention to focal points. Avoid smooth blending; purposefully textured painting adds depth and character to the model. Experimenting with Glazing TechniquesExperiment with glazing techniques to blend colours seamlessly and soften transitions between different areas of the model.Glazing allows for subtle colour adjustments and can help unify the overall color scheme, creating a harmonious visual effect. Video – How to Paint the Nagash Helmet Part Two In this part, we’ll focus on painting the skull face, hair, and bone structures atop the hat. Paints Vallejo Model Colour: English Uniform (VX-88), Golden Olive (Elysian Green mixed with Yriel Yellow), Yellow Green (Dorn Yellow mixed with Moot Green), Ice Yellow (Dorn Yellow), Ivory (Screaming Skull), Neutral Grey (Mechanicus Standard Grey), Pale Grey Blue (Grey Seer mixed with Blue Horror) Games Workshop: Rhinox Hide, Warpstone Green Contrast, Deathclaw Brown P3: Morrow White Steps and Tips on How to Paint the Nagash Helmet (Part Two) Paint the Bone Structures: Using Vallejo’s English Uniform (VX-88), begin by painting the bone structures on top of the hat. Focus on picking out the highlights, keeping in mind the top-left orientation of the light source. Apply the paint carefully to emphasize the edges and contours of the bones.Enhance the Bone Texture: Utilise Golden Olive (a mix of Elysian Green and Yriel Yellow) to add depth and shading to the bone structures. Concentrate on areas that require additional definition, such as the joints and sockets. Remember to maintain a balance between light and shadow to create a realistic, textured effect.Add Highlights: With Yellow Green (a mix of Dorn Yellow and Moot Green), further highlight the bone structures, focusing on the areas where light would naturally hit. Pay attention to the left-hand side of the model to create a stronger contrast and emphasise the lighting direction.Refine the Highlights: Using Ice Yellow (Dorn Yellow), continue to build up the highlights on the bone structures, especially on the left-hand side. Gradually increase the brightness of the highlights towards the center of the model to draw attention to focal points.Adjusting with Rhinox Hide: If necessary, use Rhinox Hide to refine any areas where you’ve made mistakes or to add depth to the shadows. The translucency of this paint allows for easy blending and adjustment while maintaining a natural look.Painting the Skull Face: For the skull face, start with Deathclaw Brown, focusing on creating a weathered, textured appearance. Apply the paint in a rough, uneven manner to mimic the natural wear and tear of ancient bones.Highlighting the Skull: Gradually add highlights to the skull using Morghast Bone. Concentrate the highlights towards the left-hand side of the face to maintain consistency with the overall lighting scheme. Ensure the highlights stand out against the darker base colour to create depth and dimension.Adding Detail to the Eyes: Use a small amount of Morghast Bone to pick out the details around the eyes, emphasising the cheekbones and brow ridge. Be mindful of the sculpted eye sockets and adjust the highlights accordingly to enhance the overall appearance.Painting the Hair: Begin painting the hair with Neutral Grey, focusing on the large, clumpy strands. Keep the highlights towards the top side of the hair to simulate light hitting the surface. Apply the paint in a rough, textured manner to achieve a realistic look.Adding Texture to the Hair: Continue to build up the texture of the hair using Pale Grey Blue. Emphasize the highlights on the top side of the hair while leaving the underside darker to create depth and volume.Refining the Highlights: Using Morrow White sparingly, refine the highlights on the hair strands to add contrast and dimension. Focus on the areas closest to the face to draw attention to the focal points. Video – How to Paint the Nagash Freehand Swirls/Filigree Paints Vallejo: English Uniform (VX-88), Golden Olive (Elysian Green mixed with Yriel Yellow), Yellow Green (Dorn Yellow mixed with Moot Green), Ivory (Screaming Skull), Neutral Grey (Mechanicus Standard Grey), Pale Grey Blue (Grey Seer mixed with Blue Horror)Games Workshop: Warpstone Green Contrast, Abaddon BlackP3: Morrow White Tips for the Freehand Filigree Base Coat: Apply a base coat of Vallejo English Uniform (VX-88) to start the filigree on the Nagash hat. Ensure even coverage and allow it to dry completely. Highlighting with Yellow-Green: Mix Vallejo Yellow Green (Dorn Yellow mixed with Moot Green) with a small amount of white to increase opacity. Use a fine tip brush to apply highlights to what would be the raised areas of the filigree. Focus on creating sharp lines and highlights to enhance the detail. Adding Ivory Highlight Dots: Using Vallejo Ivory (Screaming Skull), create small highlight dots on the filigree. These dots should be strategically placed on curves and extreme curve points to simulate shine and reflectivity. Ensure consistency in placement for a cohesive look. Enhancing Contrast with Black: With Games Workshop Abaddon Black, carefully outline the filigree details to enhance contrast and definition. Use a fine tip brush and steady hand to create clean lines and borders. Glazing with Warpstone Green Contrast: Thin Games Workshop Warpstone Green Contrast with water (about two parts water to one part paint) to create a glaze. Apply the glaze over the filigree to enhance shading and highlights. Final Touches: Use P3 Morrow White to add final highlights to the filigree, focusing on the most raised and reflective areas. Ensure consistency and restraint with the white highlights to avoid overpowering the overall effect. Video – How to Paint the Nagash Helmet Leather Strips and Runes By following these steps and techniques, you can effectively paint leather strips and runes on your Nagash (or any other model, really!) adding depth, texture, and character. Paints Games Workshop: Rhinox Hide, Mournfang Brown, Cadian Fleshtone, Temple Guard Blue, Barroth Blue. Step and Tips on How to Paint the Nagash Helmet Leather Strips and Runes Base Coat: Ensure that the leather strips on the Nagash helmet are properly primed with black primer. Once primed, apply a base coat of Games Workshop Mournfang Brown to the leather strips. This will serve as the foundation for the leather texture. Highlighting with Mournfang Brown: Using Games Workshop Mournfang Brown, begin highlighting the curves and raised areas of the leather strips. Apply the paint in a textured manner, focusing on creating depth and dimension to simulate the appearance of weathered leather. Don’t worry about perfect blending; imperfections add to the realism. Layering with Cadian Fleshtone: Next, switch to Games Workshop Cadian Fleshtone and continue highlighting the leather strips. Apply this paint more sparingly, focusing on the most raised areas and curves to enhance the texture. The tonal contrast between Mournfang Brown and Cadian Fleshtone will create depth and visual interest. Glazing with Rhinox Hide: Thin Games Workshop Rhinox Hide with water to create a glaze. Apply the glaze over the highlighted areas to tone down the highlights and add depth to the leather texture. Focus on applying the glaze in the shadowed areas and along the edges of the leather strips for a realistic look. Painting Runes: Using Games Workshop Temple Guard Blue and Barroth Blue, paint the runes onto the leather strips. Ensure that the runes are clearly visible and neatly painted. Use a fine tip brush and steady hand to create clean lines and shapes. Less is more; avoid overcrowding the leather strips with too many runes to maintain balance. Touching Up: Review the painted leather strips and runes, making any necessary touch-ups or adjustments. Ensure consistency in highlighting placement and rune design throughout the miniature model. For all of my Nagash Tutorials in one place, go here Nagash, Supreme Lord of the Undead Nagash, Supreme Lord of the Undead is the father of necromancy.  I created a series of detailed tutorials on how I painted him. Watch Now Explore More Nagash Technique Tutorials If you don’t have an account here on my website, please sign up here! I have over 350 video tutorials with steps and tips, plus a selection of PDFs. If you are not sure about joining, you can explore my free videos with a free membership, or take the plunge and become a full subscriber for full access. If you’d prefer to support me on Patreon, please visit: https://www.patreon.com/RichardGray [...]
Learn how to paint Melusai Blood Sisters (the Daughters of Khaine!) in my step by step video guides. The Melusai Blood Sister are formidable warriors in service to Morathi, the High Oracle of Khaine. Born from a concoction of enchantments, shadow magic, and Morathi’s own blood, these serpentine beings are the trusted handmaidens and guardians of the goddess herself. Clad in terrifying kragath war-masks resembling the visage of Khaine, the Melusai Blood Sisters possess a deadly prowess on the battlefield. With their intricate details, dynamic poses, and rich lore, the Melusai Blood Sisters were great fun to paint, with lots of techniques to explore (the gore dripping heart was a favourite!). Click the headers below to explore by part of technique, or scroll to watch in order. Video Part One – How to Paint Melusai Blood Sisters (Gold NMM Armour) Materials needed Paints Step by Step and Tips How to Paint Melusai Blood Sisters Gold NMM Armour Video Part Two – How to Paint Melusai Blood Sisters (Shiny Scales) Paints Step by Step and Tips How to Paint Melusai Blood Sisters Shiny Scales Video Part Three – How to Paint Melusai Blood Sisters (Hair and Skin) Paints Step by Step and Tips How to Paint Melusai Blood Sisters Hair and Skin Video Part Four – How to Paint Melusai Blood Sisters (Blood Drops, Heart and Halberd Staff) Paints and Materials Needed Step by Step and Tips on How to Paint Melusai Blood Sisters Dripping Heart and Halberd Preparing the Heart Creating Realistic Blood Drips Painting the Halberd Staff Video Part One – How to Paint Melusai Blood Sisters (Gold NMM Armour) Materials needed Fine detail brush (suitable for precise painting) – I use the Artist Opus range of brushes.Medium-sized brush (for larger areas and blending)Wet palette (for mixing and thinning paints) Paints Games Workshop:Moot GreenBalor BrownMournfang BrownXV-88Firedragon Bright P3 (Privateer Press):Morrow White (or Ceramite White) Vallejo:Ice Yellow (or Dorn Yellow) Step by Step and Tips How to Paint Melusai Blood Sisters Gold NMM Armour Prime the Model – Apply a primer – I used black for this model.Allow the primer to dry completely before proceeding. Base Coat – Start by applying a base coat of XV-88 or a similar brown colour to the armour areas of the model. Use thin layers of paint to achieve smooth coverage, allowing each layer to dry before applying the next. Establish Highlights – Begin adding highlights using Balor Brown, focusing on raised areas and edges of the armour. Build up the highlights gradually, using the tip of your brush and thin layers of paint for precision. Add Secondary Reflections – Apply secondary reflections using Mournfang Brown or a darker shade of brown, focusing on areas where light would not directly hit. Keep these reflections subtle to avoid overpowering the main highlights. Refine the Highlights – Continue refining the highlights by adding brighter shades like Firedragon Bright or Ice Yellow to create a more metallic appearance. Concentrate these brighter highlights on the most reflective areas, such as the tops of curves and edges. Blend Colours – Use a wet palette to blend colours seamlessly and achieve smooth transitions between different shades. Adjust the intensity and placement of highlights as needed to maintain realism and visual interest. Detail Work– For gemstones or intricate patterns, use contrasting colours like red or green to really stand out!! Video Part Two – How to Paint Melusai Blood Sisters (Shiny Scales) This video shows how to paint the shiny scales with realistic lighting on the Gorgai Blood Sister from Games Workshop Paints Games Workshop: Stegadon Scale Green, Ahriman Blue, Temple Guard Blue, Squig Orange, Ratskin Flesh, Lugganath Orange P3 (Privateer Press): Morrow White (Ceramite White) Step by Step and Tips How to Paint Melusai Blood Sisters Shiny Scales Base Coating – Begin by applying a base coat of Stegadon Scale Green to the scales on the belly area of the miniature. Use thin layers to ensure smooth coverage over the black primer. Adding Highlights – With Ahriman Blue, start picking out the lighter areas of the scales facing upward. These areas will catch more light, so focus on the top edges and curves. Build up the highlights gradually with thin layers. Blending Transitions – Mix Ahriman Blue with Temple Guard Blue to create a lighter shade. Use this mixture to blend the transitions between the darker and lighter areas of the scales. Work quickly while the paint is still wet to achieve smooth transitions. Introducing Warmth – Incorporate warm tones by applying Squig Orange to small dots on the scales. Vary the size and placement of the dots for visual interest. These dots will add a contrasting element to the cool blue tones. Adjusting the Approach – Evaluate the effect of the orange dots and consider the overall look. If desired, use Ratskin Flesh to glaze over the orange dots and adjust their intensity. This step adds depth to the scales without overpowering the blue tones. Enhancing Highlights – Create a glaze by mixing Morrow White with a small amount of water. Apply this glaze to the scales, focusing on the areas where light would hit most directly. Use thin layers and build up the intensity gradually to achieve a shiny effect. Final Touches – Use Lugganath Orange to accentuate the orange dots on the scales, ensuring they remain visible but subtle. This step adds a final layer of detail to enhance the overall appearance of your Melusai Blood Sister! Video Part Three – How to Paint Melusai Blood Sisters (Hair and Skin) This video shows how to paint the hair and skin of the Gorgai Sister of Blood. All videos are recorded in HD 1080p or higher – use full screen for the full effect and let the video load completely. Paints Citadel Paints: Naggaroth Night, Daemonette Hide, Dechala Lilac, Ceramite White, Slaanesh Grey P3 Paints: Mauro White (or any preferred white paint) Citadel Contrast Paint: Magos Purple Step by Step and Tips How to Paint Melusai Blood Sisters Hair and Skin Painting the HairBegin by applying Naggaroth Night, a base colour from Citadel, to the hair of the model using a medium brush.Apply multiple thin layers of Naggaroth Night to achieve good coverage, as it may initially appear translucent.Leave the recesses black to create shading effects.Next, mix Daemonette Hide with some water to thin it down and apply it to the highlighted areas of the hair to create depth and dimension.Use Dechala Lilac to highlight specific strands of hair, ensuring that the brush strokes follow the natural flow of the hair.Mix Ceramite White with water to create a thin glaze and apply it to the highest points of the hair for additional highlights.Finally, use Magos Purple Contrast Paint, thinned down with water, to glaze over the highlighted areas of the hair to enhance its vibrancy and depth. Painting the SkinFor the skin, start by using Slaanesh Grey to paint the base coat onto the model’s skin.Apply multiple thin coats of Slaanesh Grey to achieve solid coverage, as black primer may cause the paint to appear patchy.Mix Kislev Flesh with Ceramite White to create a lighter tone, approximately a 50/50 mixture, and thin it down with water to create a glaze-like consistency.Carefully apply the thinned Kislev Flesh mixture to the raised areas of the skin to create highlights, paying close attention to the direction of light.Ensure that the highlights are consistent with the overall lighting scheme of the model.Pay attention to details such as elbow creases, where highlights may naturally occur due to light reflection.Use watered-down Magos Purple Contrast Paint to glaze over the highlighted areas of the skin to enhance vibrancy and depth, similar to the technique used for the hair. Video Part Four – How to Paint Melusai Blood Sisters (Blood Drops, Heart and Halberd Staff) This video shows how to paint the heat and create the blood drip effect. It also shows how to paint the NMM staff. Paints and Materials Needed Games Workshop paints: Mephiston Red, Wraithbone, XV-88, Balor Brown, Dorn Yellow, Ceramite White, Blood For The Blood God, Ahriman Blue, Rhinox Hide Vallejo paint: Neutral Grey (alternatively, Mechanicus Standard Grey) Superglue Fine hair (preferably from your own head) Gloss varnish (pink lab coat or any gloss varnish) Paintbrushes Water and palette for mixing paints Step by Step and Tips on How to Paint Melusai Blood Sisters Dripping Heart and Halberd Preparing the Heart Start by applying a base coat of Mephiston Red to the heart held by the Melusai Blood Sister. Ensure thorough coverage and allow it to dry completely before proceeding. Once the red base coat is dry, apply a coat of Wraithbone or bone-coloured paint to certain areas of the heart. Leave some areas of red in the recesses to create depth and realism. Use a fine detail brush to pick out specific details on the heart, such as striations and tubing. These details will add texture and visual interest to the finished piece. Creating Realistic Blood Drips After applying gloss varnish to the hair, allow it to dry completely between coats to ensure stability and durability. When painting the heart with Wraithbone or bone-coloured paint, focus on leaving some areas of red in the recesses to create depth and realism. Utilize the Blood For The Blood God paint to add the blood drips. This paint has a translucent quality, mimicking the appearance of real blood. Start by applying small droplets of the Blood For The Blood God paint at the bottom of the heart, where the hair strands meet the surface. This will simulate the blood dripping effect realistically. Gradually build up the size of the blood drips by applying additional layers of the paint. This will create the illusion of thicker blood droplets as they descend from the heart. As you add more layers of the paint, focus on varying the size and shape of the drips to achieve a natural and organic appearance. Remember that blood doesn’t flow in uniform lines, so irregular shapes and sizes are key to realism. Allow each layer of paint to dry completely before adding the next layer. This will prevent smudging and ensure a clean and crisp finish to your blood drips. Once satisfied with the appearance of the blood drips, allow the entire model to dry thoroughly before handling or applying any additional layers of paint. This will ensure that the blood drips remain intact and vibrant on your miniature model. Painting the Halberd Staff Start by determining the primary light source and angle on the model. This will dictate where the highlights and shadows should be placed on the halberd staff. Use XV-88 to establish the main highlight line on the staff, focusing on the areas that would catch the most light. Apply multiple layers of XV-88 to gradually build up the highlights, ensuring smooth transitions and depth. Use Ice Yellow or Dorn Yellow to add secondary highlights to the staff, focusing on areas that would catch reflected light or have a slightly warmer tone. Blend the highlights together using thin layers of paint and subtle transitions, ensuring a natural and cohesive appearance. Use Balor Brown to add darker tones and shadows to the staff, focusing on areas that would be in shadow or less exposed to light. Apply Neutral Grey or Mechanicus Standard Grey to create additional contrast and definition on the staff, paying attention to details and textures. Use Ahriman Blue to add accents and details to the staff, such as rivets or embellishments, to enhance its overall appearance. Finish by adding highlights with Ceramite White or another white paint, focusing on sharp edges and raised details to create a sense of depth and dimension. Allow the paint to dry completely before handling or applying any additional layers, ensuring a clean and professional finish. If you don’t have an account here on my website, please sign up here! I have over 350 video tutorials with steps and tips, plus a selection of PDFs. If you are not sure about joining, you can explore my free videos with a free membership, or take the plunge and become a full subscriber for full access. If you’d prefer to support me on Patreon, please visit: https://www.patreon.com/RichardGray [...]
These videos show how to paint my Golden Demon winning Loonboss Knight on a Giant Cave Squig, with tips on NMM armour, woodgrain, banners, freehand and more. Scroll down to look at all the how to paint a Loonboss knight tutorials in order, or use the links below to quickly jump to a part of him, or a technique. Techniques and Approaches – What do I mean?MaterialsVideo: Loonboss Armour and Yellow RobePaintsPreparing the ModelPainting the Armour (Non-Metallic Metal Technique)Painting the Yellow RobeVideo: Armour and Banner with FreehandMaterials Needed:Steps to Paint the Armour:Steps to Create and Paint the Pennant:Video: Lance NMM (Non Metallic Metal)Materials Needed:Steps to Paint the Armour:Steps to Paint the Lance/Spear Tip:Video: Woodgrain on the LanceMaterials List:Step-by-Step Guide:Additional Tips:Video: Banner WeatheringMaterials and Paints:Step-by-Step Guide:Additional Tips:Video : Loonboss NMM SickleMaterials NeededNMM Sickle – Step-by-Step GuideNeed to paint his trusty Squig steed? Techniques and Approaches – What do I mean? Non-Metallic Metal (NMM): A painting technique used to simulate the appearance of metal without using metallic paints, relying on grey tones and colours reflecting the environment. Layering: Building up colour and intensity through multiple thin layers. Glazing: Applying a transparent layer of paint to adjust colour intensity and tone. Highlighting: Adding lighter colours to raised areas to simulate the effect of light hitting the surface. Shading: Applying darker colours to recesses to create depth and contrast. Materials A range of fine detail brushes for precise paint application. I use the Artist Opus range, but any quality brush designed for miniature painting can be used. A larger brush for base coating and applying glazes is also useful, especially for larger areas or when working with thin glazes. Blu-tack/white tack: Used for temporarily attaching parts of the model for easy handling and painting. Wet palette: Essential for keeping paints moist and workable, especially important for blending and glazing techniques. Water or a medium for thinning paints: Essential for achieving the smooth, thin layers required for detailed miniature painting. Mixing surface or palette: For mixing custom paint colours and dilutions. Reference materials: Such as photographs of knights and armour. Video: Loonboss Armour and Yellow Robe All videos are recorded in HD 1080p or higher – use full screen for the full effect and let the video load completely. Paints Games Workshop (Citadel) XV-88: Used as a base colour for the yellow robe. Balor Brown: Applied for layering on the robe. Yriel Yellow: Used for bright highlights on the robe. Flash Gits Yellow: For the final highlights on the robe to enhance vibrancy. Sotek Green: Used for reflective highlights on the armour. Mephiston Red: Applied for reflections and details. Mournfang Brown: For shading and adding depth to the yellow robe. Vallejo Neutral Grey: Used as the base colour for the armour. Pale Grey Blue: Mixed with other colours for highlights on the armour. P3 (Privateer Press) Morrow White: Mixed with Vallejo’s Pale Grey Blue for armour highlights. Preparing the Model Initial Setup: The model is mounted using white tack (a type of white blu tack) to easily handle and paint hard-to-reach areas. The arms are not glued to allow for painting underneath and around them. Painting the Armour (Non-Metallic Metal Technique) Base Coat with Vallejo Neutral Grey: Start by painting the armour with Vallejo Neutral Grey to lay down the initial highlights and shadows. This stage is rough, focusing on the placement of light and dark areas to simulate metallic reflection. Reflections and Highlights: Add reflections to the armour using colours from the model’s surroundings, such as Sotek Green for areas close to the squig and Mephiston Red for areas near red elements. This step involves carefully applying the paint to avoid damaging adjacent finished areas. Enhancing the Metallic Effect: Use a mix of Vallejo Pale Grey Blue, P3 Morrow White, and a tiny amount of yellow to create a pale green for the top-facing highlights. This mix creates a subtle colour variation that enhances the metallic sheen without resorting to pure white, which is reserved for the brightest reflection points. Refining Highlights and Shadows: Continue to refine the highlights and shadows, ensuring that the armour’s upper surfaces reflect more light and the lower surfaces remain darker, mimicking the effect of light coming from above. Smooth blending and correct highlight placement are crucial for a convincing NMM effect. Final Adjustments: Add the highest points of reflection using a light blue steel colour, moving away from the mixed colours previously used. This simplifies the process while maintaining the desired effect. Painting the Yellow Robe Base Coat with XV-88: Apply a base coat of XV-88, which serves as a foundation for building up the yellow colour. Yellow paints often have poor coverage, so starting with a solid base is important. Shading: Use Mournfang Brown to add depth to the shadows of the robe. This colour introduces warmth and contrast, making the subsequent yellow layers stand out more. Layering: Apply layers of Balor Brown, focusing on the upward-facing sections and creases to create volume and shape in the fabric. Brightening with Yriel Yellow: Use Yriel Yellow to highlight the raised areas and creases further, enhancing the vibrancy and contrast of the robe. This step may require multiple layers due to the translucency of yellow paint. Final Highlights with Flash Gits Yellow: Add the brightest highlights with Flash Gits Yellow, concentrating on the most prominent parts of the robe to achieve a vibrant, sunlit effect. Keep these highlights limited to ensure the robe maintains its rich yellow colour. Inking for Vibrancy (Optional): If additional vibrancy is needed, a yellow ink can be glazed over the painted areas to enrich the colour without affecting the underlying detail and shading. Video: Armour and Banner with Freehand Materials Needed: Paints: Games Workshop: Balor Brown, Yriel Yellow, Flash Gits Yellow, Temple Guard Blue, Mephiston Red, Mournfang Brown, Rhinox Hide, Borghast Bone, Neutral Grey, Black Vallejo: Pale Grey Blue P3: Morrow White Other Materials: Plastic from a model clam pack for the pennant, green stuff for attachment, heat gun for shaping the pennant, model holder (optional for comfort), wet palette, water for thinning paints. Steps to Paint the Armour: Enhancing Reflections: Begin by using Yriel Yellow to stipple on the lower reflections of the armour, focusing above the yellow skirt. This technique involves using very small, controlled marks to blend the paint without creating noticeable dots. Aim for a subtle blend rather than a harsh stipple effect. Mixing Colours: If you previously mixed colours such as Blue Horror with Uriel Yellow for specific shades, consider simplifying this process by sticking with a basic light blue for upward-facing areas. This approach minimises time spent on mixing while achieving a similar visual effect. Steps to Create and Paint the Pennant: Creating the Pennant: Cut a piece of plastic from a model clam pack into a long triangle shape. Attach it to the spear of the Goblin using green stuff, ensuring it has a realistic attachment point. Sand and prime it black before beginning to paint. Shaping the Pennant: After priming, use a heat gun to carefully bend the pennant into a dynamic, swirling shape that suggests movement. Act quickly as the plastic cools and sets rapidly. Base Coating: Apply a base coat of Neutral Grey across the pennant. This provides a better surface for the following colours than a black base would, reducing the number of coats needed for opaque coverage. Applying the Main Colours: Start painting the pennant with the primary colours of your design. For this tutorial, we use a triadic colour scheme of purple, turquoise (Temple Guard Blue), and yellow. Apply the colours in blocks or patterns as desired, ensuring smooth, even coverage. Freehand Details: Add freehand designs such as checkered patterns or symbols in contrasting colours. Paint these designs directly onto the pennant, adjusting the size and shape as necessary to fit the flowing fabric’s contours. Finishing Touches: Use fine detail work to clean up any edges or to add highlights and shading to the freehand designs. This step brings depth and vibrancy to the pennant, making it stand out. Video: Lance NMM (Non Metallic Metal) Materials Needed: Paints: Games Workshop: Balor Brown, Yriel Yellow, Flash Gits Yellow, Mournfang Brown, Rhinox Hide, Baharroth Blue, Blue Horror Vallejo: Neutral Grey, Black Steps to Paint the Armour: Base Coat: Begin with Vallejo Neutral Grey as a base coat. This colour provides a solid foundation for building up to the desired metallic effect. Enhancing the Metallic Look: Apply Baharroth Blue and Blue Horror to introduce subtle blue reflections, simulating the sky’s reflection on the armour. These colours add depth and vibrancy, making the armour appear more dynamic. Adding Highlights: Use P3 Morrow White for the brightest highlights, focusing on the edges and raised areas of the armour to mimic light reflecting off a shiny surface. Be careful with the application to ensure these highlights enhance the metallic effect without overpowering the blue tones. Detailing with Rhinox Hide: Apply Rhinox Hide in selected areas to create depth and contrast, especially around the rivets and in crevices where dirt and grime would naturally accumulate. Steps to Paint the Lance/Spear Tip: Rough Texture Base: Start with a base coat of Neutral Grey, applied in a rough, stippled fashion to create texture. This approach simulates a worn, hammered metal rather than a smooth, polished finish. Adding Depth with Rhinox Hide: Use Rhinox Hide to darken areas and add rust effects, enhancing the lance’s worn and used appearance. Apply the paint in patches to create a natural variation in texture and colour. Highlighting Edges: With P3 Morrow White, highlight the edges and any raised details on the lance to accentuate its shape and texture. The contrast between the rusted areas and these highlights will give the lance a realistic metallic appearance. Creating Contrast with Baharroth Blue and Blue Horror: Introduce slight blue tinges using Baharroth Blue and Blue Horror to suggest environmental reflections on the lance, adding to the realism of the metal. Video: Woodgrain on the Lance Materials List: Primer: Black Base Paints: Doombull Brown Detailing Paints: XV-88, Zandri Dust, Morghast Bone Glazing Paints: Mournfang Brown, Abaddon Black Brushes: Fine tip brushes for detailed line work. Step-by-Step Guide: Prepare Your Model: Start with a model primed in black. If the primer has been left for a long time and developed a shiny, hard surface that repels paint, consider applying a coat of matte varnish to improve paint adhesion. Base Coat: Apply a base coat of Doombull Brown. This colour might require multiple layers for full coverage, especially over a black primer. Allow each layer to dry thoroughly before applying the next. Initial Wood Grain Detailing: Using XV-88, begin painting the wood grain. Start with stylised curls and knots, especially on larger, flat surfaces for visual interest. Ensure these lines are somewhat thick to allow for later highlighting without losing the initial detail. Consider the Wood’s Shape: When drawing straight lines or adding to the wood grain pattern, follow the contours of the wood. Avoid straight lines that ignore the wood’s curvature, as this can look unnatural. The goal is to mimic natural wood grain, which follows the shape of the piece. Highlighting: Begin highlighting with Zandri Dust, focusing on making these lines thinner and more refined than the initial XV-88 lines. Highlight selectively, emphasising areas that would naturally catch more light and leaving others darker to create depth. Final Highlights: Use Morghast Bone for the final highlights, again focusing on thin, delicate lines to accentuate the wood grain’s details. This step adds further depth and realism to the wood effect. Glazing: Mix Mournfang Brown with water to create a glaze (approximately 1 part paint to 6 parts water, though adjust based on your preference and paint consistency). Apply this glaze selectively to tone down the brightness of the highlights and unify the wood grain effect. Glaze more heavily near the lance tip and where the hand grips the wood to create natural shading. Optionally, add a glaze of Abaddon Black in the deepest recesses or where additional shading is needed to enhance the depth further. Final Touches: After glazing, you might find some lines or details need redefining or adjusting. Use the same detailed approach with XV-88, Zandri Dust, and Morghast Bone to fine-tune the wood grain effect. Assessment and Adjustment: Once the glazes have dried, assess the overall effect. If necessary, reapply highlights or glazes to achieve the desired depth and realism. The goal is to have a richly detailed wood texture that looks natural and varied. Additional Tips: Thin Lines: Practice achieving very thin lines for detailing and highlighting. The quality of these lines greatly contributes to the realism of the wood grain effect. Glazing Technique: Mastery of glazing is crucial for this technique. Glazes should be thin enough to allow underlying details to show through while unifying the overall appearance. Patience and Layers: Building up the wood grain effect requires patience and multiple layers. Allow each layer to dry thoroughly before proceeding to the next. Reference Images: Having a reference image of real wood grain can be incredibly helpful for understanding how to simulate the look on your model. Video: Banner Weathering Materials and Paints: Black Primer: For initial model preparation. Weathering Paints: Rhinox Hide XV-88 Zandri Dust Morghast Bone Screaming Skull Fine Detail Brushes: For precise application of weathering. Matte Varnish: Optional, if paint adherence is an issue on previously primed areas. Step-by-Step Guide: Initial Observation: Note any areas where paint adherence is poor, potentially due to oils or prolonged primer exposure. Apply a matte varnish coat if necessary to improve paint stickiness. Base Weathering Layer: Start with Rhinox Hide to apply the initial, broad weathering strokes. This layer sets the stage for depth and adds a first layer of grime. Apply in a seemingly haphazard manner, focusing on areas that would naturally accumulate dirt and wear. Building Up Weathering: Progressively use lighter browns, starting from XV-88 to Zandri Dust, then Morghast Bone, and finally Screaming Skull. Each successive layer should cover a smaller area than the last, creating a gradual transition from the darkest weathered areas to the lightest. The key is to create a detailed and layered effect that adds realism to the banner. Technique for Application: Use the tip of your brush for controlled application, keeping your strokes small and deliberate. As you move to lighter colours, your marks should become finer, simulating the detailed texture of weathered fabric. Highlight and Define: With Morghast Bone and Screaming Skull, focus on edges and high points where wear and tear would naturally highlight the banner. These colours also help to desaturate and blend the weathering with the rest of the banner, softening the overall effect. Glazing for Cohesion: Mix Screaming Skull with water to create a thin glaze. This step unifies the weathered effect, blending the layers together and ensuring that the weathering doesn’t overpower the underlying details of the banner. Apply sparingly over the weathered areas, paying attention not to obscure the detailed freehand work beneath. Final Adjustments: Revisit any areas that may require additional definition or where the weathering may have obscured too much detail. Use a fine brush to reapply base colours or add final highlights where necessary. Assessment: Step back and assess the overall effect. The weathering should add character and age to the banner without diminishing the vibrancy of the underlying colours or the clarity of the freehand details. Protect Your Work: Consider applying a protective varnish to seal the model and protect the weathering from handling and transport, especially important for competition pieces! Additional Tips: Subtlety is Key: Weathering should enhance, not detract. Aim for a realistic look that suggests wear rather than overwhelming the piece. Consistency in Lighting: Ensure the highlighted areas of weathering are consistent with the light source affecting the entire model for a cohesive look. Patience and Layers: Build up the weathering gradually. Rushing can lead to a muddled effect that lacks depth. Video : Loonboss NMM Sickle Materials Needed Paints Vallejo Paints German Grey Neutral Grey Dark Blue Pale Ice Yellow Games Workshop Paints Mournfang Brown Abaddon Black P3 Paints Morrow White Brushes Artis Opus Size 00 brush, slightly worn for a softer tip. The worn tip is preferred for certain techniques like stippling and creating softer marks. NMM Sickle – Step-by-Step Guide Initial Blocking of Colours:Start by blocking in a few grey colours on the sickle. Use Vallejo’s German Grey as the first colour, then transition to Neutral Grey. This stage is about establishing the basic shape and light direction of the sickle. Considering the Angle:Remember to consider how the Loonboss will hold the sickle. The angle of the sickle will impact the position of the reflections. The brightest highlight point should be at the top curve of the sickle. Detailing the Surface:Pay attention to the texture of the sickle. It should appear chunky and uneven, typical of goblin craftsmanship. Use the undulations on the blade’s surface to add interest and realism. Mixing Colours on the Wet Palette:Prepare a wet palette with a range of colours. Include variations of grey, both warm and cool tones. For instance, mix German Grey with Neutral Grey in different proportions. Also include Dark Blue Pale (a greenish-blue tone), Ice Yellow, and White. These colours will be used for creating various shades and highlights. Creating Highlights and Texture:Work on the shine points using a stippling effect. This technique helps create softer edges for the highlights, making the blending process easier. Gradually refine these highlights to make them smoother and cleaner. Refining with Glazes:Begin glazing with Mournfang Brown, watered down significantly (about 5-6 parts water to 1 part paint). This adds subtle colour and helps blend different tones together. It also imparts a slightly rusty look without adding texture. Adding Details and Final Highlights:Continue to add finer details and highlights using the prepared paints. Focus on the sharp edge of the sickle, adding subtle reflections. Use a combination of Abaddon Black and Morrow White for the final highlights and shadows. Final Touches:Keep refining the sickle, focusing on smoothing out transitions and ensuring the contrast between light and dark areas is pronounced. This step might require going back and forth between different shades to achieve a highly polished look. Need to paint his trusty Squig steed? How to Paint a Giant Cave Squig A really fun experience playing with colour and texture! These videos show I created this bright little fellow. Watch Now If you don’t have an account, please sign up here! The website currently has over 350 video tutorials with steps and tips, plus a selection of PDFs. If you are not sure about joining, you can explore my free videos with a free membership, or take the plunge and become a full subscriber for full access. If you’d prefer to support me on Patreon, please visit: https://www.patreon.com/RichardGray [...]
Creating a Non-Metallic Metal (NMM) texture on a sword for a miniature model requires patience, precision, and a good understanding of light and shadow. This guide is designed to walk you through the process of painting the weapon blade of Sekhar The Vampire, focusing on achieving a weathered, high-contrast, NMM effect. Video: Non Metallic Metal Texture Sword Materials Required Paints: Vallejo Neutral Grey, Ice Yellow; Games Workshop Mournfang Brown, Rhinox Hide; P3 Morrow White; Two Thin Coats Dark Sun Yellow. Brushes: Fine detail brushes capable of making very thin lines. Palette: A wet palette to ensure your paints remain workable. Water or Thinner: For diluting your paints to the desired consistency. Step-by-Step Guide to the Non Metallic Metal Texture Sword Preparing the Blade: Begin with a clean, primed miniature. Ensure Sekhar’s blade is smooth and free from any debris or fingerprints. Base Coating: Apply a base coat of Neutral Grey on the blade. This serves as your midpoint for building up highlights and deepening shadows. Establishing Light Points: Identify the main light points on the blade using a lamp. Typically, the flat back section of the blade and the curved edges will catch the most light. Mark these areas mentally as points where the highest highlights will be placed. Initial Highlights and Shadows: Create a gradient on your palette ranging from Neutral Grey to Ice Yellow, progressively adding Ice Yellow to lighten the mixture. Include a separate mix with Mournfang Brown and Neutral Grey for warmer tones, and pure white for the brightest highlights. Begin adding these mixtures to the blade, focusing on the predetermined light points. Use a scratchy, controlled technique with the very tip of your brush for texture. Refining the Texture: As the paint on your palette dries slightly, it will naturally become thicker. Use this to your advantage to add textured highlights and shadows, adjusting the water content as necessary for softer transitions or more pronounced scratches. Correcting and Sharpening Details: Utilise black to correct any oversteps or to sharpen the divisions between different sections of the blade. This step is crucial for defining the shape and enhancing the contrast of your NMM effect. Adding Depth with Glazes: Mix highly diluted glazes of Mournfang Brown (and variations with Neutral Grey) to apply to the lower sections of the blade. This creates a sense of depth and simulates a subtle reflection from the environment. Final Highlights: Use the brightest mixtures, including pure white, to add the final highlights to the top light points. This step might require going back to reinforce the contrast between the brightest highlights and the adjacent shadows. Weathering Effects: To add a weathered look, incorporate fine scratches across the blade’s surface with a very thin brush and lighter paint mixes. These should traverse both the light and dark areas to create a unified texture across the blade. Bounce Light: For a more advanced NMM effect, paint a bounce light on the cutting edge of the blade. This is a subtle highlight that simulates light reflecting off the ground, adding to the realism of your metal effect. Finishing Touches: Reassess the overall effect from multiple angles, ensuring that the blade looks good from all perspectives. Additional Tips Patience is Key: Achieving a convincing NMM effect is time-consuming. Work slowly and carefully. Lighting: Understanding how light interacts with metal is crucial for NMM. Study real-life examples if possible. More Soulblight, Undead and Vampire Tutorials! If you don’t have an account, please sign up here! The website currently has over 350 video tutorials with steps and tips, plus a selection of PDFs. If you are not sure about joining, you can explore my free videos with a free membership, or take the plunge and become a full subscriber for full access. If you’d prefer to support me on Patreon, please visit: https://www.patreon.com/RichardGray [...]
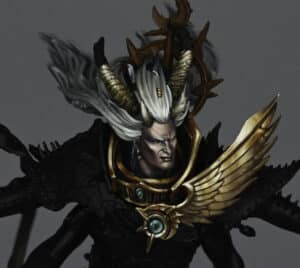
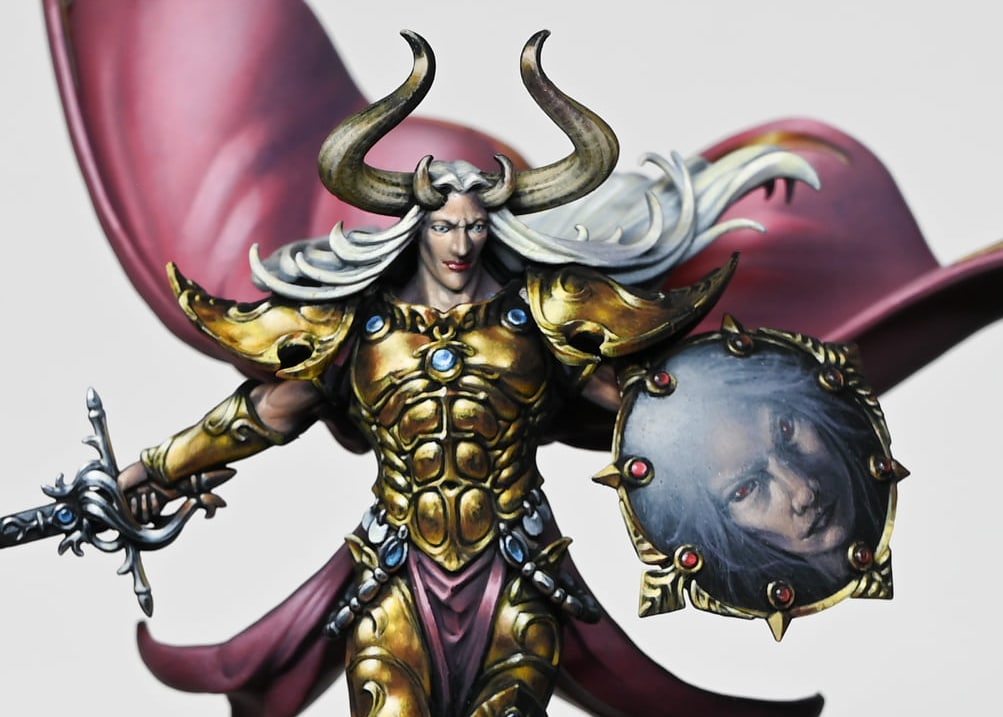
How to paint the skin, face, and eyes of Sekhar the Blood Queen, highlighting common pitfalls when painting tiny faces like hers, and how to rectify them. We’ll use a specific set of paints from Games Workshop, Vallejo, and P3 to achieve our desired effects. Video Part Three: Sekhar the Blood Queen Face with Eyes, and Skin Paints Needed Games Workshop: Bugman’s Glow, Sotek Green, Yriel Yellow, Evil Sunz Scarlet, Morghast Bone Vallejo: Ice Yellow, Neutral Grey, Black P3: Morrow White (or any white paint) Step-by-Step Guide to Sekhar the Blood Queen Face, Eyes and Skin Preparing the Base Mixture for Skin: Mix a 50/50 blend of Sotek Green and Bugman’s Glow to create the base skin tone. This unique combination provides a natural, yet distinctly fantastical, skin colour for our vampire queen. Adding Highlights to the Skin: Gradually incorporate Ice Yellow into the base mixture for highlights. Start with small quantities and increase the Ice Yellow for each successive highlight layer. This technique helps achieve a smooth gradient in the skin tone, offering a more lifelike appearance. Advanced Skin Highlights: For a creamy and realistic skin tone, mix Bugman’s Glow with Ice Yellow, carefully adjusting the blend to prevent the colours from becoming overly vibrant. Add a tiny amount of white to this mixture for the lightest highlights, aiming for an off-white shade that retains a hint of the base tones. Painting Contrast and Metallic Elements: Apply a grey base to the collar, preparing it for a metallic silver finish. This step is crucial for setting up the contrast between the metallic textures and the skin, ensuring that both elements stand out without competing for attention. Achieving Skin Texture and Smooth Transitions: Use thin layers for the skin, starting with a mix of approximately 1.5 parts water to 1 part paint, and adjust as necessary for smoother finishes. Ensure each layer is completely dry before applying the next to avoid any unwanted textures. Highlighting Techniques: Focus on painting towards the highlights, lifting the brush at the brightest points for precise application. This method ensures that the highlights are sharp and well-defined, enhancing the model’s dimensional details. Painting Facial Features: Pay particular attention to the face, adjusting features like the nose with shading and highlighting to ensure it fits naturally under any headgear. Avoid relying solely on box art for colour references, as this can mislead your perception of how facial features should be represented. Painting the Eyes: Start with a solid base colour for the eyes, using black or a deep brown. Paint the iris in a striking colour, adding a small dot of white to each eye to simulate light reflection. This detail adds life and intensity to the figure’s gaze. Enhancing the Lips: Choose a vibrant red for the lips, applying it carefully to add depth and dimension. This colour choice should complement the vampire theme, adding an element of allure and danger to the figure. Overall Facial Harmony: Revisit the entire face to ensure all elements work together harmoniously. Adjust shadows, highlights, and colour intensity to achieve a balanced and realistic facial expression that suits the character’s persona. More Soulblight, Undead and Vampire Tutorials! If you don’t have an account, please sign up here! The website currently has over 350 video tutorials with steps and tips, plus a selection of PDFs. If you are not sure about joining, you can explore my free videos with a free membership, or take the plunge and become a full subscriber for full access. If you’d prefer to support me on Patreon, please visit: https://www.patreon.com/RichardGray [...]
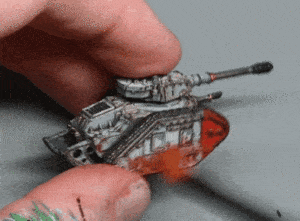
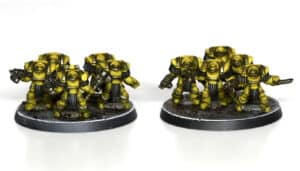
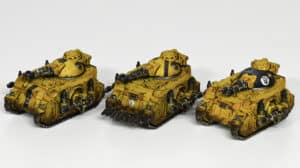
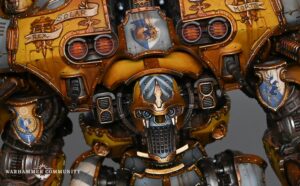
I was lucky enough to be sent the teeny tiny little Leviathan Dreadnoughts from the Legiones Astartes and couldn’t wait to paint them up. Follow along with my tutorial on how to paint a Leviathan Dreadnought yourself, below. Video: How to Paint a Tiny Leviathan Dreadnought This video looks at the new Leviathan model for Legions Imperialis and looks at an alternate method of painting the model as Imperial Fists. The same painting method can be used for other Legion models, but instead of the base red, just airbrush the off-white colour over the black primer and select an appropriate Legion Contrast Paint colour. Materials Needed: Primer: Black Base Paints: Wild Rider Red (Games Workshop) Highlight Paints: Chimera Colours Sunray (or Vallejo Ice Yellow as alternative), Imperial Fists Yellow (Contrast), Uriel Yellow (Games Workshop) Shading: Winsor & Newton Artist’s Oil Colour Burnt Umber, Agrax Earthshade (Games Workshop) Metallics: Metal Colour Exhaust Manifold (Vallejo) Additional Colours: Mournfang Brown, Rhinox Hide, Sotek Green, Morgast Bone, Skeleton Horde (Contrast), Black (Vallejo), Neutral Grey (Vallejo) Finishing: Decals, Coffee Granules, MIG Sand and Gravel Glue Tools: Airbrush, various brushes including a very worn-out old brush for oil washes, wet palette Steps: Preparation: Assemble your model ensuring to correctly match the pieces as per instructions to avoid misfitting parts. Prime the entire model in black to prepare for painting. Base Coating: Airbrush the model with Wild Rider Red as the base layer. Ensure a solid, even coat by applying two or three layers if necessary. Highlighting: Apply a zenithal highlight using Chimera Colours Sunray or Vallejo Ice Yellow. Focus on areas where sunlight naturally hits to create a sense of volume and depth. For further highlights, transition to a lighter shade using Uriel Yellow mixed with a bit of white for the brightest points on the model. Contrast Layering: Over the prepared base, apply Imperial Fists Yellow contrast paint. The red undercoat will enrich the yellow, providing a vibrant, intense colour suitable for Imperial Fists. Shading: Create depth using a wash of Winsor & Newton Artist’s Oil Colour Burnt Umber thinned with Sansodor. Apply this carefully to recesses and shaded areas to enhance details. Metallic Details: Paint metallic parts with Vallejo Metal Colour Exhaust Manifold. Transfer this paint to a pot for easier access and to avoid spillage. Use Agrax Earthshade to add depth to the metallic areas. Additional Details: For areas requiring darker tones or additional shading, use Mournfang Brown and Rhinox Hide. This includes adding weathering effects and battle damage. Eyes and lenses can be detailed using Sotek Green, with highlights added by mixing the green with white. Use Morgast Bone for highlighting edges and details subtly. Skeleton Horde contrast paint can be used for additional shading and to add variety to the base. Base Decoration: Prime the base in black, then airbrush with Neutral Grey. Apply coffee granules (fresh, not sticky or old) to simulate dirt or rubble, securing them with MIG Sand and Gravel Glue. Highlight the texture with Morgast Bone and add weathering powder for further detail. Decals: Apply decals as needed, using a small brush to position them. Set them with Micro Set and ensure they conform to the model’s surface. If necessary, seal with matte varnish to remove any glossiness. Finishing Touches: Finalise your model with any additional weathering, highlighting, or detailing as desired. This may include further battle damage, streaking effects using thinned-down Mournfang Brown, or reinforcing highlights on the most prominent features. Varnishing: Once satisfied with the painting, apply a matte varnish to protect your work and reduce any unwanted shine, especially over decals. More Legions Imperialis Tutorials and Videos! If you don’t have an account, please sign up here! The website currently has over 350 video tutorials with steps and tips, plus a selection of PDFs. If you are not sure about joining, you can explore my free videos with a free membership, or take the plunge and become a full subscriber for full access. If you’d prefer to support me on Patreon, please visit: https://www.patreon.com/RichardGray [...]
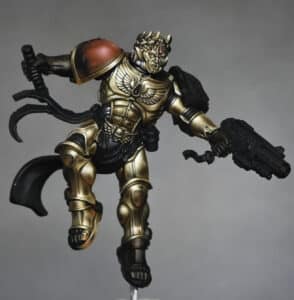
This guide will walk you how to create a boulder base with realistic large rocks utilising Milliput for the sculpting part and a selection of Games Workshop paints for painting. Materials Needed Milliput (Super Fine White preferred, but any type will do) Sculpting tools and a scalpel Water or a lubricant like Vaseline for smoothing Milliput PVA glue and fine grain sand for texture Paints: Vallejo Model Color Black, Games Workshop Deathworld Forest, Ogryn Camo, Morghast Bone, Ushabti Bone, and Kantor Blue Weathering pigment (e.g., Forge World Dark Sand) Brushes, including a small Artist Opus dry brush Matte varnish for sealing Step-by-Step Guide: How to Create a Base Sculpting the Base Mixing Milliput: Take equal parts of Milliput’s two components and knead until uniformly beige. It might initially be flaky; continue until smooth. Forming the Terrain: Roll the mixed Milliput into a ball and press onto the base. Begin sculpting the rough shape of the terrain using sculpting tools, dipped in water or lubricant to prevent sticking. Adding Details: Once you have a basic shape, use tools and a scalpel to carve more detailed rock formations. Ensure the terrain is level where the model will stand. Creating Smaller Rocks: Take excess Milliput, form small balls, and press onto the base to simulate smaller rocks, blending them into the larger mass. Smoothing and Refining: Continue to refine the shapes, adding crevices and smoothing surfaces. Allow the Milliput to partially dry for easier handling. Painting the Base Base Coat: Once the Milliput is dry, apply a thin base coat of Vallejo Model Color Black. Ensure it’s watered down to cover quickly without obscuring details. Adding Sand: Apply PVA glue to the base and sprinkle fine grain sand over it for additional texture. Allow to dry. Applying Weathering Pigment: Use a dark sand weathering pigment, pushing it into crevices and blowing away the excess. Washing: Create a wash with Deathworld Forest (5 parts water to 1 part paint) and cover the entire base. This will spread the pigment and add depth. Dry Brushing: Once dry, dry brush the base with Deathworld Forest, followed by Ogryn Camo, focusing on top-down strokes to highlight edges and textures. Detailing: Use Morghast Bone and Ushabti Bone to pick out individual rocks and edges for added contrast and detail. Adding Shadows: Water down Kantor Blue and apply it to the undersides of rocks and in shadowed areas to simulate ambient occlusion and enhance depth. Finishing Touches Sealing: Once fully painted and dry, apply a matte varnish to seal the weathering pigment and paint, protecting your work. Base Rim: Tidy up the base’s rim with Vallejo Model Color Black for a neat finish. Tips Work in stages, allowing materials to dry fully between steps. Be creative with your rock shapes but ensure the model will stand level on the finished base. Use a variety of brush sizes for dry brushing to reach different areas without disturbing the painted model. Test fit your model frequently on the base during the sculpting process to ensure a good fit How to Paint a Gold Necron Overlord Keen to learn how to paint the model standing on this base? Go here: Necron Overlord NMM Gold A series of video tutorials on how I painted this Necro Overlord, with gold non metallic metals and a guide to how to paint his glowing weapons. Plus, a guide on creating his base. Watch Now If you don’t have an account, please sign up here! The website currently has over 350 video tutorials with steps and tips, plus a selection of PDFs. If you are not sure about joining, you can explore my free videos with a free membership, or take the plunge and become a full subscriber for full access. If you’d prefer to support me on Patreon, please visit: https://www.patreon.com/RichardGray [...]
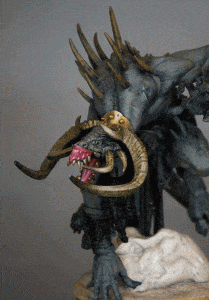
This how to paint a Red Techmarine NMM Axe guide aims to help you achieve a realistic non-metallic metal effect on your Techmarine’s axe, with a focus on contrast, texture, and light reflection. For all of the videos on how to paint a Red Techmarine, follow the link below, or scroll down here for just the axe guide! Red Techmarine A series for how to paint a Primaris Techmarine by Games Workshop. Watch Now Video: How to Paint a Red Techmarine – NMM Axe This guide aims to help you achieve a realistic non-metallic metal effect on your Techmarine’s axe, with a focus on contrast, texture, and light reflection. Materials Needed: Fine detail brushes for precise application. A wet palette to keep your paints hydrated. Vallejo and Games Workshop paints: Doombull Brown, Mournfang Brown, Balor Brown, XV-88, Ice Yellow, Pale Grey Blue, and P3 Morrow White (or any white). Preparing the NMM Axe: Metal Pole: Begin by painting the metal pole using the same NMM techniques detailed in the previous video. This ensures consistency across metallic elements of the miniature. Painting the Circular Detail on the NMM Axe: Base Colour: Start with the darker brown (Doombull Brown), applying it as the base for the small circular detail on the pole. This connects the colour scheme with the axe head, adding warmth and interest. Highlighting: Gradually build up the highlights transitioning from dark (Doombull Brown) to light (XV-88 to Ice Yellow) from the top to the bottom of the circular detail. Finish with a thin edge highlight at the top for definition. Painting the NMM Axe Blade: Vertical Lines: Initially, paint vertical lines across the blade with a mixture of 50:50 water to paint. This underlayer softens the stark contrast between subsequent horizontal lines and the dark primer. Adding Texture: Apply horizontal lines over the vertical ones to create a cross-hatching effect. This technique adds texture and subtlety to the blade, avoiding harsh contrasts. Defining Highlights: Focus on creating a diagonal highlight across the axe head, marking the primary light reflection. This line should be brighter at the top edge of the blade, tapering and becoming more subtle as it crosses the blade. Building Up the Blade’s Texture: Further Highlights: Use Mournfang Brown to add more texture and depth, emphasizing the top of the blade where the light is strongest. The aim is to make the top appear lighter than the bottom, enhancing the NMM effect. Ice Yellow Highlights: Progress to Ice Yellow for the highest highlights, concentrating on areas that would catch the most light. Ensure these lines are fine and precise to maintain the textured look. Detailing the Axe Head: Base Texturing: With Mournfang Brown, create scribbly, textured marks on the flat of the axe head, focusing on creating a light to dark modulation from one edge to the other. Enhancing Texture: Progress through Balor Brown and XV-88, adding finer, more controlled highlights to build up the texture. These should be more focused and less extensive than the base texture, adding depth and interest to the surface. Final Highlights: Use Ice Yellow and Pale Grey Blue for the final highlights, paying particular attention to areas like the skull and the circle on the axe head. These colours should only be applied to the blade for differentiation, so don’t go too crazy with them, adding a cool tone to contrast with the warmer body of the axe head. Finishing Touches: Neatening Edges: Go back and tidy up any overspill or overly broad lines with the base colours, ensuring the texture remains coherent and the contrasts sharp. Evaluation: Step back and review the entire piece, making any necessary adjustments to ensure the NMM effect is convincing and the textures and contrasts work together harmoniously. If you can’t see the videos, please sign up here! The website currently has over 350 video tutorials with steps and tips, plus a selection of PDFs. If you are not sure about joining, you can explore my free videos with a free membership, or take the plunge and become a full subscriber for full access. If you’d prefer to support me on Patreon, please visit: https://www.patreon.com/RichardGray [...]
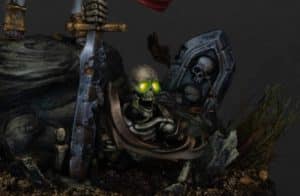
A beginners guide on how to apply Forge World decals and weather them so they look a natural part of the painting on your model. Painting and applying decals to your models adds significant details and realism, making it stand out during tabletop gaming. It’s also a lot easier than freehand! I still use decals a lot in my models, despite also enjoying freehand work. This step-by-step guide, designed to be beginner-friendly, will walk you through applying decals, adding a gloss finish for protection, and executing weathering techniques to give your model a battle-worn appearance. Video Tutorial: How to Apply Forge World Decals and Weather Them Be sure to subscribe to me on Youtube if you like my free content! Materials Needed: Vallejo Gloss Varnish Water for softening decals Micro Sol and Micro Set for decal application Tamiya 3mm Masking Tape or equivalent Games Workshop Kantor Blue Vallejo Neutral Grey, Ultramarine Blue, and Pale Grey Blue for weathering Games Workshop Matte Varnish Fine detail brushes Airbrush (optional for varnishing) Forge World Decals for Legio Gryphonicus How to Apply Forge World Decals Steps: Preparing the Surface: Apply Gloss Varnish: Begin by applying Vallejo Gloss Varnish to the areas where decals will be applied. This creates a smooth surface, reducing air pockets and imperfections. You can apply the varnish with a brush or an airbrush. If brushing, slightly dilute the varnish with water for easier application. How to Apply Forge World Decals: Soften Decals in Water: Cut out your chosen decals and soak them in water until they easily slide off the backing paper. This typically takes a few minutes. Apply Micro Sol: Place a small amount of Micro Sol on the model where the decal will be applied. This softener helps the decal conform to the model’s surface. Position the Decal: Carefully slide the decal from the paper to the model. Use a soft brush to adjust its position accurately. Remove Excess Water: Gently dab a soft, dry brush or a paper towel to remove any excess water and air bubbles beneath the decal. Apply Micro Set: Once the decal is in place, apply Micro Set over it. This solution helps soften the decal further, allowing it to snuggle down into the model’s details. Let it dry thoroughly, ideally overnight. Don’t worry if the decal looks wrinkled at this stage; it will smooth out as it dries. Take it steady when you reach this step to apply Forge World decals! Sealing the Decal: Apply Additional Gloss Varnish: After the decal has dried, apply another layer of gloss varnish over it using an airbrush for an even coat. This step helps to seal the decal and even out the surface. If necessary, apply 2-3 coats, allowing each to dry thoroughly. Matte Varnish Finish: Once the gloss varnish is completely dry, apply a matte varnish over the entire model to give it a uniform, non-glossy finish. This also helps to further blend the edges of the decal into the model. Weathering the Decal and Armour: Weathering with Paint: Use Vallejo Neutral Grey and Pale Grey Blue to add weathering around the decals and on the armour. Use a fine detail brush to apply small chips and scratches, focusing on edges and areas that would naturally see more wear. This adds realism and depth to your titan. Additional Weathering Techniques: For further realism, you can add streaks and rust effects using diluted paint or weathering powders. Apply these sparingly in areas where water and dirt would naturally accumulate and streak down the model’s surface. Additional Tips: Take your time with each step, especially when applying and positioning the decals. Always allow each layer of varnish and paint to dry completely before proceeding to the next step. Practice weathering techniques on a spare piece before applying them to your model to get a feel for the effect. By following these steps, you can achieve professional-looking results on your models, ready for display or tabletop gaming. More Tools and Basics Tutorials If you don’t have an account, please sign up here! The website currently has over 350 video tutorials with steps and tips, plus a selection of PDFs. If you are not sure about joining, you can explore my free videos with a free membership, or take the plunge and become a full subscriber for full access. If you’d prefer to support me on Patreon, please visit: https://www.patreon.com/RichardGray [...]
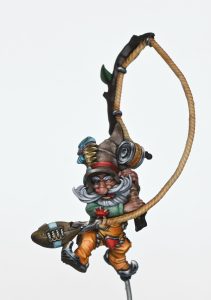
I was lucky enough to be sent Sekhar, Fang of Nulahmia by Games Workshop as an early review copy and couldn’t wait to paint her up for you. I’ve gone for an aged bronze look for her. Read on for my tutorials so far on how to paint her, with paints and step-by-step guide. Sekhar, Fang of Nulahmia, stands as a formidable agent of Neferata, wielding hypnotic powers to enthrall her foes. Accompanied by the serpent Ouboroth (although not in my version, sorry!) and leading packs of Dire Wolves and Fell Bats into battle, she embodies the deadly elegance of Nulahmia’s dark majesty. This set introduces Sekhar, her loyal Dire Wolves, and swooping Fell Bats, ready to bring terror to the Soulblight Gravelord armies! First Video Tutorial: Sekhar, Fang of NulahmiaMaterials NeededPreparationPainting the ArmourAdditional TipsVideo Part Two: Red Satin Cloak and Bronze HelmetPaintsPainting the Bronze HelmetPainting the Satin Red CloakVideo Part Three: Sekhar Fang of Nulahmia Face with Eyes, and SkinPaints NeededStep-by-Step Guide to her Face, Eyes and SkinVideo Part Four: Non Metallic Metal Texture SwordMaterials RequiredStep-by-Step Guide to the Non Metallic Metal Texture SwordAdditional TipsVideo Part Five: How to Paint a Skeleton with Glowing EyesMaterials needed:More Soulblight, Undead and Vampire Tutorials! First Video Tutorial: Sekhar, Fang of Nulahmia Welcome to this step-by-step painting guide for Sekhar, a new vampire model from the Soulblight Gravelords range by Games Workshop. In this tutorial, we will focus on achieving a bronzed armour effect using a non-metallic metal (NMM) technique and subtly applying verdigris for an aged look. Materials Needed Primer: Black Base Paints: Mournfang Brown, Mephiston Red (for the cloak) Main Paints: Mournfang Brown, Sybarite Green, Rhinox Hide, Dark Sun Yellow (or Balor Brown with a bit of yellow), Morrow White Tools: Airbrush (optional), brushes (sizes 1 or 2 and a finer 00 for details), wet palette, super glue, and plastic glue. Preparation Prime the Model: Begin with a black primer. If desired, airbrush the cloak with Mephiston Red. Allow the primer to fully cure to avoid rubbing off the paint. Assembly: Attach all parts with plastic glue, except for the head, which you should temporarily attach with a tiny bit of super glue for easy removal and precise painting. Painting the Armour Base Layer: Apply a solid base layer of Mournfang Brown over the armour. The coverage doesn’t need to be perfect due to the textured look we’re aiming for. Highlight Preparation: Mix your highlights on a wet palette. Start with Mournfang Brown and progressively mix in Dark Sun Yellow and Morrow White to create a gradient of shades from dark brown to light yellow, finishing with white for the brightest highlights. Applying Highlights: Start with a mid-tone mix of Mournfang Brown and Dark Sun Yellow, then progressively lighten the highlights by adding more Dark Sun Yellow and eventually white. Map out the highlights, focusing on the armour’s raised areas and edges. Texture Effect: Use a scratchy technique to add texture to the highlights, simulating wear and tear. Combine this with stippling for denser highlights. Ensure the texture is consistent across the armour to maintain a cohesive look. Verdigris Effect: Thin down Sybarite Green with water (approximately 70:30 water to paint ratio) for a heavy glaze. Apply this to mid-tones and shadows, avoiding the highest highlights to maintain the metallic sheen. For a more subtle verdigris, mix a small amount of Rhinox Hide into Sybarite Green. Avoid using the mix of Sybarite Green and white, as this may look too bright and unnatural. Additional Tips Brush Selection: Use larger brushes for broad highlights and switch to a finer brush (like a 00) for detailed texture work and smaller areas. Glazing: Use glazes to smooth transitions or adjust the intensity of colours. This is especially useful for blending the verdigris into the surrounding areas. Reflections and Details: For areas like the silver collar necklace, consider how it will reflect its surroundings. This includes colours from the helmet, the sky, and possibly the red cloak. Use lighter, desaturated colours to simulate reflection. Evaluating Your Work: Frequently step back and review your progress. Adjust highlights, shadows, and textures as needed to ensure a balanced and cohesive look. Video Part Two: Red Satin Cloak and Bronze Helmet Paints Mournfang Brown (Games Workshop) Sybarite Green (Games Workshop) Rhinox Hide (Games Workshop) Mephiston Red (Games Workshop) Morrow White (P3; any white will do) Dark Sun Yellow (Two Thin Coats; Balor Brown can be substituted with added yellow) White (Kimera Colours; any white optional) Painting the Bronze Helmet Base Layer: Start with a base layer of Mournfang Brown on the helmet. Ensure even coverage for a solid foundation. Mixing for Bronze: Prepare a mix of Mournfang Brown and a small amount of Dark Sun Yellow (or Balor Brown with added yellow) to create the bronze shade. This mix should be applied in two thin coats to ensure smooth coverage without obscuring details. Highlighting: Gradually add white to the bronze mix to create highlights. Focus these lighter shades on areas where light would naturally hit the helmet, enhancing the non-metallic metal effect. For very high highlights, use a mix predominantly of white with a touch of the bronze mixture. Verdigris Effect: Mix Sybarite Green and Rhinox Hide to create the verdigris shade. Apply this sparingly in recesses and areas where weathering would naturally accumulate. This step is optional and can be adjusted based on personal preference for the weathered look. Texture and Final Highlights: For added texture and to simulate wear, apply very fine dots and scratches using the lighter bronze mix. These should be concentrated around edges and high points where wear would be most apparent. Painting the Satin Red Cloak Base Layer: Apply a base coat of Mephiston Red over the cloak. Ensure smooth, even coverage as this will be the foundation for subsequent layers. Shadows: Create a shadow mix by combining Mephiston Red with Rhinox Hide. Apply this mixture in areas that would naturally be in shadow, such as under folds or lower parts of the cloak. Highlighting: Begin highlighting by adding white to Mephiston Red for a brighter red mix. Apply this to areas where light would naturally strike the cloak, such as the top of folds and raised areas. Gradually increase the amount of white in the mix for higher highlights, but avoid going up to pure white to maintain a satin finish. Glazing for Smoothness: Use glazes (thin, transparent layers) of your red mixes to smooth out transitions between shadows, mid-tones, and highlights. This step is crucial for achieving the smooth, satin look of the cloak. Final Adjustments: Revisit both the helmet and cloak for any final adjustments. Add more highlights or shadows as needed to enhance contrast and detail. Pay special attention to maintaining the balance between detailed texture on the helmet and the smooth finish of the cloak. Video Part Three: Sekhar Fang of Nulahmia Face with Eyes, and Skin Paints Needed Games Workshop: Bugman’s Glow, Sotek Green, Yriel Yellow, Evil Sunz Scarlet, Morghast Bone Vallejo: Ice Yellow, Neutral Grey, Black P3: Morrow White (or any white paint) Step-by-Step Guide to her Face, Eyes and Skin Preparing the Base Mixture for Skin: Mix a 50/50 blend of Sotek Green and Bugman’s Glow to create the base skin tone. This unique combination provides a natural, yet distinctly fantastical, skin colour for our vampire queen. Adding Highlights to the Skin: Gradually incorporate Ice Yellow into the base mixture for highlights. Start with small quantities and increase the Ice Yellow for each successive highlight layer. This technique helps achieve a smooth gradient in the skin tone, offering a more lifelike appearance. Advanced Skin Highlights: For a creamy and realistic skin tone, mix Bugman’s Glow with Ice Yellow, carefully adjusting the blend to prevent the colours from becoming overly vibrant. Add a tiny amount of white to this mixture for the lightest highlights, aiming for an off-white shade that retains a hint of the base tones. Painting Contrast and Metallic Elements: Apply a grey base to the collar, preparing it for a metallic silver finish. This step is crucial for setting up the contrast between the metallic textures and the skin, ensuring that both elements stand out without competing for attention. Achieving Skin Texture and Smooth Transitions: Use thin layers for the skin, starting with a mix of approximately 1.5 parts water to 1 part paint, and adjust as necessary for smoother finishes. Ensure each layer is completely dry before applying the next to avoid any unwanted textures. Highlighting Techniques: Focus on painting towards the highlights, lifting the brush at the brightest points for precise application. This method ensures that the highlights are sharp and well-defined, enhancing the model’s dimensional details. Painting Facial Features: Pay particular attention to the face, adjusting features like the nose with shading and highlighting to ensure it fits naturally under any headgear. Avoid relying solely on box art for colour references, as this can mislead your perception of how facial features should be represented. Painting the Eyes: Start with a solid base colour for the eyes, using black or a deep brown. Paint the iris in a striking colour, adding a small dot of white to each eye to simulate light reflection. This detail adds life and intensity to the figure’s gaze. Enhancing the Lips: Choose a vibrant red for the lips, applying it carefully to add depth and dimension. This colour choice should complement the vampire theme, adding an element of allure and danger to the figure. Overall Facial Harmony: Revisit the entire face to ensure all elements work together harmoniously. Adjust shadows, highlights, and colour intensity to achieve a balanced and realistic facial expression that suits the character’s persona. Video Part Four: Non Metallic Metal Texture Sword Creating a Non-Metallic Metal (NMM) texture on a sword for a miniature model requires patience, precision, and a good understanding of light and shadow. This guide is designed to walk you through the process of painting the weapon blade of Sekhar The Vampire, focusing on achieving a weathered, high-contrast, NMM effect. Materials Required Paints: Vallejo Neutral Grey, Ice Yellow; Games Workshop Mournfang Brown, Rhinox Hide; P3 Morrow White; Two Thin Coats Dark Sun Yellow. Brushes: Fine detail brushes capable of making very thin lines. Palette: A wet palette to ensure your paints remain workable. Water or Thinner: For diluting your paints to the desired consistency. Step-by-Step Guide to the Non Metallic Metal Texture Sword Preparing the Blade: Begin with a clean, primed miniature. Ensure Sekhar’s blade is smooth and free from any debris or fingerprints. Base Coating: Apply a base coat of Neutral Grey on the blade. This serves as your midpoint for building up highlights and deepening shadows. Establishing Light Points: Identify the main light points on the blade using a lamp. Typically, the flat back section of the blade and the curved edges will catch the most light. Mark these areas mentally as points where the highest highlights will be placed. Initial Highlights and Shadows: Create a gradient on your palette ranging from Neutral Grey to Ice Yellow, progressively adding Ice Yellow to lighten the mixture. Include a separate mix with Mournfang Brown and Neutral Grey for warmer tones, and pure white for the brightest highlights. Begin adding these mixtures to the blade, focusing on the predetermined light points. Use a scratchy, controlled technique with the very tip of your brush for texture. Refining the Texture: As the paint on your palette dries slightly, it will naturally become thicker. Use this to your advantage to add textured highlights and shadows, adjusting the water content as necessary for softer transitions or more pronounced scratches. Correcting and Sharpening Details: Utilise black to correct any oversteps or to sharpen the divisions between different sections of the blade. This step is crucial for defining the shape and enhancing the contrast of your NMM effect. Adding Depth with Glazes: Mix highly diluted glazes of Mournfang Brown (and variations with Neutral Grey) to apply to the lower sections of the blade. This creates a sense of depth and simulates a subtle reflection from the environment. Final Highlights: Use the brightest mixtures, including pure white, to add the final highlights to the top light points. This step might require going back to reinforce the contrast between the brightest highlights and the adjacent shadows. Weathering Effects: To add a weathered look, incorporate fine scratches across the blade’s surface with a very thin brush and lighter paint mixes. These should traverse both the light and dark areas to create a unified texture across the blade. Bounce Light: For a more advanced NMM effect, paint a bounce light on the cutting edge of the blade. This is a subtle highlight that simulates light reflecting off the ground, adding to the realism of your metal effect. Finishing Touches: Reassess the overall effect from multiple angles, ensuring that the blade looks good from all perspectives. Additional Tips Patience is Key: Achieving a convincing NMM effect is time-consuming. Work slowly and carefully. Lighting: Understanding how light interacts with metal is crucial for NMM. Study real-life examples if possible. Video Part Five: How to Paint a Skeleton with Glowing Eyes This is another video looking at Sekhar the vampire, this time focusing on how to paint a skeleton with glowing eyes for the model on her base. This video looks at the skeleton, how to paint his glowing eyes, sword and bones etc. The whole model is covered! Materials needed: Skeleton ModelPriming spray (I’ve used black!) Brushes:I use the Artist Opus range of brushesFine detail brushMedium-sized brushLarge brush (optional, for basecoating larger areas) Wet Palette (for mixing and thinning paints)Varnish (to protect the finished paint job) Paints:All paints mentioned are from Games Workshop’s Citadel range. Yriel Yellow Moot Green Balor Brown Morghast Bone Screaming Skull Mournfang Brown XV-88 Rhinox Hide Other Materials: Rocks or pebblesFoliage (such as static grass or miniature leaves)Sand or texture paste (for ground texture)Super glue (for attaching basing materials)Water (for thinning paints)Paper towels or cloth to ensure your brushes are totally clean! More Soulblight, Undead and Vampire Tutorials! If you don’t have an account here on my website, please sign up here! I have over 350 video tutorials with steps and tips, plus a selection of PDFs. If you are not sure about joining, you can explore my free videos with a free membership, or take the plunge and become a full subscriber for full access. If you’d prefer to support me on Patreon, please visit: https://www.patreon.com/RichardGray [...]
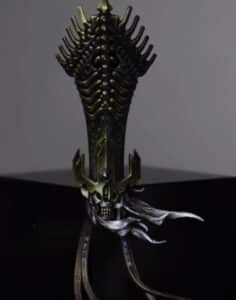
How to paint lava glow on the molten lava and body panels for Aeldari Avatar, although lots of these techniques can be used wherever you are painting lava. This guide will walk you through the process of painting both the glowing lava effect and the cooled magma appearance on the body. Video – Aeldari Avatar Lava Glow Materials Needed Paints: Flash Gitz Yellow (Games Workshop) Firedragon Bright (Games Workshop) Mephiston Red (Games Workshop) Daemonette Hide (Games Workshop) Black (Vallejo Model Colour or any black) Morrow White (P3 or any white) Tools: Wet palette, fine detail brushes, water for thinning paints. Paint Lava Glow Preparing Your Palette On your wet palette, prepare a mix of Flash Gitz Yellow with a small amount of Morrow White to increase opacity. Aim for a shade slightly darker than Dawn Yellow but lighter than pure Flash Gitz Yellow. Base Layer Apply the yellow-white mix thoroughly into all the cracks between the model’s muscles, where you want the lava effect to show. This base layer might need to be applied liberally due to the translucency of the yellow. Adding Brightness While the first layer is still wet, add pure Morrow White into the mixture directly on the model, blending it in the centre of the lava channels to create a gradient effect from white to yellow. Enhancing the Glow After the initial layers dry, apply pure Flash Gitz Yellow at the base of the lava channels to diversify the intensity of the glow, adding depth to the effect. Darkening the Muscles Mix Mephiston Red with a bit of black to darken the muscle areas adjacent to the lava channels. This enhances the contrast and makes the glow appear more intense. Painting the Cooled Magma Initial Dark Layer Apply a mix of black across the raised areas of the muscles, avoiding covering deep recesses or textural details to maintain a sense of depth and heat variation. Adding Grey Tones Lightly brush a mix of Daemonette Hide and black over the blackened areas to simulate cooled magma. Be sparing with this application to keep the high-contrast effect intact. Final Highlights Use pure Daemonette Hide to highlight the edges and highest points of the cooled magma areas, enhancing the texture and adding a final touch to the illusion of heat emanating from beneath. Additional Tips Contrast is Key: The effectiveness of the lava glow effect relies heavily on the contrast between the bright, almost white centres of the lava channels and the dark, cooled magma areas. Layering: Build up the glow effect gradually, allowing each layer to dry before applying the next. This approach helps in achieving a smooth gradient. Mixing Paints: Adjust the mixtures based on the specific details and shapes of your model. The suggested ratios are starting points; feel free to modify them to suit your needs. Patience and Practice: Achieving a convincing lava glow effect requires patience and practice, especially when blending the colours directly on the model. More Aeldari Tutorials! If you don’t have an account, please sign up here! The website currently has over 350 video tutorials with steps and tips, plus a selection of PDFs. If you are not sure about joining, you can explore my free videos with a free membership, or take the plunge and become a full subscriber for full access. If you’d prefer to support me on Patreon, please visit: https://www.patreon.com/RichardGray [...]
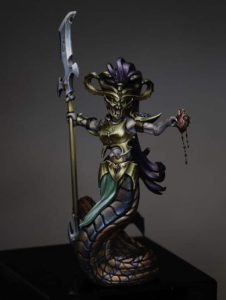
How to Paint Soul Stones. A short video and guide to walk you through the steps to achieve a realistic gem effect on your model (in this case, the Aeldari Avatar) using Sotek Green, Black, and Morrow White. Materials Needed Paints: Sotek Green (Games Workshop) Black (Vallejo or equivalent) Morrow White (P3 or equivalent) Tools: Fine detail brush, wet palette for mixing and diluting paints, water for thinning paints. Step-by-Step Guide Preparing the Palette On your wet palette, prepare Sotek Green, Black, and White. You’ll be using these colours to create the gem effect, with Black and White to modify the Sotek Green for shadows and highlights. Base Layer Start by applying Sotek Green directly to the soul stones on the model. Focus on achieving a neat, circular highlight at the top of each gem to represent the light source’s direction. If the paint appears too thin and the underlying colour shows through, apply another layer to enhance opacity. Highlighting Mix a small amount of Morrow White with Sotek Green to lighten the colour. Apply this lighter shade to the upper part of the gem, following the initial highlight’s shape but slightly reducing the area to create a gradient effect. Ensure this blend is more concentrated towards where you envision the light source hitting the gem, typically the top left, matching the light direction established on other parts of the model, like the non-metallic gold avatar symbol. Refining the Gem For added depth, incorporate a very small line of this lighter mix at the bottom right of the gem, creating a sense of reflection and roundness. Use the original Sotek Green to tidy up any overspill and blend the edges of your highlights for a smoother transition. Intensifying Highlights Gradually add more Morrow White to the mix for the brightest points of light on the gem. Focus these intensified highlights on a smaller area within your previously applied lighter shade, continuously narrowing the focus as you add more white. This method creates a luminous effect, simulating light reflecting within the gem. Adjusting Shadows To define the gem further, mix a small amount of Black with Sotek Green and apply it sparingly to the edges and around the base of the soul stone, enhancing its three-dimensional appearance. Be cautious with the amount of black, as it can quickly overpower the Sotek Green due to its strong pigmentation. Final Touches Use pure Morrow White to add a final pinpoint highlight to the top left of the gem, where the light source is strongest. This small detail significantly contributes to the gem’s realistic sparkle. Additional Tips Light Source Consistency: Ensure all gems on the model reflect the same light source direction for coherence across the miniature. Layering: Achieve a smooth transition between shades by allowing each layer to dry thoroughly before applying the next. This technique prevents unwanted blending and muddiness. Paint Consistency: Adjust the paint’s thickness based on the effect you’re aiming for. Thinner paint can act as a glaze to smooth out transitions, while thicker paint is better for opaque highlights. Practice: Perfecting the soul stone effect may take practice. Experiment on a test model or an inconspicuous area before applying the technique to more visible parts of the miniature. By following these steps and adjusting your technique as needed based on the specific details and shape of your model’s soul stones, you can achieve a striking and realistic gem effect. If you don’t have an account, please sign up here! The website currently has over 350 video tutorials with steps and tips, plus a selection of PDFs. If you are not sure about joining, you can explore my free videos with a free membership, or take the plunge and become a full subscriber for full access. If you’d prefer to support me on Patreon, please visit: https://www.patreon.com/RichardGray [...]
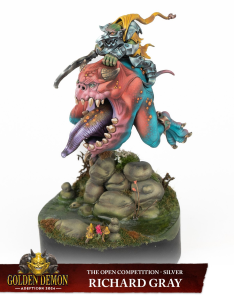
This video looks at how to paint the head of the Tomb Kings Bone Dragon. The video looks at the textured bone, how to add colour and interest and then how to add verdigris and NMM to the bronze trim. Video – How to Paint the Tomb Kings Bone Dragon Head Paints and Materials Used on the Tomb Kings Bone Dragon Paints: Games Workshop Paints: Mournfang Brown, XV-88, Morghast Bone, Screaming Skull, Skavenblight Dinge, (Skeleton Horde Contrast optional) Kimera Colours: Fallen Grass (Sybarite Green as an alternative) Two Thin Coats: Dark Sun (Balor Brown alternative) Brushes and Tools: Artis Opus Small Dry Brush: Used for stippling the base coat and first highlights. Size 2 Brush (Old): Ideal for glazing with Scavenblight Dinge and applying the verdigris effect on metallic elements. An older brush is recommended as the techniques used can be rough on the bristles. Size Z00 Brush: Used for finer detail work, such as adding texture to the verdigris effect. However, a larger brush may be more efficient for larger areas. Size 1 Brush: Recommended for applying non-metallic metal highlights. An older brush is suitable as long as it maintains a good point. Wet Palette: Handy for keeping your paint mixes workable and blending colours. Kitchen Roll: For dabbing off excess paint and ensuring the right consistency on the brush. Water Pot: For thinning paints and cleaning brushes. Step-by-Step Guide to Painting the Tomb Kings Bone Dragon Step 1: Base Coat Create a mix of Mournfang Brown and XV-88 in approximately a 50/50 ratio. The exact mix isn’t crucial, but aim for a reddish-brown shade. Thin this mixture with water (about two parts water to one part paint). Using an Artist Opus small dry brush, apply this mixture to the dragon head using a stippling method. Ensure the brush is damp, not wet, to avoid a dusty look. Cover the entire surface, allowing the small dots of paint to create texture. This might require two to three layers for opaque coverage. Step 2: First Highlight Switch to Morghast Bone for the next layer of highlight. Again, thin the paint (similar ratio as before) and dab off excess paint on kitchen roll before applying. Stipple Morghast Bone more selectively, focusing on creating a transition from darker to lighter areas. Pay special attention to the metal crests and teeth-like protrusions, ensuring they are light enough for later glazing. Step 3: Final Highlight Move on to Screaming Skull for the highest highlights. Apply this colour even more sparingly and delicately, focusing on the most raised areas and textures. Remember, this is not dry brushing. Dab the brush straight onto the model to create the desired texture. Step 4: Painting the Teeth Start with the base colours used for the bone and apply them with a normal brush for a smoother finish. For the top teeth, paint from the bottom upwards. This creates a shiny effect, with the brightest part of the tooth at the top. Use Screaming Skull for the very top section of the teeth to enhance the shiny look. Step 5: Softening Textures Use Scavenblight Dinge to soften the texture on the skull. Thin the paint significantly (about three to four parts water to one part paint). Apply with a large brush, focusing on midtones to shadows to enhance depth and contrast. Step 6: Glazing and Highlighting Return to the mixture of XV-88 and Mournfang Brown, now very watered down. Glaze around the teeth and other areas to add warmth and contrast, separating different elements like teeth from the skull. Step 7: Additional Details and Glazing Use Morghast Bone and Screaming Skull to pick out details, focusing on areas like the eye sockets and brow for added focus. For the bone spikes, start glazing with Rhinox Hide, thinned down. Progress from Rhinox Hide to a black colour (like Vallejo Model Color Black), applying from halfway down the bone spike towards the tip, creating a dark gradient. Step 8: Metallic Elements Base the metal parts with Mournfang Brown. Apply a wash of Fallen Grass, heavily watered down (five parts water to one part paint), focusing on recesses. Follow up with black lining for added definition, using watered-down black paint. Step 9: Non-Metallic Metal Highlights Create a palette with Mournfang Brown, a 50/50 mix of Mournfang Brown and Dark Sun, Dark Sun, Dark Sun mixed with white, and pure white. Start with the darker mixes and progressively highlight with lighter mixes, focusing on edges and areas where wear would naturally occur. Add finer highlights and scratches with the lightest mixtures. Step 10: Finishing Touches Revisit areas with Scavenblight Dinge for further softening and definition. Optionally, add warmth with a glaze of Mournfang Brown and XV-88, or Skeleton Horde Contrast for subtlety. Explore more Old World and Bone Tutorials! If you don’t have an account, please sign up here! The website currently has over 350 video tutorials with steps and tips, plus a selection of PDFs. If you are not sure about joining, you can explore my free videos with a free membership, or take the plunge and become a full subscriber for full access. If you’d prefer to support me on Patreon, please visit: https://www.patreon.com/RichardGray [...]
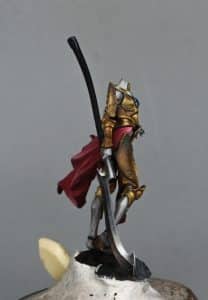
Today, we’re in my archives learning how to create a water effect base for the formidable Neave Blacktalon. This tutorial will help you in bringing a scene to life, adding depth and narrative to your miniature. The landscape we are looking to create is complete with realistic water effects that give the impression of Neave Blacktalon traversing through a treacherous, water-logged terrain. Working with materials like resin for water effects can be tricky and messy. Patience is key. Ensuring a watertight seal for the resin and avoiding air bubbles are crucial steps that require a steady hand and mustn’t be rushed. Also, when working with various textures like cork and sand, achieving a natural blend with your paints is essential for realism. Biggest thing on this tutorial is not to rush the drying and curing process of the materials we use. Patience pays off in ensuring each layer, from the base textures to the resin, sets perfectly. And remember, when dealing with intricate details, like adding vegetation and painting skulls, less is often more. Subtlety can make all the difference in achieving a natural look. Video Tutorial – How to Create a Water Effect Base Materials Required Resin plinths and cork bark for the base. Tools including a Dremel for shaping. Protective gear: Mask for dust protection. Games Workshop plastic skulls for decoration. Builder’s sand (with a mix of fine and large grains). Standard PVA glue. Baking soda and matte varnish for texture. Scale 75 paints (Brown Leather, Orange Leather, Arabic Shadow, Sherwood Green, Black Leather). Games Workshop Ahriman Blue and Ceramite White. P3 Menoth White Base. Airbrush (optional). Superglue. Acetate sheet or similar for creating a barrier. Epoxy resin for water effects. Gloss varnish (AK Interactive recommended). Vallejo Model Colour Black. Step-by-Step Guide Base Preparation: Glue resin plinths together and top with cork bark for a natural rock formation look. Use a Dremel to shape the cork, ensuring proper ventilation and safety measures when you do so. Adding Detail: Place GW plastic skulls in the drilled areas for added interest. Texturing with Sand: Apply a mix of builder’s sand using PVA glue to add varied texture. This creates a more natural look with different grain sizes. Baking Soda and Varnish Mix: Combine baking soda with matte varnish to add fine texture, particularly around the edges and over the cork. Priming: Once dry, prime the base black using Vallejo Surface Primer. Airbrushing Base Colours: Optionally use an airbrush to apply Scale 75 paints in layers (Brown Leather, followed by Orange Leather, then Arabic Shadow). Airbrush inside the holes with Ahriman Blue, lightened with Ceramite White for a glowing effect. Dry Brushing Textures: Overemphasize textures with dry brushing, starting with Balor Brown and progressively lighter shades up to Menoth White Base. Focus on raised areas and edges. Applying Colour Washes: Use watered-down Scale 75 Sherwood Green and Black Leather to add natural colour variations. The washes will blend naturally, creating a cohesive look. Moss and Algae Effects: Mix Sherwood Green with baking soda and varnish to create a mossy texture, especially around the water edge. Adding Vegetation: Apply grass tufts, flowers (from Army Painter and MiniNatur), and field-found “real life!” vegetation with PVA and superglue for a diverse and organic look. Resin Water Effects: Carefully pour mixed epoxy resin into the prepared areas. Ensure a leak-proof barrier with acetate and superglue. Let it set for at least 24 hours. Final Touches: Once the resin is set and clear, tidy up the base edges with Vallejo Model Colour Black. Sand any rough edges if needed. Integration with the Model: To blend the model with the base, replicate the base’s texturing under the model’s foot. Completion: Leave to dry and cure fully. The finished base should present a detailed and textured landscape, complete with realistic water effects, enhancing Neave Blacktalon’s dynamic pose. If you don’t have an account, please sign up here! The website currently has over 350 video tutorials with steps and tips, plus a selection of PDFs. If you are not sure about joining, you can explore my free videos with a free membership, or take the plunge and become a full subscriber for full access. If you’d prefer to support me on Patreon, please visit: https://www.patreon.com/RichardGray [...]
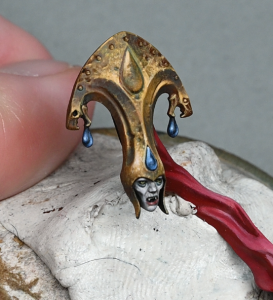
I don’t usually paint true metals as I find them irritating and the metallic particles get everywhere like a glitter bomb. I get a lot of requests for how to paint them though, so I thought I’d record this How to Paint an Iron Warrior in True Metallic Metals and Contrast Paint for you, below! Video – How to Paint an Iron Warrior in True Metallic Metals and Contrast Paint Paints Used The following paints were used: Games Workshop Contrast: Snakebite Leather, Black Templar Games Workshop: Averland Sunset, Ushabti Bone Vallejo: Air Chrome, Air Gunmetal Grey (large pots), Neutral Grey, German Grey, Black (substitute Mechanicum Codex Grey and Abaddon Black) Step-by-Step : How to Paint an Iron Warrior in True Metallic Metals and Contrast Paint Initial Preparation Begin by assembling your Iron Warrior model, ensuring all parts are properly attached except for the head, which should be left unattached for easier painting. Your primary paints will be Vallejo Metal Colour Airbrush Colours, specifically Gunmetal Grey and Chrome, and Games Workshop’s Contrast paints like Snakebite Leather and Black Templar. Applying the Base Coat Start with Vallejo’s Air Gunmetal Grey. It’s a true metallic colour, enriched with botanic flakes to achieve a genuine metallic effect. This is in contrast to non-metallic metals which use standard colours to simulate metal. Apply Gunmetal Grey evenly, using a brush for a more organic, less sterile look. This approach maintains the natural shadows in recesses and adds interesting brush strokes. Highlighting with Chrome Enhance the model’s metallic sheen by highlighting with Vallejo Air Chrome. Focus on areas where light naturally falls, such as elevated surfaces and curves. The chrome will accentuate these spots, creating a dynamic contrast with the darker Gunmetal Grey. It’s crucial to observe the light interaction with the model to identify the best areas for chrome highlights. Adding Shadows with Contrast Paint For deepening shadows and adding depth, use Black Templar Contrast paint. This is particularly effective over metallic paints due to its translucent nature, adding depth without obscuring the metallic shine. Apply carefully to avoid overwhelming the metallic effect. Detailing with Snakebite Leather Snakebite Leather Contrast paint is excellent for adding warmth and a tint of colour to the metallics. It’s particularly useful for areas you want to appear weathered or less shiny. Apply sparingly and blend well to maintain a natural look. Hazard Stripes on Shoulder Pads Painting hazard stripes requires a steady hand and patience. Start by painting the shoulder pads with Neutral Grey and German Grey, blending these colours to create a mid-tone. Once the base is ready, use Averland Sunset for the yellow stripes. Ensure this paint is thin enough for smooth application but dense enough for good coverage. Carefully paint straight lines, keeping the spacing consistent. Avoid using masking techniques as they can complicate the process and don’t always yield cleaner results. Finishing Touches Once the main painting is complete, focus on adding small details like weathering effects, especially on the hazard stripes. Use black paint to simulate chips and scratches, creating a battle-worn look. Also, remember to paint the non-metallic parts, like the ribbing between armour plates, using appropriate grey tones. Final Assembly and Clean-Up After painting, reattach the head and any other separate parts. Be sure to clean your brushes thoroughly, especially when switching between metallic and non-metallic paints, to avoid unwanted cross-contamination More Contrast Paint projects and tutorials: More Free Video Tutorials Free videos for logged in members – just sign up as a ‘friend’ to view and click any of the thumbs.To explore all of these, visit this page! If you don’t have an account, please sign up here! The website currently has over 350 video tutorials, plus step by step guides and PDFs. You can explore more free videos with a free membership, or take the plunge and become a full subscriber for full access. If you’d prefer to support me on Patreon, please visit: https://www.patreon.com/RichardGray [...]
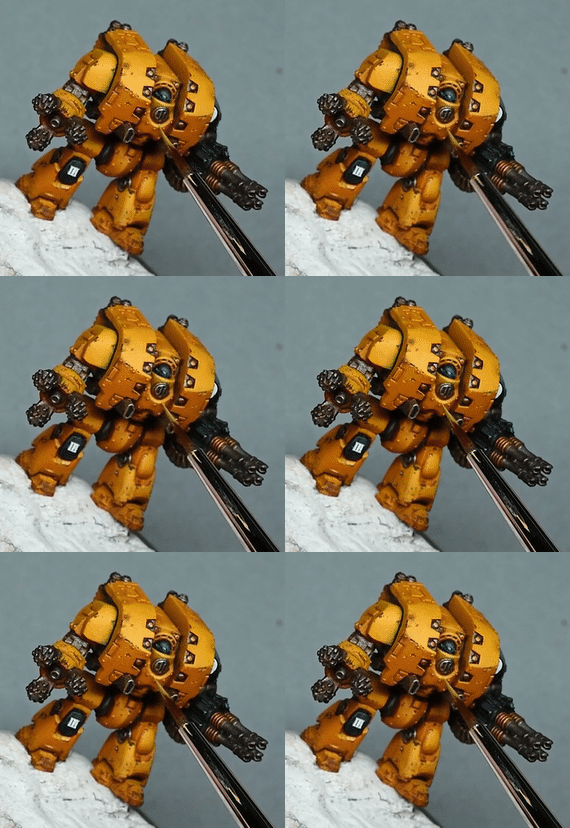
These two videos show in details how to build and prepare a base, with lots of interesting rocks and textures (and a friendly skeleton!). With full materials list and step by step text guide. Quick Jump to: Video – Skeleton Base Part OnePaints and MaterialsStep-by-Step Guide and Tips for the Skeleton BaseBuilding the BasePainting the BaseFinishing TouchesVideo – Skeleton Base Part Two (Painting the Skeleton)Paints and MaterialsStep-by-Step Guide and Tips for Painting the Skeleton BasePainting the SkeletonPainting the SwordPainting the ClothAdding Vegetation Video – Skeleton Base Part One Paints and Materials A skeleton figure from Warhammer Underworlds Warbands Milliput and Fimo (or slate pieces) Green stuff (50/50 mix of blue and yellow) Super glue Sand (variety in particle size, not sharp sand) PVA glue (diluted with water) Base brush (flat Games Workshop brush or equivalent) Neutral Grey (Vallejo), Deathworld Forest, Morghast Bone, Agrax Earthshade, Athonian Camoshade, Astronomicon Grey (Games Workshop) Water for thinning paints Rock material guide by the fantastic Julien Casses:https://www.juliencasses.com/2012/11/how-to-make-rocks Step-by-Step Guide and Tips for the Skeleton Base Building the Base Prepare Skeleton: Start by preparing your skeleton figure, ensuring it has a ‘rising from the ground’ appearance. Create Stone Slabs: Mix Milliput and Fimo, bake at 120°C for 30 minutes, then break into slabs to represent stones. Alternatively, use slate pieces. Attach these slabs to the base with super glue. Apply Green Stuff: Mix blue and yellow Green Stuff and use it to create a ridge around the skeleton, giving the illusion of a hole from which the skeleton emerges. Embed the Vampire Lord’s rock into the Green Stuff to integrate it with the base. Add Texture: Sculpt some small, round rocks using Green Stuff for added detail. Sand Application: Cover the base in beach sand, avoiding sharp sand. Use various particle sizes for a natural look. Painting the Base Seal Sand: Brush diluted PVA glue over the sand to seal it and prevent flaking. Base Colour for Sand: Dry brush the entire base with Deathworld Forest, focusing on sandy areas. Highlighting Sand: Apply a lighter dry brush of Morghast Bone to the sand for highlights. Defining Rocks: Use Agrax Earthshade as a thick glaze around the sculpted rocks to define their shapes. Enhancing Greenery: Apply Athonian Camoshade to enhance the green tones on the base. Rock Painting: Begin detailed painting on rocks using Neutral Grey. Focus on highlighting angles and adding scratchy details for texture. Additional Rock Highlights: Use Pelgrave Blue, potentially mixed with white, to highlight rocks further. Remember not to overpower the model with the base’s contrast. Enhancing Edges: Add lighter edges around rocks using Astronomicon Grey to define shapes. Finishing Touches Consider adding other details like small flowers or greenery to the base. Reflect these colours onto the whatever model you plan to attach to your base. Ensure the base matches the quality and style of your painted model. Video – Skeleton Base Part Two (Painting the Skeleton) Paints and Materials Paints: XV-88, Balor Brown, Moot Green, Deathworld Forest, Ushabti Bone, Mournfang Brown, Trollslayer Orange (Games Workshop); Neutral Grey, Pale Grey Blue, Black (Vallejo); Iosen Green, Morrow White (P3) Mininatur Moss Pads and Flowers Water for thinning paints Brushes with fine tips PVA Glue Jeweler’s tweezers Step-by-Step Guide and Tips for Painting the Skeleton Base Painting the Skeleton Eyes: Start by painting the eye sockets with white paint, thinned down. Apply 2-3 layers for an opaque finish. Avoid overloading to prevent the paint from pooling. Adding Color to Eyes: Use Pro Acryl Golden Yellow (or any similar yellow) around the edges of the eye sockets, leaving the back white to mimic a light source. Then, use Moot Green, thinned down, around the yellow, ensuring smooth transitions. Skeleton Bone: Use XV-88 to paint the skull and bones. Apply the paint thinly and unevenly to create a natural, weathered look. Emphasize areas where light would naturally hit, based on the light source direction. Highlighting Bone: Apply Ushabti Bone for highlights, focusing on raised areas and edges. Keep the paint thin for a smooth finish. Additional Details: Add small scratches or battle damage marks for realism. Final Highlights on Bone: Use white (Morrow White) for the final highlights on the most raised areas. Painting the Sword Base Colour: Use Neutral Grey to paint the entire sword, including the hilt and blade. Weathering: Add Mournfang Brown to the blade for a rust effect, focusing on recessed areas and pitted holes. Highlighting the Blade: Use Pale Grey Blue for highlighting and adding scratchy details, focusing on areas that would catch light. Rust Details: Add Trollslayer Orange in the deepest recesses for an inverted highlight effect. Refining Highlights: Go back with Neutral Grey and Pale Grey Blue to refine the highlights and add more detail to the weathered look. Painting the Cloth Base Layer: Apply Deathworld Forest over black primer, focusing on raised folds and areas that would catch light. Highlighting: Use Balor Brown for further highlights, keeping the paint very thin to maintain a dark, grubby appearance. Adding Vegetation Applying Moss Pads: Use PVA glue to attach Mininatur Moss Pads around the base. Utilize jeweler’s tweezers for precise placement. Adding Flowers: Integrate white flowers from Mininatur for additional detail. Trim if necessary to avoid overpowering the base. Adding Roots: For an emerging effect, glue small roots around the skeleton, bending them to create a natural look. Dry Brushing: Gently dry brush Balor Brown over the moss pads to integrate them with the base and add depth. My rocky base originally had my Vampire Lord on it, but its suitable for nearly any type of model! However, if you are looking to paint some vampires, here are some tutorials to explore… If you don’t have an account, please sign up here! The website currently has over 350 video tutorials with steps and tips, plus a selection of PDFs. If you are not sure about joining, you can explore my free videos with a free membership, or take the plunge and become a full subscriber for full access. If you’d prefer to support me on Patreon, please visit: https://www.patreon.com/RichardGray [...]
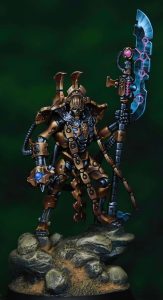
A series looking at how to paint Commander Dante, which was sent to me for early review purposes by Games Workshop. The model is being painted to a high standard and will be covered in large amounts of NMM (Non Metallic Metal) Quick Jump To: Materials and Paints Needed for the NMMVideo – How to Paint Commander Dante NMM: Part OneVideo – How to Paint Commander Dante NMM: Part TwoVideo – How to Paint Commander Dante NMM: Part ThreeSteps and Tips on Commander Dante: NMMBase LayerDeveloping Mid-TonesRefining HighlightsEnhancing BrightnessDeepening ShadowsFinal Highlights and Sharp DetailsGlazing and SmoothingClean UpTips for Success:Video – NMM Axe (First Version)Materials NeededStepsTipsVideo – NMM Axe (Second Version)Materials and Paints UsedPreparing the AxeBase PaintingSky Earth Non-Metallic Metal (NMM) TechniqueRefining the Metallic LookEdge Highlights and Final TouchesVideo – Head, Eyes, Blood GemMaterials and Paints Needed:Steps for Commander Dantes Head and DetailsVideo – Red Shoulder NMMPaints NeededStepsTips Materials and Paints Needed for the NMM Fine Detail Brushes: Essential for precise work on NMM effects. Black Primer: To create a solid base for your colours. Palette: For mixing your paints and achieving the right consistency. Paints: Base and Mid-Tones: Mournfang Brown, XV-88, Balor Brown (Games Workshop) Highlights: Ice Yellow (Vallejo; you can substitute with Dorn Yellow from GW), Troll Slayer Orange, Flash Gitz Yellow (Games Workshop) Shadows and Deep Recesses: Rhinox Hide (Games Workshop) Final Highlights and Sharp Details: Morrow White (P3; any high-quality white paint will suffice) Video – How to Paint Commander Dante NMM: Part One All videos are recorded in HD 1080p or higher – use full screen for the full effect and let the video load completely. Click the cog icon to choose speed, if I’m too fast or slow! Video – How to Paint Commander Dante NMM: Part Two Video – How to Paint Commander Dante NMM: Part Three Steps and Tips on Commander Dante: NMM Base Layer Paint: Mournfang BrownApplication: Apply Mournfang Brown as a base layer over the areas you intend to paint gold. This forms a foundational layer that aids in building depth. Developing Mid-Tones Paints: Mournfang Brown, XV-88, Balor BrownApplication: Begin layering XV-88 over the Mournfang Brown base, focusing on raised areas. Then, use Balor Brown to start defining the mid-tones, enhancing the dimensional appearance. Refining Highlights Paints: Mix of Balor Brown and Ice YellowApplication: Create a lighter shade by mixing Balor Brown with a small amount of Ice Yellow. Apply this mixture to the highest points of the highlighted areas, where light naturally catches more intensely. Enhancing Brightness Paints: Ice Yellow, Troll Slayer Orange, Flash Gitz YellowApplication: Gradually add brighter highlights using these colours. Focus on areas where light would hit the strongest, such as edges and prominent features. Deepening Shadows Paint: Rhinox HideApplication: Use Rhinox Hide to deepen the shadows and add contrast. Apply it in recessed areas and where different parts of the model meet, to give more definition and depth. Final Highlights and Sharp Details Paint: Morrow WhiteApplication: Apply Morrow White for the brightest highlights and sharp details, accentuating the most raised edges where the light would be most intense. Glazing and Smoothing Technique: GlazingApplication: If necessary, use glazing with the lighter colours to smooth out transitions between highlights and mid-tones, ensuring a more natural progression of colour. Clean Up Action: Tidy any overspill or mistakes with appropriate base colours. This step is crucial for a neat and professional finish. Tips for Success: Consistency is Key: Maintain the right paint consistency. For NMM, a slightly thicker mix can be preferable for vibrant colours, but it should still flow smoothly.Consider Lighting: Always consider the overall lighting and direction of your model. Your highlights should consistently reflect this light source.Brush Care: Look after your brushes. Use a separate brush for mixing paints to maintain the fine tips of your detail brushes.Patience Pays Off: Allow each layer to dry thoroughly before proceeding to the next. NMM is a technique that benefits greatly from patience and careful layering. Video – NMM Axe (First Version) Materials Needed Paints: Games Workshop: Sotek Green, Rhinox Hide, Mournfang Brown, Wazdakka Red Vallejo: German Grey, Neutral Grey, Ice Yellow P3: Morrow White Brushes: A variety of sizes including 00 for fine details Palette: For mixing colours Water pot: For thinning paints and cleaning brushes Steps Initial Blocking In: Start by applying a mix of Neutral Grey and Mournfang Brown at the lower part of the axe for the Earth section of SENMM. Above that, apply a mix of Sotek Green and Neutral Grey. However, this will be lightened later on for blending purposes. Lightening the Blue-Green Mix: Mix Ice Yellow with the Sotek Green and Neutral Grey mix to lighten it, allowing for smoother blending with the lighter colours in the middle. Painting the Upper and Lower Sections: Use various mixes of Neutral Grey and Ice Yellow to create gradients and highlights. For the Earthy sections, use Mournfang Brown and Rhinox Hide. Creating Specular Highlights: Apply Morrow White for the brightest highlights on the most raised edges. Be mindful of the light source and the reflective qualities you’re trying to achieve with NMM. Adding Lightning Effect: Use Wazdakka Red, gradually adding white for the lightning effects. Focus on creating dynamic, jagged lines emanating from the power nodes of the axe. Glazing and Smoothing: Use glazing techniques with lighter colours to smooth out transitions and refine highlights. Adjust the consistency of your glazes depending on the humidity and temperature of your painting environment. Final Touches: Refine the edges and any rough areas. If necessary, add more layers to enhance depth and realism. Tips Paint Consistency: Adjust the paint consistency based on your environment. Hotter conditions may require more frequent watering of paints. Brush Care: Use a separate brush for mixing paints to preserve the tips of your detail brushes. Light Reflection: Constantly refer back to how light naturally interacts with metal surfaces to guide your highlight placement. Patience and Layers: Build up your layers gradually and allow each to dry before applying the next. Video – NMM Axe (Second Version) This is my second try at the axe NMM, as I wasn’t happy with the first result! You can use whichever you prefer. Video – How to Paint Dante Axe NMM (V2) Materials and Paints Used Paints Games Workshop Paints: Baharroth Blue Rhinox Hide Mournfang Brown Vallejo Paints: Ice Yellow Neutral Grey German Grey Kimera Colours Paint: Diarylide Yellow (Note: You can create a similar effect by mixing Yriel Yellow with a small amount of orange) Materials Black Primer: For the initial coat on the axe. Wet Palette: For mixing and maintaining paint consistency. Fine Detail Brushes: Essential for applying precise highlights and details – I use Artist Opus brushes, but any high-quality fine-detail brush is fine Sanding Tools: For modifying and smoothing the cutting edge of the axe. Preparing the Axe Initial Assessment: Note that The Cutting Edge is blunt, almost a millimeter wide. Modification: Carefully shave down The Cutting Edge for a more realistic, thin look. Ensure evenness to avoid wonky highlights. Base Painting Primer: Apply a light coat of black primer. Base Colours: For the flat side of the axe, start with a base of Neutral Grey (Vallejo). For The Cutting Edge, use Rhinox Hide (Games Workshop) at the top, blending into Mournfang Brown towards the bottom. Sky Earth Non-Metallic Metal (NMM) Technique Sky Representation: Mix Baharroth Blue (Games Workshop) with Ice Yellow (Vallejo) to create a sky-like gradient on the flat side of the axe. Start darker at the top, gradually lightening towards the bottom. Earth Representation: At the bottom of The Cutting Edge, use a mix of Rhinox Hide and Mournfang Brown (Games Workshop) for the earth reflection. Blend Neutral Grey (Vallejo) into this mix for lighter shades towards the bottom. Adding Highlights: Gradually add more Ice Yellow (Vallejo) to the Baharroth Blue mix for the sky, and more Mournfang Brown for the earth, to create a sense of depth and reflection. Reflection Details: Add subtle warped shapes and lines to mimic trees or mountains in the reflection, enhancing the mirror-like quality. Refining the Metallic Look Glare Effect: Identify the primary light source and add a glare effect on the axe. This will be higher up on the axe blade. Shine Spots: Paint independent shine spots to enhance the metallic effect. Use a mix of Neutral Grey and German Grey (Vallejo) for darker areas, and a mix of Ice Yellow and Baharroth Blue for lighter areas. Edge Highlights and Final Touches Edge Highlights: Apply thin highlights along The Cutting Edge and other prominent edges of the axe. Use a mixture of the base colors for a consistent look. Lightning Effect (Optional): If desired, add a subtle lightning effect, particularly in darker areas. Use saturated colors with minimal highlights. Final Glazing: Use thinned down Ice Yellow (Vallejo) and Diarylide Yellow (Kimera Colors) or a similar mix for warm glazing over the highlights. Pure White Highlights: Add small dots of pure white paint at the brightest points of the shine spots for maximum impact. Video – Head, Eyes, Blood Gem Materials and Paints Needed: Fine Detail Brush: Crucial for precision work on small areas like eyes and gems. Magnification Tool (Optional): Can be useful for extremely detailed areas. Palette: Necessary for mixing and thinning your paints. For Gold Tones: XV-88, Balor Brown, Rhinox Hide (Games Workshop) Highlights for Gold: Troll Slayer Orange, Ice Yellow (Vallejo) Eyes Base Colour: Sotek Green (Games Workshop) Eyes and Gem Highlights: Morrow White (P3) Blood Gem: Mephiston Red, Wild Rider Red (Games Workshop) Steps for Commander Dantes Head and Details Refining the Gold: Enhance the gold’s depth by adding more orange reflections, especially on the cheeks and ear muffs. This technique replicates the way gold reflects on gold, creating an orange hue. Eyes Detailing: Start with Sotek Green for the base. For the highlights, progressively mix in Morrow White with Sotek Green. Focus on the lower edge of each eye, adding more intense highlights near the tear duct and finishing with a small white dot at the back for a gem-like appearance. Blood Gem on Forehead: Use Mephiston Red as the base color for the gem. Apply Wild Rider Red on the lower right section to simulate light reflection within the gem. Mix a small amount of Morrow White with Wild Rider Red for the edge highlights, ensuring a realistic gem look. Layering for NMM Gold Effect: Apply layers of XV-88, Balor Brown, and Rhinox Hide, using the translucency of the paints to create depth and warmth in the gold. Troll Slayer Orange is key for achieving reflective properties and varied tones in the gold. Detailed Facial Features: Paint a dark line from below the nose over both lips down to the chin. This creates a division on the face, adding to the realism. Make sure the right side of the face is slightly lighter than the left. Fine Touches on Eyes and Gem: Ensure the eyes are fully covered in blue to maintain their vibrancy. For the blood gem, detail the top left of the gem with a sharp edge and a line running down, symbolizing light reflection. Reviewing and Balancing: Regularly step back to assess the overall look. It’s essential to balance the details with the overall aesthetics of the miniature. Assembling and Final Review: Once all the parts are painted, assemble the head and do a final review. Make any necessary adjustments for a polished look. Video – Red Shoulder NMM Paints Needed Games Workshop: Mephiston Red, Evil Sunz Scarlet, Mournfang Brown, Balor Brown, Trollslayer Orange, Rhinox Hide Vallejo: Ice Yellow, Black Steps Base and Mapping: Start with Mephiston Red mixed with a small amount of black to map out where the shiny parts will be. Apply this mix to create the initial shape of the reflection on the shoulder pad. Building Layers: Use gradually lighter mixes of Mephiston Red and Evil Sunz Scarlet, adding Ice Yellow for the lighter tones. Focus on smooth layering to build up the red tones, paying attention to how light naturally reflects on a curved surface. Defining the Shine: For the brightest shine spot, use a combination of XV-88, Balor Brown, and Ice Yellow from Games Workshop. Apply these colours carefully to create a realistic reflection effect. Painting the Gold Trim: Start with Mournfang Brown and Rhinox Hide for darker areas. Progressively mix in Trollslayer Orange and Ice Yellow for brighter sections. Ensure a smooth transition between the red of the shoulder pad and the gold trim to maintain a cohesive look. Adding Additional Reflections: Insert additional shine spots in both the red and gold areas for more depth and realism. Use stippling techniques to create a diffused yet shiny highlight on the brightest parts. Be mindful of the shape and direction of these additional reflections to maintain consistency with the light source. Final Touches: Use a mix of Mephiston Red and Evil Sunz Scarlet for the final glazes to enhance the vibrancy of the red. Add final highlights with the lightest mix of Ice Yellow and white for the brightest points. Refinement: Go back and refine any areas as needed, especially the transitions between highlights and shadows. Add intricate details such as reflected light on the gold trim to enhance the NMM effect. Tips Paint Consistency: Adjust the paint-to-water ratio to around 60% water for smoother application and finish. Reflection Logic: Consider the shape of the shoulder pad and how light interacts with it. Use a lamp to guide your reflection placement. Edge Highlights: Be careful with edge highlights; ensure they are consistent with the overall light reflection and texture of the surface. Patience and Layers: Build up the layers gradually for a smooth transition. This is crucial for achieving a realistic NMM effect. Stippling Technique: Use stippling in the brightest areas to create a diffused highlight, adding depth and realism. Harmonizing Colours: Ensure the reds and golds complement each other, keeping the overall look cohesive. Reflective Details: Consider adding subtle reflective details in surrounding areas, like reflected red light on nearby silver parts, to enhance realism. Rest and Review: Sometimes stepping away from the model and returning with fresh eyes can help spot areas needing refinement or a different approach. More Tutorials to Explore If you don’t have an account, please sign up here! The website currently has over 350 video tutorials with steps and tips, plus a selection of PDFs. If you are not sure about joining, you can explore my free videos with a free “freebies” membership, or take the plunge and become a full subscriber for full access. If you’d prefer to support me on Patreon, please visit: https://www.patreon.com/RichardGray [...]
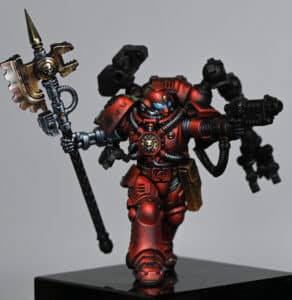
This video looks at How to Paint Fulgrim’s shiny purple armour, with tips on shine and bounce highlights. How to Paint Fulgrim’s Shiny Purple Armour The following colours were used:Games Workshop: Xereus Purple, Pink Horror P3: Morrow White Quick Tips: Base Colours and Mixes:Utilise Games Workshop’s Xereus Purple, Pink Horror, and P3’s Morrow White for the pinky purple armour. Create a 50/50 mix at the bottom left of your wet palette, adjusting for your preferred shade. Gradually add more white for each mix going up the palette, ensuring a smooth transition from dark to light. On the top right of the wet palette, fashion an off-white colour using Pink Horror and Morrow White for highlighting.Tools and Brushes:For broader, rapid coverage, employ a larger brush, but switch to a smaller brush for finer details. The Z00 brush provides superior control for detailed work, guaranteeing precise placement of highlights and shadows. Implement the stippling technique: Stipple in a motion for blending, ensuring a smooth transition without a textured effect.Highlighting Technique:Apply highlights from darker areas towards the highlight, retaining control over the direction. Do not hesitate to use translucent layers for a gradual build-up of colour intensity.Armour Reflections and Shadows:Consider the model’s pose and angle. Adjust the brightness and placement of highlights accordingly. Craft bounce highlights from the ground for a three-dimensional, shiny appearance on the armour. Introduce darker reflections with Xereus Purple for added depth and interest.Embrace imperfections during the initial stages; the process improves as you move through different sections.Adjustments and Personalisation:Modify the colour mix ratio based on personal preference for a more purple or pink look. Experiment with additional reflections and shadows for a unique and captivating finish.Final Touches:Use stippling sparingly for blending and refining transitions. Be mindful of contrast and avoid overly bright highlights, adjusting as needed to achieve a realistic yet captivating result. If you don’t have an account, please sign up here! The website currently has over 350 video tutorials, plus step by step guides and PDFs. You can explore more free videos with a free “freebies” membership, or take the plunge and become a full subscriber for full access. If you’d prefer to support me on Patreon, please visit: https://www.patreon.com/RichardGray [...]
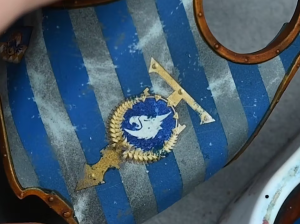
My series for how to paint Fulgrim Transfigured as a Golden Demon entry. This will be a big project and more videos will be added as I go… Quick Jump To: How to Paint Fulgrim HeadHow to Paint Fulgrim Hair and HornsFulgrim Gold Wing and Shiny Gem!Gold Wing NMMGreen, Shiny GemFulgrim’s Shiny Purple Armour How to Paint Fulgrim Head Please join the website or login to view! Steps: Prepare the Model: Clean the model, addressing any excess resin flash and imperfections, especially around the chaotic halo and other intricate details. Priming and Base Coat: Prime the model in black for a solid base. Optionally, apply a thin, shiny coat of a flesh-tone primer for initial guidance (though this isn’t crucial). Blocking in Black Cables: Prioritise painting the black cables on either side of Fulgrim’s head first to avoid complications later. Use a matte black paint like Chimera black or model color black for this step. Establishing Highlights: Determine the direction of the light source, with a top-left bias for highlights. Begin highlighting the face, focusing on light placement rather than smooth blending at this stage. Use a shiny primer to make highlighting easier, allowing details to stand out. Fixing Imperfections: Inspect the model for any imperfections, such as bubbles or bumpy areas. Address these imperfections by cutting off bumpy bits and applying multiple coats of gloss varnish, allowing each layer to dry before the next. Continuing Highlights: Continue highlighting the face, focusing on the left side for the primary source of light. Paint additional details on the face, ensuring consistency in colours and paying attention to details around the eyes and other facial features. Eye Detailing: Paint the eyes using flesh-tone highlight colours rather than pure white. Carefully paint the iris and pupil, avoiding excess paint on surrounding details like eyelids. Adjust the size and detailing of the eyes to achieve the desired expression. Lip and Facial Features: Paint the lips with a bright red colour. Add highlights to the lips to create depth and definition. Focus on refining facial features, adjusting as needed to achieve a balanced and aesthetically pleasing look. Refining and Tweaking: Step back and assess the overall look of the model. Identify areas that need refinement, such as blending in highlights, adjusting colour tones, and tweaking specific details. Final Touches: Paint additional elements like front horns and non-metallics around the face. Ensure balance in the elements on the forehead and brow area. Aim for a lighter, off-white colour to enhance the focus on Fulgrim’s face, considering the model’s central nature. How to Paint Fulgrim Hair and Horns Here we will look at the horns and hair, as well as general issues with resin. The following paints were used:Vallejo: Neutral Grey, Ice Yellow, BlackGames Workshop: Balor Brown, Morghast Bone, Screaming Skull, Mournfang BrownP3: Morrow WhiteI forgot to mention in the video what I use the gloss varnish for! You will see me paint some on the model and it is when the surface is slightly rough. If you apply a few coats of gloss varnish it will smooth out the surface so that when you paint over it, it looks much neater.Quick Tips:Fulgrim’s Hair:Begin with Vallejo Neutral Gray using a large brush for overall coverage.Gradually add ice yellow and white to the mix for highlights and reflections, maintaining a desaturated look.Use a large brush for broad strokes to cover more significant areas, allowing for a natural blend.Don’t wash off the brush between different shades to leverage harsh lighting for enhanced detail visibility.Employ vertical lines while blending to mimic the natural flow of hair strands.Fulgrim’s Horns:Paint the horns with Mournfang Brown as the base colour, ensuring a textured application for added contrast.Highlight segmented elements and recesses with lighter shades such as Screaming Skull.Darken the lower sections of the horns to create depth and contrast with the upper areas.“Texture effects are really handy for hiding the damage or little inconsistencies within the sculpt.”BrushesUse a larger brush for the initial application of the base colour on the horns.Switch to a smaller brush (size 00) for highlighting and detailing, especially when working on the segmented elements and recesses.Contrast Tips:Leverage texture on the horns to create natural contrast against the smoother hair.Ensure that the highlights on the hair and horns complement each other for a cohesive look.Darken specific areas, such as the base of the horns, to enhance contrast and make details stand out.Consider the overall colour scheme to ensure that both hair and horns harmonise effectively on the model.Top TipHarsh Lighting: Work under harsh lighting during painting to reveal and address minute details that might be overlooked under softer lighting. Fulgrim Gold Wing and Shiny Gem! Gold Wing NMM This video shows you how to paint the Non-Metallic-Metal Gold on the chest of Fulgrim. It talks about the reflections and some of the difficulties with the shape of the piece. The following paints were used: Games Workshop: Rhinox Hide, Mournfang Brown, XV-88, Balor Brown, Troll Slayer Orange Vallejo: Ice Yellow P3: Morrow White Kimera Colours: Diarylide Yellow (Fire Dragon Bright alternative) Quick Tips: Colour Mixes for Base Coat: Use a mix of colours for the base coat; in this case, Mournfang Brown was used. Experiment with mixing to achieve the desired tone and richness.Layering for Opacity: Layer the colours with attention to opacity. Ensure that each layer is opaque enough, especially for brighter colours like Ice Yellow, to maintain a shiny and clean appearance.Brush Selection and Size: Choose a brush size appropriate for the area being painted. Larger brushes can cover larger surfaces efficiently, while smaller brushes are useful for detailed work and additional reflections.Highlights and Shadows: Gradually build up highlights, paying attention to where the light hits the most. Add shadows with darker tones, keeping in mind the overall light direction.Reflections and Light Volumes: Consider reflections on the model, especially on curved surfaces like wings. Mimic light volumes to create a realistic appearance. Don’t forget smaller reflections to add complexity. Patience with Resin Models: Be patient when working with resin models. Expect the need for additional tweaking and cleaning during the painting process due to the material’s characteristics. Scale Realism: Adjust the scale of details to the model’s size. For larger models like Fulgrim, make smaller details extra tiny to maintain a realistic appearance. Focal Points: Invest extra time and attention on focal points of the model, like the wing and face. Perfecting these areas allows for some flexibility in other, less prominent parts. Balance Brightness: Maintain a balance in brightness across different sections. Avoid making some areas too bright, as it can affect the overall realism of the NMM effect. Green, Shiny Gem This video shows you how to paint the green, shiny gem on the chest of Fulgrim. It talks about the reflections and some of the difficulties with the shape of the piece. The following paints were used: Games Workshop: Sotek Green, Moot Green Vallejo: Black (only to correct mistakes) P3: Morrow White Top Gem Tips: Colour Consistency is Key: When painting gems, mix your own colours to maintain consistency throughout. Experiment with different shades, but ensure a harmonious look by using variations of the base colour Define the Shape: Gems with protruding shapes require more definition. Paint a circle around the gem to give it a three-dimensional appearance. Be mindful of how light interacts with the shape, especially from different angles. Play with Reflections: Instead of the standard dark top left, light bottom right approach, add three distinct reflections for a more unique look. These reflections can be influenced by the gem’s surroundings, offering a chance to get creative with the environment’s impact on the gem’s appearance. Distortion Matters: Consider the shape of the gem when painting reflections. A sphere, for example, will distort reflections, so adjust accordingly. This adds realism and interest to the gem’s appearance. Adjust Saturation for Impact: After painting, use glazing to adjust saturation, especially at the edges of highlights. This technique can bring out a stronger colour without compromising the contrast. Remember to leave the black section undisturbed for high contrast and to make shine spots stand out. Experiment with Gem Cuts: Don’t feel limited by traditional gem-cut rules. Different gem cuts can impact reflections, so if your gem has a unique shape, consider how it interacts with light and reflections. Incorporate Environmental Factors: Gems don’t exist in isolation. Consider the environment of your model and how it influences reflections. Objects nearby, lighting conditions, and even occlusions or inclusions within the gem can affect the way light plays on its surface. Details Matter: Pay attention to small details. Even if a flaw is present in the resin mould, take the time to correct and refine it. Small adjustments can significantly enhance the overall appearance of the gem. Experiment with Colour Palette: While my tutorial suggests specific colours, don’t hesitate to experiment with your own palette. Gems come in various colours, and adapting the technique to different hues can yield exciting and unique results. Have Fun and Be Creative: Painting gems offers an opportunity for creativity. Don’t feel constrained by conventions. Have fun experimenting with colours, shapes, and reflections to create a gem that stands out and adds character to your model. Fulgrim’s Shiny Purple Armour This video looks at the purple armour of Fulgrim and how to make it shiny and give it bounce highlights. The following paints were used:Games Workshop: Xereus Purple, Pink Horror P3: Morrow White Quick Tips: Base Colours and Mixes:Utilise Games Workshop’s Xereus Purple, Pink Horror, and P3’s Morrow White for the pinky purple armour. Create a 50/50 mix at the bottom left of your wet palette, adjusting for your preferred shade. Gradually add more white for each mix going up the palette, ensuring a smooth transition from dark to light. On the top right of the wet palette, fashion an off-white colour using Pink Horror and Morrow White for highlighting.Tools and Brushes:For broader, rapid coverage, employ a larger brush, but switch to a smaller brush for finer details. The Z00 brush provides superior control for detailed work, guaranteeing precise placement of highlights and shadows. Implement the stippling technique: Stipple in a motion for blending, ensuring a smooth transition without a textured effect.Highlighting Technique:Apply highlights from darker areas towards the highlight, retaining control over the direction. Do not hesitate to use translucent layers for a gradual build-up of colour intensity.Armour Reflections and Shadows:Consider the model’s pose and angle. Adjust the brightness and placement of highlights accordingly. Craft bounce highlights from the ground for a three-dimensional, shiny appearance on the armour. Introduce darker reflections with Xereus Purple for added depth and interest.Embrace imperfections during the initial stages; the process improves as you move through different sections.Adjustments and Personalisation:Modify the colour mix ratio based on personal preference for a more purple or pink look. Experiment with additional reflections and shadows for a unique and captivating finish.Final Touches:Use stippling sparingly for blending and refining transitions. Be mindful of contrast and avoid overly bright highlights, adjusting as needed to achieve a realistic yet captivating result. Want to watch each how to paint Fulgrim video on it’s own page? No problem, follow the links below: Videos Not Showing? To view any of my paid tutorials, you need to be a member of the website – please click below to log in or join the site. Not sure about joining just yet? Check out my Youtube for all my free tutorials or sign up as a free “friend” member on this site and visit the Freebies video page! [...]
This video shows how to paint some tanks for the Solar Auxilia faction of Legions Imperialis. Plus, I’ve included a little step-by-step guide underneath on the key points of the video! The following paints were used: Games Workshop: Agrax Earthshade, Skeleton Horde Contrast, Sotek Green, Moot Green, Evil Sunz Scarlet, Rhinox HideVallejo: Neutral Grey, Black, Metal Colour Exhaust Manifold, Metal Colour Copper P3: Morrow White Winsor and Newton: Burnt Sienna (series 1 oil paint), Black, Sansodoor mineral spirit For melting decals onto models : Micro Set Step-by-Step Guide: Prepare the Base Coat:Use an airbrush for efficiency in batch painting for your large Legions Imperialis faction.Mix Vallejo Neutral Gray with airbrush thinner (30 PSI, 50/50 ratio with thinner).Apply the base coat evenly to the entire tank. Consider using gray primer for a quicker and better result.Layering for Opaque Finish:Apply two or three layers of paint, especially for lighter colours like Pale Blue Gray Blue and Morrow White.Account for the drying effect, as colours may appear brighter when wet and darker when dry.Ensure a smooth and opaque finish by layering. Weathering Techniques:Stipple Rhinox Hide for additional details, using a foam piece held by tweezers.Apply weathering heavily to achieve a worn and battle-hardened look.Consider the impact areas for realistic weathering, such as edges and front sections. Adding Red Markings:Use Evil Suns Scarlet for red markings.Differentiate leader tanks by adding a red turret.Apply the red markings consistently across Legions Imperialis tanks for uniformity. Metallic and Lens Details:Use Exhaust Manifold by Vallejo for metallic parts.Apply Agrax Earthshade for a wash over the metallic sections.Paint lenses black and highlight with a mix of black and white in three stages. Final Touches:Add decals before applying any oil wash to blend them with the weathering.Consider adding additional details like hazard stripes or cables for higher-level detailing.Apply a final matte varnish or Games Workshop fixative to set the weathering powder and prevent rubbing off. Optional Colour Variations:Experiment with different colours based on personal preferences.Lighter colours with heavy weathering can enhance contrast and visibility in smaller scale models.Customise the Legions Imperialis tanks according to your gaming preferences. Final Assessment and Variations:Assess the overall look of the Legions Imperialis tank for any additional highlighting or weathering needed.Consider variations in colours and markings for a diverse tank fleet.Keep in mind that the level of detail can be adjusted based on personal preferences and the purpose of the painted tanks (e.g., gaming).! More videos! Click on the thumbnails below to explore more Legions Imperialis videos, or visit the All Videos page to browse all of my latest tutorials! If you don’t have an account, please sign up here! The website currently has over 350 video tutorials with steps and tips, plus a selection of PDFs. If you are not sure about joining, you can explore more of my free videos with a free “freebies” membership, or take the plunge and become a full subscriber for full access. If you’d prefer to support me on Patreon, please visit: https://www.patreon.com/RichardGray [...]
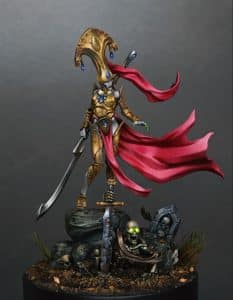
A short series on how to paint a Striking Scorpion Exarch to a high display standard. How to Paint a Striking Scorpion Exarch: Part 1 This video looks at the painting techniques and the importance of light placement and reflections. The following paints were used: Games Workshop: Moot Green, Sotek Green Vallejo: Black P3: Morrow White How to Paint a Striking Scorpion Exarch: Part 2 The video carries on with the armour, but mainly looks at the yellow face mask and NMM gold scorpion symbol on the chest. The following paints were used:Games Workshop: Moot Green, Sotek Green, Balor Brown, Mournfang Brown, XV-88, Yriel Yellow Vallejo: Black, Ice Yellow Kimera Colours: Diarylide Yellow (Yriel Yellow and Troll Slayer Orange mix as alternative) P3: Morrow White Top Tips for So Far to Paint a Striking Scorpion Exarch Colour Mixing for Green Armour:Use a mix of Moot Green and Sotek Green for a rich green colour.Adjust the ratio to control warmth and coolness in the colour.Dealing with Opacity Issues:When adding highlights and shadows, mix with white or black to improve coverage.Yellow can be challenging, so adding black or white helps with opacity.Order of Painting:Consider painting highlights and shadows first before adding mid-tones.This allows better control over saturation and coverage. Balancing Highlights:Balance highlights based on the light source; adjust brightness for different parts like shoulders and chest.Reflective Details:Reflect shiny details on the armor, like the gemstones on the helmet, on adjacent panels.Use a similar technique for lenses and gems as for the eyes. Gemstone Painting:Use a base of Sotek Green, adding a bit of black for contrast.Map out highlights in layers, from blue to white.Consider adding orange for a gold-like effect on certain areas.Attention to Detail:Be meticulous in painting smaller, intricate details to maintain realism.Feather in colors at the edges of highlights for a more natural look. Handling Contrasts:Adjust contrast using glazes if needed to tone down stark transitions. Bounce Highlights on Gold:Add orange to gold highlights for a subtle bounce effect. Highlight Placement on Ribbing:Vary the intensity and placement of highlights on ribbed sections.Align highlights with other shine points on the armor for a cohesive look. Want more Aeldari? Videos Not Showing? To view any of my paid tutorials, you need to be a member of the website – please click below to log in or join the site. Not sure about joining just yet? Check out my Youtube for all my free tutorials or sign up as a free “friend” member on this site and visit the Freebies video page! [...]
Two more videos for Fulgrim, this time how to paint the NMM (non-metallic metal) on his chest, plus the gem, too. Gold Wing NMM This video shows you how to paint the Non-Metallic-Metal Gold on the chest of Fulgrim. It talks about the reflections and some of the difficulties with the shape of the piece. The following paints were used: Games Workshop: Rhinox Hide, Mournfang Brown, XV-88, Balor Brown, Troll Slayer Orange Vallejo: Ice Yellow P3: Morrow White Kimera Colours: Diarylide Yellow (Fire Dragon Bright alternative) Quick Fulgrim NMM Tips: Colour Mixes for Base Coat: Use a mix of colours for the base coat; in this case, Mournfang Brown was used. Experiment with mixing to achieve the desired tone and richness.Layering for Opacity: Layer the colours with attention to opacity. Ensure that each layer is opaque enough, especially for brighter colours like Ice Yellow, to maintain a shiny and clean appearance.Brush Selection and Size: Choose a brush size appropriate for the area being painted. Larger brushes can cover larger surfaces efficiently, while smaller brushes are useful for detailed work and additional reflections.Highlights and Shadows: Gradually build up highlights, paying attention to where the light hits the most. Add shadows with darker tones, keeping in mind the overall light direction.Reflections and Light Volumes: Consider reflections on the model, especially on curved surfaces like wings. Mimic light volumes to create a realistic appearance. Don’t forget smaller reflections to add complexity. Patience with Resin Models: Be patient when working with resin models. Expect the need for additional tweaking and cleaning during the painting process due to the material’s characteristics. Scale Realism: Adjust the scale of details to the model’s size. For larger models like Fulgrim, make smaller details extra tiny to maintain a realistic appearance. Focal Points: Invest extra time and attention on focal points of the model, like the wing and face. Perfecting these areas allows for some flexibility in other, less prominent parts. Balance Brightness: Maintain a balance in brightness across different sections. Avoid making some areas too bright, as it can affect the overall realism of the NMM effect. Green, Shiny Gem This video shows you how to paint the green, shiny gem on the chest of Fulgrim. It talks about the reflections and some of the difficulties with the shape of the piece. The following paints were used: Games Workshop: Sotek Green, Moot Green Vallejo: Black (only to correct mistakes) P3: Morrow White Top Gem Tips: Colour Consistency is Key: When painting gems, mix your own colours to maintain consistency throughout. Experiment with different shades, but ensure a harmonious look by using variations of the base colour Define the Shape: Gems with protruding shapes require more definition. Paint a circle around the gem to give it a three-dimensional appearance. Be mindful of how light interacts with the shape, especially from different angles. Play with Reflections: Instead of the standard dark top left, light bottom right approach, add three distinct reflections for a more unique look. These reflections can be influenced by the gem’s surroundings, offering a chance to get creative with the environment’s impact on the gem’s appearance. Distortion Matters: Consider the shape of the gem when painting reflections. A sphere, for example, will distort reflections, so adjust accordingly. This adds realism and interest to the gem’s appearance. Adjust Saturation for Impact: After painting, use glazing to adjust saturation, especially at the edges of highlights. This technique can bring out a stronger colour without compromising the contrast. Remember to leave the black section undisturbed for high contrast and to make shine spots stand out. Experiment with Gem Cuts: Don’t feel limited by traditional gem-cut rules. Different gem cuts can impact reflections, so if your gem has a unique shape, consider how it interacts with light and reflections. Incorporate Environmental Factors: Gems don’t exist in isolation. Consider the environment of your model and how it influences reflections. Objects nearby, lighting conditions, and even occlusions or inclusions within the gem can affect the way light plays on its surface. Details Matter: Pay attention to small details. Even if a flaw is present in the resin mould, take the time to correct and refine it. Small adjustments can significantly enhance the overall appearance of the gem. Experiment with Colour Palette: While my tutorial suggests specific colours, don’t hesitate to experiment with your own palette. Gems come in various colours, and adapting the technique to different hues can yield exciting and unique results. Have Fun and Be Creative: Painting gems offers an opportunity for creativity. Don’t feel constrained by conventions. Have fun experimenting with colours, shapes, and reflections to create a gem that stands out and adds character to your model. If you don’t have an account, please sign up here! The website currently has over 350 video tutorials, plus step by step guides and PDFs. You can explore more free videos with a free “freebies” membership, or take the plunge and become a full subscriber for full access. If you’d prefer to support me on Patreon, please visit: https://www.patreon.com/RichardGray [...]
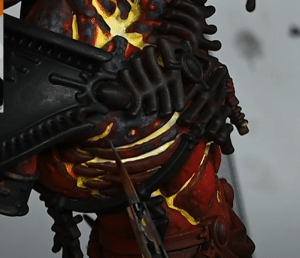
This video continues the series for how to paint Fulgrim Transfigured. Here we will look How to Paint Fulgrim hair and horns as well as how to work with general issues with resin. The following paints were used:Vallejo: Neutral Grey, Ice Yellow, BlackGames Workshop: Balor Brown, Morghast Bone, Screaming Skull, Mournfang Brown P3: Morrow White I forgot to mention in the video what I use the gloss varnish for! You will see me paint some on the model and it is when the surface is slightly rough. If you apply a few coats of gloss varnish it will smooth out the surface so that when you paint over it, it looks much neater. Quick Tips on How to Paint Fulgrim Hair and Horns: Fulgrim’s Hair: Begin with Vallejo Neutral Gray using a large brush for overall coverage. Gradually add ice yellow and white to the mix for highlights and reflections, maintaining a desaturated look. Use a large brush for broad strokes to cover more significant areas, allowing for a natural blend.Don’t wash off the brush between different shades to leverage harsh lighting for enhanced detail visibility. Employ vertical lines while blending to mimic the natural flow of hair strands. Fulgrim’s Horns: Paint the horns with Mournfang Brown as the base colour, ensuring a textured application for added contrast. Highlight segmented elements and recesses with lighter shades such as Screaming Skull. Darken the lower sections of the horns to create depth and contrast with the upper areas. “Texture effects are really handy for hiding the damage or little inconsistencies within the sculpt.” Brushes Use a larger brush for the initial application of the base colour on the horns.Switch to a smaller brush (size 00) for highlighting and detailing, especially when working on the segmented elements and recesses. Contrast Tips: Leverage texture on the horns to create natural contrast against the smoother hair. Ensure that the highlights on the hair and horns complement each other for a cohesive look. Darken specific areas, such as the base of the horns, to enhance contrast and make details stand out. Consider the overall colour scheme to ensure that both hair and horns harmonise effectively on the model. Top Tip:Harsh Lighting: Work under harsh lighting during painting to reveal and address minute details that might be overlooked under softer lighting. More Fulgrim Videos! If you don’t have an account, please sign up here! The website currently has over 350 video tutorials, plus step by step guides and PDFs. You can explore more free videos with a free “freebies” membership, or take the plunge and become a full subscriber for full access. If you’d prefer to support me on Patreon, please visit: https://www.patreon.com/RichardGray [...]
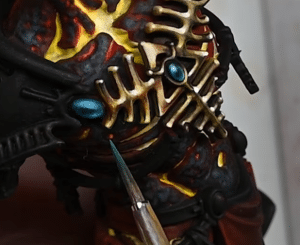
This video shows how to paint a Legions Imperialis Praetor to a very high tabletop standard and discusses some of the important aspects to consider when painting at this scale. *note that the Legions Imperialis Praetor was first primed black, very strong airbrush zenithal layer of Screaming Skull and then an Airbrush coat of Contrast Imperial Fist, followed by a wash of 1:1 mix of Contrast Medium and Contrast Darkoath Flesh. You can get a very similar result just by hand painting the model with an off-white colour and hand painting the Imperial Fist Contrast Wash and thinned Darkoath Flesh Contrast wash. The following paints were used: Games Workshop: Yriel Yellow, Sotek Green, Mephiston Red, Evil Sunz Scarlet, Wild Rider Red, Agrax Earthshade Vallejo: Neutral Grey, Model Colour Black Two Thin Coats: Sir Coates Silver, Dragon’s Gold Top Tips for painting the Legions Imperialis Praetor: Use a Headset: When painting small models like Legions Imperialis Praetor, wearing a headset can help you pick out tiny details more easily, especially if you aim for a higher standard. Start with a Solid Base: Prime the model with black spray, cover it in a bone colour, airbrush with Imperial Fist contrast, and wash with a 50/50 mix of contrast and contrast medium for a good base. Opt for a Small Brush: Use a size 0000 brush or even smaller for precision when painting details. This is crucial for the tiny model, and you don’t need a lot of paint on your brush. Focus on Contrast and Highlights: Pay attention to contrast and highlights, especially for areas like red armour, metallics, eyes, and gems. The small size requires well-defined details to make the model stand out. Careful with Metallics: When painting metallics, consider using a black base first to enhance shine. Be mindful of the thickness of metallic paints on small models, as they can be trickier to work with. Experiment with Washes: Try different wash colours to enhance contrast and add interest to the model. Experimenting with washes can help bring out specific colours and details. Highlight with Caution: When highlighting yellow, be cautious not to turn it into non-metallic metal gold. The vibrancy of colours, especially red, can stand out against desaturated areas, creating a visually appealing contrast. Keep Gems and Eyes in Sync: Paint gems and eyes with the same colours simultaneously since they require a small amount of paint. This ensures consistency in the model’s overall appearance. Final Touches for Distinction: Add final touches like highlights and details to make the model stand out as a command model compared to generic troops. This distinction is crucial for leadership models in the army. More Legions Imperialis Tutorials! If you don’t have an account, please sign up here! The website currently has over 350 video tutorials, plus step by step guides and PDFs. You can explore free videos with a free “freebies” membership, or take the plunge and become a full subscriber for full access. If you’d prefer to support me on Patreon, please visit: https://www.patreon.com/RichardGray [...]
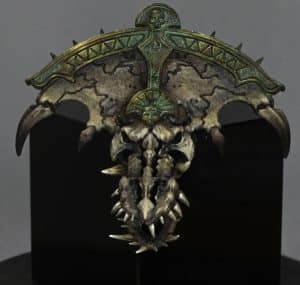
How to paint the Fulgrim Transfigured Head. It’s the start of a massive series for how to paint Fulgrim Transfigured as a Golden Demon entry. This is a big project, with links to more tutorial videos for Fulgrim at the bottom of this page. The following paints were used: Games Workshop: Cadian Fleshtone, Xereus Purple P3: Morrow White Kimera: Black (Any black will do) Steps: Prepare the Model: Clean the model, addressing any excess resin flash and imperfections, especially around the chaotic halo and other intricate details. Priming and Base Coat: Prime the model in black for a solid base. Optionally, apply a thin, shiny coat of a flesh-tone primer for initial guidance (though this isn’t crucial). Blocking in Black Cables: Prioritize painting the black cables on either side of Fulgrim’s head first to avoid complications later. Use a matte black paint like Chimera black or model color black for this step. Establishing Highlights: Determine the direction of the light source, with a top-left bias for highlights. Begin highlighting the face, focusing on light placement rather than smooth blending at this stage. Use a shiny primer to make highlighting easier, allowing details to stand out. Fixing Imperfections: Inspect the model for any imperfections, such as bubbles or bumpy areas. Address these imperfections by cutting off bumpy bits and applying multiple coats of gloss varnish, allowing each layer to dry before the next. Continuing Highlights: Continue highlighting the face, focusing on the left side for the primary source of light. Paint additional details on the face, ensuring consistency in colours and paying attention to details around the eyes and other facial features. Eye Detailing: Paint the eyes using flesh-tone highlight colours rather than pure white. Carefully paint the iris and pupil, avoiding excess paint on surrounding details like eyelids. Adjust the size and detailing of the eyes to achieve the desired expression. Lip and Facial Features: Paint the lips with a bright red colour. Add highlights to the lips to create depth and definition. Focus on refining facial features, adjusting as needed to achieve a balanced and aesthetically pleasing look. Refining and Tweaking: Step back and assess the overall look of the model. Identify areas that need refinement, such as blending in highlights, adjusting colour tones, and tweaking specific details. Final Touches: Paint additional elements like front horns and non-metallics around the face. Ensure balance in the elements on the forehead and brow area. Aim for a lighter, off-white colour to enhance the focus on Fulgrim’s face, considering the model’s central nature. Check out the next video! More Fulgrim Tutorials! If you don’t have an account, please sign up here! The website currently has over 350 video tutorials, plus step by step guides and PDFs. If you are not sure about joining, you can explore my free videos with a free “freebies” membership, or take the plunge and become a full subscriber for full access. If you’d prefer to support me on Patreon, please visit: https://www.patreon.com/RichardGray [...]
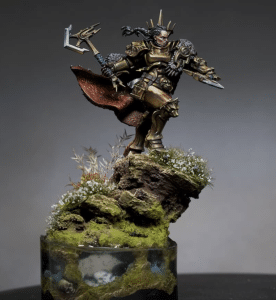
This video shows How to Paint Tiny Legions Imperialis Terminators quickly, to get them on the table for gaming, while still looking fancy! The following paints were used: Games Workshop: Screaming Skull, Contrast Imperial Fist, Agrax Earthshade Two Thin Coats: Sir Coates Silver Vallejo: Model Colour Black, Neutral Grey Winsor & Newton: Black, Burnt Sienna, Sansodoor Thinner Top Tips: Keep them on the sprue: These models are small and can easily be lost. Leave them on the plastic sprue while painting to make your life easier. Choose a light base colour: Use a light colour like Screaming Skull for the base. It helps the yellow contrast paint (Imperial Fist contrast) to adhere better. Airbrush technique: Apply the base colour using a zenithal spray technique. This involves spraying from above to create subtle shading. Oil wash for shading: Use oil paints for shading. Mix black and burnt sienna (or burnt umber) in equal parts, thin it with Sansodoor Thinner, and apply it generously. This method is quicker but takes longer to dry. Detailing with black paint: Use a matte black paint (Vallejo Model Colour Black) to paint leather straps on the model. Be cautious with contrast paints, as they can obscure details. Metallic trim: Apply Sir Coates Silver or any silver colour paint to the metallic trim. Other metallic paints like Games Workshop’s or Vallejo’s are also suitable. Simple highlights: Use Neutral Grey to highlight, keeping in mind the small size of the models. Avoid intricate details that may not be visible at a distance. Individualisation: Feel free to experiment with different colours for details like leather straps, shoulder pads, and weapons. Legions in the setting have various chapters with unique variations. Shading with Agrax Earthshade: Apply Agrax Earthshade to all metallic areas to add shading. Use this step to define recesses and enhance contrast. Basework: Attach models to bases using super glue. Use coffee granules and fixative to blend and camouflage the attachment points. Remember, speed and simplicity are key when painting large armies. These tips aim to get your Tiny Legions Imperialis Terminators tabletop-ready quickly. Learn how to paint more Legions Imperialis! If you don’t have an account, please sign up here! The website currently has over 350 video tutorials, plus step by step guides and PDFs. If you are not sure about joining, you can explore my free videos with a free membership, or take the plunge and become a full subscriber for full access. If you’d prefer to support me on Patreon, please visit: https://www.patreon.com/RichardGray [...]
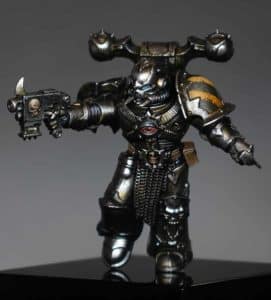
This video shows how to paint the predators from the new game, Legions Imperialis. The tanks are painted as the Imperial Fists Legion and the video shows how to add simple weathering and paint the tiny lenses. The following paints were used: Games Workshop: Contrast Imperial Fist, Contrast Darkoath Flesh, Rhonox Hide, Mournfang Brown, Sotek Green, Yriel Yellow, Daemonette Hide, Slaanesh Grey (or add white to Daemonette Hide) Vallejo: Black, (Optional Neutral Grey) Two Thin Coats: Sir Coates Silver Top Tips and Steps: Priming:Utilise white primer for a smoother base. If unavailable, prime black and then spray white.Base Coat:Apply Contrast Imperial Fist Yellow on your Legions Imperialis Predators using an airbrush. Yellow ink or thinned yellow paint can also suffice.Washing:Mix Contrast Darkoath Flesh with Contrast Medium (50/50 ratio).Wash the entire model, ensuring the contrast paint flows into recesses for shading.Cleanup:Use a large brush (Artis Opus size two) to wick off excess contrast paint from flat surfaces.Focus on neatness, but know that chipping will cover minor imperfections.Metallics:Use Sir Coates Silver for metallic parts of the Legions Imperialis Predators like tracks and details.Optionally, consider Vallejo Black or Neutral Grey for additional depth.Blocking In Details:Use Yriel Yellow (watered down, almost glaze consistency) for blocking in large open areas.Focus on turret, side track covers, and top of the vision slot area.Edge Highlighting:Highlight edges with a 50/50 water to paint mix using a small brush.Focus on large, empty spaces for a quick and effective highlight.Chipping:Create chipping effects using a stippling brush dipped in black paint.Have fun and jab the brush onto the model, focusing on areas prone to wear and tear.Weathering (Optional):Apply watered-down Mournfang Brown to create streaks for a dirty effect.Lens Painting:Paint lenses black, fill them with Sotek Green, and add a highlight dot in the top left corner.Final Touches:Consider adding a black turret for added visual interest.Experiment with different weathering techniques for variety. More tutorial videos for Legions Imperialis! If you don’t have an account, please sign up here! The website currently has over 350 video tutorials with steps and tips, plus a selection of PDFs. If you are not sure about joining, you can explore my free videos with a free membership, or take the plunge and become a full subscriber for full access. If you’d prefer to support me on Patreon, please visit: https://www.patreon.com/RichardGray [...]