


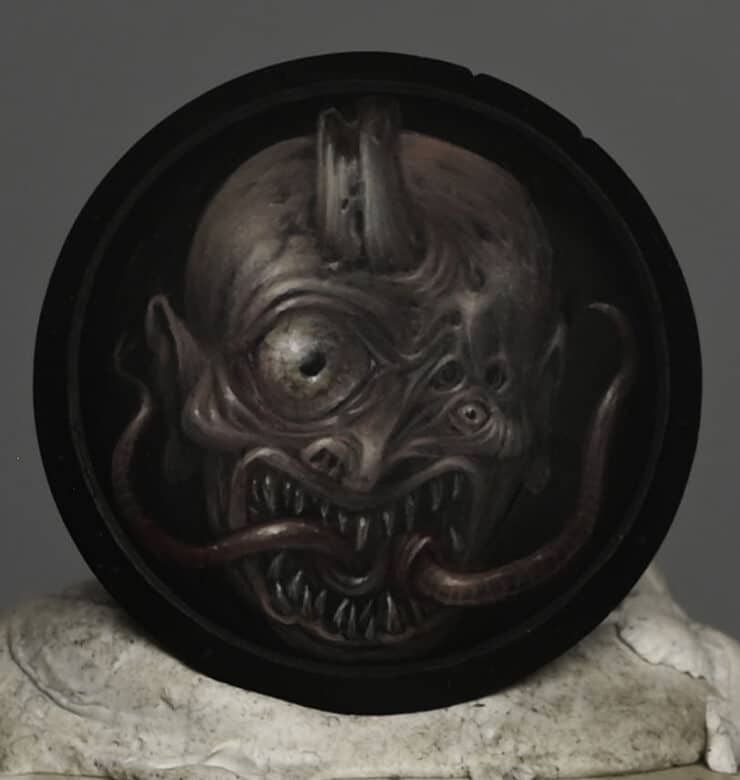
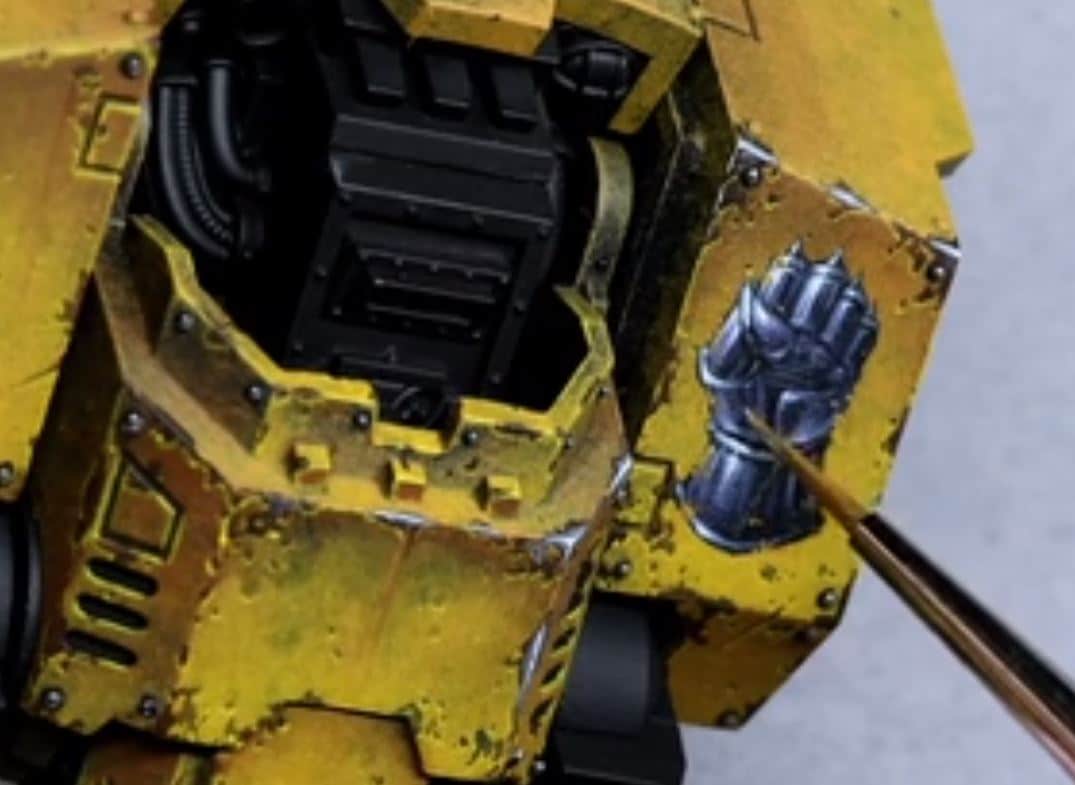
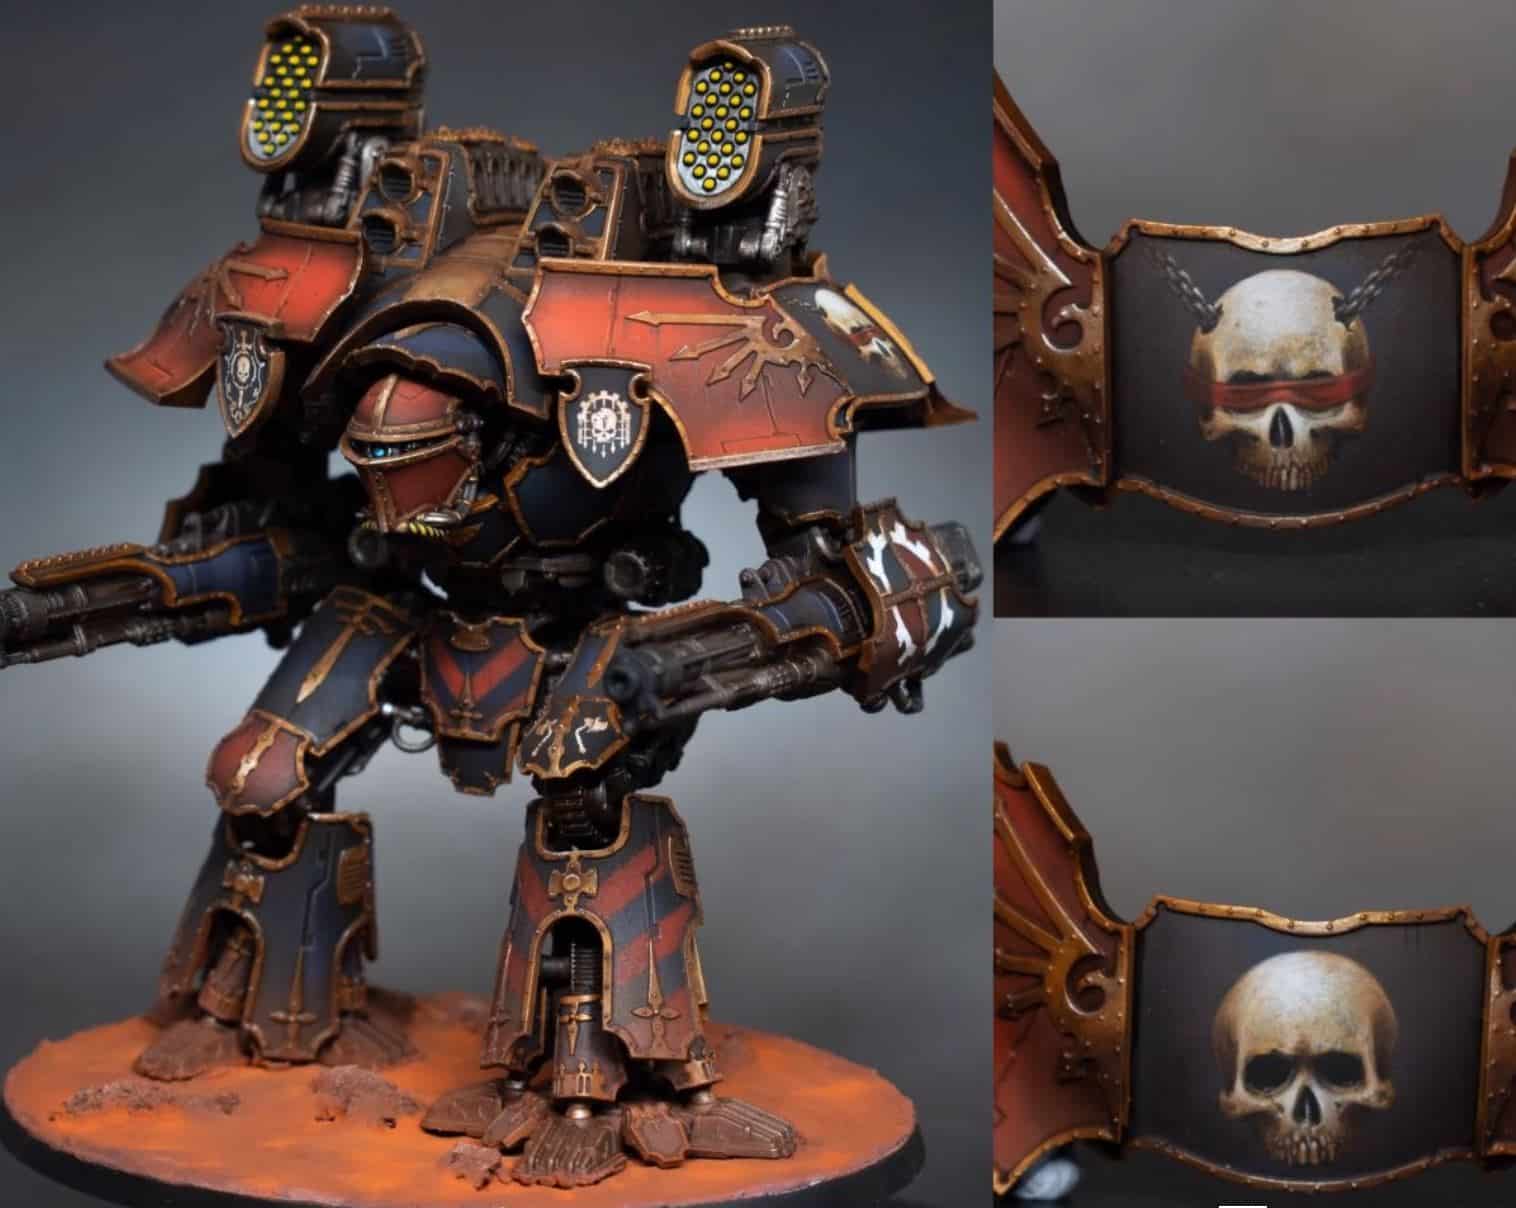
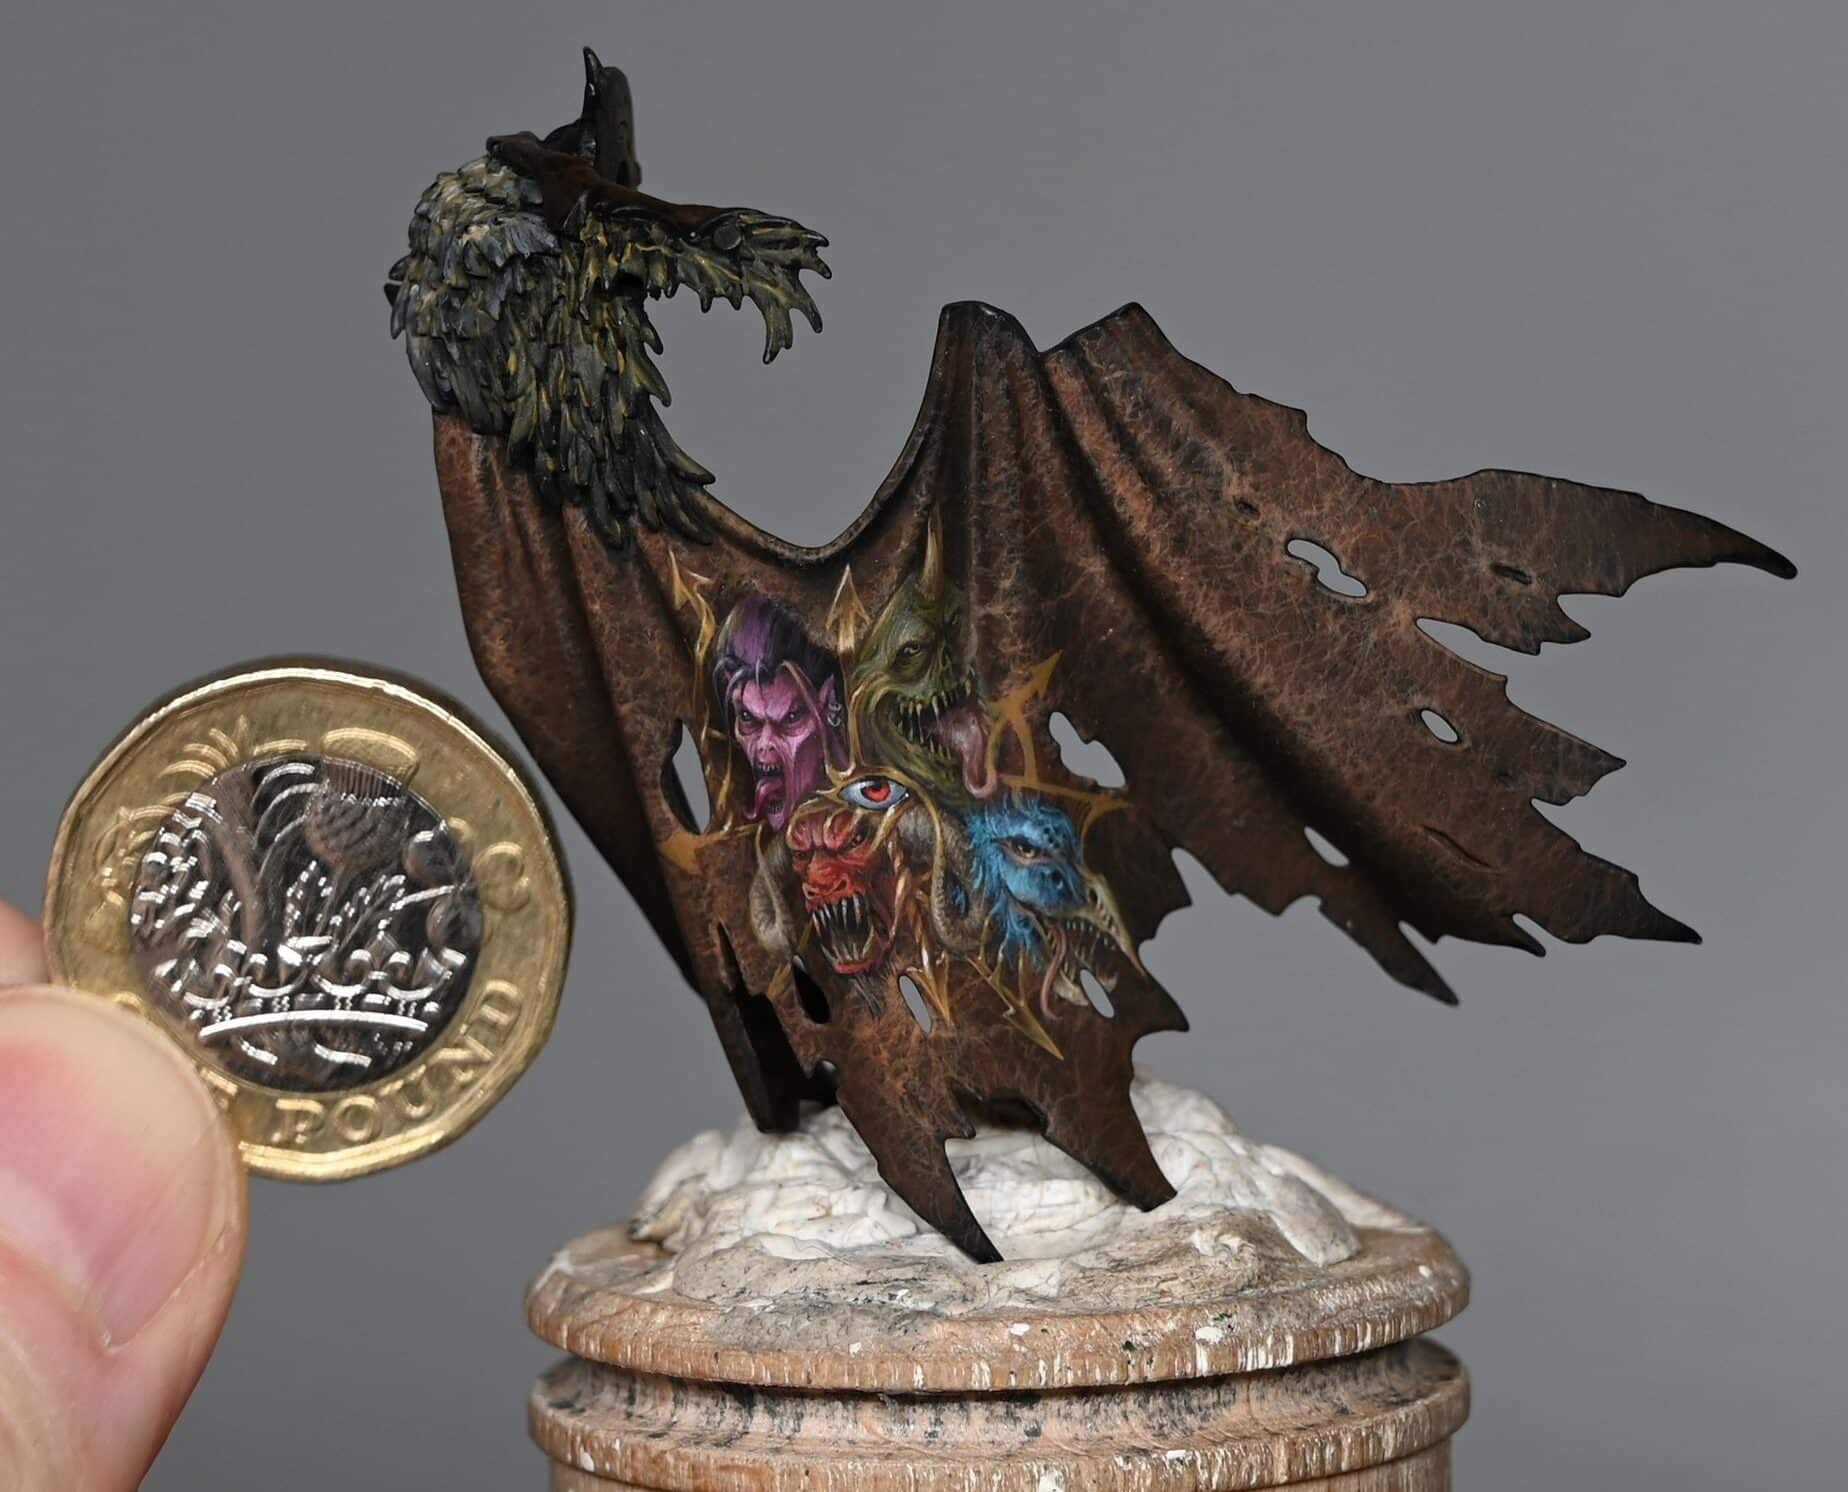
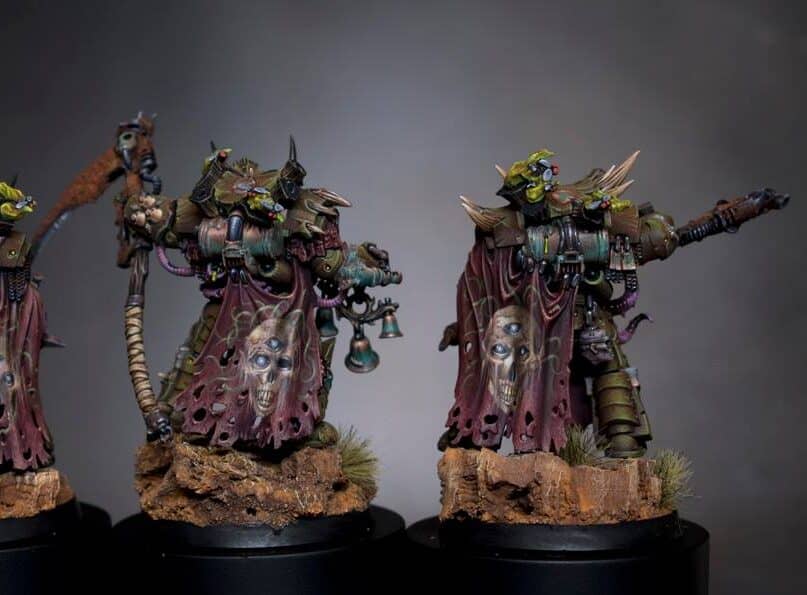
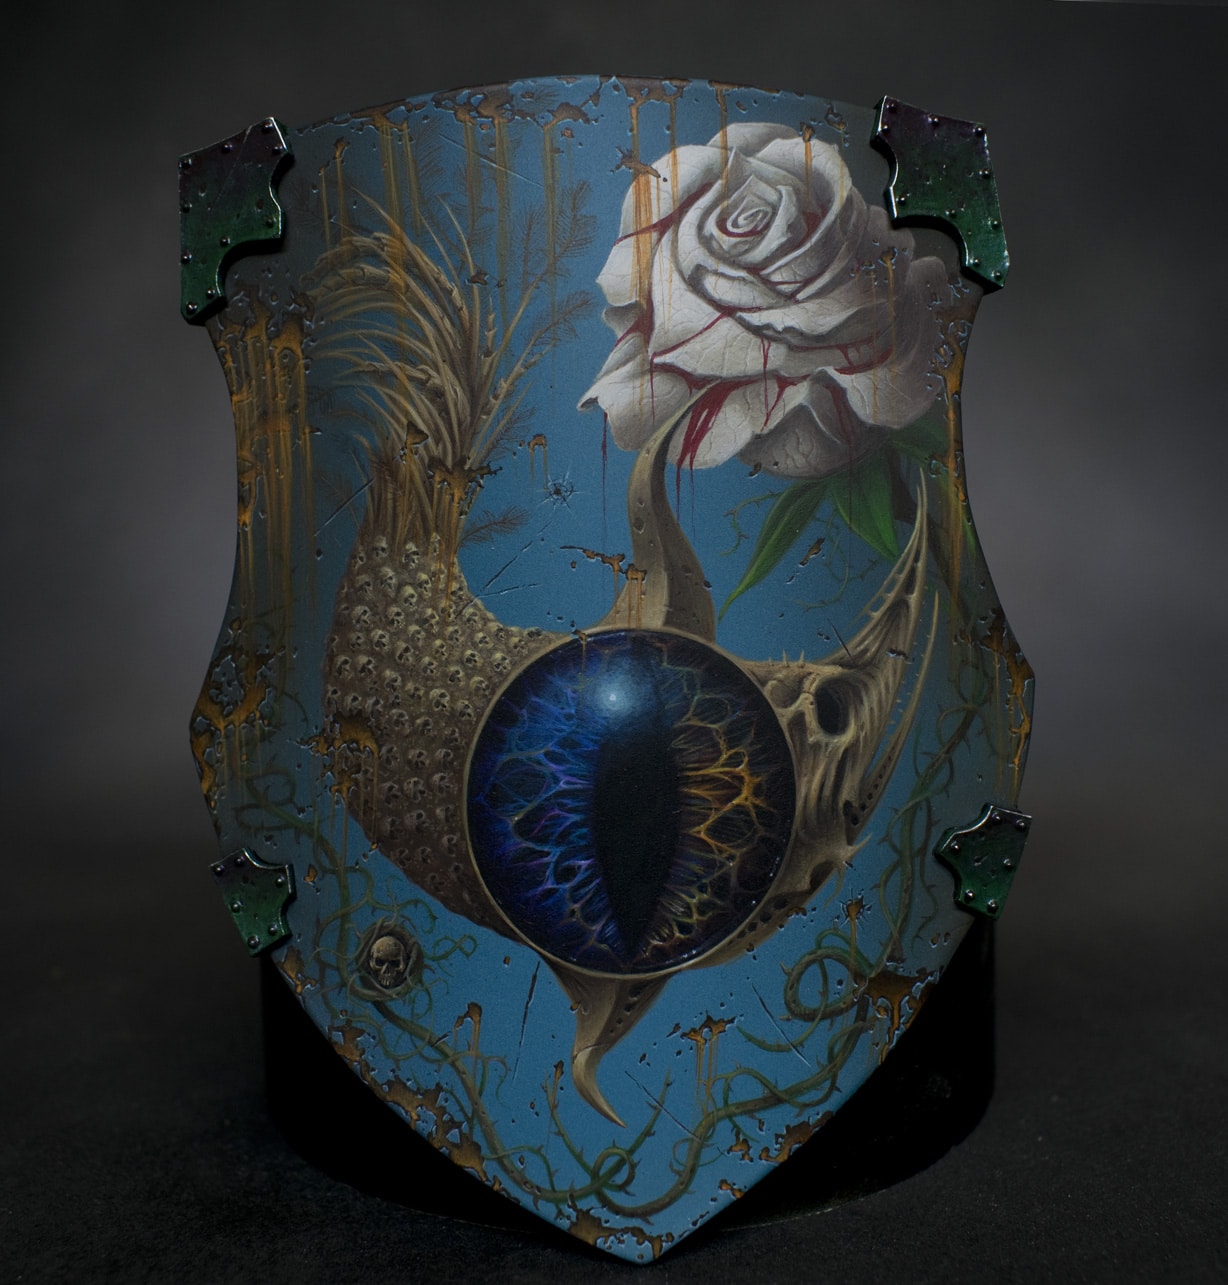
These videos show how to a paint a Nurgle shield with freehand for an Ogroid from the Slaves to Darkness army box.
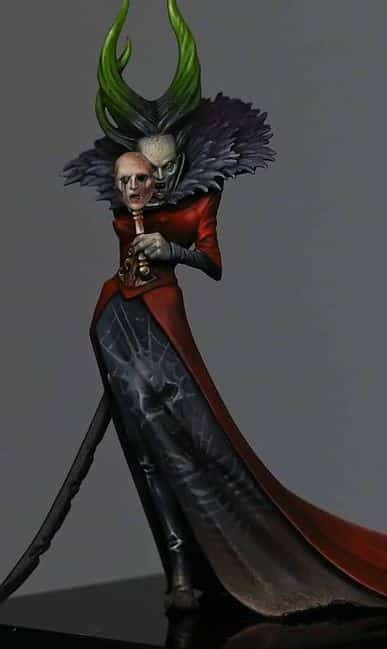
The freehand is if a Nurgle Plaguebearer head and is intended as a potential Golden Demon entry.
Scroll down to explore the tutorials and steps in order, or click the below to quick jump to a technique or section.
Video One: How to Paint a Nurgle Shield with Freehand
Paints and Materials Used
Paints
- Games Workshop Paints:
- Rhinox Hide
- Bugman’s Glow
- Mournfang Brown
- Morghast Bone
- Deathworld Forest
- Yriel Yellow
- Khorne Red
- Ushabti Bone
- Vallejo Paints:
- Black
- Ice Yellow
- P3 Paint:
- Morrow White
Brushes
- Artist Opus:
- Size 00 brushes (both a newer brush for finer details and an older brush for blending)
Other Materials
- Wet Palette: To keep paints moist and workable.
- Scalpel: For removing details from the shield.
- Sandpaper: For smoothing the shield after using the scalpel.
- Primer: Ultimate primer (specifically thinned with X20A for this project).
- Mixing Water: For thinning paints on the palette.
- Matte Varnish: To even out the surface and finish of the paint job.
Step-by-Step Guide:
Preparation
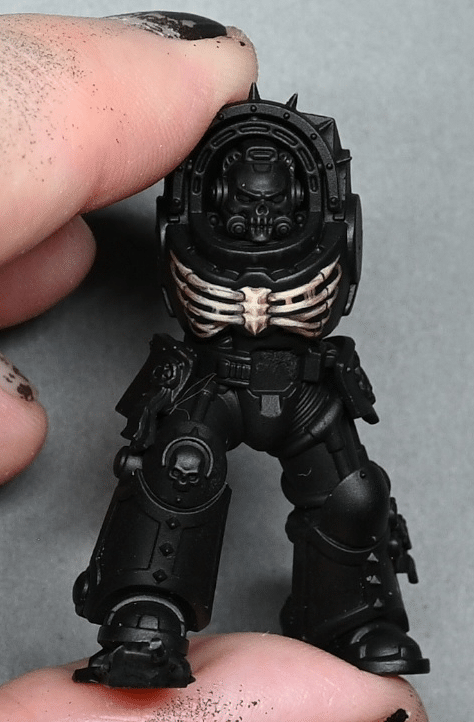
- Prep the Nurgle Shield with Freehand: Remove intricate details from the shield using a scalpel and sand it slightly. Keep some battle damage for authenticity, if you wish.
- Prime the Shield: Use Ultimate primer, thinned with X20A, applied in 4-5 thin coats.
Base Painting
- Wet Palette Setup: Prepare a wet palette with the following Games Workshop colours: Ice Yellow, Bugman’s Glow, Rhinox Hide, Mournfang Brown, Morghast Bone, Deathworld Forest, Yriel Yellow, Khorne Red, and Ushabti Bone. Also, have Vallejo Black and P3 Morrow White ready.
- Mixing Colours: Create various mixes of these colours on the palette, adjusting with water for a thinner consistency (approximately 50/50).
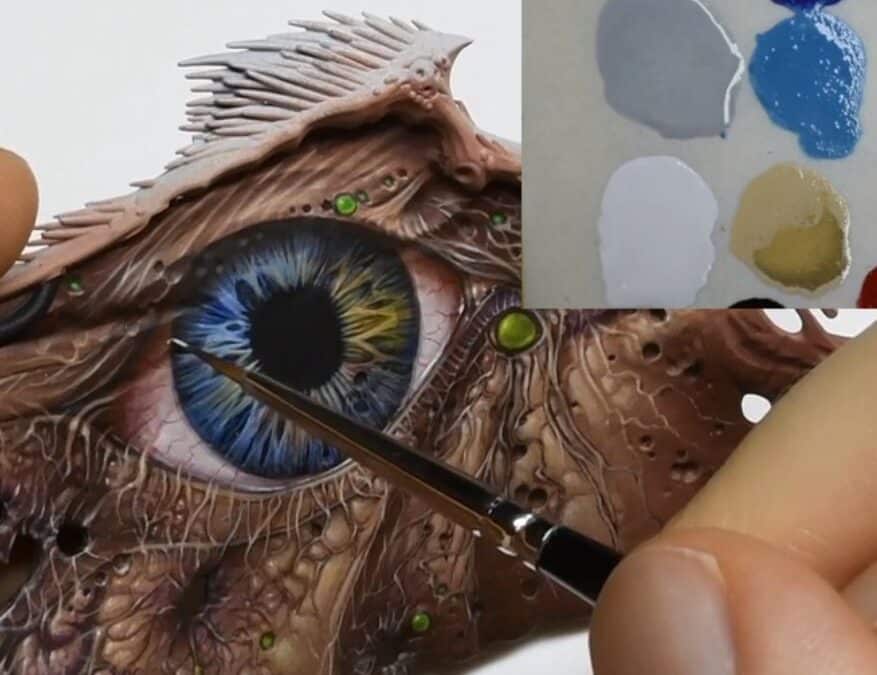
Freehand Sketching
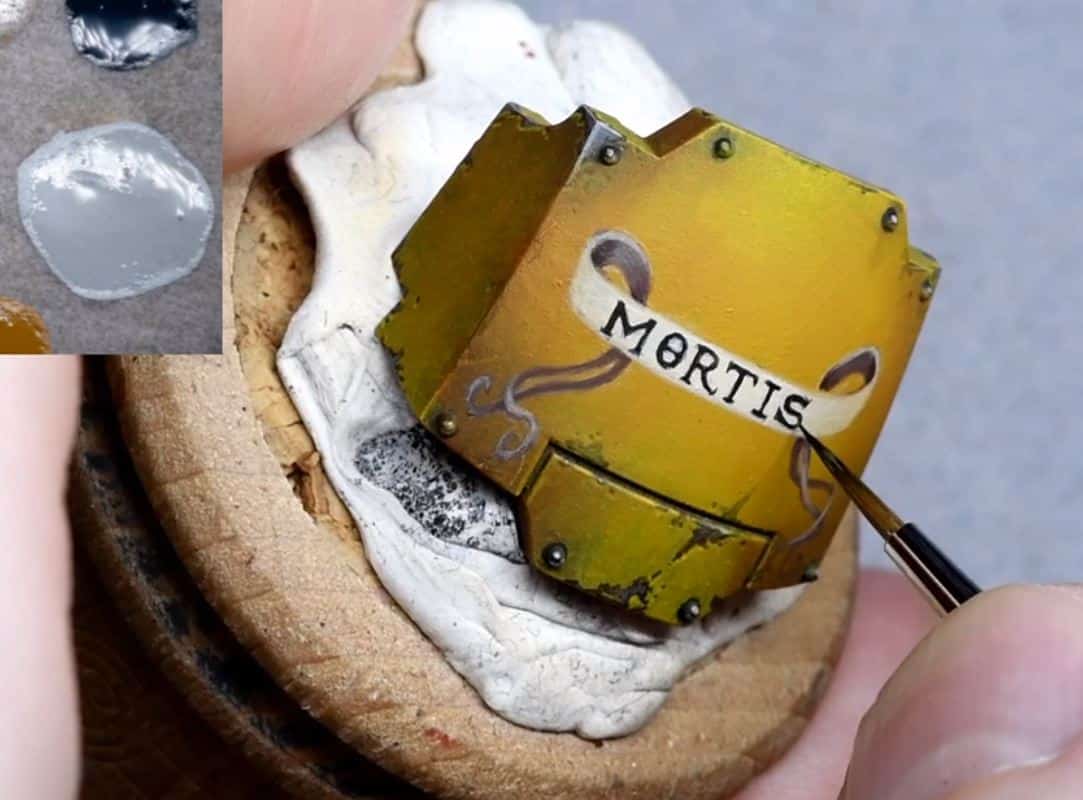
- Initial Sketch: Start sketching the Nurgle face on the shield using Bugman’s Glow. This doesn’t have to be symmetrical or realistic.
- Adding Details: Gradually add more details like eyes, horns, and facial deformations using the mixed colours. Use Rhinox Hide for shading.
- Background Technique: Use Vallejo Black as a ‘rubber’ to tweak and correct the sketch as needed.
Refining and Detailing
- Light and Shadow: Use the lighter and darker mixes to create depth, focusing on the facial features. Ensure a balance between highlights and shadows.
- Adding Texture: Pay attention to the direction of brushstrokes to replicate skin texture and facial creases.
Final Touches
- Metallic Effects: For a Golden Demon entry, ensure to incorporate light volumes and reflective effects on the shield, as well as on the freehand.
- Glazing: You may need to glaze over the freehand to integrate it with the shield’s overall shine and metallic effect.
- Varnishing: Finish the shield with a matte varnish to even out different paint finishes.
Important Notes
- Brush Technique: Use the very tip of your brush for detailed work. Switch between an older brush for blending and a newer one for sharp details.
- Colour Importance: While exact colour mixes are flexible, ensure to maintain the overall desaturated, moody look characteristic of Nurgle.
- Patience and Layers: Build up the image with multiple thin layers, allowing for smooth transitions and a detailed finish.
- Personal Style: Remember, this guide is a base. Feel free to adjust and experiment according to your style.
Video Two: How to Paint the Shield Shine and NMM Trim
Paints and Materials Used
Paints
- Vallejo Paints:
- Black
- German Grey
- Neutral Grey
- Ice Yellow
- White
- Games Workshop Paints:
- Mournfang Brown
Brushes
- Size 00 Brush: Ideal for detailed work and fine textures. Used for most of the work including the shine and trim.
- Size 2 Brush: Used for broader strokes and glazing, especially over larger areas.
Other Materials
- Wet Palette: To keep the paints moist and workable.
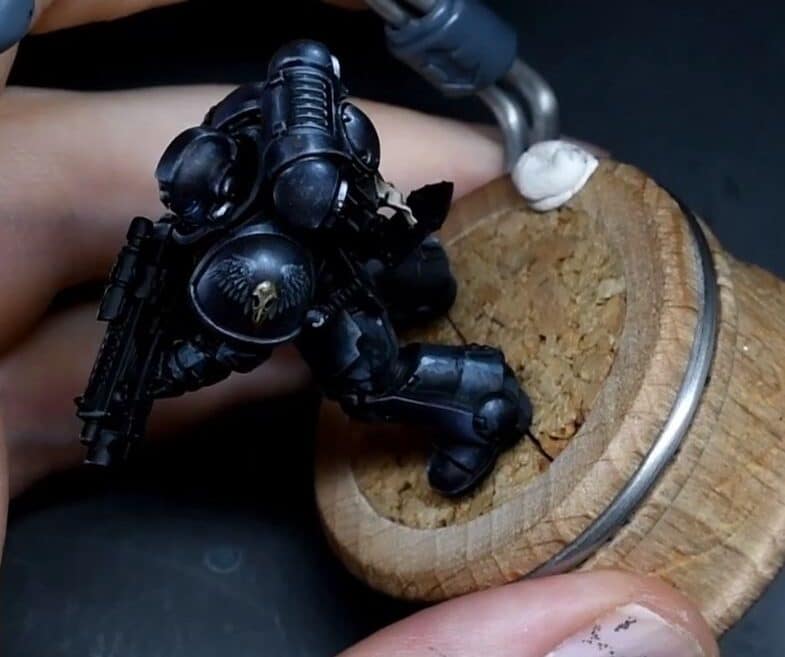
- Lamp: For observing how natural light falls on the model, crucial for accurate highlight placement.
- Blu Tack or Similar Adhesive: To temporarily attach the shield to the model for correct angle assessment.
Step-by-Step Guide
Preparing the Palette
- Setup Wet Palette: Prepare a wet palette with Vallejo Black, German Grey, Neutral Grey, Ice Yellow, White, and Games Workshop Mournfang Brown. Create a gradient of grey shades from black to white, mixing in Ice Yellow and White with Neutral Grey for various mid-tones.
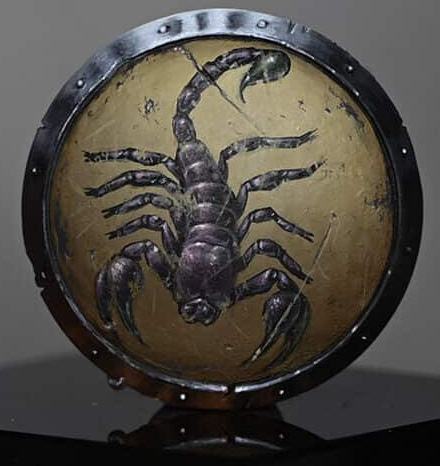
Painting the Shine
- Analyzing Light Direction: Position the model under a lamp to observe natural light fall. This will guide the placement of the shine.
- Initial Highlights: Start with a Neutral Grey or a mix of Neutral Grey and German Grey to block in the primary highlight areas on the shield.
- Building Up Layers: Gradually increase the brightness of the highlights, focusing on the top left as the primary light source. Remember, the paint will appear brighter when wet and duller when dry.
- Textured Effect: Use scratchy and stipple brushstrokes with minimal paint for a textured shine effect. Use the very tip of your brush.
- Bounce Highlight: Add a bounce highlight at the bottom of the shield, reflecting light from the ground. This should be less bright than the primary highlight. Use a watered-down Mournfang Brown for a glaze over this area.
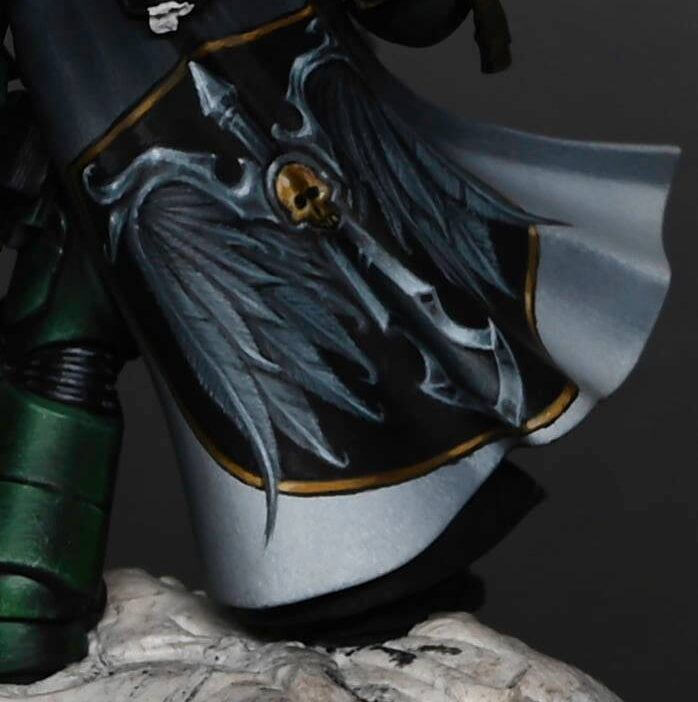
Painting the NMM Trim
- Blocking in Highlights: Use Neutral Grey to block in primary highlights on the trim, focusing on the top area.
- Adding Variation: Create a variety of light grey blocks along the trim, ensuring they get darker and more spaced out as they move away from the top highlight.
- Refining Highlights: Gradually add lighter tones, culminating in white for the brightest parts. Ensure these highlights align with the shield’s central highlight.
- Detailing Scratches: Use white to pick out tiny dots on sculpted scratches for added realism and depth.
- Bounce Highlight on Trim: Similar to the shield, add a less intense bounce highlight at the bottom of the trim.
Final Touches
- Glazing: Apply a thin glaze of Mournfang Brown over certain areas for colour integration and smooth transitions.
- Detail Checks: Make any necessary adjustments to neaten the highlights and ensure consistency in lighting and texture across the shield and trim.
Important Notes
- Consistency and Control: Maintain a good balance in paint consistency – not too thick for opaque marks and not too watery to avoid spreading.
- Brush Technique: Always pull the brush towards yourself for control and precision, especially important when working near the freehand area.
- Learning and Experimentation: Remember, this technique is both challenging and rewarding. Don’t be afraid to experiment and learn from the process.
These guides should provide a clear roadmap to achieving a high-standard finish for your freehand on shields, suitable for display or competition. Remember, practice and patience are key to mastering these techniques and don’t be afraid to do your own thing and add your own personal touch or style to your freehand!
More Freehand Tutorials to Explore


If you don’t have an account, please sign up here! The website currently has over 350 video tutorials with steps and tips, plus a selection of PDFs. If you are not sure about joining, you can explore my free videos with a free membership, or take the plunge and become a full subscriber for full access.


If you’d prefer to support me on Patreon, please visit: https://www.patreon.com/RichardGray