Shoulder Pad Tactical Marking for a Space Marine

How to Paint a Shoulder Pad Tactical Marking for a Space Marine

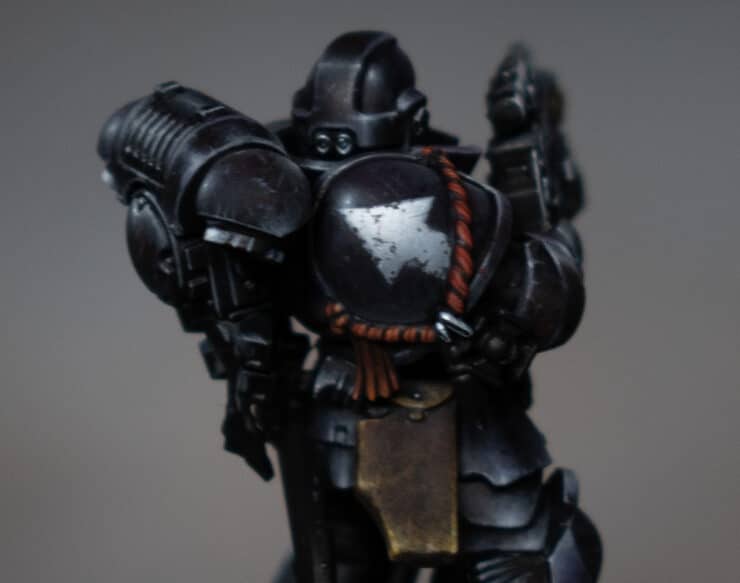
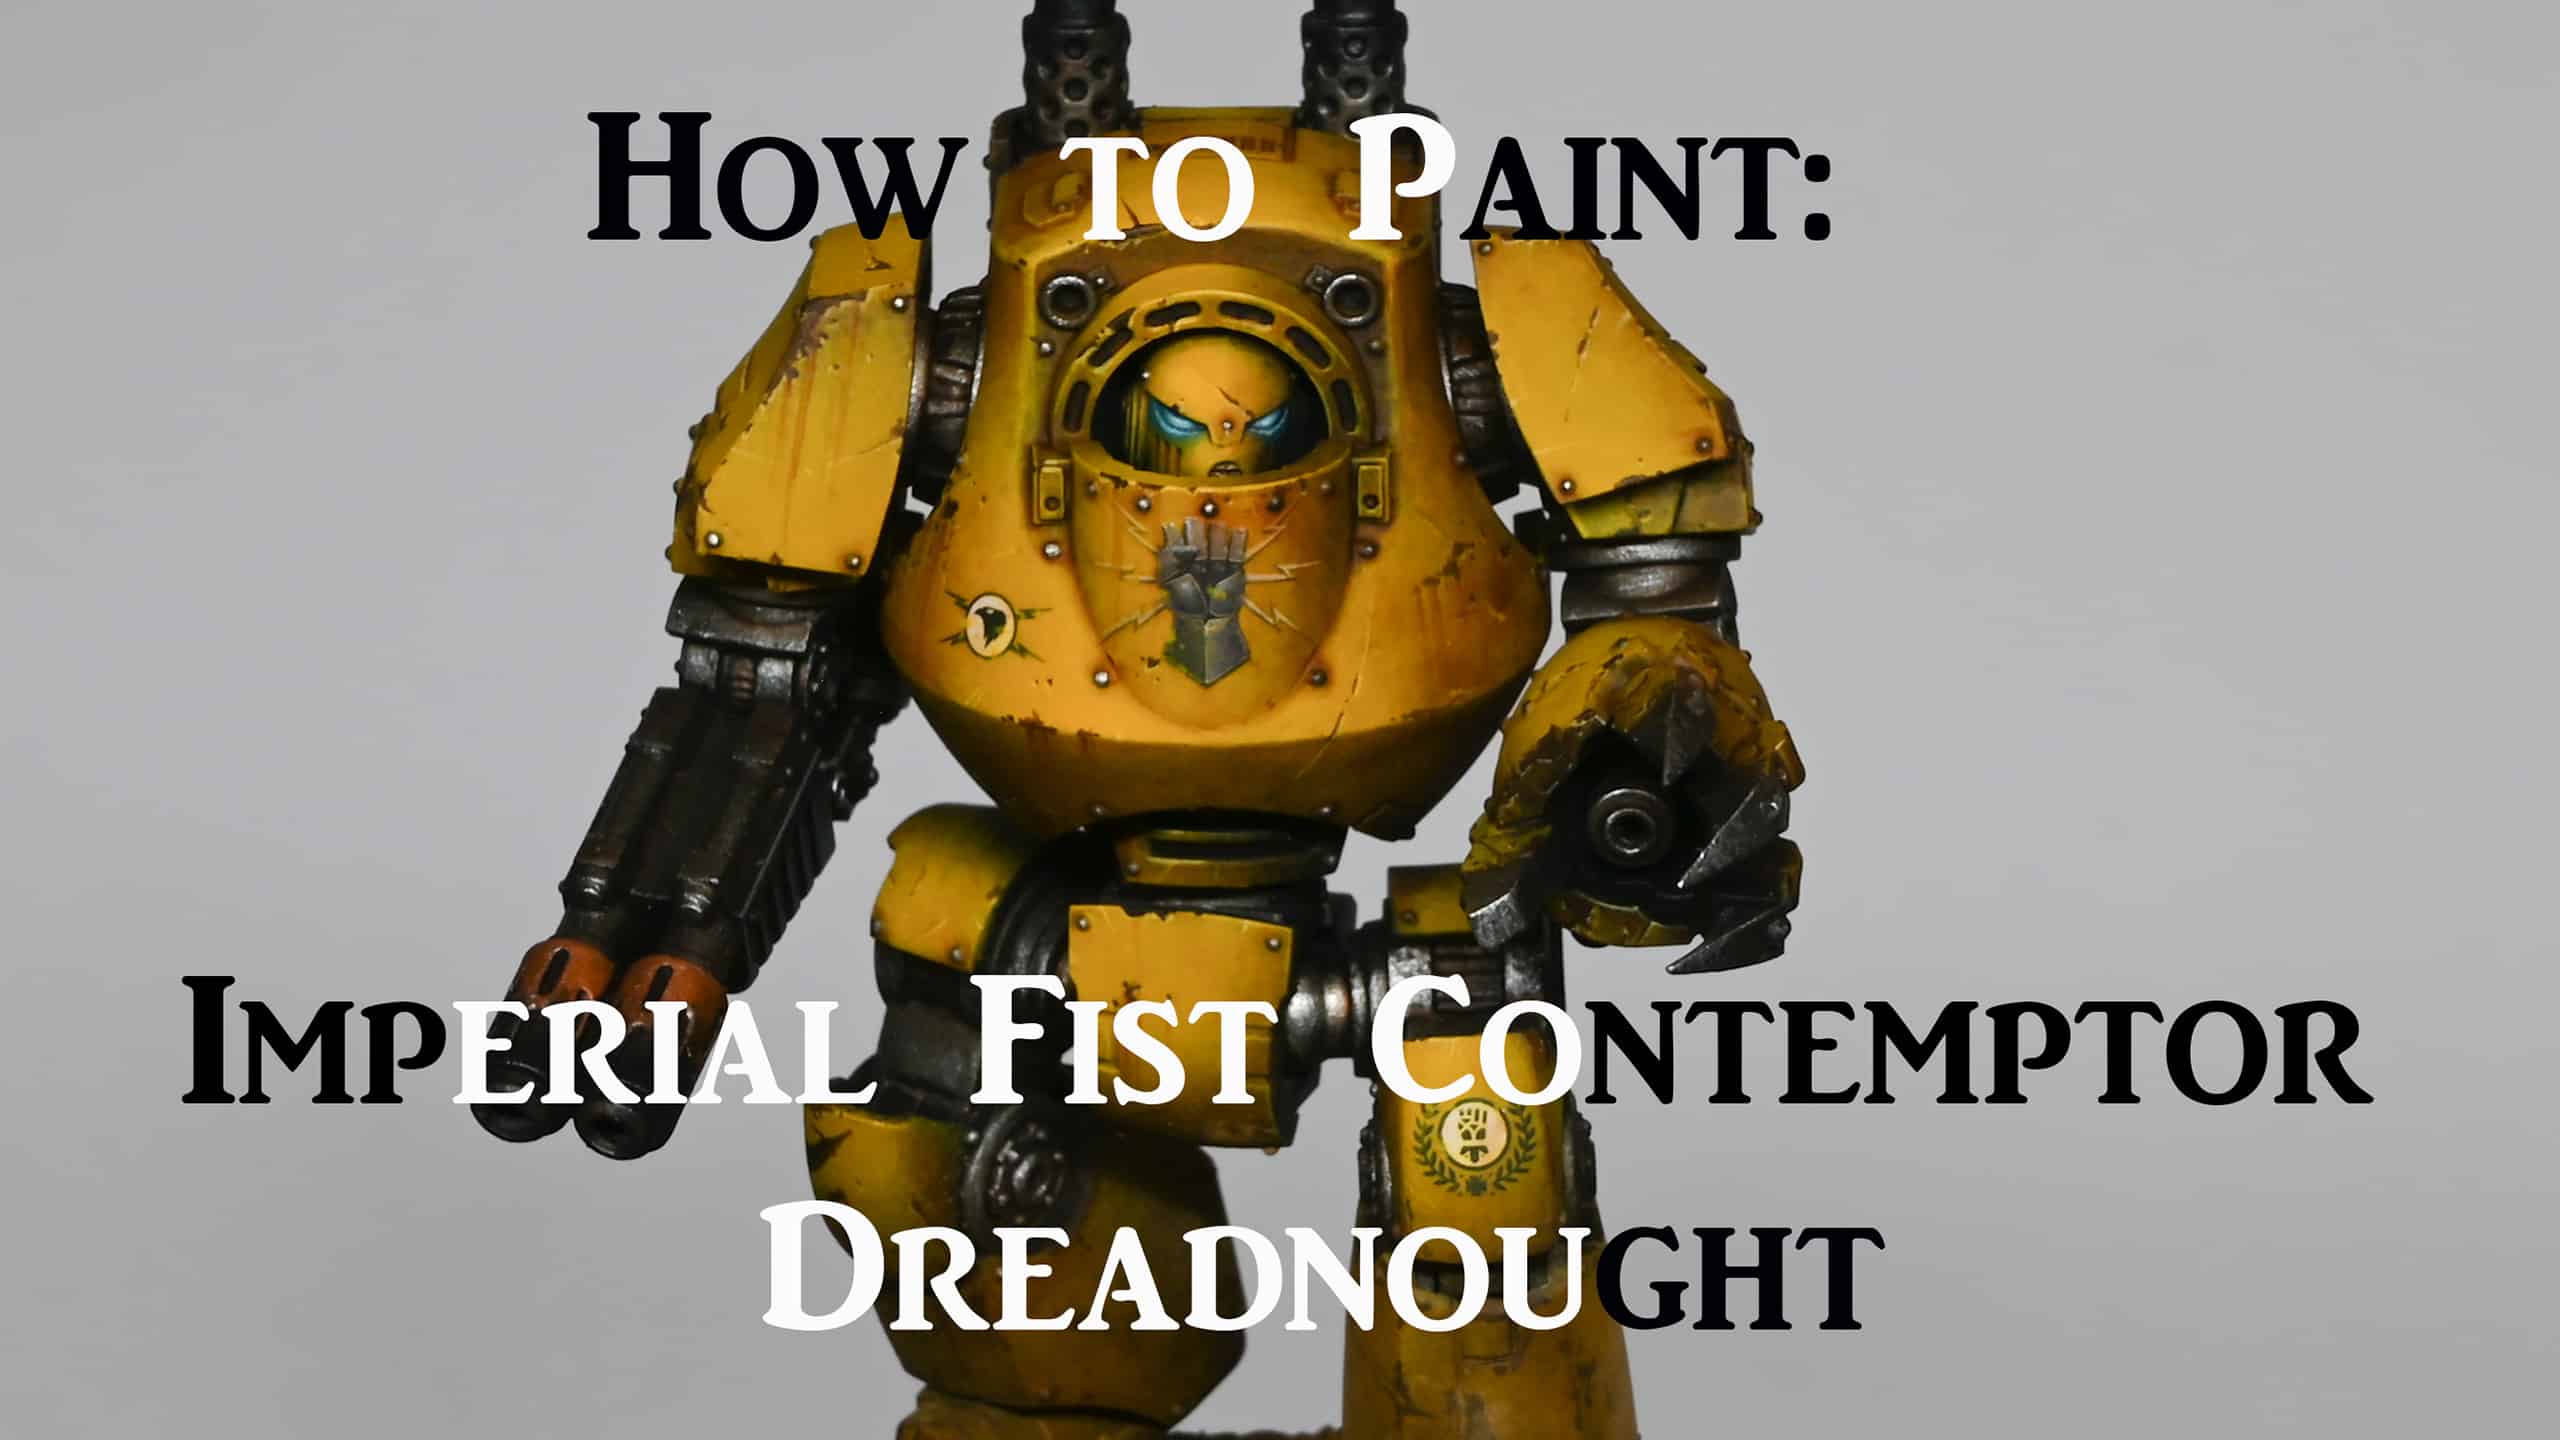
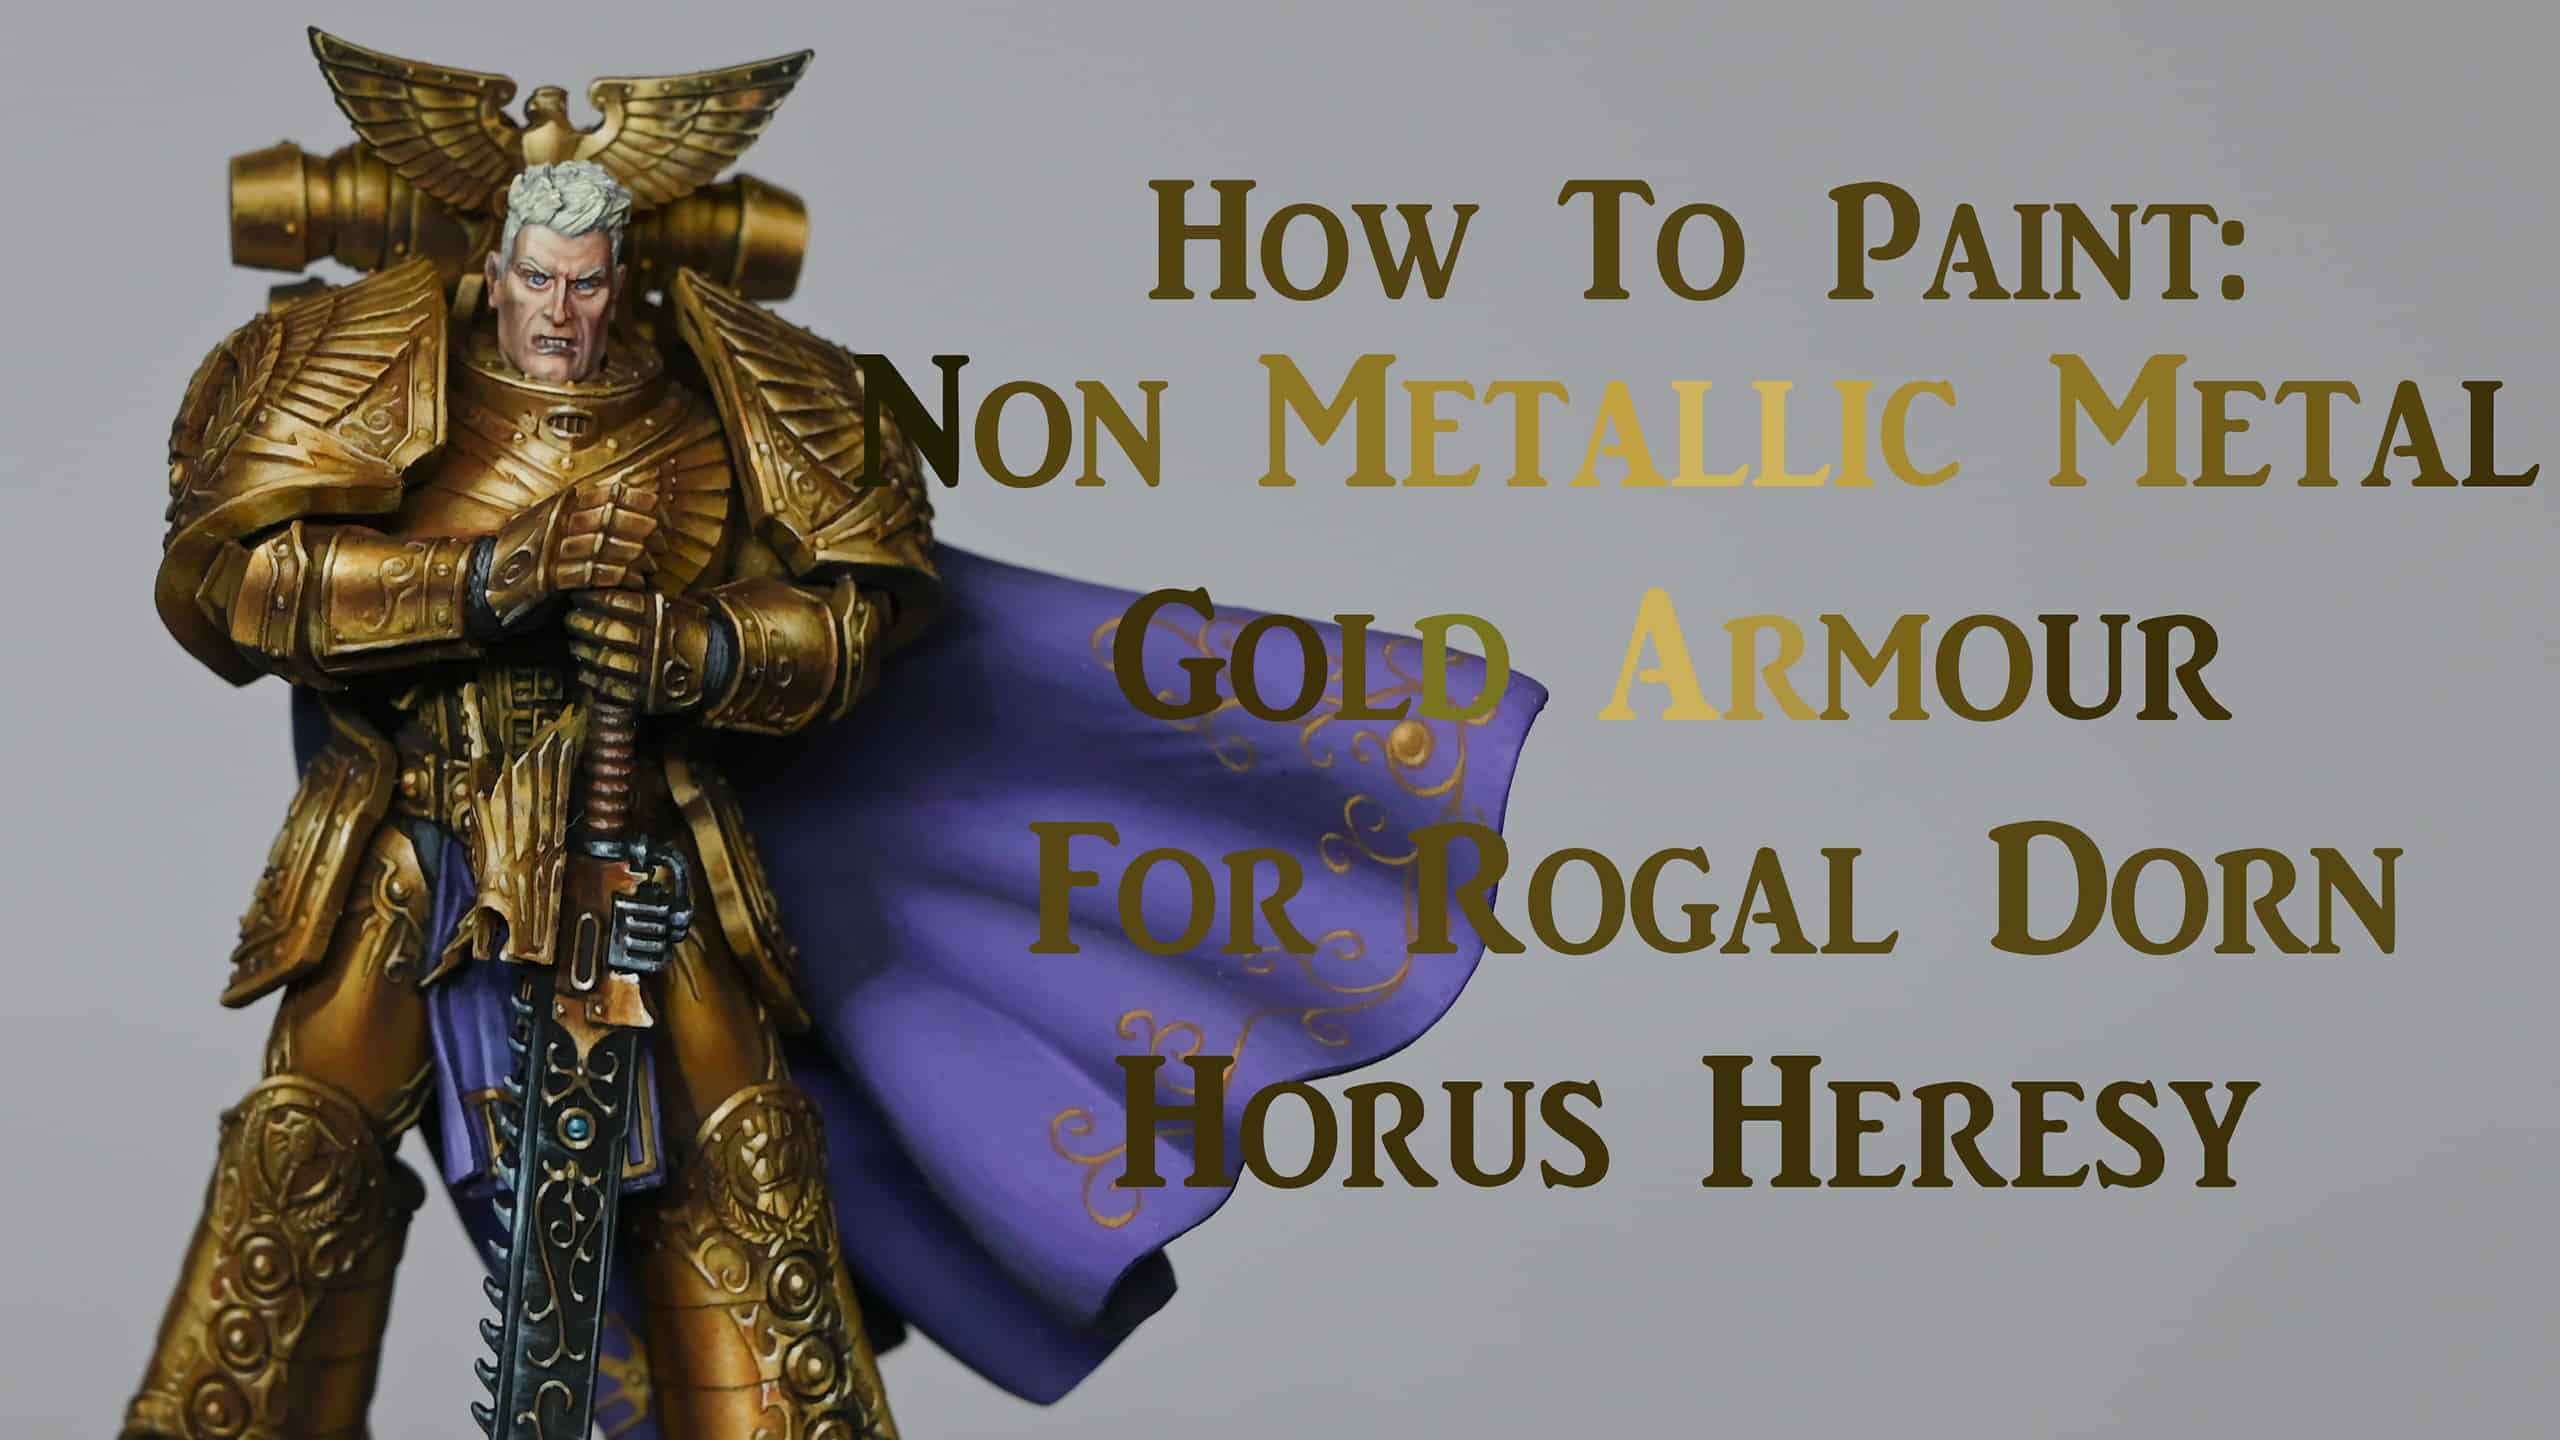
In my latest freehand for space marines tutorial “How to Paint a Shoulder Pad Tactical Marking for a Space Marine” we delve into the intricate process of painting the iconic shoulder pad marking for your Raven Guard Space Marine miniature from Games Workshop. Follow along as I break down each step, from laying down the base colour to adding highlights and battle damage, ensuring your model stands out on the battlefield!

Video: How to Paint a Shoulder Pad Tactical Marking for a Space Marine

This video tutorial is currently hidden. To unlock it and watch, please join the website and log in.

All videos are recorded in HD 1080p or higher – use full screen for the full effect and let the video load completely.

Step-by-Step: How to Paint a Shoulder Pad Tactical Marking for a Space Marine

Prepare the Model – Ensure your Raven Guard Space Marine model is assembled and primed. Make sure to paint the highlights on the shoulder pad before starting on the tactical arrow marking.

Painting the Base Colour – Dip your fine detail brush into Vallejo Heavy Greyblue (Celestra Grey) paint. Begin by painting a line straight down the middle of the shoulder pad. Then, work outwards from this line to map the basic shape of the arrow. Focus on neat edges and use the tip of the brush for sharp lines.

Refining the Shape – Continue to refine the shape of the arrow, adjusting as needed to ensure symmetry and neatness. Pay attention to the edges, making sure they are clean and precise. Don’t worry too much about perfection, as minor mistakes can be covered with later detailing.

Adding Highlights – Using P3 Morrow White (Ceramite White), apply highlights to the arrow. Be cautious not to overlap onto the grey base too much. Focus on creating smooth transitions, blending the white into the grey gradually. Work from the centre of the arrow outwards for better control.

Glazing for Smoothness – To achieve a smoother finish, apply glazes of white paint towards the highlight areas. This helps to blend the colours seamlessly and enhances the overall appearance of the marking. Be mindful of brushstrokes and apply the glazes sparingly.

Adding Battle Damage – For a weathered look, use Vallejo German Grey (Skavenblight Dinge with a touch of black) to add battle damage to the arrow. Apply tiny marks and scratches strategically, focusing on areas that would naturally wear over time. Be careful not to go overboard, as realism is key.

Painting the Red Cord – Switch to painting the red cord that goes over the shoulder. Use Vallejo Amarantha Red (Evil Sunz Scarlet) to carefully paint the cord, layering it to achieve a rich colour. Be mindful not to get any red paint on areas you’ve already finished.

Adding Details to the Cord – For added realism, paint on some details such as individual strands on each notch of the cord. Use Citadel Wild Rider Red (Evil Sunz Scarlet) for this, applying thin lines to represent the strands. Take your time and focus on precision.

Final Highlights – Finish off the red cord by adding final highlights with Citadel Fire Dragon Bright (Wild Rider Red mixed with a touch of white). Apply these highlights sparingly to the top parts of the cord to maintain consistency.

Finishing Touches If needed, do some final touch-ups and adjustments. Use black paint for glazing to tidy up any areas where needed, ensuring a clean and polished look. Step back and admire your painted Shoulder Pad Tactical Marking for a Space Marine!


More Space Marine Tutorials!

Space Marines
This how to paint a Red Techmarine NMM Axe guide aims to help you achieve a realistic non-metallic metal effect on your Techmarine’s axe, with a focus on contrast, texture, and light reflection. For all of the videos on how to paint a Red Techmarine, follow the link below, or scroll down here for just the axe guide! Red Techmarine A series for how to paint a Primaris Techmarine by Games Workshop. Watch Now Video: How to Paint a Red Techmarine – NMM Axe This guide aims to help you achieve a realistic non-metallic metal effect on your Techmarine’s axe, with a focus on contrast, texture, and light reflection. Materials Needed: Fine detail brushes for precise application. A wet palette to keep your paints hydrated. Vallejo and Games Workshop paints: Doombull Brown, Mournfang Brown, Balor Brown, XV-88, Ice Yellow, Pale Grey Blue, and P3 Morrow White (or any white). Preparing the NMM Axe: Metal Pole: Begin by painting the metal pole using the same NMM techniques detailed in the previous video. This ensures consistency across metallic elements of the miniature. Painting the Circular Detail on the NMM Axe: Base Colour: Start with the darker brown (Doombull Brown), applying it as the base for the small circular detail on the pole. This connects the colour scheme with the axe head, adding warmth and interest. Highlighting: Gradually build up the highlights transitioning from dark (Doombull Brown) to light (XV-88 to Ice Yellow) from the top to the bottom of the circular detail. Finish with a thin edge highlight at the top for definition. Painting the NMM Axe Blade: Vertical Lines: Initially, paint vertical lines across the blade with a mixture of 50:50 water to paint. This underlayer softens the stark contrast between subsequent horizontal lines and the dark primer. Adding Texture: Apply horizontal lines over the vertical ones to create a cross-hatching effect. This technique adds texture and subtlety to the blade, avoiding harsh contrasts. Defining Highlights: Focus on creating a diagonal highlight across the axe head, marking the primary light reflection. This line should be brighter at the top edge of the blade, tapering and becoming more subtle as it crosses the blade. Building Up the Blade’s Texture: Further Highlights: Use Mournfang Brown to add more texture and depth, emphasizing the top of the blade where the light is strongest. The aim is to make the top appear lighter than the bottom, enhancing the NMM effect. Ice Yellow Highlights: Progress to Ice Yellow for the highest highlights, concentrating on areas that would catch the most light. Ensure these lines are fine and precise to maintain the textured look. Detailing the Axe Head: Base Texturing: With Mournfang Brown, create scribbly, textured marks on the flat of the axe head, focusing on creating a light to dark modulation from one edge to the other. Enhancing Texture: Progress through Balor Brown and XV-88, adding finer, more controlled highlights to build up the texture. These should be more focused and less extensive than the base texture, adding depth and interest to the surface. Final Highlights: Use Ice Yellow and Pale Grey Blue for the final highlights, paying particular attention to areas like the skull and the circle on the axe head. These colours should only be applied to the blade for differentiation, so don’t go too crazy with them, adding a cool tone to contrast with the warmer body of the axe head. Finishing Touches: Neatening Edges: Go back and tidy up any overspill or overly broad lines with the base colours, ensuring the texture remains coherent and the contrasts sharp. Evaluation: Step back and review the entire piece, making any necessary adjustments to ensure the NMM effect is convincing and the textures and contrasts work together harmoniously. If you can’t see the videos, please sign up here! The website currently has over 350 video tutorials with steps and tips, plus a selection of PDFs. If you are not sure about joining, you can explore my free videos with a free membership, or take the plunge and become a full subscriber for full access. If you’d prefer to support me on Patreon, please visit: https://www.patreon.com/RichardGray [...]
Games Workshop sent me the new Deathwing Assault box as an early review copy. It’s a little rushed but I’ve started to paint a Deathwing Assault Knight with the aim to make him very weathered and rough looking. A video tutorial on how I painted this Deathwing Assault Knight will be on YouTube and here on the website, too, along with my step-by-step guides once I’ve done a bit more. The most esteemed warriors among the enigmatic and steadfast Dark Angels are those of the Deathwing! Each member, a battle-hardened veteran, is led by legendary champions who have weathered countless conflicts. They don imposing Terminator armour and wield formidable armaments, treasures from the Chapter’s revered armouries. At the helm of the Deathwing stands Belial, the esteemed Grand Master. His command extends over 15 Terminators. Among them, ten are versatile multi-part Terminators, adorned in the iconic Deathwing style, enhanced with two newly crafted Dark Angels upgrade frames. The remaining five are the formidable Deathwing Knights, unyielding colossi armed with ancestral weapons of great power. Included in the set is the Codex Supplement: Dark Angels. This 96-page tome provides comprehensive rules and rich lore for the Dark Angels, embellished with a distinctive cover. The package is further enriched with 20 datasheet cards, encompassing every unit described in the Codex Supplement, and two decal sheets, each boasting over 200 transfers. Join the Discord and Chat about new Releases! I have a friendly Discord community filled with painters both experienced and new who love to chat all things model-painting and help each other out. Join in with live model painting in the video rooms, give feedback (or get some) or just hang out and talk. Come say hello! If you don’t have an account on the website, please sign up here! The website currently has over 350 video tutorials with steps and tips, plus a selection of PDFs. If you are not sure about joining, you can explore my free videos with a free membership, or take the plunge and become a full subscriber for full access. If you’d prefer to support me on Patreon, please visit: https://www.patreon.com/RichardGray [...]
This video shows how to paint a Grimdark Grimy Death Guard for the Horus Heresy. The model is a new MKIII plastic marine and is painted in the Grimdark style to try and capture the weight and brutal nature of the armour. The following paints were used:Games Workshop: Balor Brown, Morghast Bone, Screaming Skull, Mephiston Red, Wildrider Red, Yriel Yellow, Contrast Darkoath Flesh, Contrast Medium, Rhinox Hide, Agrax Earthshade Vallejo: Heavy Blackgreen, Ice Yellow P3: Morrow White (Any white will do) Kimera Colours: Black (Any black will do) Pro Acryl: Light Bronze Metallic, Rich Gold Metallic Top Grimdark Grimy Death Guard Tips!: Prepare Your Palette: Utilize a wet palette to maintain paint hydration.For the initial dry brushing, use Balor Brown from Games Workshop on a wet palette.Choose the Right Brush:Select a small dry brush, like the Artis Opus dry brush, for the stippling technique.Stippling Technique:Diverge from traditional dry brushing; instead, stipple the paint onto the model.Aim for a disheveled, grimy, and weathered appearance.Start with Balor Brown, advancing to lighter hues like Morghast Bone, Screaming Skull, and Yriel Yellow for a textured effect.Application Method:Stipple the paint directly onto the model, concentrating on armour panels.Rotate the model as you paint to ensure each section dries before revisiting.Focus on hitting the model face-on with the brush to create a textured, dotty buildup.Chipping Effect:For chipping effects, use Rhinox Hide with a sponge chipping technique.Contemplate hand-painting some scratches for added detail.Accentuating Details:Employ a fine brush for details like scratches and chips.Highlight specific armour panels for added depth.Contrast and Weathering:Apply Darkoath Flesh contrast paint mixed with contrast medium to unify the your Grimdark Grimy Death Guard.Experiment with adding more brightness by layering appropriately watered-down contrast paints.Highlighting and Shadows: Highlight edges using Morrow White from P3.Contemplate applying washes like Agrax Earthshade to blend highlights and shadows.Use Ice Yellow from Vallejo for specific details, building up the colour gradually.Fine-Tune Highlights:Use a finer brush to refine highlights and correct any over-spill.Introduce Agrax Earthshade for added depth in recessed areas.Final Touches:Experiment with Wildrider Red and Mephiston Red from Games Workshop for added details.Apply a matte varnish to seal the paint job.Consider adding additional details to your Grimdark Grimy Death Guard like basing with textures and powders. If you don’t have an account, please sign up here! The website currently has over 350 video tutorials with steps and tips, plus tips and PDFs. If you are not sure about joining, you can explore my free videos with a free “freebies” membership, or take the plunge and become a full subscriber for full access. If you’d prefer to support me on Patreon, please visit: https://www.patreon.com/RichardGray [...]
How to freehand ribs on the new Terminator Chaplain that Games Workshop sent me for review. I know some people were disappointed that it didn’t have sculpted on ribs, so this should fix it! This guide should help you add a striking rib detail to your Chaplain Terminator, enhancing its visual impact and bringing it closer to the iconic Chaplain imagery. Video: How to Paint Chaplain Ribs Freehand Materials Required: Paints: Games Workshop XV-88, Morghast Bone, Screaming Skull, Rhinox Hide; Vallejo Neutral Grey; P3 Morrow White; Kimera Colours Black Brushes: A variety of sizes for detailed work Milliput or Sprew Glue: For filling and smoothing the chest area Sandpaper: For sanding down the filled areas Palette and Water: For paint mixing and brush cleaning Steps for Freehanding Ribs: 1. Preparation: Fill the chest holes with Milliput or Sprew Glue. Sand down to create a smooth surface. Be patient and allow adequate drying time to avoid issues. 2. Base Painting: Begin with a base coat of XV-88. This will be your primary rib colour. Ensure the background remains a flat black for high contrast. Chimera Black is recommended for its matte finish and good coverage. 3. Adding the Ribs: With XV-88, sketch out the shape of the ribs. Remember, space is limited, so it’s more about suggesting ribs rather than anatomical accuracy. For human-like ribs, remember that Space Marines are portrayed with fused ribs, but standard human ribs are usually depicted on Chaplains for visual impact. 4. Shading and Detailing: Use Rhinox Hide to create shadows and define the separation between ribs and sternum. This paint can be applied translucently to allow underlying colours to show through, adding depth. 5. Highlighting: Progressively add highlights with Morghast Bone. Focus on the front of the ribs, gradually reducing intensity towards the sides. Add fine details and further highlights with Screaming Skull, but use sparingly to avoid excessive brightness. 6. Refining: Use Neutral Grey and Morrow White for subtle colour variations and additional highlights. Keep refining the details until you achieve the desired level of depth and realism. Use black paint to clean up any errors and sharpen the edges of the ribs. 7. Finishing Touches: For the sternum, devise a suitable design that complements the ribs. This might include fused elements or socket-like features. Tips: Asymmetry: Deliberately make the ribs asymmetric for ease of painting and to avoid the challenge of perfect symmetry. Light Source: Consider the model’s overall lighting when placing highlights to maintain consistency. Take Your Time: With freehanding, patience is key. Build up layers gradually and refine as needed. By following my “How to Paint Chaplain” guide, you’ve now mastered the art of freehanding rib details, enhancing the iconic look of your miniature. Check out more of my freehand tutorials, below, for more ideas for your next project. More Freehand Videos If you don’t have an account, please sign up here! The website currently has over 350 video tutorials with steps and tips, plus a selection of PDFs. If you are not sure about joining, you can explore my free videos with a free “freebies” membership, or take the plunge and become a full subscriber for full access. If you’d prefer to support me on Patreon, please visit: https://www.patreon.com/RichardGray [...]
This video looks at how to paint a Deathwing Terminator from the new Leviathan boxed set, which Games Workshop sent to me as an early review copy. Video – How to Paint a Deathwing Terminator The following paints were used Games Workshop: Black Templar (Contrast), Darkoath Flesh (Contrast), Contrast Medium, XV-88, Morghast Bone, Ushabti Bone, Screaming Skull, Mephiston Red, Evil Sunz Scarlet, Wild Rider Red, Yriel Yellow Vallejo: Game Colour Dark Green, Neutral Grey, German Grey, Black, Gunmetal Grey (Metallic), Chrome (Metallic) P3: Morrow White Step by Step Guide Preparation and Priming: Assemble the Deathwing Terminator, modifying as desired (e.g., swapping weapons). Prime the model in black. Base Coat and Airbrush Highlighting: Apply a base coat of XV-88. Highlight with Morghast Bone using an airbrush, focusing on natural light areas. Applying Contrast Paint: Mix Darkoath Flesh with Contrast Medium and cover the Deathwing Terminator, emphasising recesses over large, smooth areas. Highlighting and Texturing: Hand apply highlights and textures using Ushabti Bone and Screaming Skull, targeting brighter airbrushed areas. Detailing with Black Paint: Paint areas destined for other colours (metal, red, green) with Black Templar Contrast or thinned black paint. Metallic Parts: Apply Vallejo Gunmetal Grey to metal parts. Use Agrax Earthshade for a matte effect. Add highlights with Chrome. Red Areas (Eyes, Lenses, Purity Seals): Base with Mephiston Red mixed with a small amount of black. Progressively highlight with Mephiston Red, Evil Sunz Scarlet, and Wild Rider Red. Green Areas (Chest Eagle): Base in Vallejo Game Colour Dark Green. Add highlights by progressively mixing in white. Bone Armour Texturing and Detailing: Further texture and scratch effects using Morghast Bone, Ushabti Bone, and Screaming Skull. Mix Morghast Bone with a bit of Mournfang Brown for shadows. Chest Eagle and Purity Seal Text: Use fine brushwork for text effects on purity seals with black paint. Final Highlights and Details: Apply final highlights with Screaming Skull or white, focusing on areas for maximum contrast. Blend and soften with Neutral Grey glazing. Basing: Base the Deathwing Terminator as preferred, employing sand texturing, painting rocks in German Grey and Neutral Grey, and adding grass tufts. Finishing Touches: Add chips and scratches across the armour with Rhinox Hide and Screaming Skull. Enhance details and edge highlights to complete your Deathwing Terminator! Show it off! As you progress, feel free to adapt and tweak techniques to suit your style. Good luck! When you’ve finished, why not pop into our Discord and show it off to other website members? 🙂 More Free Video Tutorials Free videos for logged in members – just sign up as a ‘friend’ to view and click any of the thumbs.To explore all of these, visit this page! If you don’t have an account, please sign up here! The website currently has over 350 video tutorials, plus step by step guides and PDFs. You can explore more free videos with a free “freebies” membership, or take the plunge and become a full subscriber for full access. If you’d prefer to support me on Patreon, please visit: https://www.patreon.com/RichardGray [...]
Richard was sent the new Warhammer 40,000 Leviathan box set from Games Workshop, and of course had to pick out his favourite model to paint up for a tutorial video for you guys. This is up on the website, ad free for freebie members and above, but also on Youtube – follow the link below or click in the embed to watch: The following paints were used: Games Workshop: Black Templar (Contrast), Darkoath Flesh (Contrast), Contrast Medium, XV-88, Morghast Bone, Ushabti Bone, Screaming Skull, Mephiston Red, Evil Sunz Scarlet, Wild Rider Red, Yriel Yellow Vallejo: Game Colour Dark Green, Neutral Grey, German Grey, Black, Gunmetal Grey (Metallic), Chrome (Metallic) P3: Morrow White About the Leviathan box set – (Review by Rebecca) The “launch box” contains two armies (Space Marines and Tyranids), a limited edition book, and lots of other treats. However, if you’re a newbie to this hobby, brace yourself for a slightly steeper learning curve. Unlike some dedicated starter sets, Leviathan skips the dice, measuring tools, and handy “get started” guide. The box also contains a set of transfers covering a host of Space Marine Chapters.In the video Richard says that there are no Dark Angel ones, but there are, (sorry). In addition to this, while the rules for every Warhammer 40k unit will be available for free download from Warhammer Community, be aware that the box itself does not include physical cards. Instead, you’ll find basic profiles tucked away in the back of the instruction manual. Richard enjoyed painting a Terminator for the video above, and was impressed by the level of detail. They’ve managed to retain the classic charm of their predecessors while seamlessly blending into the ranks of the latest Space Marine models. In this new edition, the Terminators boast some nifty tricks up their power-armoured sleeves. Imagine being able to plant a teleport marker anywhere on the battlefield right from the get-go, courtesy of these bad boys. And the best part? You can use Rapid Ingress without spending a single resource to appear right next to that marker. Finally, they give a resounding “no thanks” to any negative hit modifiers. That means they’re practically unstoppable in combat. For beginners and those who stick themselves together more than their miniatures, the models in the Leviathan box set are push fit, requiring no glue. Despite their easy assembly, they stand strong against intricate multi-part kits, however and still boast a great level of detail and good customisability. I, personally, love the books that comes with the sets, especially when they are as full of background information as the rule book that comes with the Leviathan set.This exclusive book encompasses a whopping 200 pages of background information, hobby details, and lore. Not only does it provide insights into every Combat Patrol available, but it also showcases stunning images of painted models. In short, the Leviathan box set is a great set if you are looking to get a lot of very cool models plus some great lore! Rebecca Gray This website showcases lots of Warhammer tutorial videos by Richard Gray! If you don’t have an account on the website, please sign up here! In total, the website currently has over 350 video tutorials with steps and tips, plus a selection of PDFs. If you are not sure about joining, you can explore the free videos with a free membership, or take the plunge and become a full subscriber for full access. If you’d prefer to support me Richard on Patreon, please visit: https://www.patreon.com/RichardGray [...]
This video tutorial and step-by-step guide shows how to paint a Desolation Dark Angel, one of the new Desolation Marines from the Strike Force Agastus, which was sent to me by Games Workshop. Read on for a full video, lots of tips and full materials and paints list. Video Tutorial – Desolation Dark Angel Materials: Vallejo Model Colour (New): Angel Green, Charcoal, Toxic Yellow, Black, Turquoise, Aquamarine, Grunge Brown, Orange Fire, Nocturnal Red, Scarlet Blood Games Workshop: Darkoath Flesh (Contrast), Contrast Medium Two Thin Coats: Plate Armour, Dragon’s Gold P3: Morrow White Steps: Base Coat:Mix Angel Green and Charcoal (50:50 ratio).Apply this mix over the entire model using a large dry brush or makeup brush.Water the paint down slightly for a smoother application, aiming for a 50:50 water-to-paint ratio. Layering:Apply straight Angel Green on top, using a kitchen roll to dab off excess paint for a thin layer.Focus on light volumes, covering flat surfaces more than edges. Metallics:Paint metallic areas using Two Thin Coats’ Plate Armour and Dragon’s Gold.Thin these slightly for better flow and coverage. Red Details:Use Nocturnal Red and Scarlet Blood for red areas, like the gun.Mix them for a base layer, then use Scarlet Blood mixed with a bit of white for highlights. Adding Depth:Use Vallejo Black for shading and defining darker areas. Highlighting Armour:Create three mixes on your palette: pure Angel Green, a 50:50 mix of Angel Green and Toxic Yellow, and a majority Toxic Yellow with a small amount of Angel Green.Apply these mixes progressively, starting with the darkest and moving to the lightest for highlights. Use a brush control technique similar to edge highlighting. Contrast and Washes:Apply Darkoath Flesh (Contrast) selectively, followed by Contrast Medium for dilution in specific areas.Use Nuln Oil for metallic parts to create depth. Detailing Metallics:Add highlights to metallic areas using a mix of Plate Armour and white. Eyes and Lenses:Paint eyes with a base of Nocturnal Red, adding highlights with a mix of Scarlet Blood and white.Use a small white dot for reflection. For lenses, use Turquoise mixed with Charcoal, then highlight with Aquamarine and pure white. Final Touches:Add fine scratches and details using lighter shades of the base colours.For the belt, use Grunge Brown base and Orange Fire for highlights. Basing:Apply PVA glue and sand.Once dry, wash with Agrax Earthshade and apply weathering powder. More Free Video Tutorials Free videos for logged in members – just sign up as a ‘friend’ to view and click any of the thumbs.To explore all of these, visit this page! If you don’t have an account, please sign up here! The website currently has over 350 video tutorials, plus step by step guides and PDFs. You can explore more free videos with a free “freebies” membership, or take the plunge and become a full subscriber for full access. If you’d prefer to support me on Patreon, please visit: https://www.patreon.com/RichardGray [...]
In this guide you will be shown how to paint Imperial Fists with Heavy Bolters without the need for an Airbrush or Oil Paints! Video – How to Paint Imperial Fists with Heavy Bolters Paints and Materials Used Games Workshop: Mournfang Brown, Zamesi Desert, Yriel Yellow, Mephiston Red, Wild Rider Red, Sotek Green, Forge World Weathering Powder Dark Sand, Darkoath Flesh (Contrast), Contrast Medium Vallejo: German Grey, Neutral Grey, Black Vallejo: Mecha Varnish Gloss, Mecha Varnish Matt, Metal Exhaust Manifold P3: Morrow White (Any White will do) Micro Set Step by Step Guide on How to Paint Imperial Fists with Heavy Bolters Preparing the Base Begin by applying Mournfang Brown, heavily watered down with a ratio of about two or three parts water to one part paint. Patience is key here; you’ll need to apply multiple coats. Ensure each layer is thin to avoid a bumpy finish. This step is time-consuming compared to airbrushing but results in a more weathered, textured look. Applying the Base Yellow Next, use Zamesi Desert for the base yellow. Don’t be alarmed if it appears desaturated and pale; this is merely the foundation for a cleaner yellow. This stage might require up to four coats due to the paint being heavily watered down. Though initially patchy, the paint evens out as it dries. Highlighting with Yriel Yellow Once the base layers are dry, start highlighting with Yriel Yellow. Focus on areas where light naturally falls, like the chest, head, and forward-facing elements of the armour. The contrast created by less yellow paint in shadowed areas will add depth and make the highlighted sections pop. Detailing the Black Elements For the black elements, like the gun and eyes, Vallejo Black is a suitable choice. Paint a black stripe on the head to denote a heavy weapon marine. Keep in mind, sergeants may have different helmet colours, but for practicality and ease, you can rely on the red plume to indicate the sergeant’s status. Metallic Trims The metallic trims, especially on Mark III shoulder pads, add considerable painting time. Use Vallejo Metal Colour Exhaust Manifold for these areas. Pay special attention to highlighting as it requires neat painting around the trim, increasing time spent on each marine. Applying Decals After painting the trims, apply a layer of Vallejo Mecha Gloss Varnish to the shoulder pads for a smooth surface. This helps in applying decals neatly. Use Micro Set for decal application. Ensure to add another layer of gloss varnish after the decals to blend them seamlessly with the surface. Creating Shadows and Depth For creating shadows and depth, use Darkoath Flesh contrast paint mixed with Contrast Medium. Apply it quickly and efficiently as it dries faster than oils. Focus on the brighter areas and remove any excess to avoid losing detail in crevices. Final Yellow Glazing Post the contrast application and a layer of matte varnish, begin the final yellow glazing. Use the thinned down Yriel Yellow, focusing on the model’s focal points. The matte varnish’s texture aids in a smoother application of this glaze, highlighting the model’s prominent features. Heavy Bolter Detailing For the heavy bolter, start with German Grey and gradually transition to Neutral Grey. The paint should be thinned down for smoother blending. Focus on the upward-facing surfaces and sides for a realistic effect. Highlight edges with pure Neutral Grey for a more three-dimensional look. Plume and Eye Details The plume is initially painted with Mephiston Red, followed by highlights using Wild Rider Red. For the eyes, start with Sotek Green, adding P3 Morrow White for subsequent highlights. Ensure the brightest part of the eye is off-centre for a more natural look. Chipping and Weathering Use Rhinox Hide for chipping effects, focusing on edges and high-wear areas. Highlight the lower edges of these chips with a mix of Yriel Yellow and Morrow White for a realistic worn look. For the metal parts, return to Exhaust Manifold for highlights, focusing on areas where light naturally hits. Final Touches with Weathering Powder Finish off with Forge World Weathering Powder Dark Sand, particularly on the lower parts of the armour and base. This adds a realistic, battle-worn effect. Seal with a matte varnish to fix the powder in place. More Free Video Tutorials Free videos for logged in members – just sign up as a ‘friend’ to view and click any of the thumbs.To explore all of these, visit this page! If you don’t have an account, please sign up here! The website currently has over 350 video tutorials, plus step by step guides and PDFs. You can explore more free videos with a free membership, or take the plunge and become a full subscriber for full access. If you’d prefer to support me on Patreon, please visit: https://www.patreon.com/RichardGray [...]
In this guide you will be shown how to paint a Plastic Contemptor Dreadnought in Imperial First colours from the new Horus Heresy boxed game. Many of you were asking for help painting a model in this style without using an airbrush or oils – so here he is! Video: How to Paint a Plastic Contemptor Dreadnought All videos are recorded in HD 1080p or higher – use full screen for the full effect and let the video load completely. You can also click the little “cog” and change the speed of the video, if I am going too fast (or slow!). The following paints were used: Games Workshop: Mournfang Brown, Yriel Yellow, Darkoath Flesh (Contrast), Contrast Medium, Sotek Green, Forge World Weathering Powder Dark Sand. Vallejo: Black, Mecha Varnish Gloss, Mecha Varnish Matt, Metal Colour Burnt Iron P3: Morrow White (Any White will do) Step by Step Guide: How to Paint a Plastic Contemptor Dreadnought Initial Preparation Begin with assembling the Plastic Contemptor Dreadnought. Keep arms and backpack separate for easier painting. Prime your Plastic Contemptor Dreadnought in black to set the stage for the upcoming colours. Base Coating with Mournfang Brown Start with Mournfang Brown, heavily diluted with water for a translucent effect. Using a large brush, apply the paint in a stippling motion. This technique creates a mottled, weathered look on the model. Multiple thin coats are needed, around three or four, to achieve the desired coverage. Creating Highlights Mix P3 Morrow White (or any available white paint) with Mournfang Brown. This mixture is used for creating highlights on the model. Apply with a smaller dry brush for more controlled and precise placement of highlights, especially on areas like the chest and upper stomach. Adding Layers and Textures Progress with the painting by layering and texturing the model. Focus on building up colours gradually. Use the stippling method to apply these layers, which enhances the weathered and battle-worn appearance. Incorporating Uriel Yellow Uriel Yellow, diluted in a similar fashion to Mournfang Brown, is used next. It’s important to keep the brush damp, not wet, to avoid the paint running. Apply in a dabbing motion, focusing on areas where light naturally falls. This stage is crucial for developing the yellow hue characteristic of the Imperial Fist. Glazing and Fine Details Move to glazing layers using Uriel Yellow. This involves a thinner consistency and focuses on the model’s focal points like the head and chest. Pay attention to edges and hard lines, using a fine brush for precise application. Weathering and Final Touches For weathering effects, employ Rhinox Hide for chipping and damage marks. Apply these strategically across the model to create a realistic battle-damaged effect. Focus on edges and areas likely to receive wear. Enhancing Eyes and Metal Details Sotek Green is used for the eyes, creating a layered effect with a transition from green-blue to pure white. For metal parts, use Vallejo Metal Color Exhaust Manifold and Copper, applying carefully due to their fluid nature. Applying Transfers and Final Varnishing After applying decals or transfers, coat them with gloss varnish to blend them seamlessly into the model. Use Micro Set for applying and setting the transfers. Base Details Finish by creating a cohesive base using Forge World Weathering Powder Dark Sand. Apply multiple layers, interspersed with matte varnish, to build up a textured, grimy effect that complements your Contemptor Dreadnought Show it off! As you progress, feel free to adapt and tweak techniques to suit your style. Good luck! When you’ve finished, why not pop into our Discord and show it off to other website members? 🙂 More Free Video Tutorials Free videos for logged in members – just sign up as a ‘friend’ to view and click any of the thumbs.To explore all of these, visit this page! If you don’t have an account, please sign up here! The website currently has over 350 video tutorials, plus step by step guides and PDFs. You can explore more free videos with a free “freebies” membership, or take the plunge and become a full subscriber for full access. If you’d prefer to support me on Patreon, please visit: https://www.patreon.com/RichardGray [...]
In this guide you will be shown how to paint Rogal Dorn’s armour in NMM (non-metallic metal) gold. This is a higher level technique, suitable for the mighty Primarch of the Imperial Fists! (make sure you are logged in to view!) All videos are recorded in HD 1080p or higher – use full screen for the full effect and let the video load completely. You can also click the little “cog” and change the speed of the video, if I am going too fast (or slow!). Paints and Materials Games Workshop: Rhinox Hide, Mournfang Brown, XV-88, Balor BrownP3: Morrow White (Any White will do) BrushesArtis Opus: Series S size 1 and 00, Small Drybrush Priming Prime the model black for a deep shadow base. Over the primer, airbrush or brush on Mournfang Brown thinly. Base Highlights Use XV-88 to mark where light naturally reflects on the armor. Focus on large shapes and avoid intricate details at this stage. Layering Gradually build up lighter tones, moving from Rhinox Hide to Balor Brown. This step creates a depth and transition in the gold effect. Bright Highlights Mix small amounts of Morrow White into Balor Brown. Apply this mix to areas where light hits strongest like the shoulders and helmet. Smoothing Transitions Use glazing techniques to blend the transitions smoothly. Aim for a gradient effect from dark to light tones. Deepening Shadows Apply darker tones like Rhinox Hide in recessed areas for depth. Contrast between shadows and highlights enhances the metallic look. Final Touches Add nearly pure white highlights at the highest points of light reflection. These should be minimal but bright for impact. Refinement Revisit the model to tighten any details and ensure uniformity. A matte varnish can be used at the end to protect the paintwork and unify the sheen. More Free Video Tutorials Free videos for logged in members – just sign up as a ‘friend’ to view and click any of the thumbs.To explore all of these, visit this page! If you don’t have an account, please sign up here! The website currently has over 350 video tutorials, plus step by step guides and PDFs. You can explore more free videos with a free membership, or take the plunge and become a full subscriber for full access. If you’d prefer to support me on Patreon, please visit: https://www.patreon.com/RichardGray [...]

If you don’t have an account here on my website, please sign up here! I have over 350 video tutorials with steps and tips, plus a selection of PDFs. If you are not sure about joining, you can explore my free videos with a free membership, or take the plunge and become a full subscriber for full access.

warhammer painting tutorials
free warhammer painting tutorials

If you’d prefer to support me on Patreon, please visit: https://www.patreon.com/RichardGray