


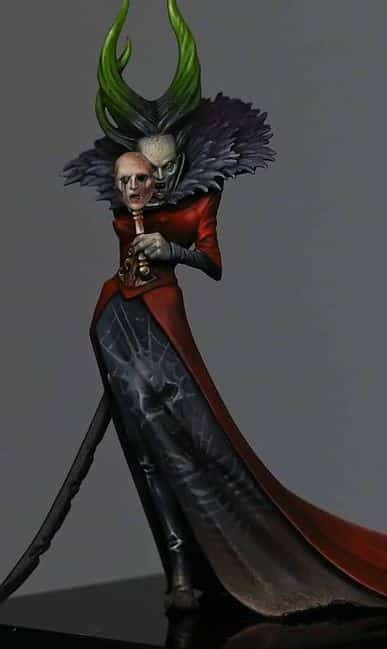
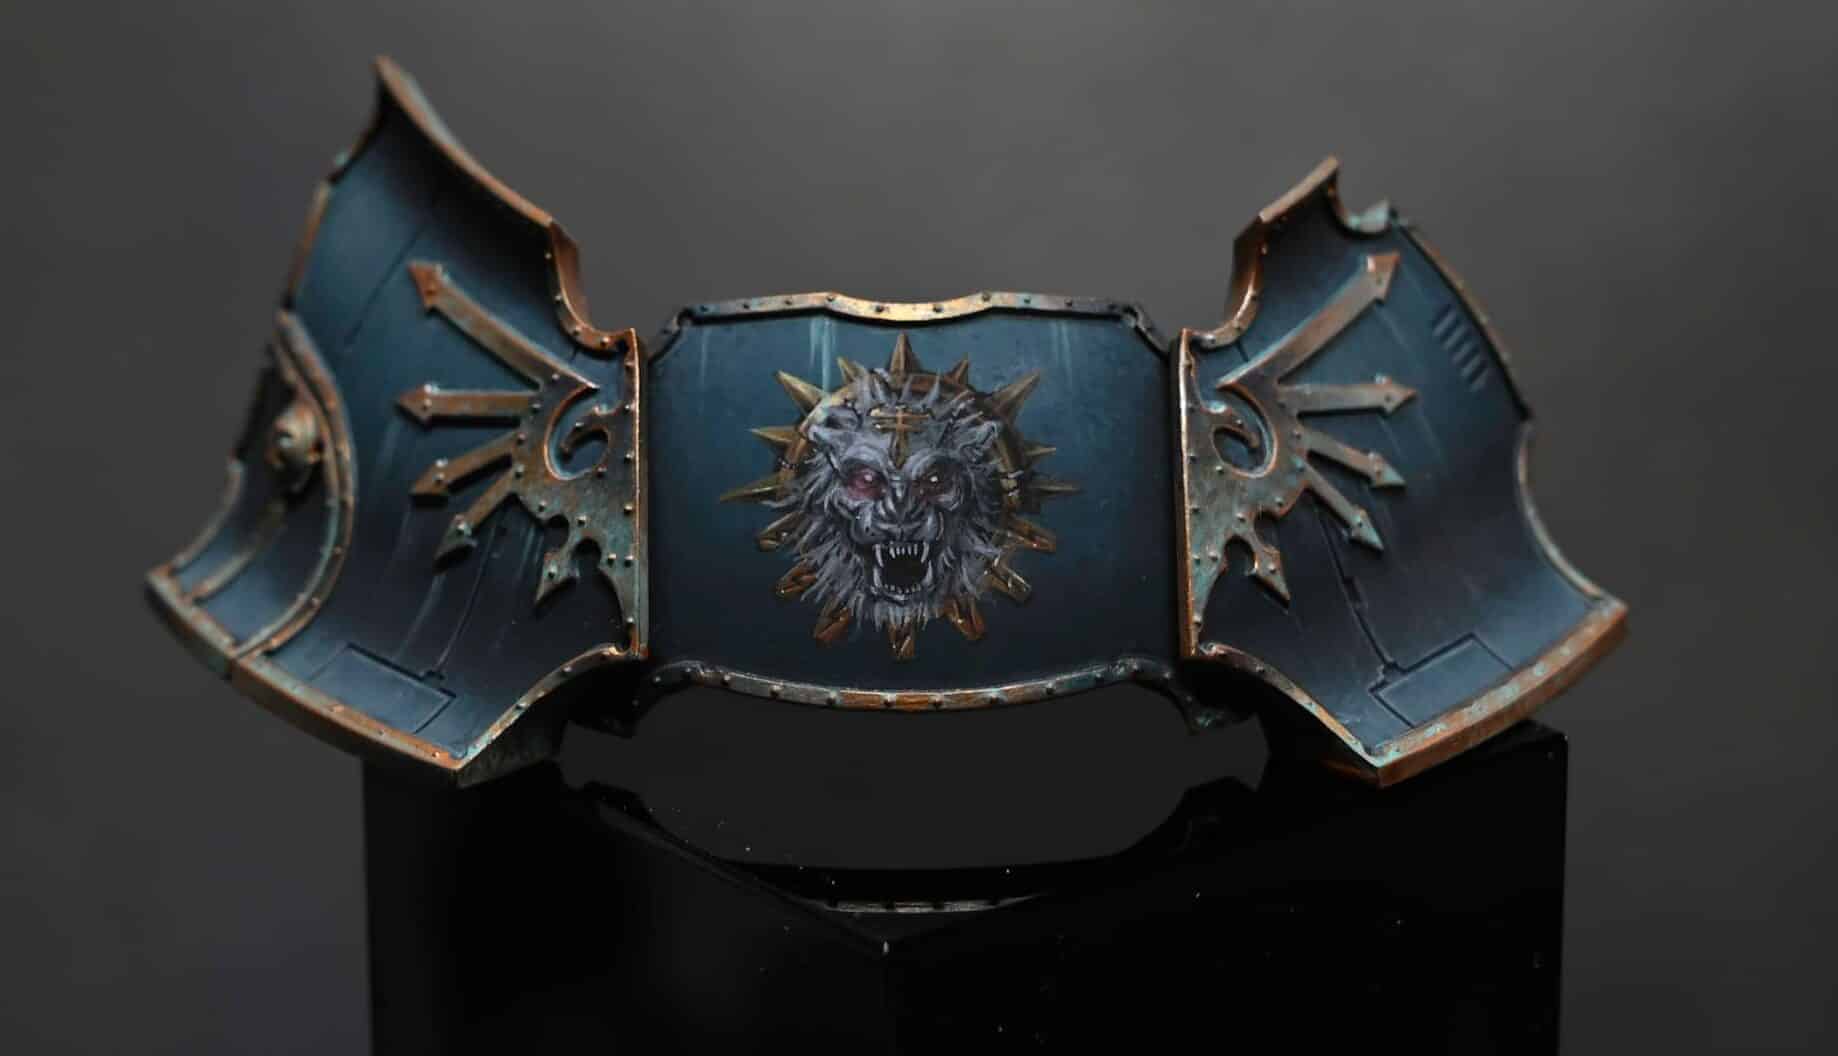
A selection of tutorials on how to paint Master Lazarus’ Cloak. In these we explore simple freehand with bold, clean lines, then move onto the more complex custom Dark Angel symbol on the rear of Master Lazarus of the Dark Angels.
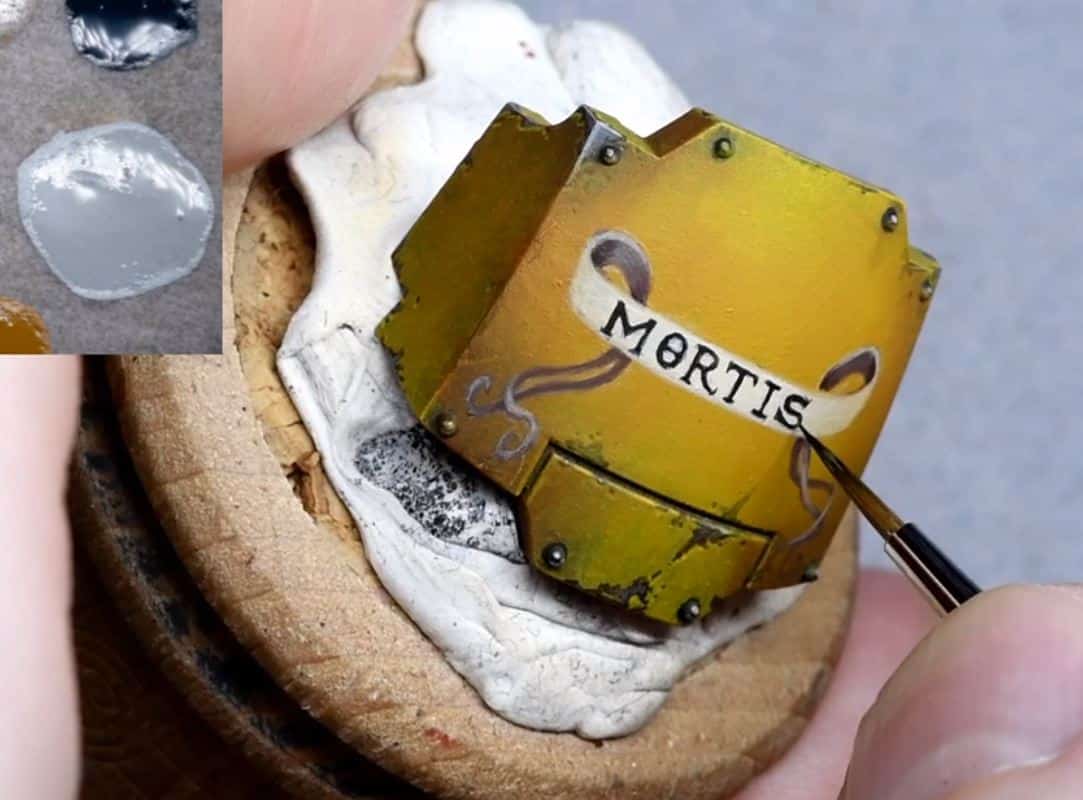
Video: Simple Freehand Cloak – Front
This video shows how to paint the simple Dark Angel freehand symbol on the inside of the cloak of Master Lazarus
The following paints were used:
Games Workshop: Mephiston Red
Vallejo: Ice Yellow, Neutral Grey, Pale Grey Blue
Step-by-Step – How to paint the cloak of Master Lazarus of the Dark Angels
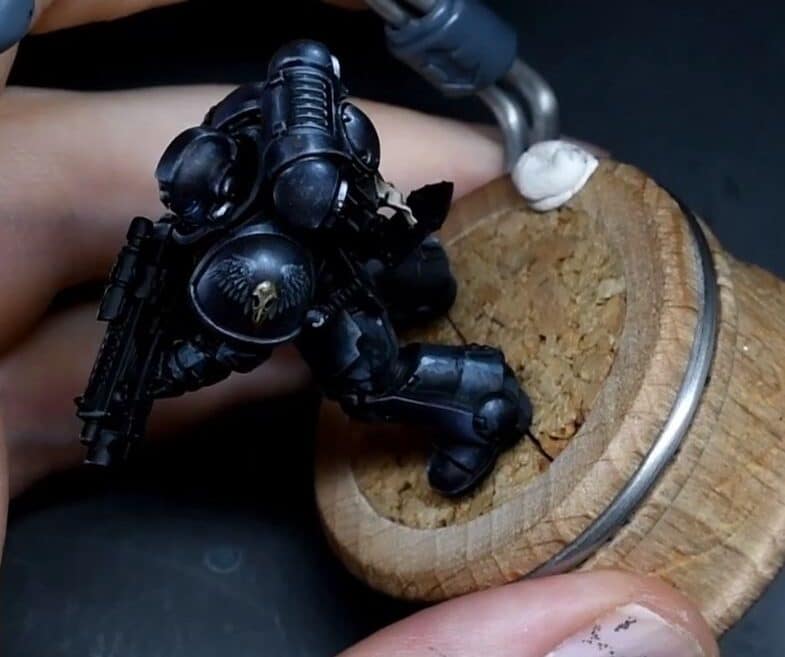
Step 1: Preparation
Ensure that you have already glued the cloak onto the model.
Have Mephiston Red paint ready for the freehand work.
Make sure you’ve applied texture work to the cloak before starting the freehand.
Step 2: Starting the Freehand
Begin with a drag motion using Mephiston Red along the edge of the cloak. This will be your first guideline.
Maintain consistent pressure while painting to ensure an even line.
Step 3: Lower Edge
Repeat the process for the lower edge.
Step 4: Creating Simple Shapes
Paint a line equidistant from horizontal and vertical lines, forming the basis for the sword part of the wing.
Be cautious with thickness and avoid making it too thick.
Step 5: Painting Wings
Paint the wings by going straight up towards the guideline, making your life easier.
Focus on leaving space at the top for the hilt of the sword.
Feel free to paint curves for feathers, keeping in mind the hilt’s space.
Step 6: Painting the Hilt
Paint a line straight across for the hilt, extending it to touch the wings.
Use neutral gray and pale gray blue to define the diamond shapes on the hilt.
Cut into the edges with the appropriate gray colours to make it sharp.
Step 7: Adding Details to Feathers
Use neutral gray and pale gray blue to define individual feathers on the wing.
Make them as sharp as possible, and don’t worry if they look slightly patchy.
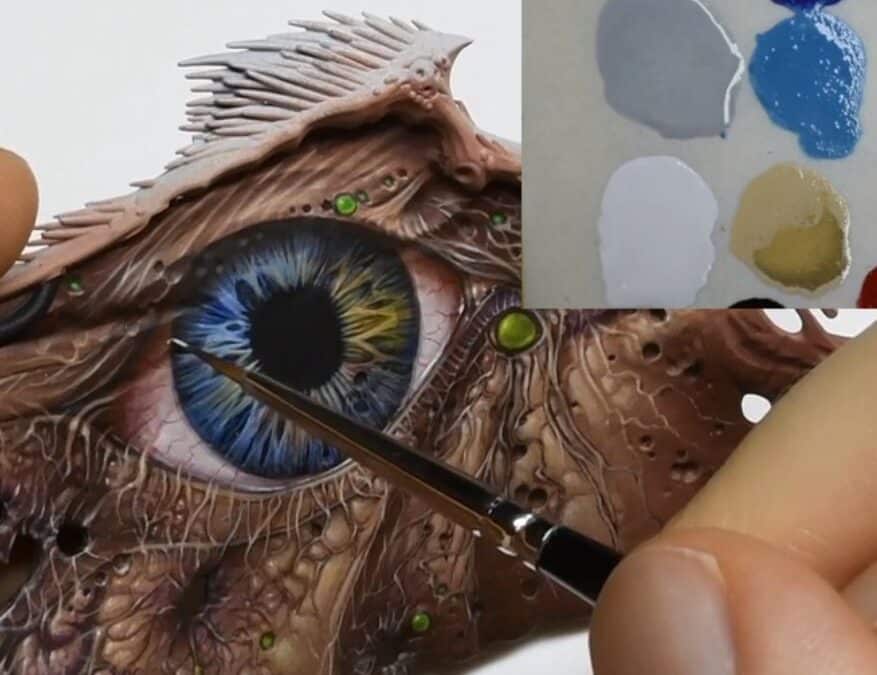
Step 8: Adding Lighting Effects
Mix ice yellow with the base colour to create a gradient for the highlights.
Paint a gradient up towards the lightest part on the cloak, following the natural flow of light.
Ensure neat painting, using the tip of the brush and bracing your arms for stability.
Step 9: Final Touch
Optionally, add a touch of ice yellow to the line underneath the hand for a subtle transition.
Soften the contrast and make the lighting more cohesive with the overall model.
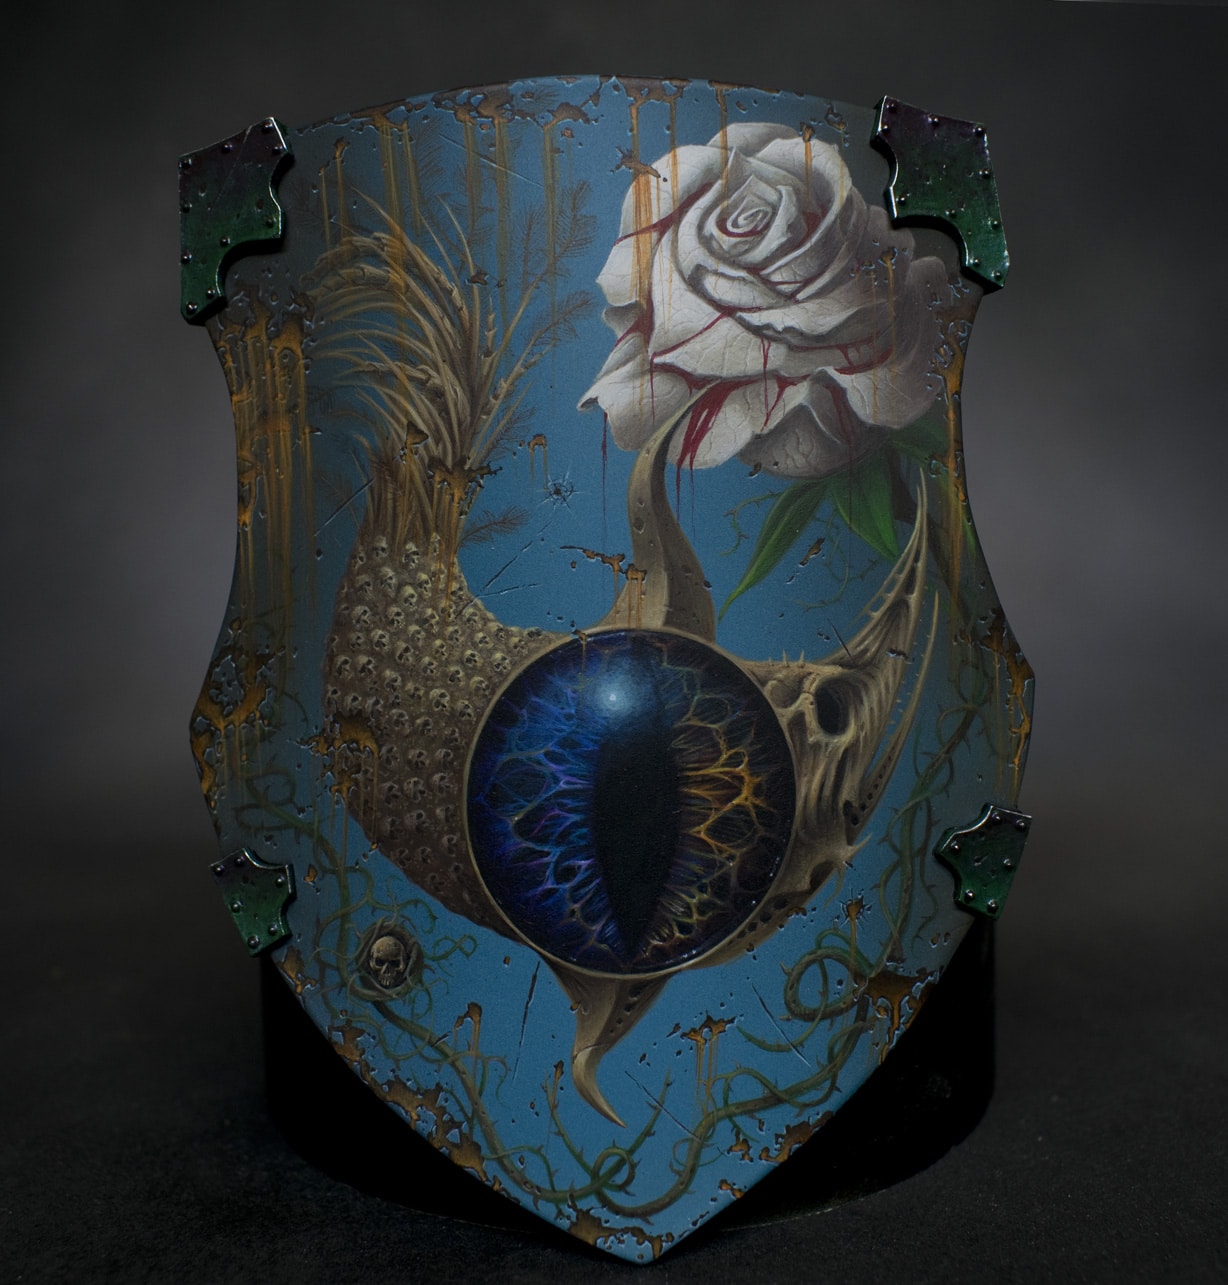
Video: Complex Cloak – Back Freehand Part One
This video shows the difficulty of painting a design for the cloak of Master Lazarus and how to paint the freehand.
The following paints were used:
Vallejo: Black, Pale Grey Blue, Dark Blue Pale, Dark Grey, Black
P3: Morrow White
Step-by-Step – How to paint the cloak of Master Lazarus of the Dark Angels
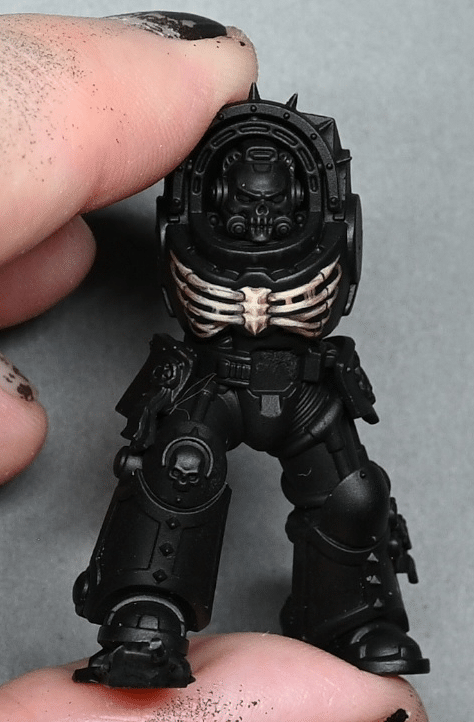
Step 1: Prepare the Base
Make sure your model has been previously stippled and glazed, creating a smooth surface for the freehand work.
If needed, adjust the base colours by adding white and gray-blue to achieve a smoother finish.
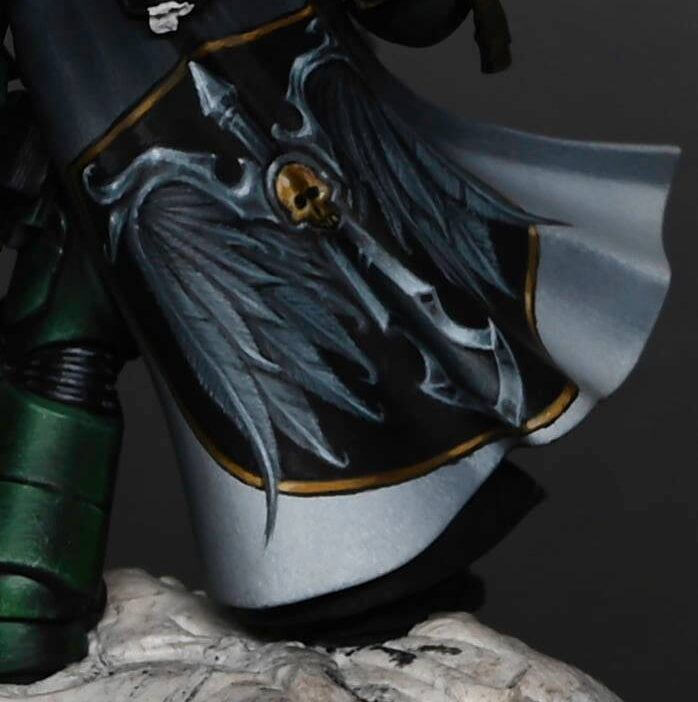
Step 2: Outline the Design
Begin by using Vallejo model colour black to outline the freehand design on the rear of Master Lazarus’s cloak.
Take note of any folds or challenges in the cloak’s sculpt, as these may impact the symmetry and centralization of the design.
Step 3: Adjust Placement
Address any issues with the cloak’s fold or bias to one side by adjusting the placement of the design.
Consider the visibility of the main focal points, such as a sword, and ensure they are not hidden within creases.
Step 4: Start the Freehand Work
Use black as a base colour for the freehand work, focusing on creating the overall shapes and outlines of the design.
The black background allows for easier corrections, but the details should be lighter than black to ensure visibility.
Step 5: Refine the Design
Refine the shapes and details by using a 50/50 mix of dark blue pale and dark gray.
Take your time with the refining stage, using the tip of the brush to add intricate details to feathers and other elements.
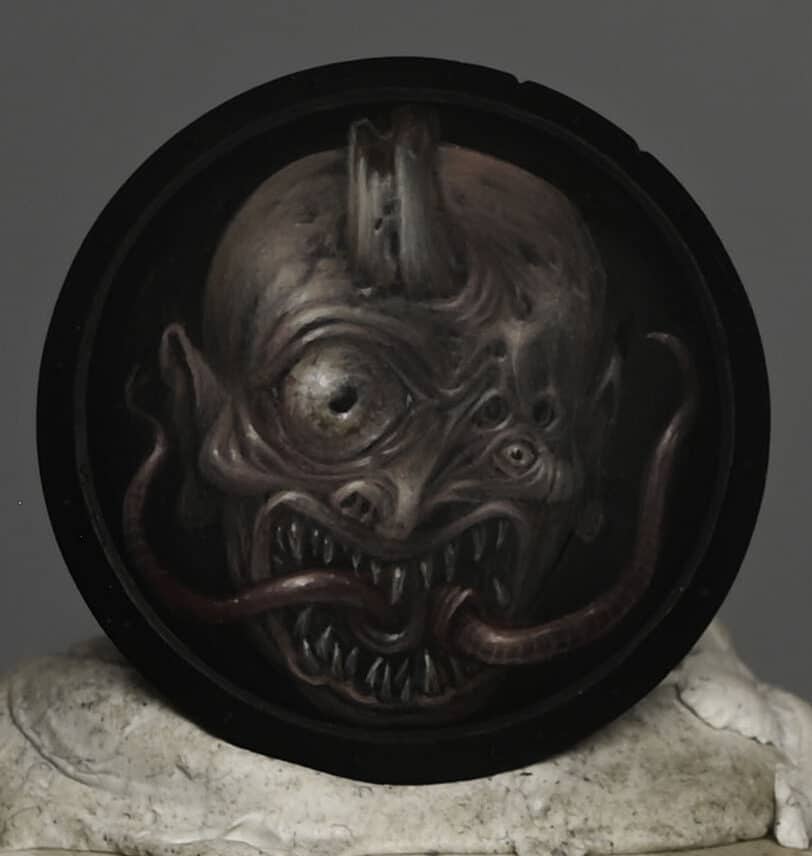
Step 6: Add Organic Details
Introduce organic details, such as veins in the feathers, to make the freehand design look more natural.
Make small tweaks to enhance the overall appearance, ensuring the design is visually appealing.
Step 7: Focus on Feather Highlights
Highlight the feathers using a 50/50 mix of dark blue pale and dark gray, focusing on the tips and edges.
Avoid making the edge highlights too obvious, maintaining the illusion of feathers.
Step 8: Work on Sword Hilt
Move on to the detailed and complex freehand on the hilt of the sword, planning for a non-metallic effect.
Use various shades, starting with dark blue pale and gradually adding pale gray blue for highlights.
Step 9: Create Texture and Highlights
Build texture by creating small marks and bumps on the hilt, paying attention to the shapes and transitions.
Add dots with white on the brightest parts to enhance contrast and create a more dynamic effect.
Step 10: Final Touches
Make final adjustments as needed, ensuring that the freehand complements the overall model without overshadowing it.
Take breaks when necessary to maintain focus and avoid painting when fatigued.
Note: Keep an eye on the wet palette, especially in warmer conditions, to prevent paint from thickening and affecting the painting process.
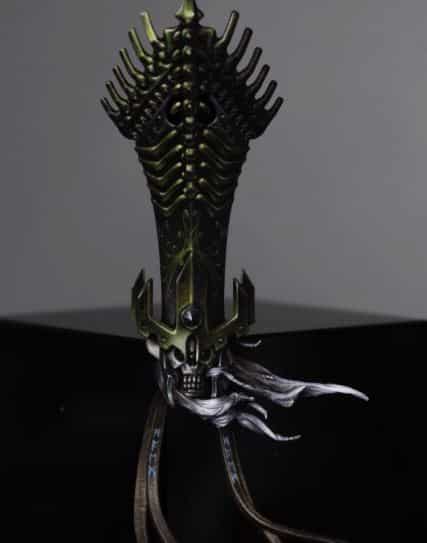
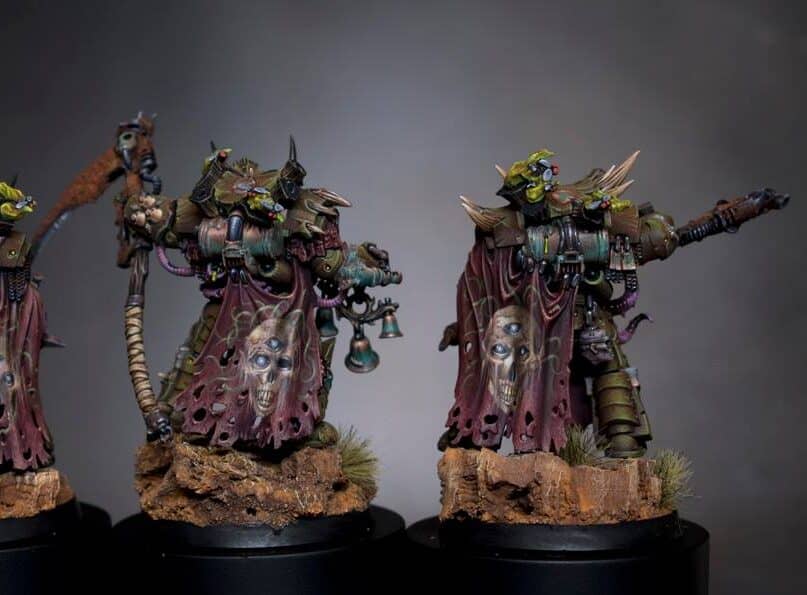
Video: Complex Cloak – Back Freehand Part Two
This video is part 2 for how to paint the custom Dark Angel symbol on the rear of Master Lazarus of the Dark Angels.
The following paints were used:
Vallejo: Dark Grey, Blue Grey Pale, Pale Grey Blue, Heavy Goldbrown, Ice Yellow, English Uniform, Black
Games Workshop: Mournfang Brown
P3: Morrow White
Step-by-Step – How to paint freehand on Master Lazarus of the Dark Angels
Step 1: Preparation
Ensure you have the necessary paints ready: Dark Grey, Blue Grey Pale, Pale Grey Blue, Heavy Goldbrown, Nuln Oil, Pale Grey Blue, P3 Morrow White, and a 50/50 mix of Heavy Gold Brown and Ice Yellow.
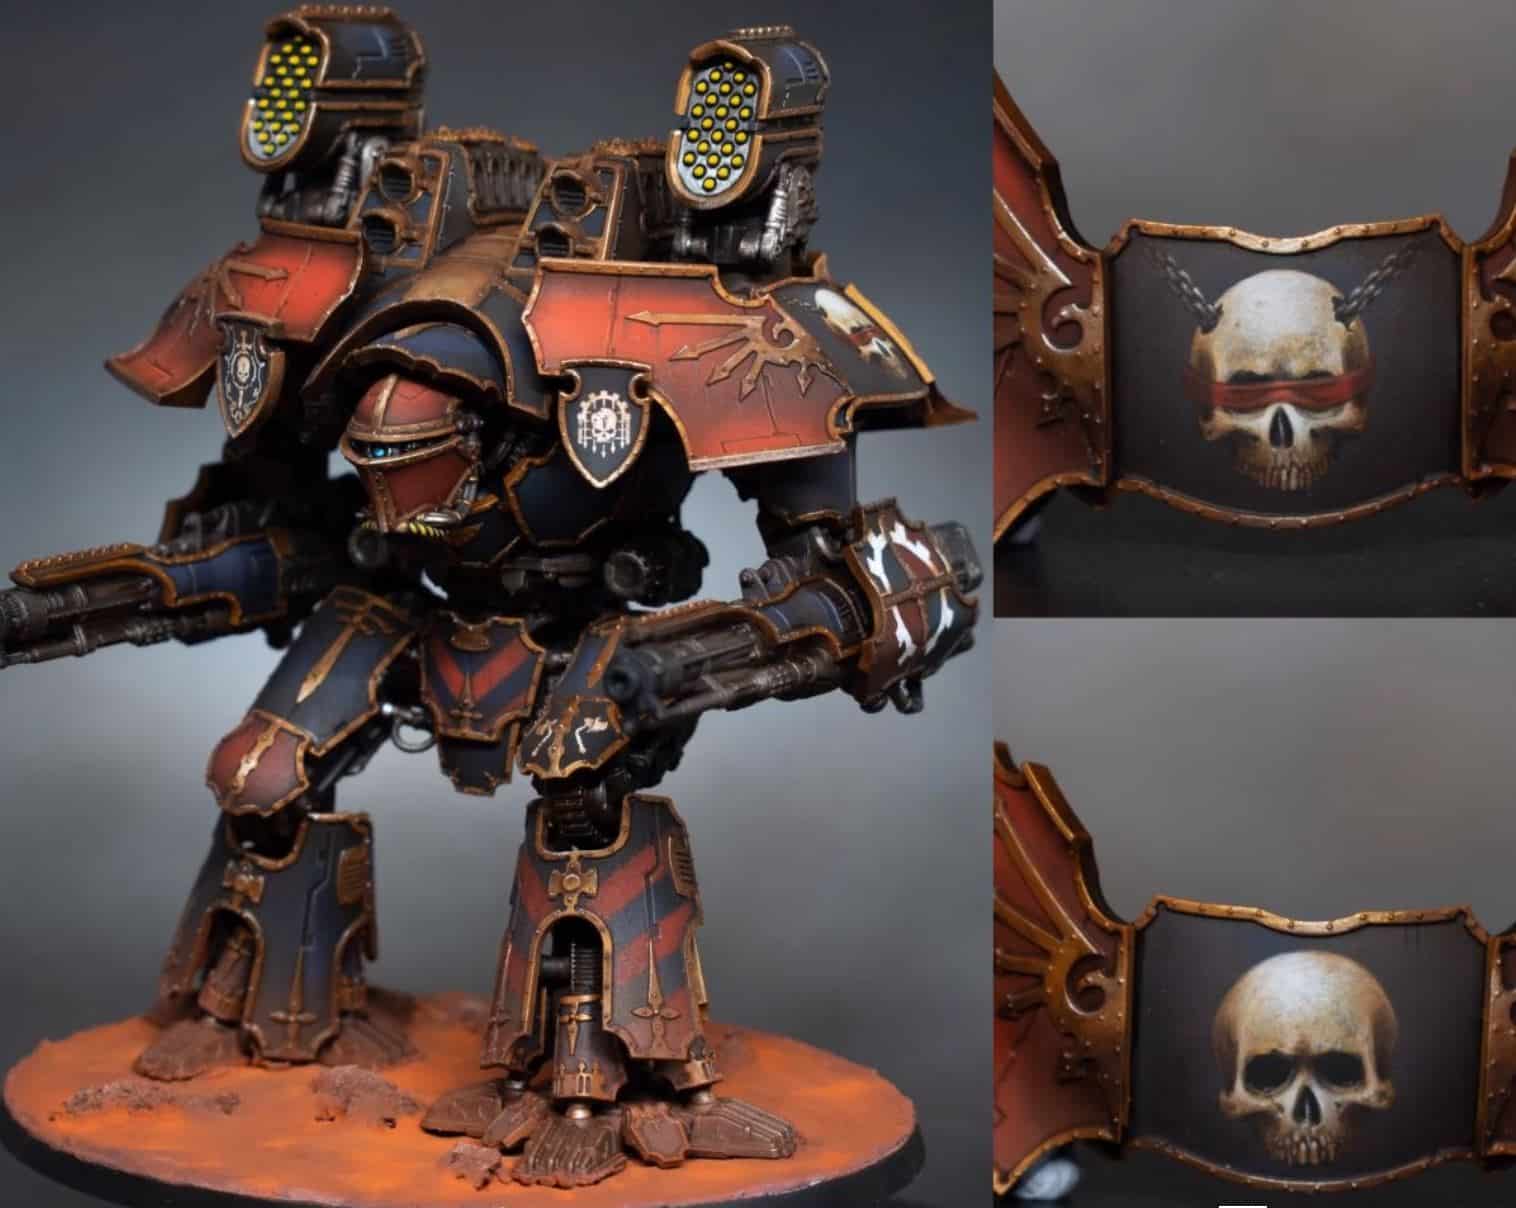
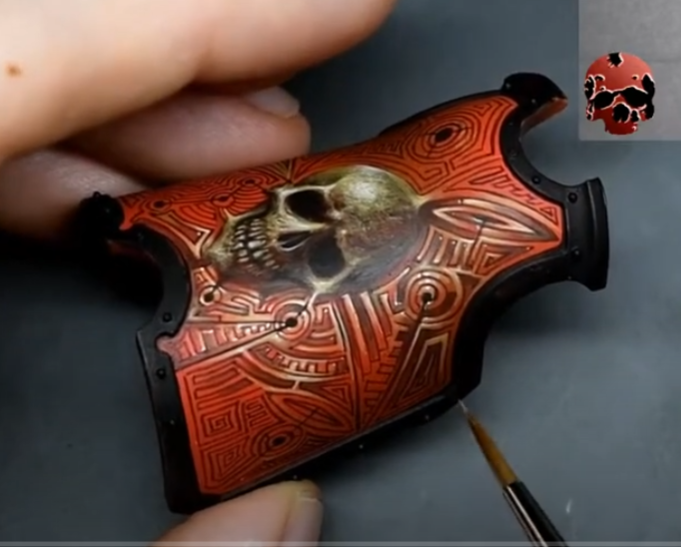
Step 3: Start with Skull and Circle
Use English Uniform to roughly block in the skull and circle in the center of the cloak.
Use Nuln Oil to define eye sockets and nose hole.
Cut into shapes with black paint to refine details.
Step 4: Gold Non-Metallic Skull
Highlight skull with a mix of Heavy Goldbrown and Ice Yellow.
Emphasize high contrast, especially on the forehead for a non-metallic look.
Step 5: Detailing the Blade
Paint the blade using Blue, Blue Grey Pale, a 50/50 mix of Dark Gray and Pale Blue, and Pale Gray Blue.
Consider the highlights on the blade separately to ensure clarity.
Step 6: Refining the Design
Cut back into the design with fluid black paint for sharper edges and finer highlights.
Emphasize the central section of the blade, adjusting highlights accordingly.
Add random highlights with Blue Grey Pale to enhance the non-metallic look.
Step 7: Wings and Trim
Paint the second wing with slight variations, maintaining an organic feel.
Cut into black edges for sharpness, especially at the bottom of the cloak.
Highlight the gold trim, aligning it with the natural highlights on the cloak.
Step 8: Final Touches
Check for any faults or blobs and address them.
Avoid making highlights too bright, maintaining a realistic feel.
Consider adding small details for visual interest without overshadowing the main design.
All videos are recorded in HD 1080p or higher – use full screen for the full effect and let the video load completely.
More Freehand tips:


Videos Not Showing?
To view any of my paid tutorials, you need to be a member of the website – please click below to log in or join the site.


Not sure about joining just yet? Check out my Youtube for all my free tutorials or sign up as a free “friend” member on this site and visit the Freebies video page!
If you’d prefer to support me on Patreon, please visit: https://www.patreon.com/RichardGray