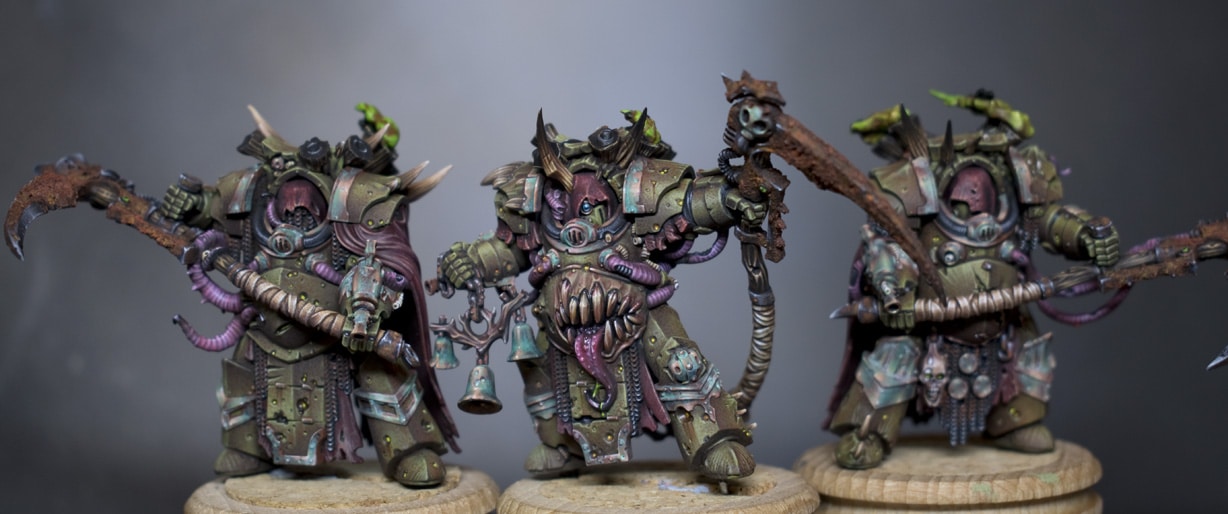
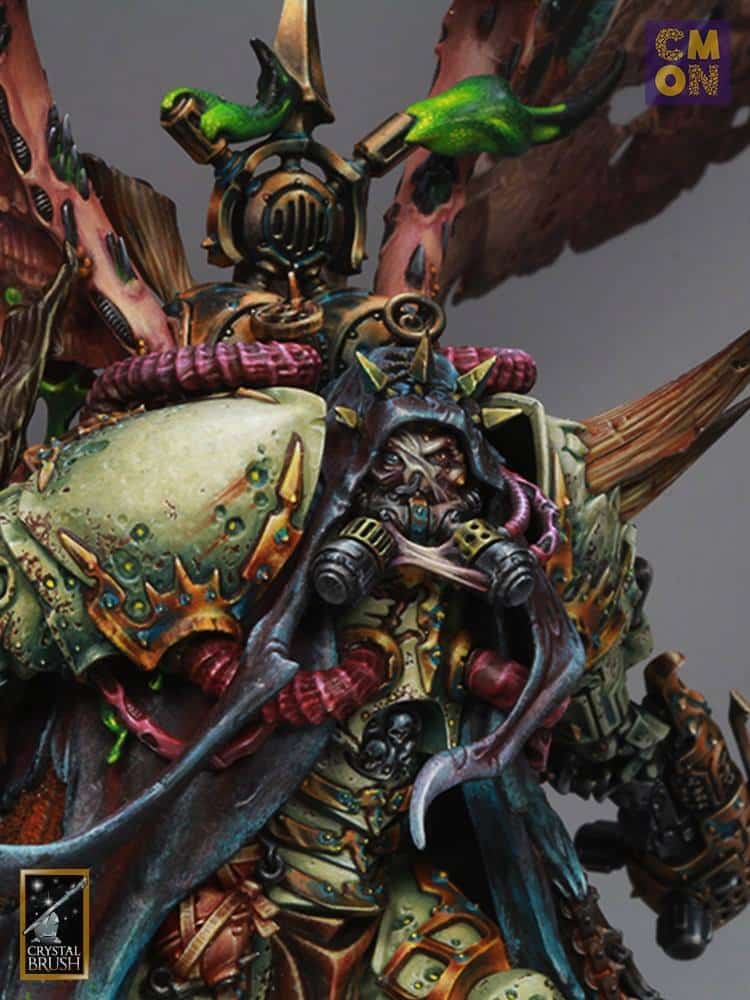
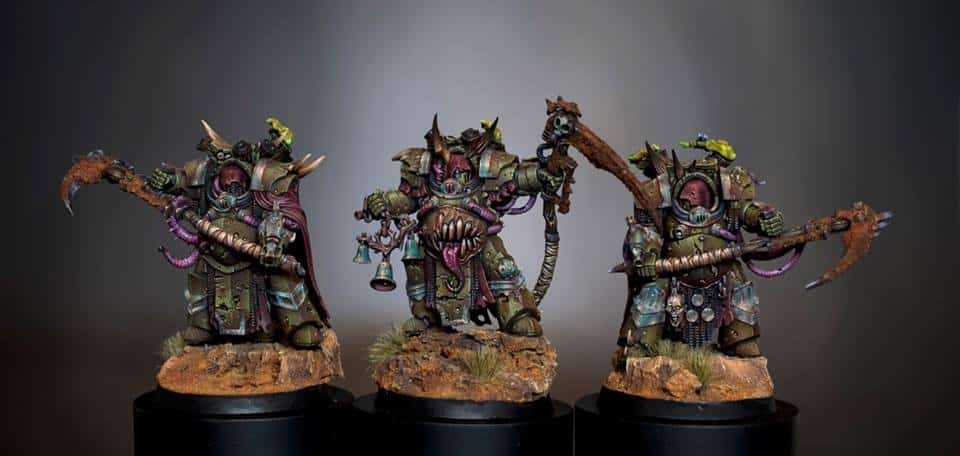
Learn how to paint a Great Unclean One in this selection of videos, with tips on his hood, skin, belly mouth, staff, horns and friendly little nurgling! My apologies for quality, this was one of my very first sets of video tutorials, way back in 2018!
Scroll down to explore these in order, or use the contents below to jump quickly to a section of the model or technique.
Video: Great Unclean One HoodMaterials NeededStep-by-Step Guide to the Great Unclean One HoodStep 1: PrimingStep 2: Base Colour ApplicationStep 3: Creating and Applying the Mid-ToneStep 4: Detailing and Texture EnhancementStep 5: Final HighlightsStep 6: Glazing for DepthStep 7: Touch-ups and Final AdjustmentsVideo: Great Unclean One Belly MouthMaterials Required:Step-by-Step Guide to the Belly MouthStep 1: Base ColouringStep 2: Painting the TeethStep 3: Shading and Texturing the GumsStep 4: Glazing for Colour DepthStep 5: Applying Blood for the Blood GodFinal TouchesVideo: Great Unclean One SkinPaints Needed:Step-by-Step Guide to the SkinBase Colouring and Initial Blending:Refinement and Detailing:Adding Texture with Dots:Finishing Touches:Video: Great Unclean One HornsMaterials:Step-by-Step Guide to the HornsBase Coating and Initial Blending:Refining the Gradient:Adding the Green Tint:Final Touches:Video: Great Unclean One (Rotigus) StaffMaterials Needed:Step-by-Step Guide to the StaffBase CoatingInitial Colour ApplicationTransition and BlendingDetailingFinishing TouchesConclusion and ProtectionVideo: Great Unclean One NurglingPaints and Materials UsedStep-by-Step Guide on the NurglingMore Nurgle Tutorials
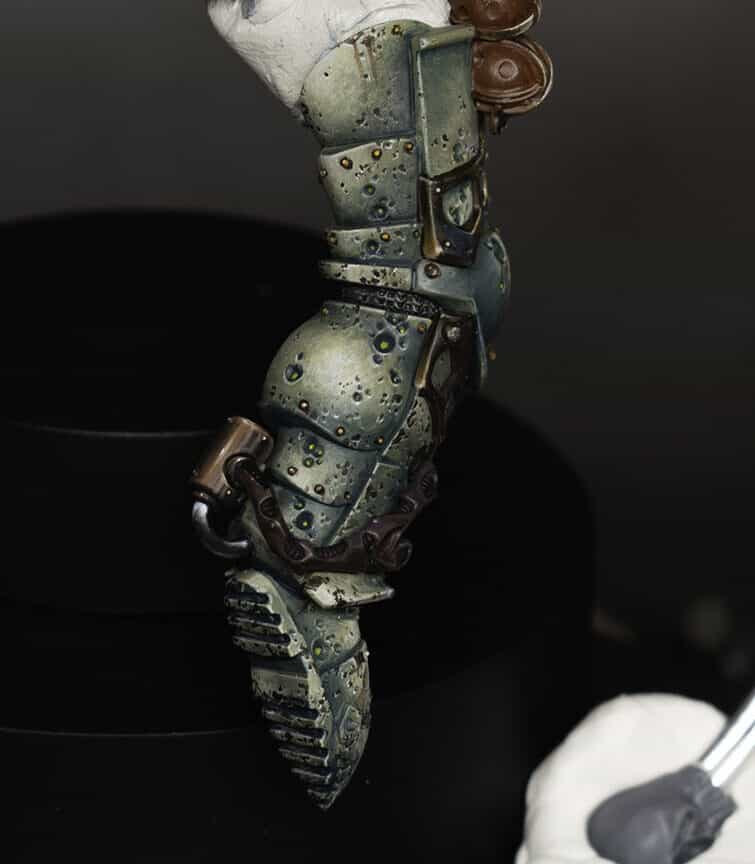
Video: Great Unclean One Hood
The process of painting the black hood of a Great Unclean One, focusing on achieving a textured, worn look that stands out on a larger model.
Materials Needed
A fine detail paintbrush, preferably a standard size over a miniature brush for better control.
Black primer (P3 or Games Workshop Black recommended).
Paints: Skavenblight Dinge, Celestra Grey (Games Workshop); Ice Yellow (Vallejo); Black Leather (Scale 75); Mournfang Brown (Games Workshop).
Water for thinning paints and creating glazes.
A palette for mixing paints.
Step-by-Step Guide to the Great Unclean One Hood
Step 1: Priming
Ensure your model is primed in black. This serves as the base colour and will help in creating deep shadows under the subsequent layers.
Step 2: Base Colour Application
Apply Black Leather from Scale 75 over the hood, leaving some of the black primer visible in the deepest recesses. This step is done roughly to start building the texture we desire. The black primer peeking through will add natural shadows to the texture.
Step 3: Creating and Applying the Mid-Tone
Mix Skavenblight Dinge and Ice Yellow (Vallejo) to create a warm, mid-grey tone. Without cleaning your brush from the Black Leather application, apply this mix over the hood. The residual Black Leather on the brush will mix with your mid-tone directly on the model, enhancing the textured effect. This mix should be applied more liberally on the areas that would naturally catch more light, such as the top and folds of the hood.
Step 4: Detailing and Texture Enhancement
Using the mid-tone mix, start adding more defined textures and highlights. Focus on the edges and any raised details to make them stand out. This includes the edges of tears and holes in the hood. Apply your paint with deliberate, rough strokes to mimic the look of worn leather. The paint should be thicker to avoid smoothing out the texture.
Step 5: Final Highlights
Use Celestra Grey to apply the final highlights. Focus on the very edges and peaks where light would hit the strongest. Remember, this paint has a matte finish, which contrasts nicely with the previously applied colours, adding to the worn fabric effect.
Step 6: Glazing for Depth
Create a glaze with Mournfang Brown and a touch of black (either P3 or Games Workshop). Thin these paints down significantly with water on a separate palette. Apply this glaze sparingly to the shadows and recesses to add depth and enhance the dirty, worn look. The glaze will subtly tint the underlying colours, marrying them together while adding a slight sheen in places to mimic the varied textures of aged fabric.
Step 7: Touch-ups and Final Adjustments
After glazing, you may find some highlights have dulled. Reapply Celestra Grey sparingly to the most prominent edges and details to bring back the contrast. This step should make sure you maintain the balance between detailed texture and the overall worn look of the hood.
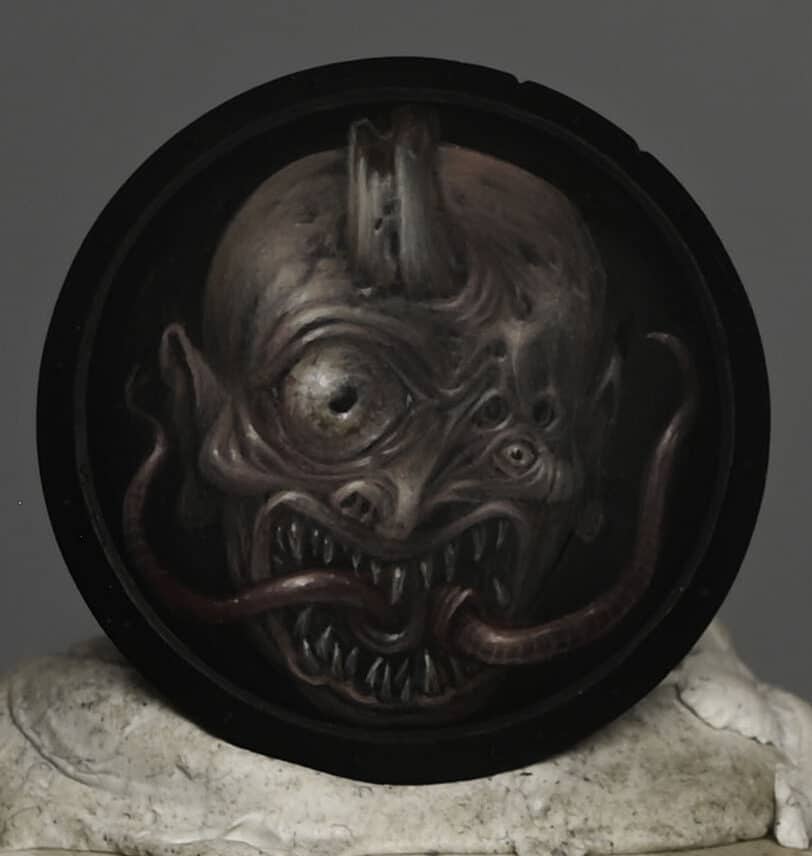
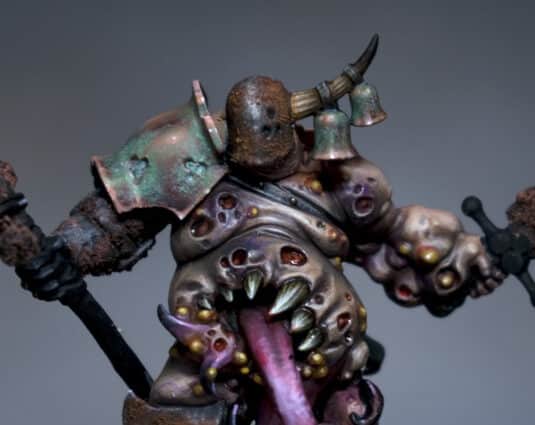
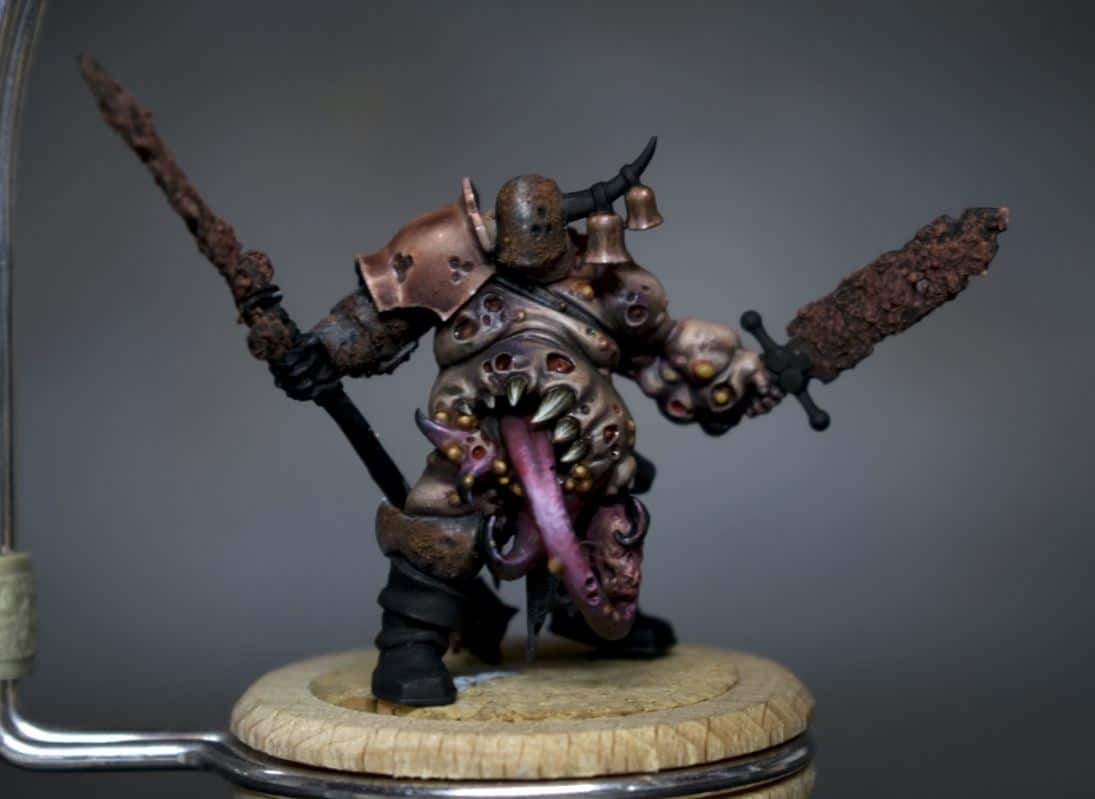
Video: Great Unclean One Belly Mouth
Materials Required:
Fine detail paintbrushes
Palette for mixing paints
Water for thinning paints
Base colour: Warboss Green (Games Workshop)
Additional Colours: Rhinox Hide, Mournfang Brown, Balor Brown (Games Workshop), Ice Yellow (Vallejo), Morrow White (P3 or any white paint from Games Workshop will suffice), Elysian Green, Evil Sunz Scarlet (Games Workshop)
Technical paint: Blood for the Blood God (Games Workshop)
Step-by-Step Guide to the Belly Mouth
Step 1: Base Colouring
Initial Base Coat: Start with a base coat of Warboss Green mixed with a touch of Rhinox Hide to slightly darken the green. This mix provides a solid foundation for the gum area and a natural shadow effect for the recesses between the teeth.
Step 2: Painting the Teeth
Initial Layer: Use Balor Brown for the teeth’s base layer, setting a warm undertone for later layers.
Highlighting: Apply Ice Yellow over Balor Brown, leaving a small margin near the gums to create a transition from the darker base to a lighter tip.
Final Highlights: Add Morrow White to the very tips of the teeth, enhancing their sharpness and giving them a polished appearance. Make sure this white layer is applied thinly and only at the tips.
Step 3: Shading and Texturing the Gums
Shading: Use Rhinox Hide to shade around the teeth and gum line, deepening the recesses and adding depth.
Adding Texture: Reapply Warboss Green to restore vibrancy to the gums, followed by Elysian Green for highlights. These steps add texture and variation.
Refining Details: With Ice Yellow, highlight the most prominent areas of the gums, aligning these highlights with the light source and the highlights on the teeth.
Step 4: Glazing for Colour Depth
Preparing Glazes: Create glazes from Mournfang Brown and Rhinox Hide by significantly thinning these paints. Apply these glazes over teeth and gums to unify the colours, soften transitions, and add natural depth.
Red Glazing: Thin Evil Sunz Scarlet to a glaze consistency and apply over the gum area, introducing a hint of irritation. This also sets the stage for applying Blood for the Blood God.
Step 5: Applying Blood for the Blood God
Applying Gore: Strategically apply Blood for the Blood God around the gum line and on select areas of the teeth to simulate fresh blood and gore, enhancing the grotesqueness with a glossy finish.
Manipulating the Blood: Use the brush to create realistic drips or pools, focusing on how blood might naturally accumulate in the creature’s mouth.
Final Touches
Adjustments: After the Blood for the Blood God has dried, revisit any areas that may require adjustments or additional highlights to ensure they stand out against the glossy blood effect.
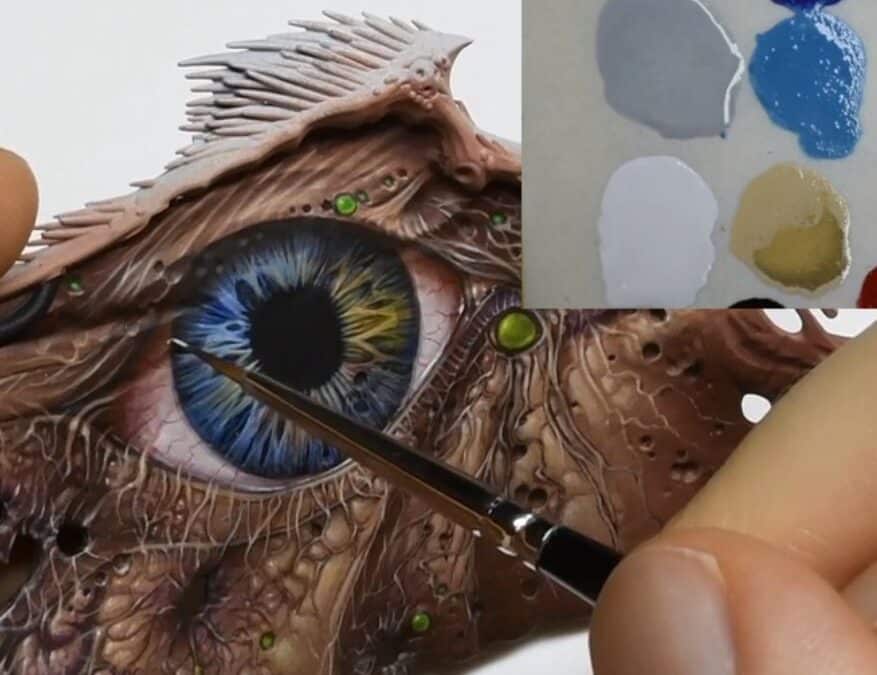
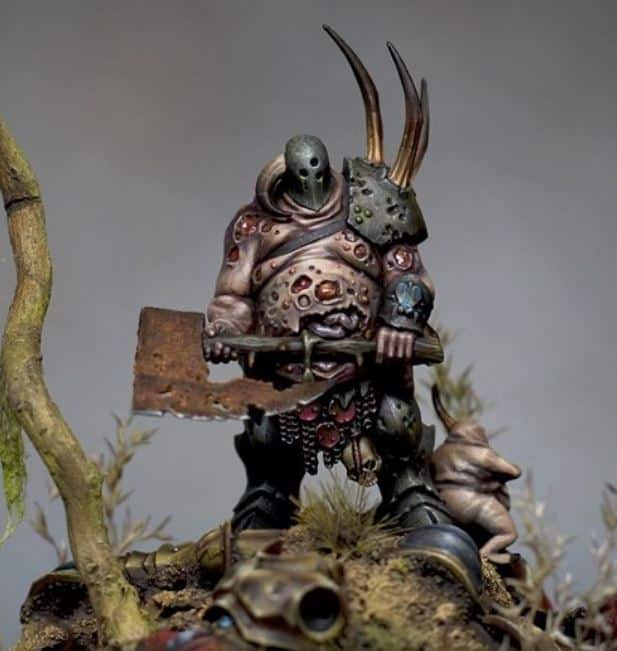
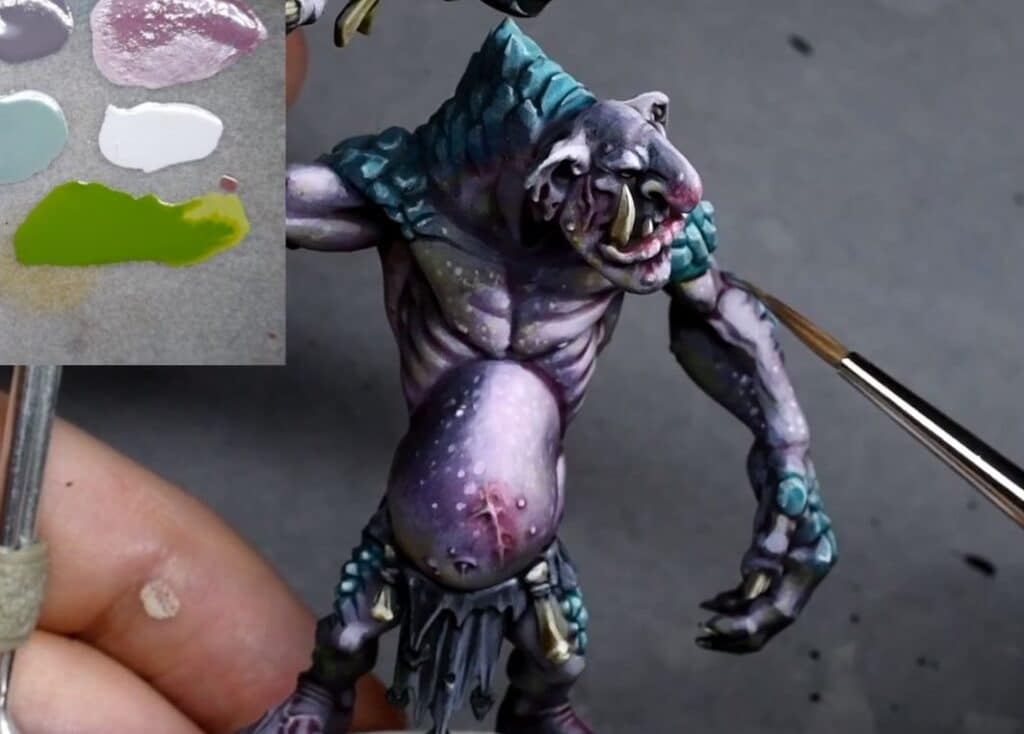
Video: Great Unclean One Skin
We’ll use a mix of Games Workshop paints to layer, blend, and detail the skin to give it a lifelike, diseased appearance.
Paints Needed:
Paints (Games Workshop): Cadian Fleshtone, Kislev Flesh, Ushabti Bone, Rhinox Hide, Mournfang Brown, Skavenblight Dinge, Moot Green, Pallid Wych Flesh.
Step-by-Step Guide to the Skin
Base Colouring and Initial Blending:
Base Coat: Start with a base coat of Cadian Fleshtone applied over a grey primer. This doesn’t require precision; just ensure complete coverage.
Rhinox Hide: Apply a quick airbrush (or brush) layer of Rhinox Hide to introduce shadows. This is optional but provides a good base for further detailing.
Mixing on the Model: Begin blending Rhinox Hide directly on the model into the Cadian Fleshtone. This method is quick and doesn’t require perfect smoothness, as further texture work will cover imperfections. Use a thicker consistency for better blending.
Light and Shadow: Focus on creating light at the top and shadows at the bottom of curves and crevices. Blend by alternating between Cadian Fleshtone and Rhinox Hide, directly mixing on the model for a rough transition.
Refinement and Detailing:
Refining with Kislev Flesh: With the skin’s base layers blended, use Kislev Flesh to start highlighting. Focus on raised areas and parts that would catch the light. This stage involves more precise brushwork to enhance the model’s details.
Ushabti Bone for Highlights: For the highest points and most prominent details, apply Ushabti Bone. This step brings out the texture and gives the skin a more dimensional look.
Glazing for Depth: Create glazes with Skavenblight Dinge and Mournfang Brown. Apply these very thinly over the skin to unify the tones, add warmth, and enhance the transitions between colours.
Adding Texture with Dots:
Dotting Technique: Use a mix of the flesh tones (Cadian Fleshtone for darker areas, Kislev Flesh for mid-tones, and Ushabti Bone for light areas) to dot the skin, creating texture. Vary the size of the dots based on the area you’re working on, keeping them random to avoid patterns.
Applying Glazes Over Dots: Use Moot Green to glaze over the dotted areas, focusing on the recesses but avoiding the highest lights. This introduces a sickly green hue indicative of Nurgle’s influence.
Final Glazes: Reapply glazes of Mournfang Brown to reintroduce warmth and further blend the skin tones, ensuring a cohesive and natural look.
Finishing Touches:
Highlighting with Pallid Wych Flesh: Finally, use Pallid Wych Flesh to add fine highlights to the very tips and edges of the most raised details, enhancing the texture and depth of the skin.
Final Adjustments: Assess the model and make any necessary adjustments to ensure a smooth gradient and natural look across all skin areas.
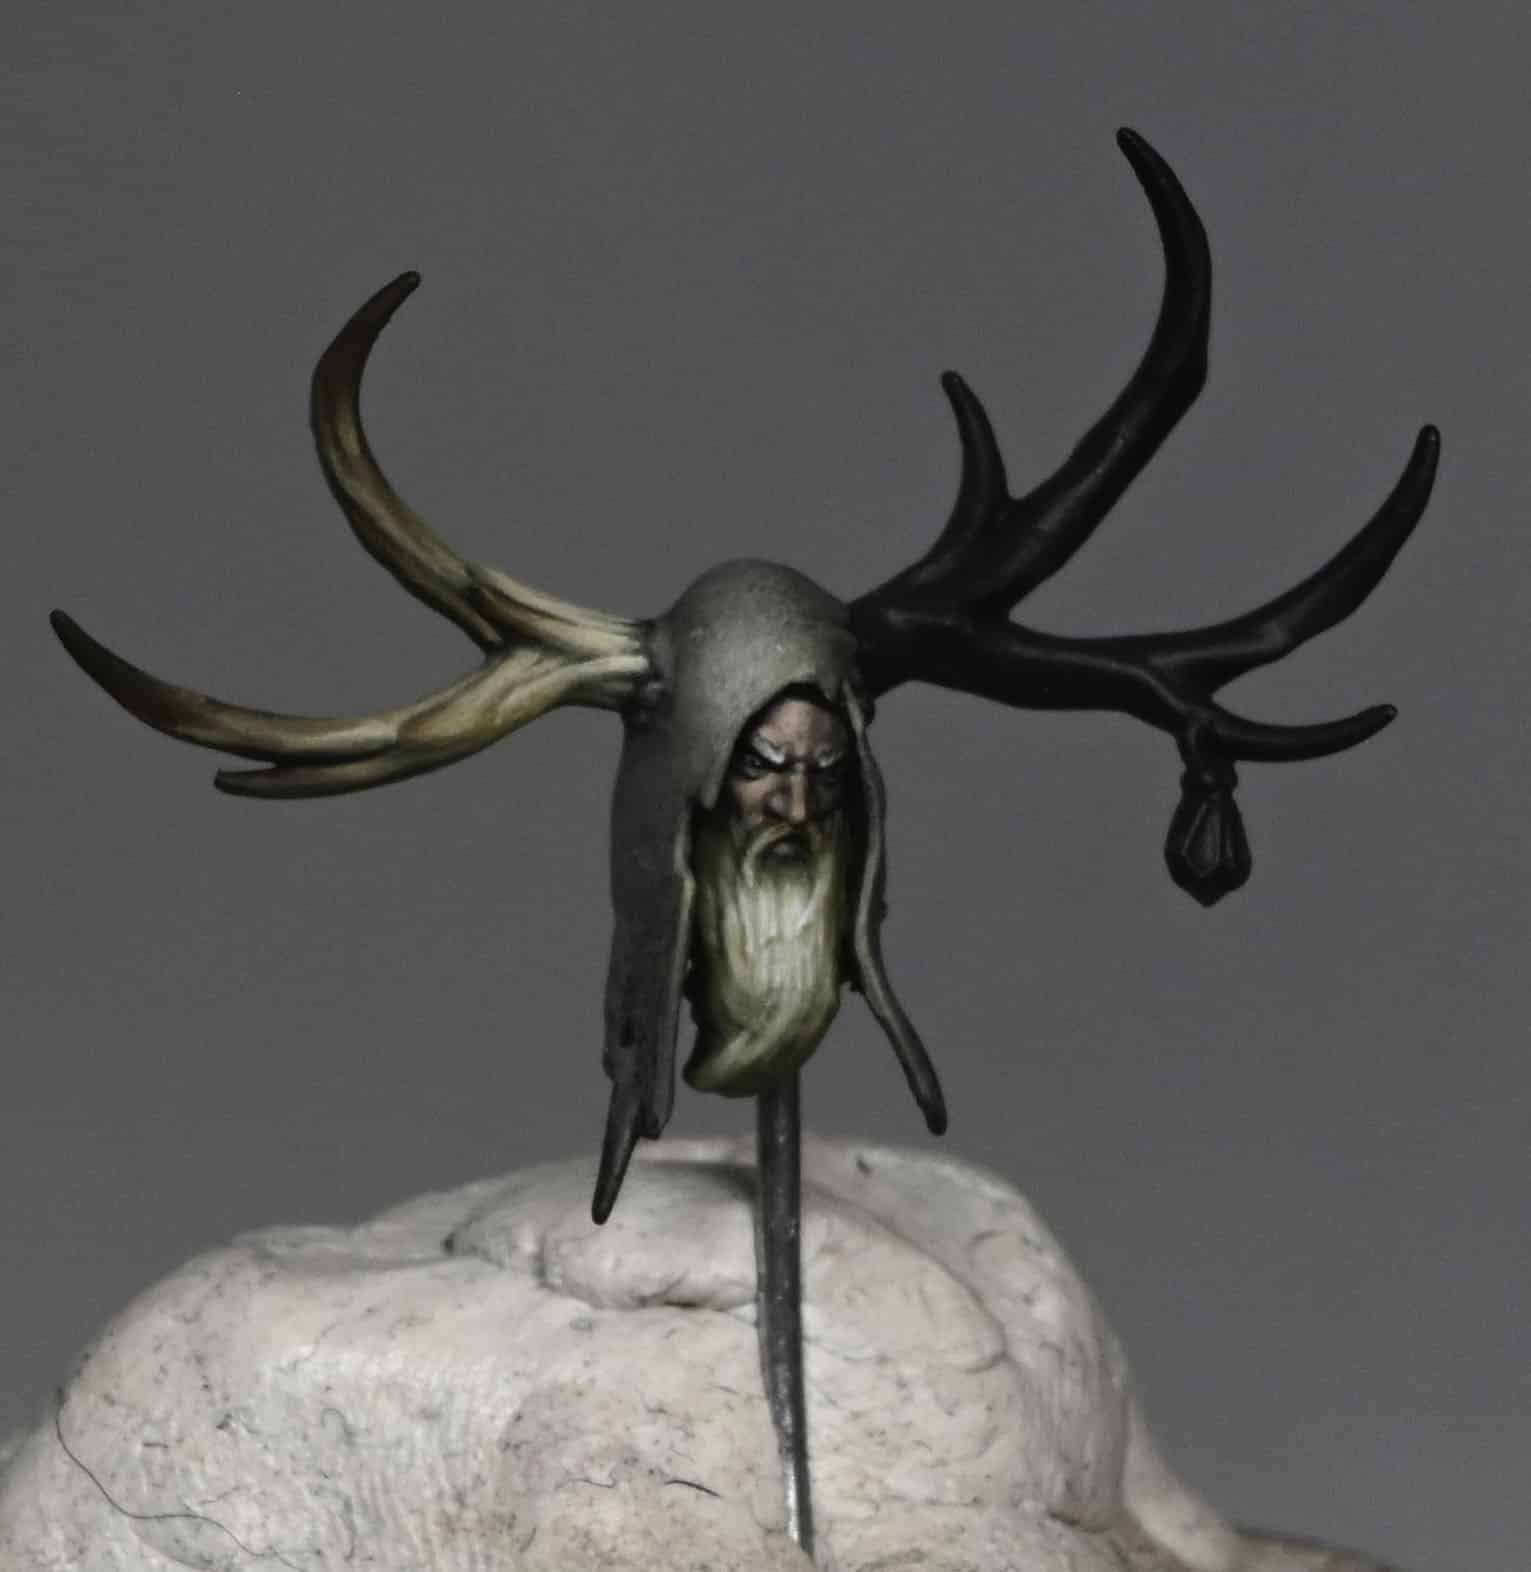
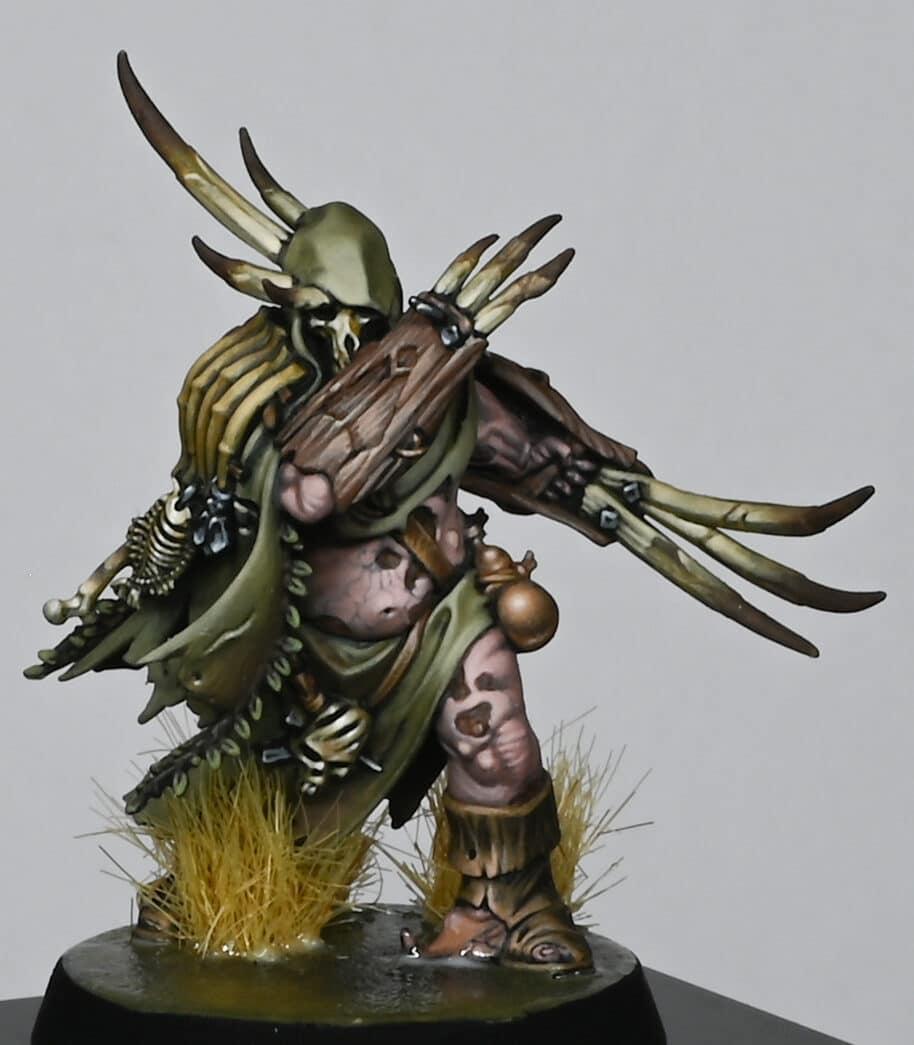
Video: Great Unclean One Horns
Materials:
Vallejo Model Color Black
Vallejo Ivory
Mournfang Brown (Games Workshop)
Balor Brown (Games Workshop)
Iyanden Yellow (Alternative to P3’s Iosen Green for glazing)
Abaddon Black (Games Workshop, alternative to Coat d’Arms Black)
Fine detail brushes
A wet palette
Water for thinning paints
Step-by-Step Guide to the Horns
Base Coating and Initial Blending:
Base Coat: Start by applying Vallejo Model Color Black directly onto the horns over a grey primer base. Ensure full coverage for a solid foundation.
Creating a Transition: On your wet palette, mix Vallejo Model Color Black with Mournfang Brown to create a transition shade. Also, prepare a mix of Balor Brown and Vallejo Ivory for a lighter transition. You’ll use these mixes to create a gradient along the horns, starting from the darkest at the base to lighter towards the tips.
Applying the Transitions: Begin with the black, blending into the Mournfang Brown mix, and proceed towards the tip with Balor Brown and the Balor Brown-Ivory mix. Use a large brush for quick, broad strokes, blending directly on the model for efficient coverage. The goal is a smooth gradient from dark to light without distinct lines.
Refining the Gradient:
Mournfang Brown Detailing: Revisit with Mournfang Brown to accentuate the ridges and details of the horns, enhancing the transition effect. Apply it in a way that leaves some of the base gradient visible beneath, contributing to the depth of the horns’ texture.
Balor Brown Highlights: Next, apply Balor Brown to continue defining the ridges, focusing on the midsections of the horns to reinforce the gradient transition.
Ivory Highlights: Finish the base gradient by applying Vallejo Ivory at the tips and highest points of the horns. This step brings a sharp contrast to the horns, setting the stage for the unique green tint to be applied later.
Adding the Green Tint:
Iyanden Yellow Glaze Preparation: Mix Iyanden Yellow (as a substitute for Iosen Green) with water on your palette to a very thin, glaze-like consistency. This mix will be applied over the horns to give them a subtle green tint, enhancing the overall theme of the miniature.
Applying the Glaze: Use a flat, wide brush to apply the glaze along the entire length of the horns, starting from the base where it’s darkest, up to where the ivory begins. Allow each layer to dry before applying the next to build up the green tint gradually without obscuring the underlying gradient.
Deepening Shadows with Abaddon Black: Finally, mix a thin glaze of Abaddon Black and apply it selectively towards the base and lower sections of the horns. This step reintroduces depth and shadow lost during the glazing process, ensuring the horns maintain their dimensional appearance.
Final Touches:
Detailing and Corrections: Go back with your lighter colours (Balor Brown-Ivory mix and pure Ivory) to reinforce highlights or correct any overspill from the glazing process. This step ensures sharpness and clarity in the horns’ details.
Assessment and Adjustment: Evaluate the overall effect, making adjustments as necessary to ensure a smooth transition between all colours and a satisfactory green tint.
Protective Coating: Once completely dry and you’re satisfied with the results, consider applying a matte varnish to protect your work and reduce any unwanted glossiness from the glazing process.
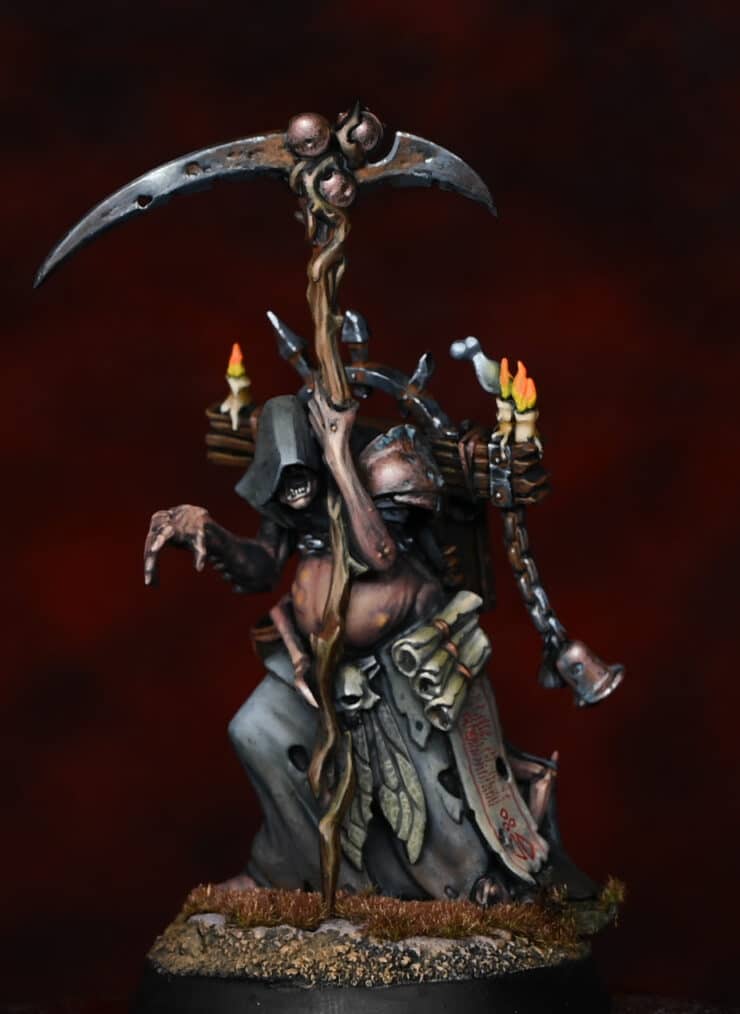
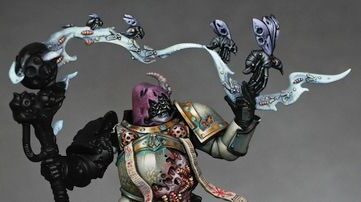
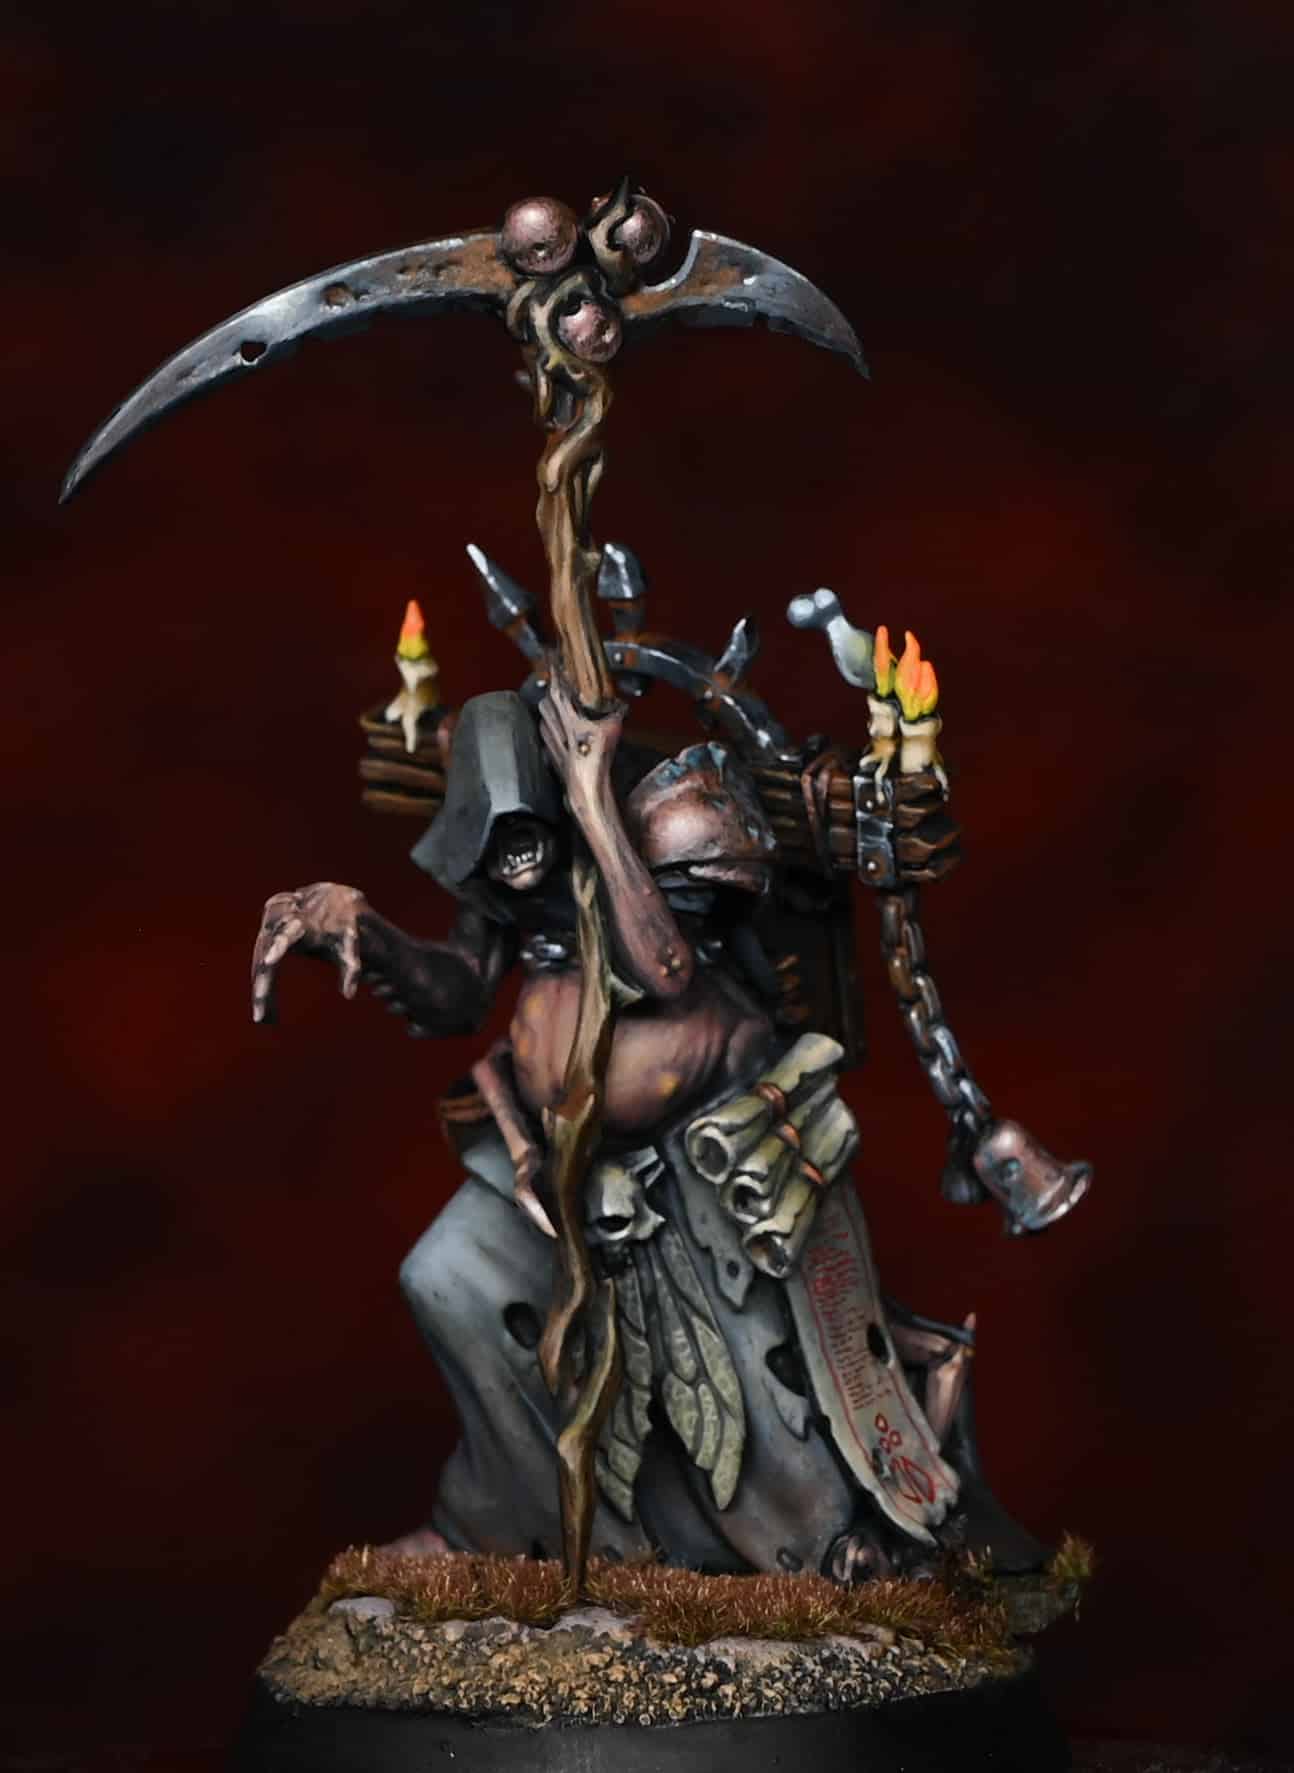
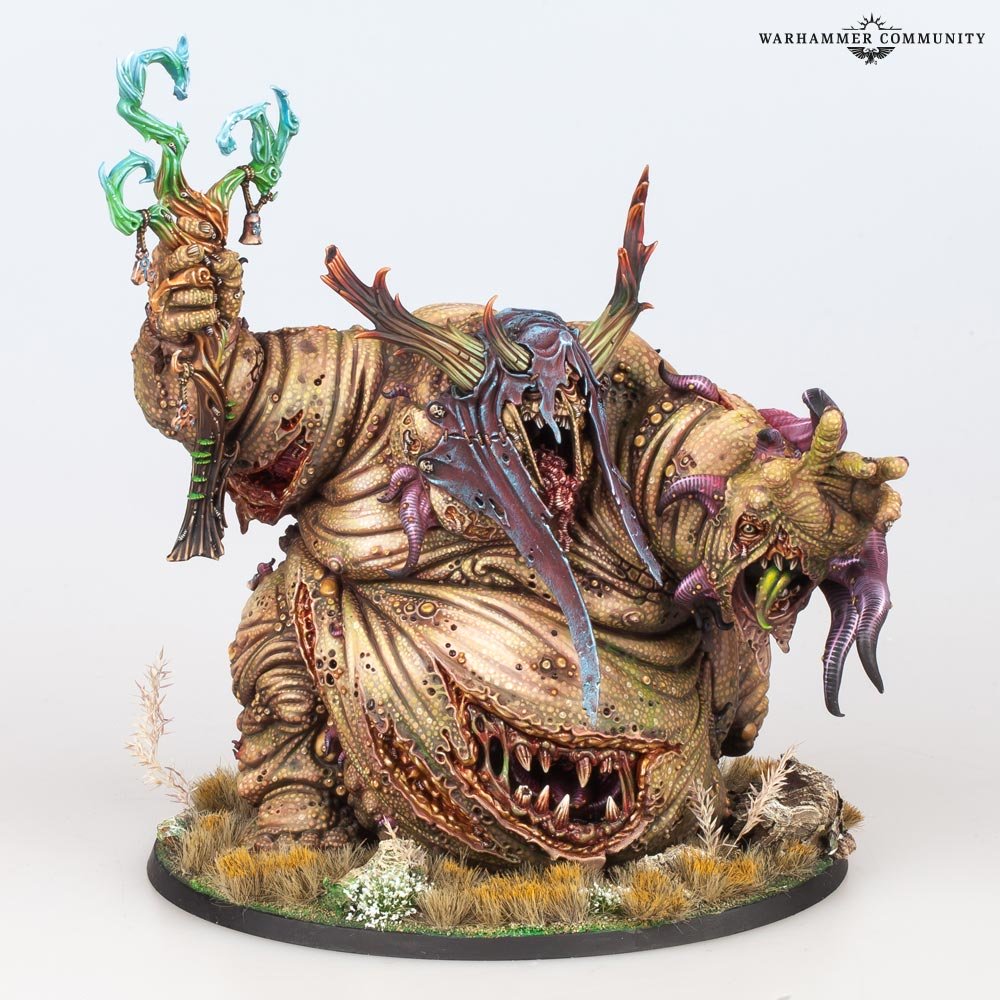
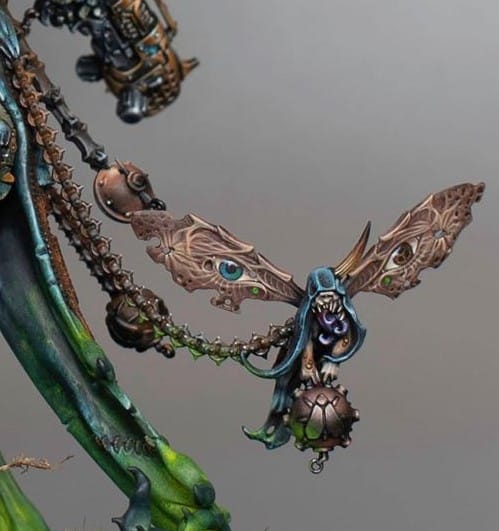
Video: Great Unclean One (Rotigus) Staff
The goal is to achieve a vibrant, multi-hued effect that transitions from dark at the base to light and colourful at the top.
Materials Needed:
Vallejo Model Colour Black (or Games Workshop’s Abaddon Black as an alternative)
Games Workshop’s Rhinox Hide, Ceramite White, Cadian Fleshtone, Balor Brown, Moot Green, Ushabti Bone, Lothern Blue, Mournfang Brown
P3’s Iosen Green (or an equivalent green from GW for similar effect)
Fine detail brushes
A wet palette
Step-by-Step Guide to the Staff
Base Coating
Priming and Base Coat: Begin with a light grey primer across the entire model for uniformity, though a black primer may work better for darker elements like the staff. Apply Rhinox Hide as the base coat on the staff.
Initial Colour Application
Applying Base Colours: Start at the base of the staff with Vallejo Model Colour Black, blending upwards into Rhinox Hide, then to Mournfang Brown. This creates a dark to light gradient, preparing for brighter colours above.
Transition and Blending
Creating the Transition: Without cleaning your brush, dip into subsequent colours to facilitate wet blending directly on the model. Progress through the colours: Mournfang Brown to Fire Dragon Bright, then to Moot Green, followed by a custom blue mix, Ceramite White, and Lothern Blue.
Mixing for Intermediate Shades: Where necessary, mix adjacent colours on your palette to create intermediate shades for smoother transitions.
Application Technique: Apply each colour in segments, blending into the previous colour while wet to ensure a smooth gradient. The aim is for a seamless transition from dark at the base through greens, oranges, and blues, culminating in white at the tip.
Detailing
Highlighting: After the base gradient is complete, use lighter shades of each colour (mixes involving Ceramite White and Ushabti Bone) to highlight raised areas and textures. This step accentuates the staff’s intricate details and enhances the colour gradient’s impact.
Focus on Contrast: Ensure that the top sections, especially around the twisting branches, receive adequate highlights to create a vibrant contrast between the dark base and the colourful top.
Finishing Touches
Additional Details: Address any minor details, such as maggots and ropes on the staff, using base colours like Rhinox Hide and highlighting appropriately to integrate them into the overall colour scheme without disrupting the gradient flow.
Refinement and Adjustment: Revisit any areas requiring further blending or intensified colour saturation. Adjust highlights as necessary to maintain a consistent light source impression across the model.
Conclusion and Protection
Final Assessment: Review the entire piece for uniformity and depth of colour. Ensure that all transitions are smooth and that the highlights appropriately reflect the model’s contours and texture.
Protective Coating: Consider applying a matte varnish to protect the paintwork and reduce any unintended shininess, ensuring the staff’s finish matches Rotigus’ overall appearance.
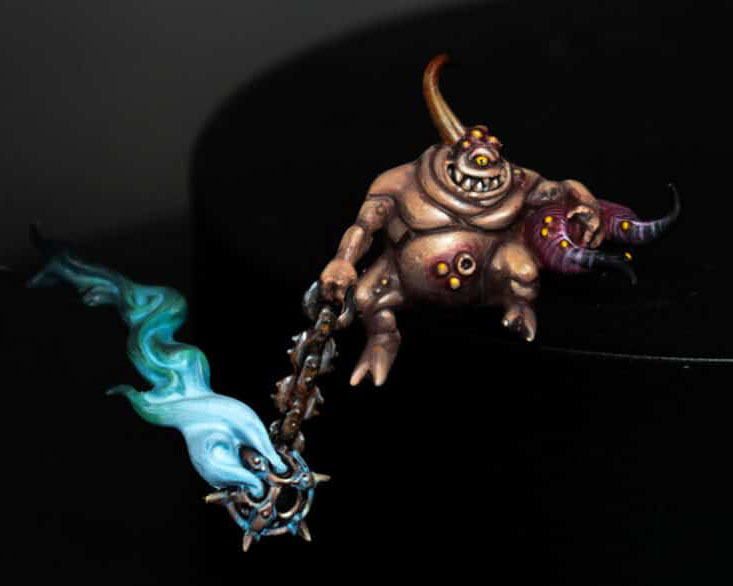
Video: Great Unclean One Nurgling
Paints and Materials Used
Games Workshop Paints:
Cadian Fleshtone
Rhinox Hide
Kislev Flesh
Ceramite White
Yriel Yellow
Emperor’s Children
Celestra Grey
Skavenblight Dinge
Lothern Blue
Cybarite Green
Abaddon Black
Mournfang Brown
Ushabti Bone
Zamesi Desert
Agrax Earthshade (for wash)
Scale 75 Paints:
Kalahari Orange
Mars Orange
Vallejo Paints:
Model Colour Black
Ice Yellow
Brushes:
In the tutorial I mention using a new size 1 brush with a fine point, ideal for both general painting and fine details. A good point for precision work and the brush I was using was an Artist Opus brush!
An older, rough brush is used for applying the Scale 75 paints to create a rusty texture on the chain.
Step-by-Step Guide on the Nurgling
Step 1: Base Colours for Skin
Begin with a base of Cadian Fleshtone on the skin. Create a palette with three colour mixtures: pure Cadian Fleshtone, a 50/50 mix of Cadian Fleshtone and Rhinox Hide, and a mixture mostly of Rhinox Hide with a small amount of Cadian Fleshtone.
Step 2: Painting Shadows
Start with the darkest mixture (mostly Rhinox Hide) to paint creases, dark areas, and shadows. The approach here doesn’t need to be very neat; it’s more about laying down the dark tones.
Step 3: Mid-tone Shading
Use the mid-tone mixture for most of the shading. Avoid painting over areas that will be highlighted later, like the chest and middle of the belly.
Step 4: Blending and Refining
As you proceed, switch between mixtures for blending, often without washing the brush. This method helps create quick transitions. Focus on darkening areas around the edges where the Nurgling touches Rotigus for shadow effects.
Step 5: Teeth and Boils
For the teeth, apply a quick wash of Agrax Earthshade to outline and define them. Then, start refining the shading and blending, particularly with the mid-tone shade.
Step 6: Final Skin Highlights
The final skin highlights won’t be Cadian Fleshtone but a brighter colour. However, use Cadian Fleshtone initially to get all shadows in place, creating transitions where the darkest shadows show through beneath lighter layers.
Step 7: Eyes and Pupils
Paint the eye with Yriel Yellow for a strong, vibrant colour. Then, use Vallejo Model Colour Black to paint the pupil, ensuring it looks forward and round.
Step 8: Smoke Effect
Base the smoke with Lothern Blue, then use Cybarite Green mixed with a little Abaddon Black. Highlight the inner recesses of the smoke with a mixture of Lothern Blue and Ceramite White, getting lighter towards the start of the smoke.
Step 9: Rusty Chain
Use Scale 75 Kalahari Orange and Mars Orange for a rusty look. Apply with a rough brush for a patchy appearance. Highlight with Skavenblight Dinge, Celestra Grey, and a touch of Ushabti Bone on the raised edges to mimic worn metal.
Step 10: Copper Smoke Dispenser
Paint with Mournfang Brown, highlighting with Cadian Fleshtone mixed with Ice Yellow, focusing on raised edges facing upwards. Use Lothern Blue for the verdigris effect, concentrating on the recesses for a corroded look.
Step 11: Horns and Tentacles
Start horns with Mournfang Brown, blending into Abaddon Black towards the tip. Highlight with Skavenblight Dinge and Celestra Grey. For tentacles, use a base of Emperor’s Children mixed with a small amount of Ushabti Bone, adding horizontal lines along each tentacle. Highlight with a brighter mix of Emperor’s Children and Ceramite White, focusing on the central area.
Remember, the key to this process is layering and blending, creating smooth transitions between colours.
More Nurgle Tutorials
If you don’t have an account, please sign up here! The website currently has over 350 video tutorials with steps and tips, plus a selection of PDFs. If you are not sure about joining, you can explore my free videos with a free membership, or take the plunge and become a full subscriber for full access.
If you’d prefer to support me on Patreon, please visit: https://www.patreon.com/RichardGray [...]