How to Paint Deathguard Deathshroud Bodyguard

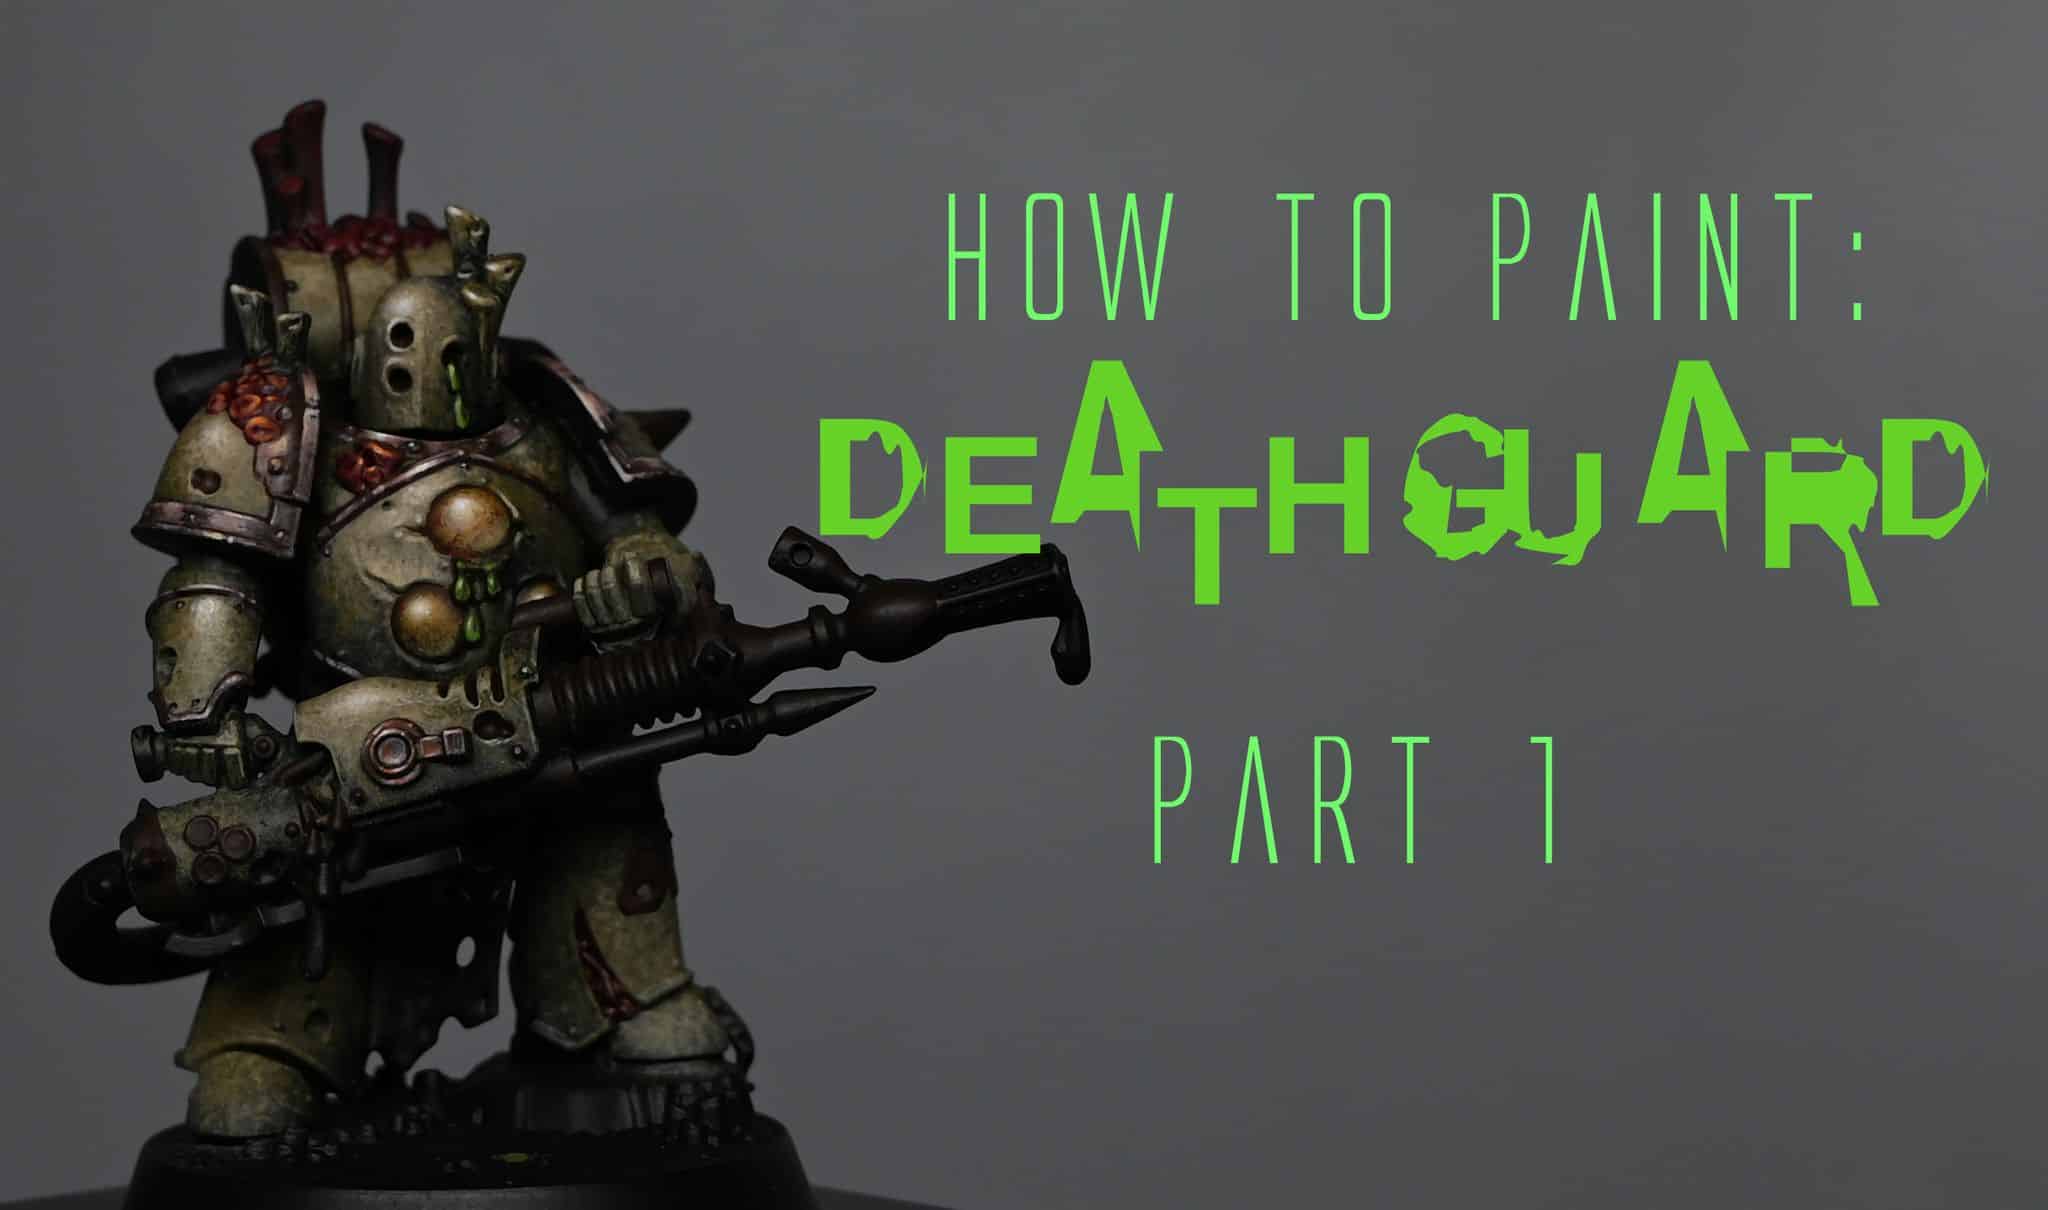
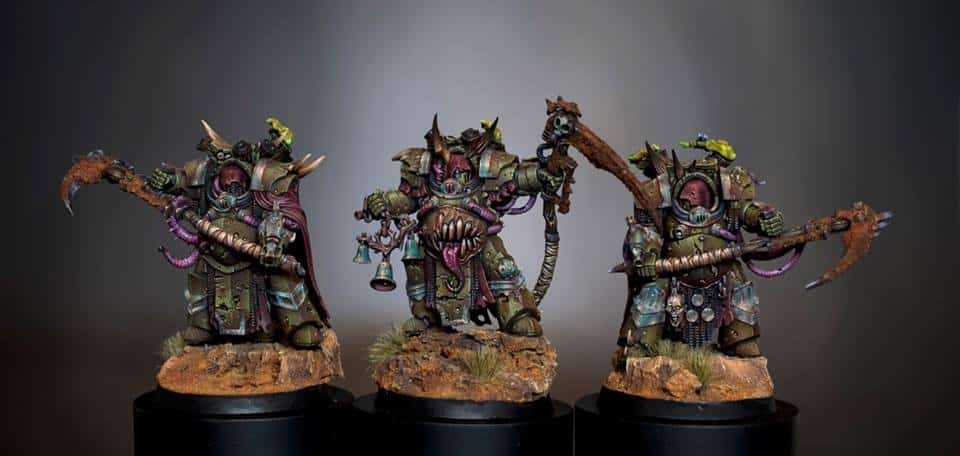
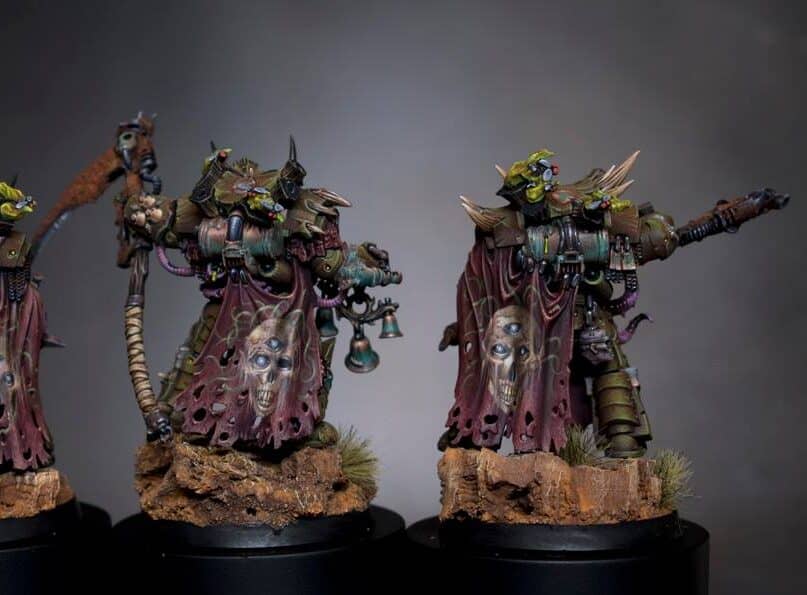
A series of tutorials on how I painted my set of Golden Demon winning Deathguard Deathshroud Bodyguard! This includes nurgly armour, weathering, rust, metals, tentacles, freehand and more!

Quick note here – these are some of my earliest tutorial videos, so are not of the same quality as my current tutorials visually and sound-wise. My apologies for this.

Richard

Scroll down to explore the tutorials in order, or quick-jump to a segment by clicking on one of the items below:

Video: Deathguard Deathshroud Bodyguard Green Armour

This video tutorial is currently hidden. To unlock it and watch, please join the website and log in.

Materials and Paints Used

  1. Games Workshop: Elysian Green, Nurgling Green, Rhinox Hide
  2. Additional paints for mixing and shading: Pine Oxide, Loden Gree

Step by Step Guide

  1. Paint Preparation: Gather your paints – Legion Green, Pine Oxide, Loden Green, and Rhinox Hide. Mix these to create five different shades ranging from light to dark for various transitions.
  2. Base Coat: Start with a base coat of pure Legion Green. This will be your foundation colour.
  3. Shading: Begin shading the lower belly area and other parts where shadows naturally fall. Use a mixture of Legion Green and Rhinox Hide for this. Remember, at this stage, the transitions don’t need to be perfect.
  4. Wet Blending: Apply the shading using a wet blending technique. This involves placing one colour and, before it dries, adding another colour to blend on the model. It’s a rough, quick blending to position the shadows and shapes.
  5. Highlighting: For highlighting, mix Legion Green with Megan Green. Start applying highlights to areas where light naturally hits, like the upper sections of the model.
  6. Refining Transitions: As you progress, refine your transitions and shadows for a more polished and detailed look.
  7. Final Highlights: Use pure Nurgling Green for the final highlight stage. This adds a brighter touch to the highest points where light would be most intense.
  8. Detailing: Add finer details, like light reflections and texture variations, as needed to enhance the realism of the armour.
  9. Additional Techniques: If desired, use glazes or additional layers to further refine the shading and highlighting.

Video: Deathguard Deathshroud Bodyguard Armour Detail

This video tutorial is currently hidden. To unlock it and watch, please join the website and log in.

Materials and Paints Used

Games Workshop: Elysian Green, Nurgling Green, Mournfang Brown, Rhinox Hide
Forge World: Gal Vorbak Red (use Games Workshop Khorne Red with a tiny amount of blue for a similar colour)

Step by Step Guide

  1. Initial Shading: Start by shading the lower leg using a mix of Elysian Green and Rhinox Hide. This forms the base for the subsequent layers.
  2. Layering with Pine Oxide: Apply Pine Oxide in layers. This is a form of light layering, where the paint is applied thinly, almost like working with glazes but slightly thicker.
  3. Blending Techniques: Employ wet blending by quickly layering the paint. This helps in merging the layers smoothly, ensuring a subtle transition of colours.
  4. Stippling with Mournfang Brown: Use Mournfang Brown for stippling effects. This is done by applying small dots to create texture and depth.
  5. Refining Highlights: Add highlights using a finer brush. Highlight the lower edges of the leg where light naturally catches but avoid highlighting the upper edges to maintain a natural look.
  6. Fixing Imperfections: If any area becomes too dark, use the in-between transitions to correct it. This involves mixing paint directly on the model, which can help in hiding mistakes.
  7. Applying Red Glazes: Use a heavily watered-down Evil Sunz Scarlet (or a similar red glaze) to add subtle tones and enhance contrast.
  8. Streaking for Battle Damage: For bullet holes or battle-damaged areas, create streaking effects using Mournfang Brown and Rhinox Hide, depicting the gunk running down from the damage.
  9. Final Touches: Add final details and weathering to complete the look of the armour. This includes additional stippling and refining the contrast between light and shadow areas.

Video: Deathguard Deathshroud Bodyguard Pink Tentacles

This video tutorial is currently hidden. To unlock it and watch, please join the website and log in.

Materials and Paints Used

  1. Games Workshop: Emperor’s Children, Rhinox Hide, Evil Sunz Scarlet
  2. Vallejo: Model Colour Black (Alternatively, Games Workshop black can be used)
  3. P3: Morrow White (Alternatively, Games Workshop white can be used)

Step by Step Guide

  1. Base Colour: Start with a base of Emperor’s Children pink.
  2. Shading: Apply Rhinox Hide for shading. Paint the tip of the tentacle black for contrast.
  3. Blending: Blend Rhinox Hide mixed with Emperor’s Children down from the black tip to create a smooth transition.
  4. Detailing: Using straight Emperor’s Children, add line details to the tentacle, going beyond the sculpted segments for more intricacy.
  5. Highlighting: Focus on the middle area of the tentacle with a mix of Emperor’s Children and Morrow White. This creates a focal point and simulates light catching the tentacle.
  6. Final Touches: For light reflections, use a lighter pink or white. Add a glaze of Evil Sunz Scarlet for depth and contrast.

Video: Deathguard Deathshroud Bodyguard Copper Canister

This video tutorial is currently hidden. To unlock it and watch, please join the website and log in.

This technique will give you a realistic copper effect using a simplified palette.

Materials and Paints Used

Games Workshop: Doombull Brown, Cadian Fleshtone
Vallejo: Ice Yellow

Step by Step Guide

  1. Base Coat: Start with a base coat of Doombull Brown.
  2. Mixing Colours: Create a palette with five shades by mixing Doombull Brown, Cadian Fleshtone, and Ice Yellow in different proportions.
  3. Highlighting: Apply the mix of Doombull Brown and Cadian Fleshtone across the upper curve for initial highlights. Adjust the position of the highlight by observing the model under light.
  4. Refining: Blend the colours for smooth transitions. Use finer brushes for detailed areas and to keep dark lines sharp.
  5. Final Highlights: Use a mixture of Cadian Fleshtone and Ice Yellow for brighter highlights. Add small touches of pure Ice Yellow for the brightest points.
  6. Artificial Reflections: Paint reflections and detail lines that may not naturally occur but enhance the metallic effect. Look as photographs of copper items for references to help you with this.
  7. Finishing Touches: Adjust and refine the highlights and shadows, ensuring a balance between realism and aesthetic appeal.

Video: Deathguard Deathshroud Bodyguard Red Cloak

This video tutorial is currently hidden. To unlock it and watch, please join the website and log in.

This process results in a textured, worn cloak suitable for a Death Shroud Terminator, using a simple but effective painting technique.

Materials and Paints Used

Gal Vorbak Red (Forge World)
Cadian Fleshtone (Games Workshop)
Eldandil Violet (Scalecolour Fantasy)

Step by Step Guide

  1. Base Coat: Start with Gal Vorbak Red as the primary colour.
  2. Detailing and Texture: Use Cadian Fleshtone for adding highlights and texture, creating a worn and mouldy appearance.
  3. Shading: Apply Eldandil Violet for shading in the recesses, enhancing depth and wear.
  4. Glazing with Evil Sunz Scarlet: Use it as a glaze to add warmth to the cloak.
  5. Refining Texture: Focus on cross-hatching movements to build texture, emphasizing the worn look.
  6. Final Touches: Add further glazes and highlights to refine the texture and depth, tailoring the effect to your desired level of detail.

Video: Deathguard Deathshroud Bodyguard Cloak Freehand

This video tutorial is currently hidden. To unlock it and watch, please join the website and log in.

Materials and Paints Used

The following paints were used:
Games Workshop: Rhinox Hide
Vallejo: Heavy Brown, Cork Brown, Ice Yellow, Black
P3: Battlefield Brown
*Note, Morrow White was not actually used in this video, but is used in part 2.

Step by Step Guide

  1. Preparation: I used a test model to experiment with my design concept. This approach allows you to refine the freehand pattern before applying it to the main models.
  2. Base Colours: Apply Vallejo Heavy Brown as a foundational colour. Enhance the base with Cork Brown for a richer texture. Use Rhinox Hide to outline the design, ensuring the lines are crisp and distinct.
  3. Detailing: Carefully mark the eye sockets with black paint, paying attention to the cloak’s folds. These details will add depth and character to the freehand design.
  4. Highlighting: Utilize Ice Yellow for highlights. This step involves blending the highlights with the base colors to achieve a natural, integrated look. The highlights should accentuate the topography of the cloak and enhance the freehand design.
  5. Shading: Use Battlefield Brown to deepen the shadows and add complexity to the design. This shade will create a more dynamic and realistic appearance on the cloak.
  6. Finishing Touches: Review the entire design, making final adjustments for consistency and balance. Focus on refining the freehand artwork, ensuring it harmonizes with the cloak’s texture and the overall theme of the model.

Video: Deathguard Deathshroud Bodyguard Cloak Freehand Refinement

This video tutorial is currently hidden. To unlock it and watch, please join the website and log in.

Materials and Paints Used

The following paints were used:
Games Workshop: Cadian Fleshtone, Pallid Wych Flesh, Bugman’s Glow, Rhinox Hide, Loren Forest, Nurgling Green,
Vallejo: Ice Yellow, Cork Brown, Black, Neutral Grey, Pale Grey Blue, Heavy Brown
P3: Battlefield Brown, Morrow White

Step by Step Guide

  1. Base Preparation: Start by painting a rough base of fleshy shapes using Cadian Fleshtone. This initial layer doesn’t need to be perfect or smooth.
  2. Detailing Ears and Face: Add ears to distinguish the image from a skull, creating a more zombie-like face. Use Kadeem Flesh Tone for this step.
  3. Sketching Flesh and Bone: Sketch out areas where flesh appears torn or missing, revealing bone underneath. This technique enhances the undead appearance and integrates the existing skull highlights.
  4. Adding White Highlights: Use Pallid Wych Flesh to accentuate bone areas, making them stand out from the flesh tone.
  5. Painting the Eyes: Employ Neutral Grey, followed by Pale Grey Blue for the eyes. Add white dots in the center and top left corner of each eye for a lifelike effect.
  6. Mouth and Teeth Details: Refine the mouth and teeth using Rhinox Hide and Ice Yellow for highlights. Focus on defining the teeth shapes and adding depth to the mouth.
  7. Adding Texture to Flesh: Use Bugman’s Glow and other flesh tones to create textured, worn skin. Apply these tones in layers, allowing the underlying skull details to peek through.
  8. Final Touches: Finish by adding fine details and additional highlights to enhance the depth and realism of the freehand design.

The key to this process is building up the layers gradually, refining the details as you go, and ensuring the highlights and shadows work together to create a realistic, three-dimensional appearance.


Death Guard
These videos will show you how to paint a Death Guard Space Marine, specifically from the Space Marine Heroes collection. These guides will focus on creating a textured, decayed look characteristic of the Death Guard, using various stippling techniques. Video – How To Paint: Death Guard Space Marine : Part OneMaterials NeededStepsTipsVideo – How To Paint: Death Guard Space Marine : Part TwoAdditional Painting StepsAdditional TipsMore Death Guard Tutorials to Explore!Free Video Tutorials Video – How To Paint: Death Guard Space Marine : Part One Materials Needed Paints: Games Workshop: Balor Brown, Rhinox Hide, Morghast Bone, Screaming Skull, Khorne Red, Volupus Pink, Fire Dragon Bright, (alternatively Bugman’s Glow and Cadian Fleshtone for copper effect) Vallejo: Ice Yellow, (alternatively Old Rose and Salmon Rose) Brushes: A variety of sizes, including stippling brushes (Artist Opus dry brush or makeup brushes can be used) Primer: Black primer (Ultimate Primer recommended) Palette: For mixing colours Water pot: For thinning paints and cleaning brushes Steps Priming and Base Texture: Prime the model in black. Start stippling texture onto the armour using Balor Brown. Ensure the paint is diluted (about 50% water) to achieve translucency and avoid excessive build-up. Layering the Texture: Continue building texture with Morghast Bone, focusing on areas where light naturally hits. Aim for a top-left light perspective. Dilute your paints as you stipple, gradually building up layers for a controlled, textured effect. Detailing with Contrast Paint: Apply Volupus Pink to recesses and bubbly areas on the armour for quick coverage. This helps in defining those decayed spots distinct to Death Guard armour. Base Colour for Trims and Metals: Paint all trims and metal areas with watered-down Rhinox Hide. This acts as a base for later metallic effects. Non-Metallic Metal (NMM) Effect: For a non-metallic metal look, mix Old Rose with Rhinox Hide and Salmon Rose with Ice Yellow. Layer these mixes to create a copper-like effect, adding Mournfang Brown for warmth. Highlighting Armour and Details: Use Screaming Skull to push highlights on the armour. Concentrate on areas like the chest, head, and shoulder pads to draw focus. Stippling Screaming Skull provides a more opaque highlight. For the pus boils, start with Balor Brown and build up layers with Fist Red for veins. Add Morghast Bone and Screaming Skull for highlights, creating a shiny, reflective surface. Painting Fungus and Red Details: Base the fungus-like growths with Khorne Red. Create a gradient effect by mixing Khorne Red with Fire Dragon Bright, then highlight with Ice Yellow for a vibrant contrast against the armour. Tips Patience is Key: Death Guard models are detailed, so take your time to add depth and texture. Light Source Consistency: Ensure the light source remains consistent across the model for a cohesive look. Layering: Gradual layering helps create a more realistic texture, particularly for the decayed look of the Death Guard. Brush Care: Clean brushes thoroughly between colours, especially when working with stippling techniques. Video – How To Paint: Death Guard Space Marine : Part Two Continuing from Part 1, let’s delve into completing the Death Guard Space Marine with a focus on the gun, additional weathering effects, and other details. We’ll be using a variety of techniques to add depth and character to the model. Additional Painting Steps Gun and Metallics: Start with Bugman’s Glow and Cadian Fleshtone for a coppery effect. Apply these colours to the gun, focusing on light placement and creating non-metallic metal effects. Use Mournfang Brown and Ice Yellow for richer copper tones. Ensure smooth transitions and consistent light reflection. Weathering and Verdigris Effect: For added realism, apply verdigris using Sotek Green. Mix with water (approx. 6-7 parts water to 1 part paint) and apply it to recessed areas and around details for an oxidized look. Add layers of Sotek Green mixed with white for a more pronounced effect. Apply sparingly to avoid overpowering the metallic sheen. Highlighting and Details: Highlight the gun and metallic parts with Ice Yellow and a touch of white for glare effects. Be cautious with paint consistency to avoid unwanted textures. Address the back of the model similarly, but you can opt for brighter highlights as this part is often in shadow during gameplay. Painting the Backpack and Tentacles: For the backpack’s tentacle-like extensions, use a mix of Pink Horror, Emperor’s Children, and Fulgrim Pink. Stipple on these colours to create a mottled, organic texture. Use Averland Sunset or a similar yellow for raised pustules, adding depth and contrast to the tentacles. Green Goo Effect: Paint any dripping goo with Moot Green, applying in layers to create a luminous, toxic effect. Highlight edges with Ice Yellow for added vibrancy. Finishing Touches: Utilize Corvus Black for deepening shadows and refining details. Water down the paint and apply it as a glaze to enhance contrast and soften textures. For the final highlights, focus on the model’s focal points, such as the head, chest, and weapon, ensuring they draw the viewer’s attention. Additional Tips Layering: Build up your colours gradually for a more natural and controlled effect. Light Source: Keep the light source consistent across the model for a cohesive appearance. Weathering Techniques: Experiment with weathering to add character. Verdigris and rust effects can significantly enhance the decayed look of the Death Guard. Patience: Take your time with details, especially on focal points, to make them stand out. Brush Care: Maintain your brushes, especially when working with techniques that can be hard on them, like stippling and dry brushing. More Death Guard Tutorials to Explore! Free Video Tutorials Free videos for logged in members – just sign up as a ‘friend’ to view and click any of the thumbs.To explore all of these, visit this page! If you don’t have an account, please sign up here! The website currently has over 350 video tutorials, plus step by step guides and PDFs. You can explore more free videos with a free “freebies” membership, or take the plunge and become a full subscriber for full access. If you’d prefer to support me on Patreon, please visit: https://www.patreon.com/RichardGray [...]
A guide on painting the Deathshroud Scythe Handle Wrappings. PDF Tutorial These grubby handwraps are perfect for Deathshroud. – Richard Please wait for the below PDF to load. Alternatively, you can download it here. DeathShroudScytheWrapForPatreon More Deathshroud Tutorials How to Paint Deathshroud ArmourDeathshroud Scythe Handle WrappingDeathshroud Terminator Cloak FreehandHorn Painting Guide Video Tutorials Death Guard Deathshroud Bodyguard A series of video tutorials on how I painted my set of Golden Demon winning Death Guard Deathshroud Bodyguard! This includes nurgly armour, weathering, rust, metals, tentacles, freehand and more! Watch Now More Nurgle Tutorials: If you don’t have an account, please sign up here! The website currently has over 350 video tutorials with steps and tips, plus a selection of PDFs. If you are not sure about joining, you can explore my free videos with a free membership, or take the plunge and become a full subscriber for full access. If you’d prefer to support me on Patreon, please visit: https://www.patreon.com/RichardGray [...]
A guide on painting the Deathshroud Armour. PDF Tutorial This guide details how to achieve the green armour effect on the Deathshroud terminator as seen in the photograph above. The techniques are straight forward with the exception of the stippling on the armour requiring a fairly high level of precision. If the below link does not work, please go here to download! DeathShroudArmourPDFforPatreon More Deathshroud Tutorials How to Paint Deathshroud ArmourDeathshroud Scythe Handle WrappingDeathshroud Terminator Cloak FreehandHorn Painting Guide Video Tutorials Death Guard Deathshroud Bodyguard A series of video tutorials on how I painted my set of Golden Demon winning Death Guard Deathshroud Bodyguard! This includes nurgly armour, weathering, rust, metals, tentacles, freehand and more! Watch Now If you don’t have an account, please sign up here! The website currently has over 350 video tutorials with steps and tips, plus a selection of PDFs. If you are not sure about joining, you can explore my free videos with a free membership, or take the plunge and become a full subscriber for full access. If you’d prefer to support me on Patreon, please visit: https://www.patreon.com/RichardGray [...]
This video shows how to paint a Grimdark Grimy Death Guard for the Horus Heresy. The model is a new MKIII plastic marine and is painted in the Grimdark style to try and capture the weight and brutal nature of the armour. The following paints were used:Games Workshop: Balor Brown, Morghast Bone, Screaming Skull, Mephiston Red, Wildrider Red, Yriel Yellow, Contrast Darkoath Flesh, Contrast Medium, Rhinox Hide, Agrax Earthshade Vallejo: Heavy Blackgreen, Ice Yellow P3: Morrow White (Any white will do) Kimera Colours: Black (Any black will do) Pro Acryl: Light Bronze Metallic, Rich Gold Metallic Top Grimdark Grimy Death Guard Tips!: Prepare Your Palette: Utilize a wet palette to maintain paint hydration.For the initial dry brushing, use Balor Brown from Games Workshop on a wet palette.Choose the Right Brush:Select a small dry brush, like the Artis Opus dry brush, for the stippling technique.Stippling Technique:Diverge from traditional dry brushing; instead, stipple the paint onto the model.Aim for a disheveled, grimy, and weathered appearance.Start with Balor Brown, advancing to lighter hues like Morghast Bone, Screaming Skull, and Yriel Yellow for a textured effect.Application Method:Stipple the paint directly onto the model, concentrating on armour panels.Rotate the model as you paint to ensure each section dries before revisiting.Focus on hitting the model face-on with the brush to create a textured, dotty buildup.Chipping Effect:For chipping effects, use Rhinox Hide with a sponge chipping technique.Contemplate hand-painting some scratches for added detail.Accentuating Details:Employ a fine brush for details like scratches and chips.Highlight specific armour panels for added depth.Contrast and Weathering:Apply Darkoath Flesh contrast paint mixed with contrast medium to unify the your Grimdark Grimy Death Guard.Experiment with adding more brightness by layering appropriately watered-down contrast paints.Highlighting and Shadows: Highlight edges using Morrow White from P3.Contemplate applying washes like Agrax Earthshade to blend highlights and shadows.Use Ice Yellow from Vallejo for specific details, building up the colour gradually.Fine-Tune Highlights:Use a finer brush to refine highlights and correct any over-spill.Introduce Agrax Earthshade for added depth in recessed areas.Final Touches:Experiment with Wildrider Red and Mephiston Red from Games Workshop for added details.Apply a matte varnish to seal the paint job.Consider adding additional details to your Grimdark Grimy Death Guard like basing with textures and powders. If you don’t have an account, please sign up here! The website currently has over 350 video tutorials with steps and tips, plus tips and PDFs. If you are not sure about joining, you can explore my free videos with a free “freebies” membership, or take the plunge and become a full subscriber for full access. If you’d prefer to support me on Patreon, please visit: https://www.patreon.com/RichardGray [...]
Horn Painting Guide. PDF Tutorial How to paint a Nurgle horn with texture on a Deathshroud Terminator. – Richard Download the Horn Painting Guide Please wait for the PDF below to load to view, or download it here. HornguideforPatreon About the Guide In this detailed guide I meticulously explain the process of painting a horn on a Death Shroud terminator model, emphasising brush control and the right consistency of paint. The tutorial progresses through six stages, including colour banding, blending, and highlighting, with tips on brush selection and technique. It’s good resource for model painters keen on improving their skills in adding realistic textures and details to their Nurgle model and is filled with practical advice, making complex techniques accessible to painters at various skill levels. More Deathshroud Tutorials How to Paint Deathshroud ArmourDeathshroud Scythe Handle WrappingDeathshroud Terminator Cloak FreehandHorn Painting Guide Video Tutorials Death Guard Deathshroud Bodyguard A series of video tutorials on how I painted my set of Golden Demon winning Death Guard Deathshroud Bodyguard! This includes nurgly armour, weathering, rust, metals, tentacles, freehand and more! Watch Now More Nurgle Tutorials If you don’t have an account, please sign up here! The website currently has over 350 video tutorials with steps and tips, plus a selection of PDFs. If you are not sure about joining, you can explore my free videos with a free membership, or take the plunge and become a full subscriber for full access. If you’d prefer to support me on Patreon, please visit: https://www.patreon.com/RichardGray [...]
This video shows you how to paint a Death Guard marine for the Horus Heresy. This guide incorporates a mix of airbrushing and traditional painting techniques, ideal for achieving a weathered, battle-hardened look. Death Guard Horus Heresy – Video All videos are recorded in HD 1080p or higher – use full screen for the full effect and let the video load completely. You can also click the little “cog” and change the speed of the video, if I am going too fast (or slow!). Materials Required: Death Guard Marine miniature, primed black Airbrush and Tamiya X20A thinner Paints: Games Workshop’s Mournfang Brown, Ionrach Skin, Yriel Yellow, Mephiston Red, Troll Slayer Orange, Rhinox Hide, Moot Green, Mortarion Grime (Shade), Vallejo’s Black, Burnt Iron Metal Colour, Pure White, and P3’s Iosen Green Brushes, including a large brush for applying washes and a fine detail brush Painting Steps: Base Coat: Apply Mournfang Brown using an airbrush, thinned with Tamiya X20A to ensure smooth application. If an airbrush is unavailable, a brown primer can be used as an alternative. Secondary Coat: Airbrush Ionrach Skin over the model. If the paint speckles, add more thinner to achieve a smooth finish. Focus on armour panels, allowing some brown to show in recesses for depth. Highlighting: Use Vallejo Pure White, thinned more heavily than the previous layers, to highlight areas such as the head, chest, and shoulder pads. Be selective, as the right shoulder pad will be painted green later. Metallic Parts: Paint all metal parts with Vallejo Burnt Iron Metal Colour. For better control and to prevent the paint from flowing into unwanted areas, let it thicken slightly in a palette before use. Black Areas: Use a black contrast paint to cover areas like the shoulder pad. This can be done with a large brush for speed and efficiency. A couple of coats may be needed for full coverage. Green Shoulder Pad: Airbrush Iosen Green onto the left shoulder pad, gradually adding Yriel Yellow to the mix for a bright front highlight, creating a transition from bright to dark. Shading: Saturate the model with Mortarion Grime shade using a large brush. Ensure an even coat and avoid pooling. The shade will naturally darken recesses and enhance details. Chipping Effect: Apply Rhinox Hide to simulate chips and wear on the armour. Focus on edges and surfaces that would naturally see wear and tear. This step adds realism to the model. Highlighting Chips: Using Vallejo Pure White, highlight the lower edges of the chips to create a three-dimensional effect. This step is particularly effective in making the chipping stand out. Weapon Details: Highlight the gun with Neutral Grey by Vallejo, focusing on upward-facing edges and adding scratches for realism. This adds contrast and depth to the weapon. Glowing Red Eyes: Start with Mephiston Red, followed by Troll Slayer Orange, and then highlight with Yriel Yellow. Finish with a small dot of Pure White in the centre for a glowing effect. Final Touches: Apply light highlights of Vallejo Burnt Iron Metal Colour on metallic surfaces for extra sheen. Use Forge World Dark Sand weathering powder on the feet for a dusty look. Tips for Success: Ensure smooth transitions when airbrushing by adjusting paint consistency. Use the chipping technique to add character and age to the model. Focus on focal points like the head and chest for your brightest highlights. Experiment with the thickness of your paint for different effects; thicker paint can achieve sharper lines and highlights. Be mindful of the lore and aesthetic of the Death Guard when choosing colours, especially for details like the eye lenses. Remember, the goal is to create a visually striking model that embodies the rugged and corroded nature of the Death Guard. Show it off! As you progress, feel free to adapt and tweak techniques to suit your style. Good luck! When you’ve finished, why not pop into our Discord and show it off to other website members? 🙂 Free Video Tutorials Free videos for logged in members – just sign up as a ‘friend’ to view and click any of the thumbs.To explore all of these, visit this page! If you don’t have an account, please sign up here! The website currently has over 350 video tutorials, plus step by step guides and PDFs. You can explore more free videos with a free “freebies” membership, or take the plunge and become a full subscriber for full access. If you’d prefer to support me on Patreon, please visit: https://www.patreon.com/RichardGray [...]
How to paint a Deathshroud Terminator Cloak using freehand. This model won me a Golden Demon in 2017! These models represent the grotesque and decay-themed warriors of Nurgle, a faction known for their resilience and corrupted, plague-ridden aesthetics. So, in these tutorials we are aiming to enhance the models’ appearance with detailed faces and textures on their cloaks! Quick note here – these are some of my earliest tutorial videos, so are not of the same quality as my current tutorials visually and sound-wise. My apologies for this.Richard Video: Deathshroud Terminator Red Cloak This process results in a textured, worn cloak suitable for a Death Shroud Terminator, using a simple but effective painting technique. Materials and Paints Used Gal Vorbak Red (Forge World) Cadian Fleshtone (Games Workshop) Eldandil Violet (Scalecolour Fantasy) Step by Step Guide Base Coat: Start with Gal Vorbak Red as the primary colour. Detailing and Texture: Use Cadian Fleshtone for adding highlights and texture, creating a worn and mouldy appearance. Shading: Apply Eldandil Violet for shading in the recesses, enhancing depth and wear. Glazing with Evil Sunz Scarlet: Use it as a glaze to add warmth to the cloak. Refining Texture: Focus on cross-hatching movements to build texture, emphasizing the worn look. Final Touches: Add further glazes and highlights to refine the texture and depth, tailoring the effect to your desired level of detail. Video: Deathshroud Terminator Cloak Freehand Materials and Paints Used The following paints were used:Games Workshop: Rhinox Hide Vallejo: Heavy Brown, Cork Brown, Ice Yellow, Black P3: Battlefield Brown *Note, Morrow White was not actually used in this video, but is used in part 2. Step by Step Guide Preparation: I used a test model to experiment with my design concept. This approach allows you to refine the freehand pattern before applying it to the main models. Base Colours: Apply Vallejo Heavy Brown as a foundational colour. Enhance the base with Cork Brown for a richer texture. Use Rhinox Hide to outline the design, ensuring the lines are crisp and distinct. Detailing: Carefully mark the eye sockets with black paint, paying attention to the cloak’s folds. These details will add depth and character to the freehand design. Highlighting: Utilize Ice Yellow for highlights. This step involves blending the highlights with the base colors to achieve a natural, integrated look. The highlights should accentuate the topography of the cloak and enhance the freehand design. Shading: Use Battlefield Brown to deepen the shadows and add complexity to the design. This shade will create a more dynamic and realistic appearance on the cloak. Finishing Touches: Review the entire design, making final adjustments for consistency and balance. Focus on refining the freehand artwork, ensuring it harmonizes with the cloak’s texture and the overall theme of the model. Video: Deathshroud Terminator Cloak Freehand Refinement Materials and Paints Used The following paints were used: Games Workshop: Cadian Fleshtone, Pallid Wych Flesh, Bugman’s Glow, Rhinox Hide, Loren Forest, Nurgling Green, Vallejo: Ice Yellow, Cork Brown, Black, Neutral Grey, Pale Grey Blue, Heavy Brown P3: Battlefield Brown, Morrow White Step by Step Guide Base Preparation: Start by painting a rough base of fleshy shapes using Cadian Fleshtone. This initial layer doesn’t need to be perfect or smooth. Detailing Ears and Face: Add ears to distinguish the image from a skull, creating a more zombie-like face. Use Kadeem Flesh Tone for this step. Sketching Flesh and Bone: Sketch out areas where flesh appears torn or missing, revealing bone underneath. This technique enhances the undead appearance and integrates the existing skull highlights. Adding White Highlights: Use Pallid Wych Flesh to accentuate bone areas, making them stand out from the flesh tone. Painting the Eyes: Employ Neutral Grey, followed by Pale Grey Blue for the eyes. Add white dots in the center and top left corner of each eye for a lifelike effect. Mouth and Teeth Details: Refine the mouth and teeth using Rhinox Hide and Ice Yellow for highlights. Focus on defining the teeth shapes and adding depth to the mouth. Adding Texture to Flesh: Use Bugman’s Glow and other flesh tones to create textured, worn skin. Apply these tones in layers, allowing the underlying skull details to peek through. Final Touches: Finish by adding fine details and additional highlights to enhance the depth and realism of the freehand design. The key to this process is building up the layers gradually, refining the details as you go, a More Deathshroud Tutorials How to Paint Deathshroud ArmourDeathshroud Scythe Handle WrappingDeathshroud Terminator Cloak FreehandHorn Painting Guide All Deathshroud Bodyguard Video Tutorials Death Guard Deathshroud Bodyguard A series of video tutorials on how I painted my set of Golden Demon winning Death Guard Deathshroud Bodyguard! This includes nurgly armour, weathering, rust, metals, tentacles, freehand and more! Watch Now More Freehand Tips: If you don’t have an account, please sign up here! The website currently has over 350 video tutorials with steps and tips, plus a selection of PDFs. If you are not sure about joining, you can explore my free videos with a free membership, or take the plunge and become a full subscriber for full access. If you’d prefer to support me on Patreon, please visit: https://www.patreon.com/RichardGray [...]

If you don’t have an account, please sign up here! The website currently has over 350 video tutorials with steps and tips, plus a selection of PDFs. If you are not sure about joining, you can explore my free videos with a free membership, or take the plunge and become a full subscriber for full access.

Deathguard Deathshroud Bodyguard

If you’d prefer to support me on Patreon, please visit: https://www.patreon.com/RichardGray

Leave a Reply