


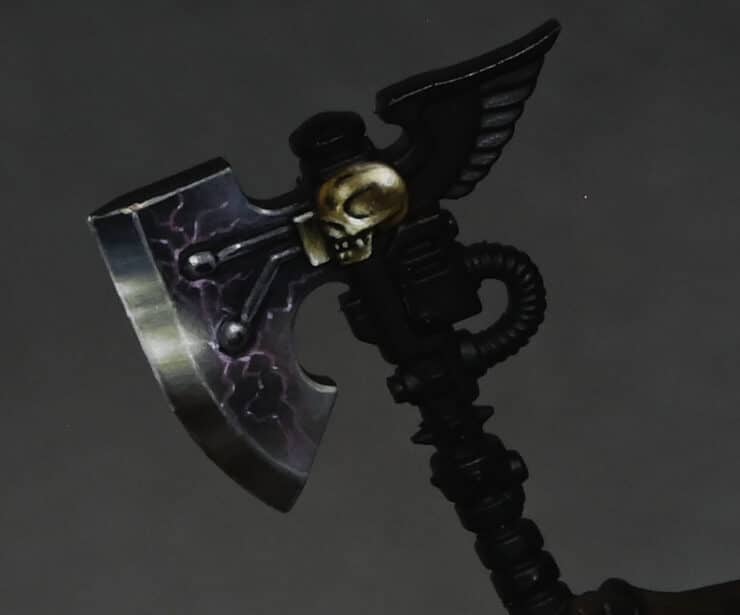
This video shows how to paint the Dante’s axe using NMM or SENMM (Sky Earth Non Metallic Metal.) The video also covers some of the challenges of painting in hot weather!
This video is currently hidden. Please make sure you are a member of the website to view!
Materials Needed:
- Paints:
- Games Workshop: Sotek Green, Rhinox Hide, Mournfang Brown, Wazdakka Red
- Vallejo: German Grey, Neutral Grey, Ice Yellow
- P3: Morrow White
- Brushes:
- A variety of sizes including 00 for fine details
- Palette: For mixing colours
- Water pot: For thinning paints and cleaning brushes
Steps:
- Initial Blocking In:
- Start by applying a mix of Neutral Grey and Mournfang Brown at the lower part of the axe for the Earth section of SENMM.
- Above that, apply a mix of Sotek Green and Neutral Grey. However, this will be lightened later on for blending purposes.
- Lightening the Blue-Green Mix:
- Mix Ice Yellow with the Sotek Green and Neutral Grey mix to lighten it, allowing for smoother blending with the lighter colours in the middle.
- Painting the Upper and Lower Sections:
- Use various mixes of Neutral Grey and Ice Yellow to create gradients and highlights.
- For the Earthy sections, use Mournfang Brown and Rhinox Hide.
- Creating Specular Highlights:
- Apply Morrow White for the brightest highlights on the most raised edges.
- Be mindful of the light source and the reflective qualities you’re trying to achieve with NMM.
- Adding Lightning Effect:
- Use Wazdakka Red, gradually adding white for the lightning effects.
- Focus on creating dynamic, jagged lines emanating from the power nodes of the axe.
- Glazing and Smoothing:
- Use glazing techniques with lighter colours to smooth out transitions and refine highlights.
- Adjust the consistency of your glazes depending on the humidity and temperature of your painting environment.
- Final Touches:
- Refine the edges and any rough areas.
- If necessary, add more layers to enhance depth and realism.
Tips:
- Paint Consistency: Adjust the paint consistency based on your environment. Hotter conditions may require more frequent watering of paints.
- Brush Care: Use a separate brush for mixing paints to preserve the tips of your detail brushes.
- Light Reflection: Constantly refer back to how light naturally interacts with metal surfaces to guide your highlight placement.
- Patience and Layers: Build up your layers gradually and allow each to dry before applying the next.
Now, you’re all set to bring Dante’s axe to life with a stunning NMM effect that mimics the intricate play of light on metal surfaces!
More NMM Tutorials
NMM
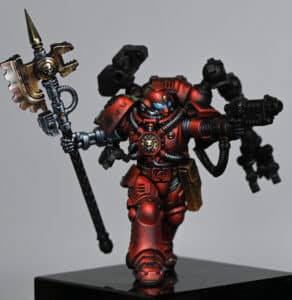
This how to paint a Red Techmarine NMM Axe guide aims to help you achieve a realistic non-metallic metal effect on your Techmarine’s axe, with a focus on contrast, texture, and light reflection.
For all of the videos on how to paint a Red Techmarine, follow the link below, or scroll down here for just the axe guide!
Red Techmarine
A series for how to paint a Primaris Techmarine by Games Workshop.
Watch Now
Video: How to Paint a Red Techmarine – NMM Axe
This guide aims to help you achieve a realistic non-metallic metal effect on your Techmarine’s axe, with a focus on contrast, texture, and light reflection.
Materials Needed:
Fine detail brushes for precise application.
A wet palette to keep your paints hydrated.
Vallejo and Games Workshop paints: Doombull Brown, Mournfang Brown, Balor Brown, XV-88, Ice Yellow, Pale Grey Blue, and P3 Morrow White (or any white).
Preparing the NMM Axe:
Metal Pole: Begin by painting the metal pole using the same NMM techniques detailed in the previous video. This ensures consistency across metallic elements of the miniature.
Painting the Circular Detail on the NMM Axe:
Base Colour: Start with the darker brown (Doombull Brown), applying it as the base for the small circular detail on the pole. This connects the colour scheme with the axe head, adding warmth and interest.
Highlighting: Gradually build up the highlights transitioning from dark (Doombull Brown) to light (XV-88 to Ice Yellow) from the top to the bottom of the circular detail. Finish with a thin edge highlight at the top for definition.
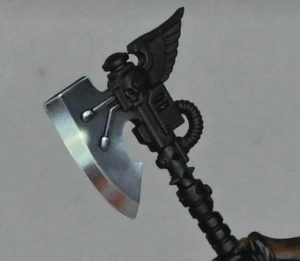
Painting the NMM Axe Blade:
Vertical Lines: Initially, paint vertical lines across the blade with a mixture of 50:50 water to paint. This underlayer softens the stark contrast between subsequent horizontal lines and the dark primer.
Adding Texture: Apply horizontal lines over the vertical ones to create a cross-hatching effect. This technique adds texture and subtlety to the blade, avoiding harsh contrasts.
Defining Highlights: Focus on creating a diagonal highlight across the axe head, marking the primary light reflection. This line should be brighter at the top edge of the blade, tapering and becoming more subtle as it crosses the blade.
Building Up the Blade’s Texture:
Further Highlights: Use Mournfang Brown to add more texture and depth, emphasizing the top of the blade where the light is strongest. The aim is to make the top appear lighter than the bottom, enhancing the NMM effect.
Ice Yellow Highlights: Progress to Ice Yellow for the highest highlights, concentrating on areas that would catch the most light. Ensure these lines are fine and precise to maintain the textured look.
Detailing the Axe Head:
Base Texturing: With Mournfang Brown, create scribbly, textured marks on the flat of the axe head, focusing on creating a light to dark modulation from one edge to the other.
Enhancing Texture: Progress through Balor Brown and XV-88, adding finer, more controlled highlights to build up the texture. These should be more focused and less extensive than the base texture, adding depth and interest to the surface.
Final Highlights: Use Ice Yellow and Pale Grey Blue for the final highlights, paying particular attention to areas like the skull and the circle on the axe head. These colours should only be applied to the blade for differentiation, so don’t go too crazy with them, adding a cool tone to contrast with the warmer body of the axe head.
Finishing Touches:
Neatening Edges: Go back and tidy up any overspill or overly broad lines with the base colours, ensuring the texture remains coherent and the contrasts sharp.
Evaluation: Step back and review the entire piece, making any necessary adjustments to ensure the NMM effect is convincing and the textures and contrasts work together harmoniously.
If you can’t see the videos, please sign up here! The website currently has over 350 video tutorials with steps and tips, plus a selection of PDFs. If you are not sure about joining, you can explore my free videos with a free membership, or take the plunge and become a full subscriber for full access.
If you’d prefer to support me on Patreon, please visit: https://www.patreon.com/RichardGray [...]
Read more...
This video shows how to paint Dante’s axe NMM. This is my second try at the axe NMM, as I wasn’t happy with the first result!
Video – How to Paint Dante Axe NMM
Materials and Paints Used
Paints
Games Workshop Paints:
Baharroth Blue
Rhinox Hide
Mournfang Brown
Vallejo Paints:
Ice Yellow
Neutral Grey
German Grey
Kimera Colours Paint:
Diarylide Yellow (Note: You can create a similar effect by mixing Yriel Yellow with a small amount of orange)
Materials
Black Primer: For the initial coat on the axe.
Wet Palette: For mixing and maintaining paint consistency.
Fine Detail Brushes: Essential for applying precise highlights and details – I use Artist Opus brushes, but any high-quality fine-detail brush is fine
Sanding Tools: For modifying and smoothing the cutting edge of the axe.
Step 1: Preparing the Axe
Initial Assessment: Note that The Cutting Edge is blunt, almost a millimeter wide.
Modification: Carefully shave down The Cutting Edge for a more realistic, thin look. Ensure evenness to avoid wonky highlights.
Step 2: Base Painting
Primer: Apply a light coat of black primer.
Base Colours:
For the flat side of the axe, start with a base of Neutral Grey (Vallejo).
For The Cutting Edge, use Rhinox Hide (Games Workshop) at the top, blending into Mournfang Brown towards the bottom.
Step 3: Sky Earth Non-Metallic Metal (NMM) Technique
Sky Representation: Mix Baharroth Blue (Games Workshop) with Ice Yellow (Vallejo) to create a sky-like gradient on the flat side of the axe. Start darker at the top, gradually lightening towards the bottom.
Earth Representation: At the bottom of The Cutting Edge, use a mix of Rhinox Hide and Mournfang Brown (Games Workshop) for the earth reflection. Blend Neutral Grey (Vallejo) into this mix for lighter shades towards the bottom.
Adding Highlights: Gradually add more Ice Yellow (Vallejo) to the Baharroth Blue mix for the sky, and more Mournfang Brown for the earth, to create a sense of depth and reflection.
Reflection Details: Add subtle warped shapes and lines to mimic trees or mountains in the reflection, enhancing the mirror-like quality.
Step 4: Refining the Metallic Look
Glare Effect: Identify the primary light source and add a glare effect on the axe. This will be higher up on the axe blade.
Shine Spots: Paint independent shine spots to enhance the metallic effect. Use a mix of Neutral Grey and German Grey (Vallejo) for darker areas, and a mix of Ice Yellow and Baharroth Blue for lighter areas.
Step 5: Edge Highlights and Final Touches
Edge Highlights: Apply thin highlights along The Cutting Edge and other prominent edges of the axe. Use a mixture of the base colors for a consistent look.
Lightning Effect (Optional): If desired, add a subtle lightning effect, particularly in darker areas. Use saturated colors with minimal highlights.
Final Glazing: Use thinned down Ice Yellow (Vallejo) and Diarylide Yellow (Kimera Colors) or a similar mix for warm glazing over the highlights.
Pure White Highlights: Add small dots of pure white paint at the brightest points of the shine spots for maximum impact.
Now, you’re all set to bring Dante’s axe to life with a stunning NMM effect that mimics the intricate play of light on metal surfaces! While you are here, check out more NMM tutorials to try.
More NMM Tutorials
If you don’t have an account, please sign up here! The website currently has over 350 video tutorials with steps and tips, plus a selection of PDFs. If you are not sure about joining, you can explore my free videos with a free “freebies” membership, or take the plunge and become a full subscriber for full access.
If you’d prefer to support me on Patreon, please visit: https://www.patreon.com/RichardGray [...]
Read more...
A series looking at how to paint Commander Dante, which was sent to me for early review purposes by Games Workshop. The model is being painted to a high standard and will be covered in large amounts of NMM (Non Metallic Metal)
Quick Jump To:
Materials and Paints Needed for the NMMVideo – How to Paint Commander Dante NMM: Part OneVideo – How to Paint Commander Dante NMM: Part TwoVideo – How to Paint Commander Dante NMM: Part ThreeSteps and Tips on Commander Dante: NMMBase LayerDeveloping Mid-TonesRefining HighlightsEnhancing BrightnessDeepening ShadowsFinal Highlights and Sharp DetailsGlazing and SmoothingClean UpTips for Success:Video – NMM Axe (First Version)Materials NeededStepsTipsVideo – NMM Axe (Second Version)Materials and Paints UsedPreparing the AxeBase PaintingSky Earth Non-Metallic Metal (NMM) TechniqueRefining the Metallic LookEdge Highlights and Final TouchesVideo – Head, Eyes, Blood GemMaterials and Paints Needed:Steps for Commander Dantes Head and DetailsVideo – Red Shoulder NMMPaints NeededStepsTips
Materials and Paints Needed for the NMM
Fine Detail Brushes: Essential for precise work on NMM effects.
Black Primer: To create a solid base for your colours.
Palette: For mixing your paints and achieving the right consistency.
Paints:
Base and Mid-Tones: Mournfang Brown, XV-88, Balor Brown (Games Workshop)
Highlights: Ice Yellow (Vallejo; you can substitute with Dorn Yellow from GW), Troll Slayer Orange, Flash Gitz Yellow (Games Workshop)
Shadows and Deep Recesses: Rhinox Hide (Games Workshop)
Final Highlights and Sharp Details: Morrow White (P3; any high-quality white paint will suffice)
Video – How to Paint Commander Dante NMM: Part One
All videos are recorded in HD 1080p or higher – use full screen for the full effect and let the video load completely. Click the cog icon to choose speed, if I’m too fast or slow!
Video – How to Paint Commander Dante NMM: Part Two
Video – How to Paint Commander Dante NMM: Part Three
Steps and Tips on Commander Dante: NMM
Base Layer
Paint: Mournfang BrownApplication: Apply Mournfang Brown as a base layer over the areas you intend to paint gold. This forms a foundational layer that aids in building depth.
Developing Mid-Tones
Paints: Mournfang Brown, XV-88, Balor BrownApplication: Begin layering XV-88 over the Mournfang Brown base, focusing on raised areas. Then, use Balor Brown to start defining the mid-tones, enhancing the dimensional appearance.
Refining Highlights
Paints: Mix of Balor Brown and Ice YellowApplication: Create a lighter shade by mixing Balor Brown with a small amount of Ice Yellow. Apply this mixture to the highest points of the highlighted areas, where light naturally catches more intensely.
Enhancing Brightness
Paints: Ice Yellow, Troll Slayer Orange, Flash Gitz YellowApplication: Gradually add brighter highlights using these colours. Focus on areas where light would hit the strongest, such as edges and prominent features.
Deepening Shadows
Paint: Rhinox HideApplication: Use Rhinox Hide to deepen the shadows and add contrast. Apply it in recessed areas and where different parts of the model meet, to give more definition and depth.
Final Highlights and Sharp Details
Paint: Morrow WhiteApplication: Apply Morrow White for the brightest highlights and sharp details, accentuating the most raised edges where the light would be most intense.
Glazing and Smoothing
Technique: GlazingApplication: If necessary, use glazing with the lighter colours to smooth out transitions between highlights and mid-tones, ensuring a more natural progression of colour.
Clean Up
Action: Tidy any overspill or mistakes with appropriate base colours. This step is crucial for a neat and professional finish.
Tips for Success:
Consistency is Key: Maintain the right paint consistency. For NMM, a slightly thicker mix can be preferable for vibrant colours, but it should still flow smoothly.Consider Lighting: Always consider the overall lighting and direction of your model. Your highlights should consistently reflect this light source.Brush Care: Look after your brushes. Use a separate brush for mixing paints to maintain the fine tips of your detail brushes.Patience Pays Off: Allow each layer to dry thoroughly before proceeding to the next. NMM is a technique that benefits greatly from patience and careful layering.
Video – NMM Axe (First Version)
Materials Needed
Paints:
Games Workshop: Sotek Green, Rhinox Hide, Mournfang Brown, Wazdakka Red
Vallejo: German Grey, Neutral Grey, Ice Yellow
P3: Morrow White
Brushes:
A variety of sizes including 00 for fine details
Palette: For mixing colours
Water pot: For thinning paints and cleaning brushes
Steps
Initial Blocking In:
Start by applying a mix of Neutral Grey and Mournfang Brown at the lower part of the axe for the Earth section of SENMM.
Above that, apply a mix of Sotek Green and Neutral Grey. However, this will be lightened later on for blending purposes.
Lightening the Blue-Green Mix:
Mix Ice Yellow with the Sotek Green and Neutral Grey mix to lighten it, allowing for smoother blending with the lighter colours in the middle.
Painting the Upper and Lower Sections:
Use various mixes of Neutral Grey and Ice Yellow to create gradients and highlights.
For the Earthy sections, use Mournfang Brown and Rhinox Hide.
Creating Specular Highlights:
Apply Morrow White for the brightest highlights on the most raised edges.
Be mindful of the light source and the reflective qualities you’re trying to achieve with NMM.
Adding Lightning Effect:
Use Wazdakka Red, gradually adding white for the lightning effects.
Focus on creating dynamic, jagged lines emanating from the power nodes of the axe.
Glazing and Smoothing:
Use glazing techniques with lighter colours to smooth out transitions and refine highlights.
Adjust the consistency of your glazes depending on the humidity and temperature of your painting environment.
Final Touches:
Refine the edges and any rough areas.
If necessary, add more layers to enhance depth and realism.
Tips
Paint Consistency: Adjust the paint consistency based on your environment. Hotter conditions may require more frequent watering of paints.
Brush Care: Use a separate brush for mixing paints to preserve the tips of your detail brushes.
Light Reflection: Constantly refer back to how light naturally interacts with metal surfaces to guide your highlight placement.
Patience and Layers: Build up your layers gradually and allow each to dry before applying the next.
Video – NMM Axe (Second Version)
This is my second try at the axe NMM, as I wasn’t happy with the first result! You can use whichever you prefer.
Video – How to Paint Dante Axe NMM (V2)
Materials and Paints Used
Paints
Games Workshop Paints:
Baharroth Blue
Rhinox Hide
Mournfang Brown
Vallejo Paints:
Ice Yellow
Neutral Grey
German Grey
Kimera Colours Paint:
Diarylide Yellow (Note: You can create a similar effect by mixing Yriel Yellow with a small amount of orange)
Materials
Black Primer: For the initial coat on the axe.
Wet Palette: For mixing and maintaining paint consistency.
Fine Detail Brushes: Essential for applying precise highlights and details – I use Artist Opus brushes, but any high-quality fine-detail brush is fine
Sanding Tools: For modifying and smoothing the cutting edge of the axe.
Preparing the Axe
Initial Assessment: Note that The Cutting Edge is blunt, almost a millimeter wide.
Modification: Carefully shave down The Cutting Edge for a more realistic, thin look. Ensure evenness to avoid wonky highlights.
Base Painting
Primer: Apply a light coat of black primer.
Base Colours:
For the flat side of the axe, start with a base of Neutral Grey (Vallejo).
For The Cutting Edge, use Rhinox Hide (Games Workshop) at the top, blending into Mournfang Brown towards the bottom.
Sky Earth Non-Metallic Metal (NMM) Technique
Sky Representation: Mix Baharroth Blue (Games Workshop) with Ice Yellow (Vallejo) to create a sky-like gradient on the flat side of the axe. Start darker at the top, gradually lightening towards the bottom.
Earth Representation: At the bottom of The Cutting Edge, use a mix of Rhinox Hide and Mournfang Brown (Games Workshop) for the earth reflection. Blend Neutral Grey (Vallejo) into this mix for lighter shades towards the bottom.
Adding Highlights: Gradually add more Ice Yellow (Vallejo) to the Baharroth Blue mix for the sky, and more Mournfang Brown for the earth, to create a sense of depth and reflection.
Reflection Details: Add subtle warped shapes and lines to mimic trees or mountains in the reflection, enhancing the mirror-like quality.
Refining the Metallic Look
Glare Effect: Identify the primary light source and add a glare effect on the axe. This will be higher up on the axe blade.
Shine Spots: Paint independent shine spots to enhance the metallic effect. Use a mix of Neutral Grey and German Grey (Vallejo) for darker areas, and a mix of Ice Yellow and Baharroth Blue for lighter areas.
Edge Highlights and Final Touches
Edge Highlights: Apply thin highlights along The Cutting Edge and other prominent edges of the axe. Use a mixture of the base colors for a consistent look.
Lightning Effect (Optional): If desired, add a subtle lightning effect, particularly in darker areas. Use saturated colors with minimal highlights.
Final Glazing: Use thinned down Ice Yellow (Vallejo) and Diarylide Yellow (Kimera Colors) or a similar mix for warm glazing over the highlights.
Pure White Highlights: Add small dots of pure white paint at the brightest points of the shine spots for maximum impact.
Video – Head, Eyes, Blood Gem
Materials and Paints Needed:
Fine Detail Brush: Crucial for precision work on small areas like eyes and gems.
Magnification Tool (Optional): Can be useful for extremely detailed areas.
Palette: Necessary for mixing and thinning your paints.
For Gold Tones: XV-88, Balor Brown, Rhinox Hide (Games Workshop)
Highlights for Gold: Troll Slayer Orange, Ice Yellow (Vallejo)
Eyes Base Colour: Sotek Green (Games Workshop)
Eyes and Gem Highlights: Morrow White (P3)
Blood Gem: Mephiston Red, Wild Rider Red (Games Workshop)
Steps for Commander Dantes Head and Details
Refining the Gold: Enhance the gold’s depth by adding more orange reflections, especially on the cheeks and ear muffs. This technique replicates the way gold reflects on gold, creating an orange hue.
Eyes Detailing: Start with Sotek Green for the base. For the highlights, progressively mix in Morrow White with Sotek Green. Focus on the lower edge of each eye, adding more intense highlights near the tear duct and finishing with a small white dot at the back for a gem-like appearance.
Blood Gem on Forehead: Use Mephiston Red as the base color for the gem. Apply Wild Rider Red on the lower right section to simulate light reflection within the gem. Mix a small amount of Morrow White with Wild Rider Red for the edge highlights, ensuring a realistic gem look.
Layering for NMM Gold Effect: Apply layers of XV-88, Balor Brown, and Rhinox Hide, using the translucency of the paints to create depth and warmth in the gold. Troll Slayer Orange is key for achieving reflective properties and varied tones in the gold.
Detailed Facial Features: Paint a dark line from below the nose over both lips down to the chin. This creates a division on the face, adding to the realism. Make sure the right side of the face is slightly lighter than the left.
Fine Touches on Eyes and Gem: Ensure the eyes are fully covered in blue to maintain their vibrancy. For the blood gem, detail the top left of the gem with a sharp edge and a line running down, symbolizing light reflection.
Reviewing and Balancing: Regularly step back to assess the overall look. It’s essential to balance the details with the overall aesthetics of the miniature.
Assembling and Final Review: Once all the parts are painted, assemble the head and do a final review. Make any necessary adjustments for a polished look.
Video – Red Shoulder NMM
Paints Needed
Games Workshop: Mephiston Red, Evil Sunz Scarlet, Mournfang Brown, Balor Brown, Trollslayer Orange, Rhinox Hide
Vallejo: Ice Yellow, Black
Steps
Base and Mapping:
Start with Mephiston Red mixed with a small amount of black to map out where the shiny parts will be.
Apply this mix to create the initial shape of the reflection on the shoulder pad.
Building Layers:
Use gradually lighter mixes of Mephiston Red and Evil Sunz Scarlet, adding Ice Yellow for the lighter tones.
Focus on smooth layering to build up the red tones, paying attention to how light naturally reflects on a curved surface.
Defining the Shine:
For the brightest shine spot, use a combination of XV-88, Balor Brown, and Ice Yellow from Games Workshop.
Apply these colours carefully to create a realistic reflection effect.
Painting the Gold Trim:
Start with Mournfang Brown and Rhinox Hide for darker areas.
Progressively mix in Trollslayer Orange and Ice Yellow for brighter sections.
Ensure a smooth transition between the red of the shoulder pad and the gold trim to maintain a cohesive look.
Adding Additional Reflections:
Insert additional shine spots in both the red and gold areas for more depth and realism.
Use stippling techniques to create a diffused yet shiny highlight on the brightest parts.
Be mindful of the shape and direction of these additional reflections to maintain consistency with the light source.
Final Touches:
Use a mix of Mephiston Red and Evil Sunz Scarlet for the final glazes to enhance the vibrancy of the red.
Add final highlights with the lightest mix of Ice Yellow and white for the brightest points.
Refinement:
Go back and refine any areas as needed, especially the transitions between highlights and shadows.
Add intricate details such as reflected light on the gold trim to enhance the NMM effect.
Tips
Paint Consistency: Adjust the paint-to-water ratio to around 60% water for smoother application and finish.
Reflection Logic: Consider the shape of the shoulder pad and how light interacts with it. Use a lamp to guide your reflection placement.
Edge Highlights: Be careful with edge highlights; ensure they are consistent with the overall light reflection and texture of the surface.
Patience and Layers: Build up the layers gradually for a smooth transition. This is crucial for achieving a realistic NMM effect.
Stippling Technique: Use stippling in the brightest areas to create a diffused highlight, adding depth and realism.
Harmonizing Colours: Ensure the reds and golds complement each other, keeping the overall look cohesive.
Reflective Details: Consider adding subtle reflective details in surrounding areas, like reflected red light on nearby silver parts, to enhance realism.
Rest and Review: Sometimes stepping away from the model and returning with fresh eyes can help spot areas needing refinement or a different approach.
More Tutorials to Explore
If you don’t have an account, please sign up here! The website currently has over 350 video tutorials with steps and tips, plus a selection of PDFs. If you are not sure about joining, you can explore my free videos with a free “freebies” membership, or take the plunge and become a full subscriber for full access.
If you’d prefer to support me on Patreon, please visit: https://www.patreon.com/RichardGray [...]
Read more...
This video is the first in a short series for how to paint the Cities of Death Arch Knight from the Freeguild Command Corps. The colours are selected to achieve an aquatic feel to match the style of the armour and are painted using NMM (Non-Metallic Metal) The set was sent to me for review by Games Workshop.
How to Paint Cities of Death Arch Knight – Part One:
The following paints were used:Games Workshop: Sotek Green Vallejo: Neutral Grey, Ice Yellow, Heavy Blackgreen P3: Morrow White
Top Tips on How to Paint Cities of Death Arch Knight
Choosing the Axe: If you prefer the look of the axe over the hammer, go for it. The lack of specific details on the axe allows for creative freedom in painting a fancy cutting blade.
Colour Scheme: Opt for a green, blue, and turquoise colour scheme to complement the fish theme. Use paints like Sotek Green, Ice Yellow, and Vallejo Heavy Blackgreen for reflections.
Mapping Highlights with Vallejo Neutral Grey: Begin by mapping out highlight points using Vallejo Neutral Grey. This will serve as a base for the non-metallic metal style.
Blocking In: Use a larger brush initially, like a size 3, for quick blocking of colours. This helps cover large areas efficiently, but be aware it may result in a more translucent finish.
Layering Colours for Non-Metallic Effect: Layer Sotek Green mixed with Neutral Grey and Ice Yellow for the non-metallic effect. Adjust the mix for a gradual transition and blend as needed.
Reflective Surfaces and Angles: Consider the angles and reflective surfaces carefully. Downward-facing parts should reflect the chosen colours, but keep in mind the realism of the light source and its impact on reflections.
Focus on Head, Chest, and Shoulder Area: Concentrate on painting the head, chest, and shoulder areas. This not only emphasises the most interesting parts of the model but also guides the viewer’s attention.
Highlighting Techniques: Use careful brush marks for highlights, especially on intricate shapes like the fish helmet. Sharp, harsh brush marks can create a textured and reflective surface.
Balancing Reflections and Colours: Strike a balance between the upward-facing and downward-facing reflections. Consider the colour wheel for harmonious combinations, avoiding overly contrasting colours.
Refining and Detailing: The refining phase is crucial. Continuously refine and add details to elevate the model’s overall finish. This process can take the model from a basic finish to a Golden Demon standard with dedication.
More NMM Tutorials
If you don’t have an account, please sign up here! The website currently has over 350 video tutorials with steps and tips, plus tips and PDFs. If you are not sure about joining, you can explore my free videos with a free “freebies” membership, or take the plunge and become a full subscriber for full access.
If you’d prefer to support me on Patreon, please visit: https://www.patreon.com/RichardGray [...]
Read more...
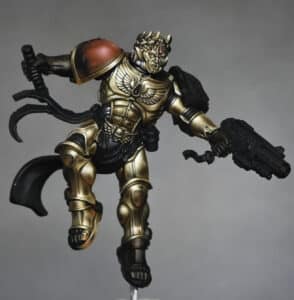
Here is the shorter version of my Alchemite Warforger video, which is available to watch on here or Youtube for free. For more detail, check out the longer version!
The following paints were used: Games Workshop: Rhinox Hide, Mournfang Brown, Balor Brown, Daemonette Hide, Slaanesh Grey, Mephiston Red, Yriel Yellow, Wild Rider Red, Troll Slayer Orange, Bugman’s Glow, Cadian Fleshtone, Morghast Bone, XV88.Vallejo: Ice Yellow, German Grey, Neutral GreyP3: Morrow White Grass: Mininatur Spring Moss Pads
Step-by-Step Guide to the Alchemite Warforger
Preparation:
Assemble your Cities of Sigmar Alchemite Warforger model from the Cities of Sigma box set.
Prime the model with black primer.
Omit the cube with smoke for easier painting (add it back when you’ve painted the model!)
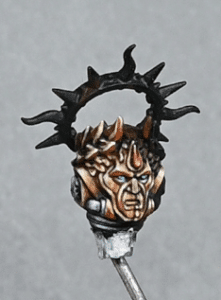
Helmet Painting:
Use XV88 to block in highlights for a bronzy colour on the helmet.
Apply the paint loosely with a size 2 Artist Opus brush, focusing on where light naturally falls.
Thin the paint to around 1.5 parts water to 1 part paint for easy layering.
Metal Painting:
Use a gray base colour (Neutral Gray or Mechanicum Standard Gray) for most steel-colored objects.
Optionally, add colour with Daemonette Hide for a purpley-gray tone.
Apply the paint loosely and scribbly to create texture.
Use smaller brushes for refined marks in specific areas.
Consider adding Daemonette Hide and Slaanesh Gray for additional colour on metal pieces for reflections.
Leather Parts:
Base the leather apron and other leather parts with Rhinox Hide.
Apply the paint loosely with a mix of around 1.5 parts water to 1 part paint.
Keep the paint flowing with the shape of the sculpt for a harmonized look.
Highlighting:
Highlight the metal parts with Slaanesh Gray, applying smaller and more refined marks.
For leather, use Mornfang Brown for additional layers, creating a distinct color difference.
Glaze with Mourning Brown on top of the highlights for added contrast.
For leather straps, use larger black marks at the edges and smaller marks towards the core.
Skin Painting:
Base the skin with Rhinox Hide and layer with Mornfang Brown.
Highlight using the following sequence: XV88, Guardian Flesh Tone mixed with Baneblade Brown and a bit of white.
Keep the skin texture smooth, differentiating it from the heavily textured leather.
Final Details:
Apply Verdigris to metal clasps for a weathered look.
Add OSL (Object Source Lighting) with plain flesh tone for the rune effect.
Optionally, use Rhinox Hide for a runic effect.
Consider the placement of the cube with smoke for potential obstructions.
Remember, these steps are a guide, and you can adjust them based on your preferences and painting style. Happy painting!
More Full Character Tutorials
Free Video Tutorials
Free videos (for logged in members – just sign up as a ‘friend’ to view and click any of the thumbs.To explore all of these, visit this page!
If you don’t have an account, please sign up here! The website currently has over 350 video tutorials, plus step by step guides and PDFs. You can explore more free videos with a free “freebies” membership, or take the plunge and become a full subscriber for full access.
If you’d prefer to support me on Patreon, please visit: https://www.patreon.com/RichardGray [...]
Read more...
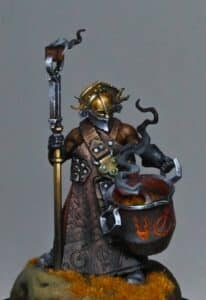
This full video shows how to paint an Alchemite Warforger from the Cites of Sigmar, which Games Workshop sent to me as an early review copy.This guide will cover various techniques such as non-metallic metal effects (NMM), leather texture, and object source lighting (OSL).
How to paint an Alchemite Warforger Video
You’ll Need:
Alchemite Warforger.
A range of brushes (including a size 3 Artist Opus M brush).
Paints from Games Workshop: Rhinox Hide, Mournfang Brown, Balor Brown, Daemonette Hide, Slaanesh Grey, Mephiston Red, Yriel Yellow, Wild Rider Red, Troll Slayer Orange, Bugman’s Glow, Cadian Fleshtone, Morghast Bone.
Vallejo paints: Ice Yellow, German Grey, Neutral Grey.
P3 paint: Morrow White.
Mininatur Spring Moss Pads for basing.
Let’s Get Started:
Base Coating: Initiate with a base layer of XV-88. This creates an ideal foundation for both gold and bronze non-metallic metal (NMM) effects. Apply these base colours in a relaxed manner; perfection isn’t the goal at this stage.
Non-Metallic Metal (NMM) Bronze/Gold: Use a combination of XV-88, Balor Brown, Ice Yellow, and a touch of Rhinox Hide. Mix these colours in various ratios to achieve the desired NMM effect.
Leather Textures: For the leather apron and straps, start with a base of Rhinox Hide. Then, build up the texture and highlights with Bugman’s Glow and Cadian Fleshtone, adding Morghast Bone for the lighter areas.
Skin Tones: Begin with Mournfang Brown as the base for the skin. Gradually layer up the skin tones using a mix of Mournfang Brown and Cadian Fleshtone, finishing with lighter highlights.
Object Source Lighting (OSL): For the glowing effects, such as the pot’s contents, start with Mephiston Red and build up to Yriel Yellow and Wild Rider Red for the intense glow.
Detailing: Use Slaanesh Grey and Daemonette Hide for the cooler tones, and Vallejo’s Ice Yellow and Neutral Grey for the metallic areas. German Grey can be used for darker shadows.
Finishing Touches: Use Morrow White for the brightest highlights and final touches. The base can be detailed with Mininatur Spring Moss Pads to add a natural touch.
Remember, painting is about building up layers and textures, so take your time and enjoy the process. Each layer adds depth and character to your Alchemite Warforger.
Explore More of my Character Tutorials
If you don’t have an account, please sign up here! The website currently has over 350 video tutorials with steps and tips, plus a selection of PDFs. If you are not sure about joining, you can explore my free videos with a free “freebies” membership, or take the plunge and become a full subscriber for full access.
If you’d prefer to support me on Patreon, please visit: https://www.patreon.com/RichardGray [...]
Read more...
This video looks more at the head of Commander Dante and shows his Eyes, and Blood Drop as well as more NMM Gold of the face. Commander Dante is being painted as a Golden Demon entry.
Video Tutorial: Commander Dante Head and Details
Materials and Paints Needed:
Fine Detail Brush: Crucial for precision work on small areas like eyes and gems.
Magnification Tool (Optional): Can be useful for extremely detailed areas.
Palette: Necessary for mixing and thinning your paints.
Paints:
For Gold Tones: XV-88, Balor Brown, Rhinox Hide (Games Workshop)
Highlights for Gold: Troll Slayer Orange, Ice Yellow (Vallejo)
Eyes Base Colour: Sotek Green (Games Workshop)
Eyes and Gem Highlights: Morrow White (P3)
Blood Gem: Mephiston Red, Wild Rider Red (Games Workshop)
Steps for Commander Dantes Head and Detail:
Refining the Gold: Enhance the gold’s depth by adding more orange reflections, especially on the cheeks and ear muffs. This technique replicates the way gold reflects on gold, creating an orange hue.
Eyes Detailing: Start with Sotek Green for the base. For the highlights, progressively mix in Morrow White with Sotek Green. Focus on the lower edge of each eye, adding more intense highlights near the tear duct and finishing with a small white dot at the back for a gem-like appearance.
Blood Gem on Forehead: Use Mephiston Red as the base color for the gem. Apply Wild Rider Red on the lower right section to simulate light reflection within the gem. Mix a small amount of Morrow White with Wild Rider Red for the edge highlights, ensuring a realistic gem look.
Layering for NMM Gold Effect: Apply layers of XV-88, Balor Brown, and Rhinox Hide, using the translucency of the paints to create depth and warmth in the gold. Troll Slayer Orange is key for achieving reflective properties and varied tones in the gold.
Detailed Facial Features: Paint a dark line from below the nose over both lips down to the chin. This creates a division on the face, adding to the realism. Make sure the right side of the face is slightly lighter than the left.
Fine Touches on Eyes and Gem: Ensure the eyes are fully covered in blue to maintain their vibrancy. For the blood gem, detail the top left of the gem with a sharp edge and a line running down, symbolizing light reflection.
Reviewing and Balancing: Regularly step back to assess the overall look. It’s essential to balance the details with the overall aesthetics of the miniature.
Assembling and Final Review: Once all the parts are painted, assemble the head and do a final review. Make any necessary adjustments for a polished look.
Continue Painting Commander Dante!
If you don’t have an account, please sign up here! The website currently has over 350 video tutorials with steps and tips, plus a selection of PDFs. If you are not sure about joining, you can explore my free videos with a free “freebies” membership, or take the plunge and become a full subscriber for full access.
If you’d prefer to support me on Patreon, please visit: https://www.patreon.com/RichardGray [...]
Read more...
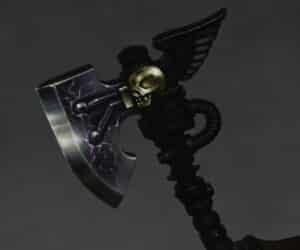
This video shows how to paint the Dante’s axe using NMM or SENMM (Sky Earth Non Metallic Metal.) The video also covers some of the challenges of painting in hot weather!
Materials Needed:
Paints:
Games Workshop: Sotek Green, Rhinox Hide, Mournfang Brown, Wazdakka Red
Vallejo: German Grey, Neutral Grey, Ice Yellow
P3: Morrow White
Brushes:
A variety of sizes including 00 for fine details
Palette: For mixing colours
Water pot: For thinning paints and cleaning brushes
Steps:
Initial Blocking In:
Start by applying a mix of Neutral Grey and Mournfang Brown at the lower part of the axe for the Earth section of SENMM.
Above that, apply a mix of Sotek Green and Neutral Grey. However, this will be lightened later on for blending purposes.
Lightening the Blue-Green Mix:
Mix Ice Yellow with the Sotek Green and Neutral Grey mix to lighten it, allowing for smoother blending with the lighter colours in the middle.
Painting the Upper and Lower Sections:
Use various mixes of Neutral Grey and Ice Yellow to create gradients and highlights.
For the Earthy sections, use Mournfang Brown and Rhinox Hide.
Creating Specular Highlights:
Apply Morrow White for the brightest highlights on the most raised edges.
Be mindful of the light source and the reflective qualities you’re trying to achieve with NMM.
Adding Lightning Effect:
Use Wazdakka Red, gradually adding white for the lightning effects.
Focus on creating dynamic, jagged lines emanating from the power nodes of the axe.
Glazing and Smoothing:
Use glazing techniques with lighter colours to smooth out transitions and refine highlights.
Adjust the consistency of your glazes depending on the humidity and temperature of your painting environment.
Final Touches:
Refine the edges and any rough areas.
If necessary, add more layers to enhance depth and realism.
Tips:
Paint Consistency: Adjust the paint consistency based on your environment. Hotter conditions may require more frequent watering of paints.
Brush Care: Use a separate brush for mixing paints to preserve the tips of your detail brushes.
Light Reflection: Constantly refer back to how light naturally interacts with metal surfaces to guide your highlight placement.
Patience and Layers: Build up your layers gradually and allow each to dry before applying the next.
Now, you’re all set to bring Dante’s axe to life with a stunning NMM effect that mimics the intricate play of light on metal surfaces!
More NMM Tutorials
If you don’t have an account, please sign up here! The website currently has over 350 video tutorials with steps and tips, plus a selection of PDFs. If you are not sure about joining, you can explore my free videos with a free “freebies” membership, or take the plunge and become a full subscriber for full access.
If you’d prefer to support me on Patreon, please visit: https://www.patreon.com/RichardGray [...]
Read more...
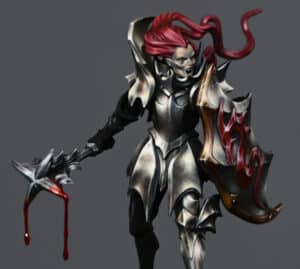
How to Paint a Vampire Lord from the Soulblight Gravelord Armies! This includes NMM shiny steel armour, face and hair, skeleton base tutorial plus a dripping gore-covered mace! Read on to watch the comprehensive set of How to Paint a Vampire Lord tutorials plus key steps, paints and materials guide.
Quick Jump to:
Video – How to Paint a Vampire Lord Steel ArmourPaints and MaterialsStep-by-Step Guide and Tips for the NMM ArmourVideo – How to Paint a Vampire NMM ShieldPaints and MaterialsStep-by-Step Guide and Tips for the NMM ShieldVideo – Non Metallic Metal Mace with added GorePaints and MaterialsStep-by-Step Guide and Tips for the Gory MaceVideo – Vampire Lord Face and HairPaints and MaterialsStep-by-Step Guide and Tips for the Face and HairVideo – Skeleton Base Part OnePaints and MaterialsStep-by-Step Guide and Tips for the Skeleton BaseBuilding the BasePainting the BaseFinishing TouchesVideo – Skeleton Base Part Two (Painting the Skeleton)Paints and MaterialsStep-by-Step Guide and Tips for Painting the Skeleton BasePainting the SkeletonPainting the SwordPainting the ClothAdding VegetationVideo – Simple Freehand DragonPaints and MaterialsStep-by-Step Guide and Tips for the Freehand Dragon
Video – How to Paint a Vampire Lord Steel Armour
All videos are recorded in HD 1080p or higher – use full screen for the full effect and let the video load completely. Click the cog icon to choose speed, if I’m too fast or slow!
Paints and Materials
Paints:
Vallejo Neutral Grey: Used for mapping out highlights and base tones on the armour.
Vallejo Ice Yellow: Applied for initial highlights, gives a warm, off-white effect.
Games Workshop Mournfang Brown: Used sparingly for adding depth and richness in transitions.
Games Workshop Abaddon Black: Thinned down and used for glazing to deepen shadows and smooth transitions.
P3 Morrow White: For final bright highlights. Thinned down considerably for a subtle effect.
Brushes:
Fine Detail Brushes: Essential for applying precise highlights and for the stippling technique. I used the Artis Opus range, but any high-quality fine brush will work.
Glazing Brushes: Preferably also with a fine tip, used for applying thinned down glazes of Mournfang Brown and Abaddon Black.
Primer:
Ultimate Primer (Black): Used for priming the model before painting.
Step-by-Step Guide and Tips for the NMM Armour
Preparation: Assemble the model but avoid gluing areas like the shield or head that might obstruct painting. Prime the model in black. For this, Ultimate Primer is a good choice.
Base Layer: Start with Vallejo Neutral Grey to map out highlight points on the armour. This colour is ideal for desaturated, steel-like effects.
Light Direction and Armour Detailing: Consider the light source and how it hits the model. Focus on areas like the hip covers and rib cage, and map out light and reflections. The Neutral Grey will be useful for creating the base tones.
Initial Highlights: Apply Vallejo Ice Yellow for the highlights. Despite its name, Ice Yellow will give a desaturated, warm white appearance, especially when applied thinly. This is perfect for adding a subtle warmth to the steel.
Refining the Highlights: Use a stippling technique with Neutral Grey and Ice Yellow, building up the texture and refining the highlights. Remember, this is a gradual process, and patience is key.
Adding Depth with Mournfang Brown: Introduce Games Workshop Mournfang Brown sparingly at transition edges or darker areas for a richer tone. Be cautious not to overdo it, as too much brown can detract from the steel effect.
Glazing for Smoothness: Thin down Mournfang Brown and Abaddon Black with water (about 5-6 parts water to 1 part paint) and apply them as glazes. This step will help in smoothing out transitions and adding depth.
Final Highlights with Morrow White: Use P3 Morrow White for final bright highlights. Ensure the white is thinned down and apply it very carefully to the highest points of the armour.Adjusting and Blending: Keep adjusting the highlights and shadows, blending the colours where necessary. This might involve going back and forth between the different shades to achieve a smooth transition.Finish and Review: Once satisfied, review the model under different lighting to ensure the non-metallic metal effect is consistent and realistic.
Throughout this process, keep your paint thin and apply multiple layers for the best results. The key to NMM is patience and gradual building of layers. Remember, each step contributes to the overall metallic effect, so take your time and enjoy the process!
Video – How to Paint a Vampire NMM Shield
Paints and Materials
Games Workshop: Mournfang Brown, Abaddon Black, Mephiston Red, Balor BrownVallejo: Neutral Grey, Ice YellowP3: Morrow White
Step-by-Step Guide and Tips for the NMM Shield
Priming and Preparation: The shield should be primed black. The use of Ultramar Varnish is optional.
Base Layering: Start with Vallejo Neutral Grey, using scribbly strokes to create a rough and scratchy base.Add a darker grey mixture by blending Neutral Grey with Abaddon Black. This can be substituted with other dark greys like Vallejo German Grey.
Creating Texture: Continue with Neutral Grey, making irregular, scratchy marks. These marks will contribute to a subtle textured look.Focus on building up layers and refining the texture.
Highlighting:Apply a mix of Neutral Grey and Ice Yellow for initial highlights.Move to Ice Yellow, applying it thinly (1.5 parts water to 1 part paint) to avoid a chalky finish.Apply the Ice Yellow in a stippling manner to refine the highlights and cover uneven areas.Painting the Dragon:Base the dragon with Mephiston Red.Create shadows by adding a small amount of Abaddon Black to Mephiston Red.For highlights, mix Mephiston Red with P3 Morrow White (or another white) and apply to raised areas and facets of the dragonGlazing and Refining: Use a heavily diluted mixture of Mournfang Brown, Abaddon Black, and P3 Morrow White for glazing.Apply the Mournfang Brown for a soft yellow-brown hue in certain areas.Use Abaddon Black to darken and dull areas and to create shadows.Use P3 Morrow White to soften and blend the highlighted areas.
Adding Scratches and Imperfections:Add random scratch-like marks using a very light application for realism.Apply small white dots to suggest nicks and imperfections.
Final Highlights and Adjustments:Go over the shield and dragon, adding final highlights and making adjustments as necessary.Focus on achieving a balanced look from different viewing angles.
Painting the Trim: Paint the trim using a mix of Abaddon Black and Mephiston Red as a base.Layer with Balor Brown, and then add highlights with a mix of Balor Brown and Mournfang Brown.Add final edge highlights and details to match the overall lighting and contrast of the shield.Finishing Touches:
Tidy up any rough edges or over-painted areas.Ensure that the shield’s various sections harmonize in terms of light and contrast.Remember to let each layer dry thoroughly before applying the next, and adjust the thickness of your paints with water to maintain control and avoid a textured buildup.
Video – Non Metallic Metal Mace with added Gore
Paints and Materials
Primer: Black
Paints:
Vallejo Neutral Grey
Vallejo Black
Vallejo Basalt Grey
Vallejo German Grey
Games Workshop Rhinox Hide
Games Workshop Blood for the Blood God
P3 Morrow White
Brushes: Fine detail brushes
Additional: Gloss varnish, super glue, fishing wire for gore effect
Step-by-Step Guide and Tips for the Gory Mace
Priming: The mace should be primed in black.
Base Layering:
Start with Vallejo Neutral Grey. This can be created with a mix of black and white.
Use Pearl Grey Blue for slight colour variation, though this is optional.
German Grey can also be added to the mix.
Highlighting and Texture:
Focus on picking out angles and curves on the mace.
Ensure brighter parts on surfaces facing you, with darker shades on less visible parts.
Use a combination of different greys to build up layers and create a realistic metal effect.
Detailing:
Pay attention to the many facets of the mace, including chamfered edges and curves.
Use fine brushes for precision in highlighting these small, detailed areas.
Glazing:
Mix Rhinox Hide with a significant amount of water for a thin glaze.
Apply this to mid-tones to shadows, avoiding the brightest highlights.
This step enhances contrast and adds a hint of colour to the mace.
Adding the Gore Effect:
Attach thin strands of fishing wire to the mace using super glue to create dangling gore.
Apply gloss varnish to the connection points for added strength and flexibility.
Once the varnish is dry, cover the fishing wire with “Blood for the Blood God” paint.
Ensure the gore effect is applied in a realistic manner, considering where blood would naturally accumulate and drip from the mace.
Final Touches:
Revisit any areas that need refining or additional highlights.
Make sure the gore effect blends seamlessly with the painted mace.
Allow all layers to dry completely before handling.
Tips:
Take your time with each facet of the mace; precision is key to a realistic look.
Ensure your paint consistency is right for each step – thinner for glazing, thicker for opaquer details.
Be cautious when applying the gore effect; it’s a focal point but shouldn’t overwhelm the detailed painting beneath.
Video – Vampire Lord Face and Hair
Paints and Materials
Games Workshop: Calgar Blue, Cadian Fleshtone, Ushabti Bone, Yriel Yellow, Khorne Red, Mephiston RedVallejo: Neutral Grey, Black
Step-by-Step Guide and Tips for the Face and Hair
Painting the Face:Base Coat: Start with a base coat of Calgar Blue over the black primer. Expect poor coverage initially. Thin the paint with approximately 1.5 parts water to 1 part paint. Apply 3-4 layers to achieve an opaque finish.
Highlighting: Create a mix of 50/50 Calgar Blue and Cadian Fleshtone. Apply this mix to specific areas of the face, considering the natural light fall. Key areas include the forehead, cheekbones, and areas between the eyes and nose. This mix will start to give a flesh tone, retaining a hint of blue for the undead look.
Further Detailing: Use Cadian Fleshtone and a mix of 50/50 Ushabti Bone and Cadian Fleshtone for additional highlighting. Focus on raised areas and consider how light interacts with facial features. Apply highlights gradually, using a heavily diluted mix for soft transitions.
Eyes and Mouth: Paint the eyes and the inside of the mouth in black. This step ensures these areas are defined and helps balance the highlights on the face.
Painting the Hair:Base Coat: Apply Neutral Grey from Vallejo over the black primer. Switch to Khorne Red for a vibrant, contrasting colour to the skin. Thin the paint slightly and apply multiple coats for an even, opaque finish.
Highlighting: Use Ushabti Bone to highlight the hair. Mix it with Khorne Red in varying proportions, increasing the Ushabti Bone content for brighter highlights. Focus on areas where light would naturally hit, creating a shiny, luxurious look.
Glazing for Colour Depth: After highlighting, the hair may appear too desaturated. To bring back the richness of the red, glaze over the hair with a heavily diluted Mephiston Red. This step enhances the red colour while maintaining the shine.
Final Touches on Hair: Optionally, add Abaddon Black to the corn red to create darker shades in the hair, increasing the depth and contrast.
Video – Skeleton Base Part One
Paints and Materials
A skeleton figure from Warhammer Underworlds Warbands
Milliput and Fimo (or slate pieces)
Green stuff (50/50 mix of blue and yellow)
Super glue
Sand (variety in particle size, not sharp sand)
PVA glue (diluted with water)
Base brush (flat Games Workshop brush or equivalent)
Neutral Grey (Vallejo), Deathworld Forest, Morghast Bone, Agrax Earthshade, Athonian Camoshade, Astronomicon Grey (Games Workshop)
Water for thinning paints
Rock material guide by the fantastic Julien Casses:https://www.juliencasses.com/2012/11/how-to-make-rocks
Step-by-Step Guide and Tips for the Skeleton Base
Building the Base
Prepare Skeleton: Start by preparing your skeleton figure, ensuring it has a ‘rising from the ground’ appearance.
Create Stone Slabs: Mix Milliput and Fimo, bake at 120°C for 30 minutes, then break into slabs to represent stones. Alternatively, use slate pieces. Attach these slabs to the base with super glue.
Apply Green Stuff: Mix blue and yellow Green Stuff and use it to create a ridge around the skeleton, giving the illusion of a hole from which the skeleton emerges. Embed the Vampire Lord’s rock into the Green Stuff to integrate it with the base.
Add Texture: Sculpt some small, round rocks using Green Stuff for added detail.
Sand Application: Cover the base in beach sand, avoiding sharp sand. Use various particle sizes for a natural look.
Painting the Base
Seal Sand: Brush diluted PVA glue over the sand to seal it and prevent flaking.
Base Colour for Sand: Dry brush the entire base with Deathworld Forest, focusing on sandy areas.
Highlighting Sand: Apply a lighter dry brush of Morghast Bone to the sand for highlights.
Defining Rocks: Use Agrax Earthshade as a thick glaze around the sculpted rocks to define their shapes.
Enhancing Greenery: Apply Athonian Camoshade to enhance the green tones on the base.
Rock Painting: Begin detailed painting on rocks using Neutral Grey. Focus on highlighting angles and adding scratchy details for texture.
Additional Rock Highlights: Use Pelgrave Blue, potentially mixed with white, to highlight rocks further. Remember not to overpower the model with the base’s contrast.
Enhancing Edges: Add lighter edges around rocks using Astronomicon Grey to define shapes.
Finishing Touches
Consider adding other details like small flowers or greenery to the base.
Reflect these colours onto the Vampire Lord for cohesion.
Ensure the base matches the quality and style of your painted model.
Video – Skeleton Base Part Two (Painting the Skeleton)
Paints and Materials
Paints: XV-88, Balor Brown, Moot Green, Deathworld Forest, Ushabti Bone, Mournfang Brown, Trollslayer Orange (Games Workshop); Neutral Grey, Pale Grey Blue, Black (Vallejo); Iosen Green, Morrow White (P3)
Mininatur Moss Pads and Flowers
Water for thinning paints
Brushes with fine tips
PVA Glue
Jeweler’s tweezers
Step-by-Step Guide and Tips for Painting the Skeleton Base
Painting the Skeleton
Eyes: Start by painting the eye sockets with white paint, thinned down. Apply 2-3 layers for an opaque finish. Avoid overloading to prevent the paint from pooling.
Adding Color to Eyes: Use Pro Acryl Golden Yellow (or any similar yellow) around the edges of the eye sockets, leaving the back white to mimic a light source. Then, use Moot Green, thinned down, around the yellow, ensuring smooth transitions.
Skeleton Bone: Use XV-88 to paint the skull and bones. Apply the paint thinly and unevenly to create a natural, weathered look. Emphasize areas where light would naturally hit, based on the light source direction.
Highlighting Bone: Apply Ushabti Bone for highlights, focusing on raised areas and edges. Keep the paint thin for a smooth finish.
Additional Details: Add small scratches or battle damage marks for realism.
Final Highlights on Bone: Use white (Morrow White) for the final highlights on the most raised areas.
Painting the Sword
Base Colour: Use Neutral Grey to paint the entire sword, including the hilt and blade.
Weathering: Add Mournfang Brown to the blade for a rust effect, focusing on recessed areas and pitted holes.
Highlighting the Blade: Use Pale Grey Blue for highlighting and adding scratchy details, focusing on areas that would catch light.
Rust Details: Add Trollslayer Orange in the deepest recesses for an inverted highlight effect.
Refining Highlights: Go back with Neutral Grey and Pale Grey Blue to refine the highlights and add more detail to the weathered look.
Painting the Cloth
Base Layer: Apply Deathworld Forest over black primer, focusing on raised folds and areas that would catch light.
Highlighting: Use Balor Brown for further highlights, keeping the paint very thin to maintain a dark, grubby appearance.
Adding Vegetation
Applying Moss Pads: Use PVA glue to attach Mininatur Moss Pads around the base. Utilize jeweler’s tweezers for precise placement.
Adding Flowers: Integrate white flowers from Mininatur for additional detail. Trim if necessary to avoid overpowering the base.
Adding Roots: For an emerging effect, glue small roots around the skeleton, bending them to create a natural look.
Dry Brushing: Gently dry brush Balor Brown over the moss pads to integrate them with the base and add depth.
Video – Simple Freehand Dragon
Paints and Materials
The following paints were used:Games Workshop: Rhinox Hide, Mournfang Brown Vallejo: German Grey, Neutral Grey, Ice Yellow, White
Step-by-Step Guide and Tips for the Freehand Dragon
Prepare the Surface: Begin by roughly painting the inside of the shield with a mixture of Mournfang Brown and Rhinox Hide from Games Workshop. These paints should be heavily thinned with approximately two parts water to one part paint. Use a large brush, like a size 2 artist opus brush, for quick and broad coverage. This base coat doesn’t need to perfectly match the shield’s front colour, as it will largely be covered.
Apply Texture: The texture on the back of the shield differs from the front to differentiate it from the armor. Apply the paint in a scratchy manner to simulate wear and tear. For this, use Neutral Grey from Vallejo, mixed with Ice Yellow for highlights, and German Grey for darker areas. Remember, this part doesn’t have to be perfectly blended, as some roughness adds character.
Glazing: If needed, glaze over the scratchy texture with more diluted Rhinox Hide and German Grey. Glazing helps to soften the texture and can hide any imperfections in the painting.
Freehanding the Dragon: When painting the dragon, start with a reference photo of the dragon design on the shield’s front. This helps maintain consistency across the model. Use Vallejo Model Color Black for the dragon outline, ensuring the paint is well-diluted for fine lines.
Brush Selection: Use a fine brush for detailed work. A worn-out brush might not give the sharp lines needed for intricate details. A newer, sharper brush is recommended for finer details and corrections.
Highlighting the Dragon: Start with Neutral Grey for initial highlights. For more pronounced highlights, mix Neutral Grey with Ice Yellow, leaning more towards Ice Yellow for brighter highlights. Apply these highlights only to the upper edges of the dragon design, where light would naturally catch.
Adjusting for 3D Effect: Paint the inside of the dragon with a darker grey, such as a mix of German Grey and Neutral Grey, to create depth and avoid a flat black appearance.
Final Touches: Add fine highlights to the dragon, especially along the edges and raised areas, to enhance the 3D effect. Use a mix of Neutral Grey and Ice Yellow, and pure Ice Yellow for the brightest points. Be mindful of the shield’s orientation to ensure that highlights correspond to the light source.
Painting the Shield Trim: Finally, paint the shield’s trim, likely in a gold or metal colour. This trim frames the dragon and gives a polished look to the shield, enhancing the overall appearance.
More Vampire Tutorials!
If you don’t have an account, please sign up here! The website currently has over 350 video tutorials with steps and tips, plus a selection of PDFs. If you are not sure about joining, you can explore my free videos with a free membership, or take the plunge and become a full subscriber for full access.
If you’d prefer to support me on Patreon, please visit: https://www.patreon.com/RichardGray [...]
Read more...
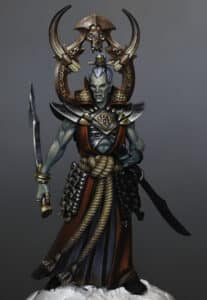
A series for how to paint an Askurgan Exemplar from the Warcry Bloodhunt box, who I painted as part of my Commended Golden Demon Entry for 2023. Because it’s a Demon entry, the techniques will be very in-depth and very precise!In these videos you will learn how to paint his undead skin, red robes and rope, NMM metals on his weapon and armour, horn effect on his trophy rack and lots of other little tips and tricks. Read on to explore them along with paints, materials and step by step help.
How to Paint an Askurgan Exemplar Vampire Part One: Face, Arm and ShoulderMaterials and PaintsPainting the SkinNon-Metallic Metal (NMM) on ArmourAdditional TipsHow to Paint an Askurgan Exemplar Vampire Part Two: Red Robes, Hair and RopeMaterials and PaintsPainting Red RobesTechnique and BrushworkPainting HairPainting the RopeNon-Metallic Metal Effect on CollarOther TipsHow to Paint an Askurgan Exemplar Vampire Part 3: Sword Blade, Gold Sword Hilt and Hip ArmourMaterials and PaintsBase CoatingPainting the RopeHip ArmourSword Blade and HandleDetailing and Finishing TouchesEdge Highlighting and RefinementHow to Paint an Askurgan Exemplar Vampire Part 4: Trophy Rack and HornsMaterials and PaintsTrophy Rack Horns How to Paint an Askurgan Exemplar Vampire Part 5: NMM SwordPaints and Materials RequiredBase Coat and HighlightingBlade Edge DetailingFlat Blade SurfaceReflections and HighlightsEdge HighlightsRefining and Adjusting HighlightsFinal TouchesHow to Paint an Askurgan Exemplar Vampire Dirt On His RobePreparing to PaintAdding Depth with Mournfang BrownFinishing Touches with Balor BrownGeneral Tips for an Authentic EffectMore Undead and Vampire Tutorials to Explore!
How to Paint an Askurgan Exemplar Vampire Part One: Face, Arm and Shoulder
All videos are recorded in HD 1080p or higher – use full screen for the full effect and let the video load completely. You can also click the little “cog” and change the speed of the video, if I am going too fast (or slow!).
Materials and Paints
Paints: Games Workshop (Sotek Green, Cadian Fleshtone, Kislev Flesh, Mournfang Brown, Balor Brown, Yriel Yellow, Evil Sunz Scarlet), Vallejo (Toxic Yellow, Ice Yellow, Neutral Grey, German Grey, Black), Two Thin Coats (Dark Sun Yellow – optional)
White Paint: Schmincke White
Brushes: Size 00 and other fine brushes for detailed work
Painting the Skin
Base Colour: Mix Sotek Green with Cadian Fleshtone for a warm, turquoise green. This will be your base colour for the skin, providing a unique look while not being too dark.
Building Highlights: Progressively lighten this mixture by adding more Kislev Flesh, and Toxic Yellow from Vallejo for higher highlights. The aim is to create a series of progressively lighter shades, leading up to a final mix of Toxic Yellow, Kislev Flesh, and Schmincke White for the brightest highlights.
Application Technique: Use a very thin consistency (about 1.5 parts water to 1 part paint). Apply with a size 00 brush, focusing on upwards-facing surfaces and muscles for a natural look. Remember, the key is to layer thinly and build up the colour gradually.
Detailing the Face: For the vampire’s face, focus on defining sharp features while maintaining a natural appearance. Use the lightest colour mix for the highest points like the brow ridges and cheekbones. The eyes are painted black with Yriel Yellow for the irises, positioned such that the upper eyelid slightly covers the iris.
Non-Metallic Metal (NMM) on Armour
Chest Armour: Begin with a base of Mournfang Brown. For highlighting, use a mix of Neutral Grey and Ice Yellow, progressively adding more Ice Yellow for brighter areas. Paint the armour’s detailed features like fangs and textures with care, incrementally building up to white for the highest highlights.
Shoulder Armour: Start with Neutral Grey, building up highlights towards the top where the light naturally hits. Add reflections and finer details, creating a smooth transition from light to dark. Use Mournfang Brown, thinned down, for adding tonal variation and depth.
Gold Details: Utilise a combination of Mournfang Brown and Dark Sun Yellow (or Balor Brown) for the base of gold areas. Highlight with Ice Yellow, and for the brightest spots, use a mix of Ice Yellow and Schmincke White. Be sure to maintain the gold’s richness by not over-highlighting with white, thus keeping the metallic effect.
Additional Tips
Glazing: Use glazes (thin, transparent layers of paint) to smooth out transitions between colours, especially on the gold and armour sections.
Edge Highlighting: On the armour, especially the shoulder guards, use edge highlighting to define shapes and enhance the metallic appearance.
Reflections and Light Sources: Be mindful of the environment’s impact on reflections. Vary the reflections on different parts of the armour to create a more dynamic and realistic look.
Detailing and Textures: Pay attention to the texture of each surface. For instance, the vampire’s skin should have a smooth finish, while the armour can have a more textured appearance.
Consistency Across the Unit: If this model is part of a unit, ensure consistency in the painting style and colour scheme across all models, while allowing for individual variations. One of the reasons I believe I missed out on a trophy with my vampires is because I made them all much too unique and they didn’t look like they were part of the group. Cohesion and lore accuracy is very important for Golden Demon! I talk about this a bit more in my Golden Demon 2023 video, here. Anyway, sorry, back to the model..!
How to Paint an Askurgan Exemplar Vampire Part Two: Red Robes, Hair and Rope
All videos are recorded in HD 1080p or higher – use full screen for the full effect and let the video load completely. You can also click the little “cog” and change the speed of the video, if I am going too fast (or slow!).
Materials and Paints
Games Workshop Colours:Rhinox Hide: A deep brown, used as a base for the red robes.Mournfang Brown: Utilized in creating non-metallic gold effects and for darkening rope.Mephiston Red: Employed to enrich the red highlights.Evil Sunz Scarlet: A vibrant red for brighter highlights.Wild Rider Red: Used very sparingly for the highest red highlights.Balor Brown: Mixed with other colors for non-metallic gold effects.Karak Stone: The base for the rope.Skeleton Horde (Contrast): Applied for shading and depth on the rope.
Vallejo Colours:Toxic Yellow: Mixed for non-metallic gold effects and for rope detailing.Ice Yellow: Used in similar contexts as Toxic Yellow.Neutral Grey: A base for light grey hair and for mixing higher highlights.German Grey: Mixed with Neutral Grey for hair.Black: Used for various detailing and mixing.
Other Materials:Schmincke White: An artist’s acrylic paint used for the highest highlights, particularly in the hair.
Painting Red Robes
Base Coat: Start with Rhinox Hide. Despite its brown tone, it’s essentially a deep red. Apply this as a base for the robe.
First Highlight: Mix Rhinox Hide with Mephiston Red. This creates a richer, warmer red. Apply with a size 2 brush for broad strokes.
Subsequent Highlights: Progressively lighten the red using Evil Sunz Scarlet and Wild Rider Red. Be cautious with Wild Rider Red, using it sparingly to maintain the robe’s red saturation.
Technique and Brushwork
Use a larger brush for the broader areas of the robe to achieve smooth, clean strokes.
For finer areas, switch to a smaller brush for precise application and to highlight raised details and creases.
Painting Hair
Initially, aim for shiny black hair, but later shift to a light grey, matte finish.
Use Neutral Grey mixed with white for higher highlights, painting in the direction of the hair’s texture.
Be mindful of the hairline; avoid a stark contrast between the skin and hair. Aim for a subtle shadow effect.
Painting the Rope
Base coat the rope with Karak Stone.
Use a larger brush to cover the area efficiently.
Apply Skeleton Horde contrast paint for shading and depth.
For texture, add tiny lines with a mix of Karak Stone and white, representing the rope’s fibres.
Non-Metallic Metal Effect on Collar
This segment is challenging due to its intricate texture.
Use a mix of Mournfang Brown, Balor Brown, Toxic Yellow, and Ice Yellow to create a gold effect.
Add white for the brightest highlights, focusing on the collar’s embossed details.
Other Tips
Throughout the process, maintain a balance between boldness and subtlety. The goal is to accentuate the model’s features without overwhelming its overall appearance. Key points to remember:
Layering and Blending: The layering technique is crucial, especially for the red robes. Begin with dark tones and gradually build up to lighter hues, ensuring a seamless transition.
Directional Brushwork: Align your brush strokes with the texture and direction of the materials you are painting, whether it’s the flow of the robes or the strands of hair. This approach enhances realism.
Contrast and Focal Points: High contrast areas, like the non-metallic metal collar, should be approached with caution. Ensure they complement, rather than overpower, the focal points like the face.
Texture and Detailing: The rope’s texture is a time-consuming but rewarding aspect. Those fine lines, while tedious, add a significant level of detail to the model.
How to Paint an Askurgan Exemplar Vampire Part 3: Sword Blade, Gold Sword Hilt and Hip Armour
All videos are recorded in HD 1080p or higher – use full screen for the full effect and let the video load completely. You can also click the little “cog” and change the speed of the video, if I am going too fast (or slow!).
Materials and Paints
Games Workshop Colours:
Rhinox Hide: A deep, dark brown, used for shading and creating gradients on elements like the rope and as a base for other colours.
Mournfang Brown: Employed in non-metallic metal effects and to add depth to certain elements.
Mephiston Red: A bright red, used for adding vivid highlights and details.
Balor Brown: Mixed with other colours for non-metallic gold effects.
Karak Stone: Used as a base colour for the rope.
Skeleton Horde (Contrast): Applied for shading and to add depth, especially on the rope.
Vallejo Colours:
Ice Yellow: Mixed for creating highlights and for non-metallic gold effects.
Neutral Grey: A base for grey tones and for mixing higher highlights.
German Grey: Used in conjunction with Neutral Grey for various details.
Black: Employed for shading and defining details.
Other Materials:
Schmincke White: An artist-grade acrylic paint used for the highest level of highlights.
Base Coating
Apply the base colours: Rhinox Hide for darker areas, Mournfang Brown for metallic parts, Karak Stone for the rope, and other base colours as required for different parts.
Painting the Rope
Apply Karak Stone as the base colour.
Shade with Skeleton Horde (Contrast) to add depth.
For weathering effects, use Rhinox Hide in a glaze consistency (about three parts water to one part paint) at the bottom of the rope.
Hip Armour
Paint the ropes in the armour with the same technique as the main rope.
For the armoured plates (that resemble bones), start with a metallic base using Mournfang Brown.
Create a non-metallic metal effect by gradually building up layers, transitioning to lighter colours like Balor Brown and then Ice Yellow. Include reflective highlights where light would naturally hit.
Sword Blade and Handle
For the sword blade, use Neutral Grey as a base, applying highlights where light would naturally reflect. Pay attention to any sculpted details like indents or edges, and enhance these with your highlights.
The sword hilt is treated similarly, with a non-metallic gold technique. Start with Mournfang Brown, adding highlights and transitioning to lighter tones like Ice Yellow and White.
For both the blade and hilt, remember to add glazes for smoother transitions.
Detailing and Finishing Touches
Enhance the gold sections (such as the bracelets and sword hilt) with Ice Yellow and White for bright highlights.
For small details like rings or intricate parts of the armour, use precise brush strokes. Highlight the top edges and create contrast with darker shades in recesses.
If necessary, use glazes (a thin mix of paint and water) to smooth out transitions and make the colours more cohesive.
Pay attention to the consistency of the paint. It should be thin enough to flow smoothly but not so thin that it loses opacity.
Edge Highlighting and Refinement
Carefully apply edge highlights to the armor and sword, using lighter colors like Ice Yellow or White. This step brings out the details and gives a more three-dimensional appearance.
For the sword blade, create the effect of light reflecting off the blade by adding thin lines and highlights. Remember to adjust the intensity based on the angle and curvature of the blade.
Use a mix of Neutral Grey, Ice Yellow, and White to create the non-metallic metal effect, building up to the brightest highlights where the light would be strongest.
How to Paint an Askurgan Exemplar Vampire Part 4: Trophy Rack and Horns
Materials and Paints
Brushes: Size 2 M Artist Opus, Size 0 and 00
Paints: Games Workshop’s Rhinox Hide, Evil Sunz Scarlet, Balor Brown, Ushabti Bone, Skeleton Horde (Contrast); Vallejo’s Ice Yellow, Dead White
Trophy Rack
Base Coat
Combine Rhinox Hide and Evil Sunz Scarlet in a 2:1 ratio
Thin the mixture with equal parts water for a smoother application
First Highlight
Add Balor Brown to the base mix for a subdued pink tone
Apply carefully, ensuring light effects align with the model’s other parts
Additional Highlights
Incrementally introduce more Balor Brown and a touch of Ice Yellow for brighter highlights
Utilise the larger brush for expansive areas, switching to finer brushes for detailed texturing
Detailing Filigree
Employ a slender brush for precision
Gently add lighter paint to intricate patterns, avoiding overly fluid paint
Horns
Begin with Ushabti Bone on a black base, requiring several layers for full coverage
Typically, four coats achieve a solid foundation
Gradients
Gradually mix in Rhinox Hide with Ushabti Bone for shading
Paint each segment, progressing towards the horn’s tip
Texture Highlights
Revert to Ushabti Bone for accentuating raised textures
Apply using small wiggles and dots, extending into less detailed areas
Horns – Finishing Touches
Apply a significantly diluted Rhinox Hide for softening transitions
Use Skeleton Horde Contrast for added depth and hue
Final Notes
Ensure uniform painting on all sides of the horns
Balance detailed work with broader strokes for a unified, realistic appearance
How to Paint an Askurgan Exemplar Vampire Part 5: NMM Sword
This guide focuses on creating a realistic non-metallic metal (NMM) effect on a sword, employing careful layering and blending techniques to achieve a shiny appearance. Patience and attention to detail are key in this process.
Paints and Materials Required
Brushes: Various sizes for detailed work
Paints: Vallejo Neutral Grey, Ice Yellow, German Grey, Black; Games Workshop Mournfang Brown
Base Coat and Highlighting
Start with Neutral Grey as the base colour
Mix Neutral Grey with a small amount of Ice Yellow for the first stage highlight
Progressively add Ice Yellow to the mixture for brighter highlights
Use Ice Yellow with a touch of White for the brightest points
Thin the paints appropriately for smooth application
Blade Edge Detailing
Focus on parallel line textures for the cutting blade edge
Use horizontal and vertical strokes for diverse textural effects
Emphasize the sharpness of the blade with these line details
Flat Blade Surface
Change brush marks on the flat blade surface for distinction
Plan for coloured reflections, using Mournfang Brown as a glazing colour
Reflections and Highlights
Paint all reflections in grey tones before applying colour glazes
Remember that the lower edge of the blade will reflect the ground, requiring a different treatment
Use glazes to soften and blend reflections and highlights
Edge Highlights
Apply fine line highlights along the sharpest part of the blade
Ensure these highlights are thin and precise for a realistic effect
Refining and Adjusting Highlights
Adjust and refine highlights as needed for balance and symmetry
Use a mix of stippling and glazing techniques for smoother transitions
Pay attention to the spine of the sword, adjusting the placement and intensity of highlights
Final Touches
Use glazes to smooth out textures, especially when working with lighter colours
Consider the overall composition and aesthetic appeal when placing final highlights
Ensure a unified and realistic look by balancing light and shadow
How to Paint an Askurgan Exemplar Vampire Dirt On His Robe
Paints Required
Games Workshop: Rhinox Hide, Mournfang Brown, Balor Brown
Preparing to Paint
Begin with Rhinox Hide: Apply at the very bottom of the robe. This colour blends well with the red robe, creating a subtle effect. As you move upwards, make the application more visible with small dots and splotches. This creates an impression of staining.
Adding Depth with Mournfang Brown
Switch to Mournfang Brown: This shade gives depth to the weathering effect. Initially, it might seem light but it darkens as it dries. If you find it too strong, you can tone it down with Rhinox Hide to soften the effect. The key here is to balance the intensity, ensuring it doesn’t overpower the base colour of the robe.
Finishing Touches with Balor Brown
Finalise with Balor Brown: This is a strong colour, so apply it cautiously. It’s significantly different from the previous colours and can make a bold impact. Focus on the very bottom of the robe, gradually building up a denser application of paint. Be mindful of areas near the highlights, such as near the foot of the robe at the front. Here, you might need to add more Balor Brown to counteract the brighter red tones.
General Tips for an Authentic Effect
Strive for unevenness: Avoid symmetrical or uniform patterns. Some areas should appear dirtier than others for a realistic effect.
Control the paint consistency: Aim for a 50/50 mix of paint to water for optimal flow and control. This consistency allows you to work for an extended period without creating a heavy texture.
Use a smaller brush: A smaller brush gives you more control, especially for creating uneven, chaotic patterns. Avoid pressing too hard to prevent large, unintended marks.
Adjust for mistakes: If you apply too much paint, quickly rub it off with your finger. For smears, stipple over them with a bit of Rhinox Hide to create interesting marks.
More Undead and Vampire Tutorials to Explore!
Videos Not Showing?
To view any of my paid tutorials, you need to be a member of the website – please click below to log in or join the site.
Not sure about joining just yet? Check out my Youtube for all my free tutorials or sign up as a free “friend” member on this site and visit the Freebies video page! [...]
Read more...
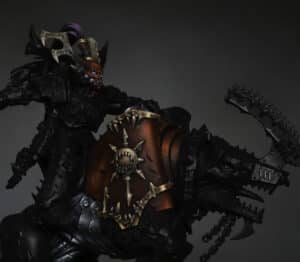
How to paint the Khorne Lord Invocatus from the World Eaters, which was sent to me as an early review copy from Games Workshop. Currently this includes his face, horns and hair to his shining red armour and NMM gold trim.
You can watch the current tutorials in order by scrolling down, or quick jump to a specific technique, paints lists or tips by clicking on the options below:
Video Part One: How to paint the Khorne Lord Invocatus from the World Eaters Armour, Horns, Eyes, HairPaints and Materials UsedStep by Step GuideVideo Part Two : Red ArmourPaints and Materials UsedStep by Step GuideVideo Part Three : Bronze Trim on the Armour (NMM)Paints and Materials UsedStep by Step Guide
Video Part One: How to paint the Khorne Lord Invocatus from the World Eaters Armour, Horns, Eyes, Hair
All videos are recorded in HD 1080p or higher – use full screen for the full effect and let the video load completely. You can also click the little “cog” and change the speed of the video, if I am going too fast (or slow!).
Paints and Materials Used
Games Workshop: Barak-Nar Burgandy, Mephiston Red, Evil Sunz Scarlet, Wild Rider Red, Sotek Green, XV-88, Balor Brown Vallejo: Ice Yellow (Dorn Yellow optional) Two Thin Coats: White Star, Carcharodon Grey, Doomdeath Black
Brushes: Fine detail brushes, larger brushes for smooth transitions.
Palette: Wet palette recommended for paint mixing and consistency maintenance.
Step by Step Guide
1. Priming:
Prime the head using Ultimate Primer (black), thinned with airbrush thinner for a matte finish.
2. Armour (Red Parts):
Basecoat the helmet with Barak-Nar Burgundy, extending slightly onto the horns for a color transition.
Apply Mephiston Red over the burgundy for the true red areas. This serves as the key red tone.
For highlights, carefully apply Evil Sunz Scarlet, followed by Wild Rider Red, ensuring the Mephiston Red remains visible for a true red effect.
3. Horns:
Start with a dark mix of XV-88 and black, blending into the burgundy on the helmet.
Gradually lighten towards the tips using XV-88 with diminishing amounts of black.
Finish the tips with pure XV-88 and a touch of Morghast Bone, ensuring smooth transitions.
4. Eyes:
Base the eyes with Sotek Green.
Highlight with a mix of Sotek Green and White Star.
Add final highlights using pure White Star, placed strategically for a realistic lens effect.
5. Hair:
Begin with a base of Barak-Nar Burgundy.
Gradually mix in White Star for highlights, focusing on the upward-facing sections.
Aim for smooth transitions to mimic natural hair shine.
6. Metal Details:
Use a mix of Doomdeath Black and Carcharodon Grey for base and mid-tones.
Highlight with Carcharodon Grey and White Star.
Add red reflections from the armor using the red tones previously mentioned.
7. Teeth:
Use the grey mix (Carcharodon Grey with black, then pure Carcharodon Grey) for base and mid-tones.
Highlight the teeth with White Star, considering the light source for realistic placement.
8. Leather Strips (Topknot):
Base with Rhinox Hide.
Layer with Dwarf Skin and Elf Skin (or similar tones like Bugman’s Glow and Cadian Fleshtone).
Glaze with thinned Mournfang Brown for added warmth.
Video Part Two : Red Armour
This video shows how to paint the red armour on the juggernaut of Khorne
Paints and Materials Used
The following paints were used: Vallejo Model Colour (new): Evil Red, Nocturnal Red Games Workshop: Evil Sunz Scarlet, Wild Rider Red Two Thin Coats: White Star (Any white will do)
Step by Step Guide
1. Base Layer:
Begin by applying a base coat of Evil Red from Vallejo Model Colour. This hue is a dark burgundy or purple tone. It may necessitate several layers to achieve a consistent and opaque covering.
2. Initial Highlight:
Use Nocturnal Red from Vallejo Model Colour for the first layer of highlights. This shade is a deep and rich red, offering more vibrancy compared to Evil Red, thus setting the stage for subsequent highlighting.
3. Main Highlights:
Apply Evil Sunz Scarlet by Games Workshop for primary highlights. This brighter shade contrasts well with the darker base.
For heightened highlights and a more textured finish, apply Wild Rider Red by Games Workshop to areas that would naturally catch more light.
To create the textured effect, employ a small brush (such as size 00) and make small, scratchy, stipple-like marks on the armour, focusing on areas where light naturally falls.
4. Enhanced Highlighting and Blending:
If the transition between Nocturnal Red and Evil Sunz Scarlet seems too abrupt, blend them by applying Nocturnal Red over the edges of the Evil Sunz Scarlet highlights.
For the brightest points, mix Wild Rider Red with White Star (or any white paint) and apply cautiously. Excessive white can desaturate the red and diminish its intensity.
Soften and merge the texture marks by glazing over them with thinned Nocturnal Red.
5. Refinement:
Alternate between Nocturnal Red, Evil Sunz Scarlet, and Wild Rider Red to refine the texture and smoothly blend the highlights.
Adjust the highlight intensity depending on the curvature and structure of the armour pieces.
6. Final Adjustments:
Once content with the highlighting and texture, make any final tweaks necessary. This might involve reinforcing the deepest shadows or adding a final glaze to unify the colours.
Technique Tips:
Consistency is key. Ensure the paint is properly thinned for a smoother application.
Build up the colours in layers, allowing each to dry before applying the next.
Consider the light source and its interaction with the armour’s shape when placing highlights.
For the textured effect, use just the tip of the brush with a gentle hand.
Video Part Three : Bronze Trim on the Armour (NMM)
This video shows how to paint the bronze trim on the juggernaut armour using NMM (Non Metallic Metal)
The following paints were used:
Paints and Materials Used
Vallejo Model Colour (New): Gorgon Brown, Grunge Brown, Sunset Orange, Toxic Yellow Two Thin Coats: Doomdeath Black, White Star (and black and white will do)
Step by Step Guide
1. Base Coat:
Start by applying Gorgon Brown from Vallejo Model Colour. This colour serves as your base for the bronze trim. It’s a dark brown that’s not as red as Rhinox Hide but works well for this purpose.
2. Building the Colour:
Next, apply Grunge Brown, also from Vallejo, to begin building up the bronze colour. This shade will act as a mid-tone in your NMM technique.
3. Adding Highlights:
Use Sunset Orange from Vallejo Model Colour to start highlighting the raised areas of the trim. Blend it in at the sides with Grunge Brown for a smoother transition.
4. Mixing for Intermediate Shades:
Create a mix of Grunge Brown and Sunset Orange (about 50/50) to create an intermediate shade. Use this to bridge the gap between the darker base and the brighter highlights.
5. Further Highlighting:
Proceed with Toxic Yellow from Vallejo Model Colour for your next layer of highlights. This colour, akin to Ice Yellow, provides a nice, smooth application and gives a cooler yellow tone to your bronze.
6. Using White for Final Highlights:
For the brightest highlights, mix a small amount of White Star from Duncan Rhodes Two Thin Coats (or any suitable white paint) with your highlight colour. Apply this sparingly to the most raised and reflective areas of the trim.
7. Refining and Adjusting:
Go back and forth between your colours, adjusting the blends and refining the highlights. Remember, NMM is about creating the illusion of metal through contrast and careful placement of lights and darks.
8. Glazing for Saturation:
If the colours lack saturation or depth, glaze over the mid-tones and shadows with a diluted Grunge Brown. This step adds richness and depth to the bronze colour.
Technique Tips:
Aim for smooth transitions between shades. Use glazing techniques to blend the layers seamlessly.
Focus on the light source and how it would naturally hit the trim. The highest points should have the brightest highlights.
For NMM, contrast is key. Don’t shy away from using dark shadows against bright highlights to mimic the reflective nature of metal.
If you don’t have an account, please sign up here! The website currently has over 350 video tutorials with steps and tips, plus a selection of PDFs. If you are not sure about joining, you can explore my free videos with a free membership, or take the plunge and become a full subscriber for full access.
If you’d prefer to support me on Patreon, please visit: https://www.patreon.com/RichardGray [...]
Read more...
This video shows you how to paint a Squigboss from the Gloomspite Gitz army for Age of Sigmar. The model was painted exclusively using Two Thin Coats paints.In this how to paint a Squigboss video, we’ll be doing something a bit different. I’ll guide you through the process of painting the Squig boss, generously sent to me by Games Workshop. Alongside, I’ll be reviewing a set of paints I personally purchased, intrigued by reviews—the Two Thin Coats series by Duncan Rhodes. These paints will exclusively adorn our Squigboss, and I’ve procured them independently. So, no sponsorships or freebies; it’s all about exploring these paints. Now, let’s get started!
All videos are recorded in HD 1080p or higher – use full screen for the full effect and let the video load completely. You can also click the little “cog” and change the speed of the video, if I am going too fast (or slow!).
The following paints were used:Two Thin Coats: Two Thin Coats: Doom Death Black, White Star, Etheral Green, Carcharodon Grey, Dark Sun Yellow, Skulker Yellow, Skeleton Legion, Demon Red, Scorched Earth, Dragon Fang, Boar Hide, Sanguine Scarlet, Dwarven Skin, Marine Blue, Orange Flare, Emerald Green, Wolf Grey, Fanatic Orange, Cuirass Leather, Berserker Red
Tips on how to paint a Squigboss with these paints!
Base Coat with Boar Hide Colour:Initiate with the “Boar Hide” shade, akin to Games Workshop’s Mournfang Brown, serving as the foundational coat for the entire Squig boss model.
Non-Metallic Metal Gold Face Mask:I’ve gone for a non-metallic gold style for the goblin’s face mask, utilising the unique properties of the Duncan Rhodes Two Thin Coats series.Apply the same colours used for the face mask on the staff, creating a non-metallic metal effect. Note differences in technique for different areas.
Adapting to Paint Properties:The paints seem quite nice to work with. Thinning is essential, however, and adapting to the colours’ strength becomes a creative challenge.
Use Translucent Marks for Subtle Effects:Experiment with translucent or softer marks by thinning the paint more. This technique can be effective for creating subtle details but requires precision in application.
Be Mindful of Paint Strength:As mentioned, the colour strength might be stronger than anticipated, so be cautious when adding subtle marks. Adjust as needed to avoid overpowering the model with vibrant colours.
Varied Application Techniques:Explore different application techniques for varied textures and effects. The angular features of the model complement the paints’ adaptability very well and allows for creative highlighting and detailing
Matte Finish and Dark Tones:Consider a matte finish for the model to achieve a pastel look. Embrace the dark and yellow tones for added depth and character.
Diverse Colour Palette for Highlights:Incorporate a diverse colour palette, such as Dark Sun Yellow, for highlighting and detailing, providing a unique touch to gold and other elements. The matte finish and the richness these paints bring to dark and yellow tones is great.
Quick Scratches and Detailing:Create quick, sharp scratches and detailing, adding interest to specific areas without the need for extensive blending. Quick and sharp detailing becomes a breeze with these paints, making them ideal for adding interesting detail without the need for laborious blending.
Highlighting with Translucent White:Use translucent white for highlighting, applying small amounts to achieve a subtle effect. Ensure quick application to prevent drying before reaching the model.
Colour Variations for Textures:Experiment with different colours for textures, adapting to the model’s features. Allow the varied palette to enhance details and bring out the intricacies. The paints are good at bringing out intricate details.
Teeth Detailing:Detail the teeth with simple lines, complementing the skin fold creases. Use the extra detailing to fill spaces and add interest without smoothing transitions.
Remember, the beauty lies in adapting and exploring the properties of the paints. Happy painting!
Free Video Tutorials
More free videos for logged in members – just sign up as a ‘friend’ to view and click any of the thumbs.To explore all of these, visit this page!
If you don’t have an account, please sign up here! The website currently has over 350 video tutorials, plus step by step guides and PDFs. You can explore more free videos with a free membership, or take the plunge and become a full subscriber for full access.
If you’d prefer to support me on Patreon, please visit: https://www.patreon.com/RichardGray [...]
Read more...
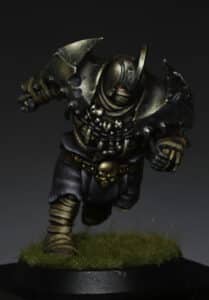
This video shows you how to paint the Bandages, Clothing, NMM Skull and Skin on a Blood Bowl Mummy.
Video Tutorial – How to Paint the Bandages, Clothing, NMM Skull and Skin
All videos are recorded in HD 1080p or higher – use full screen for the full effect and let the video load completely. You can also click the little “cog” and change the speed of the video, if I am going too fast (or slow!).
Paints and Materials Needed
Paints (Games Workshop):
Mournfang Brown
Rhinox Hide
XV-88
Balor Brown
Morghast Bone
Ushabti Bone
Death Korps Drab
Hobgrot Hide (not recommended)
Trollslayer Orange
Paints (Vallejo):
Ice Yellow
Pure White
Neutral Grey
Brushes:
Size 00 Artist Opus Brush (for detailed work)
Size 2 Artist Opus Brush (for broader strokes and glazing)
Other Materials:
MiniNatur Moss Pads (for the base grass effect)
Step-by-Step Guide
1. How to Paint the Bandages:
Base Layer: Start with Mournfang Brown (Games Workshop) as a base layer for the bandages.
Main Colour: Apply Balor Brown (Games Workshop) over the bandages. It’s recommended to use this instead of Hobgrot Hide for better coverage and a more desired effect.
Highlighting: Use Morghast Bone and Ushabti Bone (both from Games Workshop) for highlighting. Focus on creating lines parallel to the bandages’ direction, paying special attention to the upper edges around the face for more detail.
Shadows and Grubby Effect: Apply a thinned down Rhinox Hide (Games Workshop) in shadowed areas and to add a grubby effect to the bandages.
2. How to Paint the Skull (Non-Metallic Metal Gold):
Base Layer: Use Rhinox Hide (Games Workshop) as the base.
Layering: Progressively layer with Mournfang Brown, XV-88, Balor Brown, Ice Yellow (Vallejo), and Pure White (Vallejo). Each layer should be smaller than the previous, creating a bright highlight effect.
Refinement: Feather the edges of each layer for a smooth transition between shades.
3. How to Paint the Clothing (Trousers/Pants):
Base Colour: Mix Rhinox Hide (Games Workshop) with Neutral Grey (Vallejo) and apply as the base colour.
Texture and Highlight: Create a scratchy, rough texture using a mix of Rhinox Hide, Grey, and Ice Yellow (Vallejo). Add white to the mix for final highlights.
4. How to Paint the Belt:
Base Layer: Apply Rhinox Hide (Games Workshop) as the base colour.
Detailing: Use Trollslayer Orange (Games Workshop) for the detailing, ensuring the paint is not too thick.
5. How to Paint the Skin:
Base Layer: Use Death Korps Drab (Games Workshop) as the base layer for exposed skin areas.
Highlighting: Gradually add white to Death Korps Drab for highlighting, focusing on the knuckles, fingertips, and muscle definition.
6. How to Paint the Base and Finishing Touches:
Grass Application: The base is painted with Mournfang Brown (Games Workshop) and decorated with MiniNatur Moss Pads for grass.
Final Adjustments: Ensure the consistency of the lighting and colour theme across the model.
More of my latest videos:
If you don’t have an account, please sign up here! The website currently has over 350 video tutorials with steps and tips, plus a selection of PDFs. If you are not sure about joining, you can explore my free videos with a free membership, or take the plunge and become a full subscriber for full access.
If you’d prefer to support me on Patreon, please visit: https://www.patreon.com/RichardGray [...]
Read more...
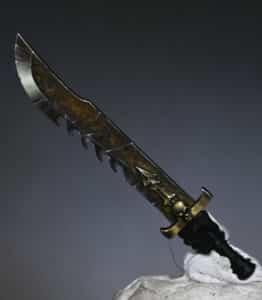
This video and guide shows how to paint an Ogroid sword with NMM (non-metallic metal) and rusty effects.
(Apologies for the dog hair)
Video : How to Paint an Ogroid Sword with NMM and Rust
All videos are recorded in HD 1080p or higher – use full screen for the full effect and let the video load completely. You can also click the little “cog” and change the speed of the video, if I am going too fast (or slow!)
Paints and Materials
Paints
Games Workshop:
Mournfang Brown
Troll Slayer Orange
Fire Dragon Bright
Rhinox Hide
Vallejo:
Ice Yellow
Black
German Grey
Neutral Grey
Pure White (Mecha Color)
Brushes
A range of brushes were used, including but not limited to:
A fine detail brush (such as a size 0 or 00), used for detailed work and fine highlights.
A larger brush (like a size 2), which can be useful for broader strokes and glazing.
Other Materials
Blue Tack: Used to temporarily attach the sword to the model for assessing lighting and highlight placement.
Wet Palette: Essential for mixing and maintaining paint consistency.
Water: For thinning paints, essential for techniques like glazing and stippling.
Step-by-Step
Basecoat and Shades:
Start with a neutral grey, darkened slightly with black.
Create a gradient of greys by mixing German Grey with Neutral Grey, and then adding Ice Yellow for various shades. This creates a series of warm greys for highlights.
Use a wet palette to mix and maintain the paint consistency.
Highlighting the Blade:
Focus on creating a main shine spot on the curved part of the blade, as this area naturally catches more light.
Add random reflections down the blade. Over-highlight initially as you will glaze over these later to reduce their intensity.
Remember that the flat of the blade will be rusty, so avoid highlighting this area.
Adding Details:
Paint distinct blocks of highlights or reflections on the blade, especially around the curved section.
Start with darker greys and layer up to lighter ones, finishing with Pure White for the brightest spots.
Use vertical brush strokes for control and consistency.
Rust Effects on the Blade:
Stipple Mournfang Brown over the flat of the blade for a textured rust effect. Be random and uneven in your application.
Layer Troll Slayer Orange over this, focusing on specific patches for an uneven and realistic rust effect.
Optionally, use Fire Dragon Bright for the brightest rust highlights.
Refining and Adding Scratches:
Add scratches and chips using a mixture of Neutral Grey and Ice Yellow.
Apply these details sparingly and randomly to avoid patterns.
For added depth, add a line of a darker colour (like Rhinox Hide) above some of the scratches.
Finishing Touches:
Make final adjustments to the highlights and rust effects.
Use glazing techniques to soften transitions and blend colours seamlessly.
Be cautious with the use of white; too much can detract from the warm effect.
More tutorials to explore!
If you don’t have an account, please sign up here! The website currently has over 350 video tutorials with steps and tips, plus a selection of PDFs. If you are not sure about joining, you can explore my free videos with a free membership, or take the plunge and become a full subscriber for full access.
If you’d prefer to support me on Patreon, please visit: https://www.patreon.com/RichardGray [...]
Read more...
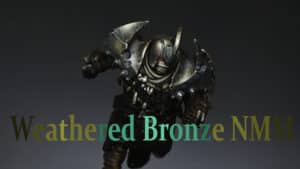
How to Paint a Blood Bowl Bronze Mummy with weathered NMM bronze effects, bandages, clothing, NMM Skull and Skin! Scroll…
Please login to view this content at https://richardgraycreations.com/login/ [...]
Read more...
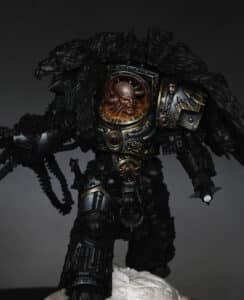
This video shows how to paint Horus Ascended from the Horus Heresy. The video looks at his skin, the red osl glow around his head, the armour and the NMM armour trim.
Video: How to Paint Horus – Part One
All videos are recorded in HD 1080p or higher – use full screen for the full effect and let the video load completely. You can also click the little “cog” and change the speed of the video, if I am going too fast (or slow!).
The following paints were used:
Games Workshop: Bugman’s Glow, Cadian Fleshtone, Mephiston Red, Wild Rider Red, Troll Slayer Orange, Yriel Yellow, Sons of Horus Green, XV-88, Mournfang Brown, Rhinox Hide, Balor BrownVallejo: Ice Yellow, Black, Neutral Grey P3: Morrow White
Steps and Tips
Assembly and Preparation:Assemble the model but leave the wolf pelt, cloak, and head unattached for ease of painting.Carefully address any mould lines on the mace, ensuring a clean finish.Utilise a heat gun to reshape the wolf pelt for an accurate fit on the model.
Priming:Prime the model thoroughly and allow it to set overnight.
Base Painting:Begin with a base coat of Mephiston Red, particularly on areas destined for the red glow (Object Source Lighting, OSL). Apply this in a brisk and relaxed style, without focusing on blending.
Building the Glow:Layer Wild Rider Red and Troll Slayer Orange, concentrating on recesses to enhance the glow effect.Incorporate Yriel Yellow for added brightness in the OSL areas.
Head Details:For the head, apply Cadian Fleshtone as a base to simulate natural lighting.Layer with Bugman’s Glow to establish depth and realistic skin tones.Highlight the forehead and areas receiving the main light with a mixture of Cadian Fleshtone and Vallejo’s Ice Yellow for a pronounced highlight.
Armour Details:Start the armour with a base of Sons of Horus Green.For depth, mix Sons of Horus Green with black for shadowed areas, and with Ice Yellow for highlighted regions.
Metallic Effects:For non-metallic metal effects on trims and details, commence with XV-88 as a base.Progressively apply layers using Mournfang Brown, Rhinox Hide, and Balor Brown, accentuating edges and raised details to mimic a metallic sheen.Employ Vallejo’s Neutral Grey for areas resembling steel or iron.
Finishing Touches:For ultimate highlights and refinement, use P3’s Morrow White.
More Character Tutorials
If you don’t have an account, please sign up here! The website currently has over 350 video tutorials with steps and tips, plus a selection of PDFs. If you are not sure about joining, you can explore my free videos with a free membership, or take the plunge and become a full subscriber for full access.
If you’d prefer to support me on Patreon, please visit: https://www.patreon.com/RichardGray [...]
Read more...
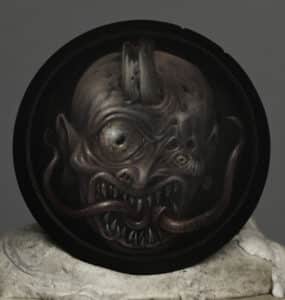
These videos show how to a paint a Nurgle shield with freehand for an Ogroid from the Slaves to Darkness army box.The freehand is if a Nurgle Plaguebearer head and is intended as a potential Golden Demon entry.
Scroll down to explore the tutorials and steps in order, or click the below to quick jump to a technique or section.
Video One: How to Paint a Nurgle Shield with FreehandPaints and Materials UsedPaintsBrushesOther MaterialsStep-by-Step Guide: PreparationBase PaintingFreehand SketchingRefining and DetailingFinal TouchesImportant NotesVideo Two: How to Paint the Shield Shine and NMM TrimPaints and Materials UsedPaintsBrushesOther MaterialsStep-by-Step GuidePreparing the PalettePainting the ShinePainting the NMM TrimFinal TouchesImportant NotesMore Freehand Tutorials to Explore
Video One: How to Paint a Nurgle Shield with Freehand
Paints and Materials Used
Paints
Games Workshop Paints:
Rhinox Hide
Bugman’s Glow
Mournfang Brown
Morghast Bone
Deathworld Forest
Yriel Yellow
Khorne Red
Ushabti Bone
Vallejo Paints:
Black
Ice Yellow
P3 Paint:
Morrow White
Brushes
Artist Opus:
Size 00 brushes (both a newer brush for finer details and an older brush for blending)
Other Materials
Wet Palette: To keep paints moist and workable.
Scalpel: For removing details from the shield.
Sandpaper: For smoothing the shield after using the scalpel.
Primer: Ultimate primer (specifically thinned with X20A for this project).
Mixing Water: For thinning paints on the palette.
Matte Varnish: To even out the surface and finish of the paint job.
Step-by-Step Guide:
Preparation
Prep the Nurgle Shield with Freehand: Remove intricate details from the shield using a scalpel and sand it slightly. Keep some battle damage for authenticity, if you wish.
Prime the Shield: Use Ultimate primer, thinned with X20A, applied in 4-5 thin coats.
Base Painting
Wet Palette Setup: Prepare a wet palette with the following Games Workshop colours: Ice Yellow, Bugman’s Glow, Rhinox Hide, Mournfang Brown, Morghast Bone, Deathworld Forest, Yriel Yellow, Khorne Red, and Ushabti Bone. Also, have Vallejo Black and P3 Morrow White ready.
Mixing Colours: Create various mixes of these colours on the palette, adjusting with water for a thinner consistency (approximately 50/50).
Freehand Sketching
Initial Sketch: Start sketching the Nurgle face on the shield using Bugman’s Glow. This doesn’t have to be symmetrical or realistic.
Adding Details: Gradually add more details like eyes, horns, and facial deformations using the mixed colours. Use Rhinox Hide for shading.
Background Technique: Use Vallejo Black as a ‘rubber’ to tweak and correct the sketch as needed.
Refining and Detailing
Light and Shadow: Use the lighter and darker mixes to create depth, focusing on the facial features. Ensure a balance between highlights and shadows.
Adding Texture: Pay attention to the direction of brushstrokes to replicate skin texture and facial creases.
Final Touches
Metallic Effects: For a Golden Demon entry, ensure to incorporate light volumes and reflective effects on the shield, as well as on the freehand.
Glazing: You may need to glaze over the freehand to integrate it with the shield’s overall shine and metallic effect.
Varnishing: Finish the shield with a matte varnish to even out different paint finishes.
Important Notes
Brush Technique: Use the very tip of your brush for detailed work. Switch between an older brush for blending and a newer one for sharp details.
Colour Importance: While exact colour mixes are flexible, ensure to maintain the overall desaturated, moody look characteristic of Nurgle.
Patience and Layers: Build up the image with multiple thin layers, allowing for smooth transitions and a detailed finish.
Personal Style: Remember, this guide is a base. Feel free to adjust and experiment according to your style.
Video Two: How to Paint the Shield Shine and NMM Trim
Paints and Materials Used
Paints
Vallejo Paints:
Black
German Grey
Neutral Grey
Ice Yellow
White
Games Workshop Paints:
Mournfang Brown
Brushes
Size 00 Brush: Ideal for detailed work and fine textures. Used for most of the work including the shine and trim.
Size 2 Brush: Used for broader strokes and glazing, especially over larger areas.
Other Materials
Wet Palette: To keep the paints moist and workable.
Lamp: For observing how natural light falls on the model, crucial for accurate highlight placement.
Blu Tack or Similar Adhesive: To temporarily attach the shield to the model for correct angle assessment.
Step-by-Step Guide
Preparing the Palette
Setup Wet Palette: Prepare a wet palette with Vallejo Black, German Grey, Neutral Grey, Ice Yellow, White, and Games Workshop Mournfang Brown. Create a gradient of grey shades from black to white, mixing in Ice Yellow and White with Neutral Grey for various mid-tones.
Painting the Shine
Analyzing Light Direction: Position the model under a lamp to observe natural light fall. This will guide the placement of the shine.
Initial Highlights: Start with a Neutral Grey or a mix of Neutral Grey and German Grey to block in the primary highlight areas on the shield.
Building Up Layers: Gradually increase the brightness of the highlights, focusing on the top left as the primary light source. Remember, the paint will appear brighter when wet and duller when dry.
Textured Effect: Use scratchy and stipple brushstrokes with minimal paint for a textured shine effect. Use the very tip of your brush.
Bounce Highlight: Add a bounce highlight at the bottom of the shield, reflecting light from the ground. This should be less bright than the primary highlight. Use a watered-down Mournfang Brown for a glaze over this area.
Painting the NMM Trim
Blocking in Highlights: Use Neutral Grey to block in primary highlights on the trim, focusing on the top area.
Adding Variation: Create a variety of light grey blocks along the trim, ensuring they get darker and more spaced out as they move away from the top highlight.
Refining Highlights: Gradually add lighter tones, culminating in white for the brightest parts. Ensure these highlights align with the shield’s central highlight.
Detailing Scratches: Use white to pick out tiny dots on sculpted scratches for added realism and depth.
Bounce Highlight on Trim: Similar to the shield, add a less intense bounce highlight at the bottom of the trim.
Final Touches
Glazing: Apply a thin glaze of Mournfang Brown over certain areas for colour integration and smooth transitions.
Detail Checks: Make any necessary adjustments to neaten the highlights and ensure consistency in lighting and texture across the shield and trim.
Important Notes
Consistency and Control: Maintain a good balance in paint consistency – not too thick for opaque marks and not too watery to avoid spreading.
Brush Technique: Always pull the brush towards yourself for control and precision, especially important when working near the freehand area.
Learning and Experimentation: Remember, this technique is both challenging and rewarding. Don’t be afraid to experiment and learn from the process.
These guides should provide a clear roadmap to achieving a high-standard finish for your freehand on shields, suitable for display or competition. Remember, practice and patience are key to mastering these techniques and don’t be afraid to do your own thing and add your own personal touch or style to your freehand!
More Freehand Tutorials to Explore
If you don’t have an account, please sign up here! The website currently has over 350 video tutorials with steps and tips, plus a selection of PDFs. If you are not sure about joining, you can explore my free videos with a free membership, or take the plunge and become a full subscriber for full access.
If you’d prefer to support me on Patreon, please visit: https://www.patreon.com/RichardGray [...]
Read more...
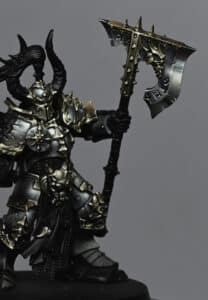
This video shows how to paint a NMM Axe belonging to the Chaos Champion from the Slaves to Darkness army box. The axe head is painted in NMM steel to a display level standard with coloured reflections. The trim of the axe is painted in NMM Gold.
Video: How to Paint a NMM Axe
Materials:
Paints: Mournfang Brown, Rhinox Hide, XV-88, Balor Brown, Barroth Blue (Games Workshop); Ice Yellow, Neutral Grey, German Grey, Black (Vallejo); Morrow White (P3)
Fine detail paintbrushes
Wet palette (optional, but recommended)
Steps for NMM Steel Effect on the Axe Blade:
Base Colour: Start with Neutral Grey. Block in the areas where you anticipate highlights, but don’t worry about precision at this stage. This step is about mapping out your light and dark areas.
Adding Reflections: Employ a ‘Sky Earth’ technique, but avoid a mirror-like chrome finish. Instead, aim for a less reflective surface with smoother transitions. This will differ from the steel look on the armour.
Colour Integration: On downward-facing surfaces, integrate a bit of Mournfang Brown into your Neutral Grey. For the top of the blade, use a lighter mix, incorporating a bit of Ice Yellow into Neutral Grey.
Brightness and Shadows: Apply Barroth Blue to represent the sky’s reflection. It should be brighter but not overly stark. Add Rhinox Hide to darken and desaturate certain areas, especially on downward curves.
Blending and Transition: Focus on blending your colours. Use a stippling or cross-hatching technique to create smooth transitions between the different tones. Pay attention to the balance between the bright and dark areas to maintain the metallic effect.
Final Highlights: For the brightest points, use Morrow White, especially on the uppermost curves and edges. This step is crucial for selling the metallic effect. Remember to keep these highlights sharp and focused.
Steps for NMM Gold Effect on the Axe Trim:
Base Coat: Start with XV-88. Outline the areas you want to appear as gold. This will be the foundation for your gold effect.
Layering: Gradually build up layers with Balor Brown, focusing on areas that would naturally catch more light. Be mindful of the shape and texture of the trim.
Adding Highlights: Use Ice Yellow for the brightest highlights on the gold sections. Apply it sparingly to the most prominent areas, like the edges and raised details.
Refining Details: Introduce Mournfang Brown and Rhinox Hide in the darker areas for deeper shadows, creating contrast and depth.
Final Touches: Use Morrow White for the brightest spots on the gold trim, emphasizing the highest points of light reflection. This will enhance the metallic illusion.
Key Tips:
Brush Control: Use the tip of your brush for precision. The quality of your lines and blending directly impacts the realism of the NMM effect.
Light Source Consistency: Ensure that the light source is consistent across the model. This affects where you place highlights and shadows.
Patience and Layers: NMM is about building up layers gradually. Work slowly and allow layers to dry before applying the next.
Blending: Smooth transitions between colours are vital. Practice stippling and glazing techniques for seamless blends.
Reflections and Realism: Study how light interacts with metallic surfaces. Incorporate reflected colours and environments subtly into your NMM work for added realism.
Explore my latest tutorials
If you don’t have an account, please sign up here! The website currently has over 350 video tutorials with steps and tips, plus a selection of PDFs. If you are not sure about joining, you can explore my free videos with a free membership, or take the plunge and become a full subscriber for full access.
If you’d prefer to support me on Patreon, please visit: https://www.patreon.com/RichardGray [...]
Read more...
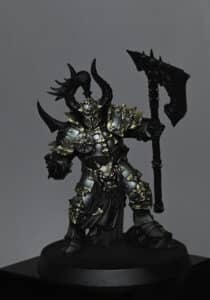
These videos show how to paint the the Chaos Champion from the Slaves to Darkness army box that Games Workshop sent me, with full paints list and detailed step by steps. This guide is a part of a series focusing on non-metallic metal (NMM) armour, NMM gold, and a large animal skull, using a variety of paints including Games Workshop and Vallejo colours. The second video where we paint his NMM axe can be found below the first.
Video: How to Paint the Chaos Champion
All videos are recorded in HD 1080p or higher – use full screen for the full effect and let the video load completely. You can also click the little “cog” and change the speed of the video, if I am going too fast (or slow!).
Materials and Paints:
Vallejo Heavy Grey
Games Workshop Barroth Blue
Games Workshop XV-88
Games Workshop Balor Brown
Games Workshop Mournfang Brown
Vallejo Ice Yellow
P3 Morrow White
Vallejo Neutral Grey
Vallejo Model Color Black
Games Workshop Elysium Green (optional)
Size 00 and Size 1 brushes
Wet palette
Step-by-Step Guide on How to Paint the Chaos Champion:
Step 1: Base Coat the Armour
Apply Vallejo Heavy Grey across all armour panels. This colour isn’t a plain grey but has a greenish, olive drab tone, adding a subtle hint of colour to the model.
Step 2: Detailed Armour Painting
Begin with a haphazard application of Heavy Grey, ensuring not to fill the recesses excessively.
For the first highlight, mix Heavy Grey and Barroth Blue in a 50/50 ratio. Apply this carefully, focusing on stippling and scratchy textures.
Progressively add more Barroth Blue to the mix for subsequent highlights.
The final highlight uses P3 Morrow White, applied sparingly on the most prominent parts.
Step 3: Non-Metallic Gold Trim
Start with a base coat of Games Workshop XV-88.
Apply Balor Brown, followed by Ice Yellow for highlights.
Use Vallejo Neutral Grey for lower bounce highlights.
Focus on creating high contrasts on sharp edges and subtle curves to mimic metallic shine.
Step 4: Painting the Skull
Base the skull with Games Workshop XV-88.
Add texture using Games Workshop Mournfang Brown, focusing on stippling to create a bone-like appearance.
Use Games Workshop Screaming Skull for higher highlights.
Finish with a glaze of Vallejo Neutral Grey to soften contrasts.
Step 5: Horns and Details
Paint the horns starting with Mournfang Brown, transitioning to Rhinox Hide, and finishing with black towards the tips.
Apply small highlights of Balor Brown and then white at the tips for a shiny effect.
Step 6: Finishing Touches
Continuously refine the armour’s highlights, focusing on light direction and texture.
Use stippling techniques for texture on the skull and bones.
Ensure all parts of the model, including edges and recesses, are neatly finished.
Video: How to Paint the Chaos Champion NMM Axe
Materials:
Paints: Mournfang Brown, Rhinox Hide, XV-88, Balor Brown, Barroth Blue (Games Workshop); Ice Yellow, Neutral Grey, German Grey, Black (Vallejo); Morrow White (P3)
Fine detail paintbrushes
Wet palette (optional, but recommended)
Steps for NMM Steel Effect on the Axe Blade:
Base Colour: Start with Neutral Grey. Block in the areas where you anticipate highlights, but don’t worry about precision at this stage. This step is about mapping out your light and dark areas.
Adding Reflections: Employ a ‘Sky Earth’ technique, but avoid a mirror-like chrome finish. Instead, aim for a less reflective surface with smoother transitions. This will differ from the steel look on the armour.
Colour Integration: On downward-facing surfaces, integrate a bit of Mournfang Brown into your Neutral Grey. For the top of the blade, use a lighter mix, incorporating a bit of Ice Yellow into Neutral Grey.
Brightness and Shadows: Apply Barroth Blue to represent the sky’s reflection. It should be brighter but not overly stark. Add Rhinox Hide to darken and desaturate certain areas, especially on downward curves.
Blending and Transition: Focus on blending your colours. Use a stippling or cross-hatching technique to create smooth transitions between the different tones. Pay attention to the balance between the bright and dark areas to maintain the metallic effect.
Final Highlights: For the brightest points, use Morrow White, especially on the uppermost curves and edges. This step is crucial for selling the metallic effect. Remember to keep these highlights sharp and focused.
Steps for NMM Gold Effect on the Axe Trim:
Base Coat: Start with XV-88. Outline the areas you want to appear as gold. This will be the foundation for your gold effect.
Layering: Gradually build up layers with Balor Brown, focusing on areas that would naturally catch more light. Be mindful of the shape and texture of the trim.
Adding Highlights: Use Ice Yellow for the brightest highlights on the gold sections. Apply it sparingly to the most prominent areas, like the edges and raised details.
Refining Details: Introduce Mournfang Brown and Rhinox Hide in the darker areas for deeper shadows, creating contrast and depth.
Final Touches: Use Morrow White for the brightest spots on the gold trim, emphasizing the highest points of light reflection. This will enhance the metallic illusion.
Key Tips:
Brush Control: Use the tip of your brush for precision. The quality of your lines and blending directly impacts the realism of the NMM effect.
Light Source Consistency: Ensure that the light source is consistent across the model. This affects where you place highlights and shadows.
Patience and Layers: NMM is about building up layers gradually. Work slowly and allow layers to dry before applying the next.
Blending: Smooth transitions between colours are vital. Practice stippling and glazing techniques for seamless blends.
Reflections and Realism: Study how light interacts with metallic surfaces. Incorporate reflected colours and environments subtly into your NMM work for added realism.
Explore my latest tutorials
If you don’t have an account, please sign up here! The website currently has over 350 video tutorials with steps and tips, plus a selection of PDFs. If you are not sure about joining, you can explore my free videos with a free membership, or take the plunge and become a full subscriber for full access.
If you’d prefer to support me on Patreon, please visit: https://www.patreon.com/RichardGray [...]
Read more...
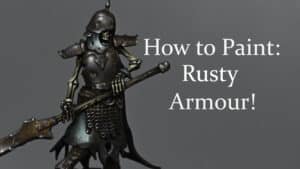
These videos show you how to paint a Sons of Velmorn Skeleton from the Sons of Velmorn warband, which comes in the new Warhammer Underworlds Gnarlwood box that Games Workshop sent me.
Video – How to Paint a Sons of Velmorn Skeleton Part One
All videos are recorded in HD 1080p or higher – use full screen for the full effect and let the video load completely. You can also click the little “cog” and change the speed of the video, if I am going too fast (or slow!).
Paints and Materials
Brushes: A size 2 brush for most painting and a smaller brush for details.
Paints: Rhinox Hide, Mournfang Brown, XV-88, Balor Brown, Morghast Bone, Troll Slayer Orange, Firedragon Bright, Sybarite Green, Gauss Blaster Green, Dryad Bark (Games Workshop); German Grey (Vallejo); Morrow White (P3).
Step by Step Guide
Basecoat Armour: Start by base coating all metal areas with Dryad Bark. This unconventional start sets the stage for rusty, worn armour.
Mix Fabric Colour: Create a custom fabric colour by mixing Sybarite Green and German Grey. Adjust this mix to your preference – more grey for desaturation or pure green for vibrancy.
Apply Base Colours: Block in other base colours: Rhinox Hide for leather and wood parts, and Morghast Bone for skeletal areas. Don’t worry about perfect opacity; focus on coverage.
Rusty Effect: To achieve a rusty effect on the armour, mix a small amount of Mournfang Brown into the Dryad Bark, then add a bit of white to desaturate. Apply this mix to the armour, focusing on recesses and areas where rust would naturally accumulate.
Enhance Rust: Use straight Mournfang Brown, thinned with water, to intensify the rust effect, especially in recesses and dents.
Brighten Rust: Add Troll Slayer Orange and Firedragon Bright to certain rust areas for colour variation, keeping in mind how rust behaves in reality.
Non-Metallic Metal Highlights: Start highlighting the armour. Mix white into your base armour colour progressively, applying these lighter shades to raised areas and edges to simulate metallic reflection.
Detailing: Use the very tip of your brush for small highlights and scratches, particularly on the armour and blade. This step adds depth and realism to the rusty, worn metal effect.
White Highlights: Finally, use Morrow White for the brightest points on the armour. Be selective and minimal with white to maintain focus and contrast.
Finish Up: Conclude by refining highlights and ensuring a smooth transition between shades.
Additional Tips
Rust Placement: Apply rust thoughtfully, considering where it would naturally form and accumulate.
Highlighting Technique: Combine stippling and precise brushwork for a realistic, weathered look.
Focus on Key Areas: Spend more time on prominent areas like the helmet and chest for better visual impact.
Maintain Brush Control: Regularly adjust your brush’s load to avoid unwanted paint marks.
Balance Realism and Style: Choose your rust and highlight placement for both aesthetic appeal and realism.
Video – How to Paint a Sons of Velmorn Skeleton Part Two
Paints and Materials
Paints: Rhinox Hide, Mournfang Brown, XV-88, Balor Brown, Morghast Bone, Troll Slayer Orange, Firedragon Bright, Sybarite Green, Gauss Blaster Green, Dryad Bark (Games Workshop); German Grey (Vallejo); Morrow White (P3).
Brushes: A size 2 brush for larger areas and a finer brush for details.
Step by Step Guide
Fabric Highlights:
Mix Sybarite Green, German Grey, and a bit of Morrow White.
Apply the mix to the fabric, focusing on smooth transitions. Use a larger brush for fewer brush strokes.
Multiple thin layers are needed. Add a small amount of white for each layer, focusing on the most illuminated areas.
Bone Details:
The bone areas are detailed and require precision. Consider using a smaller brush.
Highlight the raised areas and sculpted details, like elbow joints and knuckles.
For the face, accentuate teeth more than other bone parts for contrast.
Leather and Wood:
Start with Rhinox Hide, then apply Mournfang Brown, focusing on the upper edges.
Mix in Cadian Flesh Tone with Mournfang Brown for subsequent highlights, concentrating on the top edge and creating creases.
For the wood, after Mournfang Brown, use Balor Brown with Neutral Grey for desaturation. Highlight raised grain details.
Non-Metallic Gold:
Basecoat with XV-88.
Mix XV-88 with Ice Yellow for highlights.
Accentuate the brightest spots with a mixture of Ice Yellow and White.
Weathering Fabric:
Use heavily watered-down Rhinox Hide to create dirt and stains on the fabric.
Apply in thin layers, allowing each to dry before adding more. Focus on areas that would naturally gather dirt.
Painting the Skirt:
Base the skirt with Dark Grey or German Grey.
Add White progressively for highlights, concentrating on the curves and upper areas.
Use Rhinox Hide for weathering, similar to the green fabric.
Finishing Touches:
Add fine details like bone texture, teeth, and small crevices.
For the base, a simple grey stone effect with highlights works well.
Additional Tips
Brush Choice: Use larger brushes for broad areas and smaller ones for detailed work. I used the Artist Opus range of brushes, but any high-quality brush is good.
Weathering: Weathering can mask imperfections and add realism.
Balance of Colours: Ensure the fabric and armour contrast in cleanliness and texture.
Attention to Details: Small details like teeth or bone texture can significantly enhance the model’s appearance.
Lighting Consistency: Ensure your highlights are consistent with the light source direction established across the model.
Explore more Undead Tutorials
If you don’t have an account, please sign up here! The website currently has over 350 video tutorials with steps and tips, plus a selection of PDFs. If you are not sure about joining, you can explore my free videos with a free membership, or take the plunge and become a full subscriber for full access.
If you’d prefer to support me on Patreon, please visit: https://www.patreon.com/RichardGray [...]
Read more...
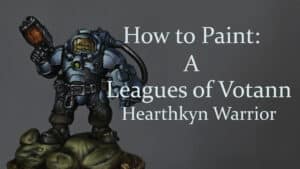
These videos show how to paint Leagues of Votann Hearthkyn Warrior (space dwarfs/squats), which were sent to me by Games Workshop.
Video Part One – How to Paint Leagues of Votann Hearthkyn WarriorVideo Part Two – How to Paint Leagues of Votann Hearthkyn WarriorPaints UsedPreparation and Base CoatingFace Mask and ArmourTrousers and BootsAdditional Details and WeatheringFinal Touches
Video Part One – How to Paint Leagues of Votann Hearthkyn Warrior
All videos are recorded in HD 1080p or higher – use full screen for the full effect and let the video load completely. You can also click the little “cog” and change the speed of the video, if I am going too fast (or slow!).
Video Part Two – How to Paint Leagues of Votann Hearthkyn Warrior
All videos are recorded in HD 1080p or higher – use full screen for the full effect and let the video load completely. You can also click the little “cog” and change the speed of the video, if I am going too fast (or slow!).
Paints Used
Games Workshop: Rhinox Hide, Sotek Green, Warpstone Glow, Yriel Yellow, XV-88, Mephiston Red, Evil Sunz Scarlet, Troll Slayer Orange, Fire Dragon Bright, Deathworld Forest, Mournfang Brown, Balor Brown, Vallejo: Neutral Grey, Black, Dark Grey, Ice Yellow
P3: Morrow White
Preparation and Base Coating
Model Assembly: Assemble your model, ensuring arms and weapons are separated for easier painting.
Priming: Apply a black primer evenly across the model. This will serve as your base for all subsequent layers.
Face Mask and Armour
Base Layer: Begin with ‘Rhinox Hide’ for the face mask, focusing on the left-hand side to simulate light direction. For the armour, start with ‘Sotek Green’, applying the paint loosely to create texture.
Highlighting Technique: Use a lamp to identify where the main highlights should be, focusing on the upper left side of the model. This will help simulate directional lighting.
Layering Armour: Build up the armour’s colour using layers of ‘Sotek Green’, ‘Ahriman Blue’, and ‘Temple Guard Blue’. For the final highlights, mix ‘Ice Yellow’ with ‘Temple Guard Blue’.
Detailing Face Mask: Use ‘Balor Brown’ and ‘Ice Yellow’ for detailing, especially on the top left side for highlights.
Trousers and Boots
Base Coat: Start with a black or dark grey base coat for the trousers.
Highlights: Gradually build highlights on the trousers using a mix of the base colour and ‘Ice Yellow’. Keep the highlights subtle to maintain the focus on the upper part of the model.
Additional Details and Weathering
Boots and Lower Details: Use a similar technique as the trousers for the boots, focusing on subtle highlights.
Weathering: Apply ‘Mournfang Brown’ to create a worn, weathered look on the armour. Focus on recesses and edges to simulate natural wear and tear.
Final Touches
Refining Highlights: Go back to the armour and face mask, refining highlights where necessary. This is the stage to perfect your light direction and ensure consistency across the model.
Completing the Base: Paint the base to complement the model. A simple, unobtrusive design ensures the focus remains on the warrior.
Explore more of my latest tutorials
If you don’t have an account, please sign up here! The website currently has over 350 video tutorials with steps and tips, plus a selection of PDFs. If you are not sure about joining, you can explore my free videos with a free membership, or take the plunge and become a full subscriber for full access.
If you’d prefer to support me on Patreon, please visit: https://www.patreon.com/RichardGray [...]
Read more...
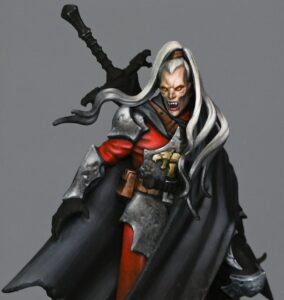
These videos show how to paint Cado Ezechiar, one of the vampire models from Games Workshop. He was painted as a part of my Golden Demon entry for 2024!
There are a lot of fun techniques I used on Cado, from his pitted, slightly worn armour, to his cloth undershirt, cape and some weathered leather. Read on to explore the tutorials in order, or click below to explore each part.
Video Part One – Armour and Red ClothPaints UsedPreparationBlocking in ColoursPainting the ArmourEnhancing Texture and ColourVideo Part Two – Leather Belt and Pouch, the NMM Gold Dragon on his chest and his Black Cape with WeatheringPaints UsedStep-by-Step GuideLeather DetailsNMM Gold DragonBlack CapeVideo Part Three – How to Paint a Vampire HeadMaterials ListHow to Paint a Vampire Head Painting GuidePreparationBase CoatingLayering and DetailingAdditional TipsVideo Part Four – How to Paint his Cracked Leather ScabbardMaterials and PaintsStep by Step Guide to Paint a Cracked Leather ScabbardLeather Technique TipsVideos Not Showing?
Video Part One – Armour and Red Cloth
All videos are recorded in HD 1080p or higher – use full screen for the full effect and let the video load completely. You can also click the little “cog” and change the speed of the video, if I am going too fast (or slow!).
Paints Used
Games Workshop: Mournfang Brown, Corvus Black Vallejo: Ice Yellow, Neutral Grey, German GreyP3: Morrow White
Preparation
Priming: The model should already be primed black. Imperfections in the primer’s coverage are not a concern, as all surfaces will be covered with paint.
Blocking in Colours
Base Coating: Start by blocking in base colours for efficiency and to prevent having to meticulously paint near completed areas later. Use Rhinox Hide for leather parts and German Grey (or a dark grey made by mixing black and white) for armour sections. This step is about laying down foundational colours and reacquainting yourself with the painting process.
Painting the Armour
Initial Armour Layer: Apply a base layer of German Grey across all armour parts. This step establishes a dark base for building up the texture and highlights that will follow.
Adding Texture and Base Highlights: Switch to Neutral Grey to begin adding texture and lighting effects to the armour. This involves creating scratch-like marks to simulate corrosion and wear, enhancing the model’s detailed sculpting. A size 00 brush is recommended for fine control and detail work.
Building Highlights: Gradually lighten the armour by adding more Neutral Grey, and then lighten further by mixing in Ice Yellow with Neutral Grey. The goal is to create a gradient of highlights leading to the brightest points of the armour. The addition of Ice Yellow introduces warmth to the grey, adding visual interest.
Final Highlights: Use P3 Morrow White for the final highlights. Apply this sparingly to the most raised areas and points where light would naturally be the strongest. The white should be watered down significantly to ensure a smooth application.
Enhancing Texture and Colour
Glazing for Depth: Mix a glaze using Mournfang Brown and apply it to shadow areas and recesses to add depth and warmth to the armour. Follow up with Corvus Black for deepening the shadows further. These glazes help unify the texture and add complexity to the finish.
Adjustments and Finishing Touches: Continuously assess the model as you paint, especially when transitioning between different sections or colours. Ensure that the lighting and colours are cohesive across the model to maintain the unit’s unified appearance.
Video Part Two – Leather Belt and Pouch, the NMM Gold Dragon on his chest and his Black Cape with Weathering
Paints Used
Games Workshop: Rhinox Hide, Mournfang Brown, Fire Dragon Bright, XV-88, Balor Brown Vallejo: Dark Grey, Ice Yellow
Step-by-Step Guide
Leather Details
Base Coat: Start with Rhinox Hide as the base for all leather parts, which was applied in the previous painting session.
Initial Highlights: Using Mournfang Brown, begin blocking in the details on the belt and pouch using a size 00 brush. Focus on applying the paint with the tip of the brush, even when filling larger areas, to maintain precision and control.
Adding Texture: With the same brush, enhance the leather texture by applying additional highlights with a mixture of Mournfang Brown and Fire Dragon Bright. The Fire Dragon Bright will lighten the colour but may also increase the paint’s translucency, requiring multiple layers for full opacity.
Further Highlights: Introduce Ice Yellow into the mix for the next set of highlights, focusing on the most illuminated areas like the top of the pouch and the sides of the belt that are exposed to light. Use a delicate touch to add fine details and texture, simulating the natural wear and tear on the leather.
NMM Gold Dragon
Base Layer: Use XV-88 as your base colour for the dragon emblem. Carefully outline the shape, leaving black lines between the details to create depth and contrast.
Building Up Colour: Gradually add Balor Brown to the XV-88, focusing on areas where light would naturally hit the emblem. Consider the curvature and form of the dragon to place your highlights thoughtfully, enhancing the 3D effect.
Final Highlights: Mix in Ice Yellow with your base colours to brighten the highest points of the emblem. Apply these highlights sparingly to areas like the brow, nose tip, and the edges of the dragon heads to achieve a metallic shine. Optionally, add a dot of pure white at the very brightest points for maximum impact.
Black Cape
Initial Layering: Prime the cape black and then apply Vallejo Dark Grey, thinned with water (approximately 60% water to 40% paint), to start building up the layers. Aim for smooth, gradual transitions, focusing on the creases and raised areas of the cape.
Highlighting: Incrementally mix Ice Yellow into the Dark Grey for the highlights. Apply these to the edges and folds of the cape where the light naturally hits, ensuring that the highlights are concentrated towards the top of the folds to emphasise the flow and texture of the fabric.
Weathering: Using Rhinox Hide, begin stippling the lower edges of the cape to simulate mud and grime build-up. Progressively add Mournfang Brown and then Balor Brown into your mix, focusing the lighter, more detailed stippling towards the very bottom to create a realistic weathered effect. Avoid making this look too uniform; natural wear and variety in the marks will enhance the realism.
Video Part Three – How to Paint a Vampire Head
All videos are recorded in HD 1080p or higher – use full screen for the full effect and let the video load completely. You can also click the little “cog” and change the speed of the video, if I am going too fast (or slow!).
Materials List
Paints:
Games Workshop: Cadian Fleshtone, Mephiston Red, Evil Sunz Scarlet
Vallejo: Neutral Grey, German Grey
P3: Morrow White (or any white paint)
Brushes:
Size 2 Round Brush (for broad applications)
Size 00 Round Brush (for detailed work)
Other Materials:
Wet Palette (to keep paints moist and workable)
Water Pot (for cleaning brushes)
Mixing Palette (for mixing custom paint shades)
Blue Tack (for temporarily attaching components)
Metal Rod (for holding the model while painting)
Super Glue (for assembly adjustments)
How to Paint a Vampire Head Painting Guide
Preparation
Modify and Assemble: Modify the hair of the model to prevent it from touching the face, allowing for easier access when painting. This involves careful cutting, reattaching, and positioning of the hair components.
Priming: Prime the model with a neutral primer to ensure paint adhesion and colour accuracy.
Base Coating
Apply Base Colours: Begin with a base coat of Cadian Fleshtone for the skin, applying it thinly (around a 1.5:1 ratio of water to paint) using a size 2 brush for a smooth layer. For the hair, use Neutral Grey as the base.
Layering and Detailing
Layering: Employ both a size 2 brush for general work and a 00 brush for fine details. Gradually build up the skin tones, focusing on creating dramatic lighting by highlighting facial features and leaving recesses darker. Mix Cadian Fleshtone with white for various highlight shades.
Eyes and Teeth Detailing: For the eyes, utilise Mephiston Red and Evil Sunz Scarlet for a glowing effect. For the teeth, mix Cadian Fleshtone with white to achieve a natural bone colour, steering clear of pure white to maintain realism.
Hair: Paint the hair in layers, starting with Neutral Grey, then adding white for highlights. Adjust shading and highlighting to reflect texture and colour accurately.
Shadows and Highlights: Use German Grey for deep shadows to add depth, especially around the eyes and under facial features. Use mixtures of Cadian Fleshtone with white and grey to refine the face’s appearance, enhancing the transition from light to shadow.
Final Touches: Add fine highlights with a mix of the lightest skin tone and a bit of white, focusing on areas where light naturally hits. Use a fine brush for precision, ensuring smooth transitions between light and dark areas.
Additional Tips
Brush Care: Always wet your brush before starting to paint, even if it appears clean, to ensure smooth paint flow.
Lighting Effects: When painting, consider how light interacts with the model’s features. This helps in achieving a more natural and realistic appearance, even with dramatic lighting.
Colour Mixing: Don’t be limited by paint names. Understand that all paints are just colours, and creative mixing can achieve the desired effect, such as using skin tone mixes for teeth to avoid too stark a contrast.
Video Part Four – How to Paint his Cracked Leather Scabbard
All videos are recorded in HD 1080p or higher – use full screen for the full effect and let the video load completely. Click the cog icon to choose speed, if I’m too fast or slow!
Materials and Paints
Paints:
Rhinox Hide (Games Workshop) – A dark brown paint used as the base color for the leather.
Bugman’s Glow (Games Workshop) – A flesh-toned paint used for creating mid-tones and highlights on the leather.
White (P3 Morrow White) – Used for mixing with Bugman’s Glow to create lighter shades for finer highlights.
Brushes:
Fine Detail Brush – A high-quality, fine-tipped brush, such as a size 0 or 00, is essential for painting the very fine lines that simulate the cracks in the leather. The brush used in the video is my favourite, the size 00 Artis Opus brush.
Additional Materials:
Water – For thinning the paints. The consistency of the paint should be around 50% water to 50% paint, with a slight adjustment for environmental factors like heat.
Wet Palette – To keep the paints hydrated and workable for longer periods. It’s particularly useful for mixing and maintaining the consistency of thinned paints.
Kitchen Roll or Paper Towel – Used for dabbing the brush to remove excess paint or water. It’s important to change the paper regularly to avoid degradation and particles sticking to the brush.
Painting Handle or Holder (optional) – To comfortably hold and manipulate the model while painting. I use Rathcore painting handles.
Step by Step Guide to Paint a Cracked Leather Scabbard
1. Preparation:
Ensure the scabbard on the model (in this case, Cado Ezechiar) is clean and ready for painting.
2. Base Coat:
Start by covering the entire scabbard area with Rhinox Hide (Games Workshop). Apply a couple of coats for even coverage but don’t worry about perfect opacity.
3. Mixing Paints:
Prepare your palette with a progression of mixes:
Rhinox Hide mixed with a small amount of Bugman’s Glow (GW).
Pure Bugman’s Glow, thinned slightly with water.
Bugman’s Glow mixed with a small amount of white (P3 Morrow White), and then a mix with more white added.
4. Detailing with a Fine Brush:
Use a thin brush, like a size 0 or 00, ensuring it has a very sharp tip for fine detailing.
Begin with the Rhinox Hide and Bugman’s Glow mix. Paint very fine, wiggly lines across the scabbard, simulating cracks in the leather. The lines should be more concentrated on the left side where the light hits, but include some on the right side too.
Turn the model as needed for comfort and accuracy but check the marks in the correct orientation to ensure they look natural.
Remember, the paint consistency should be about 50:50 water to paint, perhaps slightly more water for better flow.
5. Building Highlights:
Progress to using straight Bugman’s Glow. Go over some of the previous lines and add new ones. Ensure that some of the initial finer lines remain visible beneath.
Focus on making the edges and areas with supposed more wear brighter.
You can create deeper scratches by painting over the previous lines, adding detail and depth.
6. Correcting and Enhancing:
If any lines are too thick or dense, use Rhinox Hide to adjust them. You can also enhance them by extending the lines and creating additional features.
Remember, each line or mark should be distinct and avoid uniform patterns.
7. Final Highlights:
Use the mix of Bugman’s Glow and white for the brightest highlights. Apply these sparingly and focus on making them as small and fine as possible.
Adjust the intensity of your highlights by removing excess paint from the brush before application.
8. Glazing for Depth:
To bring the whole effect together and add depth, apply a glaze of Mournfang Brown (GW) over the entire area. This step also helps soften the texture and make it more refined.
You can go back with Rhinox Hide into darker recesses if needed, to adjust the contrast and depth.
9. Final Touches:
Add more detail and glaze as needed to achieve the desired depth and realism in the leather texture. Be mindful of over-glazing, which can dilute the detail work.
10. Review and Adjust:
Continuously review your work and adjust as necessary to ensure a realistic and varied leather texture. Each step can be refined or corrected to achieve the desired effect.
Leather Technique Tips
Consistency in paint mixture is crucial for achieving the fine lines necessary for the cracked leather effect.
Regularly maintaining the brush’s fine tip is essential for detailed work.
Turning the model upside down can facilitate easier brush strokes, but always check the work in its correct orientation.
Glazing with thinned paint helps unify the painted area and add depth to the texture.
Remember, the key to this technique is patience and precision. The fine details make the difference, so take your time with each step to achieve a convincing cracked leather effect.
Videos Not Showing?
To view any of my paid tutorials, you need to be a member of the website – please click below to log in or join the site.
Not sure about joining just yet? Check out my Youtube for all my free tutorials or sign up as a free “friend” member on this site and visit the Freebies video page! [...]
Read more...
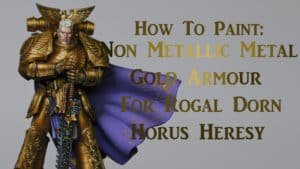
In this guide you will be shown how to paint Rogal Dorn’s armour in NMM (non-metallic metal) gold. This is a higher level technique, suitable for the mighty Primarch of the Imperial Fists! (make sure you are logged in to view!)
All videos are recorded in HD 1080p or higher – use full screen for the full effect and let the video load completely. You can also click the little “cog” and change the speed of the video, if I am going too fast (or slow!).
Paints and Materials
Games Workshop: Rhinox Hide, Mournfang Brown, XV-88, Balor BrownP3: Morrow White (Any White will do)
BrushesArtis Opus: Series S size 1 and 00, Small Drybrush
Priming
Prime the model black for a deep shadow base.
Over the primer, airbrush or brush on Mournfang Brown thinly.
Base Highlights
Use XV-88 to mark where light naturally reflects on the armor.
Focus on large shapes and avoid intricate details at this stage.
Layering
Gradually build up lighter tones, moving from Rhinox Hide to Balor Brown.
This step creates a depth and transition in the gold effect.
Bright Highlights
Mix small amounts of Morrow White into Balor Brown.
Apply this mix to areas where light hits strongest like the shoulders and helmet.
Smoothing Transitions
Use glazing techniques to blend the transitions smoothly.
Aim for a gradient effect from dark to light tones.
Deepening Shadows
Apply darker tones like Rhinox Hide in recessed areas for depth.
Contrast between shadows and highlights enhances the metallic look.
Final Touches
Add nearly pure white highlights at the highest points of light reflection.
These should be minimal but bright for impact.
Refinement
Revisit the model to tighten any details and ensure uniformity.
A matte varnish can be used at the end to protect the paintwork and unify the sheen.
More Free Video Tutorials
Free videos for logged in members – just sign up as a ‘friend’ to view and click any of the thumbs.To explore all of these, visit this page!
If you don’t have an account, please sign up here! The website currently has over 350 video tutorials, plus step by step guides and PDFs. You can explore more free videos with a free membership, or take the plunge and become a full subscriber for full access.
If you’d prefer to support me on Patreon, please visit: https://www.patreon.com/RichardGray [...]
Read more...
These videos show how to paint the Aeldari Soul Weaver from the Killteam: Nachmund boxed set that Games Workshop sent me.
Video: How to Paint the Aeldari Soul Weaver Part One
All videos are recorded in HD 1080p or higher – use full screen for the full effect and let the video load completely. You can also click the little “cog” and change the speed of the video, if I am going too fast (or slow!).
Video: How to Paint the Aeldari Soul Weaver Part Two
Paints
Games Workshop / Citadel:
Pink Horror
Cadian Fleshtone
Corvus Black
Mephiston Red
Mournfang Brown
Warpstone Glow
XV-88
Morghast Bone
Screaming Skull
Dryad Bark
Vallejo:
Turquoise
Light Turquoise
Model Colour Black
P3:
Morrow White
Brushes
A range of sizes for different tasks:
Detail work: Fine-tip brushes, such as a size 0 or 00, for eyes, facial details, and filigree.
Base coating and blending: Larger brushes, sizes 1 to 4, for smoother application over larger areas like cloaks and armour.
A dedicated dry brush for texture work on bases.
Additional Materials
Primer: Black primer for base coating.
Wet Palette: To keep paints moist and facilitate mixing and blending.
Water pot: For rinsing brushes.
Paper Towel or Cloth: For brush drying and cleaning.
Palette: For mixing paints, if not using a wet palette.
Glue: For assembling the model.
Blu-tack or Temporary Adhesive: Recommended for temporarily positioning parts like the head for easier painting access.
Fine Sand and PVA Glue: For texturing the base.
Varnish: Matte varnish to protect the finished model.
Tweezers and Sculpting Tools: Useful for applying small details like tufts or manipulating small parts.
Static Grass or Tufts: For detailing the base.
Preparation
Assembly: Assemble the model but consider leaving the head unglued to make painting the face easier. Prime the model in black to prepare it for painting.
Painting Guide
Armour and Cloak
Armour Base: Mix Vallejo Turquoise with a small amount of black to create a dark turquoise shade. Apply this mixture to the armour sections of the model.
Cloak Base: For the cloak, use Pink Horror mixed with a slight amount of black to achieve a dark pink base.
Skin
Base Layer: Apply Cadian Fleshtone, diluted with water (about 50:50), to the skin areas. Several layers may be required for opaque coverage due to the translucent nature of the paint.
Facial Features
Eyes and Eyebrows: Detail the eyes with Corvus Black and highlight with a light grey mixed from black and white. Add eyebrows with Corvus Black for a natural appearance.
Lips: Paint the lips with the same pink used for the cloak and highlight accordingly.
Hair
Mix Mephiston Red and Mournfang Brown for the hair’s base colour. Highlight by adding white to this mixture, progressively lightening the shade for higher highlights.
Leather and Accessories
Base Colour: Use Dryad Bark for leather parts, adding Cadian Fleshtone to lighten for highlights.
Soul Stones: Start with Warpstone Glow, adding white for highlights. Place a white dot on the top left of each stone to simulate light reflection.
Final Details and Assembly
Reassemble: If you left the head detached, glue it in place once the face is fully painted.
Base: Apply a simple textured base coated in a neutral colour like XV-88, followed by dry brushing with Morghast Bone and Screaming Skull to highlight texture.
Additional Tips
Highlighting: Use a wet palette to mix and blend colours smoothly. When highlighting, work from dark base shades up to light tones, focusing on where light naturally hits the model.
Blending: For smooth transitions, especially on the cloak and skin, thin your paints and build up layers gradually.
Detail Work: For fine details like eyes, use a fine-tip brush and steady hand. Keep correction fluid handy for any slips.
Finishing Touches: Use a light hand with final white highlights to ensure they complement rather than overwhelm the model’s colours.
More Aeldari/Eldar Tutorials to Explore!
If you don’t have an account, please sign up here! The website currently has over 350 video tutorials with steps and tips, plus a selection of PDFs. If you are not sure about joining, you can explore my free videos with a free membership, or take the plunge and become a full subscriber for full access.
If you’d prefer to support me on Patreon, please visit: https://www.patreon.com/RichardGray [...]
Read more...
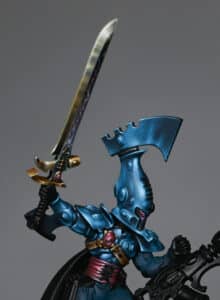
In this tutorial, I’ll be guiding you through how to paint an Aeldari Autarch power sword, focusing on achieving a non-metallic metal (NMM) effect to accentuate its alien elegance.
Video: How to Paint Aeldari Autarch Power Sword
All videos are recorded in HD 1080p or higher – use full screen for the full effect and let the video load completely. You can also click the little “cog” and change the speed of the video, if I am going too fast (or slow!).
Materials Needed:
Vallejo Neutral Grey
Vallejo Ice Yellow
Games Workshop Yriel Yellow
Games Workshop Mournfang Brown
Games Workshop Abaddon Black
Games Workshop Sotek Green
P3 Morrow White
A mix of Neutral Grey and Yriel Yellow
A mix of Ice Yellow and Morrow White
Step by Step Guide
Base Coating: Start by applying a base coat of Vallejo Neutral Grey across the sword. This serves as a solid foundation for building up the NMM gold effect.
Initial Highlights: Mix Vallejo Neutral Grey with a small amount of Yriel Yellow to create your first highlight layer. Focus this mixture towards the edges and points of the sword where light would naturally be strongest.
Enhancing the Highlights: Gradually introduce lighter shades by adding more Yriel Yellow and then Ice Yellow into your mixes. Apply these to the most pronounced edges and features to simulate the effect of light reflecting off the metal.
Defining Reflections: Pay attention to the dynamic shape of the sword, applying strategic highlights to suggest the reflection of light on its surface. This includes the curvature near the tip and along the flat of the blade.
Deepening Shadows: Use a mixture of Neutral Grey and a touch of black to deepen the shadows along the less illuminated parts of the sword. This contrast is crucial for the NMM effect.
Finishing Touches: For the brightest points of light reflection, mix Ice Yellow with Morrow White and apply sparingly to the very tips and edges where light would hit directly.
Glazing for Depth: Glaze the sword with thin layers of Mournfang Brown and Sotek Green to add colour depth and variety, enhancing the alien quality of the weapon.
Final Highlights: Use pure white to add final highlights to the most prominent areas. This step is critical for creating the illusion of a gleaming, reflective surface.
Throughout this process, remember the importance of maintaining thin paint consistency to avoid clumping and to achieve the smoothest transitions possible. If you encounter challenges with colour transitions, consider creating bridge transitions by mixing intermediate shades.
Watch all the tutorials for my Aeldari Autarch
Aeldari Autarch (Eldritch Omens)
A series of videos on how I painted my Aeldari Autarch (Eldritch Omens). This includes the pearlescent NMM armour, the soulstones, sword and Death Spinner(s).
Watch Now
If you don’t have an account, please sign up here! The website currently has over 350 video tutorials with steps and tips, plus a selection of PDFs. If you are not sure about joining, you can explore my free videos with a free membership, or take the plunge and become a full subscriber for full access.
If you’d prefer to support me on Patreon, please visit: https://www.patreon.com/RichardGray [...]
Read more...
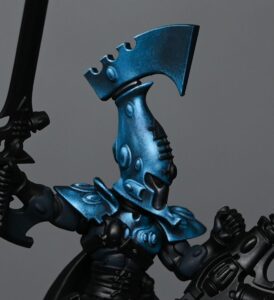
This video shows how to paint Aeldari Autarch Armour for the new Aeldari Autarch from Eldritch Omens to display standard.
Creating a striking, shiny armour effect on an Aeldari Autarch miniature requires patience, precision, and a blend of carefully chosen paints. This guide outlines the steps to achieve a high-quality finish using Vallejo and P3 paints, focusing primarily on achieving a glossy, turquoise armour reflective of the Aeldari’s elegant aesthetics. We’ll start with the helmet and touch on techniques applicable to other armour parts
Video – Aeldari Autarch Armour
All videos are recorded in HD 1080p or higher – use full screen for the full effect and let the video load completely. You can also click the little “cog” and change the speed of the video, if I am going too fast (or slow!).
Materials Needed
Base Paints: Vallejo Turquoise (Sotek Green can be used as an alternative), Vallejo Black
Highlight Paint: P3 Morrow White (or any high-quality white paint)
Brushes: Fine detail brushes, including a customised, cut-down brush for stippling
Palette: Preferably a wet palette for mixing and maintaining paint consistency
Water: For thinning paints
Preparing the Model
Assembly and Priming: Assemble your Autarch, ensuring clean joins and smooth surfaces. Prime the model in black to enhance the depth and contrast of the subsequent layers.
Base Coating
Initial Base Coat: Mix Vallejo Turquoise with a small amount of black to create a dark base colour. Apply this mixture evenly across the armour, setting the stage for the lighter highlights to come. This base layer helps in mapping out the armour’s contours and provides a foundation for building contrast.
Highlighting
Mixing Highlights: Create several shades of turquoise by mixing the base Vallejo Turquoise with varying amounts of black for darker shades and white for lighter shades. This range will allow you to build up the shiny armour effect through gradual layering.
Applying Highlights: Start highlighting areas where light naturally hits the armour, such as the helmet’s curvature. Use a “scratchy” application method for this initial layer to block in the highlight areas without aiming for perfection.
Refining Highlights
Stippling Technique: Shift to a stippling technique with a customised brush (cut down to keep the tip thin) to apply the finer, lighter highlights. This approach allows for more precise control over the intensity and spread of the highlights, contributing to the shiny armour effect.
Enhancing the Shine: Focus on areas that would reflect light more intensely, such as the helmet’s forehead and other raised surfaces. Gradually lighten these highlights by adding more white to the turquoise, working towards pure white for the most intense reflections.
Adding Depth and Detail
Creating Contrast: Apply darker shades into recesses and around the edges of the lighter highlights to enhance contrast and depth. This step is crucial for making the shiny effect believable and visually striking.
Detailing with Black: Use Vallejo Black to paint areas such as the faceplate, ensuring to keep these areas distinct and not overly bright to avoid detracting from the focal points of the armour.
Finishing Touches
Edge Highlighting: Use the lightest turquoise mix to carefully edge highlight the armour, defining its shapes and enhancing the overall shininess. Be precise and consistent with these highlights to maintain the model’s clean appearance.
Final Adjustments: Review the model for any areas that need softening or additional contrast. Use glazes (thin, transparent layers of paint) to adjust the intensity of the highlights or shadows as necessary.
Painting the Aeldari Autarch’s shiny armour is a meticulous process that rewards patience and attention to detail. By gradually building up highlights and carefully controlling the contrast between light and dark areas, you can achieve a vibrant, reflective armour finish that stands out on the battlefield or in a display case. Remember, the key to a successful paint job is not just in following the steps but in adapting the techniques to suit the unique contours and details of your miniature.
Watch all the tutorials for my Aeldari Autarch
Aeldari Autarch (Eldritch Omens)
A series of videos on how I painted my Aeldari Autarch (Eldritch Omens). This includes the pearlescent NMM armour, the soulstones, sword and Death Spinner(s).
Watch Now
If you don’t have an account, please sign up here! The website currently has over 350 video tutorials with steps and tips, plus a selection of PDFs. If you are not sure about joining, you can explore my free videos with a free membership, or take the plunge and become a full subscriber for full access.
If you’d prefer to support me on Patreon, please visit: https://www.patreon.com/RichardGray [...]
Read more...
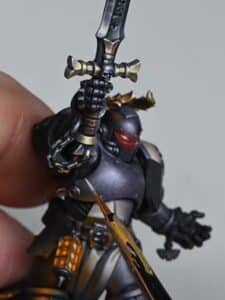
This video shows how to paint the chains on the Emperor’s Champion using NMM and giving them OSL reflections from the lamp on his belt.
This method creates a realistic NMM effect on the chains, with additional OSL reflections to show the interaction of light sources. The key to success is careful placement of highlights and maintaining high contrast between the light and dark areas. Good luck!
Video Tutorial : How to Paint the Chains with OSL Reflections
Materials Needed
The following paints were used:Games Workshop: Troll Slayer Orange, Yriel YellowVallejo: Neutral GreyP3: Morrow White (Any White will do)
Step-by-Step Guide
Base Coating with Neutral Grey
Start by applying Vallejo Neutral Grey to the chain. This colour represents the primary light source hitting the chain from above. Paint thin lines on the upper edges of each chain link, leaving a black gap in the middle for contrast.
How to Paint the Chains Link Variations:
Keep in mind that each chain link will have different edges facing upwards due to the looping nature of the chain from the wrist to the sword. Some links near the wrist may not catch any light, while others will have different lengths of edges illuminated.
Creating High Contrast:
To achieve the shiny, reflective look, ensure that the black gaps in the chain links are clear and distinct. This creates the impression of light hitting the chain from two sides, enhancing the shiny effect.
Adding OSL Reflections with Troll Slayer Orange:
Begin painting the lower reflections, which are light from the lamp, using Troll Slayer Orange. This paint is quite translucent, so it may require multiple layers for opacity. Use a slightly thicker mix (around one and a half parts paint to one part water) for solid lines.
Applying Yriel Yellow:
Overlay the Troll Slayer Orange with Yriel Yellow to enhance the OSL effect. Don’t completely cover the orange; leave some visible at the sides to simulate the orange glow from the lamp.
Increasing Contrast with Neutral Grey Mixes:
Mix Neutral Grey with white to create various shades of light grey. Use these mixes to paint the brighter highlights on the chain, focusing on the upper edges. This step significantly increases the contrast, making the chain look more reflective.
Final Highlights with Morrow White:
Apply Morrow White for the final, brightest highlights. Concentrate on the most curved parts of the chain links, where light would be most intense. Avoid over-applying white on flat surfaces to keep the reflections realistic.
Finishing Touches:
Ensure that the reflections and highlights work cohesively to create a high-contrast, reflective appearance. The goal is to make the chain look shiny and metallic, with clear light reflections from both the primary light source and the lamp.
More Emperors Champion Tutorials
If you don’t have an account, please sign up here! The website currently has over 350 video tutorials with steps and tips, plus a selection of PDFs. If you are not sure about joining, you can explore my free videos with a free membership, or take the plunge and become a full subscriber for full access.
If you’d prefer to support me on Patreon, please visit: https://www.patreon.com/RichardGray [...]
Read more...
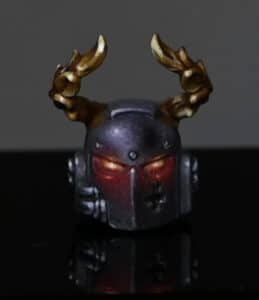
This video shows how to paint the NMM Laurel Wreath on the helmet of the Emperor’s Champion plus how to add the reflections in the armour. The method I show provides a realistic and visually appealing non-metallic metal gold effect on the laurel wreath, with corresponding reflections on the helmet. The key to success is controlled, gradual layering of colours, careful placement of highlights, and maintaining the balance between the bright gold and its reflection on the dark armour. Ready?
Video Tutorial : Helmet and NMM Laurel Wreath
Materials Needed
The following paints were used:Games Workshop: Mournfang Brown, XV-88, Balor Brown, Rhinox Hide, Corax BlackVallejo: Ice YellowP3: Morrow White (Any White will do)
Step-by-Step Guide
Base Coating the Laurel Wreath:
Begin with a base coat of Mournfang Brown over the laurel wreath to establish a rich, dark brown foundation.
Applying the First Highlight (XV-88):
Apply the first highlight using XV-88. Focus on the central parts of the curved leaves, creating a bowl shape on each. Avoid covering the entire leaf; maintain a dark rim around the highlight.
Adding Detail with Balor Brown:
Proceed to Balor Brown for the second stage of highlighting. This colour will provide a more yellow tone, crucial for the gold effect. Apply it over the XV-88 areas but in a smaller scope to enhance the contrast.
Correcting Mistakes with Rhinox Hide:
Use Rhinox Hide to fix any mistakes or overspills from the previous colours. It’s darker and provides better coverage for corrections.
Enhancing Highlights with Ice Yellow:
For bright highlights, use Ice Yellow, but apply it sparingly to avoid losing the yellow hue of the gold. Focus on the most prominent parts of the leaves where light would naturally hit the strongest.
Creating Reflections on Armour:
Using the same colours, paint reflections of the gold wreath onto the helmet’s armour. Keep these reflections subtler than the actual wreath, reflecting the dark nature of the armour.
Final Touches and Increasing Contrast:
Use Abaddon Black and Corvus Black to deepen shadows and increase contrast on the armour and the wreath. This step is crucial for enhancing the shiny, reflective quality of the metal.
Add tiny dots of Morrow White to the brightest points for added sharpness and focus.
Refining the Look:
Stipple the reflections carefully and don’t extend the highlights too much to maintain realism. The reflections should appear as subtle, controlled glimpses of light on the dark armour.
Glazing with Black:
For the final refinement, glaze over the reflections with a watered-down mix of Corvus Black to dull them slightly, ensuring they complement the armour’s colour.
More Emperors Champion Tutorials
If you don’t have an account, please sign up here! The website currently has over 350 video tutorials with steps and tips, plus a selection of PDFs. If you are not sure about joining, you can explore my free videos with a free membership, or take the plunge and become a full subscriber for full access.
If you’d prefer to support me on Patreon, please visit: https://www.patreon.com/RichardGray [...]
Read more...
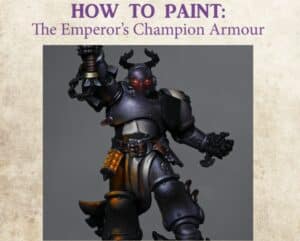
In this Emperors Champion Armour PDF guide you will be shown, in detail, how to paint the armour of the Emperor’s Champion for the Black Templars.
The PDF will load below (please allow a few mins for it to load!). You can also access it by clicking here.
Templar-Armour
The following paints were used in the PDF guide:Games Workshop: Daemonette Hide, Rhinox Gide, Xereus Purple, Corvus Black, Abaddon BlackVallejo: Black (Any Black will do)P3: Morrow White (Any White will do)
If you don’t have an account, please sign up here! The website currently has over 350 video tutorials with steps and tips, plus a selection of PDFs like the above Emperors Champion Armour PDF guide. If you are not sure about joining, you can explore my free videos with a free membership, or take the plunge and become a full subscriber for full access.
If you’d prefer to support me on Patreon, please visit: https://www.patreon.com/RichardGray
More Emperors Champion Tutorials [...]
Read more...
This video shows how to paint the loincloth of Be’lakor The Dark master. It looks at leather, skulls, chains and hooks.
Video Tutorial: How to Paint Be’lakor Loincloth
All videos are recorded in HD 1080p or higher – use full screen for the full effect and let the video load completely. You can also click the little “cog” and change the speed of the video, if I am going too fast (or slow!).
Paints and Materials
Games Workshop: Rhinox Hide, Bugman’s Glow, Mournfang Brown, Firedragon Bright, Corvus Black, Balor Brown, Morghast Bone, Vallejo: Neutral Grey, Pale Grey Blue, Basalt Grey, Dark Sea Grey, Black P3: Morrow White
Step-by-Step Guide
Base Coat:
Prime the model in black.
Use Games Workshop’s Rhinox Hide to paint the leather-based Be’lakor Loincloth, skulls, and optionally the chains for a rusted look.
Ensure to fill in the holes in the chains where the leather shows through.
Chain Detailing:
For the chains, use Vallejo’s Basil Grey. Apply it gently, almost like dry brushing, to pick up the surface details without clogging the chain links. Aim for a patchy look to represent rust and wear.
Leather Texture:
Focus on the leather flap under the belly button using Bugman’s Glow from Games Workshop.
Apply paint with scuffy, squiggly lines using the brush tip to create a textured look that combines both texture and highlights. The goal is to maintain texture visibility even on highlighted areas.
Gradually build up the opacity where needed, using a mix of approximately 50% water to 50% paint.
Weathering the Leather:
Add weathering using Vallejo’s Basalt Grey, focusing on the edges to depict wear.
Enhance the leather’s worn appearance with more faded grey towards the bottom.
Adding Colours to Leather on the Be’lakor Loincloth:
Introduce Games Workshop’s Mournfang Brown for added richness. Apply it sparingly for a translucent effect.
Go back with Bugman’s Glow if needed for further blending or highlighting.
Skull Painting:
Paint skulls using a base of Balor Brown, focusing on creating texture with stippling and maintaining the balance of light and dark areas.
Progressively highlight with Morghast Bone and finally with P3’s Morrow White, focusing on teeth and prominent skull areas.
Use Corvus Black for glazing in shadow areas to blend and desaturate colors.
Metal Hook Detailing:
Paint the hooks using a combination of Neutral Grey, Pale Grey Blue, and White from Vallejo.
Focus on creating a worn, dented look with lines and stippling. Ensure to paint the back edges of the hooks to separate them from the chains.
Apply final highlights with Morrow White to create a shiny appearance.
Rust Effects on Chains and Hooks:
Use Mournfang Brown to create rust effects, especially around areas where the skulls and hooks meet the chains.
Introduce Fire Dragon Bright for brighter, more saturated rust spots. Apply it with stippling for a subtle effect.
Highlight chains using Pale Grey Blue followed by small dots of White for metallic shine.
Final Touches:
Review the entire area, making adjustments as needed. Utilize all the colours on your palette to tweak and correct any areas.
Ensure that highlights and shadows are consistent with the light source direction and the overall look of the model.
Explore More Be’lakor!
If you don’t have an account, please sign up here! The website currently has over 350 video tutorials with steps and tips, plus a selection of PDFs. If you are not sure about joining, you can explore my free videos with a free membership, or take the plunge and become a full subscriber for full access.
If you’d prefer to support me on Patreon, please visit: https://www.patreon.com/RichardGray [...]
Read more...
If you don’t have an account, please sign up here! The website currently has over 350 video tutorials with steps and tips, plus a selection of PDFs. If you are not sure about joining, you can explore my free videos with a free “freebies” membership, or take the plunge and become a full subscriber for full access.


If you’d prefer to support me on Patreon, please visit: https://www.patreon.com/RichardGray