


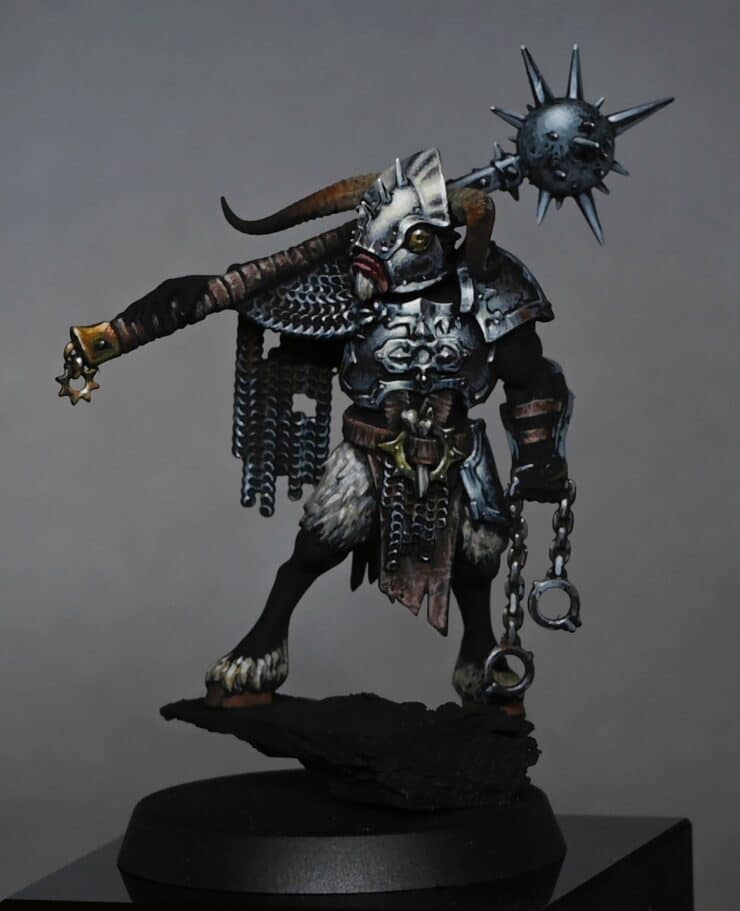
This three-part video series and step-by-step text guides the process of painting a Warcry Spire Tyrants Bestigor Destroyer, aiming to achieve a high tabletop standard with a painterly finish reminiscent of Frank Frazetta’s work. We will use a desaturated colour palette to create sharp contrasts and detailed texture.
Video: How to Paint a Warcry Spire Tyrants Bestigor Destroyer Part One
We’ll start with the basics and gradually add complexity and depth to the miniature.
All videos are recorded in HD 720p or higher – use full screen for the full effect and let the video load completely.
Paints and Materials Needed
Paints
- Games Workshop:
- Rhinox Hide
- Mournfang Brown
- Zandri Dust
- Mephiston Red (for minor details)
- Vallejo:
- Golden Olive
- Neutral Grey
- Pale Grey Blue
- Heavy Bluegrey
- Heavy Sienna
- Black
- Ivory
- Ice Yellow
- White
Brushes
- A worn-out brush (for dry brushing and applying rough textures, I’ve used a size 0 but worn to not retain a fine point)
- A detail brush with a somewhat intact tip (a size 00 or finer based on the description)
- A larger brush for applying varnish (essential for applying the matte varnish evenly)
Basing Materials
- Milliput
- Fimo (These two are mixed and then baked to create lightweight rock-like structures for the base)
Additional Supplies
- Black primer (for base coating the miniature)
- Wet palette (for keeping paints moist and workable)
- Baking equipment (for curing the Milliput and Fimo mix)
- Ultra Matte Varnish (AK Interactive recommended for the final protective and matte finish)
- Lamp (used for understanding how light naturally falls on the miniature to guide painting)
Materials and Preparation
Base Material: For the rock surface the model stands on, mix Milliput and Fimo, then bake for about 30 minutes. This method creates a lightweight and easy-to-shape base compared to natural slate.
Wet Palette Preparation: Prepare your wet palette with desaturated colours, focusing mainly on greys and browns. The standout colour will be Heavy Gold Brown, with Mephiston Red added later for minor details.
Painting Steps
Prime the Model: Begin by priming your model with a black primer to ensure subsequent colours stand out.
Base Coating: Start blocking in the main colours and highlights on the armour using Neutral Grey. This will serve as the foundational layer for further detailing.
Grey Tones for Armour: Utilize a range of greys (Black, Neutral Grey, Heavy Blue Grey, and Pale Grey Blue) to build up the tones on the armour. You can mix black and white to achieve similar grey tones if specific colours are unavailable.
Applying Texture and Highlights
While the initial armour highlights might appear rough, this method adds character and texture, essential for achieving a grimdark aesthetic. Focus the lighting from above and slightly to the left, mimicking natural light.
For non-metallic metal (NMM) effects, adjust the light reflections based on the desired material finish rather than relying solely on the lamp’s natural light.
Detailing with Colour
Incorporate Golden Olive for areas you want to hint at green without overpowering the model, building upon this with Heavy Gold Brown for metallic parts.
Use Rhinox Hide and Heavy Sienna for leather details, applying the paint in thin layers to build texture and depth gradually.
Enhancing Textures
Utilize a worn brush for techniques like dry brushing on chainmail, focusing on capturing the texture without needing a perfect finish.
The key is to build up the model’s features layer by layer, focusing on light direction and textural contrasts.
Refining and Adding Highlights
Progressively refine the model by adding Ice Yellow and Ivory highlights to areas that catch the most light, enhancing the model’s dimensional appearance.
Pay attention to focal points such as the helmet and weaponry, which benefit from additional detailing to draw the eye.
Chainmail and Metallic Textures
Apply subtle highlights to the chainmail and metallic surfaces to simulate light reflection, giving the impression of different materials.
Balance is crucial; ensure that upward-facing edges receive stronger highlights than those facing downwards to maintain a realistic light effect.
Eyes and Small Details
The eyes can be painted effectively with a combination of Heavy Sienna, Heavy Gold Brown, Ice Yellow, and a dot of Ivory for the reflective point. This combination quickly brings life to the model’s gaze.
Video: How to Paint a Warcry Spire Tyrants Bestigor Destroyer Part Two
In this continuation of the Bestigore Destroyer painting tutorial, we focus on refining the non-metallic metal (NMM) effects on the armour and making the helmet a prominent focal point.
Materials Needed:
- Paints: Rhinox Hide, Mournfang Brown, Zandri Dust, Cadian Fleshtone, Mephiston Red (Games Workshop); Golden Olive, Neutral Grey, Pale Grey Blue, Heavy Bluegrey, Heavy Sienna, Black, Ivory, Ice Yellow, White, Heavy Goldbrown (Vallejo).
- Brushes: A fine detail brush for stippling and precise highlights, and a larger brush for broader strokes and base coats.
- Other: Wet palette, water for thinning paints, a good light source.
Helmet Refinement
Begin with Heavy Bluegrey to enhance the helmet. Apply it carefully, almost like stippling, focusing on increasing the brightness and making the helmet stand out.
Balancing Colours
Use a combination of Heavy Bluegrey, Pale Grey Blue, and Ice Yellow to adjust the warmth and coldness of the metallic effect. Remember, Ice Yellow adds warmth, while the greys cool down and temper the yellow, ensuring the helmet doesn’t look overly yellow or cold.
Creating Focal Points
The goal is to make the helmet catch more light than the rest of the model, suggesting a dramatic light source, like a sunbeam breaking through clouds.
Mace Detailing
Apply a stylized NMM effect to the mace, focusing on making it look metallic without directly replicating a mirror-like finish. Emphasize primary light sources with bright highlights and use the shape of the object to guide the placement of these highlights.
Adding Colour with Mephiston Red and Cadian Fleshtone
Introduce spot colours such as Mephiston Red for the lips, toned down with Cadian Fleshtone to add interest without making it look like lipstick. This step breaks up the desaturated colours and draws attention to the face.
Fur Detailing
Revisit the Zandri Dust base on the fur, applying it to raised areas and using Ivory for highlights. Apply Neutral Grey to add texture and depth, making the yellow tones stand out more against the grey, creating a fluffy appearance.
Leather and Cloth Detailing
Use Rhinox Hide, Mournfang Brown, and Heavy Sienna for the leather and cloth, paying attention to light sources and shapes. For the loincloth, focus highlights along edges to mimic wear and tear.
Final Touches
Go back and refine areas such as the mace and armour, ensuring they match the brightness and detail level of the helmet. Adjust any areas that need more colour or contrast to maintain focus on the helmet as the primary focal point.
Video: How to Paint a Warcry Spire Tyrants Bestigor Destroyer Part Three
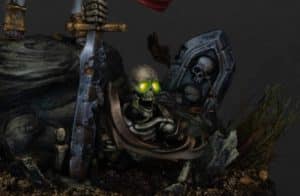
In this final installment, we will complete our Warcry Spire Tyrants Bestigor Destroyer by painting the skin, horns, and finishing the base. The goal is to achieve a painterly finish reminiscent of Frank Frazetta’s work, focusing on desaturated colours and sharp contrasts.
Paints Used
Paints: Rhinox Hide, Mournfang Brown, Zandri Dust, Cadian Fleshtone, Mephiston Red, Ushabti Bone (Games Workshop); Golden Olive, Neutral Grey, Pale Grey Blue, Heavy Bluegrey, Heavy Sienna, Black, Ivory, Ice Yellow, White, Heavy Goldbrown (Vallejo); AK Interactive Ultra Matte Varnish.
Painting Skin
Base Colours: Start with Heavy Sienna, focusing on highlight areas to create texture while keeping the skin dark. Do not cover the entire skin; allow some black areas to remain for contrast.
Layering: Apply Heavy Grey on top of Heavy Sienna, blending them to smooth the transition. Then, use Zandri Dust for final highlights, creating a desaturated, almost colourless finish that complements the overall tone of the model.
Painting Horns
Base Layer: Use the same colours as previously used for the fur—Mournfang Brown, Rhinox Hide, and Zandri Dust—to block in the basic gradients.
Detailing: With Heavy Sienna, add texture and highlights towards the tips of the horns. Layer Zandri Dust and finally, Ivory for the brightest points and edges, maintaining a rough, textured look to enhance the painterly style.
Balance and Contrast: Add small amounts of Heavy Sienna at the base of the horns for a subtle colour variation. Focus on achieving a balance between the desaturated colours and the highlighted areas to draw attention to the head.
Finishing the Base
Colour Application: Using Neutral Grey, Heavy Sienna, and Zandri Dust, paint the base to match the model’s colour scheme. Focus highlights around the front foot to create a point of interest and use Ushabti Bone for dry brushing to pick out texture.
Details and Texture: Glaze the base with thinned Neutral Grey to blend colours and deepen shadows subtly. Dry brush with Ushabti Bone to highlight the texture of the rock and sand, mimicking natural light and adding depth.
Final Touches: Apply small amounts of flock and static grass to introduce life and contrast to the base, enhancing the model’s dynamic appearance on the battlefield.
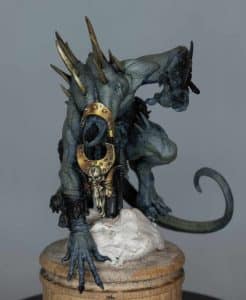
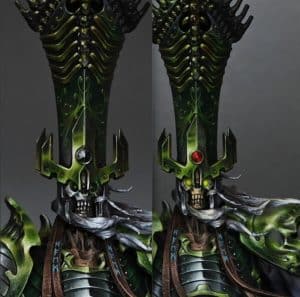
More of my latest videos:
If you don’t have an account here on my website, please sign up here! I have over 350 video tutorials with steps and tips, plus a selection of PDFs. If you are not sure about joining, you can explore my free videos with a free membership, or take the plunge and become a full subscriber for full access.


If you’d prefer to support me on Patreon, please visit: https://www.patreon.com/RichardGray