


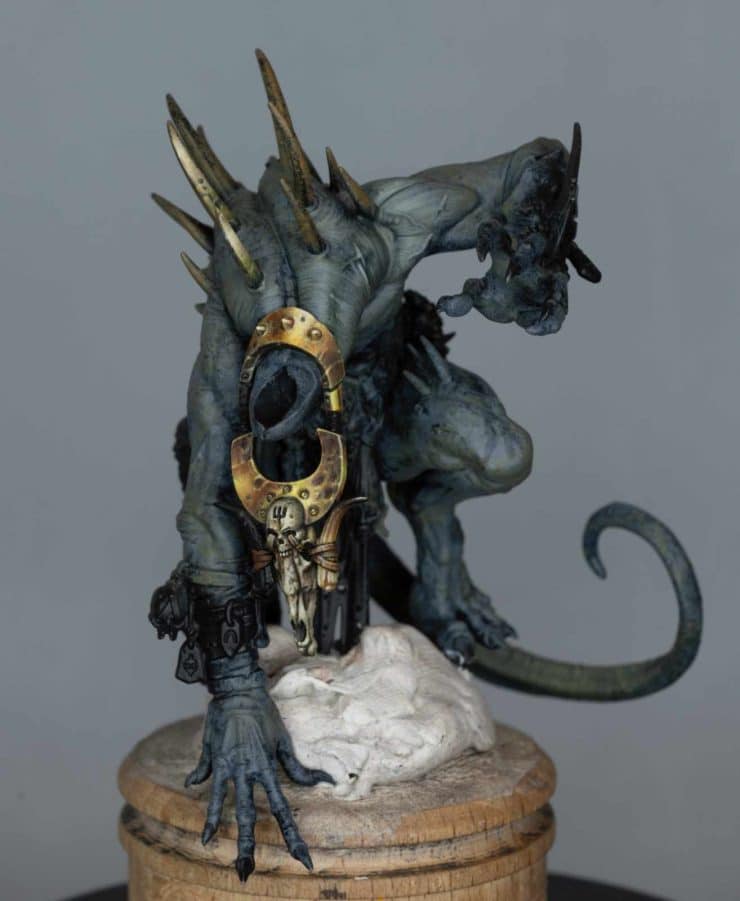
Today I’m going to focus on mastering the non-metallic metal (NMM) effect on the necklace portion of the WIlderfiend using both Games Workshop and AMMO paints. Read on to get started with a detailed video tutorial, paints list and step-by-step tips and guide.
Video: How to Paint a Wilderfiend Necklace with NMM Metal and Skulls
How to Paint a Wilderfiend Necklace with NMM Metal and Skulls Guide
Materials Needed:
- Paints: AMMO by Mig Jimenez (White, Yellow, Brown, Basic Skin, Red), Games Workshop (Rhinox Hide, Balor Brown, Mournfang Brown, Morghast Bone, Screaming Skull)
- Brushes: Size 2 Artist Opus Brush, finer detail brushes as necessary
- Other: Water for thinning paints, wet palette, palette for mixing
Step-by-Step Guide:
1. Base Coating
- Colour Used: Mournfang Brown
- Start by applying a solid base coat of Mournfang Brown to the top section of the necklace. This initial layer is not about perfection but establishing a solid foundation for further details. Ensure even coverage to avoid patchiness that can complicate later stages.
2. Adding Highlights
- Colours Used: Gradually add Dark Sun Yellow to Mournfang Brown
- Begin to introduce highlights by slowly mixing in Dark Sun Yellow into the Mournfang Brown to create a gradient effect. Concentrate this lighter mixture on areas that would naturally catch light, such as the uppermost ridges and prominent features of the necklace. This method helps to simulate the reflective properties of metal without using metallic paints.
3. Integrating Scratches and Weathering
- Enhance the realism of the piece by introducing fine scratches and signs of wear. Using a finer brush, alternate between the original base mix and a lighter mix with more Dark Sun Yellow. Apply these marks strategically to suggest age and use, enhancing the textured look of a battle-worn artefact.
4. Refining Highlights
- Colours Used: Primarily Dark Sun Yellow, mixed progressively with AMMO White for brighter highlights
- As you refine your highlights, shift towards using lighter mixes, culminating in nearly pure Dark Sun Yellow with touches of white. Focus these brightest highlights on the most prominent areas where light would be strongest. This step is crucial for pushing the NMM effect, giving the illusion of metallic shine.
5. Adjusting Shadows and Midtones
- Colours Used: Glazes of Mournfang Brown and Rhinox Hide
- Apply glazes of Mournfang Brown to smooth the transitions between the mid-tones and shadows, ensuring there are no harsh lines between colours. Use Rhinox Hide to deepen shadows in the undercuts and less exposed areas of the necklace, which helps to enhance the three-dimensional feel and adds depth to the piece.
6. Final Details and Touch-ups
- Revisit all previously worked areas to add final details such as sharper lines and more refined scratches. This stage is about perfecting the look, making sure every feature stands out as intended, and the overall effect is cohesive. Sometimes, this might include toning down overdone highlights or reinforcing the shadows for better contrast.
7. Painting Skulls and Additional Elements
- Base Coat: Start with Balor Brown for skulls and bone elements.
- Highlights and Texturing: Build up highlights using Morghast Bone, gradually adding Screaming Skull to the mix for the highest points. Pay special attention to textural details like teeth and eye sockets, using lighter colours to bring these features forward. The contrast between the bone and the metallic effect of the necklace should be stark, with bones appearing more matte and subdued.
Techniques to Note:
- Glazing: This involves mixing a small amount of paint with a large portion of water to create a transparent layer that subtly shifts the tone beneath it.
- Stippling: Use the tip of your brush to apply small dots of paint, creating a textured effect that mimics the irregular surface of metals and worn materials.
- Dry Brushing: Gently drag a dry brush with minimal paint over raised textures to highlight edges and details quickly.
All the Wilderfiend Tutorials:
This is just a part of my set of tutorials on how to paint a Wilderfiend from Games Workshop. To watch them all in order, follow the link below:
How to Paint a Darkoath Wilderfiend
A series for how to paint the Wilderfiend from the Darkoath army, which Games Workshop sent me. The first video looks at the skin, lips, teeth, eyes and horns. We’ll focus on creating a heavily textured look, while the second moves on to the NMM of his necklace and his skulls!
If you don’t have an account here on my website, please sign up here! I have over 350 video tutorials aside from my How to Paint a Wilderfiend with steps and tips, plus a selection of PDFs. If you are not sure about joining, you can explore my free videos with a free membership, or take the plunge and become a full subscriber for full access.


If you’d prefer to support me on Patreon, please visit: https://www.patreon.com/RichardGray