


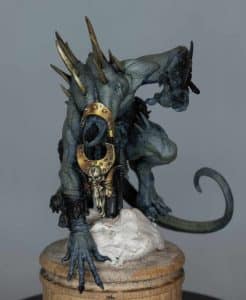
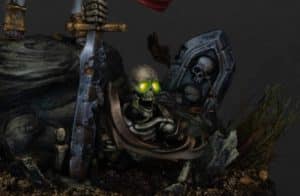
Alright, let’s take a look at how to paint the smoke on our Skaven Plague Monk from the Warhammer Underworlds Skabbik’s Plaguepack. It’s a bit of a challenge (you’ll see I had a few issues!), but with some patience and the right technique, we’ll have it looking top-notch!
Video – How to Paint the Smoke
You’ll Need:
- Skaven Plague Monk miniature
- A selection of brushes, including a size 2 for broader strokes
- Paints: Games Workshop’s Moot Green, Yriel Yellow, Xereus Purple; P3’s Iosen Green (Warpstone Green is a suitable alternative), Morrow White; Vallejo’s Ice Yellow, and Airbrush Thinner
Step by Step on How to Paint the Smoke:
- Basecoat with Iosen Green: Start with a basecoat of Iosen Green. You might need a few coats to get solid coverage. For a faster application, you can use an airbrush.
- Mix Your Colours: On your palette, mix various shades. You’ll need pure Iosen Green, Iosen Green mixed with Moot Green, pure Moot Green, Iosen Green mixed with Xereus Purple, more Xereus Purple, and straight Xereus Purple. Additionally, mix Uriel Yellow, Ice Yellow, and Morrow White for later stages.
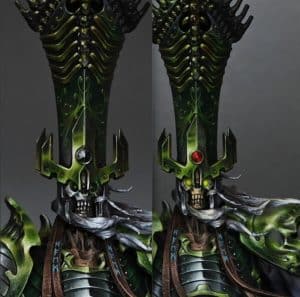
- Inverted Painting Technique: Since we’re aiming for a glowing effect, paint the recesses lighter and the raised areas darker. This inverted approach can be tricky, so patience is key. Use the mixed greens and purples to create this effect, gradually transitioning from lighter to darker shades as you move outwards.
- Highlighting and Blending: Highlight the raised areas using lighter greens and eventually Xereus Purple for the outermost areas. This creates a high-contrast look, making the smoke appear as if it’s glowing from within. Remember, smoother transitions are crucial for a realistic effect.
- Stippling for Texture: If you fancy a textured look, use stippling. This method adds a softly textured effect, enhancing the ethereal quality of the smoke.
- Finishing with Airbrush Glazing: Once you’re happy with your hand-painted transitions, use an airbrush to apply a thin glaze of Uriel Yellow. This unifies the entire smoke area, softening transitions and giving a final luminous quality. Be careful with the airbrush; you want a subtle effect, not an overpowering one.
- Refining and Adjusting: Go back and refine areas as necessary. Add more green or purple where needed, and use the glazing technique to adjust the overall tone and smoothness. Your aim is a cohesive, glowing effect that still retains some of the hand-painted character.
Remember, the process of painting smoke, especially to create a glowing effect, can be iterative and might require several adjustments to get it just right. Take your time, and don’t be afraid to go back and tweak areas that don’t quite match your vision. Good luck, and enjoy bringing this smoky effect to life!
Explore my latest tutorials
If you don’t have an account and can’t see the videos, please sign up here! The website currently has over 350 video tutorials with steps and tips, plus a selection of PDFs. If you are not sure about joining, you can explore my free videos with a free “freebies” membership, or take the plunge and become a full subscriber for full access.


If you’d prefer to support me on Patreon, please visit: https://www.patreon.com/RichardGray