


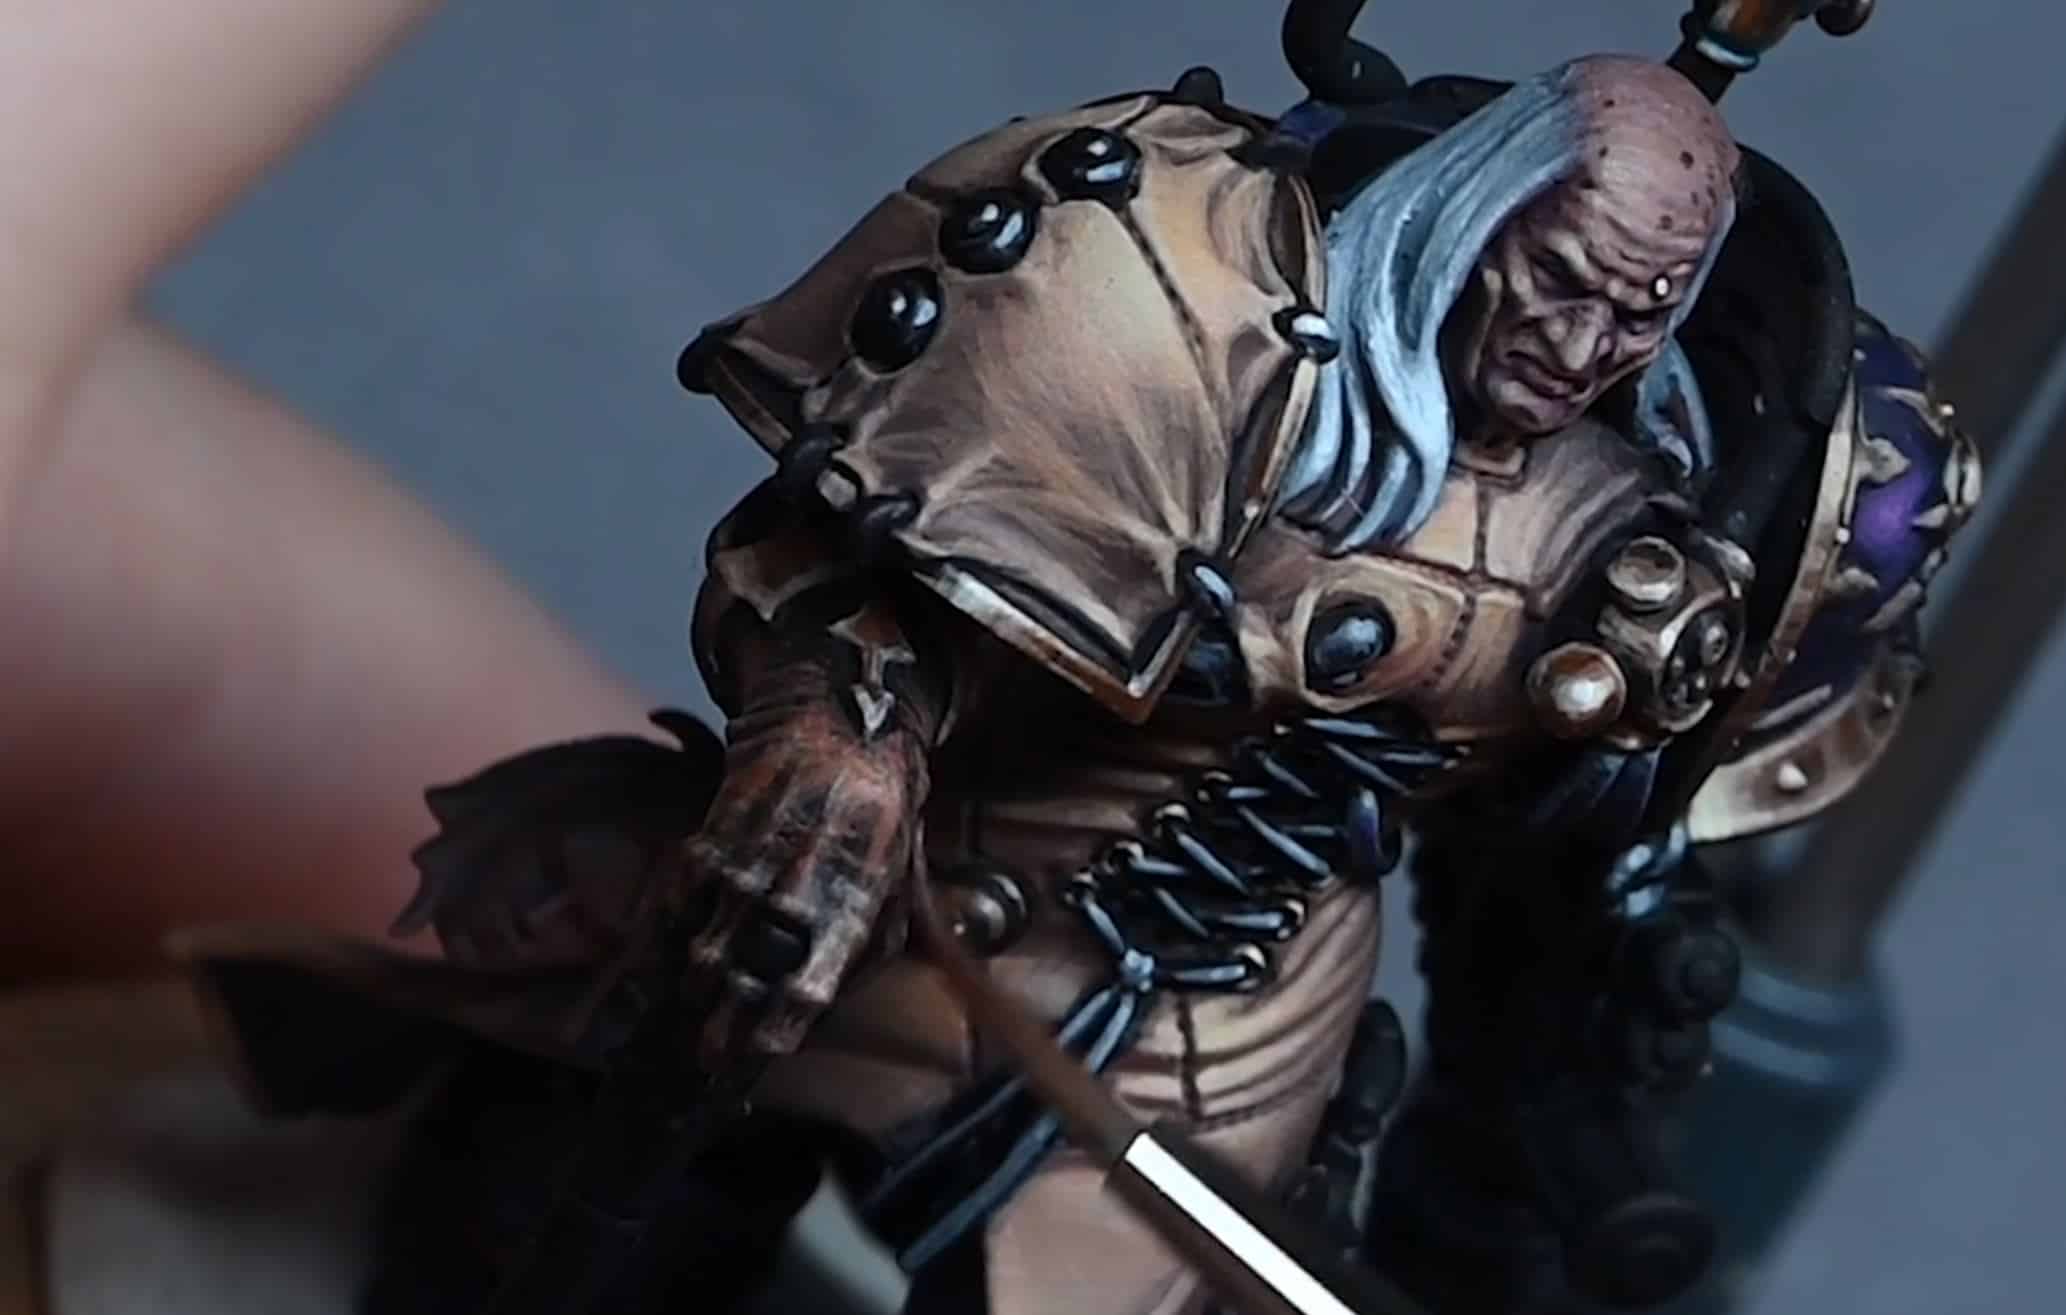
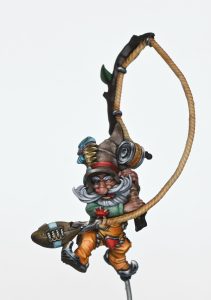
For something a bit quicker than Master Lazarus, I’ve been working on how to paint Fabius Bile, Aka ‘The Spider’. I love the model and think it’s a great update to the original. For my version I’ve added a bit more hair and thinned his nose a little.
Read on for a series of tutorials for him, from head and hair, his grisly skin cloak, to glass vials!
Quick Jump to:
How to Paint Fabius Bile Part 1: Head and Hair
This video is part 1 in a series of how to paint Fabius Bile and focuses on his head and hair.
All videos are recorded in HD 1080p or higher – use full screen for the full effect and let the video load completely.
Paints And Materials Used:
Brushes:
- Size 00 Artist Opus Brush
- Size 1 Artist Opus Brush
- (Any additional sizes used for specific details)
Paints:
Games Workshop: Cadian Fleshtone, Screaming Skull, Naggaroth Night, Mephiston Red, Rhinox Hide Vallejo: Neutral Grey
P3: Morrow White
Airbrush Supplies (If Used):
- Airbrush and Compressor
- Airbrush Thinner
- Vallejo White Ink (for priming if mentioned)
Other Materials:
- Wet Palette (for mixing and thinning paints)
- Water Container (for rinsing brushes)
- Paper Towels or Cloth (for brush cleaning and drying)
- Scalpel or Hobby Knife (for model preparation)
- Green Stuff or Modelling Putty (for any sculpting or modifications mentioned)
- Fine Sandpaper or Files (for model cleaning and preparation)
- Primer (Black, if airbrush not used for priming)
Step by Step – How to Paint Fabius Bile Head and Hair
Preparing the Model
- The model is primed in black.
- Airbrush a base coat of Buckman’s Glow on the skin.
Hair Base Coat
- Paint the hair with Neutral Grey (Vallejo) to cover any overspray and provide a good base for subsequent layers.
Skin Tones
- Create a palette with various mixtures of Cadian Fleshtone and Screaming Skull (both Games Workshop), with small amounts of Naggaroth Night for darker shades.
- Apply the darkest mix (about 50/50 Cadian Fleshtone and Naggaroth Night) to the face’s shaded areas, such as temples and eye sockets.
- Gradually build up lighter tones, focusing on the left side of the face where the light naturally falls.
Eyes
- Paint the whites of the eyes with Pale Grey.
- Add a black dot for the pupil. Optionally, you can add a smaller coloured dot and then a smaller black dot within it for iris details.
Blending and Highlighting
- Continuously blend and reapply highlights as the paint dries and its true colour and translucency become apparent.
- Use thin layers and ensure the brush is not overloaded with paint.
Hair Detailing
- Start adding hair details with Pale Grey Blue (P3), followed by Morrow White.
- Keep the brush strokes vertical and follow the hair’s natural flow.
- Concentrate more white towards the top of the head and edges of the hair for highlights.
Lips:
- Paint the lips with Mephiston Red (Games Workshop) for a base.
- Lightly overlay with flesh tones, leaving some red visible for natural variation.
Finishing Touches:
- Add liver spots using Rhinox Hide (Games Workshop), then soften them with flesh tones.
How to Paint Fabius Bile Part 2: Skin Cloak
Paints Used
Games Workshop: Bugman’s Glow, Cadian Fleshtone, Kislev Flesh, Ushabti Bone, Mournfang Brown Vallejo: Ice Yellow
Step by Step – How to Paint Fabius Skin Cloak
Base Coat for Skin Cloak:
- Prime the skin cloak with Bugman’s Glow using an airbrush or by hand.
- Paint all the small areas in black for clear distinction.
Applying Cadian Fleshtone:
- Use Cadian Fleshtone for the base layer.
- Focus on creating skin stretches and creases, rather than a smooth finish.
- Utilize the paint’s opacity to create natural highlights and detailed creases.
Adding Kislev Flesh:
- Apply Kislev Flesh for lighter tones, adding more detail and refinement to the skin cloak.
- Pay attention to the lighting direction and highlight the creases accordingly, focusing more towards the front of the model for depth.
Ushabti Bone Highlights:
- Use Ushabti Bone for the highest highlights.
- Be cautious not to overpower the face’s focal point. Keep highlights lighter on the face and more subtle on the cloak.
Painting NMM Trim on Shoulder Pads:
- Prepare a transition from Mournfang Brown to Ice Yellow, including mid-tones.
- Apply Mournfang Brown as the base.
- Gradually build up to lighter tones using mixed shades, finishing with Ice Yellow for the brightest highlights.
- Focus on creating a metallic effect through high contrast.
Painting Purple Armor:
- Start with a base of Naggaroth Night over a black primer.
- Use a stippling technique for a semi-gloss finish.
- Gradually build up lighter shades, transitioning from Naggaroth Night to Xereus Purple, Emperor’s Children, and a mix with P3 Morrow White for the brightest areas.
- Focus on creating a cylindrical highlight on the leg armor, with bounce highlights at the bottom.
Finishing Touches:
- Ensure consistent thinness in the paint application.
- Add small details and corrections as needed.
- Use the stippling and blending techniques to create texture and a natural look.
How to Paint Fabius Bile Part 3 – Non-metallic metal (NMM) trim, skin cloak.
Paints Used
Games Workshop: Cadian Fleshtone, Kislev Flesh, Ushabti Bone, Corvus Black, Skavenblight Dinge, Rhinox Hide, Mournfang Brown, Ahriman Blue (weathering effect)
Vallejo: Ice Yellow, Heavy Goldbrown
P3: Morrow White
Step by Step – How to Paint NMM Trim and Cloak
Non-Metallic Metal (NMM) Trim (Legs and Feet):
- Base colours: Vallejo Ice Yellow and Games Workshop Mournfang Brown.
- Create a tonal range by mixing these two colours in varying ratios for intermediate shades.
- Focus on achieving bright highlights on the trim, matching them with existing armour highlights.
- For areas in shadow (like the other leg under the cloak), use the same colours but do not highlight as brightly.
Skin Cloak (Lower Half):
Gloves:
- Base with Games Workshop Rhinox Hide.
- Layer with Bugman’s Glow, focusing on worn areas and adding texture.
- Add fine details and creases, considering the natural folding and stretching of the material.
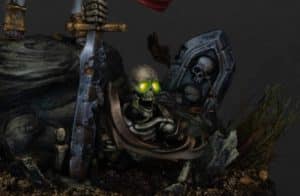
Skulls on Backpack:
- Base with Rhinox Hide.
- Use Vallejo Heavy Goldbrown, Mournfang Brown, and Ice Yellow for highlighting.
- Work with rapid transitions to simulate a shiny surface.
- Paint each tooth of the skulls individually, brightening the front teeth more.
Non-Metallic Weathering on Trim:
- Use Games Workshop Ahriman Blue for a verdigris effect.
- Apply in recesses to simulate natural weathering.
Final Touches:
- Use P3 Morrow White for the brightest highlights.
- Apply selectively, mainly on larger highlight areas for a shiny effect.
- Use Games Workshop Cadian Fleshtone for adding soft creases. These should be subtle, with a lower contrast compared to the upper cloak.
- Glaze with Games Workshop Corvus Black and Skavenblight Dinge to deepen the shadows and enrich the tones.
- Remember to align the highlights with the lighting on the rest of the model.
How to Paint Fabius Bile Part 4 : Glass and Vials
Paints Used
Games Workshop: Ahriman Blue, Mephiston Red, Wildrider Red, Lugganath Orange
Vallejo: Dark Grey, Neutral Grey, Pale Grey Blue
P3: Morrow White
Step by Step – How to Paint Glass Vials and Torture Tools
Torture Tools
Base Layer:
Start with a base of dark grey (e.g., Vallejo Dark Grey). You can mix black and white for various greys if specific greys are not available.
Cover most of each tool in at least a mid-grey, leaving dark sections for contrast and reflections.
Detailing:
Use neutral grey (Vallejo Neutral Grey) to add highlights and define the tools’ shapes. Ensure not to go into recesses to preserve the tools’ shape.
For cylindrical sections, add multiple highlight points for realism.
Use a fine-tip brush (like a size 00 Artificer brush) for precision.
Highlights:
Apply a lighter grey (Vallejo Pale Grey Blue or a mix of neutral grey and pale grey blue) for brighter highlights.
Focus on areas where light would naturally hit, creating a shiny metallic appearance.
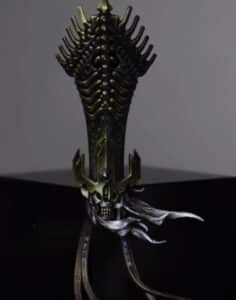
Glass Canisters with Liquid
Base Layer for Blue Liquid:
Use Ahriman Blue to paint a solid line around the middle of the canister.
Paint downward from the line to the bottom and upward towards the top, creating a gradient.
Creating the Liquid Effect:
Mix Ahriman Blue with a small amount of white to lighten the colour.
Paint this lighter blue to enhance the liquid effect, focusing on the bottom and creating a subtle gradient towards the top.
Adding Details:
Add small dots within the liquid to represent bubbles. Use a mix of Ahriman Blue and white for a reflective shine on the canister, transitioning from this mix to pure white at the top.
Red Liquid Variant:
Repeat the same process as the blue liquid, starting with Mephiston Red.
Progress to Wildrider Red and Lugganath Orange for the gradient and bubble effects.
Use the same technique for the reflective shine.
Throughout the painting process, maintain consistent lighting and reflection effects to create a realistic look. The application of highlights and the gradient effect in the liquid are key to achieving a believable metallic and glass appearance. Remember to use thin layers and smooth transitions for a polished finish.
What will you paint next? :
If you don’t have an account, please sign up here! The website currently has over 350 video tutorials with steps and tips, plus a selection of PDFs. If you are not sure about joining, you can explore my free videos with a free membership, or take the plunge and become a full subscriber for full access.


If you’d prefer to support me on Patreon, please visit: https://www.patreon.com/RichardGray