


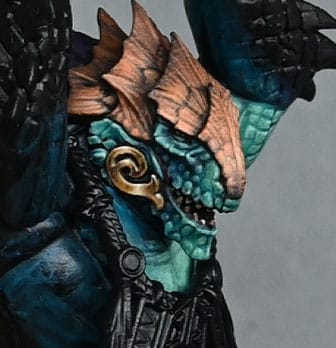
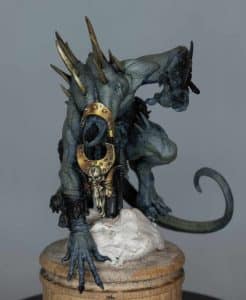
In the first of a series of videos, I will teach you how to paint a Kroxigor to a high-standard,with the model sent to me by Games Workshop.
How to Paint a Kroxigor Part One: The face, armour plates/scales and golden face jewellery.
The following paints were used:
Games Workshop: Sotek Green, Sybarite Green, Troll Slayer Orange, Xereus Purple, Flash Gitz Yellow, Ushabti Bone, Mournfang Brown, XV-88, Balor Brown
Vallejo: Ice Yellow
P3: Morrow White
How to Paint a Kroxigor – Step-by-Step Guide:
1. Preparation and Priming:
- Assemble your model, yet consider leaving the arms unattached for easier access during painting. Any seams should be filled and sanded for a smooth surface.
- Prime the model in black. For a smoother base, you might want to use an airbrush.
2. Base Colours:
- Skin: Begin with Sotek Green (Games Workshop) over the black primer. Use a size 2 brush for extensive coverage. Ensure your paint is thinned for a smoother application.
- Armour Plates: Start with Xereus Purple (GW) as a base for the orange hues that will follow.
3. Building Up Colours:
- Skin: Layer using a mix of Cyberite Green (GW) and Sotek Green, then transition to pure Cyberite Green. This will create a gradual colour change.
- Armour Plates: Progress from the purple base using layers of Troll Slayer Orange (GW), moving towards pure Troll Slayer Orange. Remember to thin your paints for smooth gradations.
4. Adding Details and Highlights:
- Skin: Highlight with Cyberite Green mixed with white (P3 Morrow White is recommended), progressively adding more white for brighter highlights. Focus these on raised areas and muscles.
- Armour Plates: Use a mix of Troll Slayer Orange and white for highlights, particularly on edges and raised textures, applying in thin layers for realism.
5. Refining and Texturing:
- Skin: Refine by glazing with thinned Sotek Green and Cyberite Green. Add subtle textures and scales with meticulous brushwork for an organic appearance.
- Armour Plates: Create texture by painting fine lines and scratches using a very fine brush with a light orange mix, adding depth and realism.
6. Non-Metallic Metal (NMM) Gold Details:
- For gold elements like the cheek jewellery, commence with a dark base such as Mournfang Brown (GW). Build up through XV-88 (GW), Balor Brown (GW), incorporating Ice Yellow (Vallejo) for brighter highlights, and culminate with pure Ice Yellow for the most luminous points.
- Concentrate on light placement and reflections, using thin layers and sharp highlights to simulate a metallic effect.
7. Final Touches:
- Eyes: Paint the eyes with care, starting with a base like Flash Gitz Yellow (GW), add a small black dot for the pupil, and a tiny white dot for reflection.
- Mouth and Teeth: Utilise Xereus Purple and pink tones for the mouth interior. Paint teeth meticulously to keep them distinct and neat.
8. Additional Details:
- Embellish with extra details like scales, scratches, and texture variations throughout the model to enhance its distinctiveness. Employ fine brushwork for these details.
9. Final Assembly:
- Once all parts are painted, assemble any remaining pieces like arms, ensuring a clean and seamless fit.
10. Finishing and Sealing:
- After you’re content with your painting, seal the model with a suitable varnish to protect your artwork.
Remember, each step calls for patience and practice. The key lies in building up layers gradually, paying attention to light and shadow to create depth and realism
Explore more of my recent tutorials
If you don’t have an account, please sign up here! The website currently has over 350 video tutorials with steps and tips, plus a selection of PDFs. If you are not sure about joining, you can explore my free videos with a free membership, or take the plunge and become a full subscriber for full access.


If you’d prefer to support me on Patreon, please visit: https://www.patreon.com/RichardGray