


A series of videos on how I painted my Aeldari Autarch (Eldritch Omens). This includes the pearlescent NMM armour, the soulstones, sword and Death Spinner(s)!
Scroll down to explore the tutorials in order, or look at specific parts or techniques of your Aeldari Autarch by clicking one of the links below:
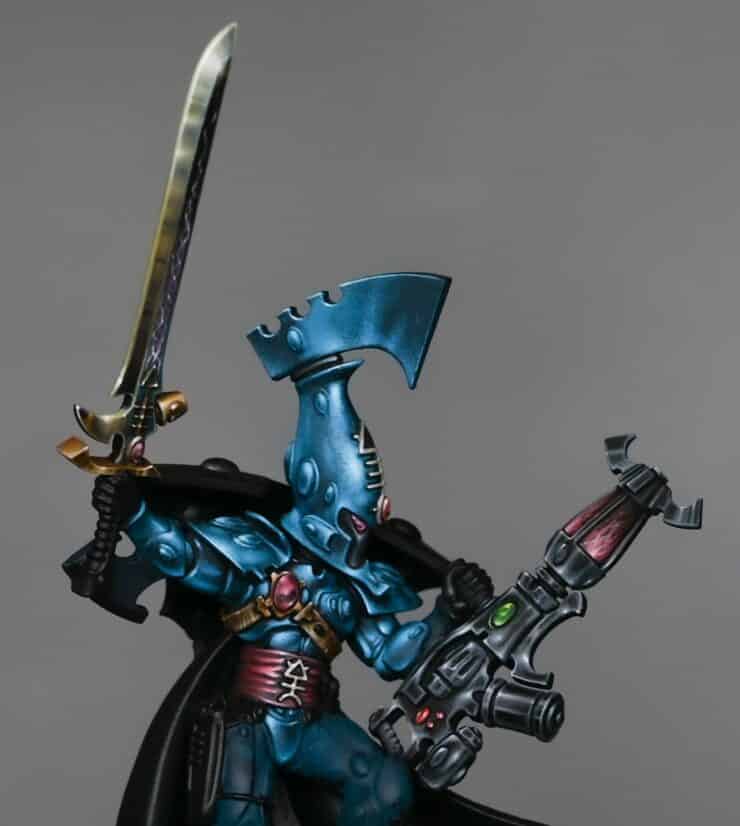
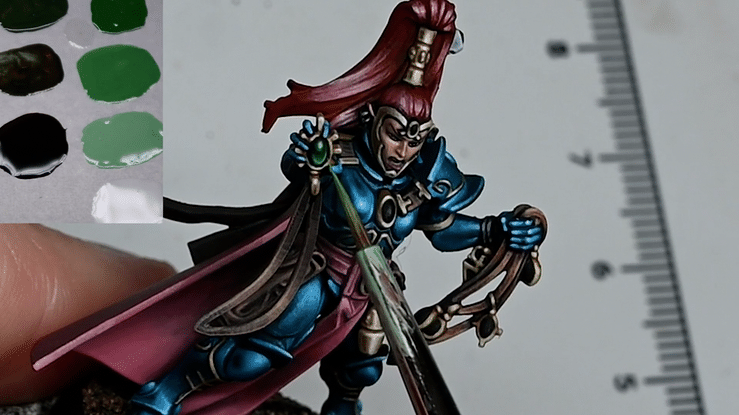
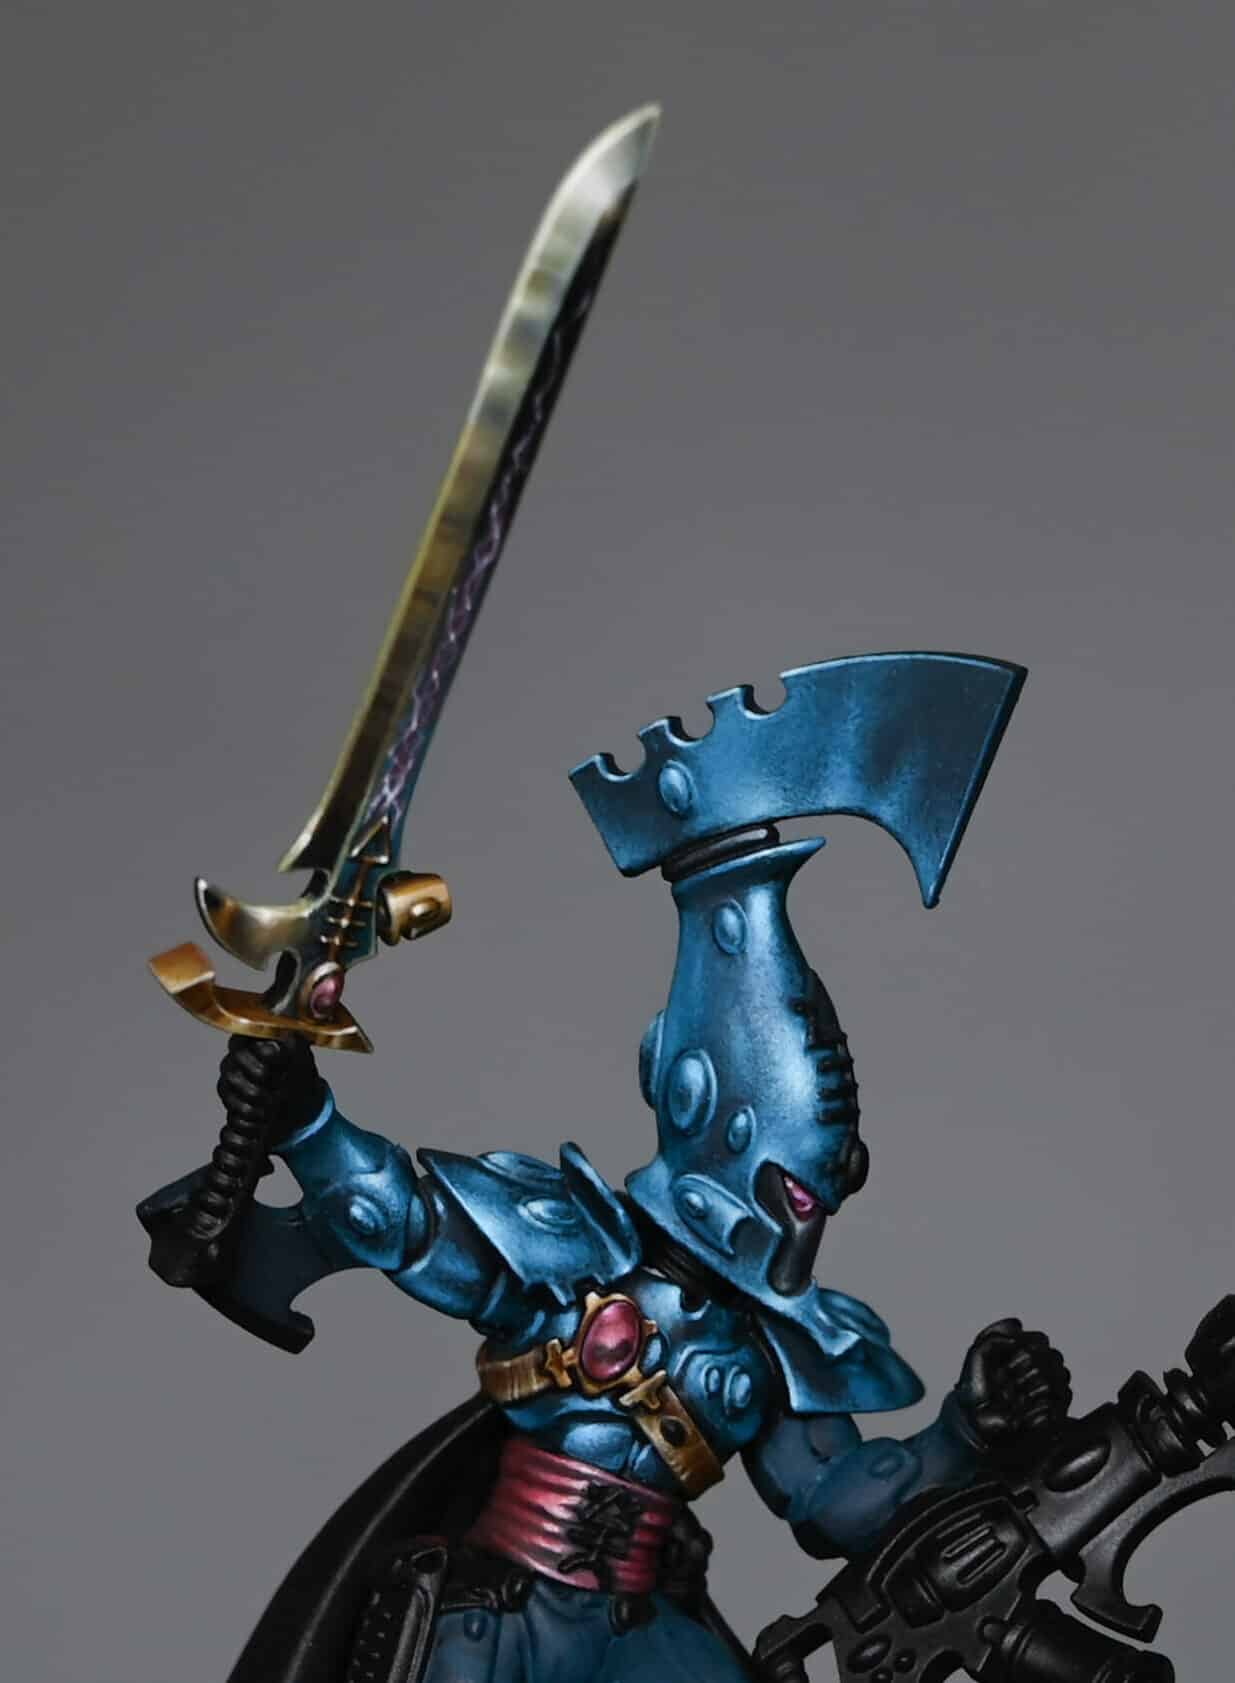
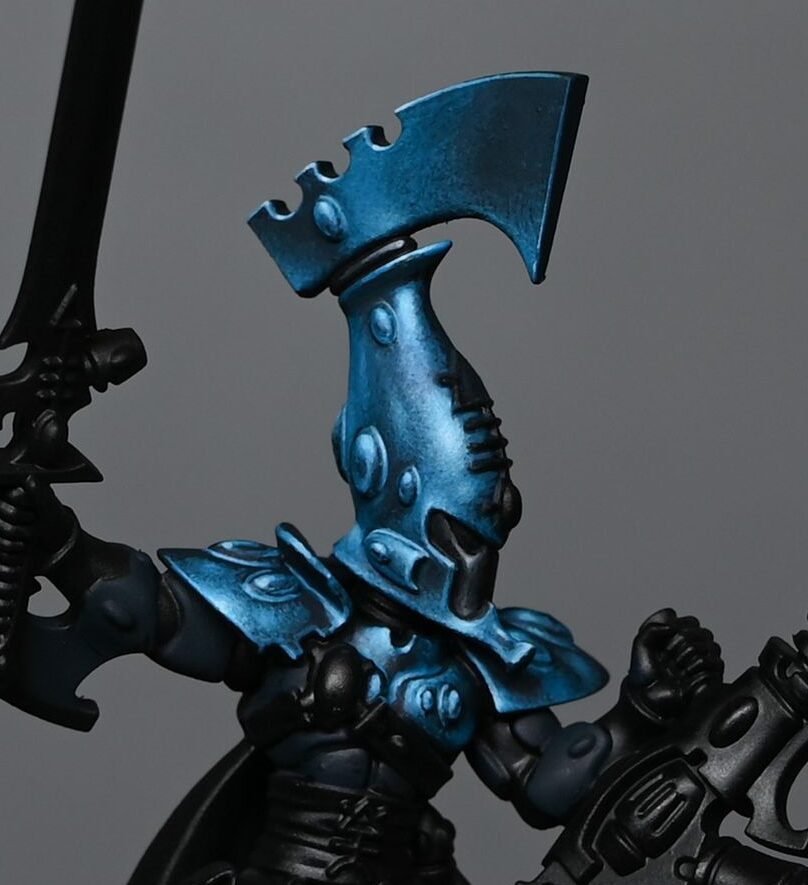
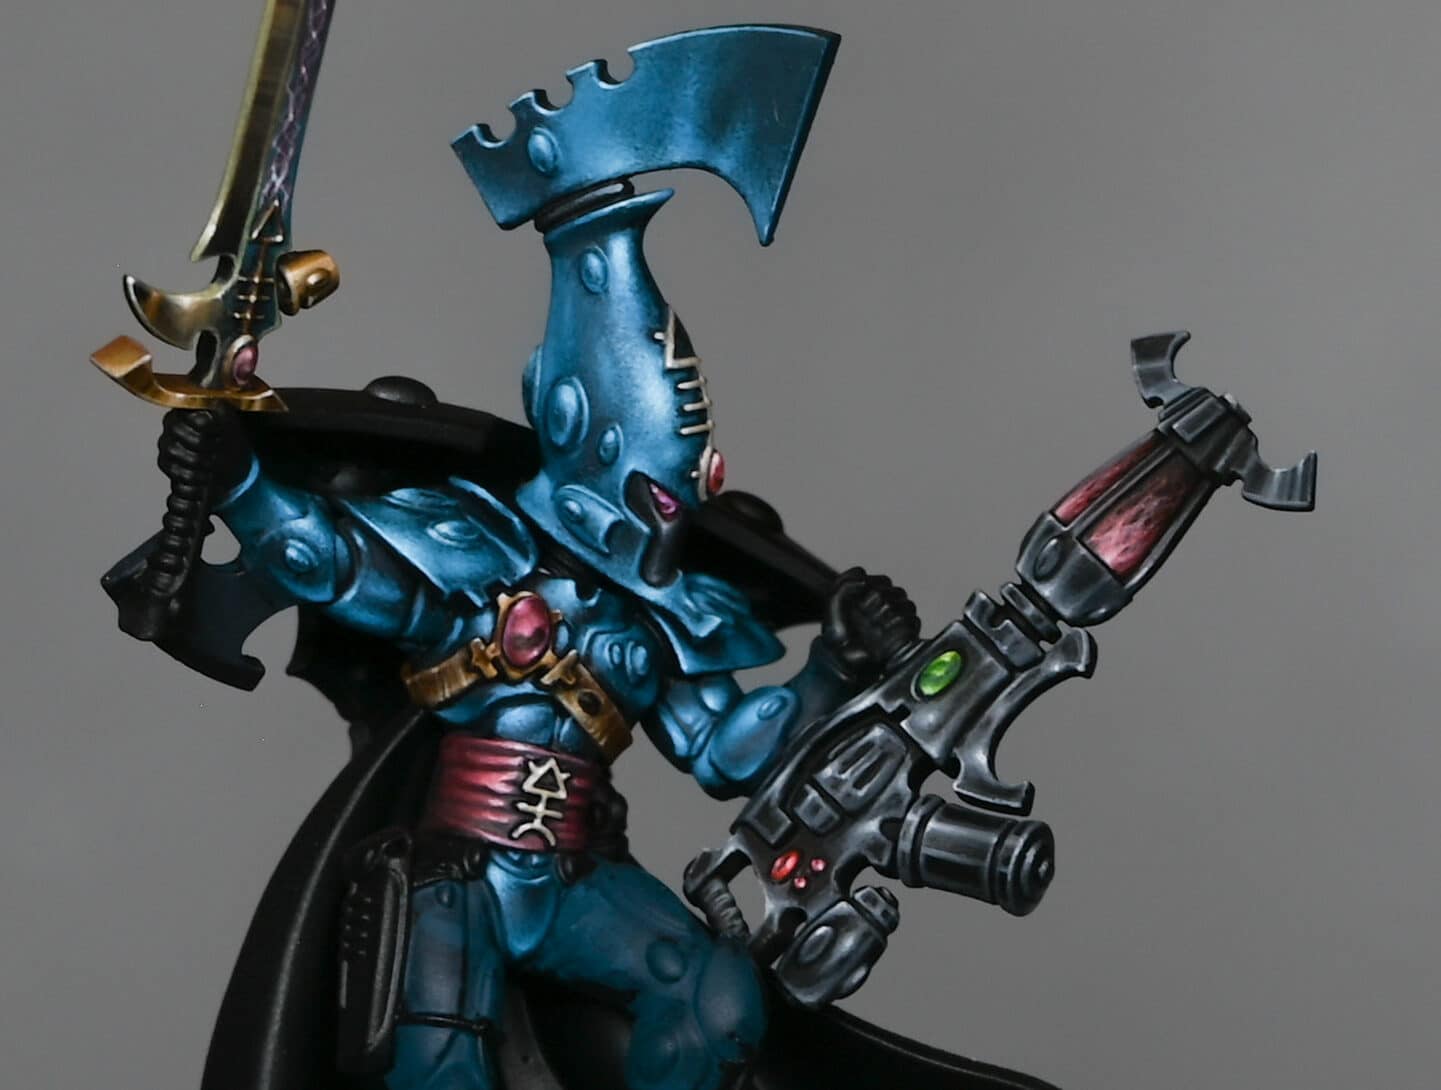
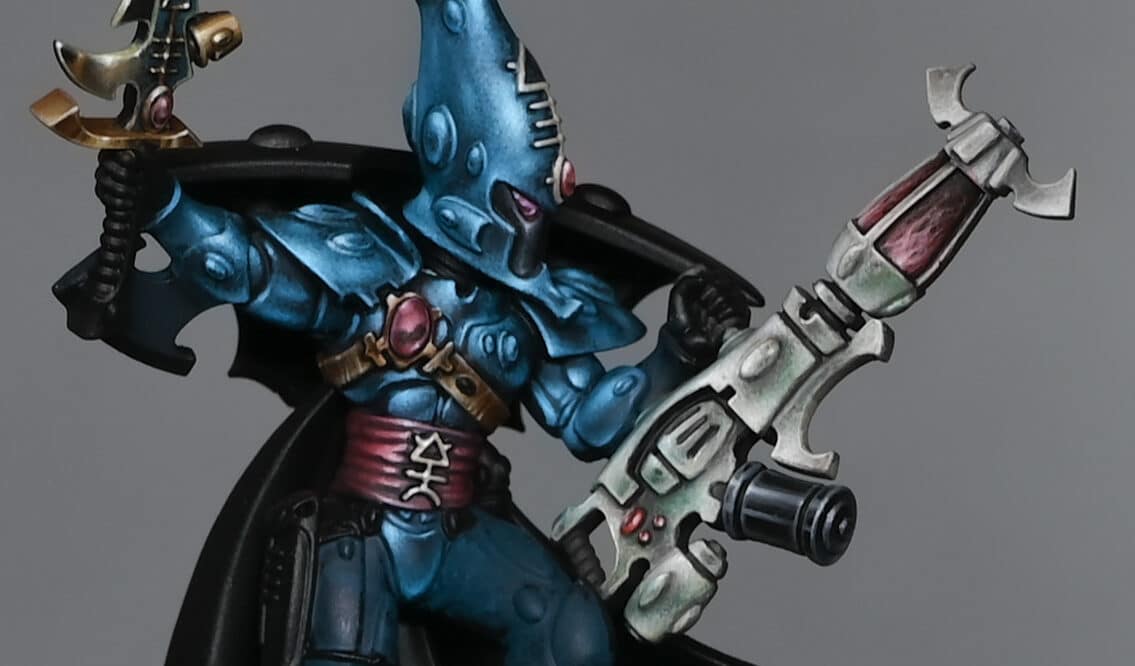
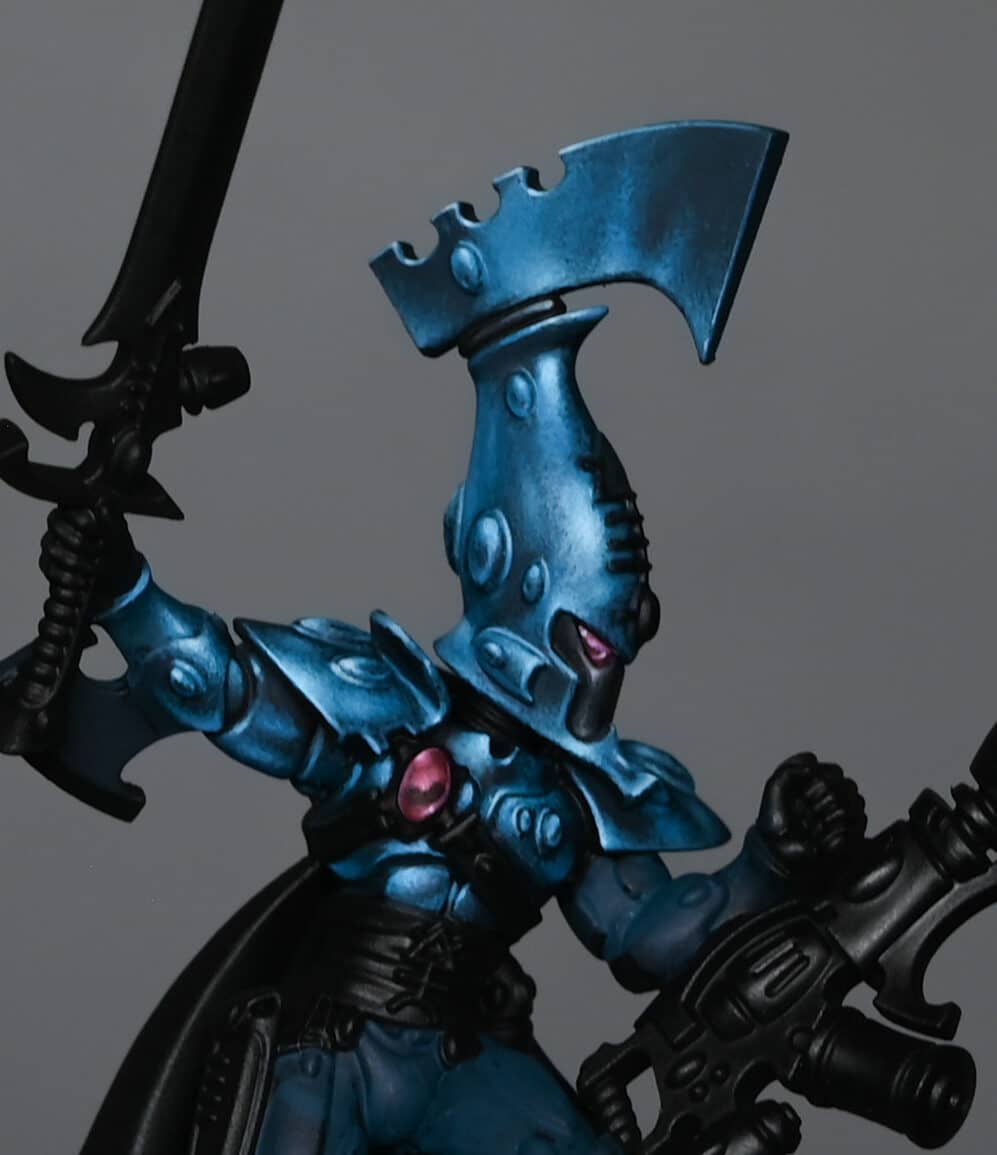
Video – Aeldari Autarch Armour
Materials Needed
- Base Paints: Vallejo Turquoise (Sotek Green can be used as an alternative), Vallejo Black
- Highlight Paint: P3 Morrow White (or any high-quality white paint)
- Brushes: Fine detail brushes, including a customised, cut-down brush for stippling
- Palette: Preferably a wet palette for mixing and maintaining paint consistency
- Water: For thinning paints
Step-by-Step Guide
Assembly and Priming: Assemble your Autarch, ensuring clean joins and smooth surfaces. Prime the model in black to enhance the depth and contrast of the subsequent layers.
Base Coating
Initial Base Coat: Mix Vallejo Turquoise with a small amount of black to create a dark base colour. Apply this mixture evenly across the armour, setting the stage for the lighter highlights to come. This base layer helps in mapping out the armour’s contours and provides a foundation for building contrast.
Highlighting
Mixing Highlights: Create several shades of turquoise by mixing the base Vallejo Turquoise with varying amounts of black for darker shades and white for lighter shades. This range will allow you to build up the shiny armour effect through gradual layering.
Applying Highlights: Start highlighting areas where light naturally hits the armour, such as the helmet’s curvature. Use a “scratchy” application method for this initial layer to block in the highlight areas without aiming for perfection.
Refining Highlights
Stippling Technique: Shift to a stippling technique with a customised brush (cut down to keep the tip thin) to apply the finer, lighter highlights. This approach allows for more precise control over the intensity and spread of the highlights, contributing to the shiny armour effect.
Enhancing the Shine: Focus on areas that would reflect light more intensely, such as the helmet’s forehead and other raised surfaces. Gradually lighten these highlights by adding more white to the turquoise, working towards pure white for the most intense reflections.
Adding Depth and Detail
Creating Contrast: Apply darker shades into recesses and around the edges of the lighter highlights to enhance contrast and depth. This step is crucial for making the shiny effect believable and visually striking.
Detailing with Black: Use Vallejo Black to paint areas such as the faceplate, ensuring to keep these areas distinct and not overly bright to avoid detracting from the focal points of the armour.
Finishing Touches
Edge Highlighting: Use the lightest turquoise mix to carefully edge highlight the armour, defining its shapes and enhancing the overall shininess. Be precise and consistent with these highlights to maintain the model’s clean appearance.
Final Adjustments: Review the model for any areas that need softening or additional contrast. Use glazes (thin, transparent layers of paint) to adjust the intensity of the highlights or shadows as necessary.
Video – Aeldari Autarch Soulstone
Materials Needed
- Fine detail brushes
- Palette for mixing paints
- Water for thinning paints
Paints Used:
- Games Workshop: Khorne Red, Pink Horror
- Vallejo: Pink, Black
- P3: Morrow White (or any high-quality white paint)
Step-by-Step Guide:
Base Coating: Begin by painting the entire soulstone with Khorne Red. Aim for a smooth, even coat. If the paint is too thick, thin it with a bit of water (about 50/50 ratio). Let dry and apply a second coat if necessary for full coverage.
Creating the Horizon Line: Mix Khorne Red with a tiny amount of black to darken it slightly. Paint a wobbly horizon line towards the bottom of the soulstone, simulating a shadowed effect. This line doesn’t need to be perfectly straight; a bit of curvature adds to the natural look.
Blending the Horizon: Below this line, blend back to the original Khorne Red, creating a smooth transition. You can achieve this by using a damp brush to soften the edge between the two colours.
Adding Highlights: On the upper part of the soulstone, start highlighting with Pink Horror. Near the horizon line, make this highlight bright and prominent, fading it as you move upwards. Mix Pink Horror with Vallejo Pink to lighten it for further highlights, applying these closer to the top of the gem.
Enhancing the Gem Effect: Introduce a brighter layer by using a mix of Vallejo Pink and white. This should be applied sparingly, focusing on the top edges and areas you want to emphasise the most.
Defining the Edges: Carefully outline the left and right edges of the soulstone with the light pink mix. This step requires a steady hand to achieve a thin, precise line that enhances the gem’s shape.
Final Touches: Add a small dot of P3 Morrow White at the top left of the soulstone to simulate a reflection point, making the gem appear more lustrous. Optionally, add a tiny white dot on the opposite bottom right to suggest light passing through the gem.
Adjusting and Correcting: If any areas need adjustment, gently glaze over them with the base colours to correct the intensity or blend. Always allow paint to dry between layers to avoid muddying the colours.
Video: Aeldari Autarch Power Sword
Materials Needed:
- Vallejo Neutral Grey
- Vallejo Ice Yellow
- Games Workshop Yriel Yellow
- Games Workshop Mournfang Brown
- Games Workshop Abaddon Black
- Games Workshop Sotek Green
- P3 Morrow White
- A mix of Neutral Grey and Yriel Yellow
- A mix of Ice Yellow and Morrow White
Step by Step Guide
Base Coating: Start by applying a base coat of Vallejo Neutral Grey across the sword. This serves as a solid foundation for building up the NMM gold effect.
Initial Highlights: Mix Vallejo Neutral Grey with a small amount of Yriel Yellow to create your first highlight layer. Focus this mixture towards the edges and points of the sword where light would naturally be strongest.
Enhancing the Highlights: Gradually introduce lighter shades by adding more Yriel Yellow and then Ice Yellow into your mixes. Apply these to the most pronounced edges and features to simulate the effect of light reflecting off the metal.
Defining Reflections: Pay attention to the dynamic shape of the sword, applying strategic highlights to suggest the reflection of light on its surface. This includes the curvature near the tip and along the flat of the blade.
Deepening Shadows: Use a mixture of Neutral Grey and a touch of black to deepen the shadows along the less illuminated parts of the sword. This contrast is crucial for the NMM effect.
Finishing Touches: For the brightest points of light reflection, mix Ice Yellow with Morrow White and apply sparingly to the very tips and edges where light would hit directly.
Glazing for Depth: Glaze the sword with thin layers of Mournfang Brown and Sotek Green to add colour depth and variety, enhancing the alien quality of the weapon.
Final Highlights: Use pure white to add final highlights to the most prominent areas. This step is critical for creating the illusion of a gleaming, reflective surface.
Throughout this process, remember the importance of maintaining thin paint consistency to avoid clumping and to achieve the smoothest transitions possible. If you encounter challenges with colour transitions, consider creating bridge transitions by mixing intermediate shades.
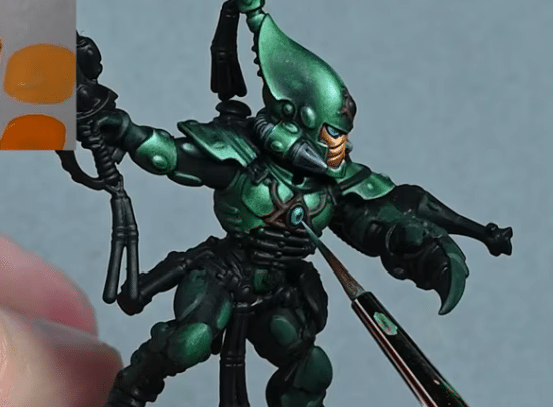
Video – Aeldari Autarch Death Spinner Wraithbone
Materials Needed
- Base Paints: Games Workshop Dryad Bark
- Layer Paints: Games Workshop Baneblade Brown, Karak Stone, Morghast Bone, Ushabti Bone, Screaming Skull
- Highlight Paints: Games Workshop Evil Sunz Scarlet, Sotek Green, Warpstone Glow, P3 Morrow White (or any white paint)
- Brushes: Fine detail brushes for texture and highlight application
- Palette: For mixing and thinning your paints
- Water: For thinning paints to the desired consistency
Step-by-Step Guide
Start with a Black Base: Ensure your miniature is primed in black. This will deepen the subsequent layers of paint, adding to the aged effect.
Apply Dryad Bark: Cover the entire weapon in a layer of Dryad Bark. This dark brown serves as a rich foundation for the wraithbone texture.
Layering
First Layer with Baneblade Brown: Apply Baneblade Brown over the Dryad Bark, focusing on the areas that will catch light. Don’t worry about perfect coverage; the slight translucency adds to the texture.
Add Karak Stone Highlights: Layer Karak Stone over the Baneblade Brown, enhancing the lighter areas and beginning to define the wraithbone texture. Again, embrace the paint’s translucency to build depth.
Texture and Detailing
Fine Texture with Morghast Bone: Use Morghast Bone to start adding fine, squiggly textures resembling weathered bone. Use the very tip of your brush and light pressure to create jagged, circular shapes.
Enhance Texture with Ushabti Bone: Increase the texture’s visibility by applying Ushabti Bone, focusing on shadowed areas and blending into the lighter sections for a smooth transition.
Highlight with Screaming Skull: Apply Screaming Skull sparingly to the most raised areas and edges to simulate light reflecting off the bone’s surface. This layer should be thin and focused.
Final Highlights and Corrections
Bright Highlights with White: Use P3 Morrow White (or any white paint) diluted with water to add final touches to the texture, focusing on the highest points and sharpest edges. This step brings out the detail and adds a sense of dimension to the wraithbone.
Adjust Texture and Contrast: If necessary, go back with previous colours to adjust the texture and contrast. This could mean softening too-bright areas with Screaming Skull or Ushabti Bone or deepening shadows with Morghast Bone.
Adding Colour and Detail
Apply Evil Sunz Scarlet: For the weapon’s energy filaments, start with a base of Evil Sunz Scarlet. Draw fine lines to mimic lightning or energy crackling from one end to the other.
Mix in White for Highlights: Gradually add white to your Evil Sunz Scarlet to lighten the colour for the highlights. Focus these lighter shades towards the base (or top, depending on orientation) of the energy filaments, creating a gradient effect.
Incorporate Sotek Green and Warpstone Glow: To add a unique touch and colour variation, introduce Sotek Green and Warpstone Glow sparingly into the wraithbone texture. This can simulate moss or growth, adding to the ancient appearance. Use these greens lightly to avoid overwhelming the bone texture.
Painting a wraithbone texture on your Aeldari Autarch Deathspinner involves a delicate balance of layering, texture creation, and strategic highlighting. By following these steps and adjusting based on your model’s specific details and your personal preference, you can achieve a beautifully aged, textured effect that stands out on the battlefield. Remember, the key to this technique is patience and layering; build your colours gradually for the most natural and detailed result.
Video – Aeldari Autarch Death Spinner (Black)
Materials Needed
- Base Paint: Vallejo Model Color Black
- Highlight Paints: Vallejo Basalt Grey, and any white paint (I’ve used P3 Morrow White, but any white will do)
- Mixing Palette: For creating various shades of grey
- Fine Detail Brushes: For precise application of highlights
- Water: For thinning paints
Step by Step Guide
Base Coating
Prepare the Miniature: Ensure your Aeldari Autarch Deathspinner is clean, primed, and ready for painting. If you’ve previously painted it, as I have, ensure the model is painted over in Vallejo Model Color Black. This provides a flat, non-satin finish that’s perfect as a canvas for our shiny black effect.
Highlights
Observe the Model: Look at the shapes and details of the model. Identify areas that will naturally catch the light, such as edges, raised surfaces, and textures. The Deathspinner has a mix of flat and curved surfaces, which will influence our highlight placement.
Create a Gradient Palette: Mix Vallejo Basalt Grey with black to create several shades of grey, from dark to light. Also, prepare a mix with white to create lighter greys. These will be used to build up the highlights gradually.
Start with Mid-Tones: Begin highlighting with a mid-tone grey, not the darkest shade. This helps in mapping out the highlights clearly without committing to high contrast immediately. Apply this mid-tone grey to areas you’ve identified as natural light catchers.
Increase Contrast: Gradually work your way up through the shades of grey you’ve mixed, moving towards the lighter greys and eventually white. Focus on smaller areas within the already highlighted sections to create a sense of light reflecting off a shiny surface.
Edge Highlighting: Use fine detail brushes to apply edge highlights meticulously. This step is crucial for defining the shapes and textures of the model, making them stand out against the black base.
Refining the Highlights
Adjust the Highlights: If any area looks too grey or the contrast isn’t high enough, go back in with your darker greys or black to redefine the shadows. This step is about balancing the overall look to maintain the illusion of a shiny black surface.
Glazing: Mix a glaze using Vallejo Model Color Black thinned down with water. Use this to subtly adjust the intensity of your highlights and shadows, smoothing out transitions and ensuring that the black remains the dominant colour.
Final Touches
Sharpening Highlights: For the brightest points, use white or a very light grey to add final touches. These should be very small, focused on the most prominent areas where light would naturally be most intense.
Cleanup: Review your Aeldari Autarch and clean up any areas where the paint may have overstepped. Use black to correct any mistakes and sharpen the edges.
Cant see the Aeldari Autarch videos?
If you don’t have an account, please sign up here! The website currently has over 350 video tutorials with steps and tips, plus a selection of PDFs. If you are not sure about joining, you can explore my free videos with a free membership, or take the plunge and become a full subscriber for full access.


If you’d prefer to support me on Patreon, please visit: https://www.patreon.com/RichardGray

The effect looks really nice and it makes me feel want to paint an Aeldari for the first time! Will you upload the finally picture in the future? It would help a lot for me to copy it 😀