


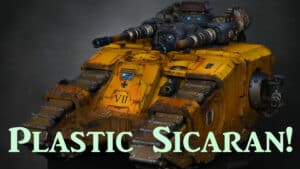
This video and step by step guide shows paint and oil weathering on a Plastic Sicaran from Games Workshop. I use some fun techniques and paints, including Imperial Fist Contrast paint and oil paint for some oil weathering!
Video: Paint and Oil Weathering on a Plastic Sicaran
Materials and Paints Used:
Paints:
- Games Workshop: XV-88, Sotek Green, Imperial Fist (Contrast), Rhinox Hide, Abaddon Black, Daemonette Hide, Doomfire Magenta (Contrast), Asurmen Blue (Contrast), Black Legion (Contrast)
- Vallejo: German Grey, Metal Burnt Iron
- Winsor and Newton: Burnt Sienna (Series 1 oil paint), Black
- P3: Morrow White (Any White will do)
- Vallejo Mecha Varnish: Gloss and Matt
Other Materials:
- Sansodoor mineral spirit
- Abteilung 502: Desert and Sand Pigment set
- Micro Set for decals
- Airbrush (for various stages of painting)
- Brushes of various sizes
- Sponge (for weathering)
- Card for stencil work
- Wet palette
- Water jar
Step-by-Step Guide:
1. Base Coating:
- Start with an airbrush application of XV-88, focusing on avoiding the tracks and recesses to ease later stages.
- Thin the paint with Tamiya X-20A thinner for a smoother flow and less blockage.
2. Adding Transitions:
- Add white to XV-88 to lighten it for transition layers.
- Apply the transition layers by hand, focusing on areas where light and shadow would naturally occur, to create a modulation effect.
3. Applying Contrast Paint:
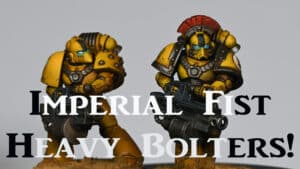
- Use Imperial Fist Contrast paint over the entire tank for a vibrant yellow hue. This step ties together all the previous layers.
4. Highlighting the Turret:
- Start with German Grey, followed by Daemonette Hide, and a mix of Daemonette Hide and white for successive highlights. Be mindful of the position of highlights.
5. Metallic Areas:
- Use Vallejo Metal Color Burnt Iron for metallic sections. Don’t worry about minor mistakes as they will be covered in the weathering process.
6. Weathering with Sponge:
- Apply Rhinox Hide with a sponge, focusing on edges and areas where wear would naturally occur. Rotate the sponge to avoid a uniform pattern.
7. Detailed Chipping:
- Use a brush for detailed chipping and scrapes, focusing on the front of the tank and areas near the tracks.
8. Decals:
- Apply decals using Micro Set, followed by a gloss varnish, and finally a coat of matt varnish.
9. Streaking and Oil Washes:
- Use Burnt Sienna oil paint for rust streaks, applied in small blobs and streaked with a damp brush dipped in mineral spirits.
- For an oil wash, mix Burnt Sienna and Black, thinned with mineral spirits, and apply into recesses and around rivets.
10. Heat Bloom on Weapons:
- Spray weapon tips with chrome, then apply layers of Imperial Fist yellow, Doomfire Magenta, and Asurmen Blue, followed by black at the tips.
11. Applying Weathering Powder:
- Use a dry weathering powder around lower sections and tracks for a dusty effect. Fix the powder with a light airbrushing of matt varnish.
12. Painting Lenses:
- Start with Sotek Green mixed with a bit of black, then layer with increasingly lighter shades of Sotek Green and white, focusing on smooth transitions.
13. Final Weathering and Varnishing:
- Dry brush tracks with Burnt Iron, focusing on raised areas.
- Finish with a coat of ultra matt varnish to unify all elements and add protection.
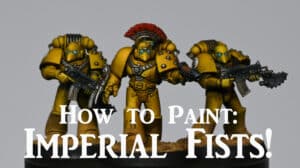
Explore more Imperial Fists tutorials
If you don’t have an account, please sign up here! The website currently has over 350 video tutorials with steps and tips, plus a selection of PDFs. If you are not sure about joining, you can explore my free videos with a free membership, or take the plunge and become a full subscriber for full access.


If you’d prefer to support me on Patreon, please visit: https://www.patreon.com/RichardGray