All of the tutorials for Sigvald the Magnificent, including how to paint NMM (gold) armour, face and horns, freehand shield, NMM silver sword and hilt and more!
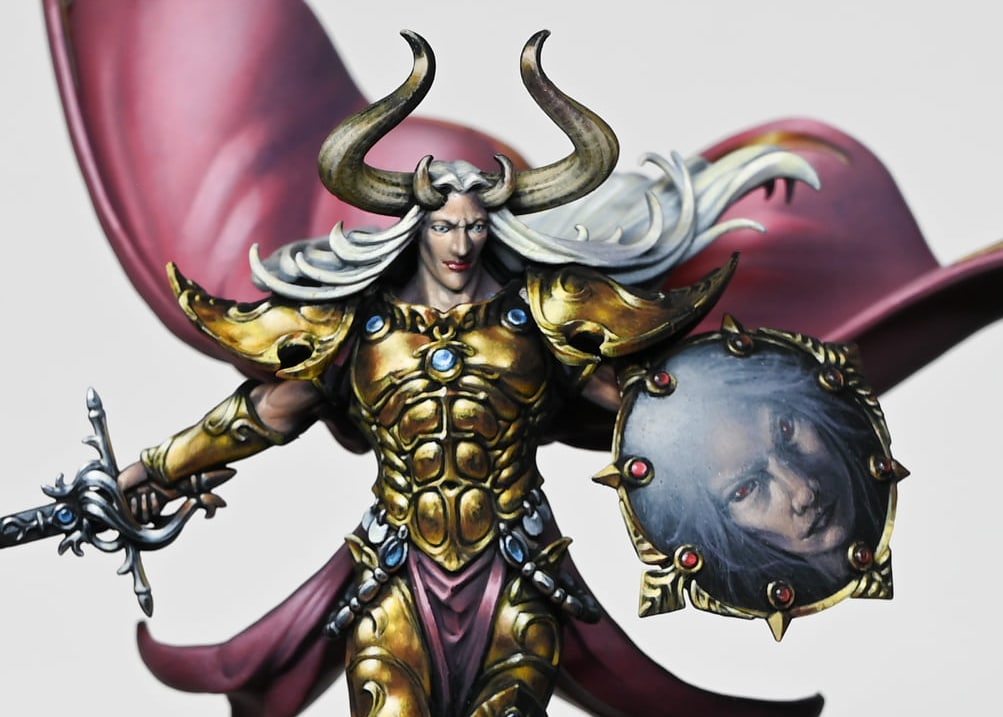
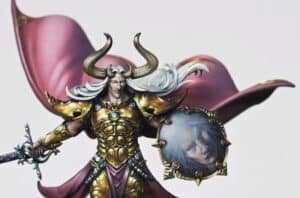
I was fortunate enough to be given one of the new Sigvald the Magnificent models to paint, so here he is! I converted him slightly so I could get some freehand on the shield. The armour is obviously NMM gold. All painted by hand, no airbrush.
Scroll down to explore the videos in order, or quick-jump to a technique or part of the model by clicking one of the below:
How to Paint: NMM Gold – Video Part OneVideo Part Two: NMM LegVideo Part Three: Shoulder and Lower Leg NMMTips: NMM GoldHow to Paint: Face and HornsTop Tips: Face and HornsHow to Paint: Sword and Hilt with NMM SilverTop Tips: Sword and Hilt with NMM SilverHow to Paint: Shield and FreehandHow to Paint: Shield and Freehand Part TwoTop Tips: Shield and FreehandHow to Paint: CloakTop Tips: Cloak
All videos are recorded in HD 1080p or higher – use full screen for the full effect and let the video load completely.
How to Paint: NMM Gold – Video Part One
The following paints were used: Games Workshop: XV-88, Flash Gitz Yellow, Mournfang Brown, Rhinox Hide Vallejo: Ice Yellow, Black P3: Morrow White
Video Part Two: NMM Leg
The following paints were used: Games Workshop: XV-88, Flash Gitz Yellow, Mournfang Brown, Rhinox Hide Vallejo: Ice Yellow, Black P3: Morrow White
Video Part Three: Shoulder and Lower Leg NMM
The following paints were used: Games Workshop: XV-88, Flash Gitz Yellow, Mournfang Brown, Rhinox Hide Vallejo: Ice Yellow, Black P3: Morrow White
Tips: NMM Gold
Model PreparationBegin by assembling the Sigvald model, using Blu Tack (other tacks are available) to hold parts together temporarily.Note that the head, shield, shoulders, and cloak are separate pieces for ease of painting.Applying Base CoatUse a worn-down brush to apply a 50/50 mix of XV-88 and Flash Gitz Yellow for the base coat on the armour.Apply thin layers to achieve a smooth finish, as multiple layers will be needed.Building LayersContinue adding thin layers to build up the metallic NMM gold effect.Remember, use thin paint (50/50 water to paint) to avoid clumpiness.Creating ReflectionsConsider the model’s pose and the reflection of light on different surfaces.Apply reflections on abs, chest, and other areas, keeping in mind the model’s dynamic sculpting.Adjusting Colour TonesBe open to adjusting the colour tones as the painting progresses.Think about the mood or alignment of the character, changing the look of the armour from dark and moody to a brighter, shinier appearance to match the character where applicable.Adding Random ReflectionsIntroduce random reflections to different armour panels to create variation.Remember – armour doesn’t need to be uniform; different angles and shapes can reflect light uniquely.Stippling TechniqueUse a stippling technique for certain areas to simulate distortion on the armour surface.Keep the paint thin and be cautious not to overload the brush to maintain control.Embracing ImperfectionsAllow for imperfections, such as small marks, smears of dirt, or grease, to enhance the reflective nature of the armour.
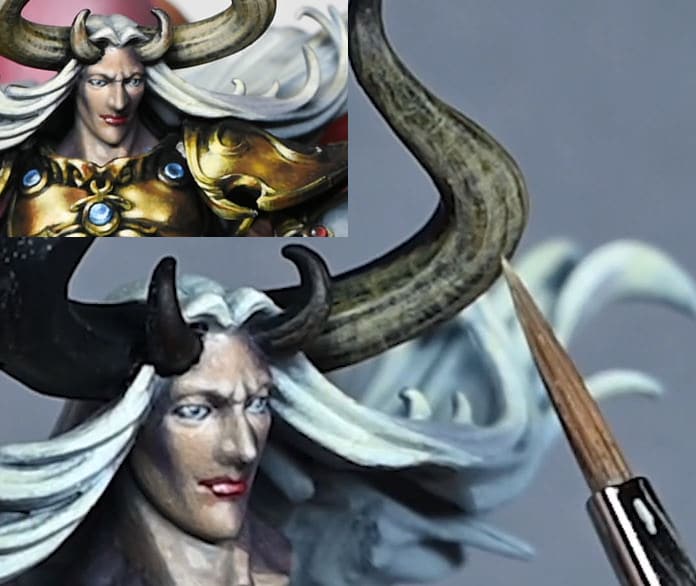
How to Paint: Face and Horns
The following paints were used: Games Workshop: Cadian Fleshtone (Kislev Flesh and Ushabti Bone optional), Daemonette Hide, Temple Guard Blue, Mephiston Red, Balor Brown, Morghast Bone, Ushabti Bone, Screaming Skull, Rhinox Hide Vallejo: Pale Grey Blue, Black P3: Morrow White
Top Tips: Face and Horns
Primer and Base Colour: Utilise dark sea grey for the skin’s base tone, applied with an airbrush over a black primer to establish a foundation for the white hair.Skin Painting: Hand-paint the skin with a diluted coat of Cadian Fleshtone. The watered-down approach allows for layering and avoids the need for perfect opacity.Use a mirror and a lamp on your own face as a reference, to understand the natural direction of shadows on a face.Eyes: Consider painting the eyes first to tackle the tricky part early on.Start with a base of Pale Grey Blue for the whites of the eyes. Add a large black dot for the initial eye shape.Adapt and change the eye detailing as needed. In this case, a white reflection in the top left corner was chosen for a more interesting look.Face Highlights: Focus on creating smooth transitions in highlights, especially on cheekbones, brow, nose, and chin.Use small amounts of paint on the brush to avoid pooling and create delicate brush marks for a smoother look.Gradually build up highlights using mixes of Cadian Fleshtone and Morrow White.Lips: Mix in a bit of Mephiston Red with the flesh colour for a pinkish lip colour. Customise based on personal preference.Hair Highlights (Optional): Use white highlights on the grey hair to work out the brightness and contrast, even if it’s not the final look for the hair.Horn Painting: Paint the horns with a gradient, starting lighter towards the head and getting darker towards the tips.Maintain horizontal lines for the reflective shine, following the same light direction as on the face.Use a series of colours from mid-tone to a lighter shade, gradually making successive highlights smaller.Texture Details (Optional): Add texture by incorporating scribbly cross-hatching in specific areas, being cautious not to overdo it.Photograph Considerations: Apply a matte varnish at the end to eliminate shine and even out surfaces, especially for photographing the model.
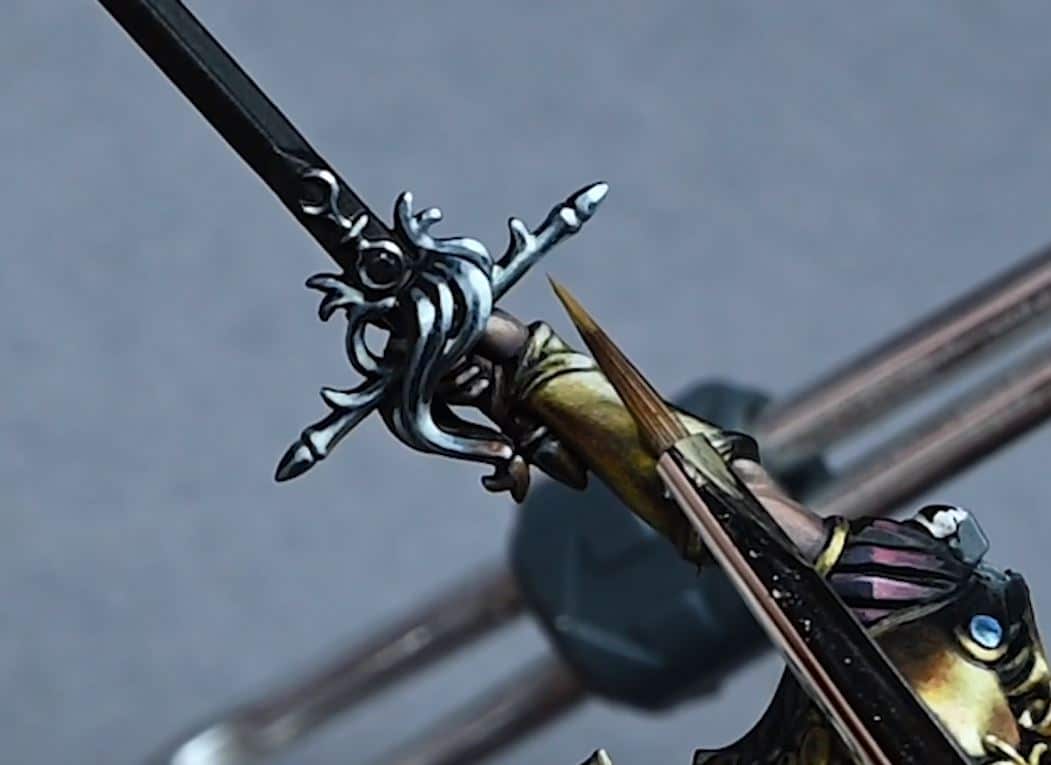
How to Paint: Sword and Hilt with NMM Silver
The following paints were used: Games Workshop: XV-88 Vallejo: Neutral Grey, Pale Grey Blue, Ice Yellow, P3: Morrow White
Top Tips: Sword and Hilt with NMM Silver
Start with Neutral Grey: Apply neutral grey to the sword hilt on the black primer.Map out the top-down highlights on the detailed, curvy hilt.Consider the contrast between wet palette view and model view due to background colours.Mapping Light Points: Identify the curves and details on the hilt to map out the light points.Pay attention to upward and downward-facing curves as they catch and reflect light differently.Bounce Highlights with Neutral Grey: Add bounce highlights to downward-facing surfaces using neutral grey.These highlights simulate light bouncing off the floor or other surfaces.Enhance Contrast: Push the highlights further to increase contrast.Use the wet palette view as a guide, but consider over-highlighting to compensate for the black primer.Transition to Pale Grey Blue: Switch to pale grey blue to pick out the main highlight points identified earlier.Create a subtle transition to enhance the shiny effect.Introduce Ice Yellow: Apply ice yellow to add a warm glow to the highlights.This subtle touch helps tie in with the overall warm lighting on the model.Define Details with Ice Yellow: Use ice yellow to define details, especially on cylindrical shapes.Consider reflections and shadows to add realism.Bounce Highlights and Details: Continue adding bounce highlights, especially on top-facing surfaces.These highlights define the edges and shapes of the hilt.Fine-Tune with Black: Use black to enhance contrast in areas where the highlights may be too thick.Pay attention to the reflections and dark lines on cylindrical shapes.Final Touch with Ice Yellow Glaze: Thin ice yellow (2 parts water to 1 part paint) for a glaze.Apply a light glaze over the hilt to add variation and interest to the NMM.Tidy Up and Finalise: Spend some time tidying up the details.Add small yellow reflective highlights for extra realism.Reflective Highlights and Variations: Consider reflecting colours from the armour or surroundings.Experiment with adding subtle variations to the metal for a more interesting finish.
How to Paint: Shield and Freehand
The following paints were used: Games Workshop: Daemonette Hide, Cadian Fleshtone, Vallejo: Black, Ice Yellow
How to Paint: Shield and Freehand Part Two
The following paints were used: Games Workshop: Daemonette Hide, Cadian Fleshtone, Mephiston Red Vallejo: Black, Ice Yellow, Pale Grey blue P3: Morrow White
Top Tips: Shield and Freehand
Wet Palette Preparation: Begin with a wet palette to keep your paints hydrated.Utilise a variety of colours, including Daemonette Hide, Daemonette Hide and Flesh Tone mix, Cadian Fleshtone, Cadian Fleshtone mixed with Ice Yellow, and Ice Yellow.Base Work and Background: Commence by roughly blocking in the main shapes on the shield. Don’t worry about perfection at this stage.Use a flat black background to provide a canvas for your work.Freehand Technique: When painting freehand, it’s recommended to start with a messy application, focusing on getting the shapes in the right place.Consider the androgynous nature of the face and add subtle demonic elements.Work on defining features like cheekbones, eyes, and forehead gradually.Lighting Considerations: Plan for top-left lighting and be mindful of how it interacts with the background and the freehand.Avoid pre-painting the background shine to maintain consistency when adding lighting later.Refinement Process: Refine the face by adjusting shapes and proportions as you progress.Pay attention to the texture and subtleties in the paintwork, allowing for variations and imperfections.Use reference images of faces and lighting to enhance realism.Layering and Thinning Paint: Thin your paints to ensure smooth layering, especially as you’ll be applying multiple layers.Experiment with thinning ratios, but generally, aim for about one and a half to two times water to one part paint.Brush Techniques: Utilise different brushes for specific tasks. A newer brush for softer marks and an older one for larger, softer applications.Pay attention to the size of the brush tip for finer details.Adding Subtle Details: Introduce subtle details by lifting the brush to create dots where the paint is thinner, adding character to the piece.Experiment with depositing tiny dots of paint to create texture and shadows.Shading and Shadow Definition: Use darker colours like Daemonette Hide mixed with black for shadow definition.Consider the natural shadowing on curved surfaces, like the bottom of the chin.Final Touches and Tweaks: Continuously refine and tweak elements while the paint is still wet.Use excess paint dots to your advantage by pushing them around to achieve desired effects.
How to Paint: Cloak
The following paints were used: Games Workshop: Pink Horror, Night Lords Blue P3: Morrow White
Top Tips: Cloak
Base Coat: Start with a primed black undercoat.Apply a quick base coat of Pink Horror using an airbrush for a smooth and quick application.Spray at a slight angle to create a subtle shadow effect, indicating light direction.Mixing Colours: Mix colours on a wet palette.Gradually add successive amounts of white to Pink Horror for highlighting.Blocking In Highlights: Use a larger brush (size 4) for blocking in large highlight areas.If no airbrush, start with Pink Horror to block in colours before proceeding to highlights.Tools for Masking: Consider using therapy putty, available on Amazon, for masking.Other options include masking fluid or cling film, but be cautious as cling film may damage paint.Hand-Painting vs. Airbrushing: While airbrushing provides a smooth finish, hand-painting offers individuality and varied textures. Choose based on personal preference and desired effects.Brush Selection: Use a larger brush for initial blocking (size 4).Transition to a smaller brush (size 1) for finer details and creases on the cloak.Transitions and Blending: Ensure smooth transitions between highlights and shadows for a natural look.Soften edges using a smaller brush for a more realistic appearance.Glazing Technique: Create a glaze by adding water to paint on the palette (4-5 parts water to 1 part paint).Apply glaze towards the highlight, allowing extra paint to accumulate for a brighter effect.Drying Techniques: Use a hair dryer or heat gun for quicker drying, but be cautious with heat guns to avoid damage.Final Touches: Glaze towards the highlight for a smooth finish.Be mindful of applying too much thin paint to avoid “coffee stain” effects.
I hope you enjoyed these videos and good luck with your Sigvald (or any other model you are trying these techniques on). For more of my full character video tutorials, follow the links below:
If you don’t have an account and cant see the videos, please sign up here! The website currently has over 350 video tutorials, plus step by step guides and PDFs. You can explore free videos with a free membership, or take the plunge and become a full subscriber for full access.
If you’d prefer to support me on Patreon, please visit: https://www.patreon.com/RichardGray [...]