


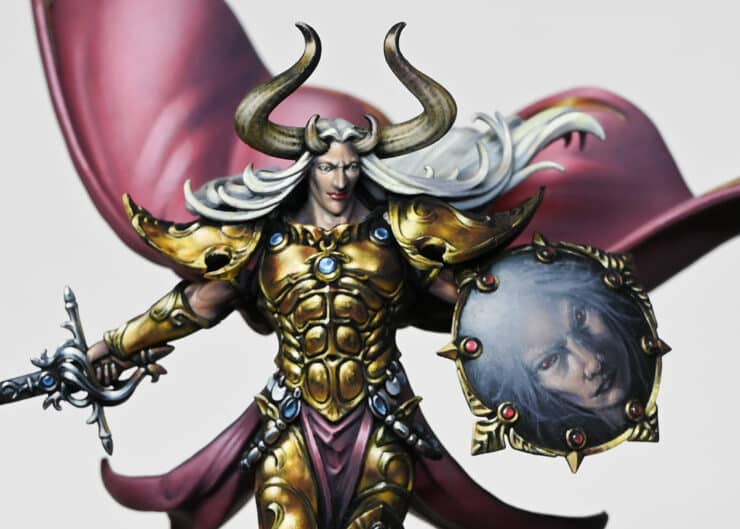
As promised, here are some videos on how I created the NMM (non metallic metal) gold armour for Sigvald the Magnificent.
How to Paint: NMM Gold Armour – Video Part One
The following paints were used:
Games Workshop: XV-88, Flash Gitz Yellow, Mournfang Brown, Rhinox Hide
Vallejo: Ice Yellow, Black
P3: Morrow White
Video Part Two: NMM Leg
The following paints were used:
Games Workshop: XV-88, Flash Gitz Yellow, Mournfang Brown, Rhinox Hide
Vallejo: Ice Yellow, Black
P3: Morrow White
Video Part Three: Shoulder and Lower Leg NMM
The following paints were used:
Games Workshop: XV-88, Flash Gitz Yellow, Mournfang Brown, Rhinox Hide
Vallejo: Ice Yellow, Black
P3: Morrow White
Tips: NMM Gold Armour
Model Preparation
Begin by assembling the Sigvald model, using Blu Tack (other tacks are available) to hold parts together temporarily.
Note that the head, shield, shoulders, and cloak are separate pieces for ease of painting.
Applying Base Coat
Use a worn-down brush to apply a 50/50 mix of XV-88 and Flash Gitz Yellow for the base coat on the gold armour.
Apply thin layers to achieve a smooth finish, as multiple layers will be needed.
Building Layers
Continue adding thin layers to build up the metallic NMM gold effect.
Remember, use thin paint (50/50 water to paint) to avoid clumpiness.
Creating Reflections
Consider the model’s pose and the reflection of light on different surfaces.
Apply reflections on abs, chest, and other areas, keeping in mind the model’s dynamic sculpting.
Adjusting Colour Tones
Be open to adjusting the colour tones as the painting progresses.
Think about the mood or alignment of the character, changing the look of the armour from dark and moody to a brighter, shinier appearance to match the character where applicable.
Adding Random Reflections
Introduce random reflections to different armour panels to create variation.
Remember – armour doesn’t need to be uniform; different angles and shapes can reflect light uniquely.
Stippling Technique
Use a stippling technique for certain areas to simulate distortion on the armour surface.
Keep the paint thin and be cautious not to overload the brush to maintain control.
Embracing Imperfections
Allow for imperfections, such as small marks, smears of dirt, or grease, to enhance the reflective nature of the armour.
Continue painting Sigvald the Magnificent with my full tutorials…

How to Paint Sigvald the Magnificent with NMM
All of the tutorials for Sigvald the Magnificent, including how to paint NMM (gold) armour, face and horns, freehand shield, NMM silver sword and hilt and more!