


Welcome back to the second part of the tutorial on painting Mephiston Lord of Death, focusing on achieving a vibrant, display-standard finish.
Video : How to Paint Mephiston Lord of Death – Part Two
All videos are recorded in HD 1080p or higher – use full screen for the full effect and let the video load completely.
Paints and Materials Needed
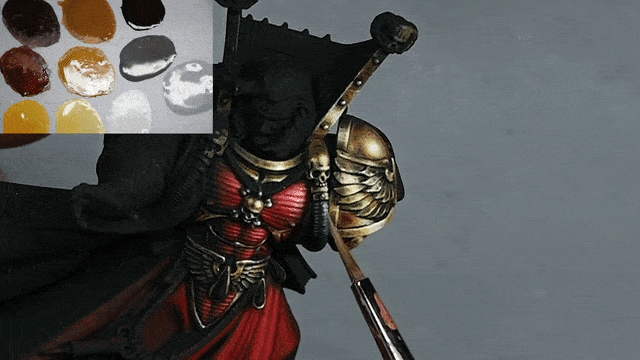
- Paints: Mephiston Red, Abaddon Black, Rhinox Hide, XV-88, Balor Brown, Yriel Yellow, Evil Sunz Scarlet, Wild Rider Red, Cadian Fleshtone, Mournfang Brown (Games Workshop); Ice Yellow, Neutral Grey, Pale Grey Blue (Vallejo); Morrow White (P3)
Steps on How to Paint Mephiston Lord of Death
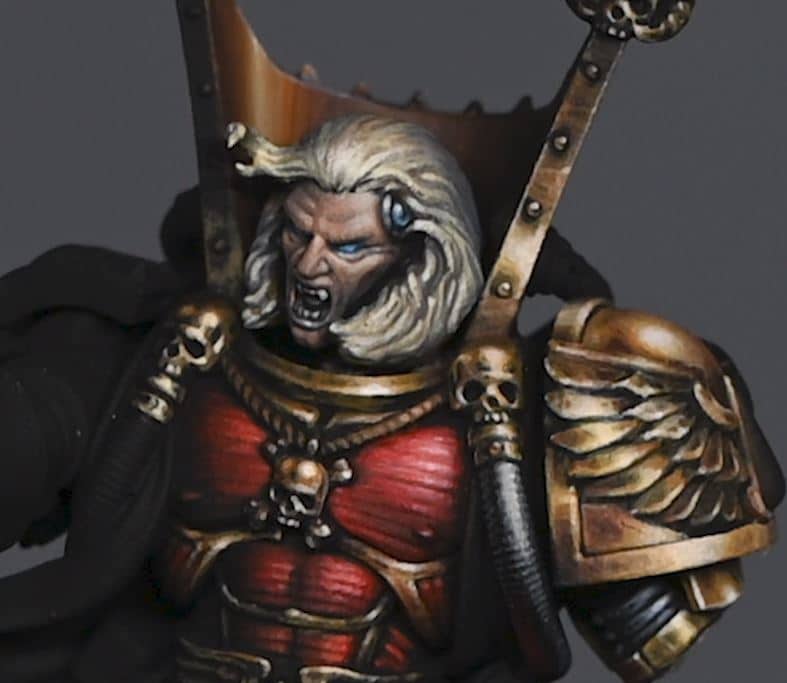
- Enhancing Chest Armour:
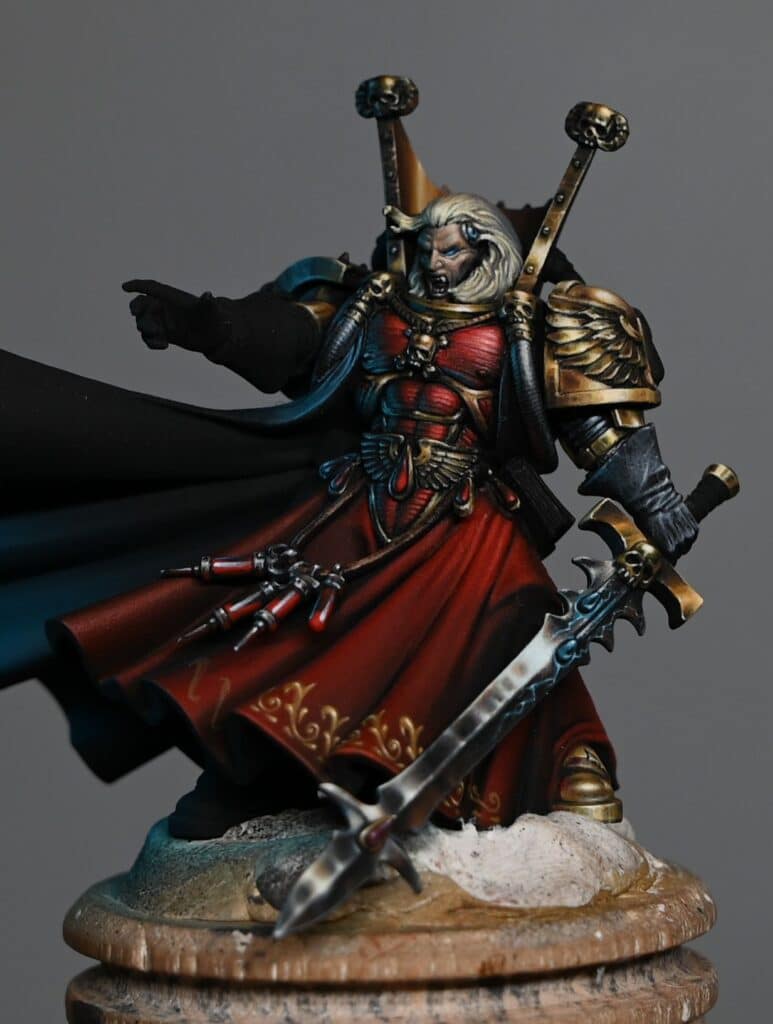
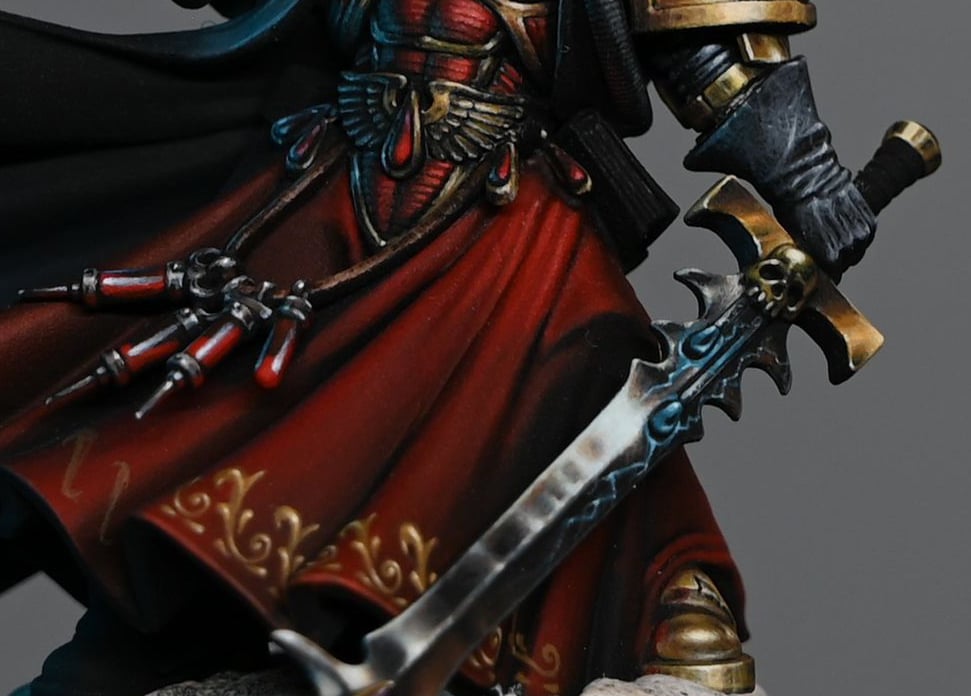
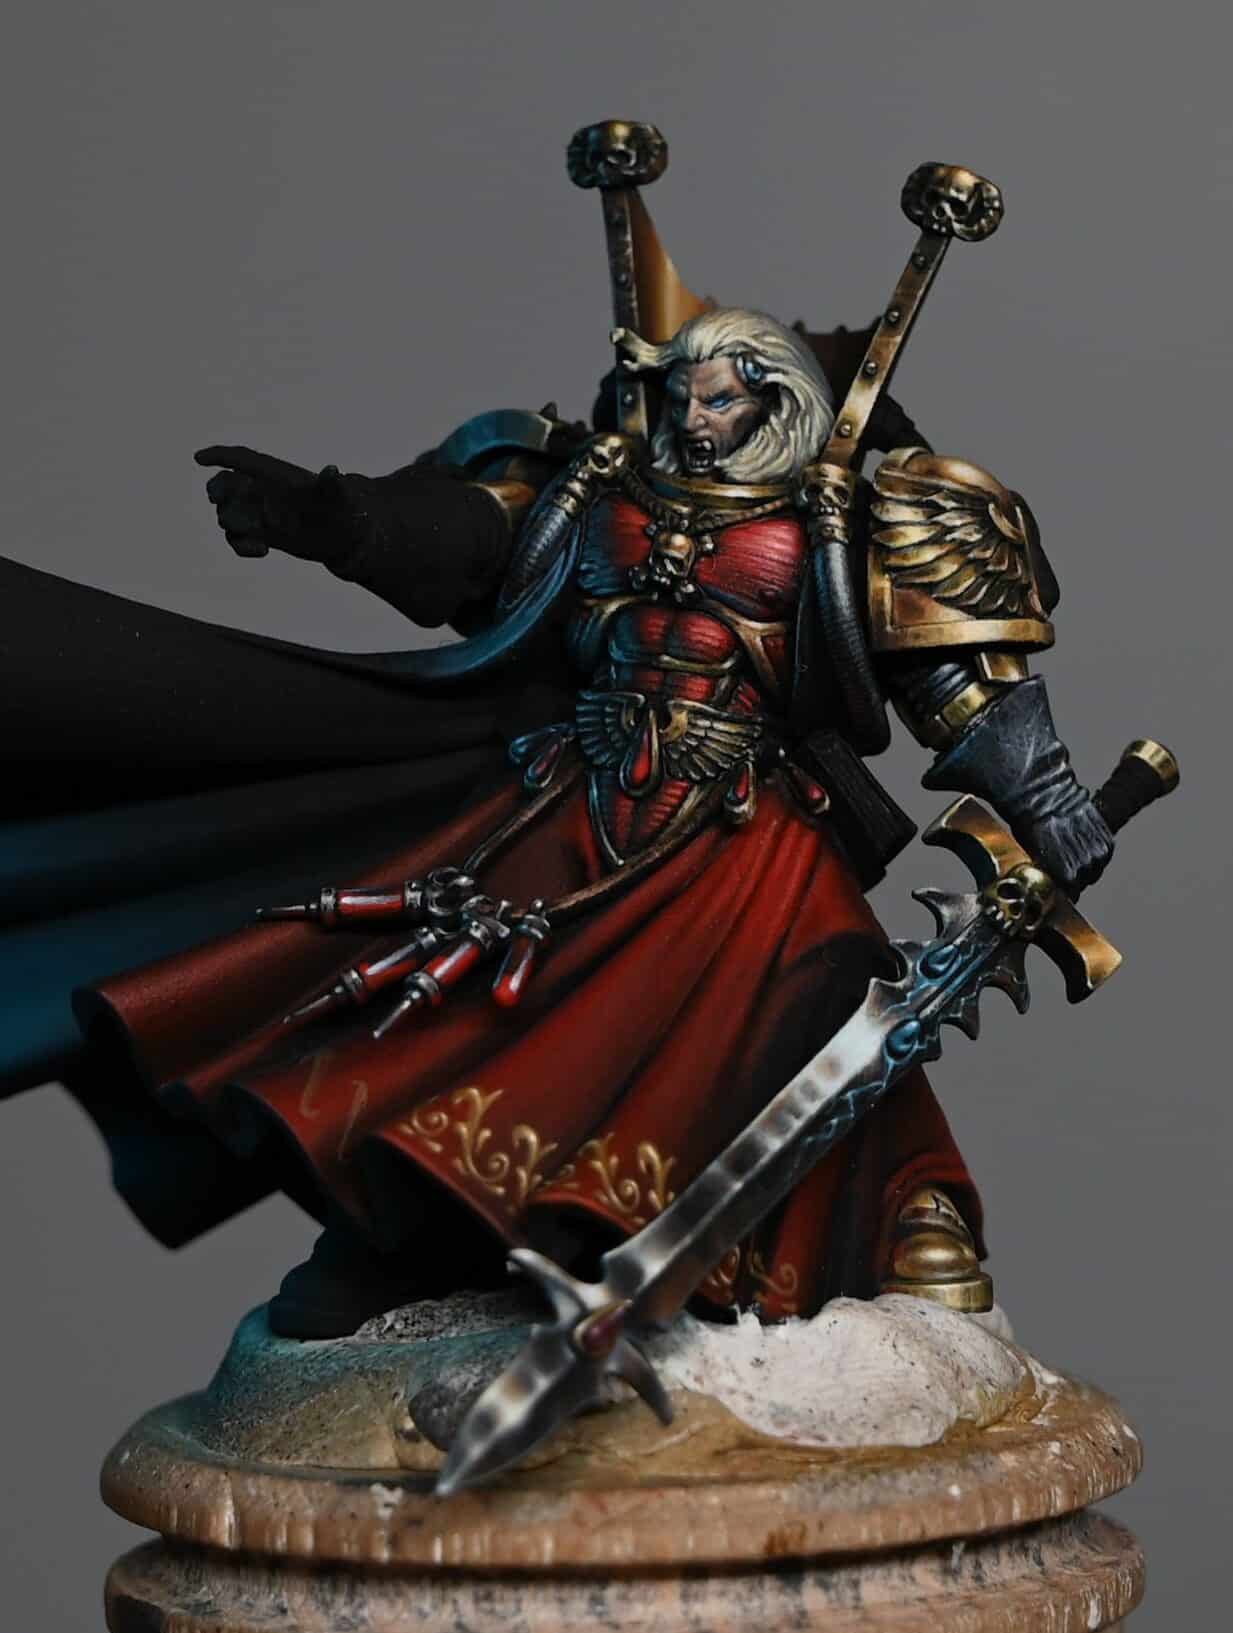
- Revisit the chest armour, increasing the brightness and size of the highlights. Ensure that the recesses between the ribs are lighter to avoid overly pronounced shine dots. Aim for a balanced sheen between the gold and the cloth elements.
- Refining Highlights and Shadows:
- Soften the transitions on the pectoral armour and midsection, avoiding excessively bright highlights that compete with the main shine points. Use a blend of Mephiston Red, Evil Sunz Scarlet, and Wild Rider Red, gradually adding Ice Yellow for the brightest highlights.
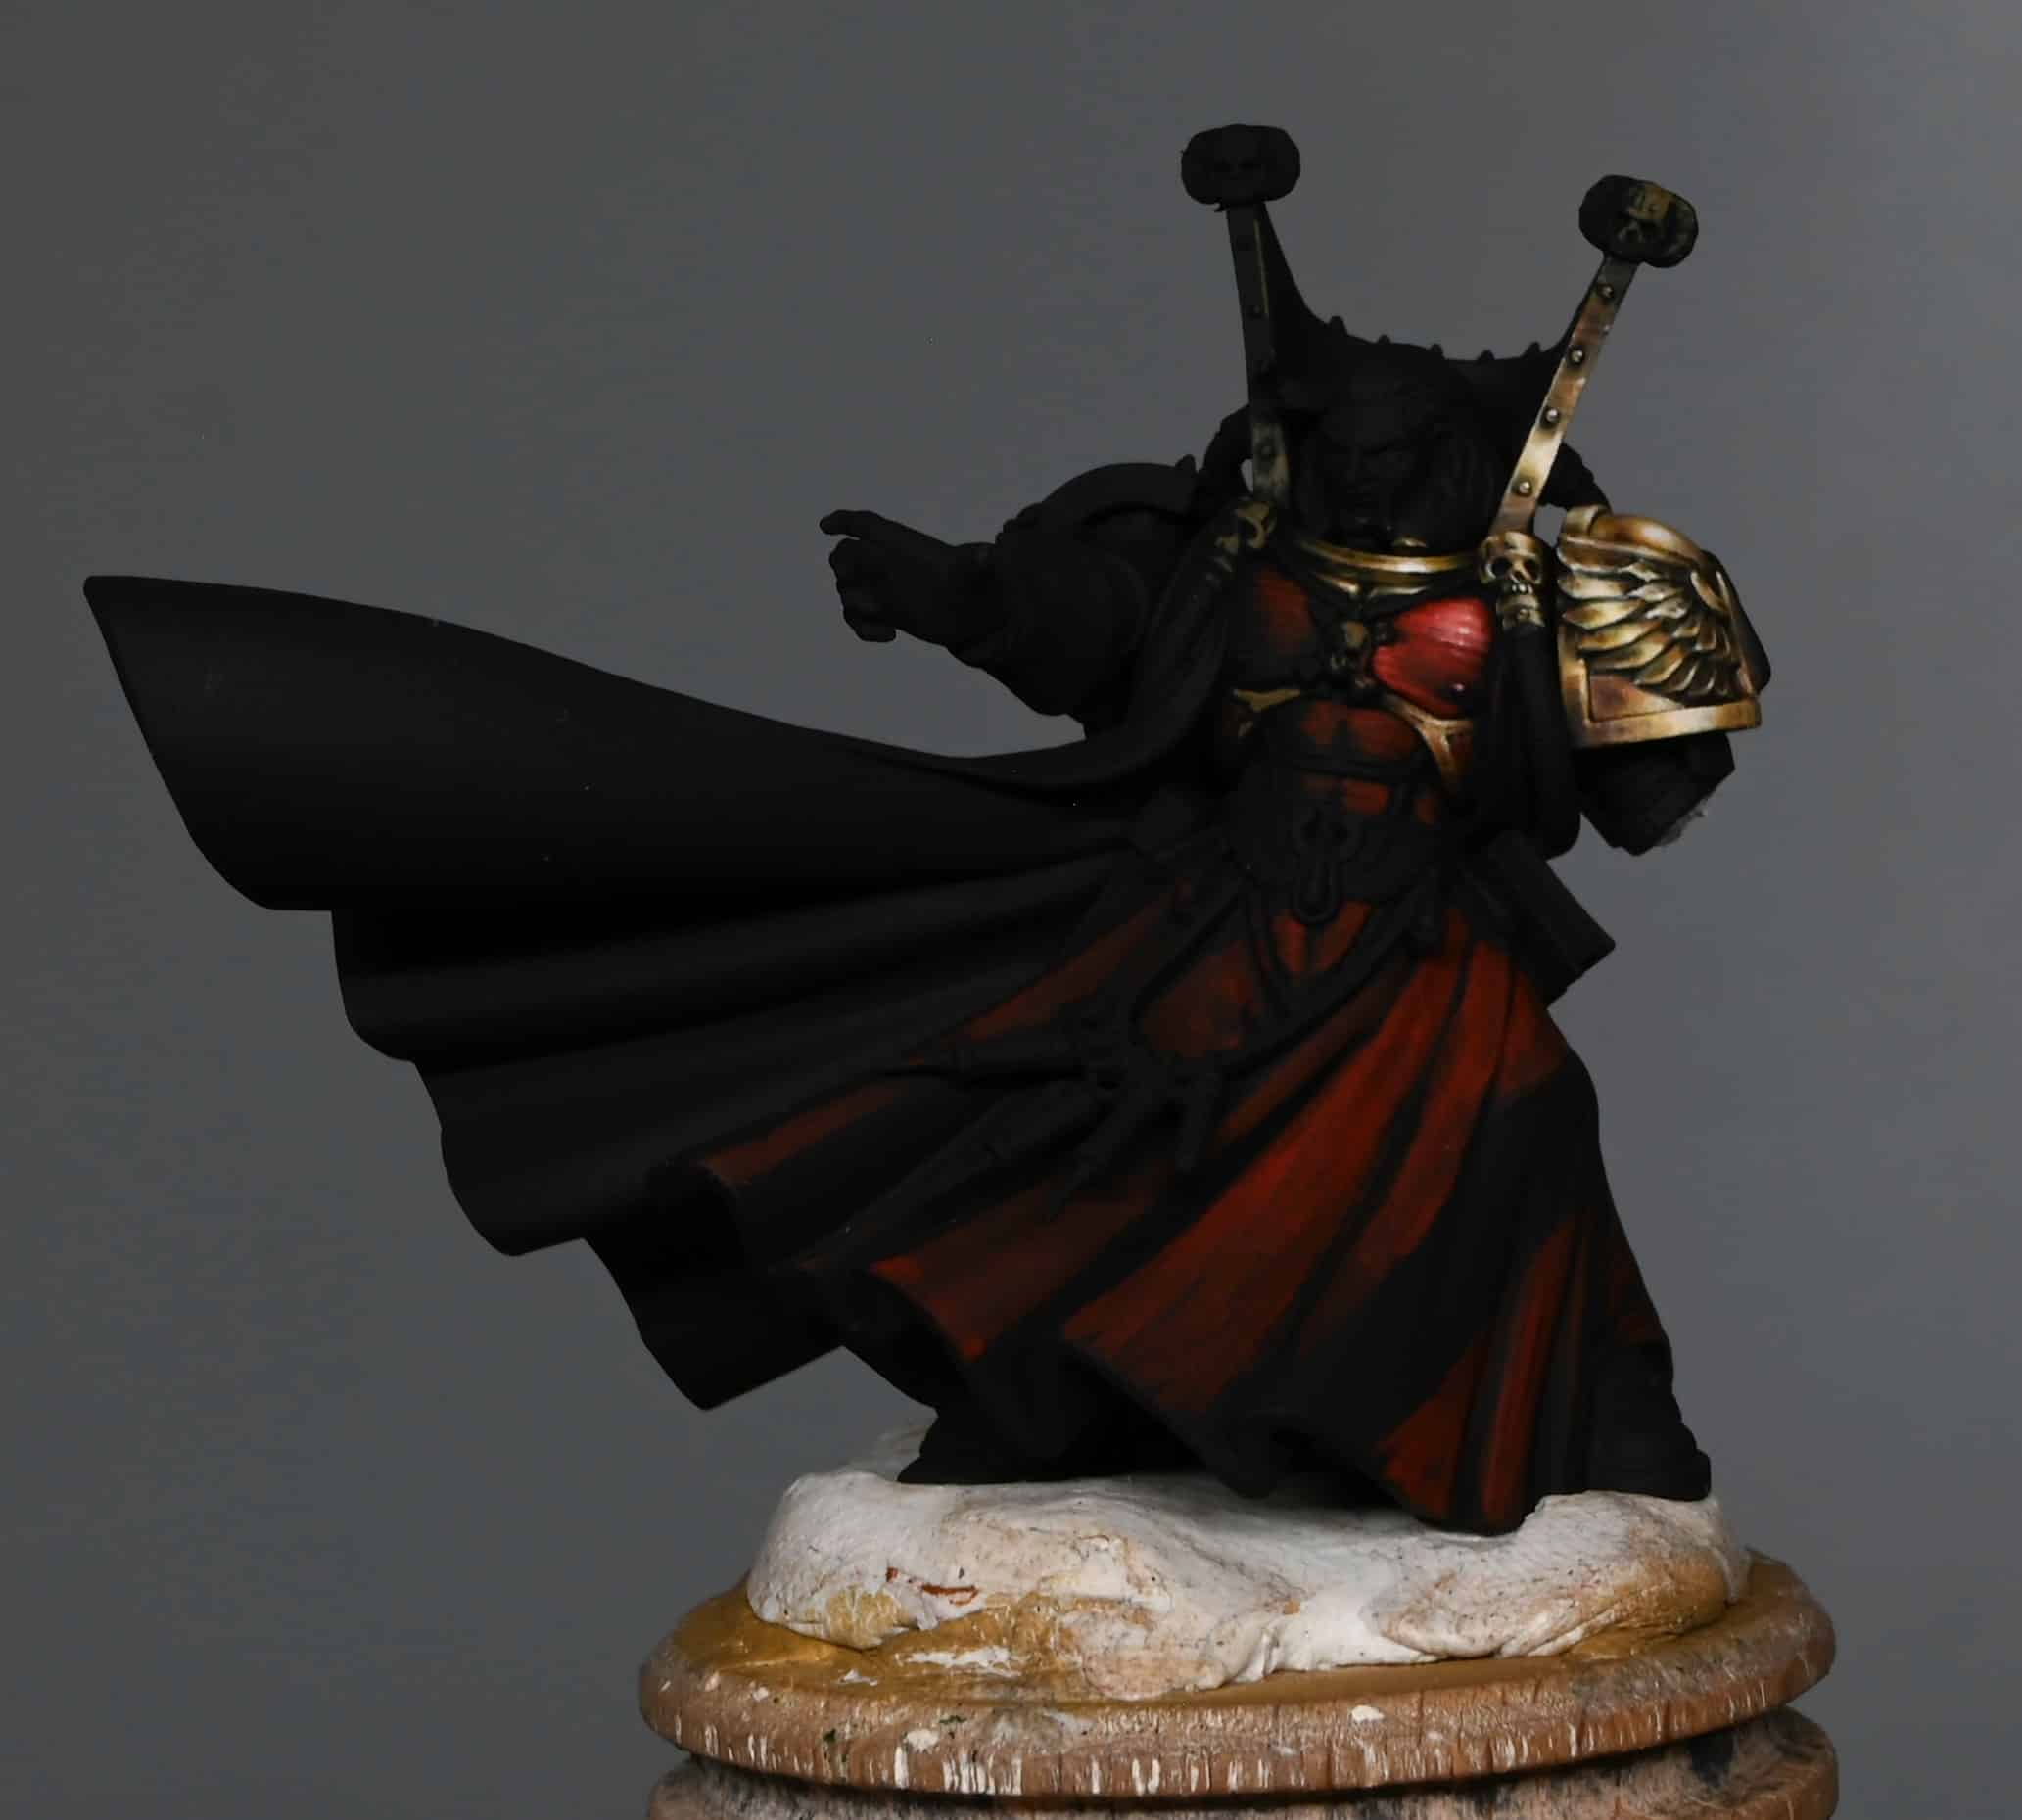
- Skirt Painting:
- Focus on creating a rich, saturated red tone using Mephiston Red. Apply multiple layers for opacity, ensuring the red stands out against darker areas. For the highest highlights, mix Wild Rider Red with a small amount of Ice Yellow or White. Use a glaze of Mephiston Red to unify the tones and correct any overly orange highlights.
- Painting the Tubing:
- For the ribbed tubing, create a more natural metallic look by blending highlights into the recesses rather than highlighting each rib perfectly. Use a mix of Neutral Grey, Pearl Grey Blue, and Morrow White for the right side (light source), and Neutral Grey for the left.
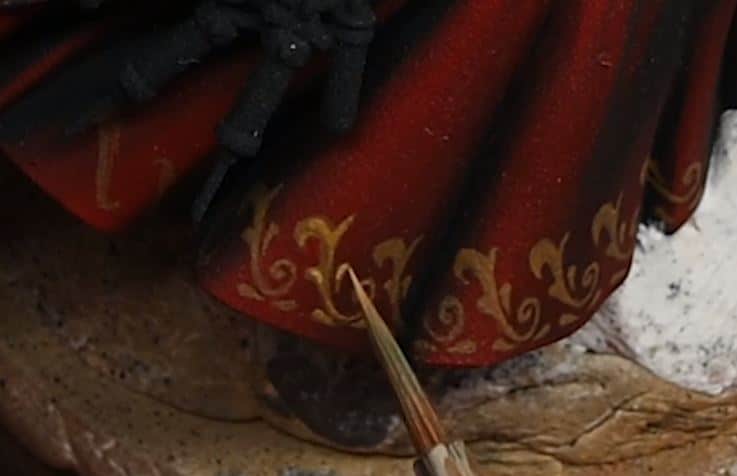
- Filigree on Skirt:
- Plan to add non-metallic gold filigree details on the skirt’s trim in a later stage to enhance the model’s detail and coherence.
- Necklace String:
- Paint the necklace string with XV-88, creating an angled line pattern to mimic the texture of a rope or string. Highlight with Cadian Fleshtone, blending shadows with XV-88 for depth.
- Final Adjustments and Preparing for Future Steps:
- Continually adjust the balance between light and dark areas. Prepare for painting the face and sword in upcoming tutorials, ensuring all elements harmonise in terms of light direction and intensity.
This part of the Mephiston painting tutorial has focused on refining details and enhancing the contrast and vibrancy of the model. Remember, painting to a display standard involves meticulous attention to light sources, transitions, and detail work. Each step builds towards creating a visually striking model.
Scroll down for further tutorials covering the face and sword, where we will delve into even more advanced techniques.
Watch all the Mephiston Lord of Death Tutorials
Mephiston, Lord of Death
Here are all of my tutorials so far on how to paint Mephiston, from basic assembly and removing mould lines and filling gaps, to detailed instruction on his painting itself with freehand, NMM and more.
Explore the Mephiston Lord of Death Tutorials by Technique

If you don’t have an account, please sign up here! The website currently has over 350 video tutorials with steps and tips, plus a selection of PDFs. If you are not sure about joining, you can explore my free videos with a free membership, or take the plunge and become a full subscriber for full access.


If you’d prefer to support me on Patreon, please visit: https://www.patreon.com/RichardGray