


Tor Garadon is the Imperial Fists’ longest serving Battle Company Captain, an unstoppable warrior in whom the lessons of the Primarch have been distilled to their most punishing form.
For all of the tutorials on how I painted Tor Garadon, please follow the link below! Or, scroll down for just the leather and details video and step-by-step guide with paints:
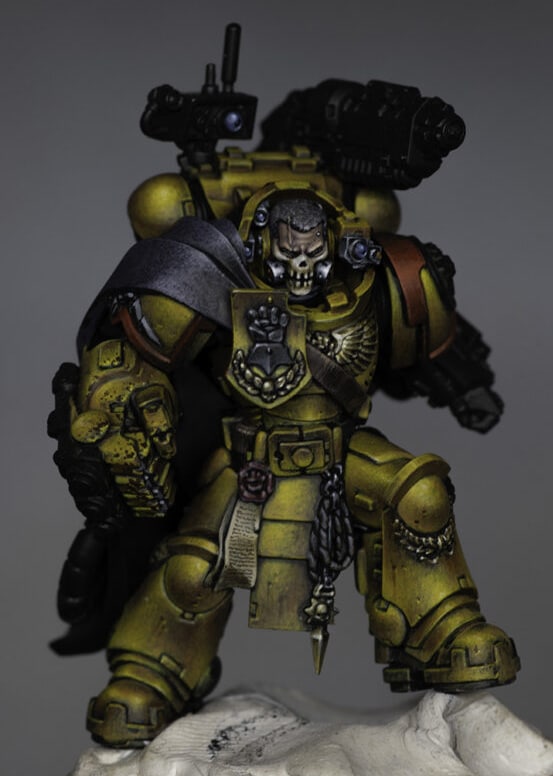
Tor Garadon
A series of videos on how I painted him, including details on the head and leather parts.
Video: How to Paint Tor Garadon Leather, Chest Eagle NMM, Red Shoulder Trim
This video covers the techniques for painting the leather details, non-metallic metal (NMM) effects on the chest eagle and other adornments, the red shoulder trim, and the blue lenses.
Materials Needed
- Base Paints: Rhinox Hide, Macragge Blue, Mephiston Red.
- Highlight Paints: Cadian Fleshtone, Mournfang Brown, Hoeth Blue, Baharroth Blue, Wild Rider Red, Evil Sunz Scarlet.
- Specialty Paints: Vallejo Japanese Uniform, English Uniform, Ice Yellow, Ivory; P3 Morrow White.
- Brushes: A selection ranging from fine detail to medium size.
- Other: Wet palette, water for thinning paints, paper towel for blotting.
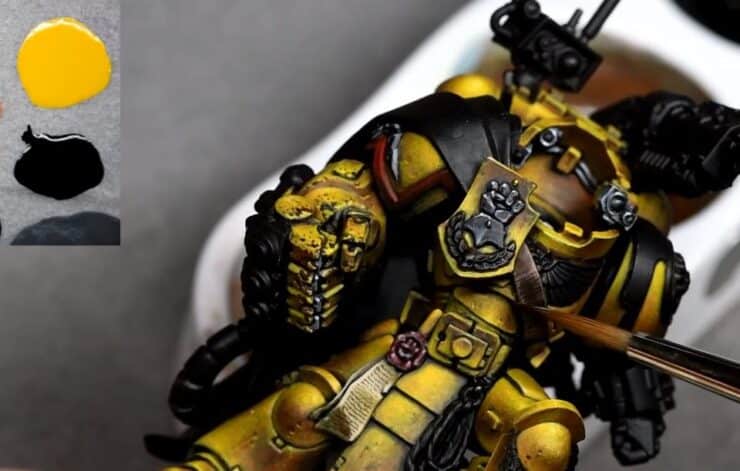
Tor Garadon Leather Details
Base Layer: Apply Rhinox Hide to the leather areas for a rich, dark brown base.
Weathering and Texture: Using Cadian Fleshtone, paint crack marks and weathering on the leather to simulate wear. Focus these marks more towards the edges and keep them parallel but slightly varied in angle for a natural look.
Shading and Depth: Mix a bit of Rhinox Hide into your Cadian Fleshtone on a wet palette and go back over your weathering marks to soften and blend them into the leather, enhancing depth.
Non-Metallic Metal (NMM) Chest Eagle
Base Colours: Start with Vallejo English Uniform as your base for the gold NMM areas.
Building Up Highlights: Layer Vallejo Japanese Uniform over the base, focusing on the upper left areas of the eagle to mimic a light source coming from that direction.
Bright Highlights: Add Vallejo Ice Yellow for the brighter highlights, concentrating on areas that would catch the most light.
Final Highlights: Use Vallejo Ivory and P3 Morrow White for the brightest points of light on the eagle, such as the tips of feathers or central areas closest to the perceived light source.
Red Shoulder Trim
Base Coat: Paint the shoulder trim with Mephiston Red, ensuring a solid, even base layer.
First Highlights: Apply Evil Sunz Scarlet to the upper portions of the trim where light would naturally hit.
Final Highlights: Use Wild Rider Red for the brightest highlights, applying it sparingly to maintain the red’s saturation and avoid it looking pink or orange.
Blue Lenses
Base Layer: Start with Macragge Blue, painting a dome shape on the lens, leaving some of the base black visible for depth.
Adding Depth: Layer Hoeth Blue over the Macragge Blue, focusing on the top left side to start building the reflective look.
Brighter Highlights: Apply Baharroth Blue in a smaller area than the Hoeth Blue, enhancing the sense of reflection.
Final Touches: Add a tiny dot of P3 Morrow White in the top left corner of the lens to simulate a pinpoint reflection of light.
If you don’t have an account here on my website, please sign up here! I have over 350 video tutorials with steps and tips, plus a selection of PDFs. If you are not sure about joining, you can explore my free videos with a free membership.


If you’d prefer to support me on Patreon, please visit: https://www.patreon.com/RichardGray