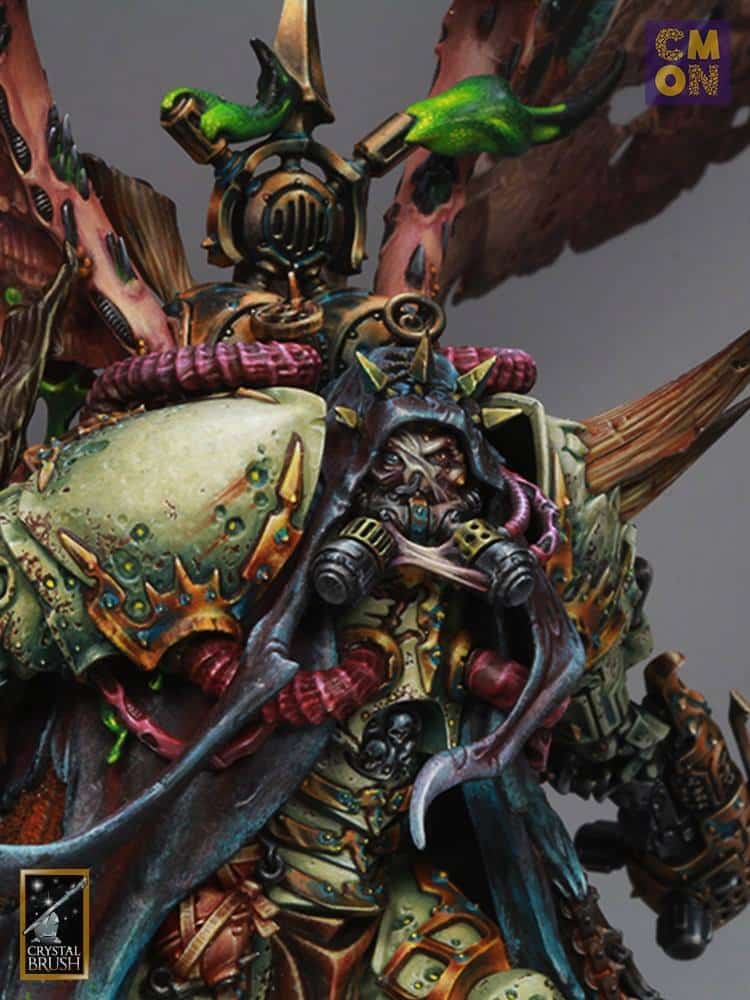
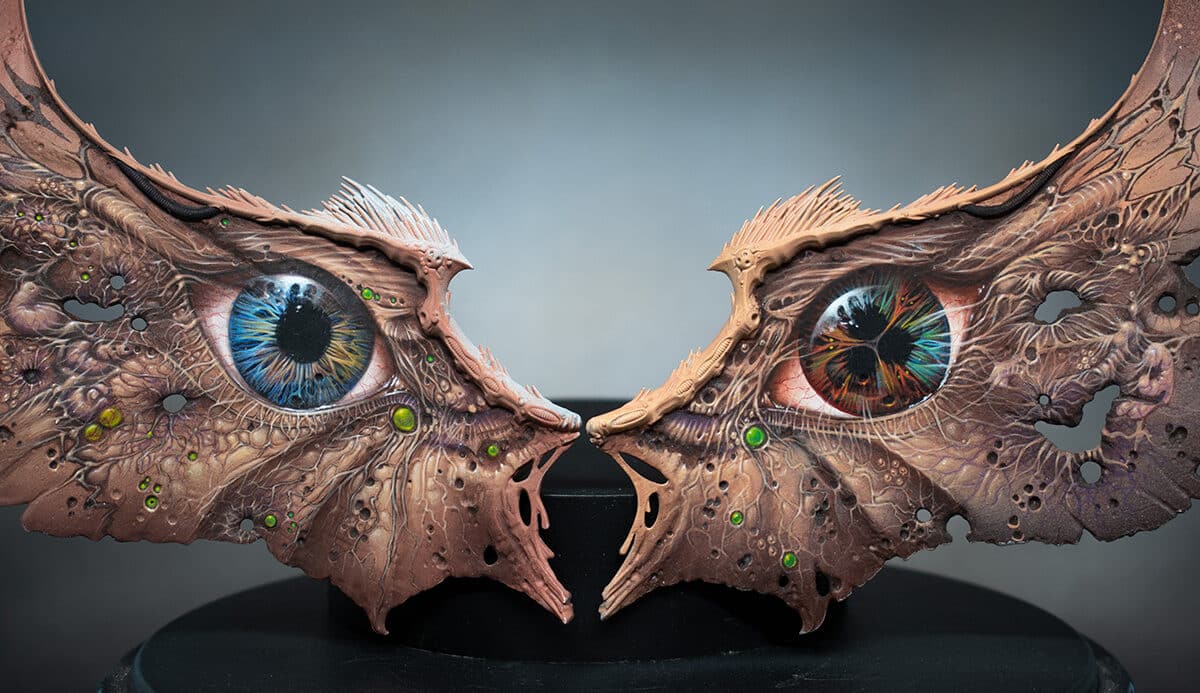
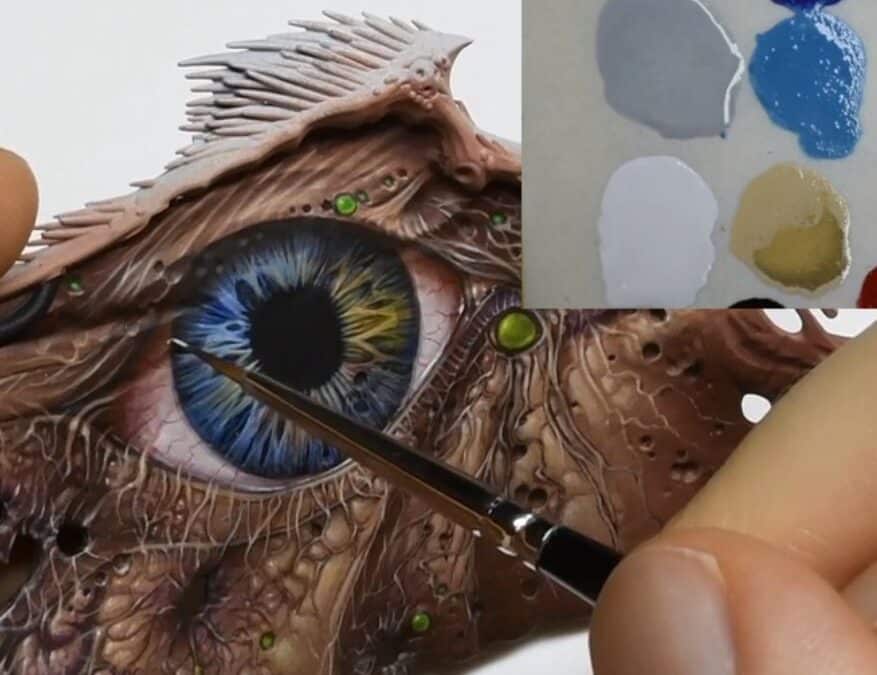
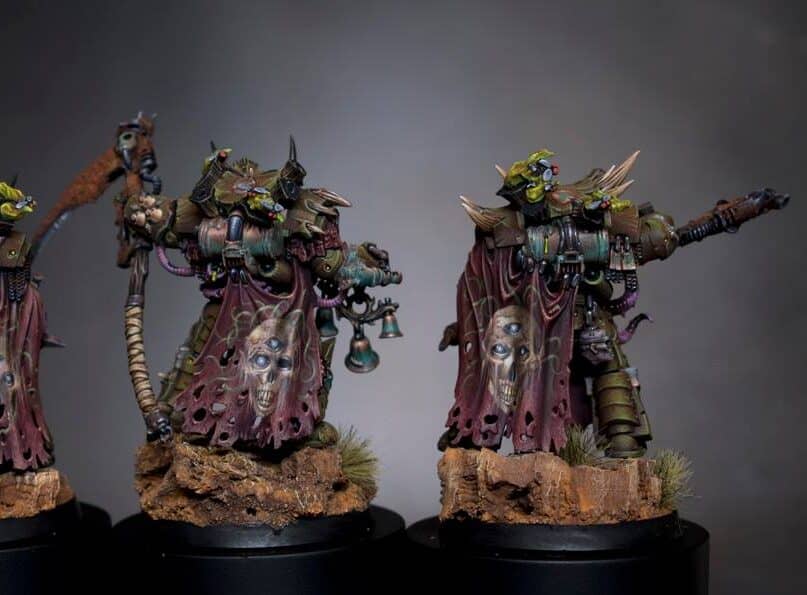
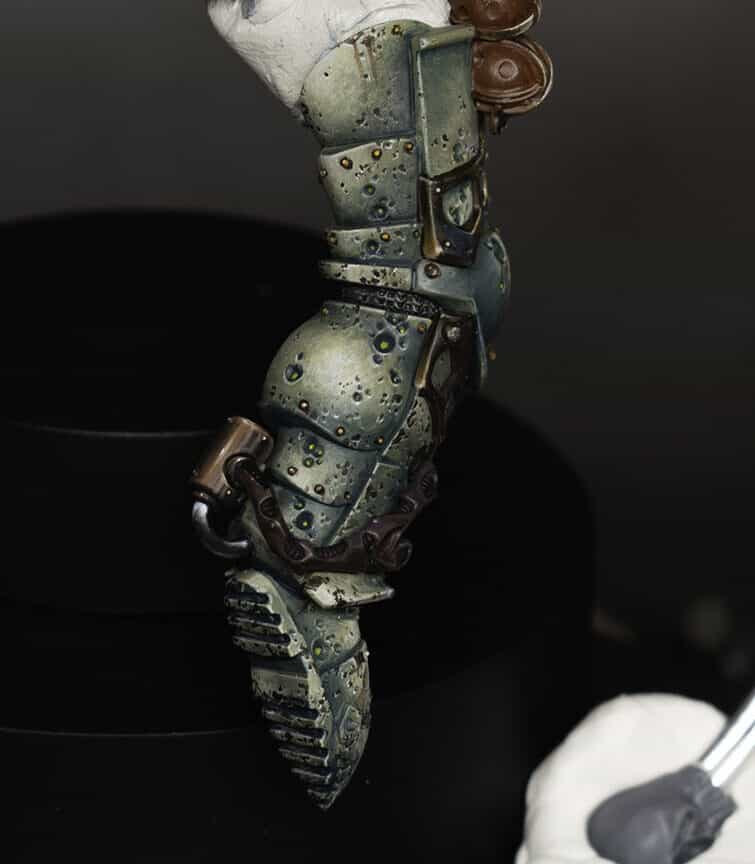
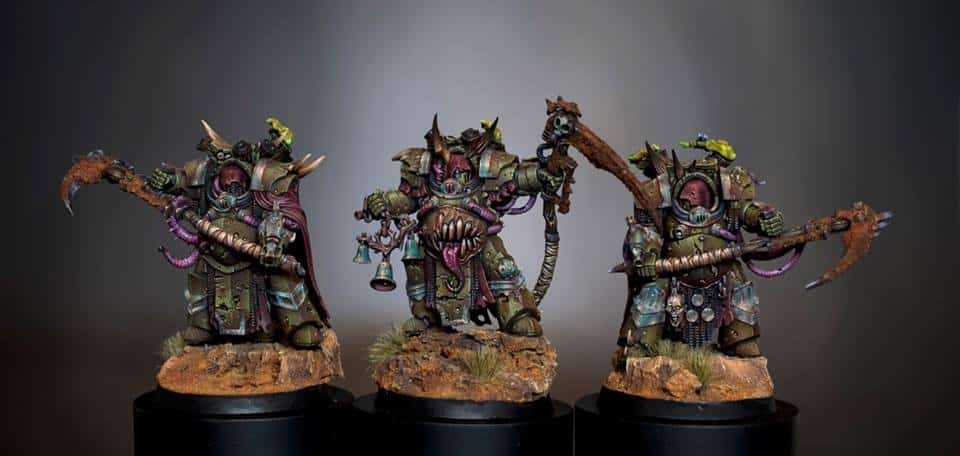
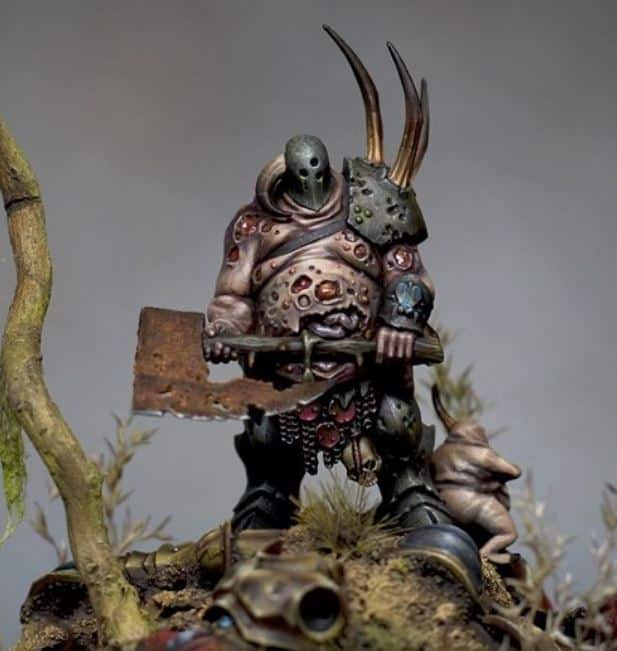
How to Paint a Great Unclean One

Learn how to paint a Great Unclean One in this selection of videos, with tips on his hood, skin, belly mouth, staff, horns and friendly little nurgling! My apologies for quality, this was one of my very first sets of video tutorials, way back in 2018!

Scroll down to explore these in order, or use the contents below to jump quickly to a section of the model or technique.


Video: Great Unclean One Hood

The process of painting the black hood of a Great Unclean One, focusing on achieving a textured, worn look that stands out on a larger model.

This video tutorial is currently hidden. To unlock it and watch, please join the website and log in.

Materials Needed

  • A fine detail paintbrush, preferably a standard size over a miniature brush for better control.
  • Black primer (P3 or Games Workshop Black recommended).
  • Paints: Skavenblight Dinge, Celestra Grey (Games Workshop); Ice Yellow (Vallejo); Black Leather (Scale 75); Mournfang Brown (Games Workshop).
  • Water for thinning paints and creating glazes.
  • A palette for mixing paints.

Step-by-Step Guide to the Great Unclean One Hood

Step 1: Priming

Ensure your model is primed in black. This serves as the base colour and will help in creating deep shadows under the subsequent layers.

Step 2: Base Colour Application

Apply Black Leather from Scale 75 over the hood, leaving some of the black primer visible in the deepest recesses. This step is done roughly to start building the texture we desire. The black primer peeking through will add natural shadows to the texture.

Step 3: Creating and Applying the Mid-Tone

Mix Skavenblight Dinge and Ice Yellow (Vallejo) to create a warm, mid-grey tone. Without cleaning your brush from the Black Leather application, apply this mix over the hood. The residual Black Leather on the brush will mix with your mid-tone directly on the model, enhancing the textured effect. This mix should be applied more liberally on the areas that would naturally catch more light, such as the top and folds of the hood.

Step 4: Detailing and Texture Enhancement

Using the mid-tone mix, start adding more defined textures and highlights. Focus on the edges and any raised details to make them stand out. This includes the edges of tears and holes in the hood. Apply your paint with deliberate, rough strokes to mimic the look of worn leather. The paint should be thicker to avoid smoothing out the texture.

Step 5: Final Highlights

Use Celestra Grey to apply the final highlights. Focus on the very edges and peaks where light would hit the strongest. Remember, this paint has a matte finish, which contrasts nicely with the previously applied colours, adding to the worn fabric effect.

Step 6: Glazing for Depth

Create a glaze with Mournfang Brown and a touch of black (either P3 or Games Workshop). Thin these paints down significantly with water on a separate palette. Apply this glaze sparingly to the shadows and recesses to add depth and enhance the dirty, worn look. The glaze will subtly tint the underlying colours, marrying them together while adding a slight sheen in places to mimic the varied textures of aged fabric.

Step 7: Touch-ups and Final Adjustments

After glazing, you may find some highlights have dulled. Reapply Celestra Grey sparingly to the most prominent edges and details to bring back the contrast. This step should make sure you maintain the balance between detailed texture and the overall worn look of the hood.

Video: Great Unclean One Belly Mouth

This video tutorial is currently hidden. To unlock it and watch, please join the website and log in.

Materials Required:

  • Fine detail paintbrushes
  • Palette for mixing paints
  • Water for thinning paints
  • Base colour: Warboss Green (Games Workshop)
  • Additional Colours: Rhinox Hide, Mournfang Brown, Balor Brown (Games Workshop), Ice Yellow (Vallejo), Morrow White (P3 or any white paint from Games Workshop will suffice), Elysian Green, Evil Sunz Scarlet (Games Workshop)
  • Technical paint: Blood for the Blood God (Games Workshop)

Step-by-Step Guide to the Belly Mouth

Step 1: Base Colouring

  1. Initial Base Coat: Start with a base coat of Warboss Green mixed with a touch of Rhinox Hide to slightly darken the green. This mix provides a solid foundation for the gum area and a natural shadow effect for the recesses between the teeth.

Step 2: Painting the Teeth

  1. Initial Layer: Use Balor Brown for the teeth’s base layer, setting a warm undertone for later layers.
  2. Highlighting: Apply Ice Yellow over Balor Brown, leaving a small margin near the gums to create a transition from the darker base to a lighter tip.
  3. Final Highlights: Add Morrow White to the very tips of the teeth, enhancing their sharpness and giving them a polished appearance. Make sure this white layer is applied thinly and only at the tips.

Step 3: Shading and Texturing the Gums

  1. Shading: Use Rhinox Hide to shade around the teeth and gum line, deepening the recesses and adding depth.
  2. Adding Texture: Reapply Warboss Green to restore vibrancy to the gums, followed by Elysian Green for highlights. These steps add texture and variation.
  3. Refining Details: With Ice Yellow, highlight the most prominent areas of the gums, aligning these highlights with the light source and the highlights on the teeth.

Step 4: Glazing for Colour Depth

  1. Preparing Glazes: Create glazes from Mournfang Brown and Rhinox Hide by significantly thinning these paints. Apply these glazes over teeth and gums to unify the colours, soften transitions, and add natural depth.
  2. Red Glazing: Thin Evil Sunz Scarlet to a glaze consistency and apply over the gum area, introducing a hint of irritation. This also sets the stage for applying Blood for the Blood God.

Step 5: Applying Blood for the Blood God

  1. Applying Gore: Strategically apply Blood for the Blood God around the gum line and on select areas of the teeth to simulate fresh blood and gore, enhancing the grotesqueness with a glossy finish.
  2. Manipulating the Blood: Use the brush to create realistic drips or pools, focusing on how blood might naturally accumulate in the creature’s mouth.

Final Touches

  • Adjustments: After the Blood for the Blood God has dried, revisit any areas that may require adjustments or additional highlights to ensure they stand out against the glossy blood effect.

Video: Great Unclean One Skin

We’ll use a mix of Games Workshop paints to layer, blend, and detail the skin to give it a lifelike, diseased appearance.

This video tutorial is currently hidden. To unlock it and watch, please join the website and log in.

Paints Needed:

  • Paints (Games Workshop): Cadian Fleshtone, Kislev Flesh, Ushabti Bone, Rhinox Hide, Mournfang Brown, Skavenblight Dinge, Moot Green, Pallid Wych Flesh.

Step-by-Step Guide to the Skin

Base Colouring and Initial Blending:

  1. Base Coat: Start with a base coat of Cadian Fleshtone applied over a grey primer. This doesn’t require precision; just ensure complete coverage.
  2. Rhinox Hide: Apply a quick airbrush (or brush) layer of Rhinox Hide to introduce shadows. This is optional but provides a good base for further detailing.
  3. Mixing on the Model: Begin blending Rhinox Hide directly on the model into the Cadian Fleshtone. This method is quick and doesn’t require perfect smoothness, as further texture work will cover imperfections. Use a thicker consistency for better blending.
  4. Light and Shadow: Focus on creating light at the top and shadows at the bottom of curves and crevices. Blend by alternating between Cadian Fleshtone and Rhinox Hide, directly mixing on the model for a rough transition.

Refinement and Detailing:

  1. Refining with Kislev Flesh: With the skin’s base layers blended, use Kislev Flesh to start highlighting. Focus on raised areas and parts that would catch the light. This stage involves more precise brushwork to enhance the model’s details.
  2. Ushabti Bone for Highlights: For the highest points and most prominent details, apply Ushabti Bone. This step brings out the texture and gives the skin a more dimensional look.
  3. Glazing for Depth: Create glazes with Skavenblight Dinge and Mournfang Brown. Apply these very thinly over the skin to unify the tones, add warmth, and enhance the transitions between colours.

Adding Texture with Dots:

  1. Dotting Technique: Use a mix of the flesh tones (Cadian Fleshtone for darker areas, Kislev Flesh for mid-tones, and Ushabti Bone for light areas) to dot the skin, creating texture. Vary the size of the dots based on the area you’re working on, keeping them random to avoid patterns.
  2. Applying Glazes Over Dots: Use Moot Green to glaze over the dotted areas, focusing on the recesses but avoiding the highest lights. This introduces a sickly green hue indicative of Nurgle’s influence.
  3. Final Glazes: Reapply glazes of Mournfang Brown to reintroduce warmth and further blend the skin tones, ensuring a cohesive and natural look.

Finishing Touches:

  1. Highlighting with Pallid Wych Flesh: Finally, use Pallid Wych Flesh to add fine highlights to the very tips and edges of the most raised details, enhancing the texture and depth of the skin.
  2. Final Adjustments: Assess the model and make any necessary adjustments to ensure a smooth gradient and natural look across all skin areas.

Video: Great Unclean One Horns

This video tutorial is currently hidden. To unlock it and watch, please join the website and log in.

Materials:

  • Vallejo Model Color Black
  • Vallejo Ivory
  • Mournfang Brown (Games Workshop)
  • Balor Brown (Games Workshop)
  • Iyanden Yellow (Alternative to P3’s Iosen Green for glazing)
  • Abaddon Black (Games Workshop, alternative to Coat d’Arms Black)
  • Fine detail brushes
  • A wet palette
  • Water for thinning paints

Step-by-Step Guide to the Horns

Base Coating and Initial Blending:

  1. Base Coat: Start by applying Vallejo Model Color Black directly onto the horns over a grey primer base. Ensure full coverage for a solid foundation.
  2. Creating a Transition: On your wet palette, mix Vallejo Model Color Black with Mournfang Brown to create a transition shade. Also, prepare a mix of Balor Brown and Vallejo Ivory for a lighter transition. You’ll use these mixes to create a gradient along the horns, starting from the darkest at the base to lighter towards the tips.
  3. Applying the Transitions: Begin with the black, blending into the Mournfang Brown mix, and proceed towards the tip with Balor Brown and the Balor Brown-Ivory mix. Use a large brush for quick, broad strokes, blending directly on the model for efficient coverage. The goal is a smooth gradient from dark to light without distinct lines.

Refining the Gradient:

  1. Mournfang Brown Detailing: Revisit with Mournfang Brown to accentuate the ridges and details of the horns, enhancing the transition effect. Apply it in a way that leaves some of the base gradient visible beneath, contributing to the depth of the horns’ texture.
  2. Balor Brown Highlights: Next, apply Balor Brown to continue defining the ridges, focusing on the midsections of the horns to reinforce the gradient transition.
  3. Ivory Highlights: Finish the base gradient by applying Vallejo Ivory at the tips and highest points of the horns. This step brings a sharp contrast to the horns, setting the stage for the unique green tint to be applied later.

Adding the Green Tint:

  1. Iyanden Yellow Glaze Preparation: Mix Iyanden Yellow (as a substitute for Iosen Green) with water on your palette to a very thin, glaze-like consistency. This mix will be applied over the horns to give them a subtle green tint, enhancing the overall theme of the miniature.
  2. Applying the Glaze: Use a flat, wide brush to apply the glaze along the entire length of the horns, starting from the base where it’s darkest, up to where the ivory begins. Allow each layer to dry before applying the next to build up the green tint gradually without obscuring the underlying gradient.
  3. Deepening Shadows with Abaddon Black: Finally, mix a thin glaze of Abaddon Black and apply it selectively towards the base and lower sections of the horns. This step reintroduces depth and shadow lost during the glazing process, ensuring the horns maintain their dimensional appearance.

Final Touches:

  1. Detailing and Corrections: Go back with your lighter colours (Balor Brown-Ivory mix and pure Ivory) to reinforce highlights or correct any overspill from the glazing process. This step ensures sharpness and clarity in the horns’ details.
  2. Assessment and Adjustment: Evaluate the overall effect, making adjustments as necessary to ensure a smooth transition between all colours and a satisfactory green tint.
  3. Protective Coating: Once completely dry and you’re satisfied with the results, consider applying a matte varnish to protect your work and reduce any unwanted glossiness from the glazing process.

Video: Great Unclean One (Rotigus) Staff

The goal is to achieve a vibrant, multi-hued effect that transitions from dark at the base to light and colourful at the top.

This video tutorial is currently hidden. To unlock it and watch, please join the website and log in.

Materials Needed:

  • Vallejo Model Colour Black (or Games Workshop’s Abaddon Black as an alternative)
  • Games Workshop’s Rhinox Hide, Ceramite White, Cadian Fleshtone, Balor Brown, Moot Green, Ushabti Bone, Lothern Blue, Mournfang Brown
  • P3’s Iosen Green (or an equivalent green from GW for similar effect)
  • Fine detail brushes
  • A wet palette

Step-by-Step Guide to the Staff

Base Coating

  1. Priming and Base Coat: Begin with a light grey primer across the entire model for uniformity, though a black primer may work better for darker elements like the staff. Apply Rhinox Hide as the base coat on the staff.

Initial Colour Application

  1. Applying Base Colours: Start at the base of the staff with Vallejo Model Colour Black, blending upwards into Rhinox Hide, then to Mournfang Brown. This creates a dark to light gradient, preparing for brighter colours above.

Transition and Blending

  1. Creating the Transition: Without cleaning your brush, dip into subsequent colours to facilitate wet blending directly on the model. Progress through the colours: Mournfang Brown to Fire Dragon Bright, then to Moot Green, followed by a custom blue mix, Ceramite White, and Lothern Blue.
  2. Mixing for Intermediate Shades: Where necessary, mix adjacent colours on your palette to create intermediate shades for smoother transitions.
  3. Application Technique: Apply each colour in segments, blending into the previous colour while wet to ensure a smooth gradient. The aim is for a seamless transition from dark at the base through greens, oranges, and blues, culminating in white at the tip.

Detailing

  1. Highlighting: After the base gradient is complete, use lighter shades of each colour (mixes involving Ceramite White and Ushabti Bone) to highlight raised areas and textures. This step accentuates the staff’s intricate details and enhances the colour gradient’s impact.
  2. Focus on Contrast: Ensure that the top sections, especially around the twisting branches, receive adequate highlights to create a vibrant contrast between the dark base and the colourful top.

Finishing Touches

  1. Additional Details: Address any minor details, such as maggots and ropes on the staff, using base colours like Rhinox Hide and highlighting appropriately to integrate them into the overall colour scheme without disrupting the gradient flow.
  2. Refinement and Adjustment: Revisit any areas requiring further blending or intensified colour saturation. Adjust highlights as necessary to maintain a consistent light source impression across the model.

Conclusion and Protection

  1. Final Assessment: Review the entire piece for uniformity and depth of colour. Ensure that all transitions are smooth and that the highlights appropriately reflect the model’s contours and texture.
  2. Protective Coating: Consider applying a matte varnish to protect the paintwork and reduce any unintended shininess, ensuring the staff’s finish matches Rotigus’ overall appearance.


Video: Great Unclean One Nurgling

This video tutorial is currently hidden. To unlock it and watch, please join the website and log in.

Paints and Materials Used

  1. Games Workshop Paints:
    • Cadian Fleshtone
    • Rhinox Hide
    • Kislev Flesh
    • Ceramite White
    • Yriel Yellow
    • Emperor’s Children
    • Celestra Grey
    • Skavenblight Dinge
    • Lothern Blue
    • Cybarite Green
    • Abaddon Black
    • Mournfang Brown
    • Ushabti Bone
    • Zamesi Desert
    • Agrax Earthshade (for wash)
  2. Scale 75 Paints:
    • Kalahari Orange
    • Mars Orange
  3. Vallejo Paints:
    • Model Colour Black
    • Ice Yellow

Brushes:

  • In the tutorial I mention using a new size 1 brush with a fine point, ideal for both general painting and fine details. A good point for precision work and the brush I was using was an Artist Opus brush!
  • An older, rough brush is used for applying the Scale 75 paints to create a rusty texture on the chain.

Step-by-Step Guide on the Nurgling

Step 1: Base Colours for Skin

  • Begin with a base of Cadian Fleshtone on the skin. Create a palette with three colour mixtures: pure Cadian Fleshtone, a 50/50 mix of Cadian Fleshtone and Rhinox Hide, and a mixture mostly of Rhinox Hide with a small amount of Cadian Fleshtone.

Step 2: Painting Shadows

  • Start with the darkest mixture (mostly Rhinox Hide) to paint creases, dark areas, and shadows. The approach here doesn’t need to be very neat; it’s more about laying down the dark tones.

Step 3: Mid-tone Shading

  • Use the mid-tone mixture for most of the shading. Avoid painting over areas that will be highlighted later, like the chest and middle of the belly.

Step 4: Blending and Refining

  • As you proceed, switch between mixtures for blending, often without washing the brush. This method helps create quick transitions. Focus on darkening areas around the edges where the Nurgling touches Rotigus for shadow effects.

Step 5: Teeth and Boils

  • For the teeth, apply a quick wash of Agrax Earthshade to outline and define them. Then, start refining the shading and blending, particularly with the mid-tone shade.

Step 6: Final Skin Highlights

  • The final skin highlights won’t be Cadian Fleshtone but a brighter colour. However, use Cadian Fleshtone initially to get all shadows in place, creating transitions where the darkest shadows show through beneath lighter layers.

Step 7: Eyes and Pupils

  • Paint the eye with Yriel Yellow for a strong, vibrant colour. Then, use Vallejo Model Colour Black to paint the pupil, ensuring it looks forward and round.

Step 8: Smoke Effect

  • Base the smoke with Lothern Blue, then use Cybarite Green mixed with a little Abaddon Black. Highlight the inner recesses of the smoke with a mixture of Lothern Blue and Ceramite White, getting lighter towards the start of the smoke.

Step 9: Rusty Chain

  • Use Scale 75 Kalahari Orange and Mars Orange for a rusty look. Apply with a rough brush for a patchy appearance. Highlight with Skavenblight Dinge, Celestra Grey, and a touch of Ushabti Bone on the raised edges to mimic worn metal.

Step 10: Copper Smoke Dispenser

  • Paint with Mournfang Brown, highlighting with Cadian Fleshtone mixed with Ice Yellow, focusing on raised edges facing upwards. Use Lothern Blue for the verdigris effect, concentrating on the recesses for a corroded look.

Step 11: Horns and Tentacles

  • Start horns with Mournfang Brown, blending into Abaddon Black towards the tip. Highlight with Skavenblight Dinge and Celestra Grey. For tentacles, use a base of Emperor’s Children mixed with a small amount of Ushabti Bone, adding horizontal lines along each tentacle. Highlight with a brighter mix of Emperor’s Children and Ceramite White, focusing on the central area.

Remember, the key to this process is layering and blending, creating smooth transitions between colours.

More Nurgle Tutorials

Nurgle
How to Paint Grandfather’s Gardeners from Warhammer Underworlds!
Welcome to my guide for painting the leader of the Grandfather’s Gardeners from Warhammer Underworlds. This step-by-step breakdown follows the techniques and colour choices used in the video tutorial, featuring a mix of Games Workshop and AK 3rd Gen paints to achieve a grimy, textured look. Let’s dive into painting this delightfully disgusting Plaguebearer with its iconic honey pot. Video: How to Paint Grandfather’s Gardeners from Warhammer Underworlds Materials and Paints Used Paints This tutorial features a mix of AK 3rd Gen and Games Workshop paints to achieve the grimy, textured look of the Plaguebearer. Here’s the full list: AK 3rd Gen Paints: Very Dark Brown Dark Brown Olive Green Golden Olive Light Brown Golden Brown Old Rose Volcanic Yellow Ice Yellow Anthracite Grey Dark Sea Grey Sky Grey White Black Games Workshop Paints: Rhinox Hide Morghast Bone Materials Brushes: Size 1 brush (recommended: Artis Opus or equivalent) Size 0 and 00 detail brushes for fine work Worn-tip brush for textured application Palette: Wet palette to keep paints workable and blends consistent Additional Tools: Microfiber cloth or kitchen roll for brush wiping Step by Step Guide : How to Paint Grandfather’s Gardeners from Warhammer Underworlds 1. Preparing the Basecoat Mix: Combine AK Very Dark Brown and Olive Green (50/50 mix). This will be your base colour. Apply: Use a larger brush (size 1 recommended) to block in the entire model. Don’t worry about a smooth finish; rough, textured strokes enhance the Nurgle aesthetic. Dry: Let the basecoat dry, observing the natural tonal shift as it lightens slightly. 2. Building Shadows and Depth Darken: Use AK Very Dark Brown straight from the tube, slightly diluted (50/50 paint-to-water ratio). Apply this as a glaze to recesses and shadowed areas, focusing on undercuts and folds in the skin. Blend: Use the initial basecoat mix (Very Dark Brown + Olive Green) to soften transitions where shadows meet midtones. 3. Highlighting the Skin Midtones: Apply Olive Green to raised areas, such as muscles, stretched skin, and prominent ridges. First Highlights: Introduce AK Golden Olive to further brighten raised details. Use sparing, scratchy strokes to maintain a grimy texture. Fine Highlights: Mix Golden Olive with AK Old Rose for subtle pinkish highlights, focusing on high points like the face, chest, and pot edges. 4. Detailing the Honey Basecoat: Use AK Light Brown to cover the honey sections entirely. Apply a couple of thin coats for smooth coverage. Ripples: Sketch ripple effects with AK Golden Brown. Use a small detail brush (size 00) to create irregular, wavy lines. Highlights: Transition with AK Volcanic Yellow and then Ice Yellow for shine spots. Place the highlights on the edges of the ripples and add small white dots for the highest contrast points. Shadows: Glaze with a mix of Light Brown and Dark Brown for shadowed ripples at the edges and underside of the honey. 5. Painting the Pot Basecoat: Start with AK Anthracite Grey for a dark, neutral foundation. Midtones: Layer AK Dark Sea Grey on raised edges and forward-facing surfaces. Highlights: Use Sky Grey to pick out rim details and add subtle scratches for texture. Final Touches: Apply a bounce highlight using the skin base mix (Very Dark Brown + Olive Green) on areas where the pot meets the skin. 6. Tackling the Horn Base Layers: Basecoat with AK Dark Brown, followed by Light Brown for initial highlights. Texture Work: Paint fine parallel lines with AK Morghast Bone, gradually increasing in precision as you build up texture. Final Highlights: Use AK Old Rose sparingly to create sharp highlights on the horn’s edges. 7. Defining the Eye Base Colour: Use AK Golden Brown to block out the eye shape. Iris and Shine: Add a semicircular highlight with AK Ice Yellow, leaving a small white dot for the reflective shine. Adjust: If necessary, glaze with Golden Brown to soften transitions and blend the eye into the surrounding skin. 8. Painting the Tongue Basecoat: Apply AK Dark Brown to the tongue. Highlights: Use a progression of AK Old Rose mixes (Dark Brown + Old Rose, then pure Old Rose) to create a textured, fleshy appearance. Details: Highlight raised areas with fine parallel lines for a natural, organic look. 9. Finishing Details Teeth: Basecoat with AK Golden Brown, followed by subtle highlights using AK Morghast Bone or Ice Yellow. Glaze back with Golden Brown if the teeth appear too bright. Gross Effects: Stipple AK Golden Brown around the mouth to create a “honey breath” effect, blending with Dark Brown for depth. 10. Evaluating and Enhancing Balance: Assess the model for consistency, ensuring focal points (head, honey pot) are brightest and most detailed. Optional Glazes: Use thinned mixes of base colours to smooth transitions and unify tones. Finishing Touches: Revisit any areas needing more contrast or definition, particularly the honey and stretched skin. Pro Tips for Painting the Plaguebearer Embrace the ImperfectionsNurgle models thrive on texture! Don’t stress about smooth, clean layers—rougher, scratchy strokes add to the grimy, decayed aesthetic. This is especially true when working on areas like the skin or pot. Use Paint Thickness to Your Advantage Matte Paints (like AK 3rd Gen) dry with a softer, flatter finish that can enhance gritty textures. Experiment with slightly thicker paint mixes for stronger, sharper transitions, or thin them down into glazes to smooth details. The Magic of Micro GlazingWhen blending highlights or tidying imperfections, create “micro glazes” by diluting your paint heavily (3–5 parts water to 1 part paint). Use these in small, controlled areas to soften transitions without overpainting. Strategic Use of GlazingMatte paints, like the AK range, can dry in ways that look chalky if you’re not careful. Using slightly satin-finish paints like Games Workshop’s range for glazes can smooth transitions and add subtle depth. Plan Ahead with Sub-AssembliesFor tricky areas like the honey pot (where the tongue gets in the way), consider leaving parts unassembled. Keeping the head separate can make detailed work much easier! Highlight Placement Tips Focus your brightest highlights on forward-facing areas to create a natural focal point for the model. Even with complex lighting (like top-left directional light), ensure the key areas facing the viewer remain the most prominent to avoid flattening the model. Texture for DifferentiationUse different painting techniques to differentiate surfaces: Skin: Rough, layered textures. Horn: Thin, fine lines to suggest grain and weathering. Honey: Smooth, glossy finishes with controlled highlights for that viscous, liquid effect. Don’t Fear Colour SubstitutionsIf you don’t have the exact colours listed, use similar ones or mix your own. Many tones in this tutorial (e.g., Golden Olive, Ice Yellow) can be replicated with basic mixes of green, yellow, and white. Bounce Highlights Add RealismAdding a subtle “bounce highlight” where objects interact (e.g., green reflected on the bottom of the pot where it meets the skin) helps tie the model together and creates a cohesive look. Speed vs. Detail Balance If you’re painting for tabletop use, focus detail and brightness on key focal points (head, chest, honey pot). For display models, invest extra time on subtle highlights and shading even in shadowed areas for a more polished look. Fun Nurgle-Specific Tip Remember, this is Nurgle—lean into the gross! Adding playful touches like honey drips on the tongue or even experimenting with small colour variations for boils and lesions can bring a unique, narrative flair to your model. Videos Not Showing? To view any of my paid tutorials, you need to be a member of the website – please click below to log in or join the site. Not sure about joining just yet? Check out my Youtube for all my free tutorials or sign up as a free “friend” member on this site and visit the free videos page! If you’d prefer to support me on Patreon, please visit: https://www.patreon.com/RichardGray [...]
How to Paint a Nurgle Sorcerer – Nurgle Death Guard
A series on how to paint a Nurgle Sorcerer from the Death Guard. It will be painted in preparation for Golden Demon! Quick Jump to: Bellyplate Plaguecaster Head Rotten BellyLeg Armour NMM Bronze Trim Nurgle Ribbons and Text Smoke and Flies How to Paint a Nurgle Sorcerer: Part One – Belly Plate In this video you will learn how to paint the belly plate with texture and corruption. Materials Needed: Nurgle Sorcerer Miniature from the Spaceman Hero Set Brushes: Various sizes, including a size two for broad strokes and size zero zero for details Paints (Games Workshop): Death Guard Green, Balor Brown, Morghast Bone, Ushabti Bone, Screaming Skull, Dark Reaper, Mournfang Brown Paint (P3): Morrow White Step 1: Base Coating Start by applying a base coat of Death Guard Green, thinned with about one and a half parts water to one part paint, using a size two brush for a smooth, thin layer. Add warmth to the colour with a layer of Balor Brown, applying it in a similar manner to maintain texture. Step 2: Building Texture Gradually build up the texture using Morghast Bone. Focus on creating a stippling effect, allowing the green to show through. This creates a transition and adds depth to the plate. Continue to refine the texture, making the marks finer as you move towards the front of the belly plate, where the light would be strongest. Step 3: Shadow and Highlight Paint a distinct line of Dark Reaper down the middle of the belly plate, creating a shadow effect. This divides the plate visually, with a lighter left side and a darker right side. Progressively lighten the left side of the belly plate, moving up through Ushabti Bone to Screaming Skull, and finally to Morrow White for the brightest highlights. Step 4: Detailing and Corruption Using Dark Reaper, begin to add corruption effects. Look for shapes in the texture and expand them into blob-like, corrupt markings. Over these Dark Reaper blobs, lightly stipple with Morghast Bone to create a sense of corruption protruding from the armour. For areas that require softer transitions or less intensity, mix Death Guard Green with Morghast Bone for a subtler effect. Step 5: Refinement and Contrast Continuously refine the texture and highlights, ensuring the lightest points are at the front of the belly plate. Add Mephiston Red, thinned heavily, around the edges of the belly plate for a corrupted, wound-like appearance. Blend this in carefully to maintain the integrity of the armour texture. Step 6: Final Touches Add finishing touches, such as more precise highlights using Morrow White, especially along the top edges and where the light would naturally be strongest. Adjust the texture and shading as needed to create a balanced, cohesive look that conveys both corruption and the Nurgle aesthetic. How to Paint a Nurgle Sorcerer: Part Two – NMM Bronze Trim with Verdigris The video focuses on the bronze NMM trim and verdigris weathering. Materials Needed: Paints: Games Workshop: Mournfang Brown, Rhinox Hide, XV-88, Balor Brown, Sotek Green, Sybarite Green Vallejo: Ice Yellow P3: Morrow White Brushes: Fine detail brushes (sizes 00 and 2 recommended) Steps: 1. Base Layer Paint: Mournfang Brown Application: Apply a base layer of Mournfang Brown over the areas you want to paint the bronze trim. This layer doesn’t have to be perfectly even; it serves as a foundation. 2. First Highlights Paint: XV-88 Application: Start applying XV-88 to highlight the raised areas. These highlights should be broad at this stage, as we’ll refine them later. 3. Second Highlights Paint: Balor Brown Application: Now, apply Balor Brown to enhance the highlights. Focus on the top edges and areas where light naturally hits. 4. Mixed Highlights Paint: Mix of Balor Brown and Ice Yellow Application: Mix Balor Brown with a small amount of Ice Yellow to create a lighter shade. Apply this to the highest points of the highlighted areas for a more intense shine. 5. Brightest Highlights Paint: P3 Morrow White Application: Using Morrow White, apply the brightest highlights. These should be on the most raised edges where the light would be strongest. 6. Shading Paints: Mournfang Brown, Rhinox Hide Application: Use Mournfang Brown and Rhinox Hide to add shadows and depth. Focus on recessed areas and where the trim meets other parts of the model. 7. Verdigris Effect Base Paint: Mix of Sybarite Green and a tiny bit of Sotek Green Application: Thin this mix with water (approx. 2:1 ratio of water to paint) and apply it selectively in recesses and crevices for a weathered look. 8. Lighter Verdigris Paint: Sybarite Green mixed with a bit of white Application: Lighten the verdigris effect in some areas for variation. Remember, less is more – don’t cover all the verdigris base layer. 9. Final Adjustments Technique: Glazing and Smoothing Application: If necessary, use a glazing technique with the lighter colours to smooth out transitions and add final touches to the highlights. 10. Clean Up Action: Tidy any overspill or mistakes with appropriate base colours. Tips: Consistency: Keep your paint at the right consistency. For NMM, a slightly thicker mix is preferred for stronger colours, but ensure it’s still flowable. Lighting: Pay attention to the overall lighting of your model. Highlights should be consistent with the light source. Brush Care: Be mindful of your brushes. Use a separate brush for mixing paints to preserve the tips of your detail brushes. Patience: Take your time with each step, and let layers dry before applying the next. How to Paint a Nurgle Sorcerer: Part Three – Plaguecaster Head How to paint the head, which includes the red hood and chain mask. Materials Needed: Paints: Games Workshop: Khorne Red, Mephiston Red, Bugman’s Glow, Mournfang Brown, Trollslayer Orange, Sotek Green Vallejo: Black P3: Morrow White Brushes: Size 00 and 2 Artist Opus Brushes Palette: For mixing and diluting paints Water pot Steps: 1. Base Colour for the Hood Paint: Mix of Khorne Red and Black Application: Apply a base layer of this mix to the hood. Ensure no pure Khorne Red is used; the mix should always include black to desaturate the colour. 2. Adding Highlights Paints: Various mixes of Khorne Red with Black and White Application: Create a gradient of shades by mixing Khorne Red with varying amounts of Black and White. Use these mixes to highlight the hood, focusing on the raised areas and textures. 3. Texturing the Hood Technique: Texture Painting Application: With a size 00 brush, apply textures using the lighter shades. Focus on creating a worn and weathered look. Balance the textures; don’t overdo them. 4. Chain Mask Detailing Paint: Neutral Grey and White Application: Start with Neutral Grey to pick out the chain links. Progressively add White to the mix for highlighting, focusing on the lower edges and curves of each chain link. 5. Glazing the Hood Paint: Mephiston Red Application: Dilute Mephiston Red significantly (approx. 4:1 water to paint ratio). Use this glaze to unify the hood’s colour, applying it more in the shadows and less on the highlights. 6. Skin Tones Paint: Bugman’s Glow with Black and Grey Application: For the skin, start with Bugman’s Glow mixed with Black and Grey to desaturate. Add White for highlights, focusing on chin, lips, and facial details. 7. Worm and Pustules Paint: Sotek Green, Mournfang Brown, Trollslayer Orange, Ice Yellow Application: Paint the worm coming out of the head in Sotek Green. For pustules, use Mournfang Brown for the base, add Trollslayer Orange for mid-tones, and highlight with Ice Yellow. 8. Final Adjustments Action: Make any necessary tweaks to ensure all elements are coherent and well-blended. Tips: Dilution is Key: Ensure paints are correctly diluted, especially lighter colours, to avoid a chalky texture. Layering: Build up the highlights gradually, allowing each layer to dry before applying the next. Focus on Details: Spend time on the head as it’s a focal point, especially for a competition piece like Golden Demon. Brush Care: Use newer, sharper brushes for fine details and textures, saving older brushes for broader strokes and glazing. How to Paint a Nurgle Sorcerer: Part Four – Nurgle Ribbons and Text Materials Needed: Paints: Games Workshop: XV-88, Morghast Bone, Screaming Skull, Mephiston Red, Rhinox Hide Vallejo: Neutral Grey Kimera Colours: Black Brushes: Size 00 and 3 S (Standard) and M (Miniature) Brushes Palette: For mixing paints Water pot Steps: 1. Base Layer Paint: XV-88 Application: Start by applying XV-88 as a base layer on the ribbons. Use a size 3 S brush for quick coverage, being careful not to touch the paint while it’s wet to avoid patchiness. 2. Adding Depth Paint: Morghast Bone Application: Apply Morghast Bone, focusing on the upward-facing curves and leaving recesses and downward-facing sections in the darker base colour. This step starts to bring out the ribbon’s flow and texture. 3. Highlighting Paint: Screaming Skull Application: Now switch to a size 00 brush and use Screaming Skull to pick out the raised details and edges. This lighter colour enhances the texture and gives the ribbons more dimension. 4. Freehand Detailing Paint: Mephiston Red Application: Using the size 00 brush, add Nurgle symbols and letters as freehand details. These should be evenly spaced and varied in size for a more natural look. Remember, these don’t need to be perfect as they’re meant to mimic hand-drawn symbols. 5. Text Simulation Paint: Mephiston Red Application: Create a text effect using small dots and dashes with Mephiston Red. This simulates handwriting and adds intricate detail to the ribbons. Aim for varied mark-making to avoid a repetitive pattern. 6. Weathering and Shading Paint: Neutral Grey and Rhinox Hide Application: Thin down Neutral Grey and Rhinox Hide for glazing. Apply Neutral Grey to shadows and Rhinox Hide to recesses and edges for a dirty, weathered look. 7. Final Touches Paint: Black (Kimera Colours) Application: Finally, use thinned black paint to refine the freehand details and text. This step enhances contrast and makes the red details stand out more effectively against the ribbon’s base colour. Tips: Consistency: Ensure the right consistency of paint for detailed work, especially for the text. It should flow easily but not be too runny. Brush Angle: Adjust the brush angle according to the ribbon’s curvature to maintain consistent pressure and mark size. Layering: Build up colours gradually, allowing layers to dry before applying the next. Freehand Techniques: Practice freehand techniques separately before applying them to the model to gain confidence. Detail Focus: Concentrate on the details but remember the overall look. Imperfections can add character, especially for Nurgle-themed models. How to Paint a Nurgle Sorcerer: Part Five – Rotten Belly and Maggots Materials Needed: Paints: Games Workshop: Bugman’s Glow, Khorne Red, Balor Brown, Morghast Bone, Screaming Skull Vallejo: Ice Yellow, Neutral Grey Brushes: Sizes 0 and 3 S (Standard) and M (Miniature) Brushes Palette: For mixing paints Water pot Steps: 1. Base Layer for Rotten Belly Paint: Bugman’s Glow mixed with Neutral Grey Technique: Apply this mix to the fleshy areas, avoiding the maggots. This creates an ill-looking skin tone. Initially, use a larger brush, then switch to a size 0 for more detailed work. 2. Adding Depth Paint: Khorne Red (watered down) Technique: Apply in the recesses to create a shaded effect and to separate the skin from the armor. This stage is about defining the texture and contours of the belly. 3. Flesh Highlights Paint: Same base mix (Bugman’s Glow and Neutral Grey) with added Ice Yellow Technique: Highlight the raised areas and ridges of the flesh, focusing on light sourcing. The addition of Ice Yellow gives a sickly hue, enhancing the rotten look. 4. Painting the Maggots Paint: Khorne Red Technique: Paint each maggot, ensuring the red is in the recesses but not covering the entire maggot. Aim for precision to keep the maggots distinct from the skin. 5. Highlighting Maggots Stage 1: Balor Brown for the first highlight, focusing on the segments but avoiding recesses. Stage 2: Morghast Bone for the second highlight, applied more selectively. Final Highlight: Screaming Skull, targeting the most raised segments for a final pop of brightness. 6. Final Touches Paint: Watered-down Khorne Red Technique: Apply as a light wash/glaze to add a gory effect, enhancing the realism of the maggots burrowing in and out of the flesh. Tips: Consistency and Dilution: Adjust paint dilution based on the step. More watered-down paint is suitable for shading and glazing. Light Source Alignment: Ensure highlights align with the light source established in other parts of the model. Texture Focus: Pay attention to the texture of the flesh and maggots, using the paint to enhance the model’s sculpted details. Clean Up: If you overstep with the paint, go back with the original colour to tidy up any mistakes. Layering: Build up the colour gradually, allowing layers to dry before applying the next. Detail Work: Smaller brushes are crucial for the intricate detailing required, especially on the maggots. How to Paint a Nurgle Sorcerer: Part Six – Smoke and Flies Materials Needed: Paints: Pro Acryl: Grey Blue, Pale Yellow (Alternatively, opt for Games Workshop’s Sotek Green and Ice Yellow) Games Workshop: Sotek Green, Daemonette Hide, Khorne Red, Balor Brown, Morghast Bone, Screaming Skull Vallejo: Black (or Kimera Colours: Black) P3: Morrow White Brushes: Assorted sizes for varied details Palette: For mixing paints Water pot Steps: 1. Smoke Effect Paints: Grey Blue, Pale Yellow (or Sotek Green and Ice Yellow) Technique: Start with Grey Blue, blending into the smoke areas. Gradually introduce Pale Yellow (or Ice Yellow) to lighten and add variation. Employ greys for shadowy areas. 2. Refining the Smoke Technique: Concentrate on the creases and fine details. Use stippling to introduce texture, imitating particles and spores. Emphasise raised areas and curves with highlights. Apply glazes to soften and blend stippling for a natural look. (Note – I messed up the smoke in this video, I will be revisiting it!) 3. Maggots Base Colour: Khorne Red Highlight: Balor Brown for segments. Technique: Apply red judiciously, avoiding recesses. Use Balor Brown highlights on segments to create dimension. 4. Flies Base Colour: A blend of Chimera Black and Ice Yellow for a dark grey. Highlight: Incrementally add more Ice Yellow for highlights. Focus on wing edges and eyes for detail. Final Touches: Add tiny dots of Ice Yellow for highlights to enhance the glossy appearance. 5. Additional Details Technique: Employ various mixes of Daemonette Hide and Ice Yellow for wing highlights. For the flies, focus on segmenting and crafting a realistic, shiny texture. Eggs: Paint with Balor Brown, then add a dot and line of Screaming Skull for luminosity. Tips: Layering: Build up the smoke colour progressively, allowing layers to dry before adding the next. Texture Emphasis: Pay close attention to the texture in the smoke, using stippling to add depth and a lifelike appearance. Light Source Consistency: Ensure highlights on maggots and flies align with the light source established in other parts of the model. Detailing: Utilise smaller brushes for intricate work, especially on the flies and maggots. Glazing: Use glazing techniques to blend and soften the stippled texture on the smoke. How to Paint a Nurgle Sorceror: Part Seven – Leg Armour In this tutorial, I’ll be continuing to paint the Malignant Plaguecaster model, specifically focusing on the lower left leg, the trim, and the Nurgle symbol. Materials Needed Paints: Games Workshop: Death Guard Green Balor Brown Morghast Bone Ushabti Bone Screaming Skull Dark Reaper Mournfang Brown XV-88 Sotek Green Sybarite Green Vallejo: Ice Yellow P3: Morrow White Brushes: Size 0 Artist Opus brush (or similar fine detail brush) Step-by-Step Instructions 1. Base Coat with Death Guard Green Preparation: Place a small amount of Death Guard Green on your wet palette. Application: Use the size 0 brush to apply Death Guard Green over the lower leg armour. This layer doesn’t need to be overly neat as we are aiming for a textured, organic look. 2. Adding Texture with Balor Brown and Dark Reaper Balor Brown: Add Balor Brown to the palette. Using the tip of the brush, apply Balor Brown in random, scratchy strokes to create a textured effect on the armour. Dark Reaper: Similarly, place Dark Reaper on the palette. Use it to paint roughly circular shapes to represent the Nurgle corruption. These shapes should vary in size and be applied in a random pattern. 3. Highlighting with Morghast Bone and Ushabti Bone Morghast Bone: Add Morghast Bone to the palette. Highlight the raised areas of the armour, focusing on the upper parts of the Nurgle bumps to create a slight 3D effect. Ushabti Bone: Mix Ushabti Bone with some white if needed for a brighter highlight. Apply this mix to the very tops of the bumps and the most prominent edges to accentuate the texture. 4. Glazing for Smooth Transitions Balor Brown Glaze: Thin Balor Brown with water (approximately 50/50 ratio) to create a glaze. Apply this glaze over the textured areas to blend the colours and soften the transitions. Dark Reaper Glaze: Thin Dark Reaper similarly and use it to add depth to the shadowed areas, particularly around the lower part of the leg. 5. Detailing the Nurgle Symbol Mournfang Brown Base: Base coat the Nurgle symbol and trim with Mournfang Brown. Highlight with XV-88 and Ice Yellow: Gradually highlight the trim by mixing XV-88 into Mournfang Brown, followed by Balor Brown, and finally adding Ice Yellow for the brightest highlights. Focus on creating sharp, bright edges to simulate a non-metallic metal (NMM) effect. 6. Applying Verdigris Effect Base with Sybarite Green: Mix Sybarite Green with a touch of Sotek Green and apply it to the areas where you want the verdigris effect. Highlight with Sotek Green and White: Gradually lighten the Sybarite Green mix with white to create layers of verdigris. Focus on the lower parts of the trim and the areas where water would naturally collect and cause corrosion. 7. Refining and Finishing Touches Final Glazes and Highlights: Use thin glazes of Ushabti Bone and Morghast Bone to refine the highlights and ensure smooth transitions. Final Details: Add any additional details like rust streaks or further texturing as needed. Use very fine lines and dots to simulate wear and tear. More Nurgle Videos… If you don’t have an account, please sign up here! The website currently has over 350 video tutorials with steps and tips plus a selection of detailed PDFs. If you are not sure about joining, you can explore my free videos with a free membership, or take the plunge and become a full subscriber for full access. If you’d prefer to support me on Patreon, please visit: https://www.patreon.com/RichardGray [...]
How to Paint Harbinger of Decay – Face, Beard, Felt Hood, Horns!
This is the first in a series looking at how to paint the Harbinger of Decay model that Games Workshop sent me. This will be my main Golden Demon entry for Adepticon! In this video I look at how to paint his face, beard, horns and felt hood. Video Tutorial – Harbinger of Decay – Face, Beard, Felt Hood, Horns The following paints were used: on the Harbinger of Decay: Games Workshop: Skavenblight Dinge, Bugman’s Glow, Cadian Fleshtone, Mournfang Brown, Deathworld Forest, Death Corps Drab, Morghast Bone, Ushabti Bone, Screaming Skull, Rhinox Hide,P3: Morrow White Step-by-Step Guide Step 1: Preparing the Harbinger of Decay Head The head is modified using a combination of existing models, with details like the beard sculpted on. The horns are simplified by removing excess details. Step 2: Base Coating Start with Deathworld Forest for the beard, applying it thinly. For the face, mix Bugman’s Glow with Skavenblight Dinge. Use Death Corps Drab for the base color of the hood. Step 3: Refining the Face Apply highlights to the face using Cadian Fleshtone mixed with white, focusing on raised areas. Adjust the nose and eyebrow areas for natural shading. Consider adding green irises for a more demonic look. Step 4: Detailing the Beard Lighten Deathworld Forest with white (or Morghast Bone) and apply to the Harbinger of Decay beard in layers. Enhance the beard texture with thin lines, gradually lightening the colour towards white. Glaze with a mixture of Deathworld Forest and white to add depth and maintain a hint of green. Step 5: The Hood Apply textured highlights to the hood using a mixture of Death Corps Drab and white, building up towards pure white. Ensure the front section near the forehead is the lightest to draw focus to the face. Step 6: Painting the Horns Begin with a mix of Death Corps Drab and white. Add successive layers of Deathworld Forest mixed with Morghast Bone, then Morghast Bone on its own, and finally Screaming Skull for the highest highlights. Glaze the horns with Mournfang Brown, focusing on the tips, and add details with Ushabti Bone. Step 7: Final Touches Refine the horns with Deathworld Forest and Morghast Bone to enhance the green tinge. Add more texture to the hood using very light colours, blending towards white. Continually review and refine the Harbinger of Decay, ensuring harmony in lighting and colour across different parts. Note: The process involves alternating between highlighting and glazing to build up texture and colour depth. Keep the paint thin for stippling and glazing, allowing underlying colours to show through for natural transitions. Explore more of my latest tutorials If you don’t have an account, please sign up here! The website currently has over 350 video tutorials with steps and tips, plus a selection of PDFs. If you are not sure about joining, you can explore my free videos with a free membership, or take the plunge and become a full subscriber for full access. If you’d prefer to support me on Patreon, please visit: https://www.patreon.com/RichardGray [...]
How to Paint a Nurgle Shield with Freehand and Shine
These videos show how to a paint a Nurgle shield with freehand for an Ogroid from the Slaves to Darkness army box.The freehand is if a Nurgle Plaguebearer head and is intended as a potential Golden Demon entry. Scroll down to explore the tutorials and steps in order, or click the below to quick jump to a technique or section. Video One: How to Paint a Nurgle Shield with FreehandPaints and Materials UsedPaintsBrushesOther MaterialsStep-by-Step Guide: PreparationBase PaintingFreehand SketchingRefining and DetailingFinal TouchesImportant NotesVideo Two: How to Paint the Shield Shine and NMM TrimPaints and Materials UsedPaintsBrushesOther MaterialsStep-by-Step GuidePreparing the PalettePainting the ShinePainting the NMM TrimFinal TouchesImportant NotesMore Freehand Tutorials to Explore Video One: How to Paint a Nurgle Shield with Freehand Paints and Materials Used Paints Games Workshop Paints: Rhinox Hide Bugman’s Glow Mournfang Brown Morghast Bone Deathworld Forest Yriel Yellow Khorne Red Ushabti Bone Vallejo Paints: Black Ice Yellow P3 Paint: Morrow White Brushes Artist Opus: Size 00 brushes (both a newer brush for finer details and an older brush for blending) Other Materials Wet Palette: To keep paints moist and workable. Scalpel: For removing details from the shield. Sandpaper: For smoothing the shield after using the scalpel. Primer: Ultimate primer (specifically thinned with X20A for this project). Mixing Water: For thinning paints on the palette. Matte Varnish: To even out the surface and finish of the paint job. Step-by-Step Guide: Preparation Prep the Nurgle Shield with Freehand: Remove intricate details from the shield using a scalpel and sand it slightly. Keep some battle damage for authenticity, if you wish. Prime the Shield: Use Ultimate primer, thinned with X20A, applied in 4-5 thin coats. Base Painting Wet Palette Setup: Prepare a wet palette with the following Games Workshop colours: Ice Yellow, Bugman’s Glow, Rhinox Hide, Mournfang Brown, Morghast Bone, Deathworld Forest, Yriel Yellow, Khorne Red, and Ushabti Bone. Also, have Vallejo Black and P3 Morrow White ready. Mixing Colours: Create various mixes of these colours on the palette, adjusting with water for a thinner consistency (approximately 50/50). Freehand Sketching Initial Sketch: Start sketching the Nurgle face on the shield using Bugman’s Glow. This doesn’t have to be symmetrical or realistic. Adding Details: Gradually add more details like eyes, horns, and facial deformations using the mixed colours. Use Rhinox Hide for shading. Background Technique: Use Vallejo Black as a ‘rubber’ to tweak and correct the sketch as needed. Refining and Detailing Light and Shadow: Use the lighter and darker mixes to create depth, focusing on the facial features. Ensure a balance between highlights and shadows. Adding Texture: Pay attention to the direction of brushstrokes to replicate skin texture and facial creases. Final Touches Metallic Effects: For a Golden Demon entry, ensure to incorporate light volumes and reflective effects on the shield, as well as on the freehand. Glazing: You may need to glaze over the freehand to integrate it with the shield’s overall shine and metallic effect. Varnishing: Finish the shield with a matte varnish to even out different paint finishes. Important Notes Brush Technique: Use the very tip of your brush for detailed work. Switch between an older brush for blending and a newer one for sharp details. Colour Importance: While exact colour mixes are flexible, ensure to maintain the overall desaturated, moody look characteristic of Nurgle. Patience and Layers: Build up the image with multiple thin layers, allowing for smooth transitions and a detailed finish. Personal Style: Remember, this guide is a base. Feel free to adjust and experiment according to your style. Video Two: How to Paint the Shield Shine and NMM Trim Paints and Materials Used Paints Vallejo Paints: Black German Grey Neutral Grey Ice Yellow White Games Workshop Paints: Mournfang Brown Brushes Size 00 Brush: Ideal for detailed work and fine textures. Used for most of the work including the shine and trim. Size 2 Brush: Used for broader strokes and glazing, especially over larger areas. Other Materials Wet Palette: To keep the paints moist and workable. Lamp: For observing how natural light falls on the model, crucial for accurate highlight placement. Blu Tack or Similar Adhesive: To temporarily attach the shield to the model for correct angle assessment. Step-by-Step Guide Preparing the Palette Setup Wet Palette: Prepare a wet palette with Vallejo Black, German Grey, Neutral Grey, Ice Yellow, White, and Games Workshop Mournfang Brown. Create a gradient of grey shades from black to white, mixing in Ice Yellow and White with Neutral Grey for various mid-tones. Painting the Shine Analyzing Light Direction: Position the model under a lamp to observe natural light fall. This will guide the placement of the shine. Initial Highlights: Start with a Neutral Grey or a mix of Neutral Grey and German Grey to block in the primary highlight areas on the shield. Building Up Layers: Gradually increase the brightness of the highlights, focusing on the top left as the primary light source. Remember, the paint will appear brighter when wet and duller when dry. Textured Effect: Use scratchy and stipple brushstrokes with minimal paint for a textured shine effect. Use the very tip of your brush. Bounce Highlight: Add a bounce highlight at the bottom of the shield, reflecting light from the ground. This should be less bright than the primary highlight. Use a watered-down Mournfang Brown for a glaze over this area. Painting the NMM Trim Blocking in Highlights: Use Neutral Grey to block in primary highlights on the trim, focusing on the top area. Adding Variation: Create a variety of light grey blocks along the trim, ensuring they get darker and more spaced out as they move away from the top highlight. Refining Highlights: Gradually add lighter tones, culminating in white for the brightest parts. Ensure these highlights align with the shield’s central highlight. Detailing Scratches: Use white to pick out tiny dots on sculpted scratches for added realism and depth. Bounce Highlight on Trim: Similar to the shield, add a less intense bounce highlight at the bottom of the trim. Final Touches Glazing: Apply a thin glaze of Mournfang Brown over certain areas for colour integration and smooth transitions. Detail Checks: Make any necessary adjustments to neaten the highlights and ensure consistency in lighting and texture across the shield and trim. Important Notes Consistency and Control: Maintain a good balance in paint consistency – not too thick for opaque marks and not too watery to avoid spreading. Brush Technique: Always pull the brush towards yourself for control and precision, especially important when working near the freehand area. Learning and Experimentation: Remember, this technique is both challenging and rewarding. Don’t be afraid to experiment and learn from the process. These guides should provide a clear roadmap to achieving a high-standard finish for your freehand on shields, suitable for display or competition. Remember, practice and patience are key to mastering these techniques and don’t be afraid to do your own thing and add your own personal touch or style to your freehand! More Freehand Tutorials to Explore If you don’t have an account, please sign up here! The website currently has over 350 video tutorials with steps and tips, plus a selection of PDFs. If you are not sure about joining, you can explore my free videos with a free membership, or take the plunge and become a full subscriber for full access. If you’d prefer to support me on Patreon, please visit: https://www.patreon.com/RichardGray [...]
How to Paint a Warcry Bloated One – Rotmire Creed Warband (Heart of Ghur)
This video shows how to paint the Warcry Bloated One from the Rotmire Creed warband from the new Warcry box that Games Workshop sent me.The Rotmire Creed, a cabal of swamp-dwelling devotees of Chaos, employ pestilence as their primary means of warfare, unleashing devastating plagues upon their adversaries. Among their ranks, the Bloated Ones stand as grotesque testaments to the Creed’s dark practices. These individuals, having been subjected to the Witherlords’ most vile potions without succumbing to death, have become swollen vessels of contagion, their bodies grotesquely expanded and their movements hindered by their unnaturally engorged limbs. Revered by their brethren as harbingers of immortality—a belief bolstered by the bizarre mutations that emerge from their putrid flesh—Bloated Ones are formidable foes in combat. They wield raker-claws to eviscerate enemies or cast hooked nets to ensnare those who dare flee. Moreover, their bloated bodies serve as deadly weapons; when breached, they expel a corrosive bile that dissolves both metal and bone with terrifying efficiency. Video: How to Paint a Warcry Bloated One All videos are recorded in HD 1080p or higher – use full screen for the full effect and let the video load completely. You can also click the little “cog” and change the speed of the video, if I am going too fast (or slow!). Paints and Materials Games Workshop (Citadel): Deathworld Forest Mournfang Brown Rhinox Hide Balor Brown Hobgrot Hide Bugman’s Glow Morghast Bone Screaming Skull Darkreaper Skeleton Horde (Contrast Paint) Seraphim Sepia (Contrast Paint) Vallejo: Neutral Grey Black P3: Morrow White Brushes Artist Opus Size 2 Brush (for softer, broader highlights and smoother finishes) Artist Opus Size 0 Brush (for detailed work and fine highlighting) A larger brush for base coating (specific size not mentioned, but a general-purpose larger brush will work) Primers Badger Ultimate Primer (Black) Additional Materials Water for thinning paints Wet palette (to keep paints workable longer) Mixing palette (for mixing paints and creating custom shades) Mod Podge (for basing, to create a wet, swampy effect) Grass tufts (for basing, to add texture and detail to the base) Black paint for touch-ups and corrections Step by Step Guide Priming Prime the model black using Badger Ultimate Primer. This will help in creating deep shadows and contrast for the layers to come. Base Coating Apply Deathworld Forest to all cloth areas. Don’t worry about perfect coverage on the first pass; the black undercoat showing through can add depth. Paint the forearm guard and wooden elements with Mournfang Brown. Aim for a base coat that covers well but allows some of the black primer to show through for natural shading. For flesh areas, use Bugman’s Glow. The paint’s consistency should be about 50:50 with water to ensure it spreads evenly without being too thick. Apply Hobgrot Hide to any bamboo-like areas, aiming for even coverage but accepting some transparency for depth. Shading Shade the bamboo using Skeleton Horde (Contrast Paint) to add depth and enhance the texture. Create a wash with Darkreaper for the flesh, thinning it significantly with water. This adds a grey-green hue, contributing to the desaturated look. Apply Seraphim Sepia to wound areas for a sickly effect. Highlighting Begin highlighting the cloth by adding white to Deathworld Forest, creating a lighter shade for the raised areas. Use a size 2 brush for softer, broader highlights. Highlight the wooden and bamboo elements by mixing Mournfang Brown with white, then progressively adding more white for brighter highlights. For flesh highlights, start with Bugman’s Glow mixed with a bit of white, increasing the white for subsequent layers to achieve a gradual, soft transition. Leather straps and bone elements should be highlighted starting with Balor Brown, then Morghast Bone, and finally Screaming Skull for the brightest points. Paint the horns starting with a base of Rhinox Hide, adding layers of Morghast Bone and Screaming Skull towards the base where it meets the hood for a light source effect. Use Rhinox Hide to paint veins and corruption spreading from the wounds. Thinly apply Darkreaper for a subtle, visible texture. Finishing Touches For the gourd, start with Mournfang Brown, gradually adding white for highlights, ensuring a smooth transition. Finalise the model by adding texture and fine details, such as chipping and weathering, to enhance the realism and depth. Basing Base the model using a combination of Deathworld Forest and Rhinox Hide, followed by patches of Skeleton Horde for variation. Finish with tufts of grass and a layer of Mod Podge for a wet, swampy effect. Throughout this process, maintain a consistent light source (top-left in this case) to ensure cohesive shading and highlighting. The goal is to achieve a look that’s both desaturated and detailed, with a focus on creating texture and depth through careful layering and shading. Remember, the key to this desaturated, pastel effect lies in thin layers, patience, and attention to detail. More Nurgle and Rot Tutorials If you don’t have an account, please sign up here! The website currently has over 350 video tutorials with steps and tips, plus a selection of PDFs. If you are not sure about joining, you can explore my free videos with a free membership, or take the plunge and become a full subscriber for full access. If you’d prefer to support me on Patreon, please visit: https://www.patreon.com/RichardGray [...]
How to Paint a Rotbringer Sorcerer
In this tutorial, we’re diving into the wonderfully grim world of Nurgle as we explore how to bring the Rotbringer Sorcerer from Age of Sigmar to life with vivid detail. Whether you’re a seasoned painter or just starting out, this step-by-step guide will equip you with techniques and tips to get going. Video: How to Paint a Rotbringer Sorcerer – Part One: All videos are recorded in HD 1080p or higher – use full screen for the full effect and let the video load completely. You can also click the little “cog” and change the speed of the video, if I am going too fast (or slow!). Video: How to Paint a Rotbringer Sorcerer – Part Two Materials and Paints Primer: Badger’s Ultimate Primer Black Games Workshop Paints: Mephiston Red, Balor Brown, Yriel Yellow, Mournfang Brown, Corvus Black, Bugman’s Glow, Cadian Fleshtone, Morghast Bone, Screaming Skull, Trollslayer Orange, Rhinox Hide, Skeleton Horde Contrast Vallejo Paints: Basalt Grey, Ice Yellow, Neutral Grey, Pale Grey Blue (optional) P3 Paints: Morrow White Step-by-Step Guide to the Rotbringer Sorceror: Preparation and Priming: Fully assemble your Rotbringer Sorcerer and prime it with a black primer. For easier access to intricate areas, consider leaving the arm that holds the scythe detached during priming. Base Coating: Apply base coats using Mournfang Brown for wooden elements and Basalt Grey for the cloak and scythe blade. Bugman’s Glow is ideal for flesh areas. Apply these base coats roughly, aiming for coverage rather than precision. Skin Tones: Enhance skin areas with Bugman’s Glow, providing a rosy, dark flesh tone. Progress with Cadian Fleshtone for highlights, ensuring to thin your paints for a smooth finish. Wood and Metal Detailing: Utilise Balor Brown for initial wood highlights, transitioning to Mournfang Brown for added depth. For metallic areas like the scythe blade, start with Rhinox Hide, building up to Neutral Grey mixed with white for higher highlights. Create rust effects using Trollslayer Orange. Shading: Employ Corvus Black, adequately thinned, to add depth through shading across the model, focusing on recesses and shadowed areas. Detail Enhancement: Use Screaming Skull for edge highlights and detail work on scrolls and similar features. Maintain thin paint layers for refinement. Textures and Freehand Elements: Incorporate freehand elements like Nurgle symbols using Mephiston Red. Apply textures such as rust and wood grain using stippling techniques with Trollslayer Orange for rust and Morghast Bone for wood grain. Verdigris Effect: On copper elements, create a verdigris effect with Sotek Green mixed with white. Apply this judiciously to areas that would naturally show oxidation, steering clear of bright highlights. Candle Flames: Paint candle flames using Yriel Yellow, adding Trollslayer Orange to the tips. Blend these colours for a realistic flame appearance. Model Basing: Prepare a base that complements the model, using a mix of sand, poly filler, and paint it with XV-88, Morghast Bone, and weathering powder. Introduce grass patches for added realism. Final Adjustments: Revisit the Rotbringer Sorcerer for any last highlights or corrections. Use a precise brush for fine details, ensuring the paint consistency is suitable. Model Sealing: Once satisfied with the painting, apply a matte varnish to protect your work. Tips: Thin your paints for smoother layers and better control. Utilise an older brush for base coating and a newer, finer brush for detailed work. Regularly assess your work from a distance for adjustments. Experiment with light placement for dynamic highlighting and shadowing effects on your Rotbringer Sorceror. Initial layers don’t need perfection as they will be layered over with more detail. Show it off! As you progress, feel free to adapt and tweak techniques to suit your style. Good luck! When you’ve finished, why not pop into our Discord and show it off to other website members? 🙂 More Nurgle Tutorials More Free Video Tutorials Free videos for logged in members – just sign up as a ‘friend’ to view and click any of the thumbs.To explore all of these, visit this page! If you don’t have an account, please sign up here! The website currently has over 350 video tutorials, plus step by step guides and PDFs. You can explore more free videos with a free “freebies” membership, or take the plunge and become a full subscriber for full access. If you’d prefer to support me on Patreon, please visit: https://www.patreon.com/RichardGray [...]
How To Paint: Death Guard Space Marine
These videos will show you how to paint a Death Guard Space Marine, specifically from the Space Marine Heroes collection. These guides will focus on creating a textured, decayed look characteristic of the Death Guard, using various stippling techniques. Video – How To Paint: Death Guard Space Marine : Part OneMaterials NeededStepsTipsVideo – How To Paint: Death Guard Space Marine : Part TwoAdditional Painting StepsAdditional TipsMore Death Guard Tutorials to Explore!Free Video Tutorials Video – How To Paint: Death Guard Space Marine : Part One Materials Needed Paints: Games Workshop: Balor Brown, Rhinox Hide, Morghast Bone, Screaming Skull, Khorne Red, Volupus Pink, Fire Dragon Bright, (alternatively Bugman’s Glow and Cadian Fleshtone for copper effect) Vallejo: Ice Yellow, (alternatively Old Rose and Salmon Rose) Brushes: A variety of sizes, including stippling brushes (Artist Opus dry brush or makeup brushes can be used) Primer: Black primer (Ultimate Primer recommended) Palette: For mixing colours Water pot: For thinning paints and cleaning brushes Steps Priming and Base Texture: Prime the model in black. Start stippling texture onto the armour using Balor Brown. Ensure the paint is diluted (about 50% water) to achieve translucency and avoid excessive build-up. Layering the Texture: Continue building texture with Morghast Bone, focusing on areas where light naturally hits. Aim for a top-left light perspective. Dilute your paints as you stipple, gradually building up layers for a controlled, textured effect. Detailing with Contrast Paint: Apply Volupus Pink to recesses and bubbly areas on the armour for quick coverage. This helps in defining those decayed spots distinct to Death Guard armour. Base Colour for Trims and Metals: Paint all trims and metal areas with watered-down Rhinox Hide. This acts as a base for later metallic effects. Non-Metallic Metal (NMM) Effect: For a non-metallic metal look, mix Old Rose with Rhinox Hide and Salmon Rose with Ice Yellow. Layer these mixes to create a copper-like effect, adding Mournfang Brown for warmth. Highlighting Armour and Details: Use Screaming Skull to push highlights on the armour. Concentrate on areas like the chest, head, and shoulder pads to draw focus. Stippling Screaming Skull provides a more opaque highlight. For the pus boils, start with Balor Brown and build up layers with Fist Red for veins. Add Morghast Bone and Screaming Skull for highlights, creating a shiny, reflective surface. Painting Fungus and Red Details: Base the fungus-like growths with Khorne Red. Create a gradient effect by mixing Khorne Red with Fire Dragon Bright, then highlight with Ice Yellow for a vibrant contrast against the armour. Tips Patience is Key: Death Guard models are detailed, so take your time to add depth and texture. Light Source Consistency: Ensure the light source remains consistent across the model for a cohesive look. Layering: Gradual layering helps create a more realistic texture, particularly for the decayed look of the Death Guard. Brush Care: Clean brushes thoroughly between colours, especially when working with stippling techniques. Video – How To Paint: Death Guard Space Marine : Part Two Continuing from Part 1, let’s delve into completing the Death Guard Space Marine with a focus on the gun, additional weathering effects, and other details. We’ll be using a variety of techniques to add depth and character to the model. Additional Painting Steps Gun and Metallics: Start with Bugman’s Glow and Cadian Fleshtone for a coppery effect. Apply these colours to the gun, focusing on light placement and creating non-metallic metal effects. Use Mournfang Brown and Ice Yellow for richer copper tones. Ensure smooth transitions and consistent light reflection. Weathering and Verdigris Effect: For added realism, apply verdigris using Sotek Green. Mix with water (approx. 6-7 parts water to 1 part paint) and apply it to recessed areas and around details for an oxidized look. Add layers of Sotek Green mixed with white for a more pronounced effect. Apply sparingly to avoid overpowering the metallic sheen. Highlighting and Details: Highlight the gun and metallic parts with Ice Yellow and a touch of white for glare effects. Be cautious with paint consistency to avoid unwanted textures. Address the back of the model similarly, but you can opt for brighter highlights as this part is often in shadow during gameplay. Painting the Backpack and Tentacles: For the backpack’s tentacle-like extensions, use a mix of Pink Horror, Emperor’s Children, and Fulgrim Pink. Stipple on these colours to create a mottled, organic texture. Use Averland Sunset or a similar yellow for raised pustules, adding depth and contrast to the tentacles. Green Goo Effect: Paint any dripping goo with Moot Green, applying in layers to create a luminous, toxic effect. Highlight edges with Ice Yellow for added vibrancy. Finishing Touches: Utilize Corvus Black for deepening shadows and refining details. Water down the paint and apply it as a glaze to enhance contrast and soften textures. For the final highlights, focus on the model’s focal points, such as the head, chest, and weapon, ensuring they draw the viewer’s attention. Additional Tips Layering: Build up your colours gradually for a more natural and controlled effect. Light Source: Keep the light source consistent across the model for a cohesive appearance. Weathering Techniques: Experiment with weathering to add character. Verdigris and rust effects can significantly enhance the decayed look of the Death Guard. Patience: Take your time with details, especially on focal points, to make them stand out. Brush Care: Maintain your brushes, especially when working with techniques that can be hard on them, like stippling and dry brushing. More Death Guard Tutorials to Explore! Free Video Tutorials Free videos for logged in members – just sign up as a ‘friend’ to view and click any of the thumbs.To explore all of these, visit this page! If you don’t have an account, please sign up here! The website currently has over 350 video tutorials, plus step by step guides and PDFs. You can explore more free videos with a free “freebies” membership, or take the plunge and become a full subscriber for full access. If you’d prefer to support me on Patreon, please visit: https://www.patreon.com/RichardGray [...]
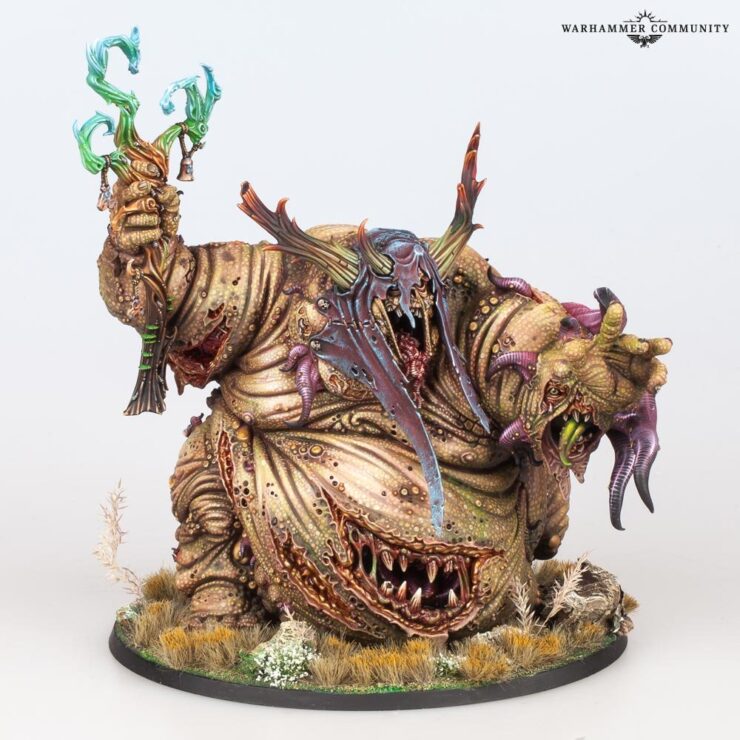
How to Paint Non Metallic Metal (NMM) Copper
I created some shiny (and then grimy!) non metallic metal copper on my Maggotkin of Nurgle, which I then weathered with distinctive green verdigris. This is how I did it in a series of step by step guides and videos on NMM copper. How to Paint NMM Copper – Part One Paints and Materials Brush Size and Type: Don’t use a tiny detail brush for the entire process. Instead, a slightly larger, older brush is preferred. My older brush has a worn tip, which is thicker than a new brush and allows for better paint control and blending. An old, well-used brush is good for this type of painting. The worn tip of an older brush can make blending easier. Paints Used Games Workshop: Doombull Brown, Golden Yellow (old colour; find a modern equivalent if needed) Scale 75: Ice Yellow, Salmon Pink, Black Red Black and White paint (any preferred brand) Step-by-Step Guide Understanding Copper NMM: Remember, copper NMM aims to create a metallic effect without using metallic paints. Copper is essentially pink in hue, similar to skin tones, with brown for shadows and a hint of sand yellow. Preparation of Palette: On your wet palette, blend all the colours together into one smear. This is because copper has a lot of subtleties in colouring. Start with Doombull Brown and mix in Black Red from Scale 75. If you don’t have Black Red, mix black and red to achieve a dark, reddish brown. Creating the Base Colour: For the darker areas of copper, you want something a bit more red. Along your paint smear on the palette, integrate colours that become more yellow and orange. Use Golden Yellow and Ice Yellow for this purpose. Add Salmon Pink at the very end for highlights. Applying the Base Layer: Before starting the video, paint the whole model (or the part you’re working on) with Doombull Brown. This creates an easier starting point for the copper effect. Mixing on the Model: You’ll be mixing the paint directly on the model, working quickly. This method is different but effective for creating copper NMM. Apply the colours and quickly determine where the highlights will be. The idea is to get lighter colours down first as a base to work from. Developing the Effect: Start blending in reflections and refining the look. Add lighter colours and work on creating smooth transitions and contrast. Remember, smooth transitions and good contrast are key in NMM painting. Refining the Details: As you progress, you’ll refine the copper effect by using thinner paint and increasing contrast. Use Salmon Pink for the higher highlights and blend it in for a smooth transition. Final Touches: Towards the end, focus on refining the paint with continual glazes until it looks smooth and metallic. You might need to make slight adjustments to the highlights and shadows. Add black, turned into a glaze, at the bottom of the shoulder pad to increase contrast. Final Overview: The final piece should showcase a refined copper NMM effect with smooth transitions, proper contrasts, and a realistic metallic look. How to Paint NMM Copper Greeny Verdigris Effect Paints and Materials Games Workshop Sybarite Green P3 Morrow White (or your preferred white paint) Step-by-Step Guide Understanding Verdigris: Verdigris is a patina that forms on copper, brass, or bronze when exposed to air or seawater over time. This guide aims to create a more realistic effect, where verdigris covers larger areas rather than just around rivets and crevices. Creating Verdigris Tones: You will mix Sybarite Green with Morrow White to create three stages of verdigris tones: First Stage: Pure Sybarite Green. Second Stage: A mix of half Sybarite Green and half Morrow White. Third Stage: Mostly Morrow White with a tint of Sybarite Green. Applying the First Layer: Start with the pure Sybarite Green. Apply it by gently dabbing it onto the model. The goal is to create a patchy texture rather than smooth streaks. This layer should cover most of the area, but try to maintain the shades and shine of the underlying metallic paint. Mid-tone Application: Next, apply the second stage mix (half Sybarite Green, half Morrow White). This should be used more sparingly than the first layer. Focus on applying this mix to darker areas and recesses. You want to maintain visibility of the copper NMM base, so apply it carefully and artistically. Adding Highlights: For the final layer, use the lightest mix (mostly Morrow White with a hint of Sybarite Green). This is like a reverse highlight, working best in shadows to create contrast. Apply this very selectively, as it can quickly cover the base layers. It should go into the deepest recesses and lower curved areas where verdigris would naturally accumulate. Final Touches: Remember, verdigris should have an uneven, patchy appearance. It should not be smooth or uniformly applied like rust. Check your work against reference images to ensure a natural look. Finishing Up: After applying all three stages, your model should exhibit a realistic verdigris effect over the copper. The underlying NMM copper should still be visible, contributing to the overall realism. Gallery – Click to view larger More NMM Tutorials to Explore! If you don’t have an account, please sign up here! The website currently has over 350 video tutorials with steps and tips, plus a selection of PDFs. If you are not sure about joining, you can explore my free videos with a free membership, or take the plunge and become a full subscriber for full access. If you’d prefer to support me on Patreon, please visit: https://www.patreon.com/RichardGray [...]
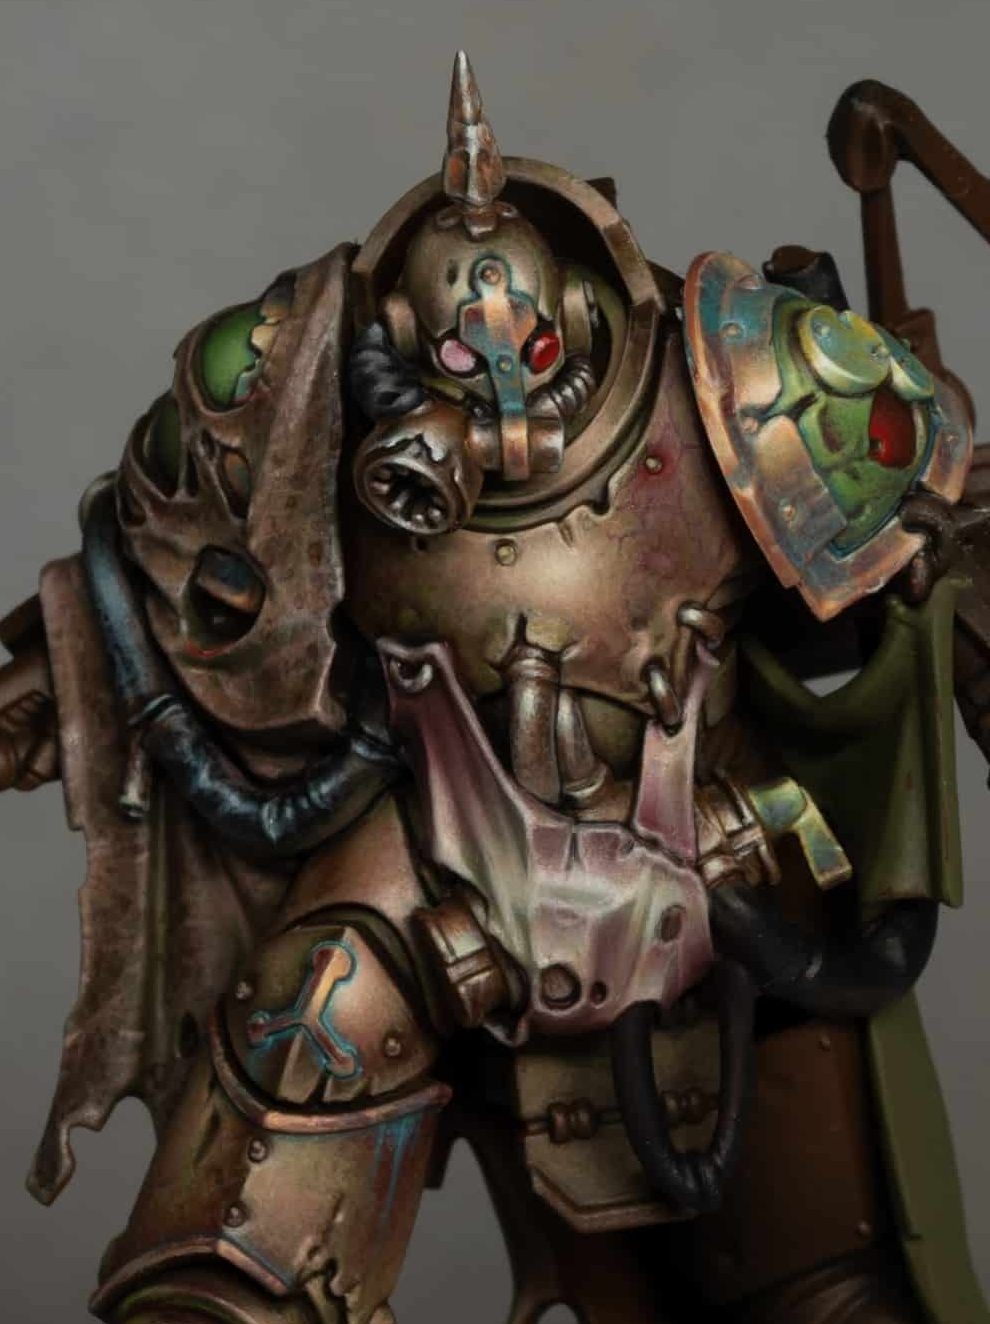
How to Paint Deathguard Deathshroud Bodyguard
A series of tutorials on how I painted my set of Golden Demon winning Deathguard Deathshroud Bodyguard! This includes nurgly armour, weathering, rust, metals, tentacles, freehand and more! Quick note here – these are some of my earliest tutorial videos, so are not of the same quality as my current tutorials visually and sound-wise. My apologies for this.Richard Scroll down to explore the tutorials in order, or quick-jump to a segment by clicking on one of the items below: Video: Deathguard Deathshroud Bodyguard Green ArmourMaterials and Paints UsedStep by Step GuideVideo: Deathguard Deathshroud Bodyguard Armour DetailMaterials and Paints UsedStep by Step GuideVideo: Deathguard Deathshroud Bodyguard Pink TentaclesMaterials and Paints UsedStep by Step GuideVideo: Deathguard Deathshroud Bodyguard Copper CanisterMaterials and Paints UsedStep by Step GuideVideo: Deathguard Deathshroud Bodyguard Red CloakMaterials and Paints UsedStep by Step GuideVideo: Deathguard Deathshroud Bodyguard Cloak FreehandMaterials and Paints UsedStep by Step GuideVideo: Deathguard Deathshroud Bodyguard Cloak Freehand RefinementMaterials and Paints UsedStep by Step GuideMore Deathshroud TutorialsLots More Deathguard Video Tutorials! Video: Deathguard Deathshroud Bodyguard Green Armour All videos are recorded in HD 1080p or higher – use full screen for the full effect and let the video load completely. Materials and Paints Used Games Workshop: Elysian Green, Nurgling Green, Rhinox Hide Additional paints for mixing and shading: Pine Oxide, Loden Gree Step by Step Guide Paint Preparation: Gather your paints – Legion Green, Pine Oxide, Loden Green, and Rhinox Hide. Mix these to create five different shades ranging from light to dark for various transitions. Base Coat: Start with a base coat of pure Legion Green. This will be your foundation colour. Shading: Begin shading the lower belly area and other parts where shadows naturally fall. Use a mixture of Legion Green and Rhinox Hide for this. Remember, at this stage, the transitions don’t need to be perfect. Wet Blending: Apply the shading using a wet blending technique. This involves placing one colour and, before it dries, adding another colour to blend on the model. It’s a rough, quick blending to position the shadows and shapes. Highlighting: For highlighting, mix Legion Green with Megan Green. Start applying highlights to areas where light naturally hits, like the upper sections of the model. Refining Transitions: As you progress, refine your transitions and shadows for a more polished and detailed look. Final Highlights: Use pure Nurgling Green for the final highlight stage. This adds a brighter touch to the highest points where light would be most intense. Detailing: Add finer details, like light reflections and texture variations, as needed to enhance the realism of the armour. Additional Techniques: If desired, use glazes or additional layers to further refine the shading and highlighting. Video: Deathguard Deathshroud Bodyguard Armour Detail Materials and Paints Used Games Workshop: Elysian Green, Nurgling Green, Mournfang Brown, Rhinox Hide Forge World: Gal Vorbak Red (use Games Workshop Khorne Red with a tiny amount of blue for a similar colour) Step by Step Guide Initial Shading: Start by shading the lower leg using a mix of Elysian Green and Rhinox Hide. This forms the base for the subsequent layers. Layering with Pine Oxide: Apply Pine Oxide in layers. This is a form of light layering, where the paint is applied thinly, almost like working with glazes but slightly thicker. Blending Techniques: Employ wet blending by quickly layering the paint. This helps in merging the layers smoothly, ensuring a subtle transition of colours. Stippling with Mournfang Brown: Use Mournfang Brown for stippling effects. This is done by applying small dots to create texture and depth. Refining Highlights: Add highlights using a finer brush. Highlight the lower edges of the leg where light naturally catches but avoid highlighting the upper edges to maintain a natural look. Fixing Imperfections: If any area becomes too dark, use the in-between transitions to correct it. This involves mixing paint directly on the model, which can help in hiding mistakes. Applying Red Glazes: Use a heavily watered-down Evil Sunz Scarlet (or a similar red glaze) to add subtle tones and enhance contrast. Streaking for Battle Damage: For bullet holes or battle-damaged areas, create streaking effects using Mournfang Brown and Rhinox Hide, depicting the gunk running down from the damage. Final Touches: Add final details and weathering to complete the look of the armour. This includes additional stippling and refining the contrast between light and shadow areas. Video: Deathguard Deathshroud Bodyguard Pink Tentacles Materials and Paints Used Games Workshop: Emperor’s Children, Rhinox Hide, Evil Sunz Scarlet Vallejo: Model Colour Black (Alternatively, Games Workshop black can be used) P3: Morrow White (Alternatively, Games Workshop white can be used) Step by Step Guide Base Colour: Start with a base of Emperor’s Children pink. Shading: Apply Rhinox Hide for shading. Paint the tip of the tentacle black for contrast. Blending: Blend Rhinox Hide mixed with Emperor’s Children down from the black tip to create a smooth transition. Detailing: Using straight Emperor’s Children, add line details to the tentacle, going beyond the sculpted segments for more intricacy. Highlighting: Focus on the middle area of the tentacle with a mix of Emperor’s Children and Morrow White. This creates a focal point and simulates light catching the tentacle. Final Touches: For light reflections, use a lighter pink or white. Add a glaze of Evil Sunz Scarlet for depth and contrast. Video: Deathguard Deathshroud Bodyguard Copper Canister This technique will give you a realistic copper effect using a simplified palette. Materials and Paints Used Games Workshop: Doombull Brown, Cadian Fleshtone Vallejo: Ice Yellow Step by Step Guide Base Coat: Start with a base coat of Doombull Brown. Mixing Colours: Create a palette with five shades by mixing Doombull Brown, Cadian Fleshtone, and Ice Yellow in different proportions. Highlighting: Apply the mix of Doombull Brown and Cadian Fleshtone across the upper curve for initial highlights. Adjust the position of the highlight by observing the model under light. Refining: Blend the colours for smooth transitions. Use finer brushes for detailed areas and to keep dark lines sharp. Final Highlights: Use a mixture of Cadian Fleshtone and Ice Yellow for brighter highlights. Add small touches of pure Ice Yellow for the brightest points. Artificial Reflections: Paint reflections and detail lines that may not naturally occur but enhance the metallic effect. Look as photographs of copper items for references to help you with this. Finishing Touches: Adjust and refine the highlights and shadows, ensuring a balance between realism and aesthetic appeal. Video: Deathguard Deathshroud Bodyguard Red Cloak This process results in a textured, worn cloak suitable for a Death Shroud Terminator, using a simple but effective painting technique. Materials and Paints Used Gal Vorbak Red (Forge World) Cadian Fleshtone (Games Workshop) Eldandil Violet (Scalecolour Fantasy) Step by Step Guide Base Coat: Start with Gal Vorbak Red as the primary colour. Detailing and Texture: Use Cadian Fleshtone for adding highlights and texture, creating a worn and mouldy appearance. Shading: Apply Eldandil Violet for shading in the recesses, enhancing depth and wear. Glazing with Evil Sunz Scarlet: Use it as a glaze to add warmth to the cloak. Refining Texture: Focus on cross-hatching movements to build texture, emphasizing the worn look. Final Touches: Add further glazes and highlights to refine the texture and depth, tailoring the effect to your desired level of detail. Video: Deathguard Deathshroud Bodyguard Cloak Freehand Materials and Paints Used The following paints were used:Games Workshop: Rhinox Hide Vallejo: Heavy Brown, Cork Brown, Ice Yellow, Black P3: Battlefield Brown *Note, Morrow White was not actually used in this video, but is used in part 2. Step by Step Guide Preparation: I used a test model to experiment with my design concept. This approach allows you to refine the freehand pattern before applying it to the main models. Base Colours: Apply Vallejo Heavy Brown as a foundational colour. Enhance the base with Cork Brown for a richer texture. Use Rhinox Hide to outline the design, ensuring the lines are crisp and distinct. Detailing: Carefully mark the eye sockets with black paint, paying attention to the cloak’s folds. These details will add depth and character to the freehand design. Highlighting: Utilize Ice Yellow for highlights. This step involves blending the highlights with the base colors to achieve a natural, integrated look. The highlights should accentuate the topography of the cloak and enhance the freehand design. Shading: Use Battlefield Brown to deepen the shadows and add complexity to the design. This shade will create a more dynamic and realistic appearance on the cloak. Finishing Touches: Review the entire design, making final adjustments for consistency and balance. Focus on refining the freehand artwork, ensuring it harmonizes with the cloak’s texture and the overall theme of the model. Video: Deathguard Deathshroud Bodyguard Cloak Freehand Refinement Materials and Paints Used The following paints were used: Games Workshop: Cadian Fleshtone, Pallid Wych Flesh, Bugman’s Glow, Rhinox Hide, Loren Forest, Nurgling Green, Vallejo: Ice Yellow, Cork Brown, Black, Neutral Grey, Pale Grey Blue, Heavy Brown P3: Battlefield Brown, Morrow White Step by Step Guide Base Preparation: Start by painting a rough base of fleshy shapes using Cadian Fleshtone. This initial layer doesn’t need to be perfect or smooth. Detailing Ears and Face: Add ears to distinguish the image from a skull, creating a more zombie-like face. Use Kadeem Flesh Tone for this step. Sketching Flesh and Bone: Sketch out areas where flesh appears torn or missing, revealing bone underneath. This technique enhances the undead appearance and integrates the existing skull highlights. Adding White Highlights: Use Pallid Wych Flesh to accentuate bone areas, making them stand out from the flesh tone. Painting the Eyes: Employ Neutral Grey, followed by Pale Grey Blue for the eyes. Add white dots in the center and top left corner of each eye for a lifelike effect. Mouth and Teeth Details: Refine the mouth and teeth using Rhinox Hide and Ice Yellow for highlights. Focus on defining the teeth shapes and adding depth to the mouth. Adding Texture to Flesh: Use Bugman’s Glow and other flesh tones to create textured, worn skin. Apply these tones in layers, allowing the underlying skull details to peek through. Final Touches: Finish by adding fine details and additional highlights to enhance the depth and realism of the freehand design. The key to this process is building up the layers gradually, refining the details as you go, and ensuring the highlights and shadows work together to create a realistic, three-dimensional appearance. More Deathshroud Tutorials How to Paint Deathshroud ArmourDeathshroud Scythe Handle WrappingDeathshroud Terminator Cloak FreehandHorn Painting Guide Lots More Deathguard Video Tutorials! If you don’t have an account, please sign up here! The website currently has over 350 video tutorials with steps and tips, plus a selection of PDFs. If you are not sure about joining, you can explore my free videos with a free membership, or take the plunge and become a full subscriber for full access. If you’d prefer to support me on Patreon, please visit: https://www.patreon.com/RichardGray [...]
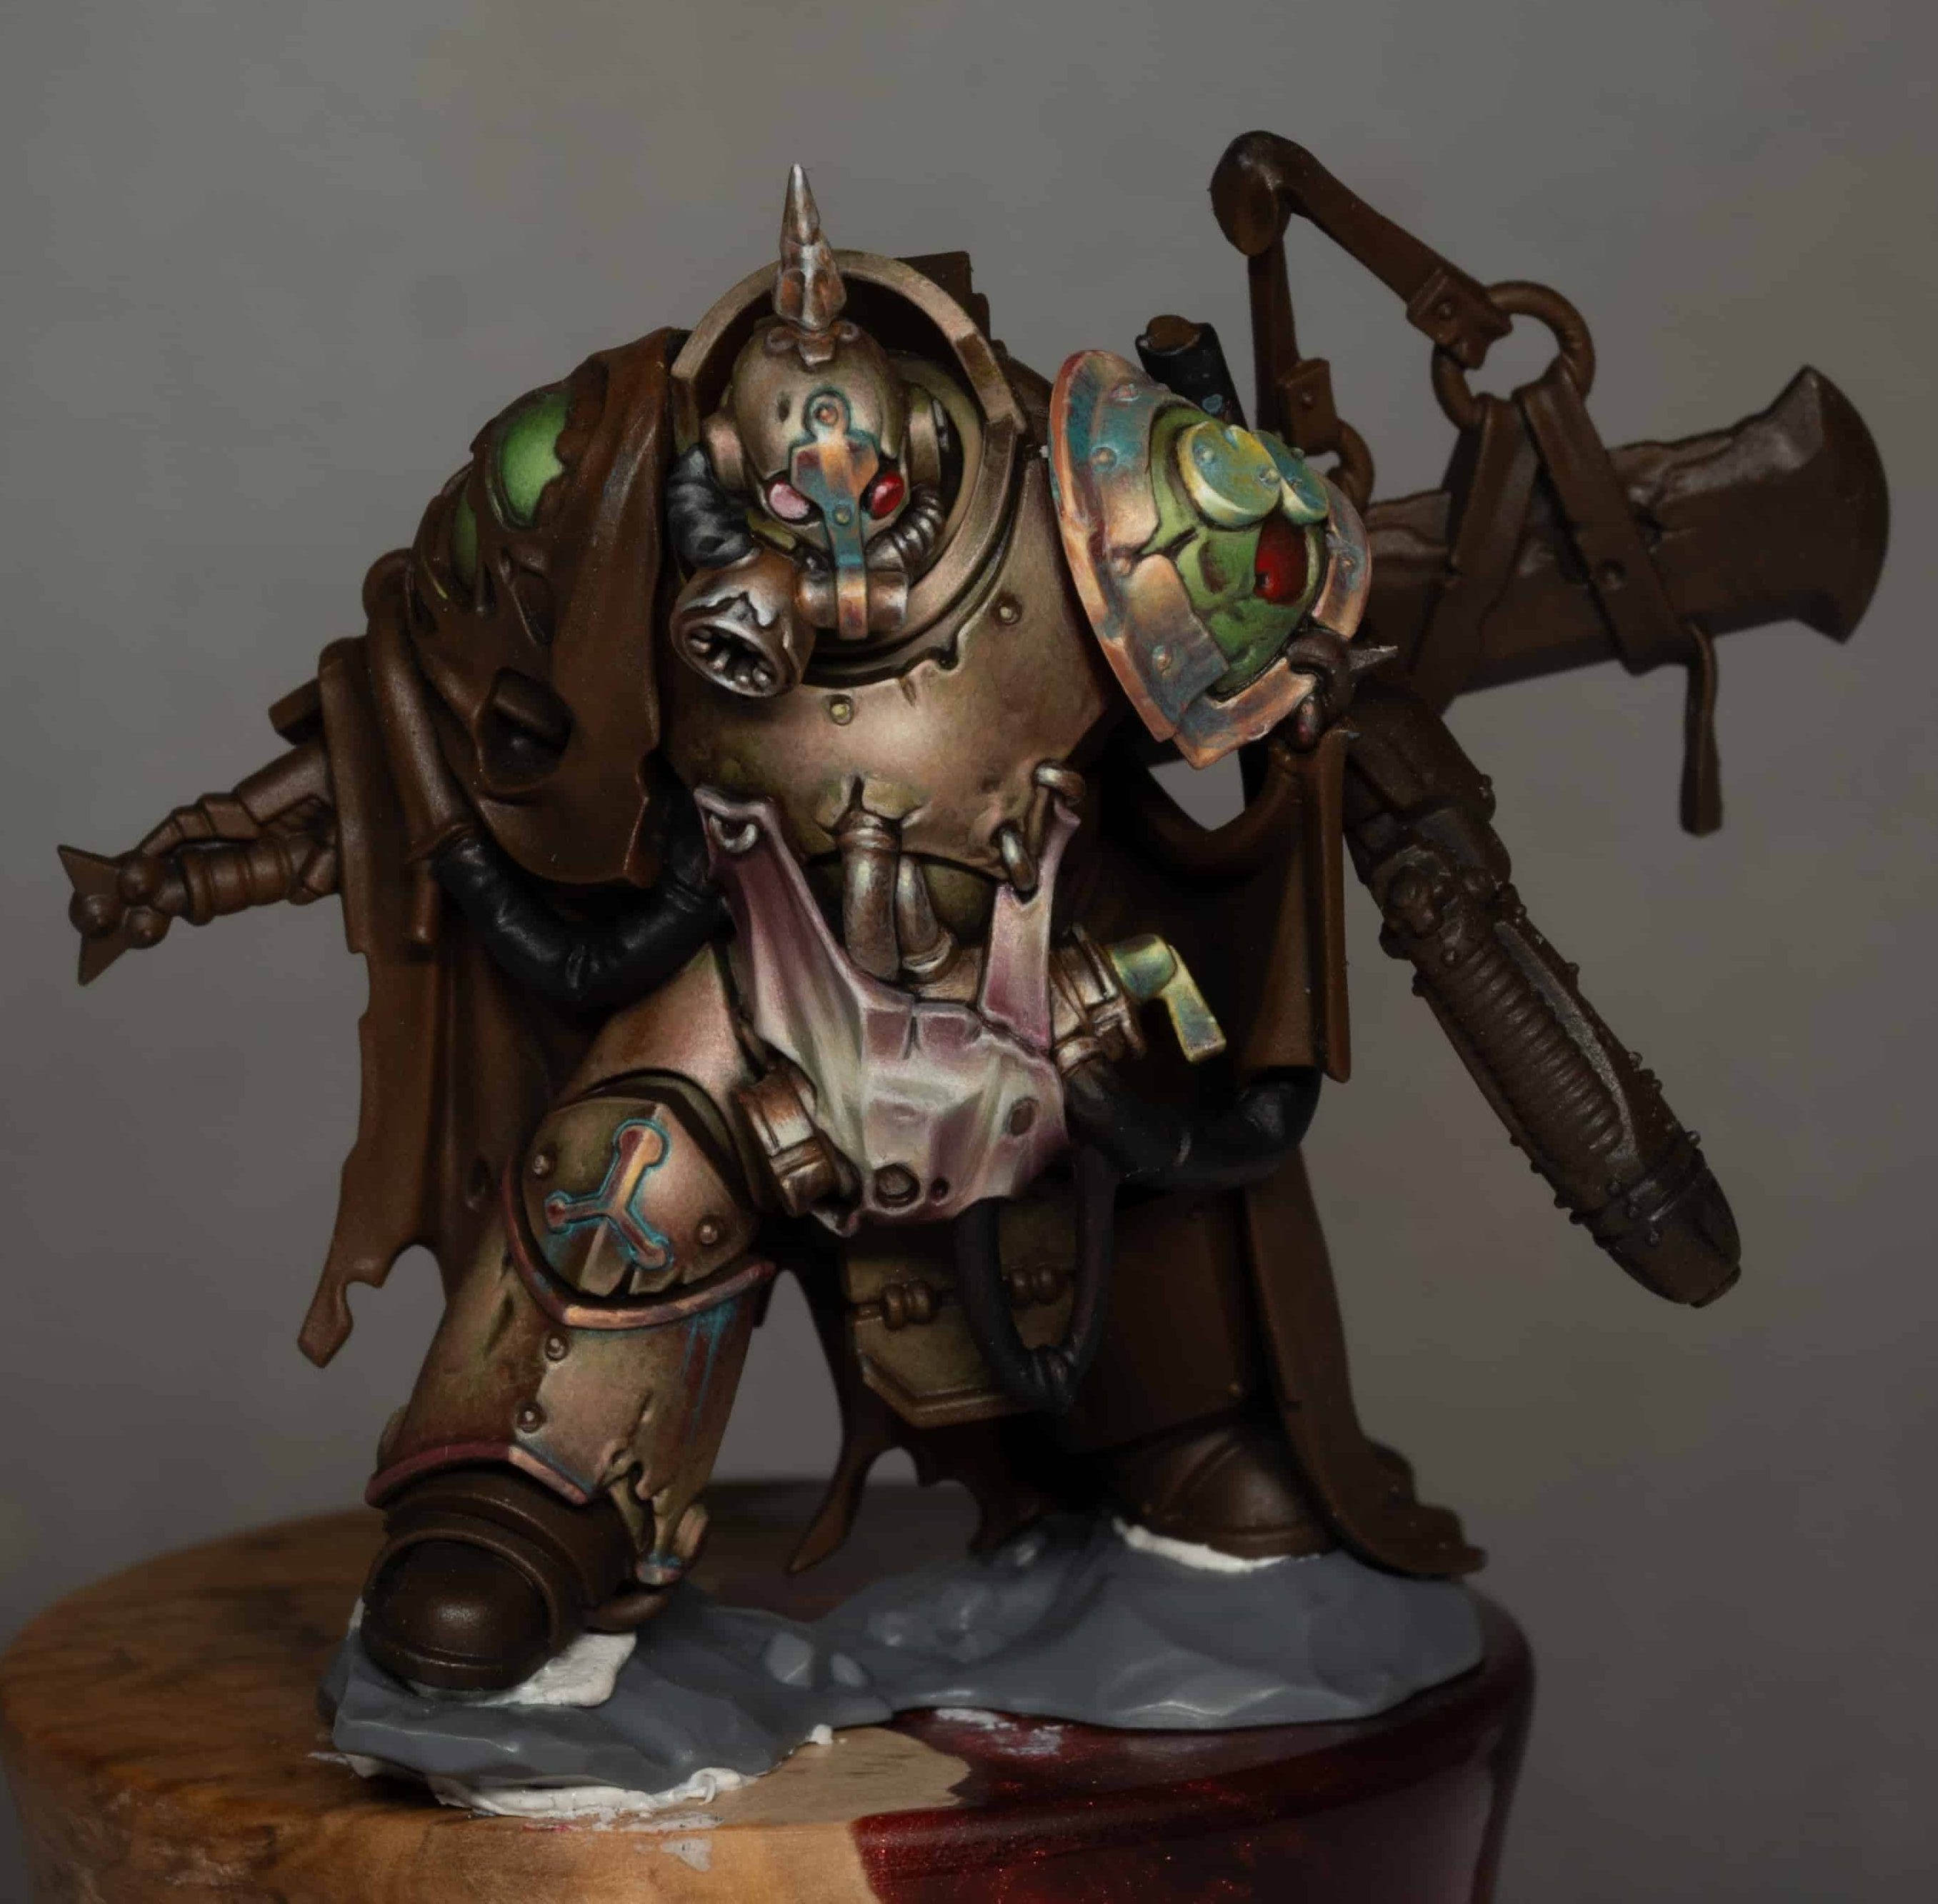
How to Paint a Great Unclean One Nurgling
A video on how I painted up this friendly little Great Unclean One Nurgling! In this comprehensive guide, we’ll learn essential techniques such as layering, blending, washing, and highlighting, all aimed at bringing the detailed Nurgling model to vivid life. Video: How to Paint a Great Unclean One Nurgling Paints and Materials Used Games Workshop Paints: Cadian Fleshtone Rhinox Hide Kislev Flesh Ceramite White Yriel Yellow Emperor’s Children Celestra Grey Skavenblight Dinge Lothern Blue Cybarite Green Abaddon Black Mournfang Brown Ushabti Bone Zamesi Desert Agrax Earthshade (for wash) Scale 75 Paints: Kalahari Orange Mars Orange Vallejo Paints: Model Colour Black Ice Yellow Brushes: In the tutorial I mention using a new size 1 brush with a fine point, ideal for both general painting and fine details. A good point for precision work and the brush I was using was an Artis Opus brush! An older, rough brush is used for applying the Scale 75 paints to create a rusty texture on the chain. Step-by-Step Guide Step 1: Base Colours for Skin Begin with a base of Cadian Fleshtone on the skin. Create a palette with three colour mixtures: pure Cadian Fleshtone, a 50/50 mix of Cadian Fleshtone and Rhinox Hide, and a mixture mostly of Rhinox Hide with a small amount of Cadian Fleshtone. Step 2: Painting Shadows Start with the darkest mixture (mostly Rhinox Hide) to paint creases, dark areas, and shadows. The approach here doesn’t need to be very neat; it’s more about laying down the dark tones. Step 3: Mid-tone Shading Use the mid-tone mixture for most of the shading. Avoid painting over areas that will be highlighted later, like the chest and middle of the belly. Step 4: Blending and Refining As you proceed, switch between mixtures for blending, often without washing the brush. This method helps create quick transitions. Focus on darkening areas around the edges where the Nurgling touches Rotigus for shadow effects. Step 5: Teeth and Boils For the teeth, apply a quick wash of Agrax Earthshade to outline and define them. Then, start refining the shading and blending, particularly with the mid-tone shade. Step 6: Final Skin Highlights The final skin highlights won’t be Cadian Fleshtone but a brighter colour. However, use Cadian Fleshtone initially to get all shadows in place, creating transitions where the darkest shadows show through beneath lighter layers. Step 7: Eyes and Pupils Paint the eye with Yriel Yellow for a strong, vibrant colour. Then, use Vallejo Model Colour Black to paint the pupil, ensuring it looks forward and round. Step 8: Smoke Effect Base the smoke with Lothern Blue, then use Cybarite Green mixed with a little Abaddon Black. Highlight the inner recesses of the smoke with a mixture of Lothern Blue and Ceramite White, getting lighter towards the start of the smoke. Step 9: Rusty Chain Use Scale 75 Kalahari Orange and Mars Orange for a rusty look. Apply with a rough brush for a patchy appearance. Highlight with Skavenblight Dinge, Celestra Grey, and a touch of Ushabti Bone on the raised edges to mimic worn metal. Step 10: Copper Smoke Dispenser Paint with Mournfang Brown, highlighting with Cadian Fleshtone mixed with Ice Yellow, focusing on raised edges facing upwards. Use Lothern Blue for the verdigris effect, concentrating on the recesses for a corroded look. Step 11: Horns and Tentacles Start horns with Mournfang Brown, blending into Abaddon Black towards the tip. Highlight with Skavenblight Dinge and Celestra Grey. For tentacles, use a base of Emperor’s Children mixed with a small amount of Ushabti Bone, adding horizontal lines along each tentacle. Highlight with a brighter mix of Emperor’s Children and Ceramite White, focusing on the central area. Remember, the key to this process is layering and blending, creating smooth transitions between colours. More Nurgle Tutorials! If you don’t have an account, please sign up here! The website currently has over 350 video tutorials with steps and tips, plus a selection of PDFs. If you are not sure about joining, you can explore my free videos with a free membership, or take the plunge and become a full subscriber for full access. If you’d prefer to support me on Patreon, please visit: https://www.patreon.com/RichardGray [...]
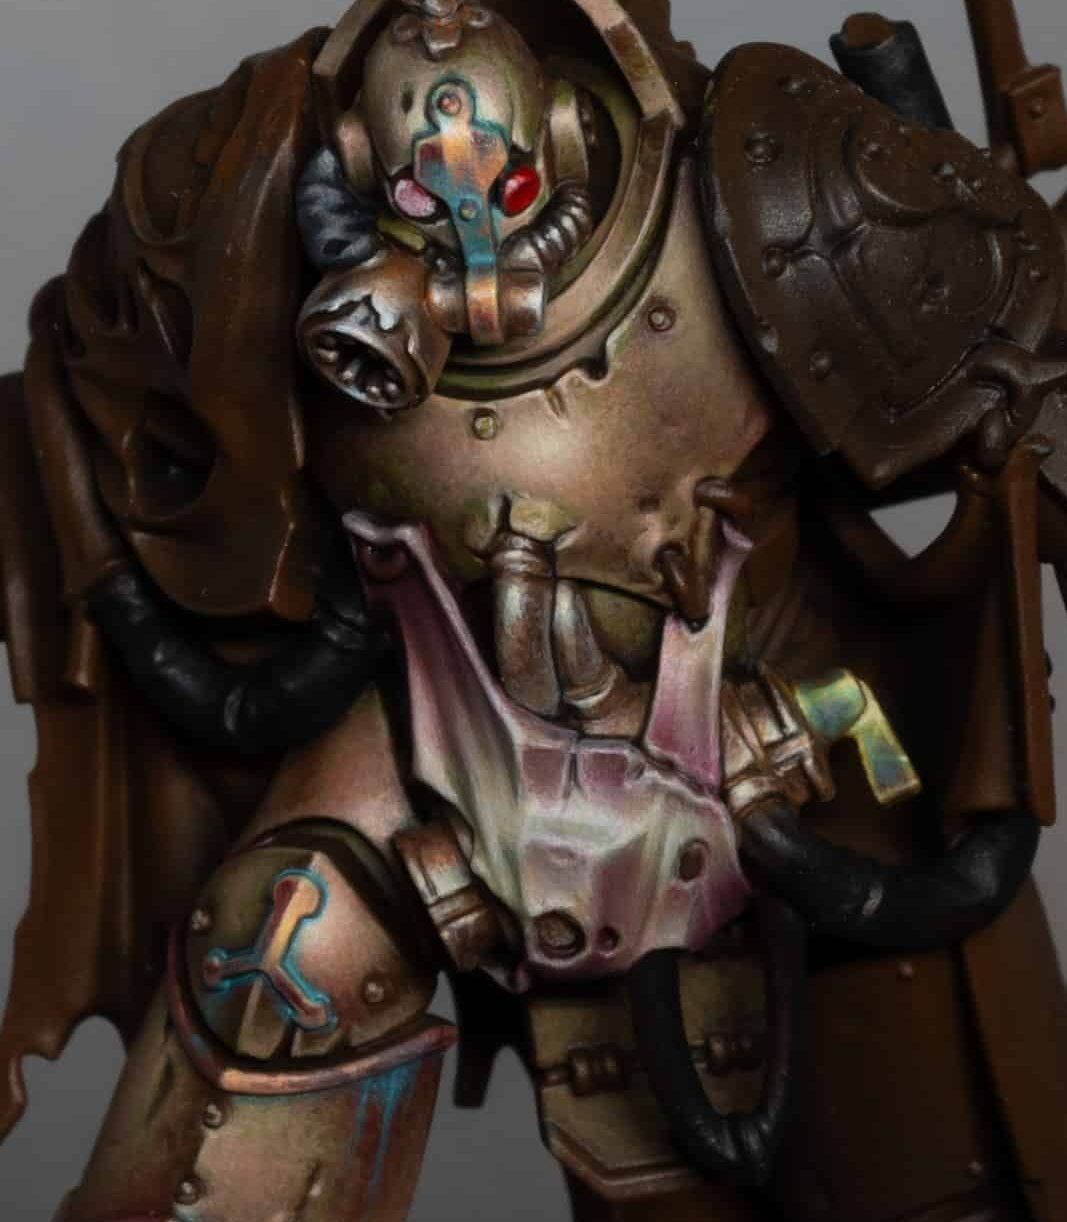
How to Paint a Great Unclean One
Learn how to paint a Great Unclean One in this selection of videos, with tips on his hood, skin, belly mouth, staff, horns and friendly little nurgling! My apologies for quality, this was one of my very first sets of video tutorials, way back in 2018! Scroll down to explore these in order, or use the contents below to jump quickly to a section of the model or technique. Video: Great Unclean One HoodMaterials NeededStep-by-Step Guide to the Great Unclean One HoodStep 1: PrimingStep 2: Base Colour ApplicationStep 3: Creating and Applying the Mid-ToneStep 4: Detailing and Texture EnhancementStep 5: Final HighlightsStep 6: Glazing for DepthStep 7: Touch-ups and Final AdjustmentsVideo: Great Unclean One Belly MouthMaterials Required:Step-by-Step Guide to the Belly MouthStep 1: Base ColouringStep 2: Painting the TeethStep 3: Shading and Texturing the GumsStep 4: Glazing for Colour DepthStep 5: Applying Blood for the Blood GodFinal TouchesVideo: Great Unclean One SkinPaints Needed:Step-by-Step Guide to the SkinBase Colouring and Initial Blending:Refinement and Detailing:Adding Texture with Dots:Finishing Touches:Video: Great Unclean One HornsMaterials:Step-by-Step Guide to the HornsBase Coating and Initial Blending:Refining the Gradient:Adding the Green Tint:Final Touches:Video: Great Unclean One (Rotigus) StaffMaterials Needed:Step-by-Step Guide to the StaffBase CoatingInitial Colour ApplicationTransition and BlendingDetailingFinishing TouchesConclusion and ProtectionVideo: Great Unclean One NurglingPaints and Materials UsedStep-by-Step Guide on the NurglingMore Nurgle Tutorials Video: Great Unclean One Hood The process of painting the black hood of a Great Unclean One, focusing on achieving a textured, worn look that stands out on a larger model. Materials Needed A fine detail paintbrush, preferably a standard size over a miniature brush for better control. Black primer (P3 or Games Workshop Black recommended). Paints: Skavenblight Dinge, Celestra Grey (Games Workshop); Ice Yellow (Vallejo); Black Leather (Scale 75); Mournfang Brown (Games Workshop). Water for thinning paints and creating glazes. A palette for mixing paints. Step-by-Step Guide to the Great Unclean One Hood Step 1: Priming Ensure your model is primed in black. This serves as the base colour and will help in creating deep shadows under the subsequent layers. Step 2: Base Colour Application Apply Black Leather from Scale 75 over the hood, leaving some of the black primer visible in the deepest recesses. This step is done roughly to start building the texture we desire. The black primer peeking through will add natural shadows to the texture. Step 3: Creating and Applying the Mid-Tone Mix Skavenblight Dinge and Ice Yellow (Vallejo) to create a warm, mid-grey tone. Without cleaning your brush from the Black Leather application, apply this mix over the hood. The residual Black Leather on the brush will mix with your mid-tone directly on the model, enhancing the textured effect. This mix should be applied more liberally on the areas that would naturally catch more light, such as the top and folds of the hood. Step 4: Detailing and Texture Enhancement Using the mid-tone mix, start adding more defined textures and highlights. Focus on the edges and any raised details to make them stand out. This includes the edges of tears and holes in the hood. Apply your paint with deliberate, rough strokes to mimic the look of worn leather. The paint should be thicker to avoid smoothing out the texture. Step 5: Final Highlights Use Celestra Grey to apply the final highlights. Focus on the very edges and peaks where light would hit the strongest. Remember, this paint has a matte finish, which contrasts nicely with the previously applied colours, adding to the worn fabric effect. Step 6: Glazing for Depth Create a glaze with Mournfang Brown and a touch of black (either P3 or Games Workshop). Thin these paints down significantly with water on a separate palette. Apply this glaze sparingly to the shadows and recesses to add depth and enhance the dirty, worn look. The glaze will subtly tint the underlying colours, marrying them together while adding a slight sheen in places to mimic the varied textures of aged fabric. Step 7: Touch-ups and Final Adjustments After glazing, you may find some highlights have dulled. Reapply Celestra Grey sparingly to the most prominent edges and details to bring back the contrast. This step should make sure you maintain the balance between detailed texture and the overall worn look of the hood. Video: Great Unclean One Belly Mouth Materials Required: Fine detail paintbrushes Palette for mixing paints Water for thinning paints Base colour: Warboss Green (Games Workshop) Additional Colours: Rhinox Hide, Mournfang Brown, Balor Brown (Games Workshop), Ice Yellow (Vallejo), Morrow White (P3 or any white paint from Games Workshop will suffice), Elysian Green, Evil Sunz Scarlet (Games Workshop) Technical paint: Blood for the Blood God (Games Workshop) Step-by-Step Guide to the Belly Mouth Step 1: Base Colouring Initial Base Coat: Start with a base coat of Warboss Green mixed with a touch of Rhinox Hide to slightly darken the green. This mix provides a solid foundation for the gum area and a natural shadow effect for the recesses between the teeth. Step 2: Painting the Teeth Initial Layer: Use Balor Brown for the teeth’s base layer, setting a warm undertone for later layers. Highlighting: Apply Ice Yellow over Balor Brown, leaving a small margin near the gums to create a transition from the darker base to a lighter tip. Final Highlights: Add Morrow White to the very tips of the teeth, enhancing their sharpness and giving them a polished appearance. Make sure this white layer is applied thinly and only at the tips. Step 3: Shading and Texturing the Gums Shading: Use Rhinox Hide to shade around the teeth and gum line, deepening the recesses and adding depth. Adding Texture: Reapply Warboss Green to restore vibrancy to the gums, followed by Elysian Green for highlights. These steps add texture and variation. Refining Details: With Ice Yellow, highlight the most prominent areas of the gums, aligning these highlights with the light source and the highlights on the teeth. Step 4: Glazing for Colour Depth Preparing Glazes: Create glazes from Mournfang Brown and Rhinox Hide by significantly thinning these paints. Apply these glazes over teeth and gums to unify the colours, soften transitions, and add natural depth. Red Glazing: Thin Evil Sunz Scarlet to a glaze consistency and apply over the gum area, introducing a hint of irritation. This also sets the stage for applying Blood for the Blood God. Step 5: Applying Blood for the Blood God Applying Gore: Strategically apply Blood for the Blood God around the gum line and on select areas of the teeth to simulate fresh blood and gore, enhancing the grotesqueness with a glossy finish. Manipulating the Blood: Use the brush to create realistic drips or pools, focusing on how blood might naturally accumulate in the creature’s mouth. Final Touches Adjustments: After the Blood for the Blood God has dried, revisit any areas that may require adjustments or additional highlights to ensure they stand out against the glossy blood effect. Video: Great Unclean One Skin We’ll use a mix of Games Workshop paints to layer, blend, and detail the skin to give it a lifelike, diseased appearance. Paints Needed: Paints (Games Workshop): Cadian Fleshtone, Kislev Flesh, Ushabti Bone, Rhinox Hide, Mournfang Brown, Skavenblight Dinge, Moot Green, Pallid Wych Flesh. Step-by-Step Guide to the Skin Base Colouring and Initial Blending: Base Coat: Start with a base coat of Cadian Fleshtone applied over a grey primer. This doesn’t require precision; just ensure complete coverage. Rhinox Hide: Apply a quick airbrush (or brush) layer of Rhinox Hide to introduce shadows. This is optional but provides a good base for further detailing. Mixing on the Model: Begin blending Rhinox Hide directly on the model into the Cadian Fleshtone. This method is quick and doesn’t require perfect smoothness, as further texture work will cover imperfections. Use a thicker consistency for better blending. Light and Shadow: Focus on creating light at the top and shadows at the bottom of curves and crevices. Blend by alternating between Cadian Fleshtone and Rhinox Hide, directly mixing on the model for a rough transition. Refinement and Detailing: Refining with Kislev Flesh: With the skin’s base layers blended, use Kislev Flesh to start highlighting. Focus on raised areas and parts that would catch the light. This stage involves more precise brushwork to enhance the model’s details. Ushabti Bone for Highlights: For the highest points and most prominent details, apply Ushabti Bone. This step brings out the texture and gives the skin a more dimensional look. Glazing for Depth: Create glazes with Skavenblight Dinge and Mournfang Brown. Apply these very thinly over the skin to unify the tones, add warmth, and enhance the transitions between colours. Adding Texture with Dots: Dotting Technique: Use a mix of the flesh tones (Cadian Fleshtone for darker areas, Kislev Flesh for mid-tones, and Ushabti Bone for light areas) to dot the skin, creating texture. Vary the size of the dots based on the area you’re working on, keeping them random to avoid patterns. Applying Glazes Over Dots: Use Moot Green to glaze over the dotted areas, focusing on the recesses but avoiding the highest lights. This introduces a sickly green hue indicative of Nurgle’s influence. Final Glazes: Reapply glazes of Mournfang Brown to reintroduce warmth and further blend the skin tones, ensuring a cohesive and natural look. Finishing Touches: Highlighting with Pallid Wych Flesh: Finally, use Pallid Wych Flesh to add fine highlights to the very tips and edges of the most raised details, enhancing the texture and depth of the skin. Final Adjustments: Assess the model and make any necessary adjustments to ensure a smooth gradient and natural look across all skin areas. Video: Great Unclean One Horns Materials: Vallejo Model Color Black Vallejo Ivory Mournfang Brown (Games Workshop) Balor Brown (Games Workshop) Iyanden Yellow (Alternative to P3’s Iosen Green for glazing) Abaddon Black (Games Workshop, alternative to Coat d’Arms Black) Fine detail brushes A wet palette Water for thinning paints Step-by-Step Guide to the Horns Base Coating and Initial Blending: Base Coat: Start by applying Vallejo Model Color Black directly onto the horns over a grey primer base. Ensure full coverage for a solid foundation. Creating a Transition: On your wet palette, mix Vallejo Model Color Black with Mournfang Brown to create a transition shade. Also, prepare a mix of Balor Brown and Vallejo Ivory for a lighter transition. You’ll use these mixes to create a gradient along the horns, starting from the darkest at the base to lighter towards the tips. Applying the Transitions: Begin with the black, blending into the Mournfang Brown mix, and proceed towards the tip with Balor Brown and the Balor Brown-Ivory mix. Use a large brush for quick, broad strokes, blending directly on the model for efficient coverage. The goal is a smooth gradient from dark to light without distinct lines. Refining the Gradient: Mournfang Brown Detailing: Revisit with Mournfang Brown to accentuate the ridges and details of the horns, enhancing the transition effect. Apply it in a way that leaves some of the base gradient visible beneath, contributing to the depth of the horns’ texture. Balor Brown Highlights: Next, apply Balor Brown to continue defining the ridges, focusing on the midsections of the horns to reinforce the gradient transition. Ivory Highlights: Finish the base gradient by applying Vallejo Ivory at the tips and highest points of the horns. This step brings a sharp contrast to the horns, setting the stage for the unique green tint to be applied later. Adding the Green Tint: Iyanden Yellow Glaze Preparation: Mix Iyanden Yellow (as a substitute for Iosen Green) with water on your palette to a very thin, glaze-like consistency. This mix will be applied over the horns to give them a subtle green tint, enhancing the overall theme of the miniature. Applying the Glaze: Use a flat, wide brush to apply the glaze along the entire length of the horns, starting from the base where it’s darkest, up to where the ivory begins. Allow each layer to dry before applying the next to build up the green tint gradually without obscuring the underlying gradient. Deepening Shadows with Abaddon Black: Finally, mix a thin glaze of Abaddon Black and apply it selectively towards the base and lower sections of the horns. This step reintroduces depth and shadow lost during the glazing process, ensuring the horns maintain their dimensional appearance. Final Touches: Detailing and Corrections: Go back with your lighter colours (Balor Brown-Ivory mix and pure Ivory) to reinforce highlights or correct any overspill from the glazing process. This step ensures sharpness and clarity in the horns’ details. Assessment and Adjustment: Evaluate the overall effect, making adjustments as necessary to ensure a smooth transition between all colours and a satisfactory green tint. Protective Coating: Once completely dry and you’re satisfied with the results, consider applying a matte varnish to protect your work and reduce any unwanted glossiness from the glazing process. Video: Great Unclean One (Rotigus) Staff The goal is to achieve a vibrant, multi-hued effect that transitions from dark at the base to light and colourful at the top. Materials Needed: Vallejo Model Colour Black (or Games Workshop’s Abaddon Black as an alternative) Games Workshop’s Rhinox Hide, Ceramite White, Cadian Fleshtone, Balor Brown, Moot Green, Ushabti Bone, Lothern Blue, Mournfang Brown P3’s Iosen Green (or an equivalent green from GW for similar effect) Fine detail brushes A wet palette Step-by-Step Guide to the Staff Base Coating Priming and Base Coat: Begin with a light grey primer across the entire model for uniformity, though a black primer may work better for darker elements like the staff. Apply Rhinox Hide as the base coat on the staff. Initial Colour Application Applying Base Colours: Start at the base of the staff with Vallejo Model Colour Black, blending upwards into Rhinox Hide, then to Mournfang Brown. This creates a dark to light gradient, preparing for brighter colours above. Transition and Blending Creating the Transition: Without cleaning your brush, dip into subsequent colours to facilitate wet blending directly on the model. Progress through the colours: Mournfang Brown to Fire Dragon Bright, then to Moot Green, followed by a custom blue mix, Ceramite White, and Lothern Blue. Mixing for Intermediate Shades: Where necessary, mix adjacent colours on your palette to create intermediate shades for smoother transitions. Application Technique: Apply each colour in segments, blending into the previous colour while wet to ensure a smooth gradient. The aim is for a seamless transition from dark at the base through greens, oranges, and blues, culminating in white at the tip. Detailing Highlighting: After the base gradient is complete, use lighter shades of each colour (mixes involving Ceramite White and Ushabti Bone) to highlight raised areas and textures. This step accentuates the staff’s intricate details and enhances the colour gradient’s impact. Focus on Contrast: Ensure that the top sections, especially around the twisting branches, receive adequate highlights to create a vibrant contrast between the dark base and the colourful top. Finishing Touches Additional Details: Address any minor details, such as maggots and ropes on the staff, using base colours like Rhinox Hide and highlighting appropriately to integrate them into the overall colour scheme without disrupting the gradient flow. Refinement and Adjustment: Revisit any areas requiring further blending or intensified colour saturation. Adjust highlights as necessary to maintain a consistent light source impression across the model. Conclusion and Protection Final Assessment: Review the entire piece for uniformity and depth of colour. Ensure that all transitions are smooth and that the highlights appropriately reflect the model’s contours and texture. Protective Coating: Consider applying a matte varnish to protect the paintwork and reduce any unintended shininess, ensuring the staff’s finish matches Rotigus’ overall appearance. Video: Great Unclean One Nurgling Paints and Materials Used Games Workshop Paints: Cadian Fleshtone Rhinox Hide Kislev Flesh Ceramite White Yriel Yellow Emperor’s Children Celestra Grey Skavenblight Dinge Lothern Blue Cybarite Green Abaddon Black Mournfang Brown Ushabti Bone Zamesi Desert Agrax Earthshade (for wash) Scale 75 Paints: Kalahari Orange Mars Orange Vallejo Paints: Model Colour Black Ice Yellow Brushes: In the tutorial I mention using a new size 1 brush with a fine point, ideal for both general painting and fine details. A good point for precision work and the brush I was using was an Artist Opus brush! An older, rough brush is used for applying the Scale 75 paints to create a rusty texture on the chain. Step-by-Step Guide on the Nurgling Step 1: Base Colours for Skin Begin with a base of Cadian Fleshtone on the skin. Create a palette with three colour mixtures: pure Cadian Fleshtone, a 50/50 mix of Cadian Fleshtone and Rhinox Hide, and a mixture mostly of Rhinox Hide with a small amount of Cadian Fleshtone. Step 2: Painting Shadows Start with the darkest mixture (mostly Rhinox Hide) to paint creases, dark areas, and shadows. The approach here doesn’t need to be very neat; it’s more about laying down the dark tones. Step 3: Mid-tone Shading Use the mid-tone mixture for most of the shading. Avoid painting over areas that will be highlighted later, like the chest and middle of the belly. Step 4: Blending and Refining As you proceed, switch between mixtures for blending, often without washing the brush. This method helps create quick transitions. Focus on darkening areas around the edges where the Nurgling touches Rotigus for shadow effects. Step 5: Teeth and Boils For the teeth, apply a quick wash of Agrax Earthshade to outline and define them. Then, start refining the shading and blending, particularly with the mid-tone shade. Step 6: Final Skin Highlights The final skin highlights won’t be Cadian Fleshtone but a brighter colour. However, use Cadian Fleshtone initially to get all shadows in place, creating transitions where the darkest shadows show through beneath lighter layers. Step 7: Eyes and Pupils Paint the eye with Yriel Yellow for a strong, vibrant colour. Then, use Vallejo Model Colour Black to paint the pupil, ensuring it looks forward and round. Step 8: Smoke Effect Base the smoke with Lothern Blue, then use Cybarite Green mixed with a little Abaddon Black. Highlight the inner recesses of the smoke with a mixture of Lothern Blue and Ceramite White, getting lighter towards the start of the smoke. Step 9: Rusty Chain Use Scale 75 Kalahari Orange and Mars Orange for a rusty look. Apply with a rough brush for a patchy appearance. Highlight with Skavenblight Dinge, Celestra Grey, and a touch of Ushabti Bone on the raised edges to mimic worn metal. Step 10: Copper Smoke Dispenser Paint with Mournfang Brown, highlighting with Cadian Fleshtone mixed with Ice Yellow, focusing on raised edges facing upwards. Use Lothern Blue for the verdigris effect, concentrating on the recesses for a corroded look. Step 11: Horns and Tentacles Start horns with Mournfang Brown, blending into Abaddon Black towards the tip. Highlight with Skavenblight Dinge and Celestra Grey. For tentacles, use a base of Emperor’s Children mixed with a small amount of Ushabti Bone, adding horizontal lines along each tentacle. Highlight with a brighter mix of Emperor’s Children and Ceramite White, focusing on the central area. Remember, the key to this process is layering and blending, creating smooth transitions between colours. More Nurgle Tutorials If you don’t have an account, please sign up here! The website currently has over 350 video tutorials with steps and tips, plus a selection of PDFs. If you are not sure about joining, you can explore my free videos with a free membership, or take the plunge and become a full subscriber for full access. If you’d prefer to support me on Patreon, please visit: https://www.patreon.com/RichardGray [...]
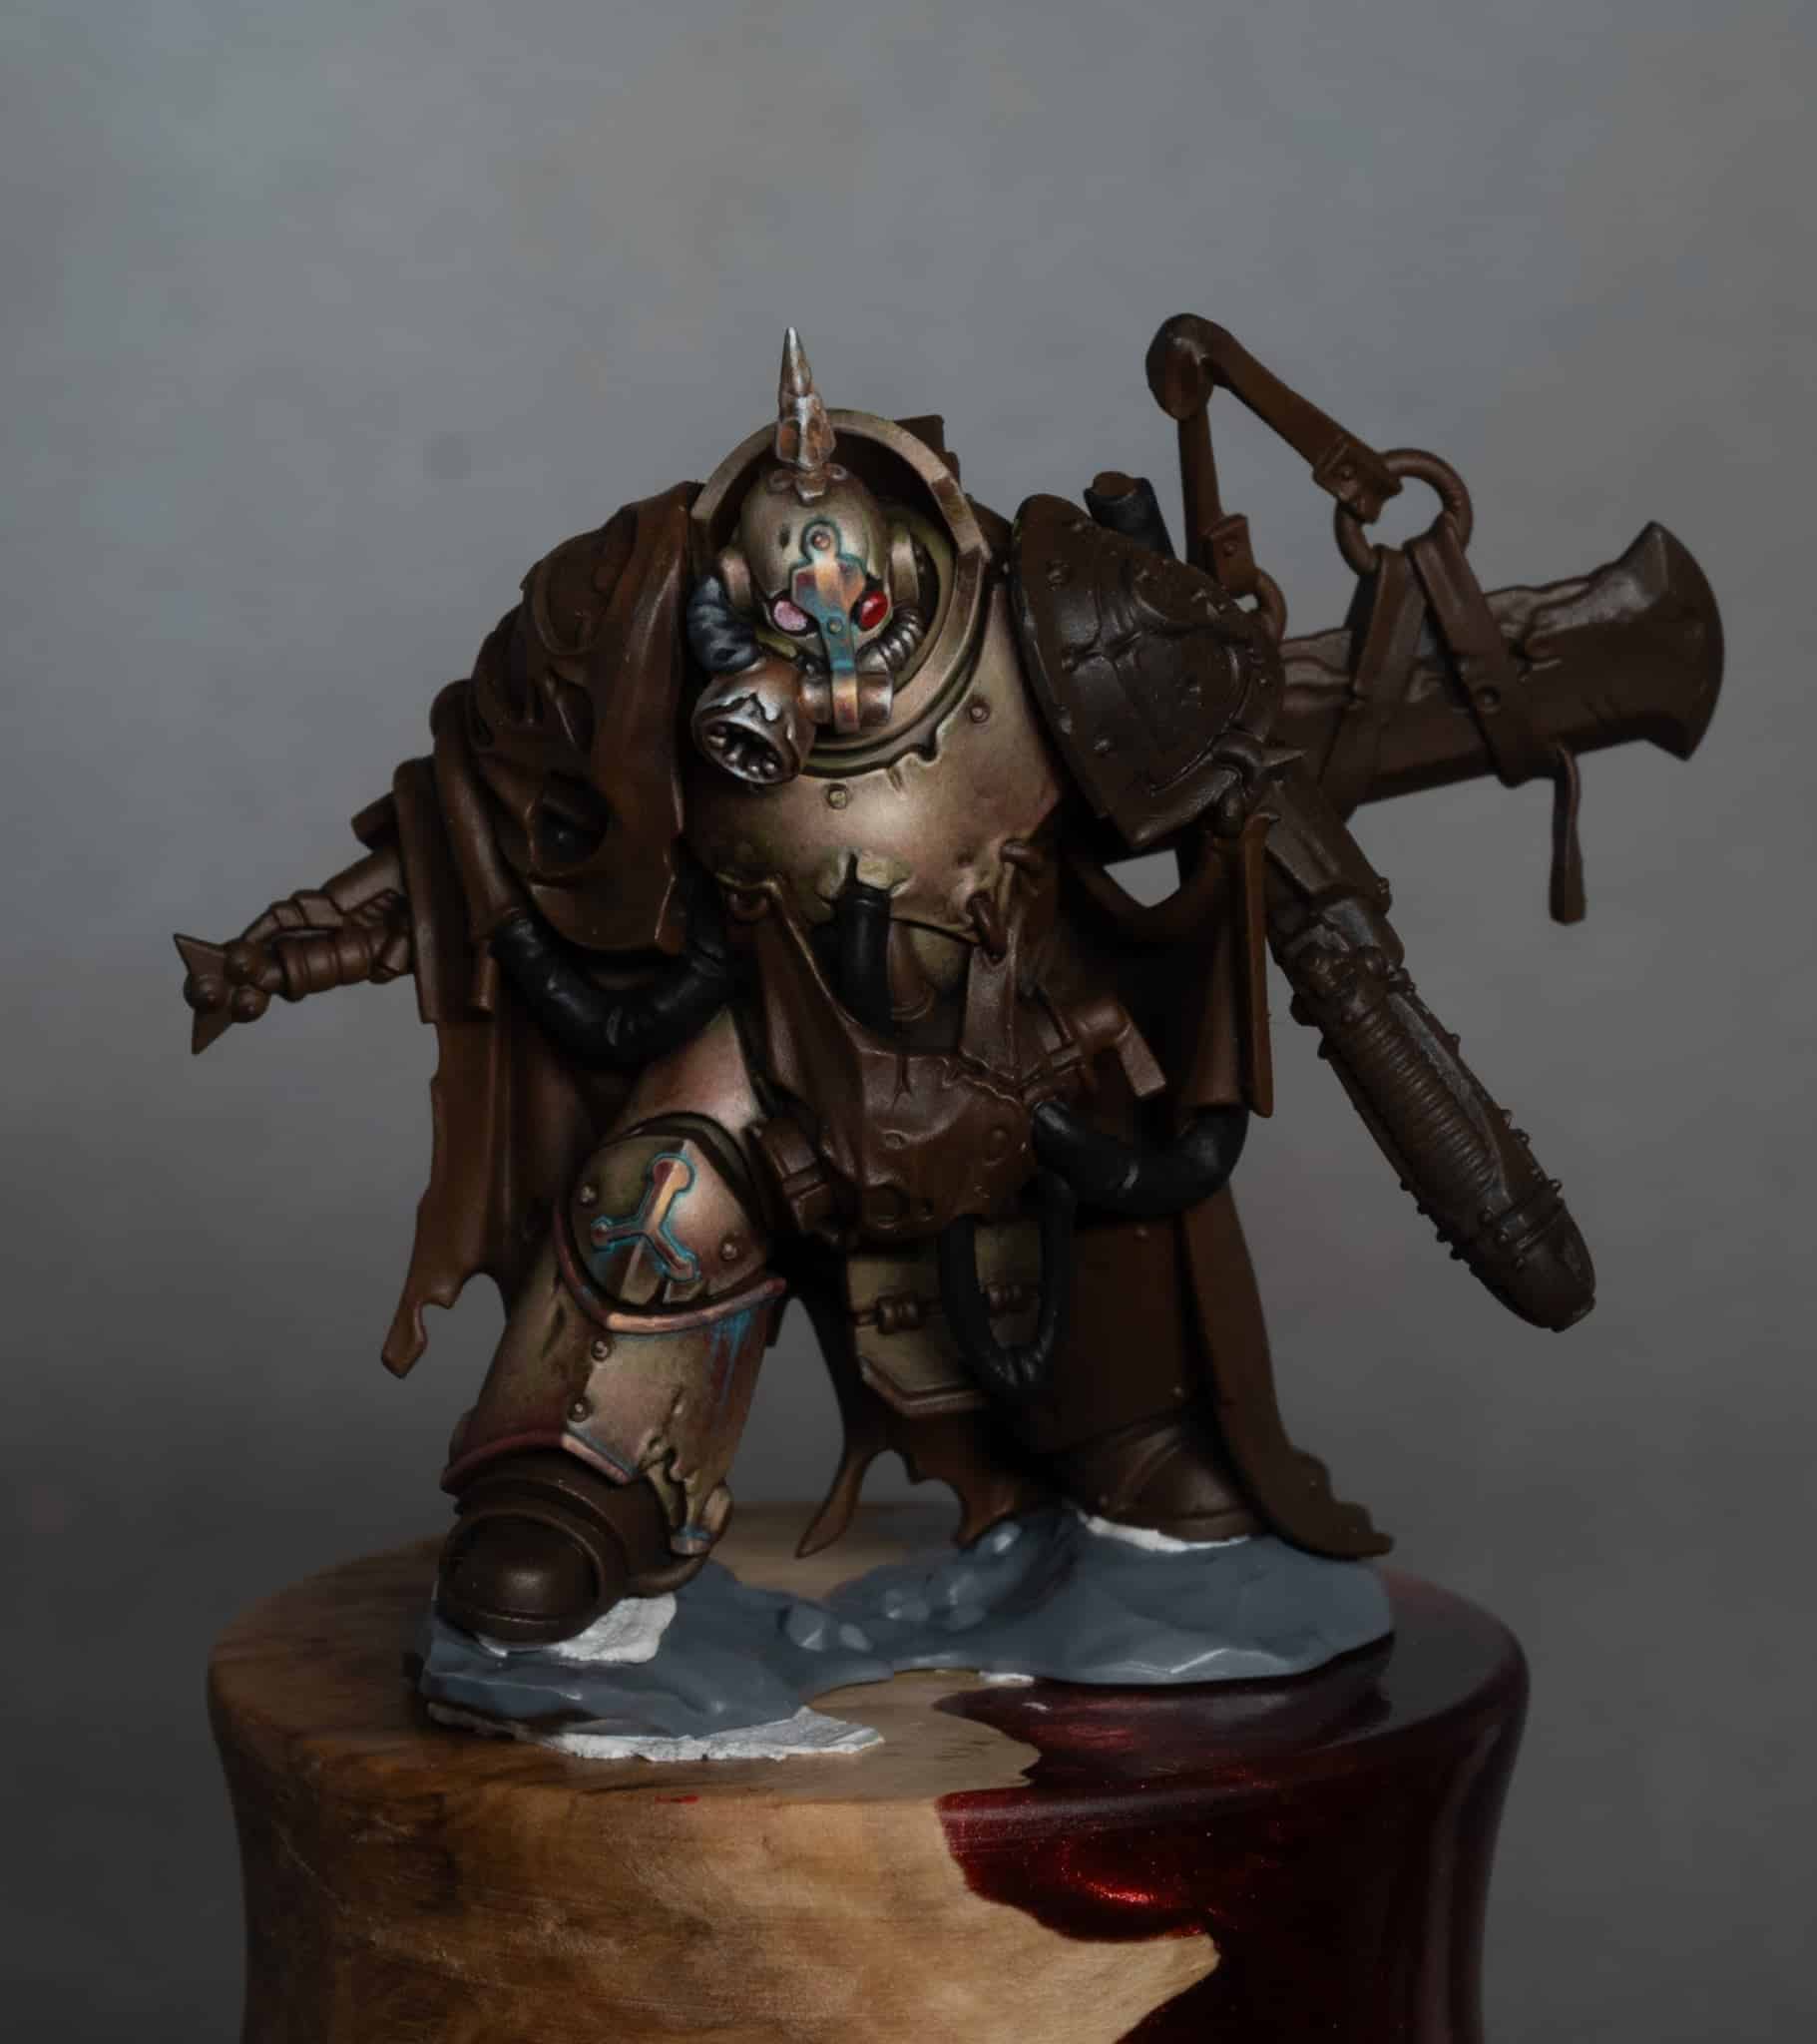
How to Paint Maggotkin of Nurgle
A guide on creating a series of effects on the Plague God’s chosen servants, the Maggotkin of Nurgle, with rusty weapons, grimy copper armour and general Nurgle weathering techniques! Keep scrolling to explore the tutorials in order, or click on one of the links below to quickly jump to an a specific effect! Video – Maggotkin of Nurgle Diseased Skin Part OnePaints UsedStep by Step GuideVideo – Maggotkin of Nurgle Diseased Skin Part TwoPaints and Materials UsedStep by Step GuideVideo – Maggotkin of Nurgle Diseased Skin Part ThreePaints and Materials UsedStep by Step GuideVideo: How to Create a Nurgle Rusty SwordMaterials Needed:Step-by-Step Guide:How to Paint NMM CopperPaints and MaterialsStep-by-Step GuideHow to Paint NMM Copper Greeny Verdigris EffectPaints and MaterialsStep-by-Step GuideMore Nurgle Tutorials! Video – Maggotkin of Nurgle Diseased Skin Part One Paints Used Games Workshop ‘Cadian Fleshtone’: For the base coat and blending. Scale 75 ‘Black Leather’: Used for initial detailing and creating depth in the skin. Games Workshop ‘Pallid Wych Flesh’: Mixed with Cadian Fleshtone for highlights. Games Workshop ‘Rhinox Hide’: Diluted for defining skin defects and recesses. Step by Step Guide Base Coat: Begin by applying a base coat of Games Workshop’s ‘Cadian Fleshtone’ to your model. Make sure this coat is even and covers any black primer fully. Adding Detail: Next, use Scale 75 ‘Black Leather’ for initial detailing. This paint has a softer finish, ideal for skin textures. Apply it more like a wash, targeting recessed areas to create depth. The goal here is to start developing a diseased skin look. Blending Techniques: While the ‘Black Leather’ is still wet, blend in additional ‘Cadian Fleshtone’. This stage can be a bit messy; the aim is to create a base for further refinement, not perfection. Highlight Focal Points: Consider where you want to draw the eye. Focus on areas like the centre of the chest and the top of the belly, which naturally lead the viewer’s gaze towards the head. Wet Blending: Continue mixing ‘Cadian Fleshtone’ with ‘Black Leather’ directly on the model. This wet blending creates a smoother transition between light and dark areas. Highlighting: Mix ‘Cadian Fleshtone’ with varying levels of ‘Pallid Wych Flesh’ on your palette. Use this mixture to introduce lighter colours for highlighting, enhancing the diseased skin effect. Detailing Shadows and Highlights: Focus on skin creases and folds, adding highlights to create an illusion of shadow. At this stage, precise brushwork isn’t crucial. Skin Defects: For holes in the skin, use a watered-down ‘Rhinox Hide’. It dries lighter than it appears when wet, perfect for defining recesses. Overall Balance: Regularly step back to view the whole model, ensuring a balanced look. Work on the entire model rather than focusing on individual sections. Refining Colours: Keep refining by alternating between shadows and highlights. Adjust as needed for the desired effect. Final Highlights: For the final touches, use ‘Pallid Wych Flesh’ to highlight key areas and make them stand out. Model Handling: Use a model holder to prevent oils from your skin affecting the paint job. I use Rathcore model holders. Video – Maggotkin of Nurgle Diseased Skin Part Two Paints and Materials Used Games Workshop Paints: ‘Cadian Fleshtone’: Used for base coating and blending. ‘Rhinox Hide’: Applied for deeper shading and detailing. ‘Pallid Wych Flesh’: Utilised for highlighting. ‘Skavenblight Dinge’: Employed for glazing and desaturating the skin tone. ‘Balor Brown’: Added for warmth in certain areas, enhancing the diseased look. ‘Evil Sunz Scarlet’: Used after initial issues with red tones, particularly for open sores. Scale 75 Paints: ‘Eldandil Violet’: Mentioned for specific details and effects. Step by Step Guide Setting the Scene: To begin with, I’ve already completed some preliminary work on the model. This includes filling in the teeth and tongue, which helps define the overall look. It’s important to get your contrasts right from the start. Introducing Additional Colours: In this session, I’m introducing a few extra colours compared to the previous video. I’ve got a purple for bruising and decay around wounds. This adds depth and a sense of realism to the skin. Consistency Check: A quick note on the consistency of the paints – it’s crucial for the glazes. You’ll notice I’m using Games Workshop paints like ‘Cadian Fleshtone’, ‘Rhinox Hide’, and ‘Pallid Wych Flesh’, as well as ‘Skavenblight Dinge’ and ‘Balor Brown’. I’ve also got Scale 75 ‘Eldandil Violet’ for some specific detailing. The Painting Process: The techniques I’m employing here are very similar to what I’ve done in the past – lots of layers, plenty of back-and-forth with highlighting, adding and taking away paint to blend it all seamlessly. It’s a slow process, but it yields great results. Focus on Glazing: A key aspect of this session is glazing. I’m using ‘Skavenblight Dinge’ quite a bit. It’s excellent on skin, helping to blend colours together and desaturate the skin tone, giving it a slightly dead look, fitting for a Nurgle warrior. Applying Highlights: When painting the highlights, especially as they get brighter, it’s important to focus on the model’s focal points. For this model, the focal points are the top of the belly and the middle of the chest, directing the viewer’s eyes towards the head. Addressing the Red Tones: I initially had some trouble with the red paint for the open sores, which turned out almost orange and then pink. After some trial and error, I switched to Games Workshop ‘Evil Sunz Scarlet’, which provided the consistency and colour I was looking for. Creating Contrast with Gloss: To enhance the contrast between the skin and wounds, I’m going to apply a gloss varnish over the red areas. This not only enriches the colour but also differentiates the wounds from the matte finish of the skin. Additional Skin Techniques: While focusing on the skin, it’s a good practice to work on other areas of the model too. This helps to show off the skin more effectively in context. Next Steps: In the coming parts, I’ll be working on more specific areas like the custom shoulder pad and weapons. I’m planning to paint these in a rust effect for a cohesive look. Video – Maggotkin of Nurgle Diseased Skin Part Three Paints and Materials Used Games Workshop Paints: ‘Cadian Fleshtone’: Used for base layers and blending. ‘Pallid Wych Flesh’: Applied for fine highlighting. ‘Rhinox Hide’: Utilised for deeper shadows and details. ‘Mournfang Brown’: Employed for additional detailing and shading. ‘Skavenblight Dinge’: Used for desaturating and blending. ‘Balor Brown’: Mixed for glazing and adding warmth. Scale 75 Paint: ‘Eldandil Violet’: Used for specific detailing and effects. Step by Step Guide Palette Setup: We’re continuing with the same colours as before. The skin tones are a mix of Games Workshop’s ‘Cadian Fleshtone’ and ‘Pallid Wych Flesh’. The top colour is pure ‘Cadian Fleshtone’, and the bottom is pure ‘Pallid Wych Flesh’. The middle two are various mixtures to create smooth transitions. Consistency and Control: For shadows and details, I’m using ‘Rhinox Hide’ and ‘Mournfang Brown’, slightly thicker than usual to make positive marks quickly. I also have Scale 75’s ‘Eldandil Violet’ for specific details. Glazing Techniques: The glazes are made with ‘Cadian Fleshtone’ and ‘Balor Brown’. When turning ‘Cadian Fleshtone’ into a glaze, be aware the pigment separates, appearing yellow. This separation is essential to understand when glazing, as it affects how the colour appears on the model. Desaturation with ‘Skavenblight Dinge’: To tone down the vibrancy of ‘Cadian Fleshtone’ in areas, I’m using ‘Skavenblight Dinge’. This creates a contrast between rotten and healthy-looking skin, allowing for more controlled desaturation. Refinement through Minimal Paint: The focus here is on making tiny, precise marks. I’m using very little paint on the brush, ensuring smooth, controlled application. It’s a time-consuming process, but necessary for display-level quality. Highlighting with ‘Pallid Wych Flesh’: Use this sparingly for the highest points of highlight. Too much can overwhelm the subtlety of the transitions. It’s almost like adding glimmers of light without using pure white. Brush Selection: For the finer details on the belly, I’ve switched to a size 0 Broken Toad brush, allowing for even smaller, more precise marks. Creating Shadows and Depth: I’m using ‘Rhinox Hide’ to accentuate shadows, especially in areas like the folds of flesh. This helps separate shapes and adds depth to the skin. Balancing Colour and Contrast: I’m continually adjusting the balance between the healthy and necrotic flesh. This involves layering ‘Cadian Fleshtone’ over darker areas to create a striking contrast. Vein Detailing: For the veins, I’m using a purple paint, thinned down for precision. This is applied over the flesh and then glazed over to create the illusion of veins beneath the skin. Final Touches: I’m adding small details and refining the transitions. This includes highlighting around wounds and pustules to make them stand out and add to the overall diseased appearance. Finishing the Skin: The final step involves going over the skin one last time, ensuring every detail is as sharp and refined as possible. This is crucial for achieving a high-quality finish suitable for display or competition. Video: How to Create a Nurgle Rusty Sword Materials Needed: Baking Soda Matte Varnish Old brushes Orange Paint (For this example, we’ll use Scale 75 Kalahari Orange, but any solid orange paint will do) Step-by-Step Guide: Mixing the Rust Effect: Begin by creating your rust mixture. You’ll need to combine baking soda, matte varnish, and orange paint. The exact colour of the orange paint isn’t crucial, but a solid orange like Scale 75 Kalahari Orange is recommended for authenticity. Mix these ingredients together. You don’t need any specialised tools for mixing; anything you have to hand will suffice. Adjusting Consistency: The mixture might appear a bit dry initially. If it’s too clumpy, thin it down with more varnish. Remember, the more varnish you add, the stronger and more hard-wearing the mixture becomes. This also helps to seal the baking soda against any acidic elements. Aim for an intense, well-bound mixture. It should dry lighter in colour, so don’t be alarmed by the initial appearance. Application on the Model: Use an old brush for application; this mixture isn’t kind to brushes. An older, slightly worn brush is ideal. Apply the mixture to the desired areas of your model. It’s a somewhat passive process; you don’t have to be overly precise. The mixture will be akin to a psyche in gel, so aim for an uneven surface. Too thin an application will just look like spread-out grains. Focus on clumping the mixture slightly for a more realistic rust effect. If applied too thinly, it won’t have the desired impact. Creating Texture: After applying, use a stippling technique with your brush to spread out the grains at the edges. This helps to soften the transition from the rusted areas to the clean areas of the model. Continue dabbing at the mixture to spread it and create a texture that resembles rust accumulating on the blade or other parts of the model. Final Touches: Once applied, the mixture might look a bit smooth, but don’t worry. As it dries, it will gain a more defined, grainy rust-like texture. To enhance the effect, you can apply a very watered-down coat of a darker paint, like Rhinox Hide, after the rust mixture has dried. Finishing Up: Allow your model to dry completely. Once dry, you should see a realistic rust effect, adding depth and character to your piece. How to Paint NMM Copper Paints and Materials Brush Size and Type: Don’t use a tiny detail brush for the entire process. Instead, a slightly larger, older brush is preferred. My older brush has a worn tip, which is thicker than a new brush and allows for better paint control and blending. An old, well-used brush is good for this type of painting. The worn tip of an older brush can make blending easier. Paints Used Games Workshop: Doombull Brown, Golden Yellow (old colour; find a modern equivalent if needed) Scale 75: Ice Yellow, Salmon Pink, Black Red Black and White paint (any preferred brand) Step-by-Step Guide Understanding Copper NMM: Remember, copper NMM aims to create a metallic effect without using metallic paints. Copper is essentially pink in hue, similar to skin tones, with brown for shadows and a hint of sand yellow. Preparation of Palette: On your wet palette, blend all the colours together into one smear. This is because copper has a lot of subtleties in colouring. Start with Doombull Brown and mix in Black Red from Scale 75. If you don’t have Black Red, mix black and red to achieve a dark, reddish brown. Creating the Base Colour: For the darker areas of copper, you want something a bit more red. Along your paint smear on the palette, integrate colours that become more yellow and orange. Use Golden Yellow and Ice Yellow for this purpose. Add Salmon Pink at the very end for highlights. Applying the Base Layer: Before starting the video, paint the whole model (or the part you’re working on) with Doombull Brown. This creates an easier starting point for the copper effect. Mixing on the Model: You’ll be mixing the paint directly on the model, working quickly. This method is different but effective for creating copper NMM. Apply the colours and quickly determine where the highlights will be. The idea is to get lighter colours down first as a base to work from. Developing the Effect: Start blending in reflections and refining the look. Add lighter colours and work on creating smooth transitions and contrast. Remember, smooth transitions and good contrast are key in NMM painting. Refining the Details: As you progress, you’ll refine the copper effect by using thinner paint and increasing contrast. Use Salmon Pink for the higher highlights and blend it in for a smooth transition. Final Touches: Towards the end, focus on refining the paint with continual glazes until it looks smooth and metallic. You might need to make slight adjustments to the highlights and shadows. Add black, turned into a glaze, at the bottom of the shoulder pad to increase contrast. Final Overview: The final piece should showcase a refined copper NMM effect with smooth transitions, proper contrasts, and a realistic metallic look. How to Paint NMM Copper Greeny Verdigris Effect Paints and Materials Games Workshop Sybarite Green P3 Morrow White (or your preferred white paint) Step-by-Step Guide Understanding Verdigris: Verdigris is a patina that forms on copper, brass, or bronze when exposed to air or seawater over time. This guide aims to create a more realistic effect, where verdigris covers larger areas rather than just around rivets and crevices. Creating Verdigris Tones: You will mix Sybarite Green with Morrow White to create three stages of verdigris tones: First Stage: Pure Sybarite Green. Second Stage: A mix of half Sybarite Green and half Morrow White. Third Stage: Mostly Morrow White with a tint of Sybarite Green. Applying the First Layer: Start with the pure Sybarite Green. Apply it by gently dabbing it onto the model. The goal is to create a patchy texture rather than smooth streaks. This layer should cover most of the area, but try to maintain the shades and shine of the underlying metallic paint. Mid-tone Application: Next, apply the second stage mix (half Sybarite Green, half Morrow White). This should be used more sparingly than the first layer. Focus on applying this mix to darker areas and recesses. You want to maintain visibility of the copper NMM base, so apply it carefully and artistically. Adding Highlights: For the final layer, use the lightest mix (mostly Morrow White with a hint of Sybarite Green). This is like a reverse highlight, working best in shadows to create contrast. Apply this very selectively, as it can quickly cover the base layers. It should go into the deepest recesses and lower curved areas where verdigris would naturally accumulate. Final Touches: Remember, verdigris should have an uneven, patchy appearance. It should not be smooth or uniformly applied like rust. Check your work against reference images to ensure a natural look. Finishing Up: After applying all three stages, your model should exhibit a realistic verdigris effect over the copper. The underlying NMM copper should still be visible, contributing to the overall realism. More Nurgle Tutorials! If you don’t have an account, please sign up here! The website currently has over 350 video tutorials with steps and tips, plus a selection of PDFs. If you are not sure about joining, you can explore my free videos with a free membership, or take the plunge and become a full subscriber for full access. If you’d prefer to support me on Patreon, please visit: https://www.patreon.com/RichardGray [...]
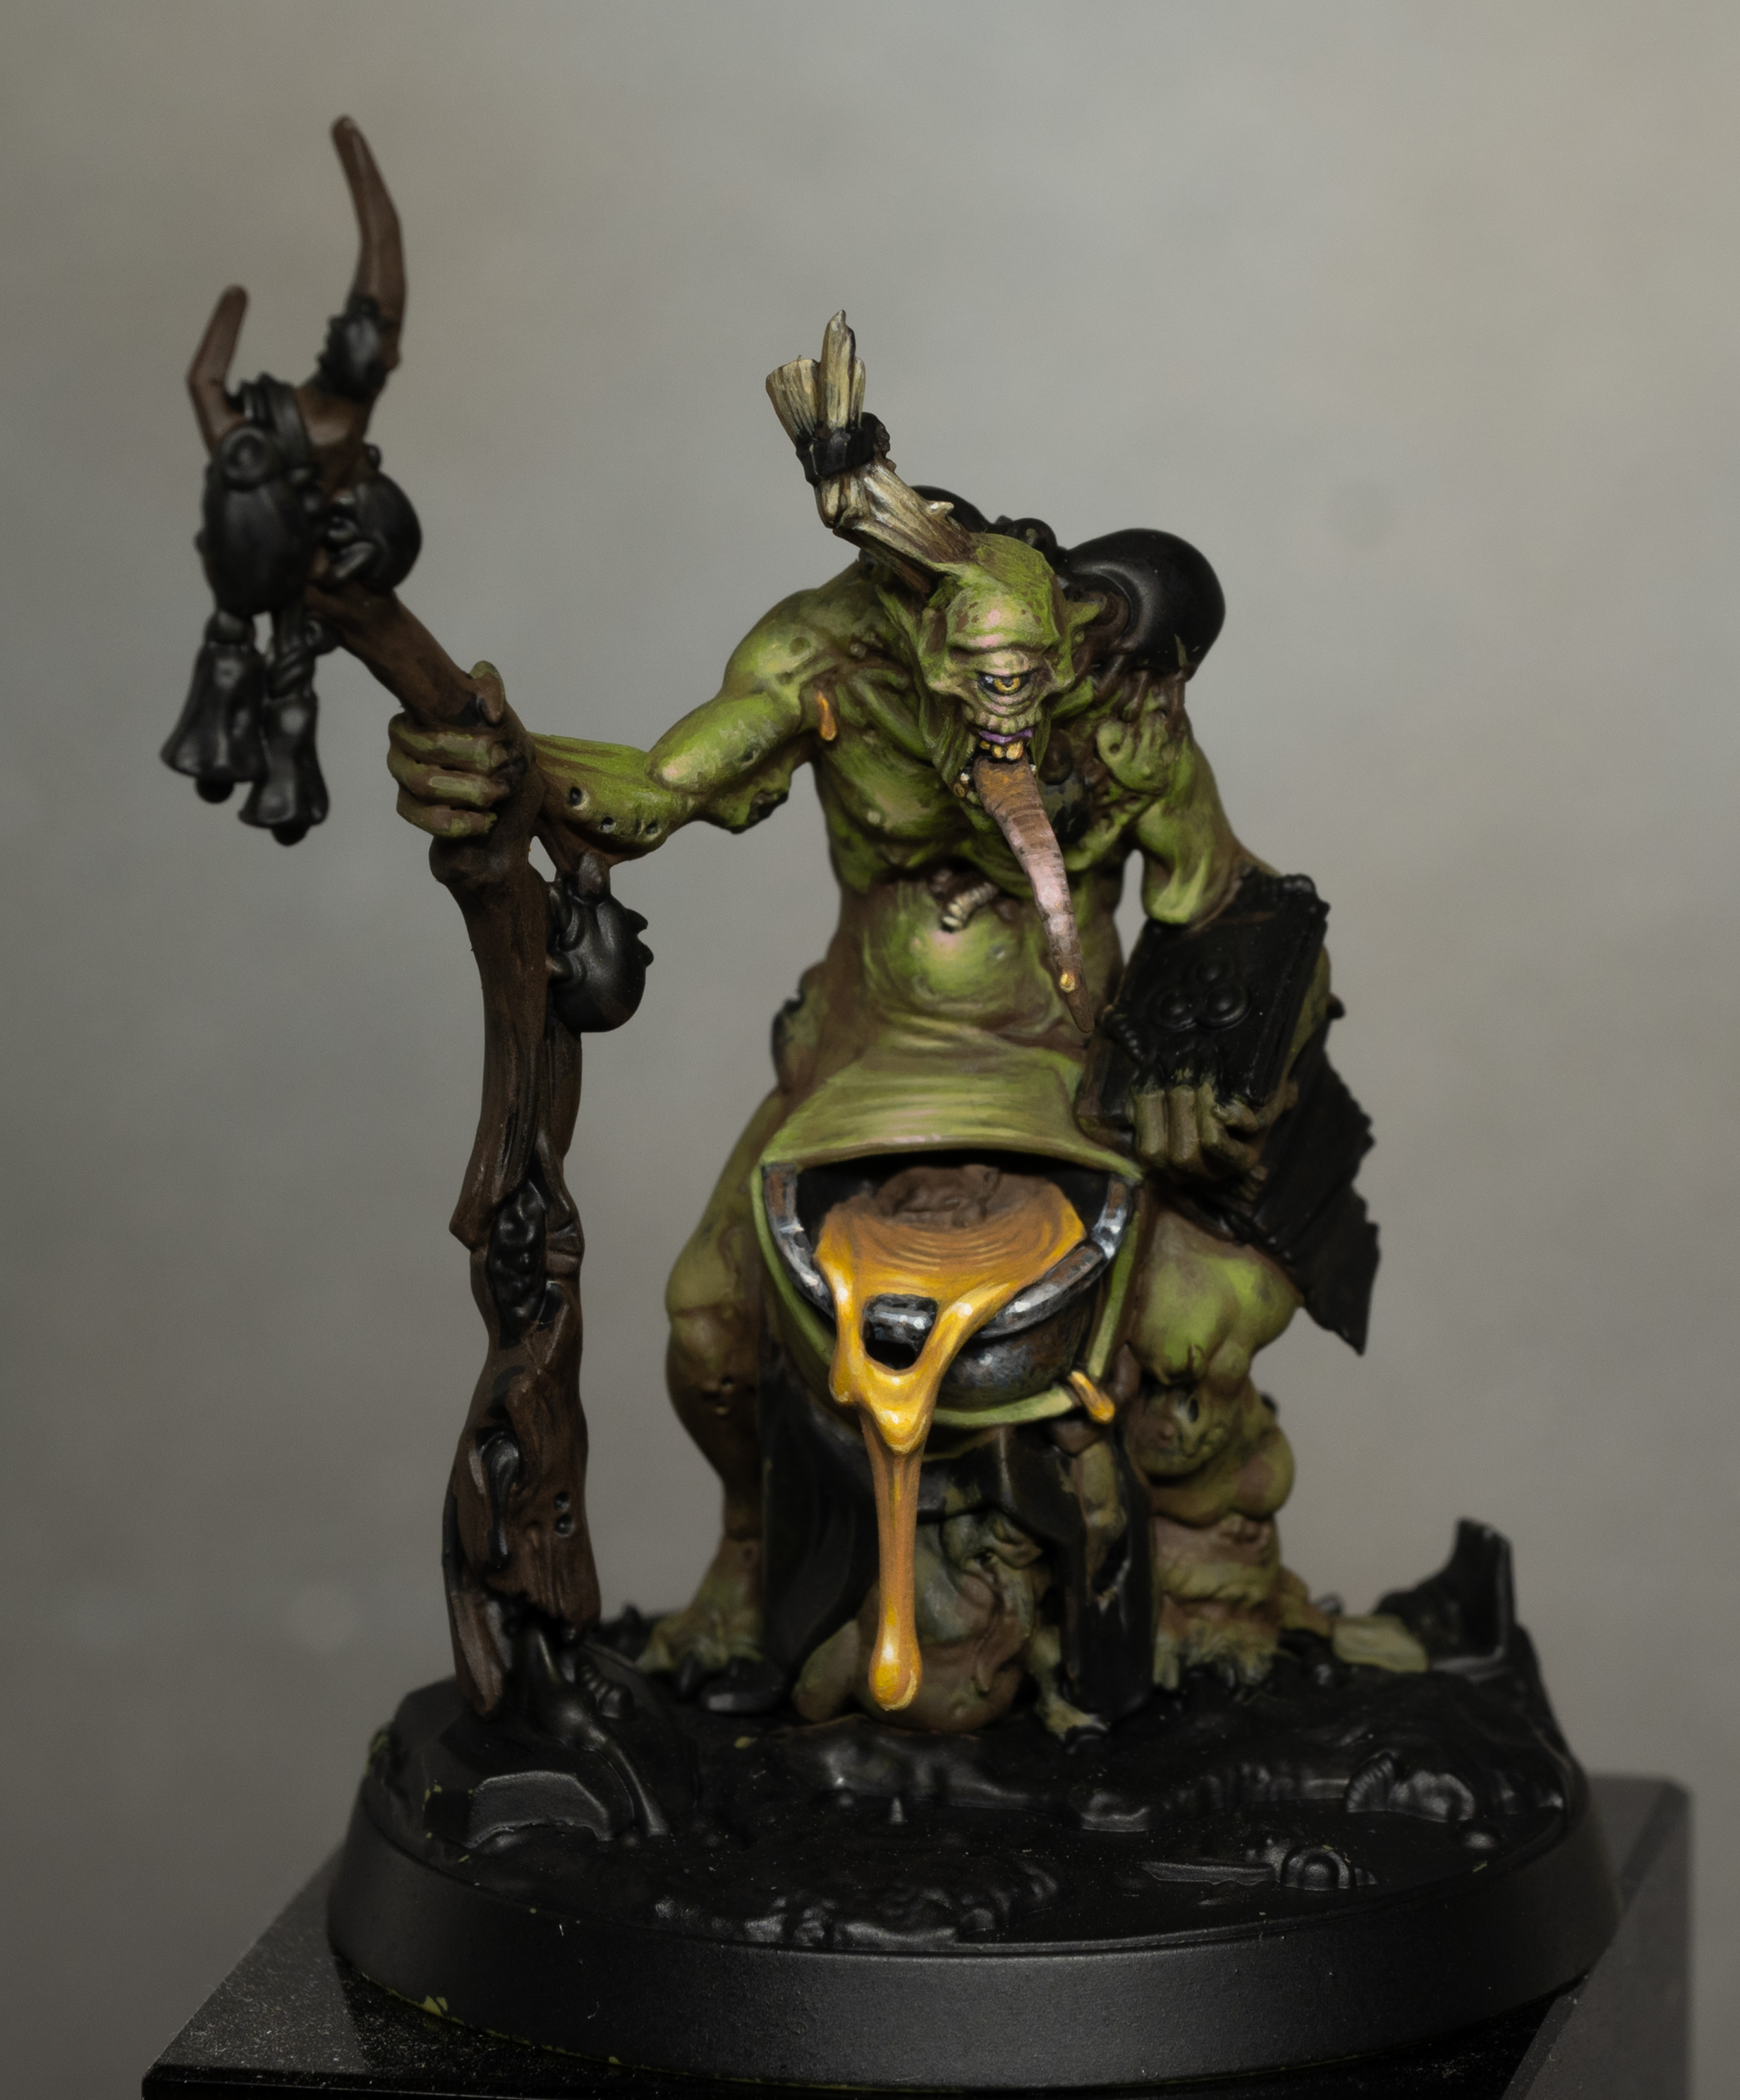
How to Create a Nurgle Rusty Sword
Here I show you how to create a Nurgle Rusty Sword in this simple but very effective way! You can use it to create a rusty effect on your Nurgle weapons, or on armour. Video: How to Create a Nurgle Rusty Sword Materials Needed: Baking Soda Matte Varnish Old brushes Orange Paint (For this example, we’ll use Scale 75 Kalahari Orange, but any solid orange paint will do) Step-by-Step Guide: Mixing the Rust Effect: Begin by creating your rust mixture. You’ll need to combine baking soda, matte varnish, and orange paint. The exact colour of the orange paint isn’t crucial, but a solid orange like Scale 75 Kalahari Orange is recommended for authenticity. Mix these ingredients together. You don’t need any specialised tools for mixing; anything you have to hand will suffice. Adjusting Consistency: The mixture might appear a bit dry initially. If it’s too clumpy, thin it down with more varnish. Remember, the more varnish you add, the stronger and more hard-wearing the mixture becomes. This also helps to seal the baking soda against any acidic elements. Aim for an intense, well-bound mixture. It should dry lighter in colour, so don’t be alarmed by the initial appearance. Application on the Model: Use an old brush for application; this mixture isn’t kind to brushes. An older, slightly worn brush is ideal. Apply the mixture to the desired areas of your model. It’s a somewhat passive process; you don’t have to be overly precise. The mixture will be akin to a psyche in gel, so aim for an uneven surface. Too thin an application will just look like spread-out grains. Focus on clumping the mixture slightly for a more realistic rust effect. If applied too thinly, it won’t have the desired impact. Creating Texture: After applying, use a stippling technique with your brush to spread out the grains at the edges. This helps to soften the transition from the rusted areas to the clean areas of the model. Continue dabbing at the mixture to spread it and create a texture that resembles rust accumulating on the blade or other parts of the model. Final Touches: Once applied, the mixture might look a bit smooth, but don’t worry. As it dries, it will gain a more defined, grainy rust-like texture. To enhance the effect, you can apply a very watered-down coat of a darker paint, like Rhinox Hide, after the rust mixture has dried. Finishing Up: Allow your model to dry completely. Once dry, you should see a realistic rust effect, adding depth and character to your piece. More Tutorials on Rust, Grime and Weathering If you don’t have an account, please sign up here! The website currently has over 350 video tutorials with steps and tips, plus a selection of PDFs. If you are not sure about joining, you can explore my free videos with a free membership, or take the plunge and become a full subscriber for full access. If you’d prefer to support me on Patreon, please visit: https://www.patreon.com/RichardGray [...]
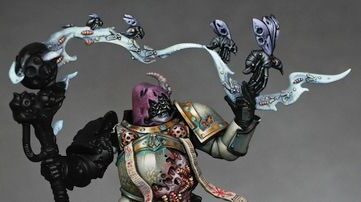
Video Tutorials: How to Paint Mortarions Face, Feet and Hood
There are lots of textures and fine details on the feet and face of Mortarion – here’s how to paint Mortarions Face, Feet and Hood! Quick Jump to: Video: Face and footStep-by-step: How to Paint Mortarions Face and footVideo: Hood Part 1Step-by-step: How to Paint Mortarions Hood – Part OneVideo: Head and Hood Part 2Step-by-step: How to Paint Mortarions Head and Hood – Part TwoVideos Not Showing? Video: Face and foot This video shows how to lighten the face of Mortarion and also how to paint the weathering on his armour. The following paints were used:Games Workshop: Ceramite White, Flayed One Flesh, Pallid Wych Flesh, Ushabti Bone, Rhinox Hide. Step-by-step: How to Paint Mortarions Face and foot Glazing for Face Lightening: Prepare a glaze using Games Workshop’s Flayed One Flesh paint and water (about 5 parts water to 1 part paint).Load the brush with the glaze and remove excess paint on kitchen roll.Apply thin layers of glaze to the face, focusing on central areas like the forehead, bridge of the nose, and cheeks.Be careful not to let the glaze pool in the recesses. Keep adjusting to maintain control over the layering.Pallid Wych Flesh Detailing: Use Games Workshop’s Pallid Wych Flesh, a thicker paint, to highlight the top of creases on the face.Build up contrast between creases and highlights gradually to create a natural look.Ensure that the creases are lightened, but maintain a balance with the overall lighting on the face.Final Highlight with Games Workshop’s Ceramite White: Apply Games Workshop’s Ceramite White to the highest points of the face, focusing on central areas.Use a controlled technique to avoid overdoing the highlights.Maintain subtlety and control over the white highlights for a natural effect.Chip-Weathering on Armor: Choose Games Workshop’s Rhinox Hide for chipping on the armor.Apply the paint with a brush, creating small marks on the model.Leave some patches of white paint between the chipped areas for added interest.Consider the positioning of chips, focusing on areas that would naturally experience wear and tear.Use a colour-coded brush to keep track of the tool’s usage and maintain control.Refining the Chipping: Adjust the thickness of the chipping lines to control the visual impact.Ensure that the chipping looks natural and not too high in contrast.Pay attention to the bottom of the foot, adjusting the highlighting based on the foot’s position.Add more chips on areas that would naturally experience more damage, like the front side of the leg. Video: Hood Part 1 The following paints were used: Games Workshop: Abaddon Black, Temple Guard Blue, Xereus Purple, Balor Brown Vallejo: Black (Abaddon Black), Heavy Blue Grey (Celestra Grey), German Grey (Abaddon Black with a touch of white) P3: Morrow White (Ceramite White) Step-by-step: How to Paint Mortarions Hood – Part One Prepare the Model: Ensure that the Mortarion model’s hood has been properly primed in black. Fill in any gaps resulting from assembling the model using polystyrene cement. Sand down the gaps to create a smoother surface. Gather Paints and Tools:On your wet palette, prepare the following paints: Abaddon Black (Games Workshop)Temple Guard Blue (Games Workshop)Xereus Purple (Games Workshop)Balor Brown (Games Workshop)German Grey (Vallejo) – Mix Abaddon Black with a touch of whiteHeavy Blue Grey (Vallejo) – Celestra Grey (Games Workshop)Morrow White (P3) – Ceramite White (Games Workshop)Tools:Older paintbrush (to avoid quick wear)Size zero artist brush (for finer details)Palette for mixing paintsAbaddon black for glazingBase Coat with Blue: Take the older paintbrush and apply Temple Guard Blue onto the model’s hood. Alternate between German Grey and Temple Guard Blue for a quick blended look. Focus on the edges and tendrils, applying more blue to create a weathered effect. Refine with Finer Brush: Switch to the size zero artist brush and refine the texture. Pay attention to the spikes on top of Mortarion’s head, making them stand out against the dark color. Apply both German Grey and Temple Guard Blue in a more controlled manner. Add Black for Shading: Introduce deeper shading by mixing Abaddon Black with a small amount of water. Use the finer brush to apply this mixture to specific areas, enhancing the three-dimensional effect. Glaze with Red: Create a glaze using Abaddon Black and Xereus Purple (or any purple paint). Start near the highlights and work into the shadows, allowing the glaze to enhance the color variance. Repeat this process to build up the desired tone. How to paint Mortarions Face: Once the hood is painted, focus on the face. Be cautious around the details, such as the eyes and eyelids. Use Balor Brown for shadows and then apply Morrow White to pick out fine details. Pay attention to the eyes, painting them with a brighter yellow for contrast. Fine-Tune and Experiment: Continue fine-tuning the paintwork, experimenting with glazes and additional details. Remember to test the paint consistency on a spare surface before applying it to the model. Glaze and Highlight: Keep glazing over the areas, especially the highlights, to add depth. Use minimal amounts of paint to pick out final highlights, enhancing the overall texture and making it look three-dimensional. Video: Head and Hood Part 2 Vallejo: Neutral Grey : Skavenblight Dinge German Grey (Abaddon Black with a touch of white) English Uniform (XV-88) Japanese Uniform (Balor Brown) Ice Yellow (Ushabti Bone with a touch of yellow) Heavy Blue Grey (Celestra Grey) Black (Abaddon Black) Games Workshop: Emperor’s Children Rhinox Hide P3: P3: Morrow White (Ceramite White) Step-by-step: How to Paint Mortarions Head and Hood – Part Two How to paint Mortarions Face and Eyes: Start with a black paint (Vallejo: Black) to paint the pupils and cover the iris.Use Vallejo: Heavy Blue Grey (Celestra Grey) to paint the eyes themselves, avoiding pure white to create a more natural look.Consider painting cataracts initially but feel free to change to red and blue eyes for a magical effect.Highlighting the Eyes: Use Vallejo: White to highlight the lower edge of the eyes, creating a subtle, realistic contrast.Paint the iris around the black dots to add depth and detail to the eyes.Painting the Metal Halo: Apply a base coat of Vallejo: English Uniform (XV-88) on the metal halo, ensuring it’s less saturated than other gold areas on the model.Use Vallejo: Neutral Grey to blend into crevices and scratches, creating a reverse shading effect.Add Vallejo: Morrow White (Ceramite White) to blend in some warmth and detail.Rebreather Cylinders: Highlight the cylinders with a mix of Vallejo: Ice Yellow (Ushabti Bone with a touch of yellow) and Vallejo: Black.Blend in some of the previous colours to add more detail and scratches.Use Games Workshop: Emperor’s Children for the tubing, and highlight with Vallejo: English Uniform (XV-88).Cabling and Tubes: Highlight cabling with a mix of Vallejo: White and Vallejo: English Uniform (XV-88).Pay attention to angles and details, painting from one angle along the length to maintain consistency.Add final highlights sparingly using Vallejo: Ice Yellow (Ushabti Bone with a touch of yellow).Fleshy Details: Paint the stringy flesh between canisters with Vallejo: Rhinox Hide for an organic look.Use Vallejo: Evil Sunz Scarlet as a glaze to transition light hitting the piping while maintaining details.Final Touches: Paint black ribbing on the inside of the lower tube with Vallejo: Neutral Grey and highlight with Vallejo: Heavy Blue Grey (Celestra Grey).Ensure all details are well-defined and consistent. More Mortarion? Right this way: Videos Not Showing? To view any of my paid tutorials, you need to be a member of the website – please click below to log in or join the site. Not sure about joining just yet? Check out my Youtube for all my free tutorials or sign up as a free “friend” member on this site and visit the free videos page! If you’d prefer to support me on Patreon, please visit: https://www.patreon.com/RichardGray [...]
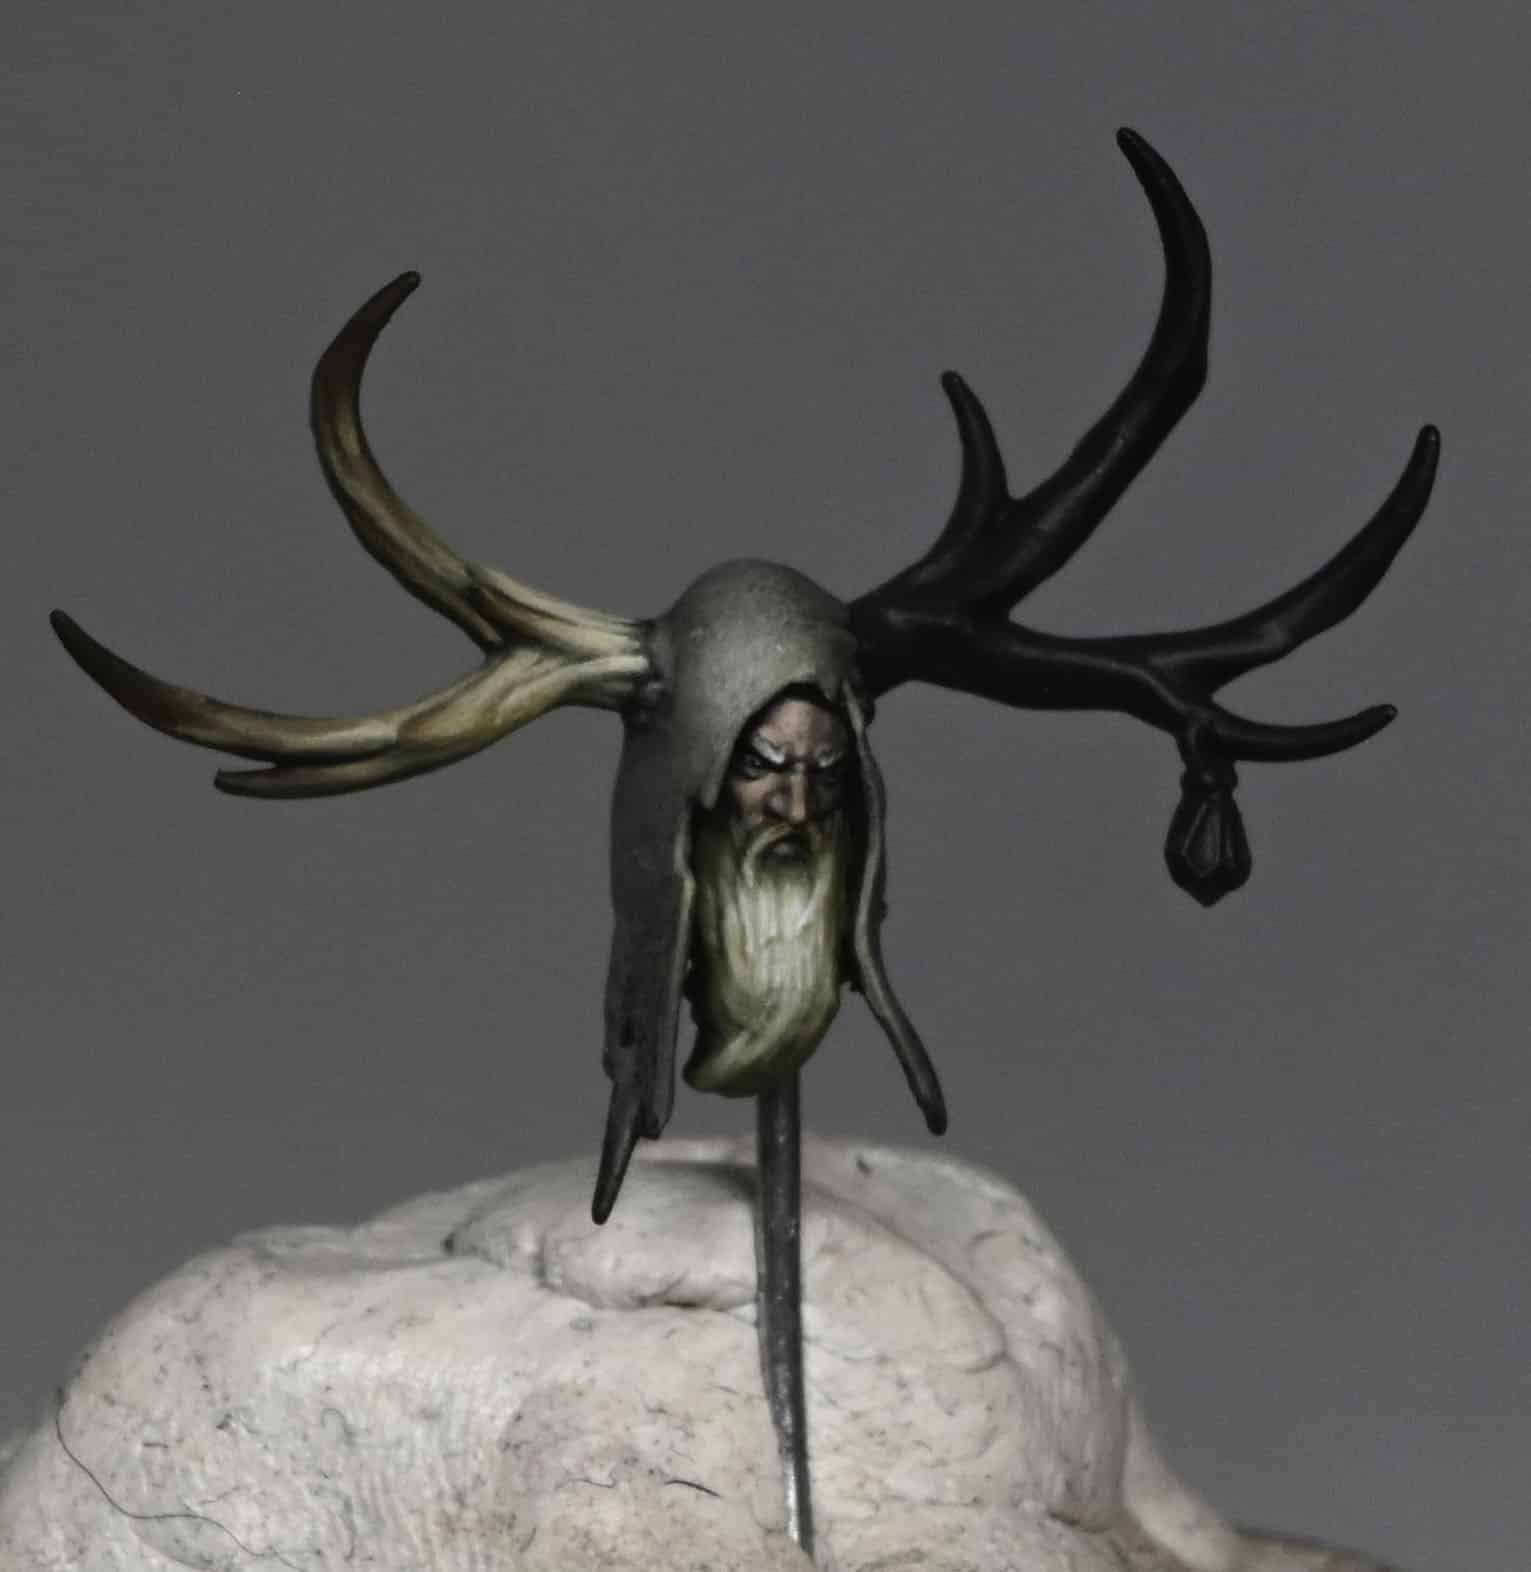
Video Tutorials: How to Paint Freehand Tiny Nurgle Wings
I had to make the Nurgling companions of Mortarion have wings to match their master! Here is How to Paint Freehand Tiny Nurgle Wings, with two videos, paints and a step-by-step guide. How to Paint Freehand Tiny Nurgle Wings : Part One The following paints were used: Games Workshop: Ushabti Bone, Kislev Flesh, Cadian Fleshtone, Bugmans Glow, Rhinox Hide Vallejo: Model Colour Black (Abaddon Black) Step by Step: How to Paint Freehand Tiny Nurgle Wings Preparation Before you begin painting the cherub wings on your Mortarion model, ensure you have the necessary paints and tools. The paints used in this tutorial are Rhinox Hide, Bugmans Glow, Ushabti Bone, Kislev Flesh, Cadian Fleshtone, and Vallejo Model Colour Black (equivalent to Abaddon Black). Additionally, you’ll need a wet palette, a size double zero artist opus brush, and a scalpel. Wing Preparation Prepare the cherub wings by carefully removing any sculpted veins with a scalpel. Sand down the wings, apply glue to smooth the details, and then give them a black prime. Use an airbrush to apply a quick layer of Ushabti Bone to create a base. Base Layer Start with a 50/50 mix of Rhinox Hide and Bugmans Glow. Using the tip of your size double zero brush, apply this mixture to the wings, building up layers to achieve a translucent effect. This darker base will allow for easier highlighting later. Painting Details Using the tip of your brush, paint the lines and details on the wings with Rhinox Hide. Be mindful of the small scale, adapting the details as needed. Focus on creating flowing lines that follow the contours of the wings. Adding Depth Mix Kislev Flesh and Cadian Fleshtone on the wet palette. Apply this mixture to highlight the lines painted with Rhinox Hide. This glazing technique adds depth without excessive layering, providing a smooth transition. Eyes and Black Details Using Vallejo Model Colour Black, paint the eyes on the wings. Don’t worry about the size; you’ll refine them later. This step helps balance tones on the model. Use the tip of the brush to paint black details, such as spikes or dots, around the wings. Veins and Highlights Switch to Kislev Flesh and paint in the veins on the wings. Ensure they are clear and defined. Gradually build up highlights using Cadian Fleshtone and Ushabti Bone, focusing on edges and details. Soften transitions for a more natural look. Refining and Tweaking Continuously refine and tweak the details as you go along. Adjust the size and position of the eyes, ensuring they complement the overall composition. Use the wet palette for any necessary paint mixing. Final Touches Highlight imperfections in the wings, emphasizing dimensional details. Pay attention to areas underneath the eyes, adapting details to fit the small scale. Continue refining until you achieve the desired depth and clarity. All videos are recorded in HD 1080p or higher – use full screen for the full effect and let the video load completely. How to Paint Freehand Tiny Nurgle Wings: Part Two The following paints were used: Games Workshop: Kislev Flesh, Cadian Fleshtone, Rhinox Hide, Bugman’s Glow, Ushabti Bone, Ceramite White, Moot Green, Warpstone Glow, Sotek Green, Mephiston Red, Fire Dragon Bright, Waaagh! FleshVallejo: Black, Pale Blue Grey Step by Step: How to Paint Freehand Tiny Nurgle Wings Softening Previous Details Commence by gently blending and softening the details on the wings painted in the previous video. Utilize a glaze mixture of approximately five parts water to one part paint, specifically using Rhinox Hide, to seamlessly merge and soften the fleshing marks on the wings. Painting the Whites of the Eyes Proceed to paint the whites of the eyes with Kislev Flesh. Ensure to leave a small gap at the top of the eye to introduce a subtle shadow effect. Apply clean and flesh tones, directing your strokes towards you for a polished finish. Building Up Highlights on the Eyes Employ a slightly thicker paint to build up highlights on the whites of the eyes. Introduce a pale blue-gray colour later for a desaturated effect. Apply highlights by initiating strokes on the left-hand side, moving towards the centre, and then returning to the right-hand side, drawing towards the centre again for more pronounced highlights at the bottom. Adding Organic Details Apply Ryza Oxide to paint small dots around the eyes, creating an organic and three-dimensional appearance. Exercise caution to avoid disrupting existing lines, maintaining the realism of veins. Green Dots and Highlights Use Waaagh! Flesh and Moot Green to paint green dots around the tear duct area. Enhance the green dots by applying a line along the bottom right edge and a dot on the top left for a glossy bubble effect. Painting the Iris and Pupil For the blue eye, use Sotek Green and Mint Green to paint a ring around the lower section of the eye to represent the iris. The actual grey doesn’t matter; choose a light grey for painting reflections, ensuring a realistic and shiny appearance. Start with Vallejo Pale Blue Grey to paint a ring around the lower section of the eye to represent the iris. The actual grey doesn’t matter; choose a light grey for painting reflections, ensuring a realistic and shiny appearance. Highlight the iris with Ceramite White, adding a few strokes to enhance the glossy effect. Complete the red eye by applying Mephiston Red to the entire iris and pupil area. Use Fire Dragon Bright to add small lines separating the circles on the iris. Apply a highlight using Vallejo Pale Blue Grey, ensuring to maintain the same technique as with the blue eye. More Mortarion Tutorials: Videos Not Showing? To view any of my paid tutorials, you need to be a member of the website – please click below to log in or join the site. Not sure about joining just yet? Check out my Youtube for all my free tutorials or sign up as a free “friend” member on this site and visit the free videos page! If you’d prefer to support me on Patreon, please visit: https://www.patreon.com/RichardGray [...]
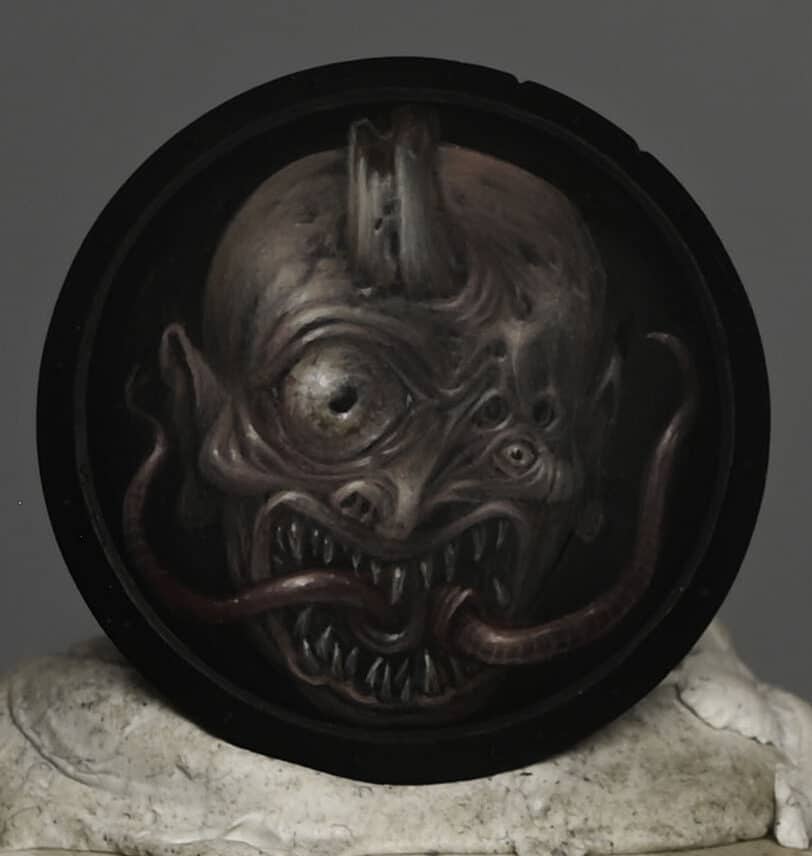
Video Tutorials : How to Paint Mortarions Wings
A set of video tutorials on How to Paint Mortarions Wings, with paints and step-by-step guides on freehand. Demon Wing Details First steps and basics For a pdf on how I cleaned the wing ready for painting, visit : https://richardgraycreations.com/mortarion-wing-prep-pdf/ ) All videos are recorded in HD 1080p or higher – use full screen for the full effect and let the video load completely. Demon Wing Details: Part One The following paints were used:Games Workshop: Rhinox Hide, Yriel Yellow, Kislev Flesh, Cadian Fleshtone, Moot Green, Xereus Purple, Evil Sunz Scarlet*note, in the video I show Emperor’s Children and Death Guard Green. These were not used in this video. Vallejo: Ivory Demon Wing Details: Part Two The following paints were used:Games Workshop: Mournfang Brown, Cadian Fleshtone, Kislev Flesh, Xereus Purple, Valejo: Ivory Demon Wing Details: Part Three The following paints were used:Games Workshop: Cadian Fleshtone, Kislev Flesh, Rhinox Hde, Xereus Purple, Vallejo Model Colour: Ivory Step by Step Tips: How to Paint Mortarions Wings – Demon Wing Details Part One: Prepare the Model: Confirm that the model has been properly primed, and any base colors, such as carmine, have been applied. Take a moment to inspect the model and identify any pre-painted outlines or details. Outline with Rhinox Hide: Utilise Rhinox Hide to start painting the outlines on the wings. This step involves creating the base pattern and initial details. Opt for Rhinox Hide over black to match the desired fleshy tone of the wings. Paint Veins with Xereus Purple: Select Xereus Purple to paint the vein-like details on the wings. Use a larger brush for broader coverage and to establish the initial structure. The combination of Xereus Purple and Rhinox Hide will give a dark, diseased appearance to the veins. Add Variation to Veins: Pay attention to the thickness and variation of the veins. Make deliberate wiggles and different shapes to create depth and interest. Ensure that the veins go over some of the previously painted thick lines for a more realistic effect. Consider Viscosity of Paint: Observe the viscosity of the paint; it should be thick enough to allow for fine lines. This is crucial for painting detailed and thin veins. You can load the brush more freely when using a thicker paint. Add Vein Details: Paint thin lines of purple coming out from certain areas, resembling veins spreading out. Use the thickness of the brush to your advantage, allowing for both longer lines and finer details. Introduce Spot Colours: Incorporate spot colours using Moot Green from Games Workshop. These spots will contrast with the purple, adding visual interest to specific areas, like craters on the wings. Highlight Veins: Highlight the veins by using Kislev Flesh, creating a raised vein effect. This will add depth and dimension to the wing. Soften Edges and Add Shadows: Use glue to soften edges and make the veins appear less pustule-like. Introduce shadow areas around the veins to enhance the three-dimensional look. Plan Lighting Directions: Consider the lighting directions on the model. Reflective lights and multiple light sources can contribute to a realistic 3D effect. Think about how the light interacts with the various elements on the wings. Part Two: Set Up Your Palette: Arrange your paints on the wet palette, as shown in the top right corner of the video. Let them mix a bit for added variation in your application. Begin with Cadian Fleshtone: Using Cadian Fleshtone, highlight the small segments between the veins. Focus on the upper areas to mimic light hitting from above. Use Reasonable Dilution: Ensure the paint is reasonably diluted, allowing for smoother application. As you’re highlighting, create the impression of shadows by avoiding direct application on dark vein edges. Utilise Mournfang Brown and Xereus Purple: Outline details with Mournfang Brown, and use Xereus Purple to add depth. These details may evolve organically as you progress. Fine-tune with a Sharp Brush: For fine details, use a sharp-tipped brush. Paint slightly thicker than usual, taking advantage of the wet palette to maintain consistency. Create Organic Look: Emphasise the fleshy and organic feel by avoiding a precise pattern. Moths and butterflies inspire the style, but the focus is on a fleshy appearance. Observe Light Source: Keep the light source in mind while highlighting. Work on veins to create shadows, ensuring a dynamic and realistic look. Add Transition Colours: Utilise mixed-up areas on the palette for transition colours. This adds depth and enhances the shadow effect, especially on larger, rounder areas. Experiment with Xereus Purple Outlining: Experiment with Xereus Purple outlining to enhance details. Remember, fine details may evolve as you progress, creating a unique and organic look. Balance the Details: Constantly tweak and balance details as you go. Ensure the veins, fleshy areas, and fine details complement each other for a cohesive appearance. Keep Consistency: Maintain consistency in the colour palette but vary the ratio of colours. This provides variation while adhering to a cohesive theme. Avoid Exaggeration: While enhancing details, avoid exaggeration. The goal is to create an organic, fleshy look without turning it into a three-dimensional eyeball. Part Three: Understand the Existing Freehand Progress: Examine the progress of the freehand on the model, especially the veins and patterns. Note that Rhinox Hide comes in two versions, with the thinner one used for glazes and quick transitions. Begin Painting the Veins: Start with Rhinox Hide to paint veins, emphasizing the connections and flow between them. Be mindful of curves and avoid making the veins look too straight or jarring. Create Veins as Eyelashes: Connect the veins to the eye, using them as eyelashes. This adds a unique and natural touch to the model, representing an organic connection between the eye and wing. Add Variation to Veins Around Holes: Paint veins around holes using Xereus Purple, varying the pattern to avoid repetition. Darken the area around the hole for contrast and tonal variation. Adjusting Freehand for a Cohesive Look: As the freehand progresses, ensure that the details flow well with each other, avoiding a disconnected appearance. Veins should follow the natural contours of the wing. Layering for Depth: Layer veins to create depth, using Kislev Flesh and Ivory for highlights. This technique makes the veins appear more 3D and layered. Darken and Outline: Darken certain areas using Rhinox Hide to create shadows and depth. Outline veins and details to make them stand out clearly. Highlighting and Refining: Use Vallejo Ivory to highlight specific sections, creating contrast and emphasizing the shapes. Continuously refine and tweak details, keeping an eye on the overall picture. Glazing for Smooth Transitions and Shapes: Use glazing to create smooth transitions between different paint layers. This is particularly useful for blending colours seamlessly. Apply glazes to emphasise the shapes of painted sections, ensuring a smooth and coherent look. Final Touches: Continue refining details, emphasising shapes, and making any final adjustments. Take your time to ensure a high-quality finish. How To Paint Mortarions Wings: Blue Eye The following paints were used:Games Workshop: Cybarite White, Flayed One Flesh, Doombull Brown, Balor Brown, Evil Sunz Scarlet, Lothern Blue, Ahriman Blue (optional) Rhinox Hide Vallejo: Ultramarine Blue, Night Blue (optional) Black, Pale Grey Blue P3: Ryn Flesh Step by Step Tips: How to Paint Mortarions Wings – Blue Eye Start with the Blue Detail on the Eyes: Commence the process by using Ultramarine Blue to paint a circle in the center of the existing black circle on the wing. Precision isn’t crucial at this point; you can refine it later. Refine the Blue Circle: Utilize black paint to clean up and refine the edges of the blue circle, serving as a guideline for the forthcoming details. Add Fine Details with Ultramarine Blue: Apply Ultramarine Blue to create fine lines and intricate details within the circle, representing the complex features of the eye. Allow the lines to follow the organic nature of the wing. Highlight the Blue Details: Use Flayed One Flesh to highlight selected blue details, creating a smooth transition between colours and enhancing the eye’s three-dimensional appearance. Introduce Pale Brown for Depth: Apply Pale Brown to add depth to the eye, concentrating on the lower section of the white. Be cautious not to use excessive paint to preserve the details from earlier steps. Create Highlights with Flayed One Flesh: Revisit Flayed One Flesh to introduce highlights on the blue details, enhancing the overall aesthetic of the eye. Glaze with Pale Grey Blue: Create a glaze using Pale Grey Blue and apply it to specific areas of the eye. This will help blend colours and add a layered effect to the strands and details. Add Red Veins and Details: Carefully reintroduce red veins, resembling eyelashes from the bottom of the eye. Utilize a dragging motion with the brush for precise lines. Correct Mistakes and Refine Detail: If any mistakes occur, use black paint to rectify errors and refine the intricate details, maintaining attention to the shape and flow of the lines. Final Touches on Reflections: Add reflections to the eye using semi-white to highlight the central part of the reflection. Consider the light source and aim for a realistic and captivating result. How To Paint Mortarions Wings: Demon Eye The following paints were used:Games Workshop: Mephiston Red, Wild Rider Red, Rhinox Hide Doombull Brown, Zamesi Desert, Yriel Yellow, Moot Green Temple Guard Blue, Sotek Green, Abaddon Black, Cadian Fleshtone, Kislev Flesh, Ceramite WhiteVallejo Model Colour: Ivory, BlackP3: Iosen Green (GW Warpstone Glow alternative) Ryn Flesh Step by Step Tips: How to Paint Mortarions Wings – Demon Eye Outline the Pupil: Begin by outlining the pupil of the eye. Focus on the inner shape rather than the outer, as you can fix any wonkiness later. Paint the Iris: Using a spread-out pattern, carefully paint the lines of the iris, starting from the center and moving outwards. Use a lighter colour to highlight some imperfections and indentations on the wing. Refine the Lines: Separate the lines, especially around the Nurgle symbol. Use Abaddon Black as a rubber to create a rough outline and add depth to the design. Introduce Different Colours: Experiment with different colours such as Temple Guard Blue and Wild Rider Red to add layers and details. Don’t be afraid to mix colours on the brush for a varied effect. Paint the Sclera: Apply Temple Guard Blue to the sclera, ensuring a smooth transition from the red, and be cautious not to paint over the detailed lines. Enhance Highlights: Use Ceramite White to brighten the eyes, creating a strong contrast. Paint carefully, following the shape of the eye for a rounded and natural look. Add Veins: Use Mephiston Red to paint veins onto the white of the eye, creating a realistic effect. Keep the lines subtle and centered for a natural appearance. Apply Glazes: Use glazes to soften transitions and tie the piece together. Deploy glazes by loading the brush from the wet palette. Final Highlights: Highlight with Ivory to emphasize details on the veins and enhance the overall look. Add Reflections: Apply White to the reflections on the eye to give it a lifelike and 3D effect. Create Wetness Effect: Using a small amount of Kislev Flesh or a similar colour, add small irregular dots to represent the wetness of the eye. Need more Mortarion? Check out the other tutorial videos, below: Free Video Tutorials Free videos (for logged in members – just sign up as a ‘friend’ to view and click any of the thumbs.To explore all of these, visit this page! If you don’t have an account, please sign up here! The website currently has over 350 video tutorials, plus step by step guides and PDFs. You can explore more free videos with a free “friend” membership, or take the plunge and become a full subscriber for full access. If you’d prefer to support me on Patreon, please visit: https://www.patreon.com/RichardGray [...]
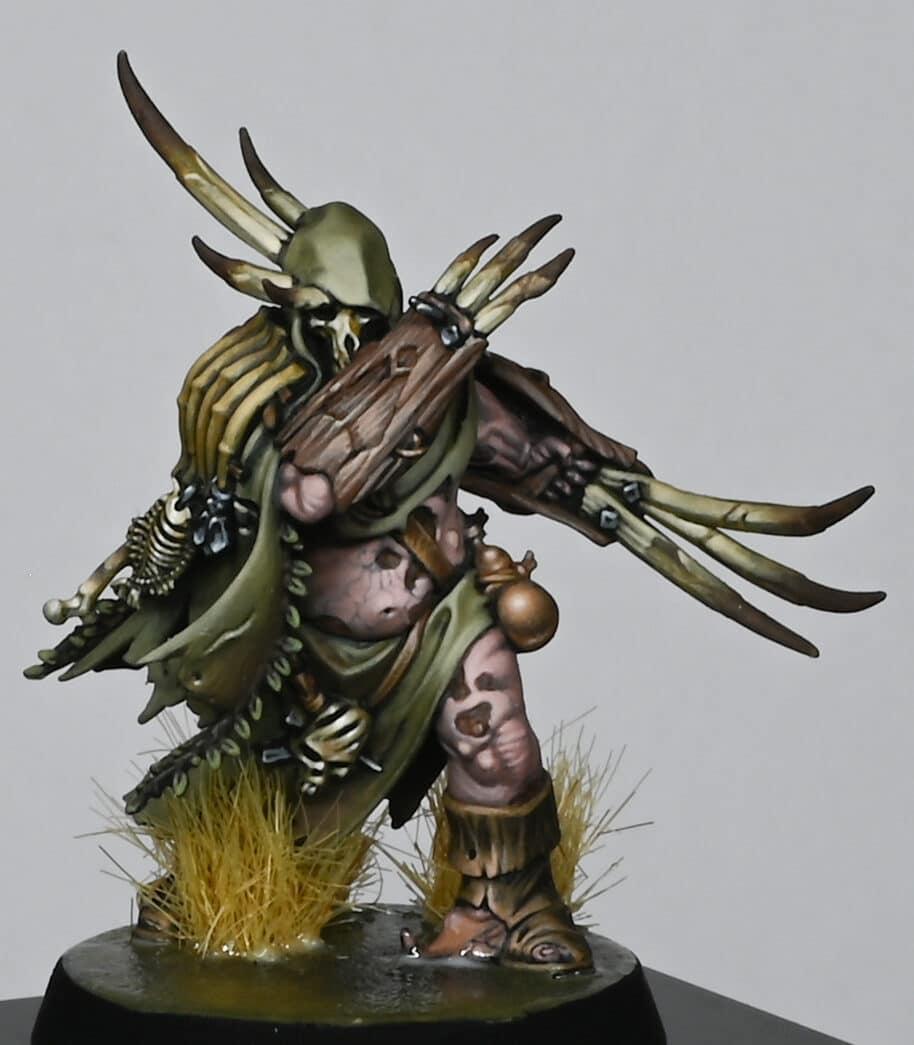
Video Tutorial : How to Paint Mortarions Blue Eye
A video tutorial with paints and a step-by-step guide on How to Paint Mortarions Blue Eye on his wings. How to Paint Mortarions Blue Eye The following paints were used:Games Workshop: Cybarite White, Flayed One Flesh, Doombull Brown, Balor Brown, Evil Sunz Scarlet, Lothern Blue, Ahriman Blue (optional) Rhinox Hide Vallejo: Ultramarine Blue, Night Blue (optional) Black, Pale Grey Blue P3: Ryn Flesh Step by Step Tips: How to Paint Mortarions Blue Eye Start with the Blue Detail on the Eyes: Commence the process by using Ultramarine Blue to paint a circle in the center of the existing black circle on the wing. Precision isn’t crucial at this point; you can refine it later. Refine the Blue Circle: Use black paint to clean up and refine the edges of the blue circle, serving as a guideline for the forthcoming details. Add Fine Details with Ultramarine Blue: Apply Ultramarine Blue to create fine lines and intricate details within the circle, representing the complex features of the eye. Allow the lines to follow the organic nature of the wing. Highlight the Blue Details: Use Flayed One Flesh to highlight selected blue details, creating a smooth transition between colours and enhancing the eye’s three-dimensional appearance. Introduce Pale Brown for Depth: Apply Pale Brown to add depth to the eye, concentrating on the lower section of the white. Be cautious not to use excessive paint to preserve the details from earlier steps. Create Highlights with Flayed One Flesh: Revisit Flayed One Flesh to introduce highlights on the blue details, enhancing the overall aesthetic of the eye. Glaze with Pale Grey Blue: Create a glaze using Pale Grey Blue and apply it to specific areas of the eye. This will help blend colours and add a layered effect to the strands and details. Add Red Veins and Details: Carefully reintroduce red veins, resembling eyelashes from the bottom of the eye. Utilize a dragging motion with the brush for precise lines. Correct Mistakes and Refine Detail: If any mistakes occur, use black paint to rectify errors and refine the intricate details, maintaining attention to the shape and flow of the lines. Final Touches on Reflections: Add reflections to the eye using semi-white to highlight the central part. All videos are recorded in HD 1080p or higher – use full screen for the full effect and let the video load completely. Need more Mortarion? Check out the other tutorial videos, below: Free Video Tutorials Free videos (for logged in members – just sign up as a ‘friend’ to view and click any of the thumbs.To explore all of these, visit this page! If you don’t have an account, please sign up here! The website currently has over 350 video tutorials, plus step by step guides and PDFs. You can explore more free videos with a free “friend” membership, or take the plunge and become a full subscriber for full access. If you’d prefer to support me on Patreon, please visit: https://www.patreon.com/RichardGray [...]
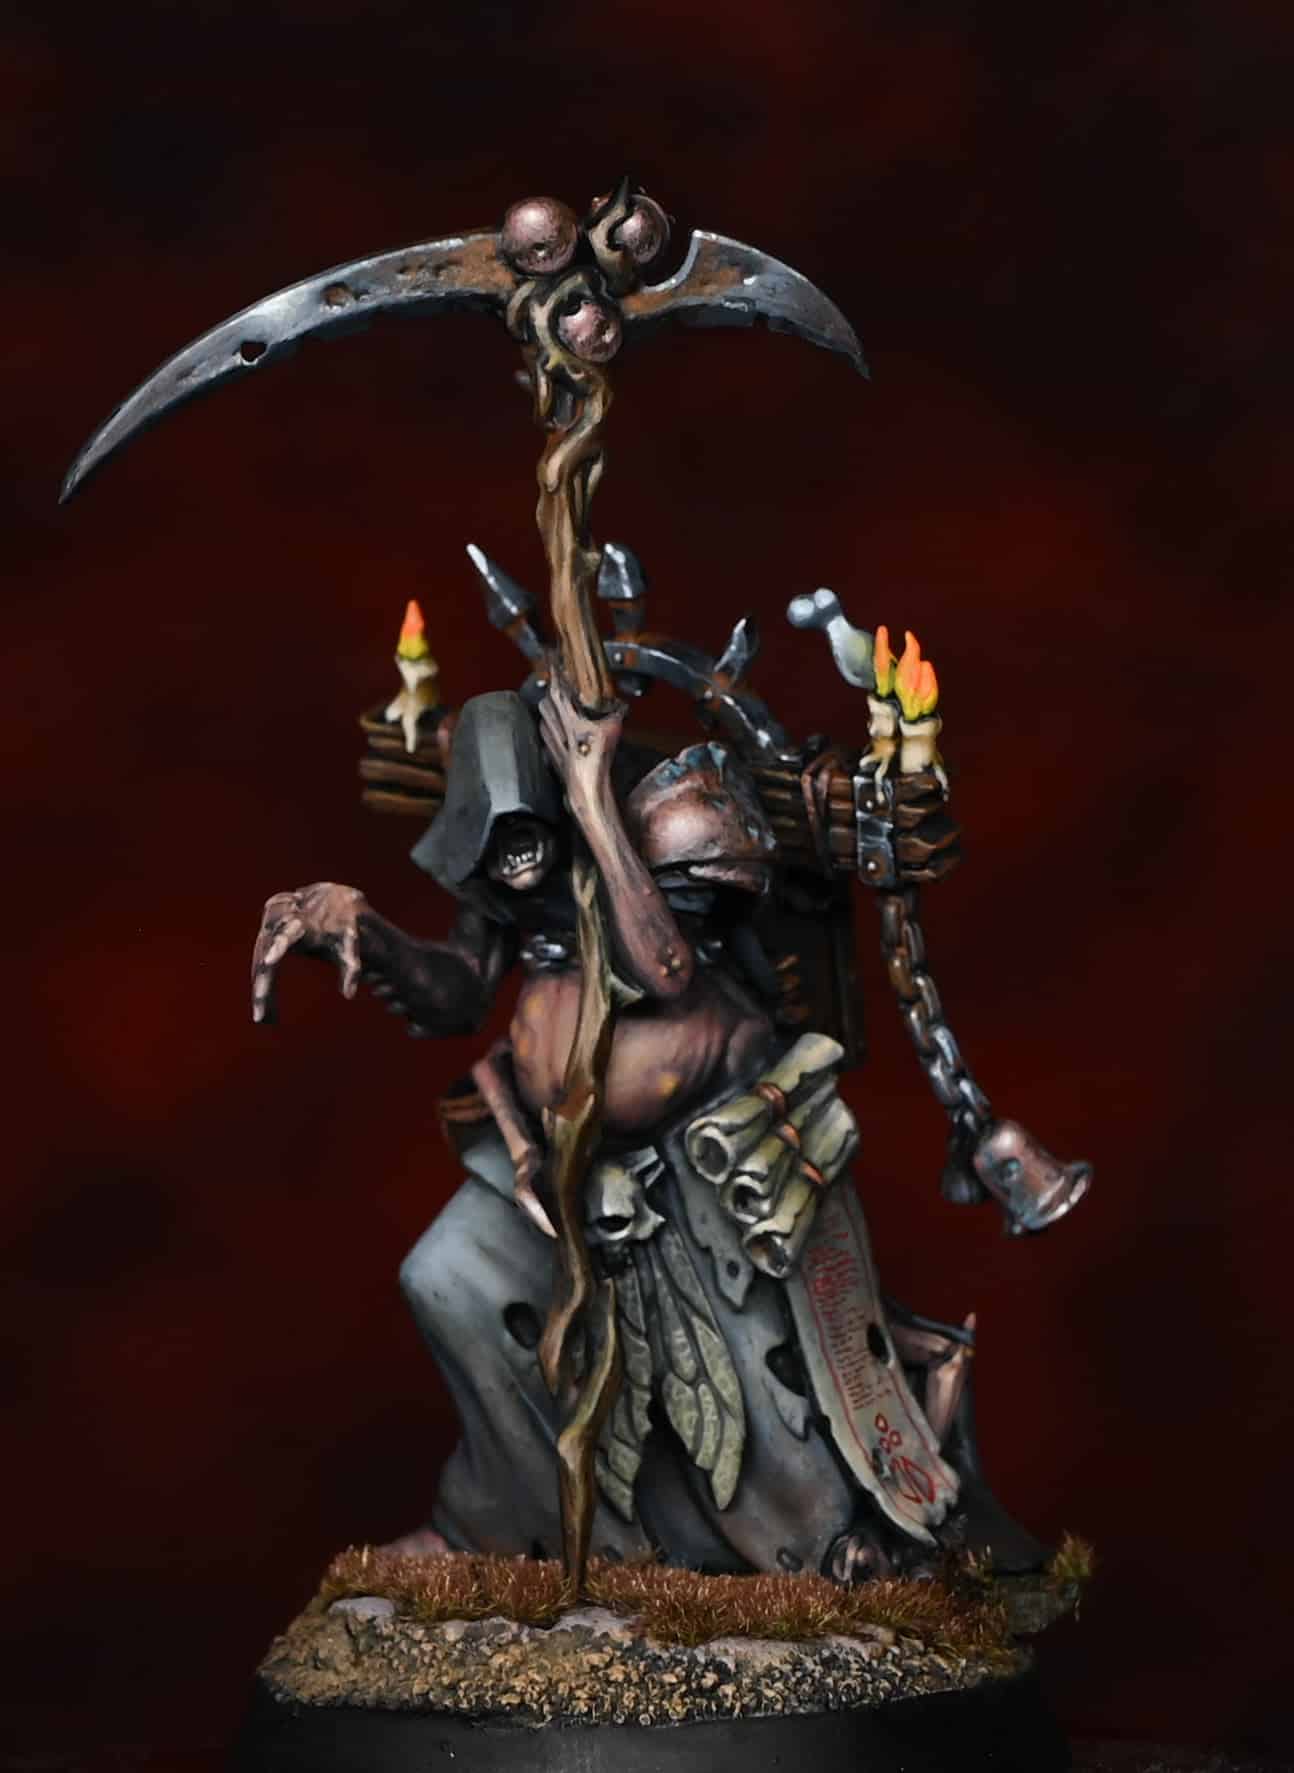
How to Paint Deathshroud Terminator Cloak Freehand
How to paint a Deathshroud Terminator Cloak using freehand. This model won me a Golden Demon in 2017! These models represent the grotesque and decay-themed warriors of Nurgle, a faction known for their resilience and corrupted, plague-ridden aesthetics. So, in these tutorials we are aiming to enhance the models’ appearance with detailed faces and textures on their cloaks! Quick note here – these are some of my earliest tutorial videos, so are not of the same quality as my current tutorials visually and sound-wise. My apologies for this.Richard Video: Deathshroud Terminator Red Cloak This process results in a textured, worn cloak suitable for a Death Shroud Terminator, using a simple but effective painting technique. Materials and Paints Used Gal Vorbak Red (Forge World) Cadian Fleshtone (Games Workshop) Eldandil Violet (Scalecolour Fantasy) Step by Step Guide Base Coat: Start with Gal Vorbak Red as the primary colour. Detailing and Texture: Use Cadian Fleshtone for adding highlights and texture, creating a worn and mouldy appearance. Shading: Apply Eldandil Violet for shading in the recesses, enhancing depth and wear. Glazing with Evil Sunz Scarlet: Use it as a glaze to add warmth to the cloak. Refining Texture: Focus on cross-hatching movements to build texture, emphasizing the worn look. Final Touches: Add further glazes and highlights to refine the texture and depth, tailoring the effect to your desired level of detail. Video: Deathshroud Terminator Cloak Freehand Materials and Paints Used The following paints were used:Games Workshop: Rhinox Hide Vallejo: Heavy Brown, Cork Brown, Ice Yellow, Black P3: Battlefield Brown *Note, Morrow White was not actually used in this video, but is used in part 2. Step by Step Guide Preparation: I used a test model to experiment with my design concept. This approach allows you to refine the freehand pattern before applying it to the main models. Base Colours: Apply Vallejo Heavy Brown as a foundational colour. Enhance the base with Cork Brown for a richer texture. Use Rhinox Hide to outline the design, ensuring the lines are crisp and distinct. Detailing: Carefully mark the eye sockets with black paint, paying attention to the cloak’s folds. These details will add depth and character to the freehand design. Highlighting: Utilize Ice Yellow for highlights. This step involves blending the highlights with the base colors to achieve a natural, integrated look. The highlights should accentuate the topography of the cloak and enhance the freehand design. Shading: Use Battlefield Brown to deepen the shadows and add complexity to the design. This shade will create a more dynamic and realistic appearance on the cloak. Finishing Touches: Review the entire design, making final adjustments for consistency and balance. Focus on refining the freehand artwork, ensuring it harmonizes with the cloak’s texture and the overall theme of the model. Video: Deathshroud Terminator Cloak Freehand Refinement Materials and Paints Used The following paints were used: Games Workshop: Cadian Fleshtone, Pallid Wych Flesh, Bugman’s Glow, Rhinox Hide, Loren Forest, Nurgling Green, Vallejo: Ice Yellow, Cork Brown, Black, Neutral Grey, Pale Grey Blue, Heavy Brown P3: Battlefield Brown, Morrow White Step by Step Guide Base Preparation: Start by painting a rough base of fleshy shapes using Cadian Fleshtone. This initial layer doesn’t need to be perfect or smooth. Detailing Ears and Face: Add ears to distinguish the image from a skull, creating a more zombie-like face. Use Kadeem Flesh Tone for this step. Sketching Flesh and Bone: Sketch out areas where flesh appears torn or missing, revealing bone underneath. This technique enhances the undead appearance and integrates the existing skull highlights. Adding White Highlights: Use Pallid Wych Flesh to accentuate bone areas, making them stand out from the flesh tone. Painting the Eyes: Employ Neutral Grey, followed by Pale Grey Blue for the eyes. Add white dots in the center and top left corner of each eye for a lifelike effect. Mouth and Teeth Details: Refine the mouth and teeth using Rhinox Hide and Ice Yellow for highlights. Focus on defining the teeth shapes and adding depth to the mouth. Adding Texture to Flesh: Use Bugman’s Glow and other flesh tones to create textured, worn skin. Apply these tones in layers, allowing the underlying skull details to peek through. Final Touches: Finish by adding fine details and additional highlights to enhance the depth and realism of the freehand design. The key to this process is building up the layers gradually, refining the details as you go, a More Deathshroud Tutorials How to Paint Deathshroud ArmourDeathshroud Scythe Handle WrappingDeathshroud Terminator Cloak FreehandHorn Painting Guide All Deathshroud Bodyguard Video Tutorials Death Guard Deathshroud Bodyguard A series of video tutorials on how I painted my set of Golden Demon winning Death Guard Deathshroud Bodyguard! This includes nurgly armour, weathering, rust, metals, tentacles, freehand and more! Watch Now More Freehand Tips: If you don’t have an account, please sign up here! The website currently has over 350 video tutorials with steps and tips, plus a selection of PDFs. If you are not sure about joining, you can explore my free videos with a free membership, or take the plunge and become a full subscriber for full access. If you’d prefer to support me on Patreon, please visit: https://www.patreon.com/RichardGray [...]
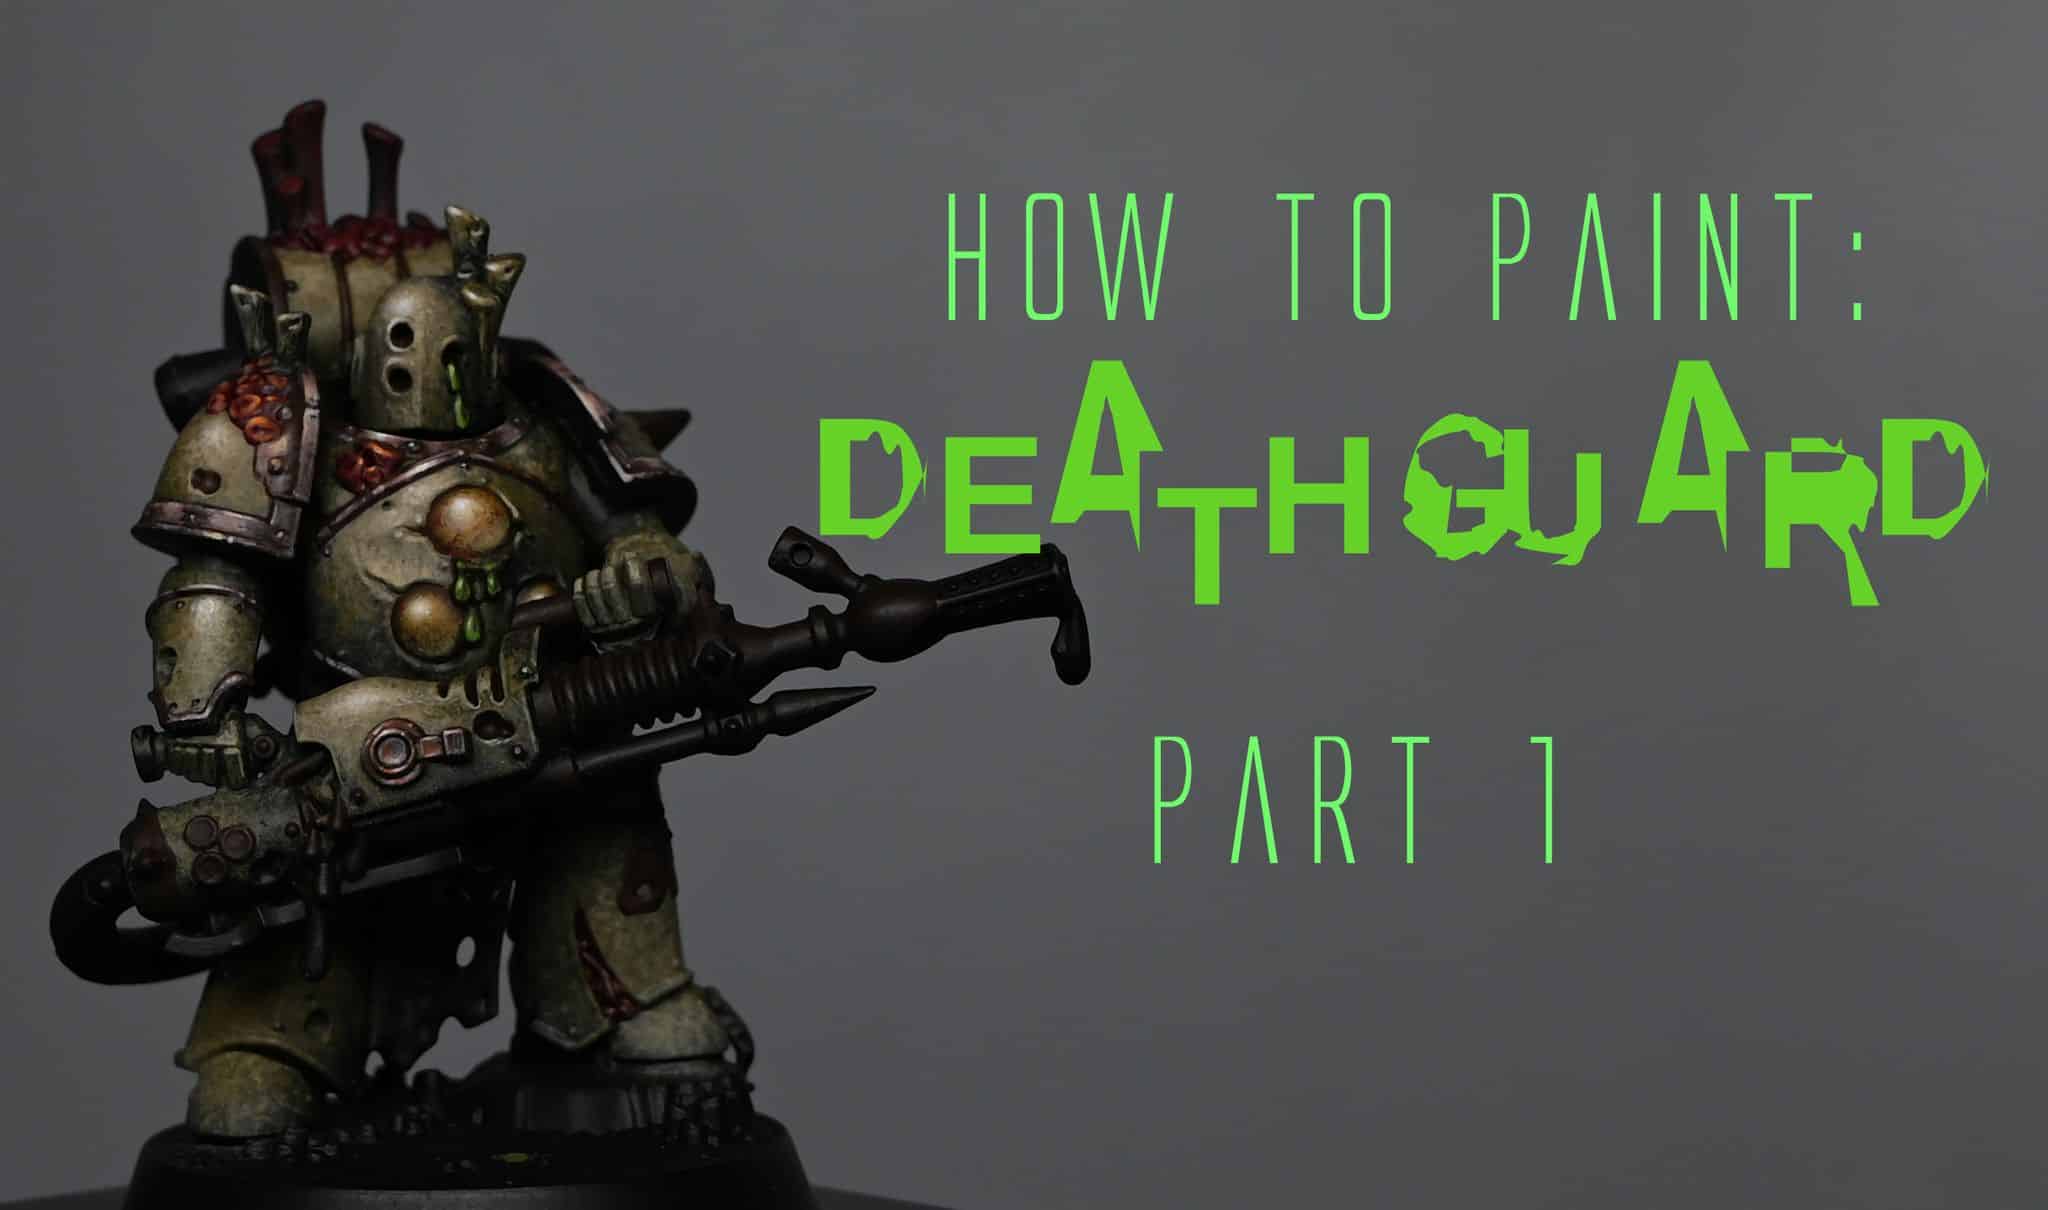
Video Tutorials : How to Paint Mortarions Green Armour
A series of videos on how to paint Mortarions green armour! Follow along with a paint guide, video and step-by-step instructions. My Mortarion won Gold in Golden Demon 2019. Quick note on the white paint I use – with Ceramite White not an option, apparently Corax White is the replacement, but really I don’t think it matters too much which white you use, eg Valleho white, Two Thin Coats, White Star etc! How to Paint Mortarions Green Armour: Basic colours and knee armour All videos are recorded in HD 1080p or higher – use full screen for the full effect and let the video load completely. The following paints were used: Games Workshop: Death Guard Green, Ushabti Bone, Ceramite White, Incubis Darkness. Step-by-step: How to Paint Mortarions Green Armour: Basic colours and knee armour Prepare Your Model: Ensure that the base colour (Death Guard green) has been sprayed onto the model. It can be applied using an airbrush or by hand painting.Shadow Bone Base Layer: Use a small brush to apply Ushabti Bone directly on top of the Death Guard green. Apply it roughly to create a textured and rough appearance.Use the side of the brush to avoid filling in details, especially in areas with corrosion or small holes.Directional Lighting: Maintain a consistent light source direction for the entire model. In this case, the lighting is from the top left.Use the side of the brush to catch the edges of details and create shadows where needed.Building Layers: Apply multiple layers of Ushabti Bone, allowing each layer to dry. This builds up texture and depth on the armour. The paint should be fairly watered-down to allow for a gradual transition and darker appearance upon drying.Ceramite White Highlights: Apply Ceramite White on top of Ushabti Bone, following the same process as before but in a reduced area. Highlight the sculpted details and the simple dark areas left by the previous layer.Fine Detailing: Use a small brush to add finer details, such as dimples and small marks, using both Ushabti Bone and Ceramite White. Take care with areas that will be hidden, as they can still be visible from certain angles.Shading with Incubis Darkness: Introduce Incubis Darkness for shading, especially in areas like the holes in the armour. Darken these areas to add contrast. Use the same directional lighting approach for shading.Gold Trim Consideration: Be mindful of the upcoming gold trim painting, as it will affect the surrounding painted areas.Final Details and Blending: Fine-tune details, especially in areas like the knee, ensuring that the lighting direction is consistent.Blend colours using a wet palette for a smoother transition between shades.Yellow Details: Consider using a yellow paint, such as Averland Sunset, for adding small details like dots in the centre of holes NMM (non metallic metal) armour trim The following paints were used: Games Workshop: Yriel Yellow, Rhinox Hide, Firedragon Bright, Troll Slayer Orange, Mournfang Brown Vallejo: Ice Yellow Step-by-step: How to Paint NMM (non metallic metal) armour trim Prepare Your Workspace: Set up your painting area with good lighting and ventilation.Gather your paints: Yriel Yellow, Rhinox Hide, Firedragon Bright, Troll Slayer Orange, Mournfang Brown, and Ice Yellow from Vallejo.Ensure you have a wet palette for smoother paint application.Have a variety of brushes ready, including a small fine-tip brush for detailed work.Base Coat with Firedragon Bright: Apply Firedragon Bright as the base coat for the non-metallic metal (NMM) effect. Use a wet palette to maintain the paint’s consistency.Focus on covering the areas designated for the metallic trim.Add Troll Slayer Orange for Vibrancy: Introduce Troll Slayer Orange to create a vibrant orange hue.Blend it with Firedragon Bright for a smooth transition.Adjust the intensity by adding more or less Troll Slayer Orange as needed.Create Initial Highlights with Ice Yellow: Utilise Ice Yellow to mark out initial highlight areas.Apply it generously, as it will be blended and softened later.Adjust based on the model’s position and where light would naturally hit.Blend and Soften Highlights: Blend the colours together using small marks and strokes.Use a wet palette to keep the paint workable.Pay attention to transitions and reflections, adjusting as necessary.Introduce Yriel Yellow for Brightness: Add Yriel Yellow for intense brightness.Be cautious not to overdo it; you can always layer and adjust later.Focus on the most prominent areas that catch the light.Tone Down with Mournfang Brown: Use Mournfang Brown to tone down the intensity of the yellow hues.Glaze over areas to create a subtle transition.Consider the reflective properties of metal for realistic effects.Adjust Highlights with White Scar: Apply White Scar to create sharp highlights.Concentrate on areas where light hits sharply.Use a fine-tip brush for precision.Evaluate and Make Adjustments: Assemble the model partially to evaluate how light interacts with the metallic trim.Identify areas that need adjustments, considering the model’s overall composition.Add Final Touches and Reflections: Fine-tune reflections and add small dots to simulate reflective points.Experiment with different angles to ensure the model looks realistic from various perspectives.Pay attention to contrast, emphasising dark areas next to light for a shiny effect. How to Paint Mortarions Green Armour: Details on the knee armour The following paints were used: Games Workshop: Death Guard Green Ushabti Bone Incubi Darkness Yriel Yellow Mournfang Brown P3: Morrow White (Ceramite White) Step-by-step: Paint Mortarions Green Armour: Details on the knee armour Prepare the Model: Ensure the model is clean and free of any dust or debris.Use an airbrush to apply Death Guard Green as the base colour evenly over the foot.Initial Highlights with Ushabti Bone: Use a sharp brush to apply Ushabti Bone roughly over the Death Guard Green. Apply the highlight at an angle to catch light on the curve of the foot.Brush Technique: Utilize a worn-out size 1 brush for a softer, larger mark.Take advantage of the worn tip to create fatter marks for a textured effect.Layering Highlights: Apply multiple layers of highlights, ensuring they align from toe to the top of the foot.Use Death Guard Green on the palette to create soft blends and transitions.Adding Depth with Incubi Darkness: Glaze or paint Incubi Darkness over the highlights for a dark, contrasting effect.Test visibility behind the cloak to determine areas worth spending time on.Refining Highlights with Morrow White (Ceramite White): Move on to a smaller area with white, refining the highlight points. Underline sculpted details to enhance their 3D appearance.Glazing and Opaque Effects: Apply a sloppy glaze of Incubi Darkness to create a wash-like effect.Be mindful of catching raised details; the goal is to maintain texture.Adjusting Glazes: Fine-tune glazes by adjusting the opacity and color on the palette.Experiment with different mixtures to achieve desired transitions.Fine Details: Use Morrow White (Ceramite White) or a preferred white paint for underlining details.Add an orange base color for a unique glow effect.Shadows and Depth: Introduce shadows with Incubi Darkness on the upper edges of textures.Add shadows to make 3D imperfections in the armor more pronounced.Rivets and Details: Paint the rivets white for contrast and visibility.Address any streaking or imperfections, correcting as needed.Yellow Dots: Water down Yriel Yellow and paint the center of holes with multiple layers.Consider using the paint directly from the pot for a harder yellow dot.Streaking Effect: Use Mournfang Brown to create streaks coming from the holes.Adjust paint thickness to control the streaking effect.Final Touches: Ensure streaking direction aligns with the model’s positioning. Face and foot This video shows how to lighten the face of Mortarion and also how to paint the weathering on his armour. The following paints were used: Games Workshop: Ceramite White, Flayed One Flesh, Pallid Wych Flesh, Ushabti Bone, Rhinox Hide. Step-by-step: How to Paint Face and foot Glazing for Face Lightening: Prepare a glaze using Games Workshop’s Flayed One Flesh paint and water (about 5 parts water to 1 part paint).Load the brush with the glaze and remove excess paint on kitchen roll.Apply thin layers of glaze to the face, focusing on central areas like the forehead, bridge of the nose, and cheeks.Be careful not to let the glaze pool in the recesses. Keep adjusting to maintain control over the layering.Pallid Wych Flesh Detailing: Use Games Workshop’s Pallid Wych Flesh, a thicker paint, to highlight the top of creases on the face.Build up contrast between creases and highlights gradually to create a natural look.Ensure that the creases are lightened, but maintain a balance with the overall lighting on the face.Final Highlight with Games Workshop’s Ceramite White: Apply Games Workshop’s Ceramite White to the highest points of the face, focusing on central areas.Use a controlled technique to avoid overdoing the highlights.Maintain subtlety and control over the white highlights for a natural effect.Chip-Weathering on Armor: Choose Games Workshop’s Rhinox Hide for chipping on the armor.Apply the paint with a brush, creating small marks on the model.Leave some patches of white paint between the chipped areas for added interest.Consider the positioning of chips, focusing on areas that would naturally experience wear and tear.Use a colour-coded brush to keep track of the tool’s usage and maintain control.Refining the Chipping: Adjust the thickness of the chipping lines to control the visual impact.Ensure that the chipping looks natural and not too high in contrast.Pay attention to the bottom of the foot, adjusting the highlighting based on the foot’s position.Add more chips on areas that would naturally experience more damage, like the front side of the leg. Cloth The following paints were used: Games Workshop: Ceramite White, Sotek Green, Abaddon Black, Evil Sunz Scarlet Vallejo: German Grey (Abaddon Black with a touch of white), Neutral Grey (Skavenblight Dinge), Pale Grey Blue (Celestra Grey). Step-by-step: How to Paint Cloth Primer Coat: Begin with a black primed base coat using Games Workshop: Abaddon Black or any black primer of your choice.Base Coat with German Gray: Apply Vallejo German Grey (a mix of Abaddon Black with a touch of white) using a stipple-like, rough fashion with a large, stiff brush. Rotate the brush to avoid obvious patterns.Dry Brush with Neutral Grey: Dry brush the cloth with Vallejo Neutral Grey (Skavenblight Dinge) using a large, stiff brush. Maintain a textured effect without removing the paint too severely.Fine Detailing with Sotek Green: Switch to a smaller brush (size 0 or similar) and use Sotek Green. Apply combinations of scratches and dots, focusing on smaller marks. Keep the paint fairly thick for strong marks.Gradual Highlighting: Mix Sotek Green with a small amount of Celestra Grey (Pale Grey Blue) in around a 2:1 ratio. Gradually build up layers, focusing on creases and details. Highlight raised areas more than recessed ones.Further Highlighting with Pale Blue-Gray: Mix Sotek Green with a small amount of Celestra Grey. Apply this highlight colour delicately, focusing on smaller areas. Enhance texture and pay attention to the shape of folds.Final Highlight with Pale Blue: Use Celestra Grey (Pale Blue) as the final highlight. Be extremely delicate with application, focusing on small details. Less is more at this stage, as the heavy paint can make strong marksGlazing with Abaddon Black: Use Abaddon Black for glazing. Apply it in the recesses to soften the texture marks and create a more blended look. Load the brush heavily for a more pronounced effect.Additional Glazing with Evil Sunz Scarlet: Use Evil Sunz Scarlet for additional glazing, mainly in the recesses. This adds contrast and depth to the demonic clothing. Experiment with colours to make the cloth more interesting.Final Touches and Details: Pay attention to focal points, such as areas where the cloth is attached to chains. Ensure that details are enhanced without losing the depth of the piece. More Mortarion Tutorials: Videos Not Showing? To view any of my paid tutorials, you need to be a member of the website – please click below to log in or join the site. Not sure about joining just yet? Check out my Youtube for all my free tutorials or sign up as a free “friend” member on this site and visit the free videos page! If you’d prefer to support me on Patreon, please visit: https://www.patreon.com/RichardGray [...]
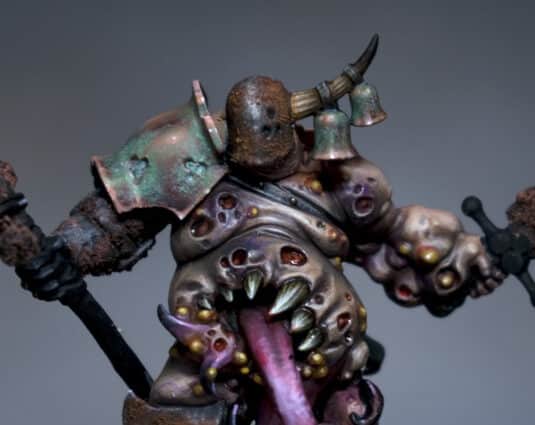
Horn Guide; Deathshroud Terminator – PDF
Horn Painting Guide. PDF Tutorial How to paint a Nurgle horn with texture on a Deathshroud Terminator. – Richard Download the Horn Painting Guide Please wait for the PDF below to load to view, or download it here. About the Guide In this detailed guide I meticulously explain the process of painting a horn on a Death Shroud terminator model, emphasising brush control and the right consistency of paint. The tutorial progresses through six stages, including colour banding, blending, and highlighting, with tips on brush selection and technique. It’s good resource for model painters keen on improving their skills in adding realistic textures and details to their Nurgle model and is filled with practical advice, making complex techniques accessible to painters at various skill levels. More Deathshroud Tutorials How to Paint Deathshroud ArmourDeathshroud Scythe Handle WrappingDeathshroud Terminator Cloak FreehandHorn Painting Guide Video Tutorials Death Guard Deathshroud Bodyguard A series of video tutorials on how I painted my set of Golden Demon winning Death Guard Deathshroud Bodyguard! This includes nurgly armour, weathering, rust, metals, tentacles, freehand and more! Watch Now More Nurgle Tutorials If you don’t have an account, please sign up here! The website currently has over 350 video tutorials with steps and tips, plus a selection of PDFs. If you are not sure about joining, you can explore my free videos with a free membership, or take the plunge and become a full subscriber for full access. If you’d prefer to support me on Patreon, please visit: https://www.patreon.com/RichardGray [...]
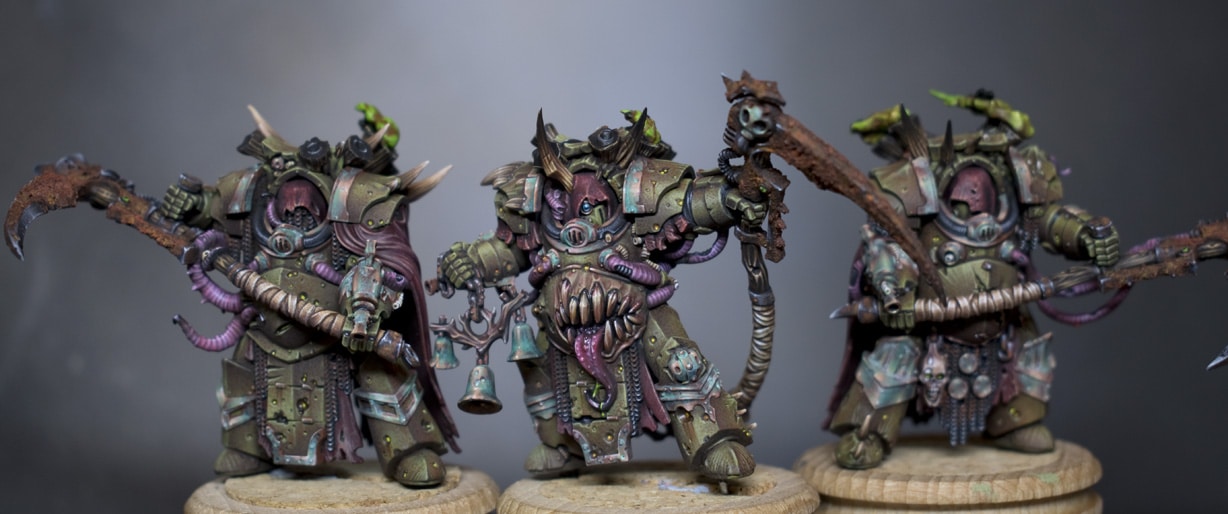
Nurgle Lord Non-Metallic Metal Armour – PDF
Nurgle Lord Non-Metallic Metal Armour Guide By Richard Gray Master the art of non-metallic metal (NMM) painting with this comprehensive Nurgle Lord Non-Metallic Metal Armour Guide to achieving a stunning armour effect for your Nurgle Lord model. Follow along with detailed steps and techniques to create a realistic, textured metal look without using metallic paints. What’s Inside the Nurgle Lord Non-Metallic Metal Armour Guide: Materials and Paints Needed: Vallejo: German Grey, Dark Sea Grey, Pale Blue Grey, Leather Brown, Black Games Workshop: Skavenblight Dinge P3: Morrow White Coat d’Arms: Black Model Preparation: Learn how to properly prepare your model by washing the plastic, using Tamiya Extra Thin Cement for assembly, and filling gaps with Greenstuff. Prime the model grey and let it cure for 24 hours. Base Colour Application: Start with a black base colour to set the foundation for the NMM effect, providing the necessary contrast for a realistic shine. Initial Lighting with German Grey: Apply German Grey to the areas of the armour that will catch the most light. This stage sets the groundwork for the lighting effect and doesn’t require neatness, allowing for texture development. Stippling Technique for Texture: Introduce Dark Sea Grey with a stippling technique, creating small dots to add texture and refine the lighting. Use thicker paint for definite dots and don’t worry about imperfections. Highlighting with Pale Blue Grey: Continue stippling with Pale Blue Grey, focusing on higher light points. Add tiny lines under darker dots to simulate three-dimensional dints. Final White Stippling: Add small white dots to enhance the texture further. Though it may look messy at this stage, the following steps will smooth out the details. Smoothing with Glazes: Use heavily watered-down Battlefield Brown to create a glaze, applying it in thin layers to subtly blend and smooth the texture. Follow with a Coat d’Arms black glaze for shadows, enhancing the contrast with its satin finish. Final Touches and Adjustments: Revisit any areas that need more texture or brightness, especially the leg plates. Use the same colours and techniques to bring out the details, making adjustments as necessary to achieve a balanced look. Additional Refinement: Apply gentle glazes of Skavenblight Dinge to unify the textures and maintain the grey metal appearance. Balance the brown glazes to avoid overwhelming the armour, adjusting for the desired effect. Tips and Techniques: Stippling for Texture: Achieve a worn and battered look by stippling, a technique that involves creating small dots with a brush. Glazing for Smooth Transitions: Use very thin layers of paint to blend textures and create smooth transitions between colours. Balancing Highlights and Shadows: Ensure the highlighted areas are bright enough without overpowering the overall effect. Use glazes to deepen shadows and enhance contrast. This guide is perfect for hobbyists looking to achieve a realistic NMM armour effect on their models. With patience and attention to detail, you can create stunning, textured armour that stands out. Stay tuned for future guides on painting the rusted axe and the skin of the Plague Lord. Download the full guide below and transform your Nurgle Lord’s armour with non-metallic metal techniques! NurgleLordArmour-for-Patreon-final-1 If the above link doesnt load, follow this link or the below to download! https://richardgraycreations.com/wp-content/uploads/2017/07/NurgleLordArmour-for-Patreon-final-1.pdf Explore my latest video tutorials! If you don’t have an account here on my website, please sign up here! I have over 350 video tutorials with steps and tips, plus a selection of PDFs. If you are not sure about joining, you can explore my free videos with a free membership, or take the plunge and become a full subscriber for full access. If you’d prefer to support me on Patreon, please visit: https://www.patreon.com/RichardGray [...]
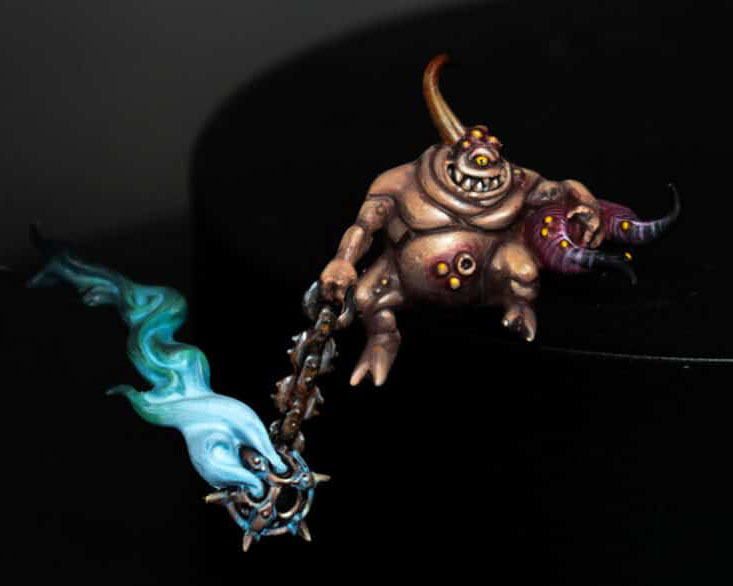
If you don’t have an account, please sign up here! The website currently has over 350 video tutorials with steps and tips, plus a selection of PDFs. If you are not sure about joining, you can explore my free videos with a free membership, or take the plunge and become a full subscriber for full access.

How to Paint a Great Unclean One
free warhammer painting tutorials

If you’d prefer to support me on Patreon, please visit: https://www.patreon.com/RichardGray
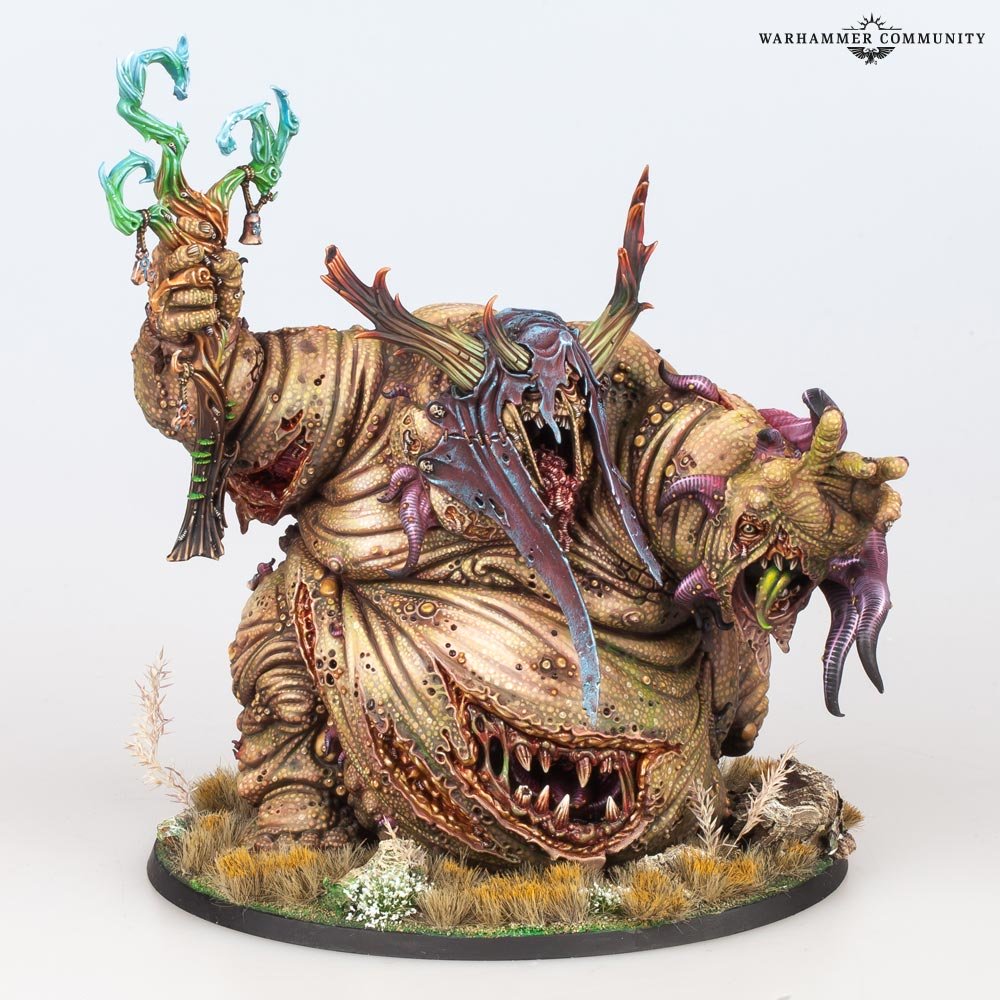
Leave a Reply