


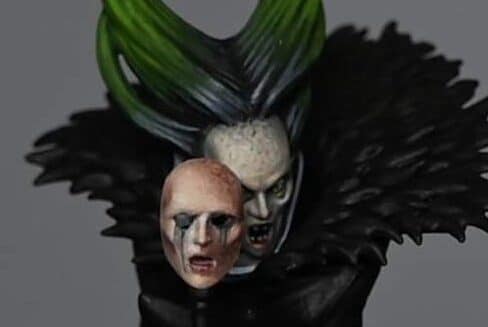
This video shows how to paint the mask of horror (and some of the difficulties I had!) for Lady Annika.
Video: Lady Annika Mask
This video tutorial is currently hidden. To unlock it and watch, please join the website and log in.
Materials Needed:
- Games Workshop Paints: Cadian Fleshtone, Rhinox Hide, Ushabti Bone, Mephiston Red, Dark Reaper (later changed to Corvus Black)
- Vallejo Paint: Model Color Air White
- Fine detail brushes
- Wet palette
- Water (for thinning paints)
Base Coat
- Prime the Mask: Begin with a black primer to ensure the colours that follow stand out.
- Apply Cadian Fleshtone: Cover the mask with Cadian Fleshtone. This will likely take three to four coats due to the poor coverage over the black primer. The aim is to achieve a base that resembles a realistic skin tone, though the mask itself is quite small, making this task more challenging.
Creating the Skin Tones
- Mix Shades: Prepare a range of shades on your wet palette by mixing Cadian Fleshtone with varying amounts of white for highlights and Rhinox Hide for shadows. For deeper shadows, use a 50/50 mix of Cadian Fleshtone and Rhinox Hide, and for pure shadow areas, use Rhinox Hide alone.
- Block in Highlights and Shadows: Considering the light source is from the top left, start blocking in highlights and shadows to define the mask’s features. This initial stage doesn’t require perfect blending, as the translucent nature of the watered-down paints (approximately two parts water to one part paint) allows for underlying layers to show through, contributing to a more natural look.
Refining Details
- Enhance the Highlights: Use the lighter mixes (Cadian Fleshtone with white and Ushabti Bone with white) to highlight areas like the bridge of the nose, cheekbones, and forehead. These areas may need even more watered-down paint to avoid a chalky texture.
- Detailing the Eyes and Mouth: With Corvus Black, add definition around the eyes and mouth. Initially, Dark Reaper was used, but Corvus Black provided a more suitable shade for creating a horror effect without being overly saturated.
Adding Horror Elements
- Mascara Tears: Using Corvus Black, paint streaks running down from the eyes to simulate mascara tears, ensuring they thin out towards the bottom. This effect should look distressed and slightly uneven to enhance the horror aesthetic.
- Red Lips: Paint the lips with Mephiston Red, carefully defining them to stand out against the paler skin tones. The open mouth adds to the mask’s gormless, horrific expression.
Finishing Touches
- Softening and Blending: Go back over the mask to soften any harsh lines or transitions, especially around the streaks and shadowed areas, to ensure a coherent and lifelike (yet horrific) appearance.
- Detailing and Corrections: If necessary, use the skin tone mixes to correct any mistakes or overly bold lines, particularly around the eyes and eyebrows, to maintain the desired look.
For all my Tutorials on Lady Annika, follow the link below:
Lady Annika
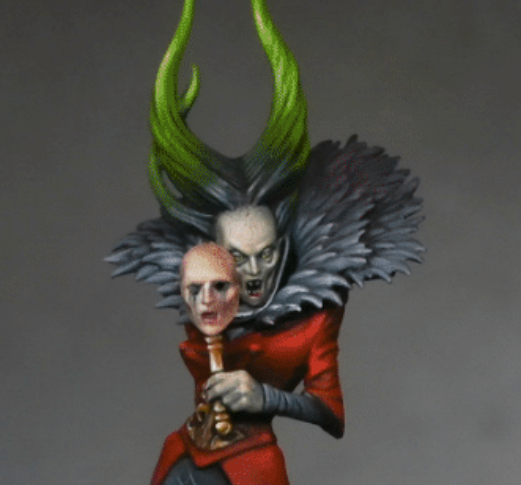
Golden Demon Entry – Lady Annika’s thirst for blood is legendary, even amongst the Soulblight vampires! I really enjoyed painting her and made a few tweaks to the model.
If you don’t have an account, please sign up here! The website currently has over 350 video tutorials with steps and tips, plus a selection of PDFs. If you are not sure about joining, you can explore my free videos with a free membership, or take the plunge and become a full subscriber for full access.


If you’d prefer to support me on Patreon, please visit: https://www.patreon.com/RichardGray