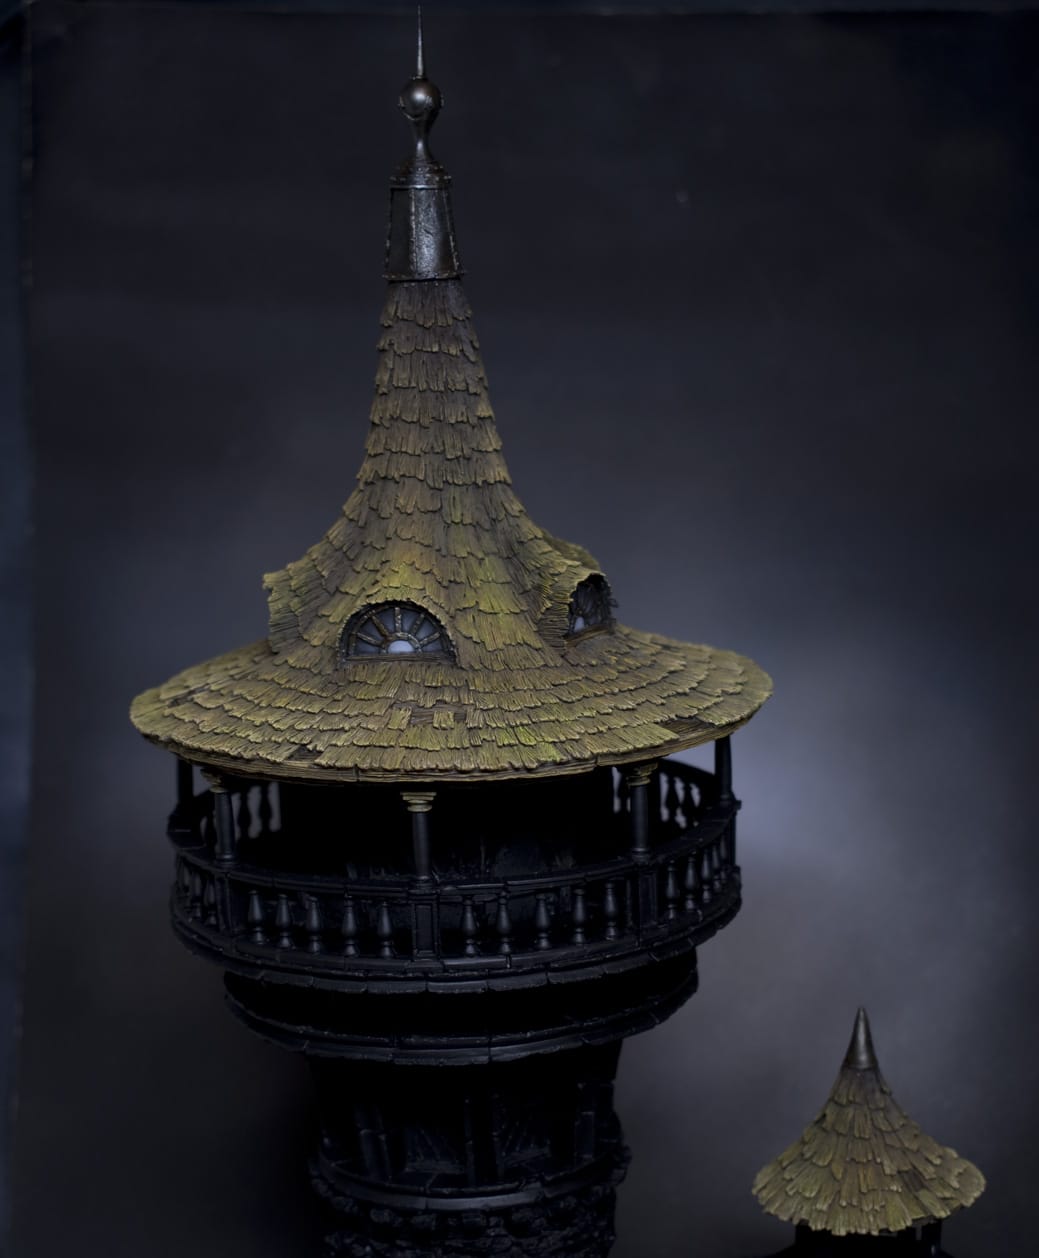
Wizard Tower

How to Paint a Wizard Tower

Now for something a little different – a tutorial on How to Paint a Wizard Tower by the folks at Tabletop World, including windows, drybrushing tips, wood texture and mossy tiles.

Video: How to Paint a Wizard Tower

This video tutorial is currently hidden. To unlock it and watch, please join the website and log in.

Materials and Tools:

  • Airbrush: A gravity-fed, double-action airbrush is recommended. The model used in the tutorial is a Harder and Steenbeck Infinity CR+, but any decent airbrush will suffice.
  • Paints: Tamiya Flat Black, Flat White, Flat Brown, Light Gray, IJN Gray, and X20A paint thinner; Scale 75 Brown Leather, Arabic Shadow, Sherwood Green; Games Workshop Balor Brown, Ushabti Bone, and Nuln Oil (mistakenly referred to as Agrax Earthshade in the video); Vallejo Gun Metal Air; Winsor and Newton Artisan Water Mixable Oil Colour Burnt Umber.
  • Brushes: A makeup blusher brush for dry brushing large areas, and a Series 7 size 2 “miniature” brush (though size 1 is mentioned in the video, a size 2 is used for detailed work).

Steps:

Airbrush Base Coating: Mix Tamiya Flat Brown with X20A thinner at a 50/50 ratio and airbrush the roof, focusing on the edges and areas where tiles are missing to create depth. Avoid complete coverage to allow for natural wood texture.

Use Tamiya Light Gray and IJN Gray to paint the windows, starting with black for the frames, then grey for the glass, progressing from dark to light to mimic glass reflections.

Dry Brushing: Use a makeup blusher brush to dry brush the roof with Scale 75 Arabic Shadow to highlight the wood texture and details.

Apply Scale 75 Brown Leather to the window frames and any overspray areas to integrate them into the woodwork.

Highlight metallic parts with Vallejo Gun Metal Air using a dry brush technique to create a natural metal finish.

Detailing and Weathering: Use Games Workshop Balor Brown and Ushabti Bone to further highlight the wood and metallic parts, focusing on edges and raised details to enhance the model’s texture.

Apply Scale 75 Sherwood Green diluted with water to parts of the roof to simulate moss and ageing, focusing on areas that would naturally gather moisture.

Wash metallic areas with Nuln Oil to add depth and contrast, ensuring the wash settles into recesses.

Final Touches: Detail the nails and other small metallic parts with Vallejo Gun Metal Air, followed by a wash of Winsor and Newton Burnt Umber to simulate rust and weathering.

Adjust any overly green areas with Arabic Shadow if necessary to tone down the brightness and integrate the moss effect more naturally into the woodwork.


More bases, houses and terrain:

Buildings, Terrain and Bases
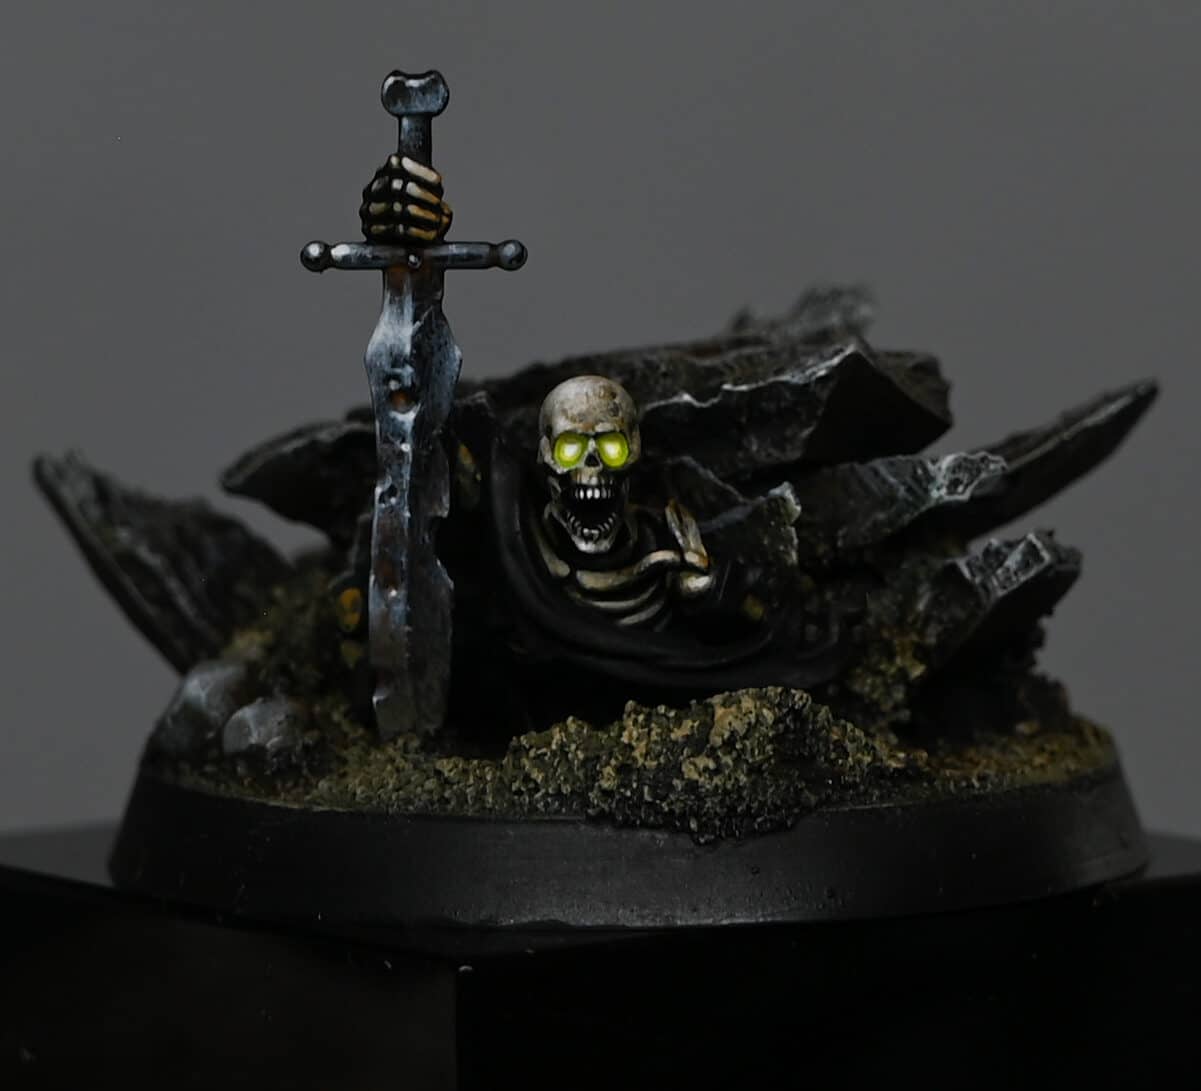
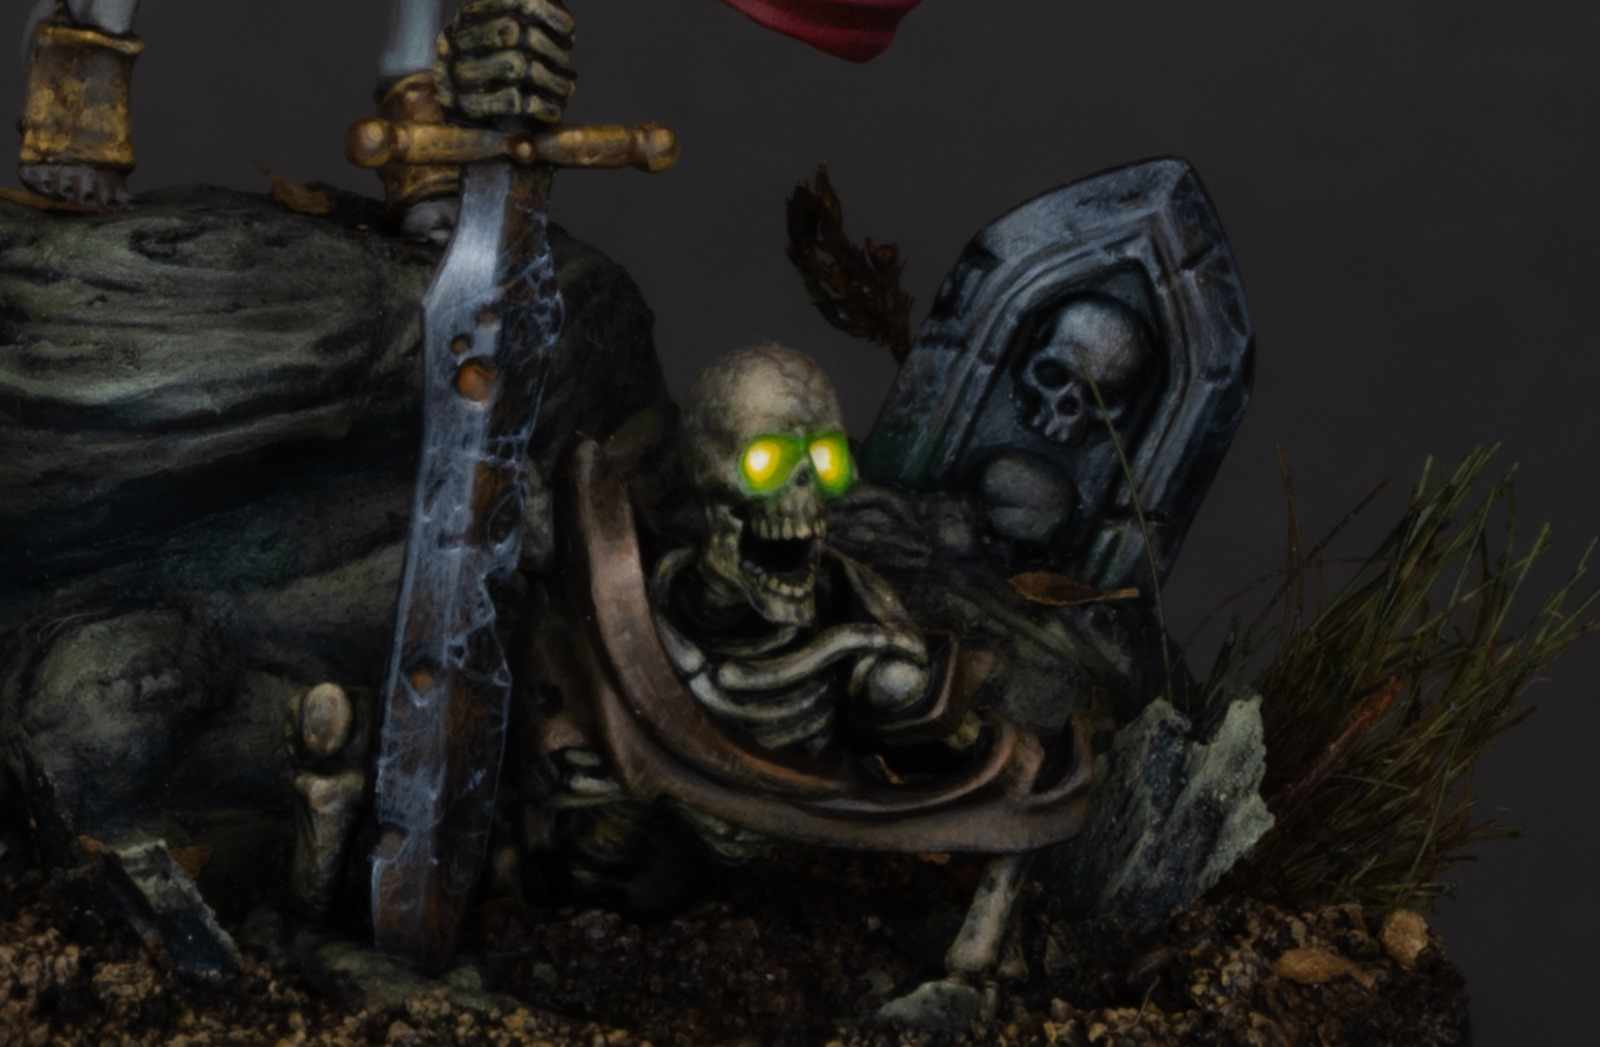
How to Paint a Skeleton with Glowing Eyes
This is another video looking at Sekhar the vampire, this time focusing on how to paint a skeleton with glowing eyes for the model on her base. This video looks at the skeleton, how to paint his glowing eyes, sword and bones etc. The whole model is covered! Video: How to Paint a Skeleton with Glowing Eyes Materials needed: Skeleton ModelPriming spray (I’ve used black!) Brushes:I use the Artist Opus range of brushesFine detail brushMedium-sized brushLarge brush (optional, for basecoating larger areas) Wet Palette (for mixing and thinning paints)Varnish (to protect the finished paint job) Paints:All paints mentioned are from Games Workshop’s Citadel range. Yriel Yellow Moot Green Balor Brown Morghast Bone Screaming Skull Mournfang Brown XV-88 Rhinox Hide Other Materials: Rocks or pebblesFoliage (such as static grass or miniature leaves)Sand or texture paste (for ground texture)Super glue (for attaching basing materials)Water (for thinning paints)Paper towels or cloth to ensure your brushes are totally clean! How to Paint a Skeleton with Glowing Eyes – Step 1: Priming Prime your model with a suitable undercoat. Black is recommended as it provides a good base for both the glowing effects and the shadowed recesses of the skeleton. Step 2: Base Coating Skeleton: Apply a thin base coat of XV-88 over the entire skeleton. Ensure the paint is thinned with water to maintain detail. Eyes: Start by painting the eye sockets with Kimera White. Given the deep recesses, apply multiple thin layers to build up a solid white base. Patience is key here to avoid a textured look. Step 3: Adding Depth to Eyes Mix Yriel Yellow with Kimera White to create a pale yellow. Carefully fill in the eye sockets, leaving the deepest part still white to simulate glow. Gradually add more Yriel Yellow towards the front of the eye sockets, intensifying the colour as you move forwards. Define the edges of the sockets with Moot Green to enhance the glow effect, blending it slightly into the yellow for a smooth transition. Step 4: Skeletal Detailing General Bone Texture: Lightly dry brush the skeleton with a mixture of Mournfang Brown and XV-88 to bring out the texture. Enhanced Details: Use Morghast Bone to highlight edges and raised details across the bones. Deepening Shadows: Mix Rhinox Hide with a small amount of black to create shadows in the deeper recesses and under the bones for added depth. Step 5: Sword and Metallic Effects Base Coat: Apply Neutral Grey as a base for the sword and any metallic elements. Weathering: Add scratch effects using Troll Slayer Orange mixed with Mournfang Brown to simulate rust and age. Highlights: Use Screaming Skull to pick out edges and features, giving the impression of worn, yet still sharp, metal. Step 6: Final Touches Refining Glows: Go back to the eyes, adding pure Yriel Yellow to the centres and intensifying the green at the edges if necessary. Blending and Smoothing: Use glazes of the base colours to smooth out transitions and unify the appearance, particularly around the eye sockets and on the sword to blend the rust effects. Contrasting Details: For a final layer of detail, use Screaming Skull to highlight teeth, knuckles, and other small bone protrusions, adding a subtle layer of Rhinox Hide for ageing. Step 7: Sealing the Model Once fully satisfied with your painting, seal the model with a matte varnish to protect your work and reduce any unwanted shininess, ensuring the skeletal figure looks as haunting in the display case as it does on the battlefield. Explore more of my Golden Demon entry tutorials If you don’t have an account here on my website, please sign up here! I have over 350 video tutorials in addition to my How to Paint a Skeleton with Glowing Eyes, with steps and tips, plus a selection of PDFs. If you are not sure about joining, you can explore my free videos with a free membership, or take the plunge and become a full subscriber for full access. If you’d prefer to support me on Patreon, please visit: https://www.patreon.com/RichardGray [...]
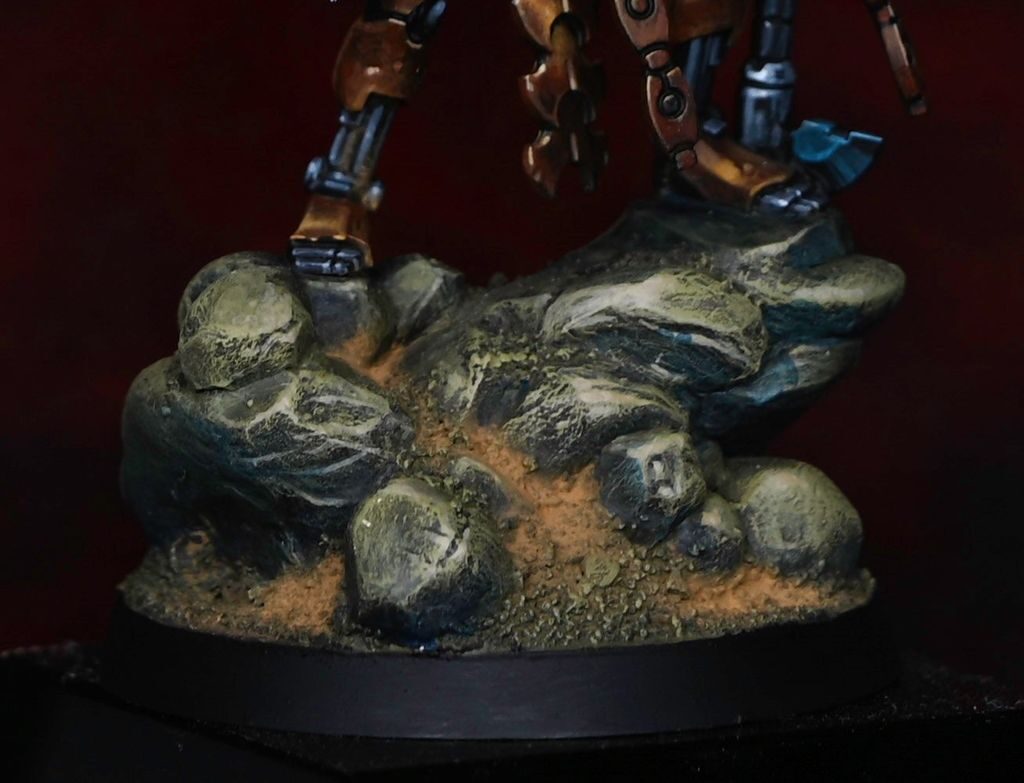
How to Create a Boulder Base
This guide will walk you how to create a boulder base with realistic large rocks utilising Milliput for the sculpting part and a selection of Games Workshop paints for painting. Materials Needed Milliput (Super Fine White preferred, but any type will do) Sculpting tools and a scalpel Water or a lubricant like Vaseline for smoothing Milliput PVA glue and fine grain sand for texture Paints: Vallejo Model Color Black, Games Workshop Deathworld Forest, Ogryn Camo, Morghast Bone, Ushabti Bone, and Kantor Blue Weathering pigment (e.g., Forge World Dark Sand) Brushes, including a small Artis Opus dry brush Matte varnish for sealing Step-by-Step Guide: How to Create a Base Sculpting the Base Mixing Milliput: Take equal parts of Milliput’s two components and knead until uniformly beige. It might initially be flaky; continue until smooth. Forming the Terrain: Roll the mixed Milliput into a ball and press onto the base. Begin sculpting the rough shape of the terrain using sculpting tools, dipped in water or lubricant to prevent sticking. Adding Details: Once you have a basic shape, use tools and a scalpel to carve more detailed rock formations. Ensure the terrain is level where the model will stand. Creating Smaller Rocks: Take excess Milliput, form small balls, and press onto the base to simulate smaller rocks, blending them into the larger mass. Smoothing and Refining: Continue to refine the shapes, adding crevices and smoothing surfaces. Allow the Milliput to partially dry for easier handling. Painting the Base Base Coat: Once the Milliput is dry, apply a thin base coat of Vallejo Model Color Black. Ensure it’s watered down to cover quickly without obscuring details. Adding Sand: Apply PVA glue to the base and sprinkle fine grain sand over it for additional texture. Allow to dry. Applying Weathering Pigment: Use a dark sand weathering pigment, pushing it into crevices and blowing away the excess. Washing: Create a wash with Deathworld Forest (5 parts water to 1 part paint) and cover the entire base. This will spread the pigment and add depth. Dry Brushing: Once dry, dry brush the base with Deathworld Forest, followed by Ogryn Camo, focusing on top-down strokes to highlight edges and textures. Detailing: Use Morghast Bone and Ushabti Bone to pick out individual rocks and edges for added contrast and detail. Adding Shadows: Water down Kantor Blue and apply it to the undersides of rocks and in shadowed areas to simulate ambient occlusion and enhance depth. Finishing Touches Sealing: Once fully painted and dry, apply a matte varnish to seal the weathering pigment and paint, protecting your work. Base Rim: Tidy up the base’s rim with Vallejo Model Color Black for a neat finish. Tips Work in stages, allowing materials to dry fully between steps. Be creative with your rock shapes but ensure the model will stand level on the finished base. Use a variety of brush sizes for dry brushing to reach different areas without disturbing the painted model. Test fit your model frequently on the base during the sculpting process to ensure a good fit How to Paint a Gold Necron Overlord Keen to learn how to paint the model standing on this base? Go here: Necron Overlord NMM Gold A series of video tutorials on how I painted this Necro Overlord, with gold non metallic metals and a guide to how to paint his glowing weapons. Plus, a guide on creating his base. Watch Now If you don’t have an account, please sign up here! The website currently has over 350 video tutorials with steps and tips, plus a selection of PDFs. If you are not sure about joining, you can explore my free videos with a free membership, or take the plunge and become a full subscriber for full access. If you’d prefer to support me on Patreon, please visit: https://www.patreon.com/RichardGray [...]
How to Create a Water Effect Base
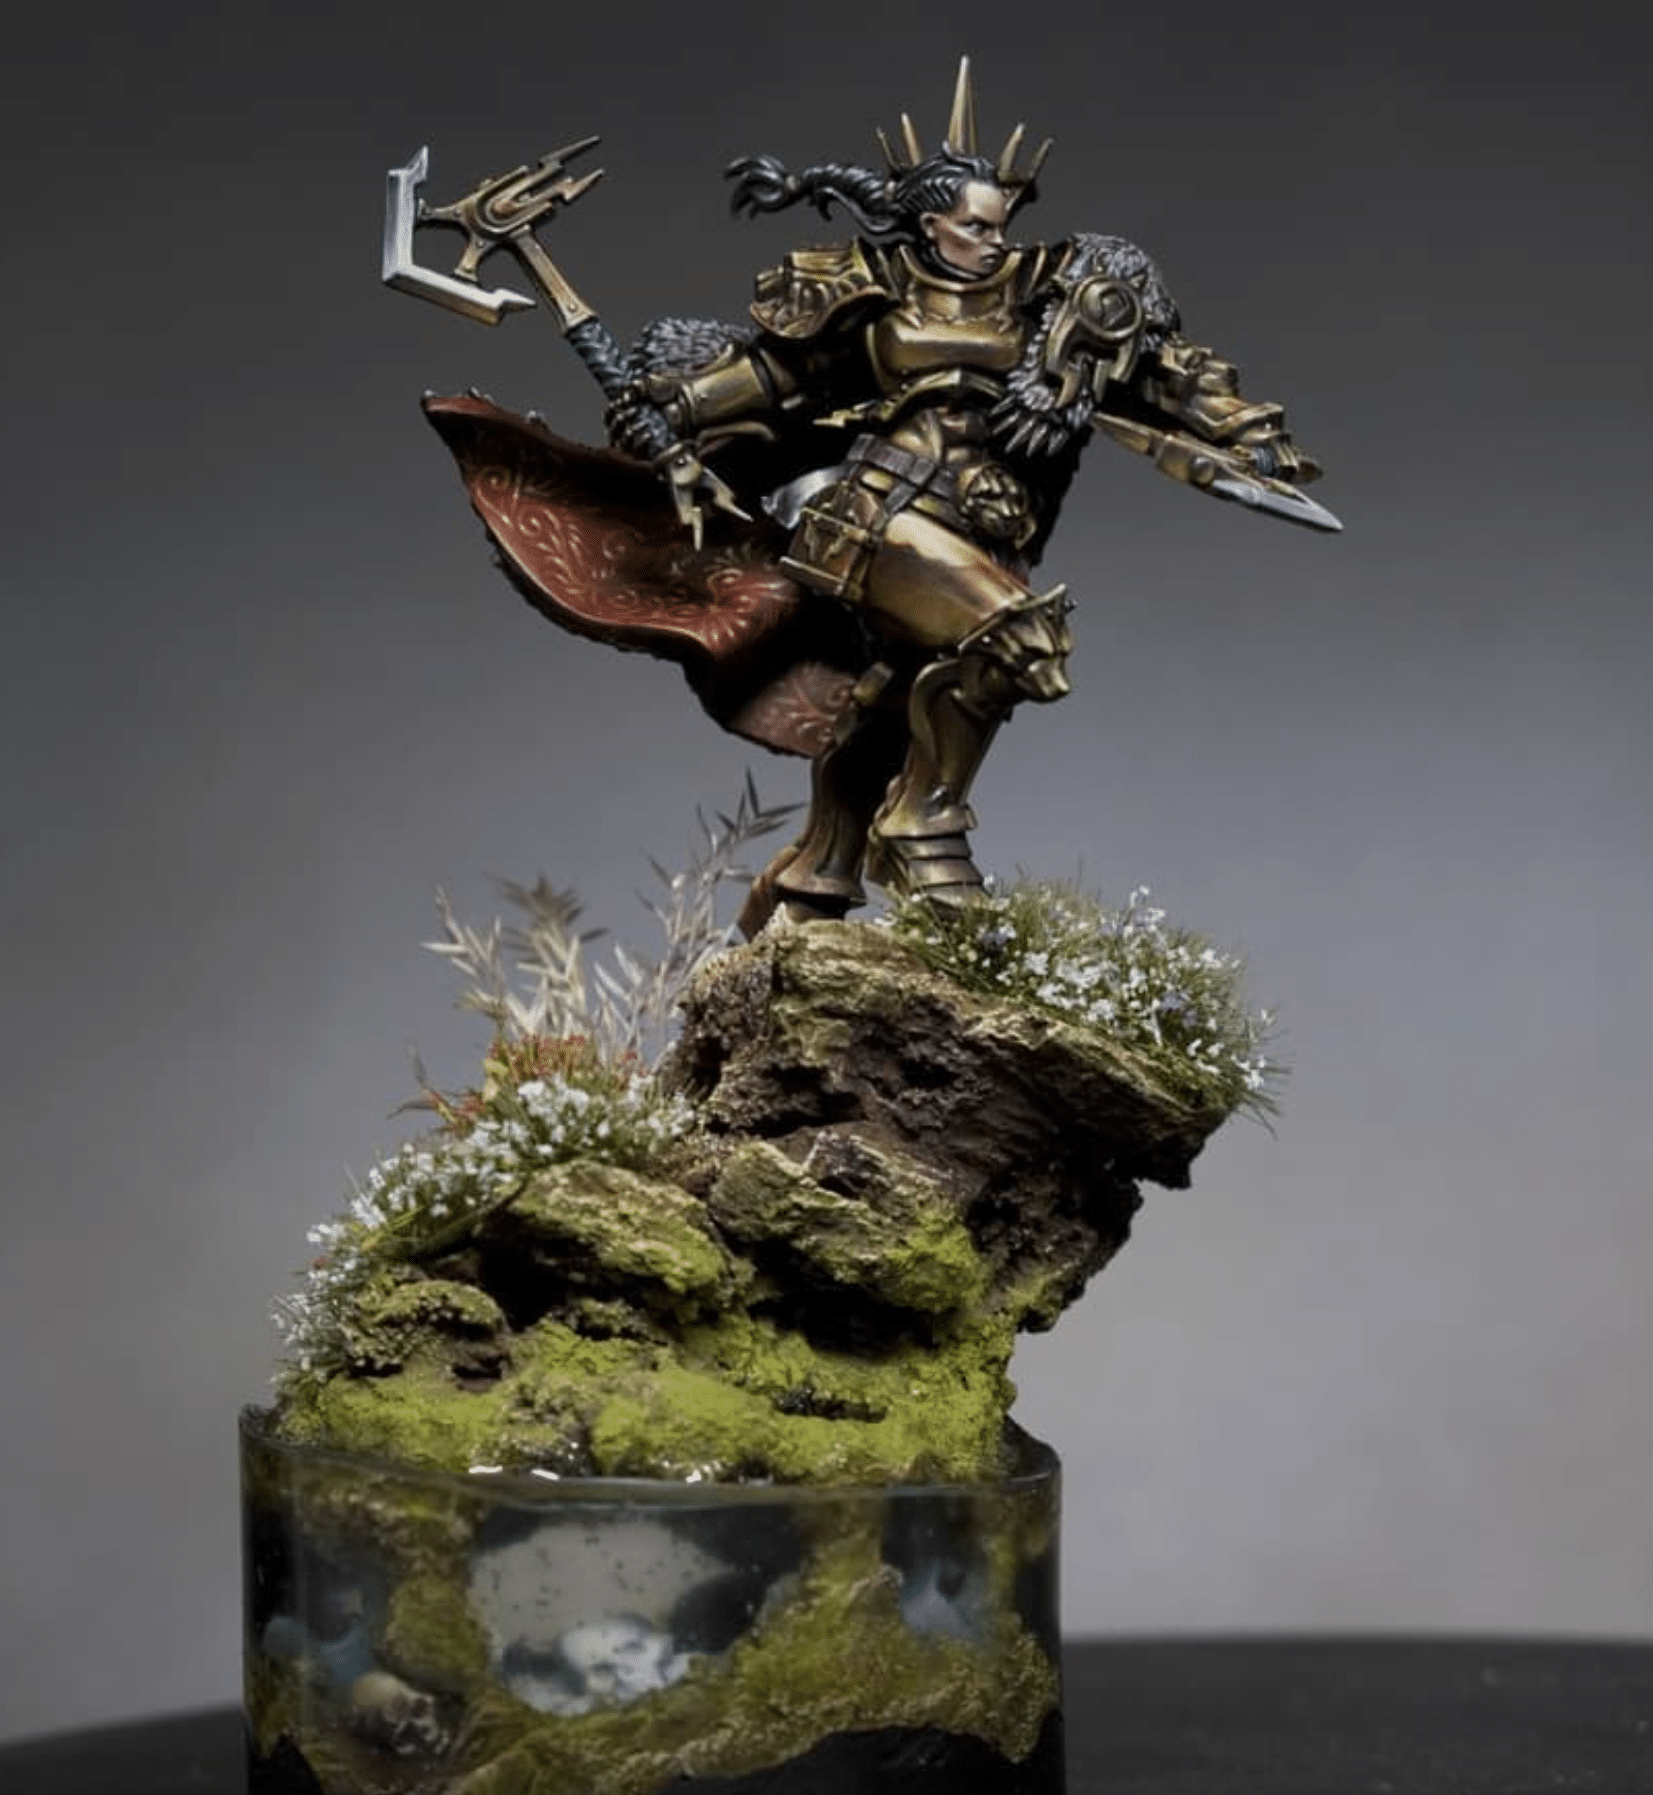
Today, we’re in my archives learning how to create a water effect base for the formidable Neave Blacktalon. This tutorial will help you in bringing a scene to life, adding depth and narrative to your miniature. The landscape we are looking to create is complete with realistic water effects that give the impression of Neave Blacktalon traversing through a treacherous, water-logged terrain. Working with materials like resin for water effects can be tricky and messy. Patience is key. Ensuring a watertight seal for the resin and avoiding air bubbles are crucial steps that require a steady hand and mustn’t be rushed. Also, when working with various textures like cork and sand, achieving a natural blend with your paints is essential for realism. Biggest thing on this tutorial is not to rush the drying and curing process of the materials we use. Patience pays off in ensuring each layer, from the base textures to the resin, sets perfectly. And remember, when dealing with intricate details, like adding vegetation and painting skulls, less is often more. Subtlety can make all the difference in achieving a natural look. Video Tutorial – How to Create a Water Effect Base Materials Required Resin plinths and cork bark for the base. Tools including a Dremel for shaping. Protective gear: Mask for dust protection. Games Workshop plastic skulls for decoration. Builder’s sand (with a mix of fine and large grains). Standard PVA glue. Baking soda and matte varnish for texture. Scale 75 paints (Brown Leather, Orange Leather, Arabic Shadow, Sherwood Green, Black Leather). Games Workshop Ahriman Blue and Ceramite White. P3 Menoth White Base. Airbrush (optional). Superglue. Acetate sheet or similar for creating a barrier. Epoxy resin for water effects. Gloss varnish (AK Interactive recommended). Vallejo Model Colour Black. Step-by-Step Guide Base Preparation: Glue resin plinths together and top with cork bark for a natural rock formation look. Use a Dremel to shape the cork, ensuring proper ventilation and safety measures when you do so. Adding Detail: Place GW plastic skulls in the drilled areas for added interest. Texturing with Sand: Apply a mix of builder’s sand using PVA glue to add varied texture. This creates a more natural look with different grain sizes. Baking Soda and Varnish Mix: Combine baking soda with matte varnish to add fine texture, particularly around the edges and over the cork. Priming: Once dry, prime the base black using Vallejo Surface Primer. Airbrushing Base Colours: Optionally use an airbrush to apply Scale 75 paints in layers (Brown Leather, followed by Orange Leather, then Arabic Shadow). Airbrush inside the holes with Ahriman Blue, lightened with Ceramite White for a glowing effect. Dry Brushing Textures: Overemphasize textures with dry brushing, starting with Balor Brown and progressively lighter shades up to Menoth White Base. Focus on raised areas and edges. Applying Colour Washes: Use watered-down Scale 75 Sherwood Green and Black Leather to add natural colour variations. The washes will blend naturally, creating a cohesive look. Moss and Algae Effects: Mix Sherwood Green with baking soda and varnish to create a mossy texture, especially around the water edge. Adding Vegetation: Apply grass tufts, flowers (from Army Painter and MiniNatur), and field-found “real life!” vegetation with PVA and superglue for a diverse and organic look. Resin Water Effects: Carefully pour mixed epoxy resin into the prepared areas. Ensure a leak-proof barrier with acetate and superglue. Do not rush! Let it set for at least 24 hours. Final Touches: Once the resin is set and clear, tidy up the base edges with Vallejo Model Colour Black. Sand any rough edges if needed. Integration with the Model: To blend the model with the base, replicate the base’s texturing under the model’s foot. Completion: Leave to dry and cure fully. The finished base should present a detailed and textured landscape, complete with realistic water effects, enhancing Neave Blacktalon’s dynamic pose. If you don’t have an account, please sign up here! The website currently has over 350 video tutorials with steps and tips, plus a selection of PDFs. If you are not sure about joining, you can explore my free videos with a free membership, or take the plunge and become a full subscriber for full access. If you’d prefer to support me on Patreon, please visit: https://www.patreon.com/RichardGray [...]
How to Make a Rocky Base (with Skeleton!)
These two videos show in details how to build and prepare a base, with lots of interesting rocks and textures (and a friendly skeleton!). With full materials list and step by step text guide. Quick Jump to: Video – Skeleton Base Part OnePaints and MaterialsStep-by-Step Guide and Tips for the Skeleton BaseBuilding the BasePainting the BaseFinishing TouchesVideo – Skeleton Base Part Two (Painting the Skeleton)Paints and MaterialsStep-by-Step Guide and Tips for Painting the Skeleton BasePainting the SkeletonPainting the SwordPainting the ClothAdding Vegetation Video – Skeleton Base Part One Paints and Materials A skeleton figure from Warhammer Underworlds Warbands Milliput and Fimo (or slate pieces) Green stuff (50/50 mix of blue and yellow) Super glue Sand (variety in particle size, not sharp sand) PVA glue (diluted with water) Base brush (flat Games Workshop brush or equivalent) Neutral Grey (Vallejo), Deathworld Forest, Morghast Bone, Agrax Earthshade, Athonian Camoshade, Astronomicon Grey (Games Workshop) Water for thinning paints Rock material guide by the fantastic Julien Casses:https://www.juliencasses.com/2012/11/how-to-make-rocks Step-by-Step Guide and Tips for the Skeleton Base Building the Base Prepare Skeleton: Start by preparing your skeleton figure, ensuring it has a ‘rising from the ground’ appearance. Create Stone Slabs: Mix Milliput and Fimo, bake at 120°C for 30 minutes, then break into slabs to represent stones. Alternatively, use slate pieces. Attach these slabs to the base with super glue. Apply Green Stuff: Mix blue and yellow Green Stuff and use it to create a ridge around the skeleton, giving the illusion of a hole from which the skeleton emerges. Embed the Vampire Lord’s rock into the Green Stuff to integrate it with the base. Add Texture: Sculpt some small, round rocks using Green Stuff for added detail. Sand Application: Cover the base in beach sand, avoiding sharp sand. Use various particle sizes for a natural look. Painting the Base Seal Sand: Brush diluted PVA glue over the sand to seal it and prevent flaking. Base Colour for Sand: Dry brush the entire base with Deathworld Forest, focusing on sandy areas. Highlighting Sand: Apply a lighter dry brush of Morghast Bone to the sand for highlights. Defining Rocks: Use Agrax Earthshade as a thick glaze around the sculpted rocks to define their shapes. Enhancing Greenery: Apply Athonian Camoshade to enhance the green tones on the base. Rock Painting: Begin detailed painting on rocks using Neutral Grey. Focus on highlighting angles and adding scratchy details for texture. Additional Rock Highlights: Use Pelgrave Blue, potentially mixed with white, to highlight rocks further. Remember not to overpower the model with the base’s contrast. Enhancing Edges: Add lighter edges around rocks using Astronomicon Grey to define shapes. Finishing Touches Consider adding other details like small flowers or greenery to the base. Reflect these colours onto the whatever model you plan to attach to your base. Ensure the base matches the quality and style of your painted model. Video – Skeleton Base Part Two (Painting the Skeleton) Paints and Materials Paints: XV-88, Balor Brown, Moot Green, Deathworld Forest, Ushabti Bone, Mournfang Brown, Trollslayer Orange (Games Workshop); Neutral Grey, Pale Grey Blue, Black (Vallejo); Iosen Green, Morrow White (P3) Mininatur Moss Pads and Flowers Water for thinning paints Brushes with fine tips PVA Glue Jeweler’s tweezers Step-by-Step Guide and Tips for Painting the Skeleton Base Painting the Skeleton Eyes: Start by painting the eye sockets with white paint, thinned down. Apply 2-3 layers for an opaque finish. Avoid overloading to prevent the paint from pooling. Adding Color to Eyes: Use Pro Acryl Golden Yellow (or any similar yellow) around the edges of the eye sockets, leaving the back white to mimic a light source. Then, use Moot Green, thinned down, around the yellow, ensuring smooth transitions. Skeleton Bone: Use XV-88 to paint the skull and bones. Apply the paint thinly and unevenly to create a natural, weathered look. Emphasize areas where light would naturally hit, based on the light source direction. Highlighting Bone: Apply Ushabti Bone for highlights, focusing on raised areas and edges. Keep the paint thin for a smooth finish. Additional Details: Add small scratches or battle damage marks for realism. Final Highlights on Bone: Use white (Morrow White) for the final highlights on the most raised areas. Painting the Sword Base Colour: Use Neutral Grey to paint the entire sword, including the hilt and blade. Weathering: Add Mournfang Brown to the blade for a rust effect, focusing on recessed areas and pitted holes. Highlighting the Blade: Use Pale Grey Blue for highlighting and adding scratchy details, focusing on areas that would catch light. Rust Details: Add Trollslayer Orange in the deepest recesses for an inverted highlight effect. Refining Highlights: Go back with Neutral Grey and Pale Grey Blue to refine the highlights and add more detail to the weathered look. Painting the Cloth Base Layer: Apply Deathworld Forest over black primer, focusing on raised folds and areas that would catch light. Highlighting: Use Balor Brown for further highlights, keeping the paint very thin to maintain a dark, grubby appearance. Adding Vegetation Applying Moss Pads: Use PVA glue to attach Mininatur Moss Pads around the base. Utilize jeweler’s tweezers for precise placement. Adding Flowers: Integrate white flowers from Mininatur for additional detail. Trim if necessary to avoid overpowering the base. Adding Roots: For an emerging effect, glue small roots around the skeleton, bending them to create a natural look. Dry Brushing: Gently dry brush Balor Brown over the moss pads to integrate them with the base and add depth. My rocky base originally had my Vampire Lord on it, but its suitable for nearly any type of model! However, if you are looking to paint some vampires, here are some tutorials to explore… If you don’t have an account, please sign up here! The website currently has over 350 video tutorials with steps and tips, plus a selection of PDFs. If you are not sure about joining, you can explore my free videos with a free membership, or take the plunge and become a full subscriber for full access. If you’d prefer to support me on Patreon, please visit: https://www.patreon.com/RichardGray [...]
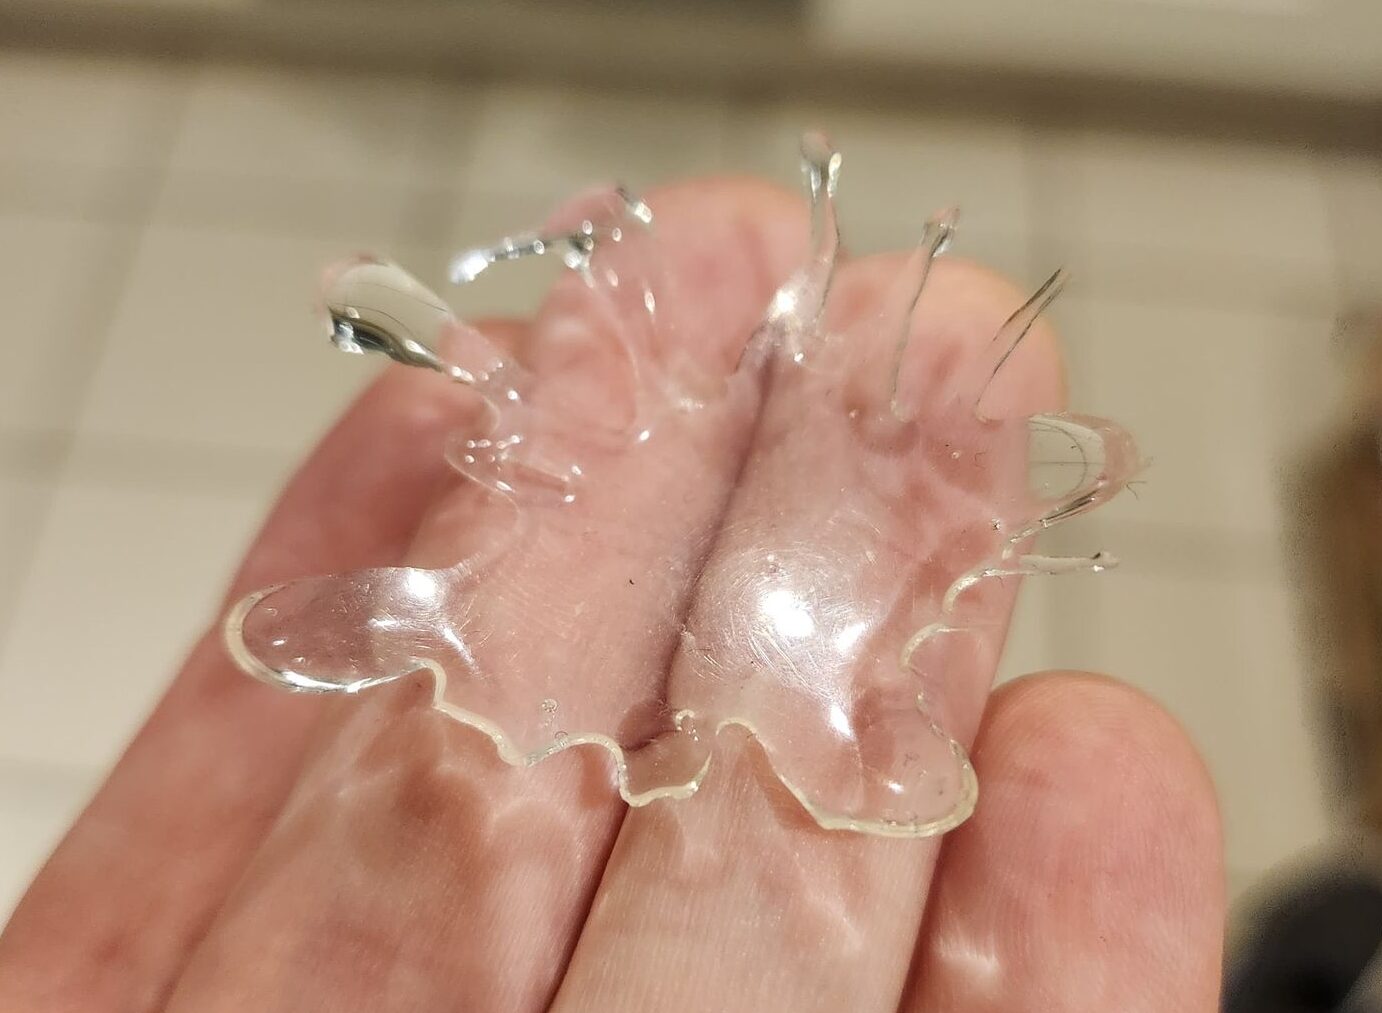
Video Tutorial: Resin Splash
This video shows you how to make a quick resin splash puddle effect using UV resin. All videos are recorded in HD 1080p or higher – use full screen for the full effect and let the video load completely. You can also click the little “cog” and change the speed of the video, if I am going too fast (or slow!). The following materials were used: UV Resin UV Light (a nail varnish UV light can work) Bath Bomb Mould or any soft plastic dome Fishing Line or human hair (optional, for finer details) Blood for the Blood God paint (optional, for a blood effect) Gloss varnish (alternative method) Paintbrush (for spreading resin, will be unusable after) Steps to follow for your resin splash: Prepare the Mould: Use a bath bomb mould or a similar soft plastic dome. The pliability of the mould allows you to easily remove the resin once it’s set. Apply the Resin: Brush the UV resin around on the plastic dome. Remember, the brush you use for this will likely be ruined, so choose an old or disposable one. Shape the Splash: With the resin in the middle of the dome, drag out streaks using the paintbrush or a cocktail stick. These streaks will form the splashes. The plastic dome will give the resin a shape that resembles a splash, pushing upwards and outwards. Cure the Resin: Place the plastic dome under the UV light. Ensure you have a UV light to set the UV resin. The resin sets quickly under the light. You can use multiple layers of these splats to create depth. Create Droplets: If you’re using fishing line or human hair, apply small blobs of resin along the line to mimic droplets. Cure these under the UV light as well. This step can also be done with gloss varnish or Blood for the Blood God for different effects. Assemble the Splash: Attach the end of the fishing line with the resin droplets to the main splash structure. Balance it and cure under the UV lamp again. Repeat this process to add multiple droplets around the splash. Final Touches: Once you’re satisfied with the splash shape and size, you can paint it to suit your scene. If you’re creating a water splash, you might leave it clear or add a slight blue tint. For blood effects, use Blood for the Blood God or a similar paint. Additional Tips: Be aware of the size of your splash in relation to the model’s base. You want the effect to complement, not overpower, the model. The process may require some experimentation. If you’re working on a competitive piece or have time constraints, consider the complexity of the effect. When creating blood droplets, applying the red paint after the resin has cured can add a more realistic and glossy effect. Explore my latest tutorials! If you don’t have an account, please sign up here! The website currently has over 350 video tutorials with steps and tips, plus a selection of PDFs. If you are not sure about joining, you can explore my free videos with a free membership, or take the plunge and become a full subscriber for full access. If you’d prefer to support me on Patreon, please visit: https://www.patreon.com/RichardGray [...]
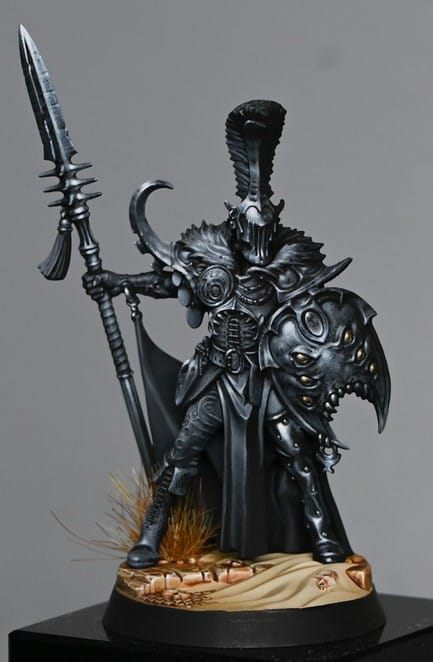
Video Tutorials : Dread Pageant Chaos Warrior
For my Dread Pageant Chaos Warrior, I wanted to paint the model in purely black and white so that you have to use light volumes and textures to separate the surfaces out, rather than relying on colour. Part One All videos are recorded in HD 1080p or higher – use full screen for the full effect and let the video load completely. Part Two Part Three Paints Used: Vallejo: Black, German Grey, Basalt Grey, Neutral Grey, Dark Sea Grey, Pale Grey Blue, White Grey P3: Morrow White Alternatively you can mix a series of greys from light to dark using just black and white paint. Base The following paints were usedVallejo: Heavy Brown, Gold Brown, Ice Yellow, Black Games Workshop: Contrast Guilliman Flesh, Balor Brown, Ushabti Bone P3: Morrow White Greenstuff World: Grass Tufts – DRY The cruel-hearted leader of a warband of Godseekers dedicated to finding Slaanesh, Vasillac stumbled across Beastgrave and became obsessed with the delicious despair of the living mountain. After a lifetime of pushing his own limits, only the most extreme and exquisite pain can excite him. His extensive and intricate scars attest to the severity of his affliction, including a ring bound through his wrist – mere flesh piercings are for the weak!  In the official painted version of the Dread Pageant Chaos Warrior, the gaudy workmanship of his weapons and armour, bedecked with baubles and trinkets, signals his vainglory, while in mine we are going to go completely black and white. Videos Not Showing? To view any of my paid tutorials, you need to be a member of the website – please click below to log in or join the site. Not sure about joining just yet? Check out my Youtube for all my free tutorials or sign up as a free “friend” member on this site and visit the free videos page! If you’d prefer to support me on Patreon, please visit: https://www.patreon.com/RichardGray [...]
How to Build and Paint a Adeptus Titanicus Titan Martian Base
This video shows you how to create a Titan Martian Base, a Martian red landscape for your Adeptus Titanicus Titan, or for any large model you like, really! Video Tutorial: Titan Martian Base All videos are recorded in HD 1080p or higher – use full screen for the full effect and let the video load completely. Paints and Materials Used Fimo and Milliput: For making rock shapes. Baking Soda: For creating the fine-grained surface texture. Paints: Scale 75’s Antares Red Scale 75’s Red Leather (or similar Games Workshop red and brown colours) Games Workshop’s Deathworld Forest Games Workshop’s Ushabti Bone Weathering Powders: Forge World’s Aged Rust Forge World’s Orange Rust Matte Varnish: For sealing the base. Tools: Brushes for painting and dry brushing. Sculpting tools or a flat surface for applying the baking soda mixture. Airbrush for applying weathering powder (optional). Other Materials: Water: For mixing with weathering powders. Super Glue: For securing rocks to the base. Q-tip: Slightly damp, for cleaning up excess weathering powder. Step by Step Guide Preparing the Base: Start by placing your model on the base and arrange rocks around it. Use rocks made from a mixture of Fimo and Milliput, baked and then broken into shapes. Creating the Surface: Mix baking soda (for fine texture), Scale 75’s Antares Red and Red Leather paint (or similar GW paints), and matte varnish to form a sticky, wet-looking substance. This creates the dusty, Martian surface. Applying the Surface Mixture: Carefully apply the mixture to the base, ensuring it’s pushed up against the rocks. Use a large, slightly damp brush to stipple and smooth out the mixture, avoiding unnatural marks. Using Cracking Paint: Apply a thin layer of Martian Ironearth cracking paint for subtle cracking effects. Ensure it’s not too thick to maintain the scale’s integrity. Painting the Rocks: Once dry, paint the rocks with Vallejo Model Color Black or a similar black paint. Then dry brush with GW Deathworld Forest for initial colour, followed by Ushabti Bone for highlights. Applying Weathering Powder: Mix Forge World Aged Rust and Orange Rust powder with a lot of water, and spray over the base using an airbrush. Focus on the lower parts of the model for a realistic effect. For manual application, use a large, soft brush. Cleaning Up: After the weathering powder dries, use a slightly damp Q-tip to remove excess powder from the rocks and lower sections of the Titan, enhancing the details and textures. Final Touches: Seal the base with a matte varnish to preserve the dusty look and reduce the brightness of the orange rust effect. More Adeptus Titanicus If you don’t have an account, please sign up here! The website currently has over 350 video tutorials with steps and tips, plus a selection of PDFs. If you are not sure about joining, you can explore my free videos with a free membership, or take the plunge and become a full subscriber for full access. If you’d prefer to support me on Patreon, please visit: https://www.patreon.com/RichardGray [...]
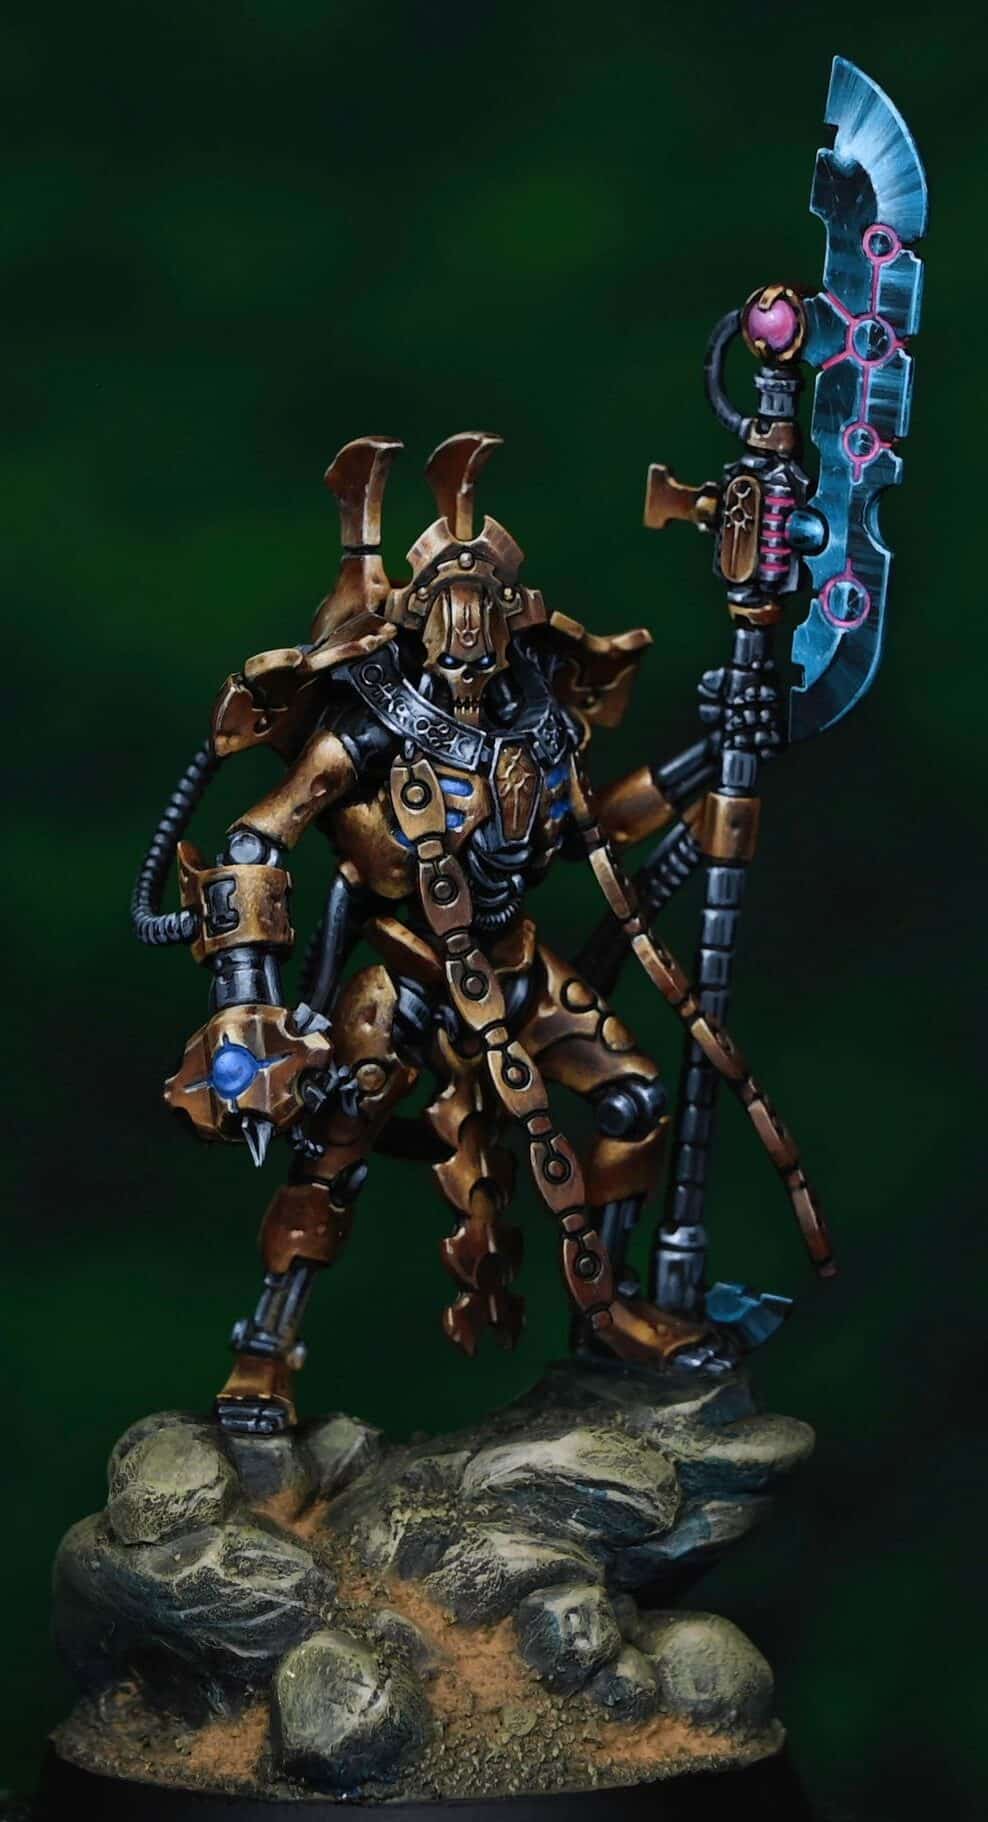
Necron Overlord Base
This video shows how to sculpt and paint the base for the Necron Overlord from the Indomitus boxed set. Video: How to Sculpt and Paint a Necron Overlord Base Materials Needed Milliput (Super Fine White preferred, but any type will do) Sculpting tools and a scalpel Water or a lubricant like Vaseline for smoothing Milliput PVA glue and fine grain sand for texture Paints: Vallejo Model Color Black, Games Workshop Deathworld Forest, Ogryn Camo, Morghast Bone, Ushabti Bone, and Kantor Blue Weathering pigment (e.g., Forge World Dark Sand) Brushes, including a small Artist Opus dry brush Matte varnish for sealing Step-by-Step Guide: How to Create a Necron Overlord Base Sculpting the Necron Overlord Base Mixing Milliput: Take equal parts of Milliput’s two components and knead until uniformly beige. It might initially be flaky; continue until smooth. Forming the Terrain: Roll the mixed Milliput into a ball and press onto the base. Begin sculpting the rough shape of the terrain using sculpting tools, dipped in water or lubricant to prevent sticking. Adding Details: Once you have a basic shape, use tools and a scalpel to carve more detailed rock formations. Ensure the terrain is level where the model will stand. Creating Smaller Rocks: Take excess Milliput, form small balls, and press onto the base to simulate smaller rocks, blending them into the larger mass. Smoothing and Refining: Continue to refine the shapes, adding crevices and smoothing surfaces. Allow the Milliput to partially dry for easier handling. Painting the Necron Overlord Base Base Coat: Once the Milliput is dry, apply a thin base coat of Vallejo Model Color Black. Ensure it’s watered down to cover quickly without obscuring details. Adding Sand: Apply PVA glue to the base and sprinkle fine grain sand over it for additional texture. Allow to dry. Applying Weathering Pigment: Use a dark sand weathering pigment, pushing it into crevices and blowing away the excess. Washing: Create a wash with Deathworld Forest (5 parts water to 1 part paint) and cover the entire base. This will spread the pigment and add depth. Dry Brushing: Once dry, dry brush the base with Deathworld Forest, followed by Ogryn Camo, focusing on top-down strokes to highlight edges and textures. Detailing: Use Morghast Bone and Ushabti Bone to pick out individual rocks and edges for added contrast and detail. Adding Shadows: Water down Kantor Blue and apply it to the undersides of rocks and in shadowed areas to simulate ambient occlusion and enhance depth. Finishing Touches Sealing: Once fully painted and dry, apply a matte varnish to seal the weathering pigment and paint, protecting your work. Base Rim: Tidy up the base’s rim with Vallejo Model Color Black for a neat finish. Tips Work in stages, allowing materials to dry fully between steps. Be creative with your rock shapes but ensure the model will stand level on the finished base. Use a variety of brush sizes for dry brushing to reach different areas without disturbing the painted model. Test fit your model frequently on the base during the sculpting process to ensure a good fit How to Paint a Gold Necron Overlord Keen to learn how to paint the model standing on this base? Go here: Necron Overlord NMM Gold A series of video tutorials on how I painted this Necro Overlord, with gold non metallic metals and a guide to how to paint his glowing weapons. Plus, a guide on creating his base. Watch Now If you don’t have an account, please sign up here! The website currently has over 350 video tutorials with steps and tips, plus a selection of PDFs. If you are not sure about joining, you can explore my free videos with a free membership, or take the plunge and become a full subscriber for full access. If you’d prefer to support me on Patreon, please visit: https://www.patreon.com/RichardGray Other video tutorials on how to paint the gold for this Necron and my other Necrons are available below!: [...]
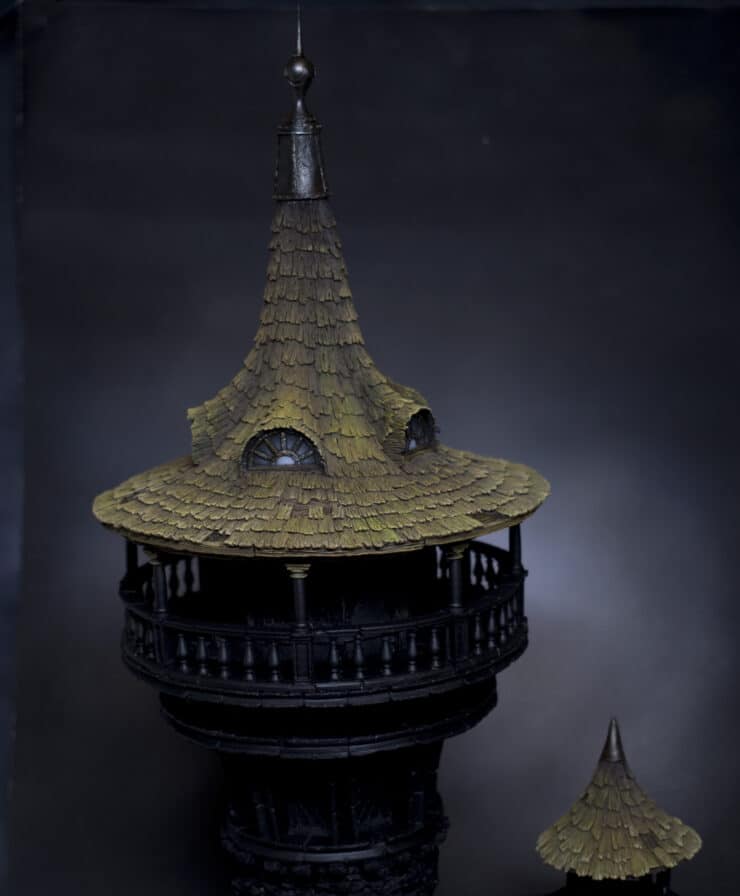
How to Paint a Wizard Tower
Now for something a little different – a tutorial on How to Paint a Wizard Tower by the folks at Tabletop World, including windows, drybrushing tips, wood texture and mossy tiles. Video: How to Paint a Wizard Tower Materials and Tools: Airbrush: A gravity-fed, double-action airbrush is recommended. The model used in the tutorial is a Harder and Steenbeck Infinity CR+, but any decent airbrush will suffice. Paints: Tamiya Flat Black, Flat White, Flat Brown, Light Gray, IJN Gray, and X20A paint thinner; Scale 75 Brown Leather, Arabic Shadow, Sherwood Green; Games Workshop Balor Brown, Ushabti Bone, and Nuln Oil (mistakenly referred to as Agrax Earthshade in the video); Vallejo Gun Metal Air; Winsor and Newton Artisan Water Mixable Oil Colour Burnt Umber. Brushes: A makeup blusher brush for dry brushing large areas, and a Series 7 size 2 “miniature” brush (though size 1 is mentioned in the video, a size 2 is used for detailed work). Steps: Airbrush Base Coating: Mix Tamiya Flat Brown with X20A thinner at a 50/50 ratio and airbrush the roof, focusing on the edges and areas where tiles are missing to create depth. Avoid complete coverage to allow for natural wood texture. Use Tamiya Light Gray and IJN Gray to paint the windows, starting with black for the frames, then grey for the glass, progressing from dark to light to mimic glass reflections. Dry Brushing: Use a makeup blusher brush to dry brush the roof with Scale 75 Arabic Shadow to highlight the wood texture and details. Apply Scale 75 Brown Leather to the window frames and any overspray areas to integrate them into the woodwork. Highlight metallic parts with Vallejo Gun Metal Air using a dry brush technique to create a natural metal finish. Detailing and Weathering: Use Games Workshop Balor Brown and Ushabti Bone to further highlight the wood and metallic parts, focusing on edges and raised details to enhance the model’s texture. Apply Scale 75 Sherwood Green diluted with water to parts of the roof to simulate moss and ageing, focusing on areas that would naturally gather moisture. Wash metallic areas with Nuln Oil to add depth and contrast, ensuring the wash settles into recesses. Final Touches: Detail the nails and other small metallic parts with Vallejo Gun Metal Air, followed by a wash of Winsor and Newton Burnt Umber to simulate rust and weathering. Adjust any overly green areas with Arabic Shadow if necessary to tone down the brightness and integrate the moss effect more naturally into the woodwork. More bases, houses and terrain: If you don’t have an account, please sign up here! The website currently has over 350 video tutorials with steps and tips, plus a selection of PDFs. If you are not sure about joining, you can explore my free videos with a free membership, or take the plunge and become a full subscriber for full access. If you’d prefer to support me on Patreon, please visit: https://www.patreon.com/RichardGray [...]
If you don’t have an account, please sign up here! The website currently has over 350 video tutorials with steps and tips, plus a selection of PDFs. If you are not sure about joining, you can explore my free videos with a free membership, or take the plunge and become a full subscriber for full access.

warhammer painting tutorials
free warhammer painting tutorials

If you’d prefer to support me on Patreon, please visit: https://www.patreon.com/RichardGray
Leave a Reply