


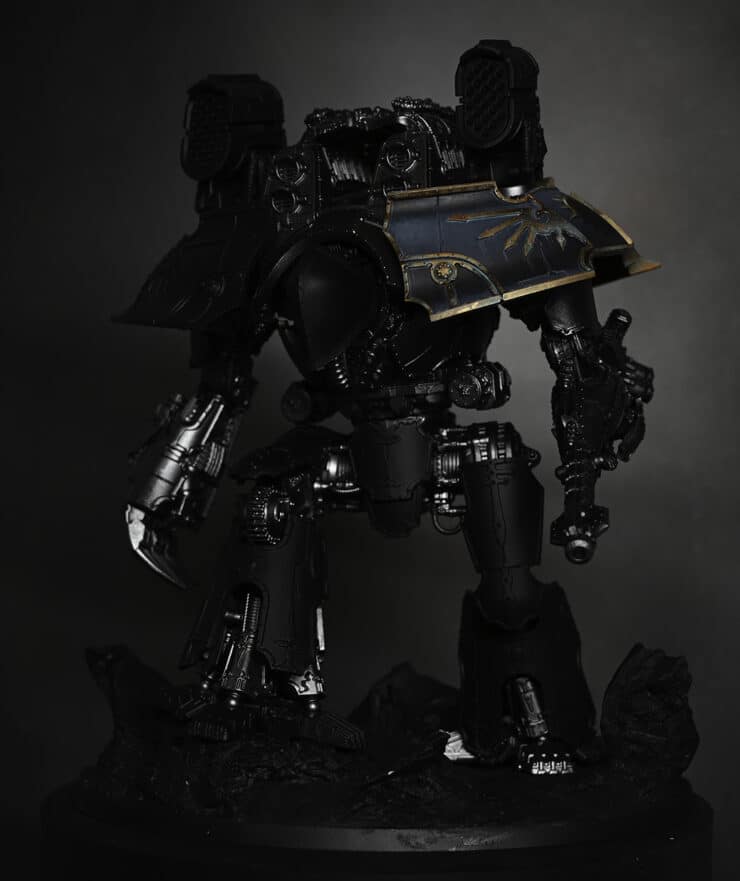
Learn how to paint Titan Armour and Trim for the Forge World Adeptus Titanicus Warlord-Sinister Psi-Titan with my video and guide below. Or, keep scrolling for my freehand guide.
Video: How to Paint Titan Armour and Trim
All videos are recorded in HD 1080p or higher – use full screen for the full effect and let the video load completely.
Materials Needed:
Paintbrushes (stippling brush, size 4 brush)
Wet palette
Paints: Mechanicus Standard Grey, Corvus Black, Grey Seer, Incubi Darkness, Abaddon Black, Darkoath Flesh (Contrast), Victorian Brass (Scale 75)
Water pot
Kitchen roll or tissue paper
Step 1: Priming:
Ensure that your miniature model is primed with black primer. This provides a solid base for the subsequent layers of paint.
Step 2: Base Layer:
Start by applying Corvus Black to the entire armour panel using a large stippling brush.
Use Mechanicus Standard Grey to apply a watered-down layer over the black, focusing on creating a gradient effect from top to bottom.
Gradually introduce Grey Seer at the very top of the panel to simulate light hitting the surface. Be mindful of the direction of light for a realistic effect
Step 3: Glazing:
Prepare glazes by mixing Incubi Darkness and Abaddon Black with water on your wet palette.
Apply Incubi Darkness glaze over the highlighted areas, gradually blending it into the shadows. Use long, vertical strokes for a smooth finish.
Follow up with Abaddon Black glaze, concentrating on the shadowed areas to enhance depth and contrast. Be cautious not to apply too much and avoid getting it on the highlighted areas.
Step 4: Metal Trim
Paint the metal trim using Victorian Brass, covering all the trim carefully.
Optionally, add verdigris effects by applying Nihilakh Oxide or a similar greenish paint to create a weathered appearance.
Step 5: Shading and Detailing:
Use Darkoath Flesh (Contrast) or a brown ink to shade certain areas of the metal trim, focusing on adding depth and texture.
Highlight the edges of the trim with Victorian Brass to define the shape and add contrast.
Step 6: Final Touches:
Blend the shaded areas on the metal trim to create a cohesive look, ensuring a natural transition between colours.
Add streaking effects with Nihilakh Oxide or a watered-down paint to simulate weathering and oxidation.
Step 7: Finishing:
Allow the paint to dry completely before handling the Psi-Titan.
Admire your finished masterpiece and prepare for the next steps in the series, which will cover freehand symbol painting.
For the Freehand, visit this link for the step-by-step tutorial with guide:
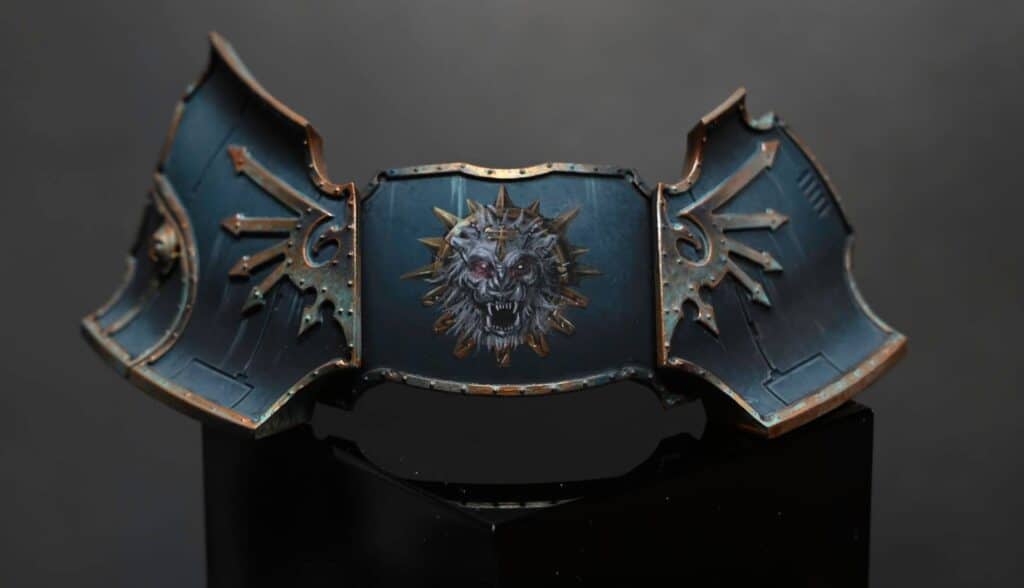
Legio Sinister Freehand on the Adeptus Titanicus Warlord Titan
A guide on how to paint the freehand Legio Sinister on the Adeptus Titanicus Warlord Titan.
Step By Step Image Guide
The team at Warhammer Community approached me for some tips on freehand and I created an article with step by step imagery for the tutorial above – to view it, visit:
If you don’t have an account here on my website, please sign up here! I have over 350 video tutorials with steps and tips, plus a selection of PDFs. If you are not sure about joining, you can explore my free videos with a free membership, or take the plunge and become a full subscriber for full access.


If you’d prefer to support me on Patreon, please visit: https://www.patreon.com/RichardGray