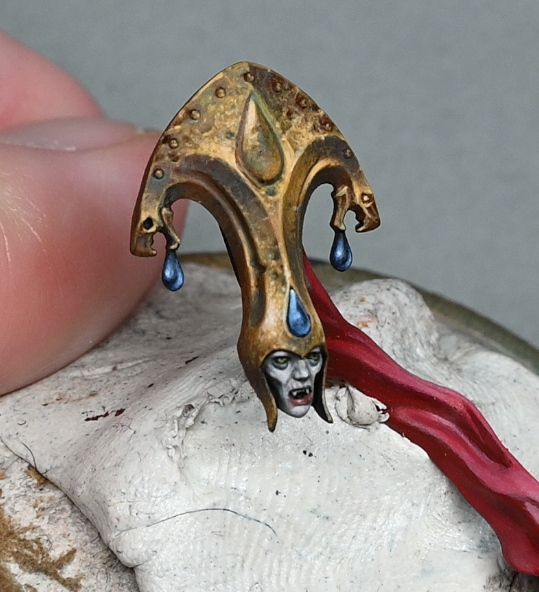
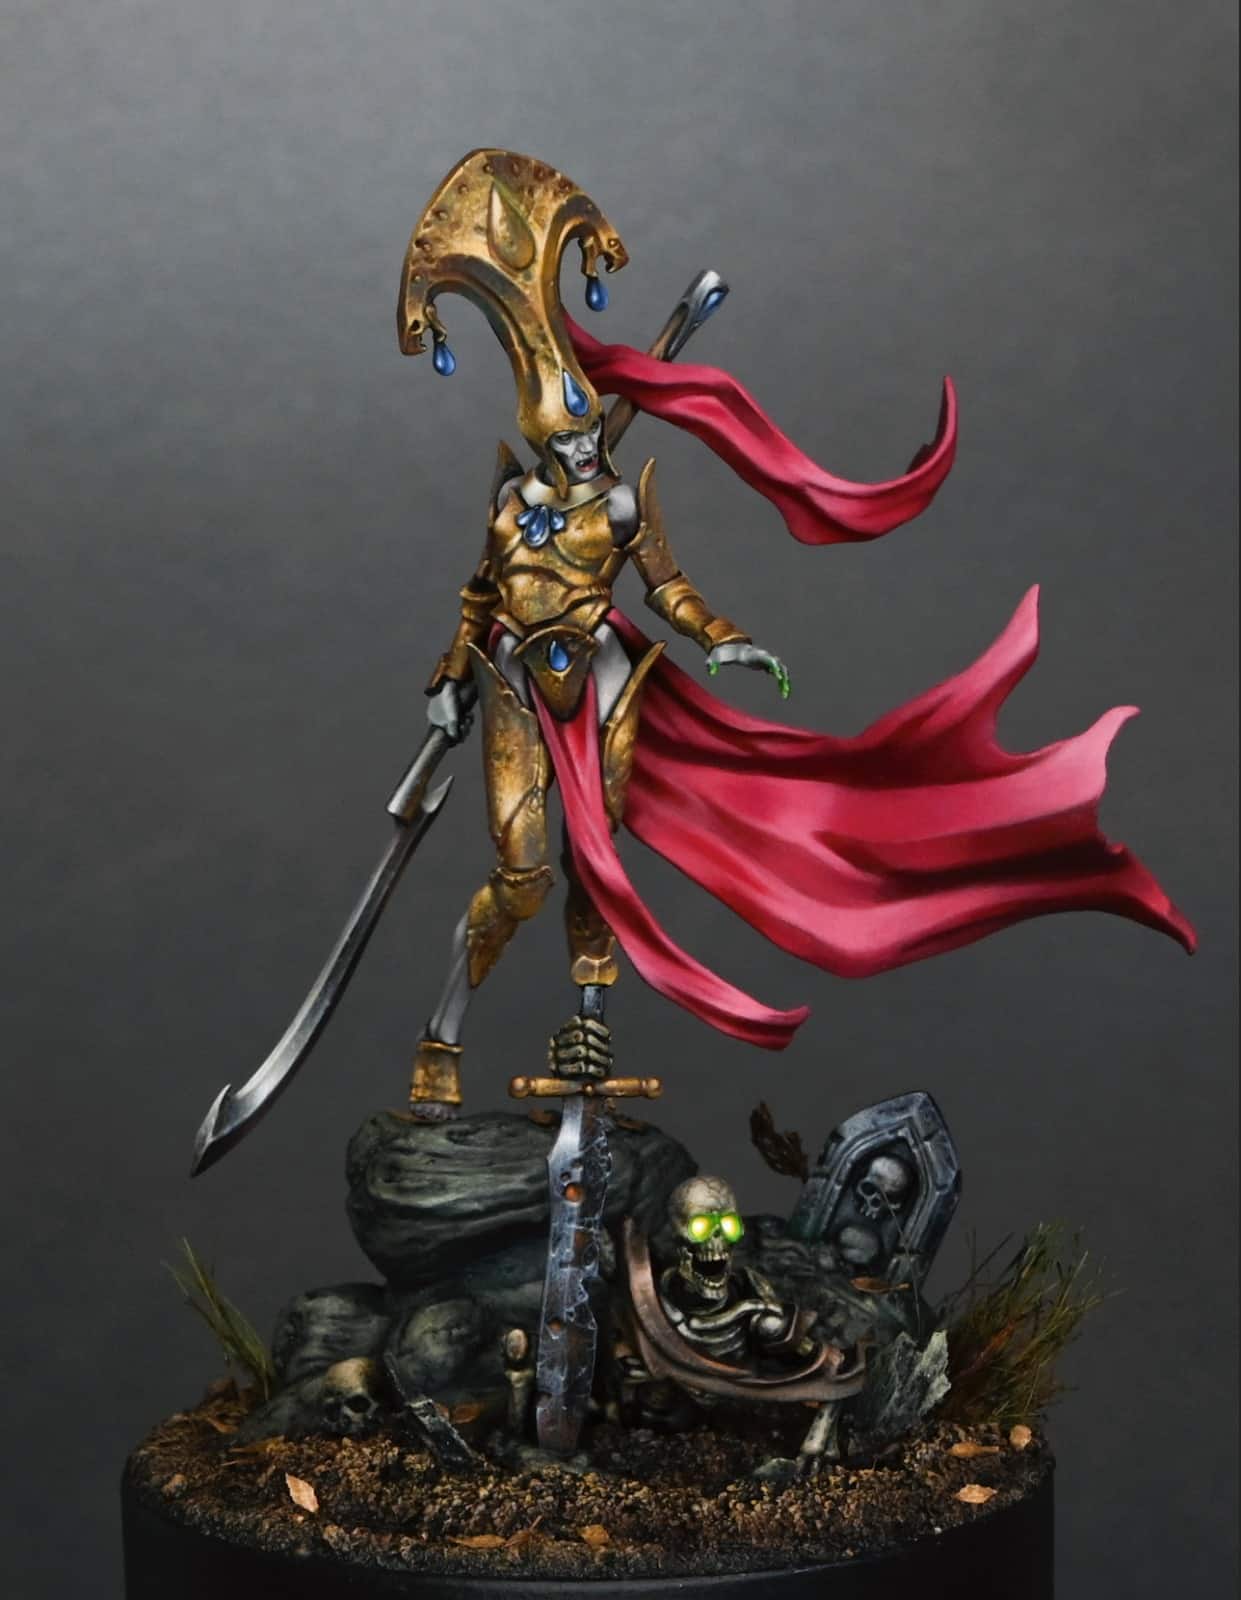
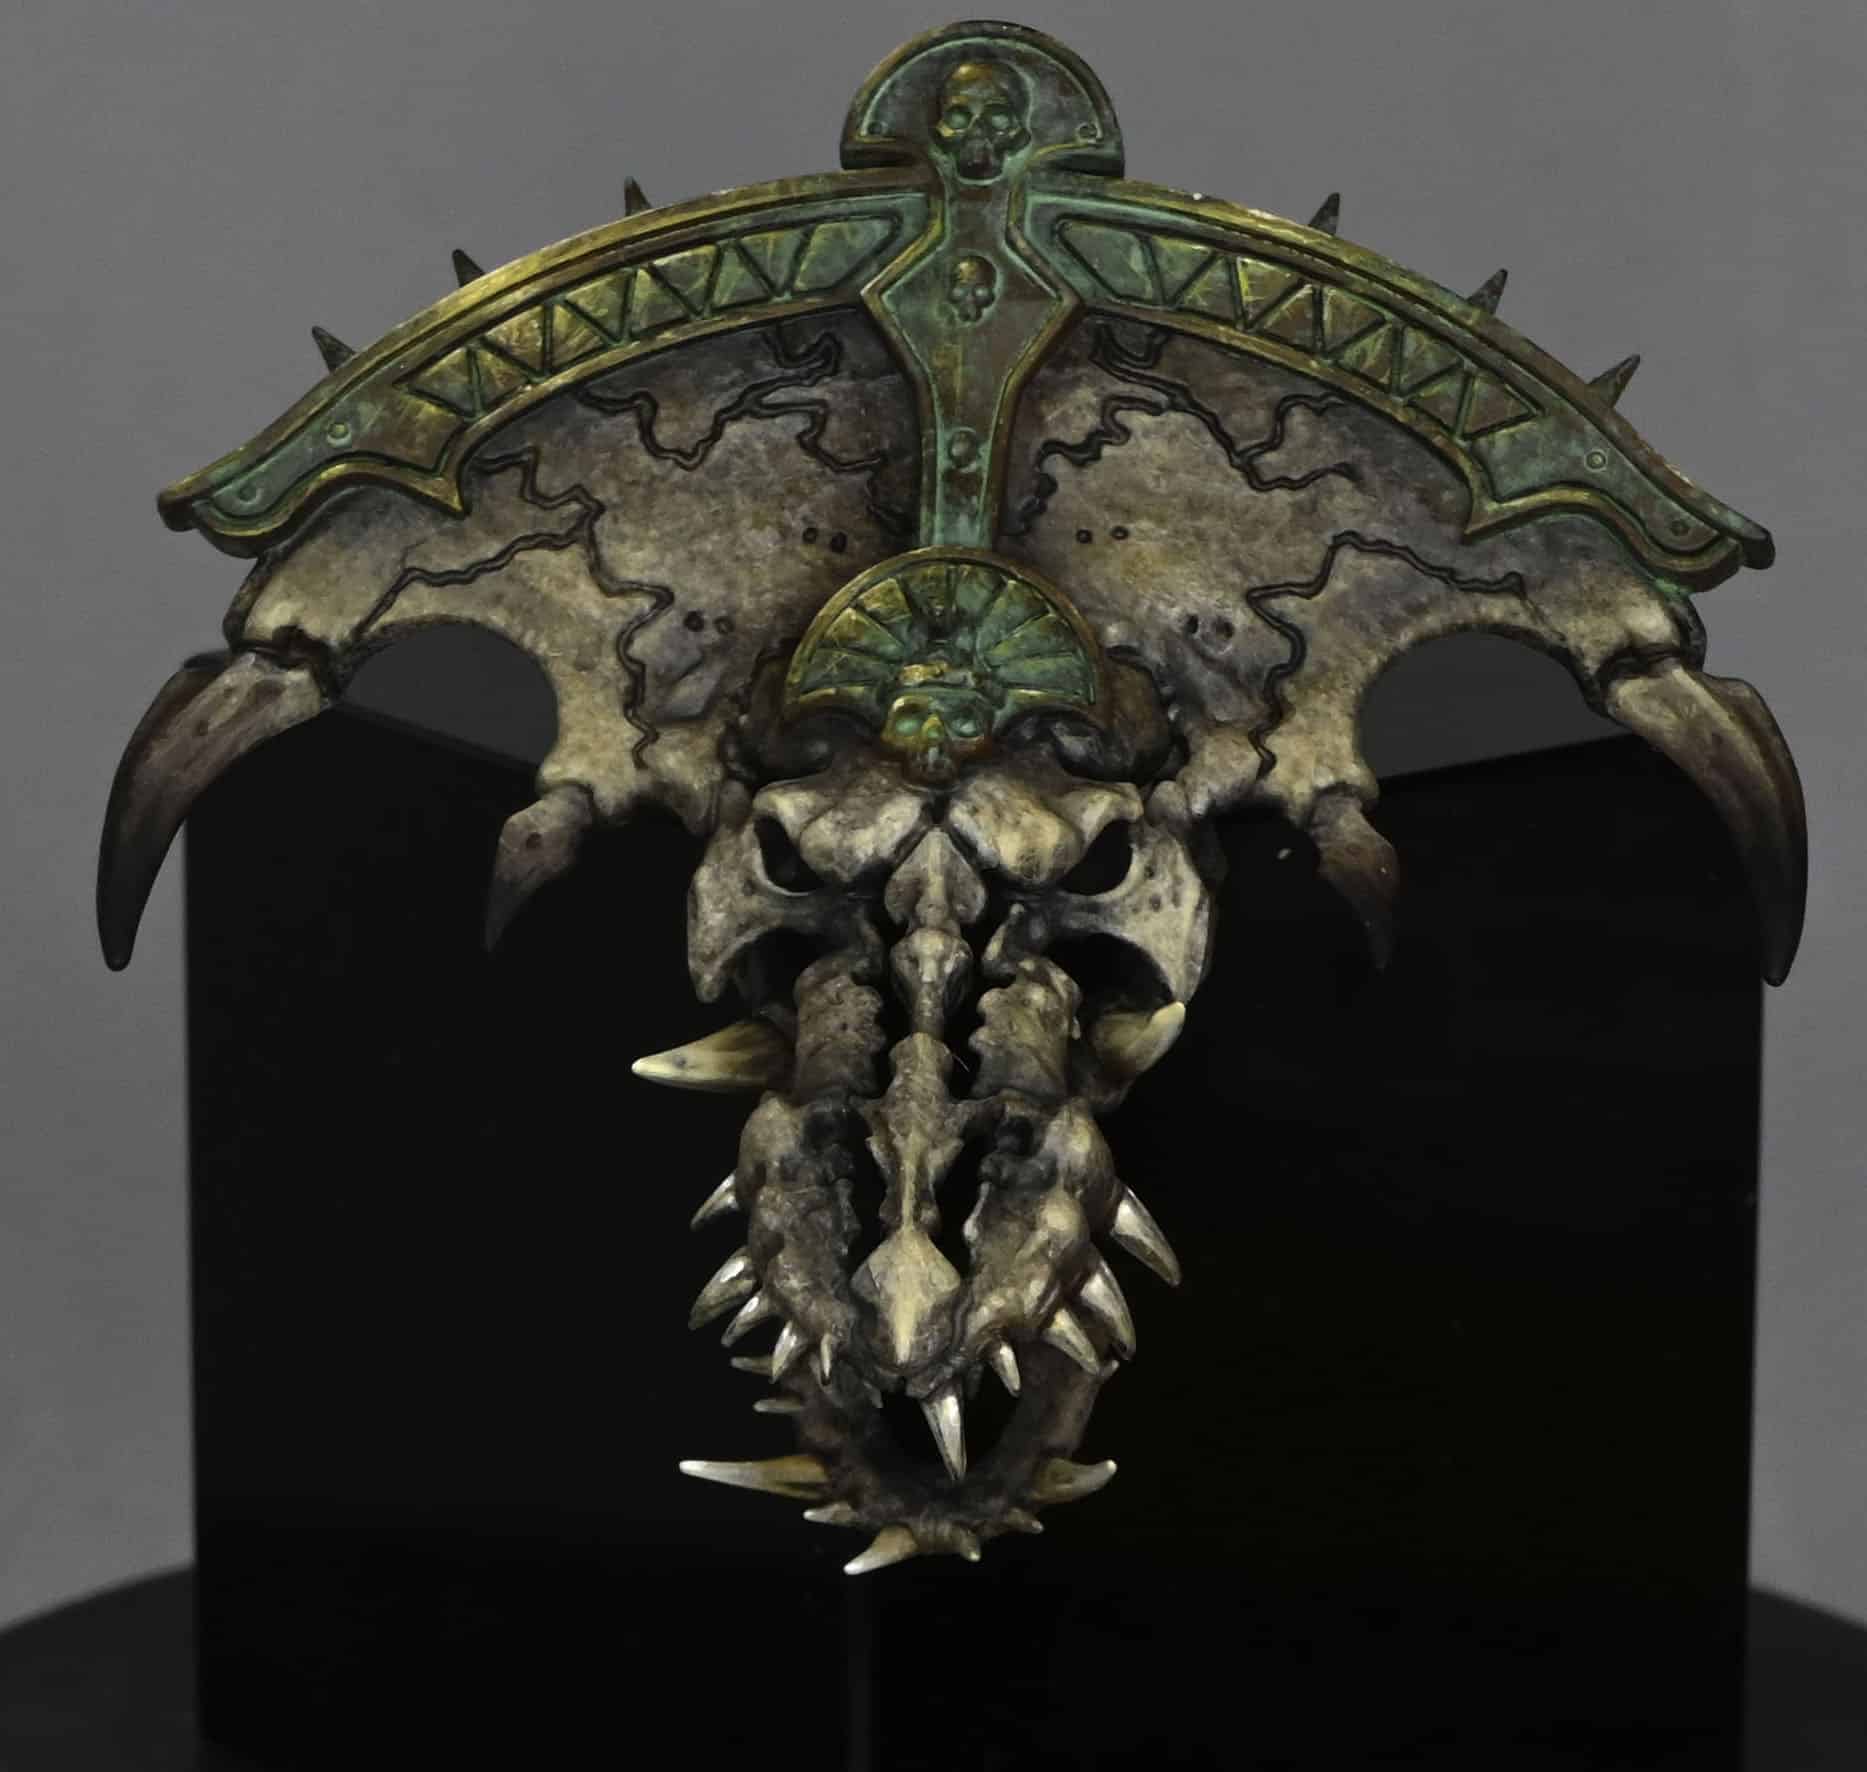
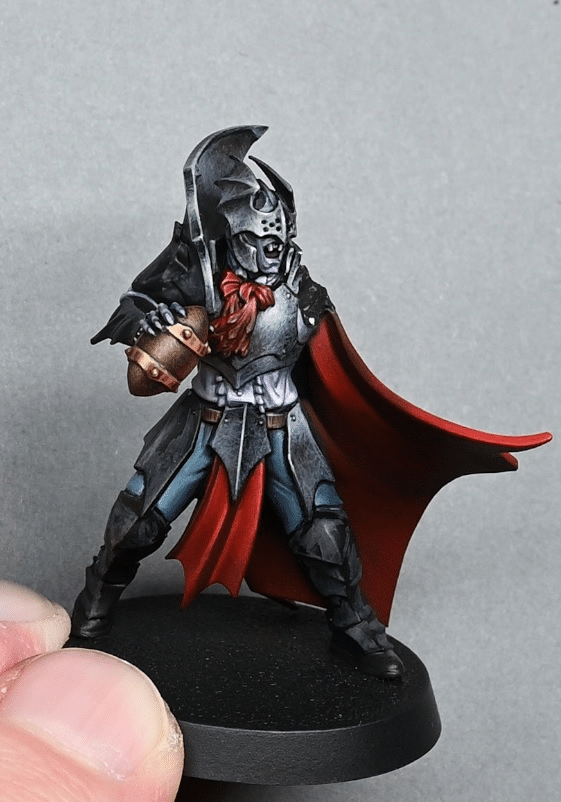
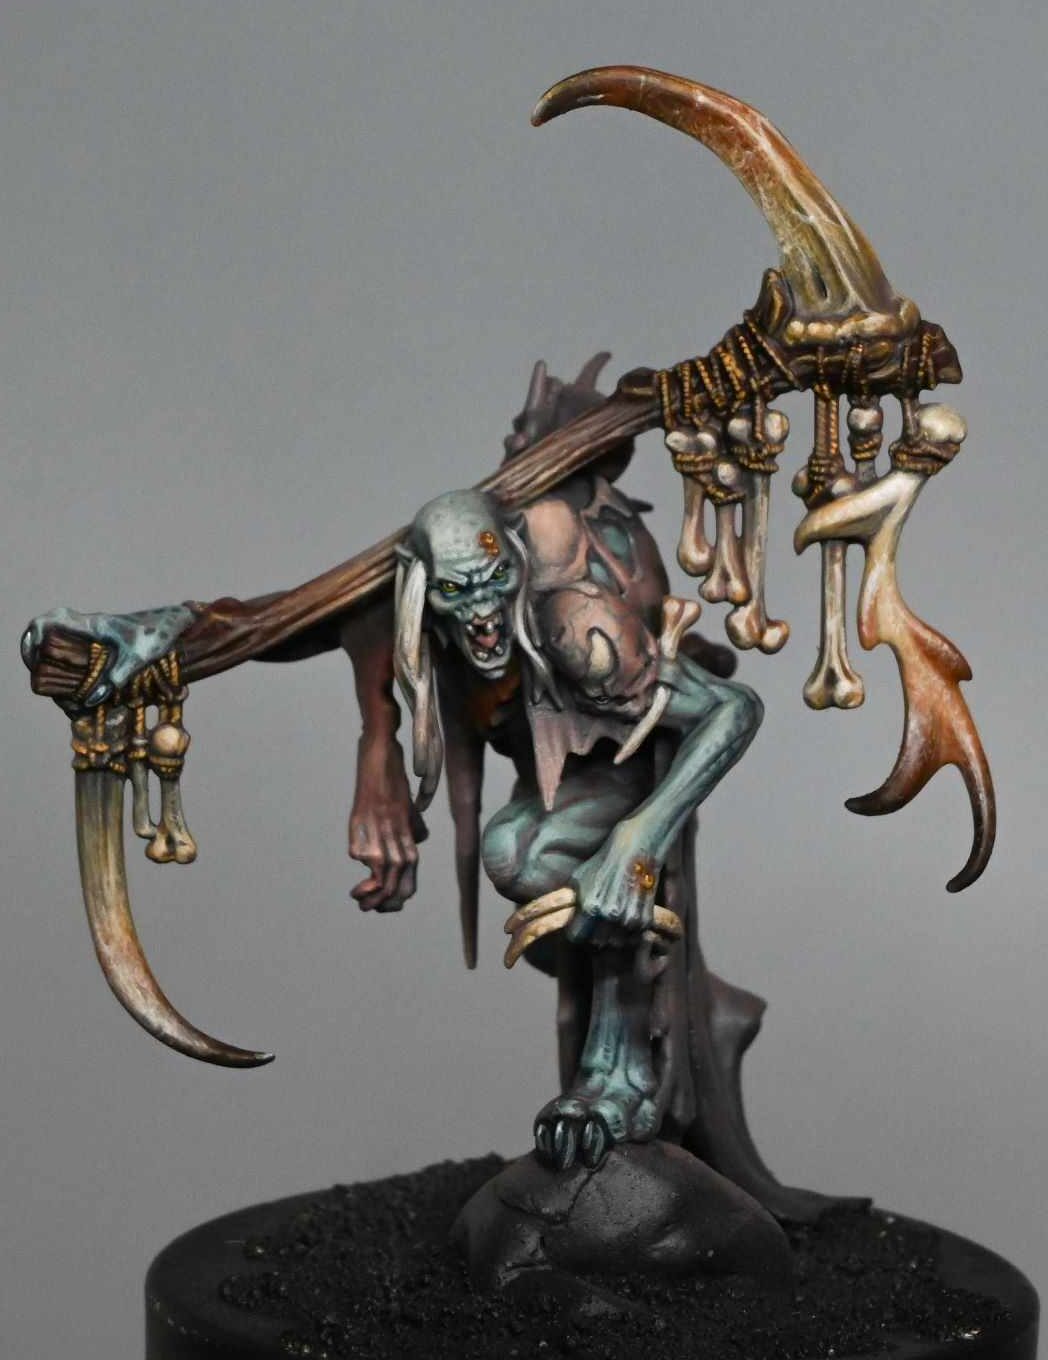
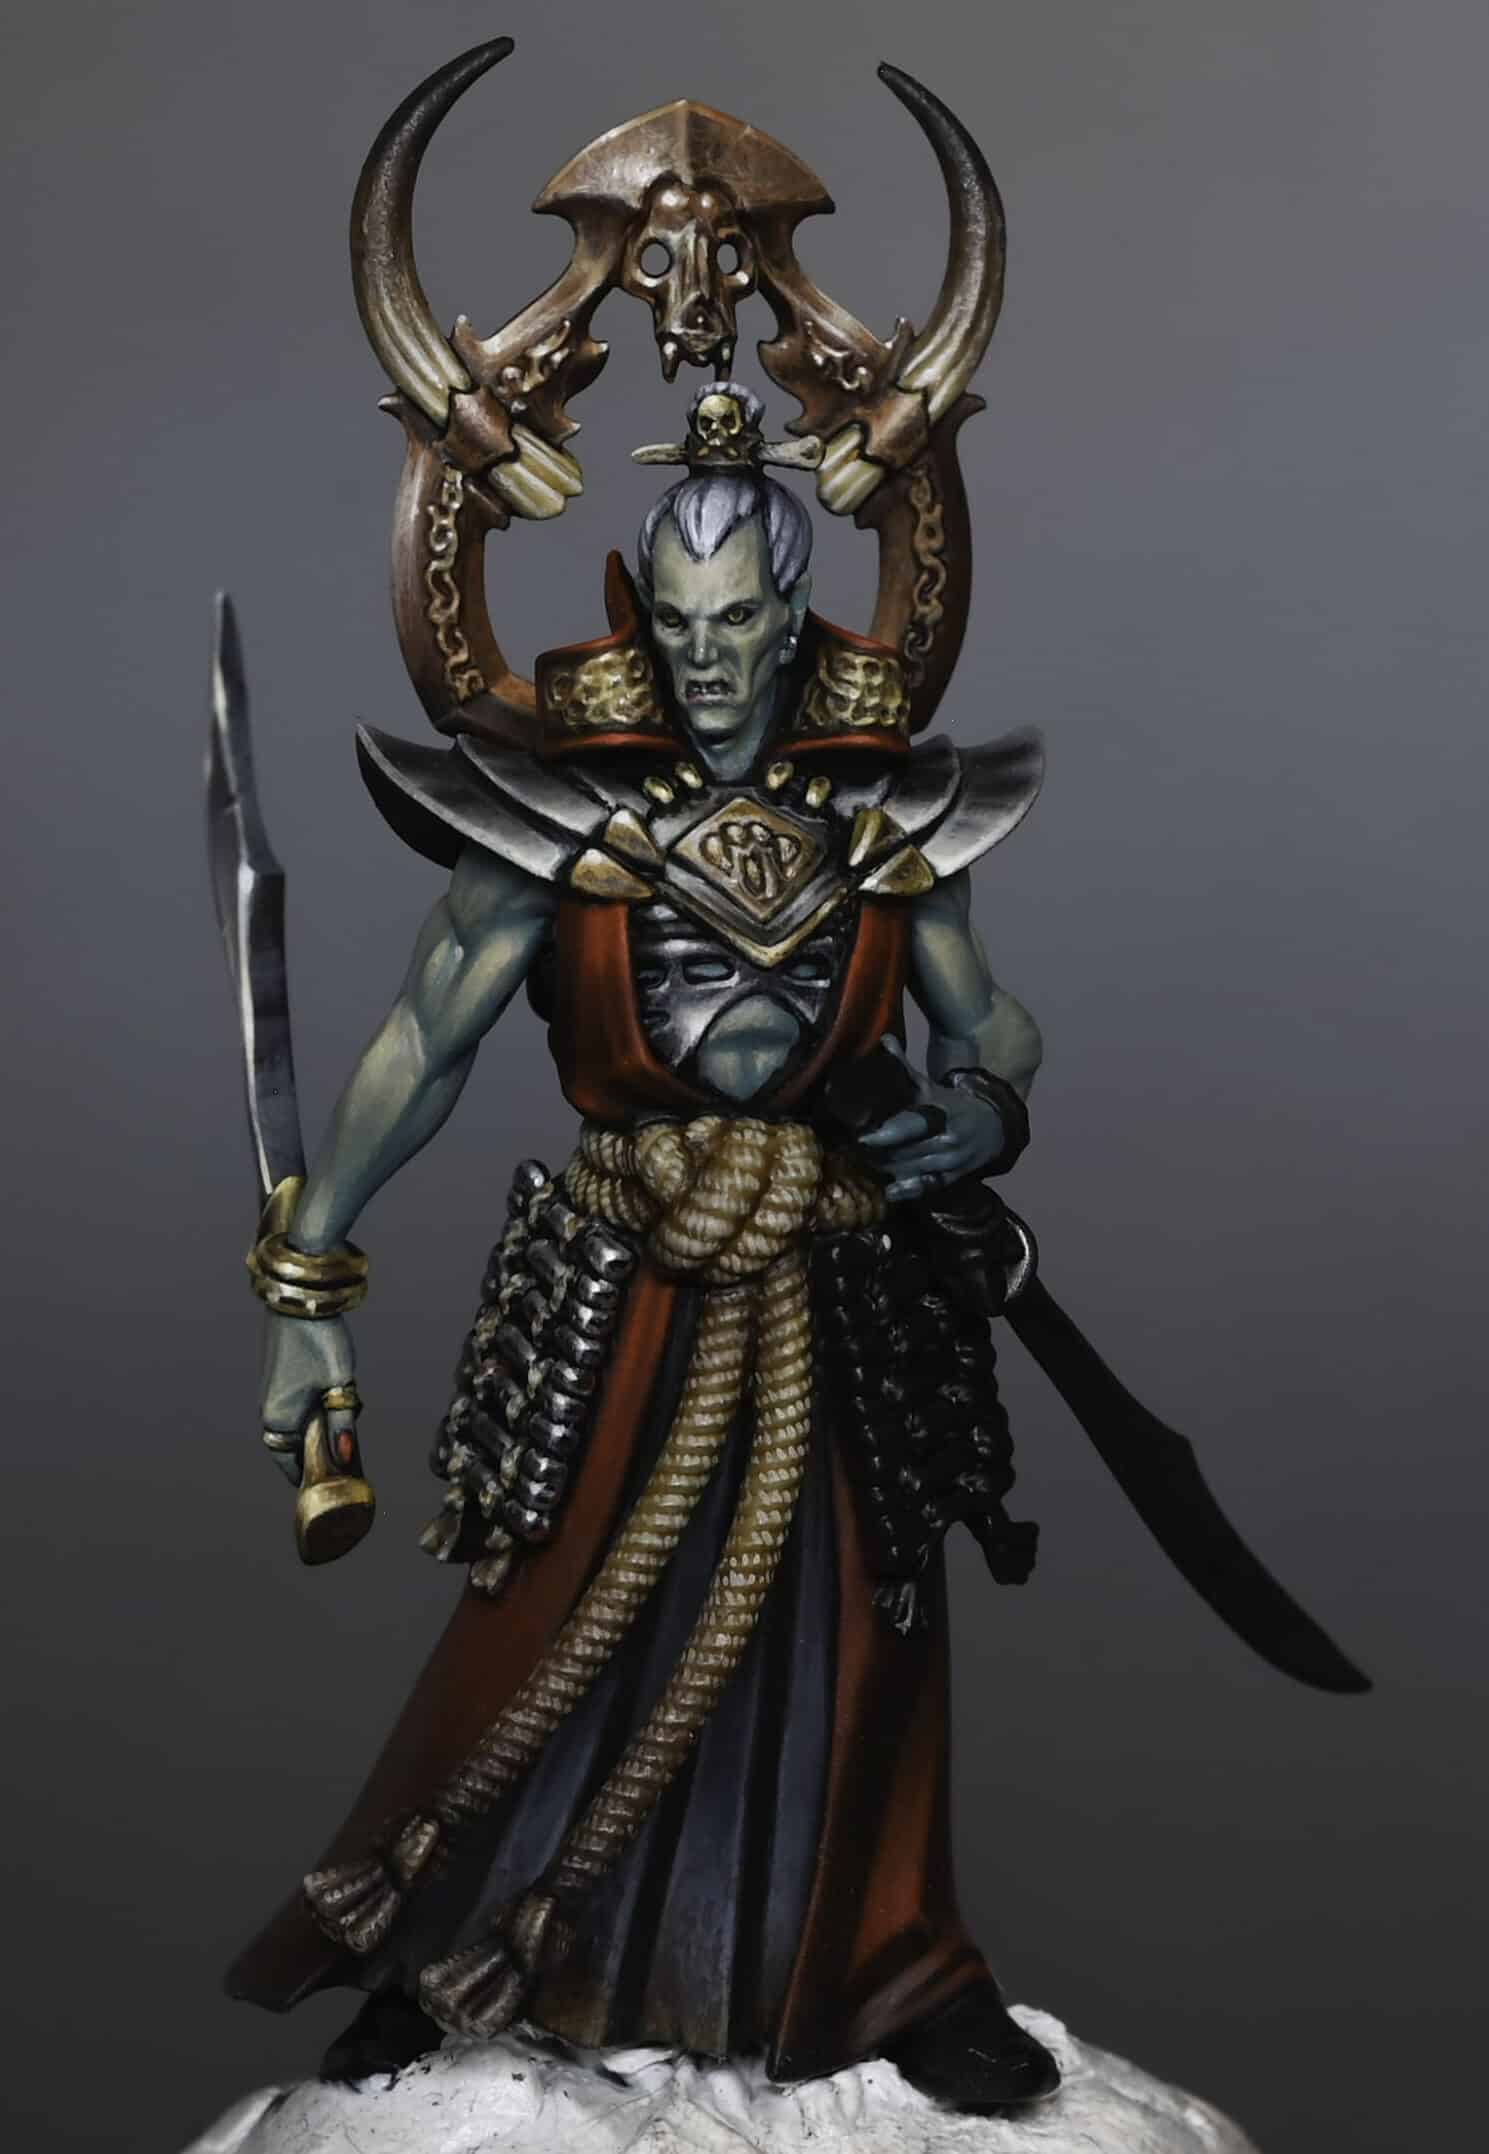
A series for how to paint an Askurgan Exemplar from the Warcry Bloodhunt box, who I painted as part of my Commended Golden Demon Entry for 2023. Because it’s a Demon entry, the techniques will be very in-depth and very precise!In these videos you will learn how to paint his undead skin, red robes and rope, NMM metals on his weapon and armour, horn effect on his trophy rack and lots of other little tips and tricks. Read on to explore them along with paints, materials and step by step help.
How to Paint an Askurgan Exemplar Vampire Part One: Face, Arm and ShoulderMaterials and PaintsPainting the SkinNon-Metallic Metal (NMM) on ArmourAdditional TipsHow to Paint an Askurgan Exemplar Vampire Part Two: Red Robes, Hair and RopeMaterials and PaintsPainting Red RobesTechnique and BrushworkPainting HairPainting the RopeNon-Metallic Metal Effect on CollarOther TipsHow to Paint an Askurgan Exemplar Vampire Part 3: Sword Blade, Gold Sword Hilt and Hip ArmourMaterials and PaintsBase CoatingPainting the RopeHip ArmourSword Blade and HandleDetailing and Finishing TouchesEdge Highlighting and RefinementHow to Paint an Askurgan Exemplar Vampire Part 4: Trophy Rack and HornsMaterials and PaintsTrophy Rack Horns How to Paint an Askurgan Exemplar Vampire Part 5: NMM SwordPaints and Materials RequiredBase Coat and HighlightingBlade Edge DetailingFlat Blade SurfaceReflections and HighlightsEdge HighlightsRefining and Adjusting HighlightsFinal TouchesHow to Paint an Askurgan Exemplar Vampire Dirt On His RobePreparing to PaintAdding Depth with Mournfang BrownFinishing Touches with Balor BrownGeneral Tips for an Authentic EffectMore Undead and Vampire Tutorials to Explore!
How to Paint an Askurgan Exemplar Vampire Part One: Face, Arm and Shoulder
All videos are recorded in HD 1080p or higher – use full screen for the full effect and let the video load completely. You can also click the little “cog” and change the speed of the video, if I am going too fast (or slow!).
Materials and Paints
Paints: Games Workshop (Sotek Green, Cadian Fleshtone, Kislev Flesh, Mournfang Brown, Balor Brown, Yriel Yellow, Evil Sunz Scarlet), Vallejo (Toxic Yellow, Ice Yellow, Neutral Grey, German Grey, Black), Two Thin Coats (Dark Sun Yellow – optional)
White Paint: Schmincke White
Brushes: Size 00 and other fine brushes for detailed work
Painting the Skin
Base Colour: Mix Sotek Green with Cadian Fleshtone for a warm, turquoise green. This will be your base colour for the skin, providing a unique look while not being too dark.
Building Highlights: Progressively lighten this mixture by adding more Kislev Flesh, and Toxic Yellow from Vallejo for higher highlights. The aim is to create a series of progressively lighter shades, leading up to a final mix of Toxic Yellow, Kislev Flesh, and Schmincke White for the brightest highlights.
Application Technique: Use a very thin consistency (about 1.5 parts water to 1 part paint). Apply with a size 00 brush, focusing on upwards-facing surfaces and muscles for a natural look. Remember, the key is to layer thinly and build up the colour gradually.
Detailing the Face: For the vampire’s face, focus on defining sharp features while maintaining a natural appearance. Use the lightest colour mix for the highest points like the brow ridges and cheekbones. The eyes are painted black with Yriel Yellow for the irises, positioned such that the upper eyelid slightly covers the iris.
Non-Metallic Metal (NMM) on Armour
Chest Armour: Begin with a base of Mournfang Brown. For highlighting, use a mix of Neutral Grey and Ice Yellow, progressively adding more Ice Yellow for brighter areas. Paint the armour’s detailed features like fangs and textures with care, incrementally building up to white for the highest highlights.
Shoulder Armour: Start with Neutral Grey, building up highlights towards the top where the light naturally hits. Add reflections and finer details, creating a smooth transition from light to dark. Use Mournfang Brown, thinned down, for adding tonal variation and depth.
Gold Details: Utilise a combination of Mournfang Brown and Dark Sun Yellow (or Balor Brown) for the base of gold areas. Highlight with Ice Yellow, and for the brightest spots, use a mix of Ice Yellow and Schmincke White. Be sure to maintain the gold’s richness by not over-highlighting with white, thus keeping the metallic effect.
Additional Tips
Glazing: Use glazes (thin, transparent layers of paint) to smooth out transitions between colours, especially on the gold and armour sections.
Edge Highlighting: On the armour, especially the shoulder guards, use edge highlighting to define shapes and enhance the metallic appearance.
Reflections and Light Sources: Be mindful of the environment’s impact on reflections. Vary the reflections on different parts of the armour to create a more dynamic and realistic look.
Detailing and Textures: Pay attention to the texture of each surface. For instance, the vampire’s skin should have a smooth finish, while the armour can have a more textured appearance.
Consistency Across the Unit: If this model is part of a unit, ensure consistency in the painting style and colour scheme across all models, while allowing for individual variations. One of the reasons I believe I missed out on a trophy with my vampires is because I made them all much too unique and they didn’t look like they were part of the group. Cohesion and lore accuracy is very important for Golden Demon! I talk about this a bit more in my Golden Demon 2023 video, here. Anyway, sorry, back to the model..!
How to Paint an Askurgan Exemplar Vampire Part Two: Red Robes, Hair and Rope
All videos are recorded in HD 1080p or higher – use full screen for the full effect and let the video load completely. You can also click the little “cog” and change the speed of the video, if I am going too fast (or slow!).
Materials and Paints
Games Workshop Colours:Rhinox Hide: A deep brown, used as a base for the red robes.Mournfang Brown: Utilized in creating non-metallic gold effects and for darkening rope.Mephiston Red: Employed to enrich the red highlights.Evil Sunz Scarlet: A vibrant red for brighter highlights.Wild Rider Red: Used very sparingly for the highest red highlights.Balor Brown: Mixed with other colors for non-metallic gold effects.Karak Stone: The base for the rope.Skeleton Horde (Contrast): Applied for shading and depth on the rope.
Vallejo Colours:Toxic Yellow: Mixed for non-metallic gold effects and for rope detailing.Ice Yellow: Used in similar contexts as Toxic Yellow.Neutral Grey: A base for light grey hair and for mixing higher highlights.German Grey: Mixed with Neutral Grey for hair.Black: Used for various detailing and mixing.
Other Materials:Schmincke White: An artist’s acrylic paint used for the highest highlights, particularly in the hair.
Painting Red Robes
Base Coat: Start with Rhinox Hide. Despite its brown tone, it’s essentially a deep red. Apply this as a base for the robe.
First Highlight: Mix Rhinox Hide with Mephiston Red. This creates a richer, warmer red. Apply with a size 2 brush for broad strokes.
Subsequent Highlights: Progressively lighten the red using Evil Sunz Scarlet and Wild Rider Red. Be cautious with Wild Rider Red, using it sparingly to maintain the robe’s red saturation.
Technique and Brushwork
Use a larger brush for the broader areas of the robe to achieve smooth, clean strokes.
For finer areas, switch to a smaller brush for precise application and to highlight raised details and creases.
Painting Hair
Initially, aim for shiny black hair, but later shift to a light grey, matte finish.
Use Neutral Grey mixed with white for higher highlights, painting in the direction of the hair’s texture.
Be mindful of the hairline; avoid a stark contrast between the skin and hair. Aim for a subtle shadow effect.
Painting the Rope
Base coat the rope with Karak Stone.
Use a larger brush to cover the area efficiently.
Apply Skeleton Horde contrast paint for shading and depth.
For texture, add tiny lines with a mix of Karak Stone and white, representing the rope’s fibres.
Non-Metallic Metal Effect on Collar
This segment is challenging due to its intricate texture.
Use a mix of Mournfang Brown, Balor Brown, Toxic Yellow, and Ice Yellow to create a gold effect.
Add white for the brightest highlights, focusing on the collar’s embossed details.
Other Tips
Throughout the process, maintain a balance between boldness and subtlety. The goal is to accentuate the model’s features without overwhelming its overall appearance. Key points to remember:
Layering and Blending: The layering technique is crucial, especially for the red robes. Begin with dark tones and gradually build up to lighter hues, ensuring a seamless transition.
Directional Brushwork: Align your brush strokes with the texture and direction of the materials you are painting, whether it’s the flow of the robes or the strands of hair. This approach enhances realism.
Contrast and Focal Points: High contrast areas, like the non-metallic metal collar, should be approached with caution. Ensure they complement, rather than overpower, the focal points like the face.
Texture and Detailing: The rope’s texture is a time-consuming but rewarding aspect. Those fine lines, while tedious, add a significant level of detail to the model.
How to Paint an Askurgan Exemplar Vampire Part 3: Sword Blade, Gold Sword Hilt and Hip Armour
All videos are recorded in HD 1080p or higher – use full screen for the full effect and let the video load completely. You can also click the little “cog” and change the speed of the video, if I am going too fast (or slow!).
Materials and Paints
Games Workshop Colours:
Rhinox Hide: A deep, dark brown, used for shading and creating gradients on elements like the rope and as a base for other colours.
Mournfang Brown: Employed in non-metallic metal effects and to add depth to certain elements.
Mephiston Red: A bright red, used for adding vivid highlights and details.
Balor Brown: Mixed with other colours for non-metallic gold effects.
Karak Stone: Used as a base colour for the rope.
Skeleton Horde (Contrast): Applied for shading and to add depth, especially on the rope.
Vallejo Colours:
Ice Yellow: Mixed for creating highlights and for non-metallic gold effects.
Neutral Grey: A base for grey tones and for mixing higher highlights.
German Grey: Used in conjunction with Neutral Grey for various details.
Black: Employed for shading and defining details.
Other Materials:
Schmincke White: An artist-grade acrylic paint used for the highest level of highlights.
Base Coating
Apply the base colours: Rhinox Hide for darker areas, Mournfang Brown for metallic parts, Karak Stone for the rope, and other base colours as required for different parts.
Painting the Rope
Apply Karak Stone as the base colour.
Shade with Skeleton Horde (Contrast) to add depth.
For weathering effects, use Rhinox Hide in a glaze consistency (about three parts water to one part paint) at the bottom of the rope.
Hip Armour
Paint the ropes in the armour with the same technique as the main rope.
For the armoured plates (that resemble bones), start with a metallic base using Mournfang Brown.
Create a non-metallic metal effect by gradually building up layers, transitioning to lighter colours like Balor Brown and then Ice Yellow. Include reflective highlights where light would naturally hit.
Sword Blade and Handle
For the sword blade, use Neutral Grey as a base, applying highlights where light would naturally reflect. Pay attention to any sculpted details like indents or edges, and enhance these with your highlights.
The sword hilt is treated similarly, with a non-metallic gold technique. Start with Mournfang Brown, adding highlights and transitioning to lighter tones like Ice Yellow and White.
For both the blade and hilt, remember to add glazes for smoother transitions.
Detailing and Finishing Touches
Enhance the gold sections (such as the bracelets and sword hilt) with Ice Yellow and White for bright highlights.
For small details like rings or intricate parts of the armour, use precise brush strokes. Highlight the top edges and create contrast with darker shades in recesses.
If necessary, use glazes (a thin mix of paint and water) to smooth out transitions and make the colours more cohesive.
Pay attention to the consistency of the paint. It should be thin enough to flow smoothly but not so thin that it loses opacity.
Edge Highlighting and Refinement
Carefully apply edge highlights to the armor and sword, using lighter colors like Ice Yellow or White. This step brings out the details and gives a more three-dimensional appearance.
For the sword blade, create the effect of light reflecting off the blade by adding thin lines and highlights. Remember to adjust the intensity based on the angle and curvature of the blade.
Use a mix of Neutral Grey, Ice Yellow, and White to create the non-metallic metal effect, building up to the brightest highlights where the light would be strongest.
How to Paint an Askurgan Exemplar Vampire Part 4: Trophy Rack and Horns
Materials and Paints
Brushes: Size 2 M Artist Opus, Size 0 and 00
Paints: Games Workshop’s Rhinox Hide, Evil Sunz Scarlet, Balor Brown, Ushabti Bone, Skeleton Horde (Contrast); Vallejo’s Ice Yellow, Dead White
Trophy Rack
Base Coat
Combine Rhinox Hide and Evil Sunz Scarlet in a 2:1 ratio
Thin the mixture with equal parts water for a smoother application
First Highlight
Add Balor Brown to the base mix for a subdued pink tone
Apply carefully, ensuring light effects align with the model’s other parts
Additional Highlights
Incrementally introduce more Balor Brown and a touch of Ice Yellow for brighter highlights
Utilise the larger brush for expansive areas, switching to finer brushes for detailed texturing
Detailing Filigree
Employ a slender brush for precision
Gently add lighter paint to intricate patterns, avoiding overly fluid paint
Horns
Begin with Ushabti Bone on a black base, requiring several layers for full coverage
Typically, four coats achieve a solid foundation
Gradients
Gradually mix in Rhinox Hide with Ushabti Bone for shading
Paint each segment, progressing towards the horn’s tip
Texture Highlights
Revert to Ushabti Bone for accentuating raised textures
Apply using small wiggles and dots, extending into less detailed areas
Horns – Finishing Touches
Apply a significantly diluted Rhinox Hide for softening transitions
Use Skeleton Horde Contrast for added depth and hue
Final Notes
Ensure uniform painting on all sides of the horns
Balance detailed work with broader strokes for a unified, realistic appearance
How to Paint an Askurgan Exemplar Vampire Part 5: NMM Sword
This guide focuses on creating a realistic non-metallic metal (NMM) effect on a sword, employing careful layering and blending techniques to achieve a shiny appearance. Patience and attention to detail are key in this process.
Paints and Materials Required
Brushes: Various sizes for detailed work
Paints: Vallejo Neutral Grey, Ice Yellow, German Grey, Black; Games Workshop Mournfang Brown
Base Coat and Highlighting
Start with Neutral Grey as the base colour
Mix Neutral Grey with a small amount of Ice Yellow for the first stage highlight
Progressively add Ice Yellow to the mixture for brighter highlights
Use Ice Yellow with a touch of White for the brightest points
Thin the paints appropriately for smooth application
Blade Edge Detailing
Focus on parallel line textures for the cutting blade edge
Use horizontal and vertical strokes for diverse textural effects
Emphasize the sharpness of the blade with these line details
Flat Blade Surface
Change brush marks on the flat blade surface for distinction
Plan for coloured reflections, using Mournfang Brown as a glazing colour
Reflections and Highlights
Paint all reflections in grey tones before applying colour glazes
Remember that the lower edge of the blade will reflect the ground, requiring a different treatment
Use glazes to soften and blend reflections and highlights
Edge Highlights
Apply fine line highlights along the sharpest part of the blade
Ensure these highlights are thin and precise for a realistic effect
Refining and Adjusting Highlights
Adjust and refine highlights as needed for balance and symmetry
Use a mix of stippling and glazing techniques for smoother transitions
Pay attention to the spine of the sword, adjusting the placement and intensity of highlights
Final Touches
Use glazes to smooth out textures, especially when working with lighter colours
Consider the overall composition and aesthetic appeal when placing final highlights
Ensure a unified and realistic look by balancing light and shadow
How to Paint an Askurgan Exemplar Vampire Dirt On His Robe
Paints Required
Games Workshop: Rhinox Hide, Mournfang Brown, Balor Brown
Preparing to Paint
Begin with Rhinox Hide: Apply at the very bottom of the robe. This colour blends well with the red robe, creating a subtle effect. As you move upwards, make the application more visible with small dots and splotches. This creates an impression of staining.
Adding Depth with Mournfang Brown
Switch to Mournfang Brown: This shade gives depth to the weathering effect. Initially, it might seem light but it darkens as it dries. If you find it too strong, you can tone it down with Rhinox Hide to soften the effect. The key here is to balance the intensity, ensuring it doesn’t overpower the base colour of the robe.
Finishing Touches with Balor Brown
Finalise with Balor Brown: This is a strong colour, so apply it cautiously. It’s significantly different from the previous colours and can make a bold impact. Focus on the very bottom of the robe, gradually building up a denser application of paint. Be mindful of areas near the highlights, such as near the foot of the robe at the front. Here, you might need to add more Balor Brown to counteract the brighter red tones.
General Tips for an Authentic Effect
Strive for unevenness: Avoid symmetrical or uniform patterns. Some areas should appear dirtier than others for a realistic effect.
Control the paint consistency: Aim for a 50/50 mix of paint to water for optimal flow and control. This consistency allows you to work for an extended period without creating a heavy texture.
Use a smaller brush: A smaller brush gives you more control, especially for creating uneven, chaotic patterns. Avoid pressing too hard to prevent large, unintended marks.
Adjust for mistakes: If you apply too much paint, quickly rub it off with your finger. For smears, stipple over them with a bit of Rhinox Hide to create interesting marks.
More Undead and Vampire Tutorials to Explore!
Videos Not Showing?
To view any of my paid tutorials, you need to be a member of the website – please click below to log in or join the site.
Not sure about joining just yet? Check out my Youtube for all my free tutorials or sign up as a free “friend” member on this site and visit the Freebies video page! [...]
