


I created two versions of this model from Cult of Paint – I hope you enjoy! Both focus on painting the armour. The method involves a balance of contrasting colours and careful blending to achieve a non-metallic metal look with a unique environmental reflection.
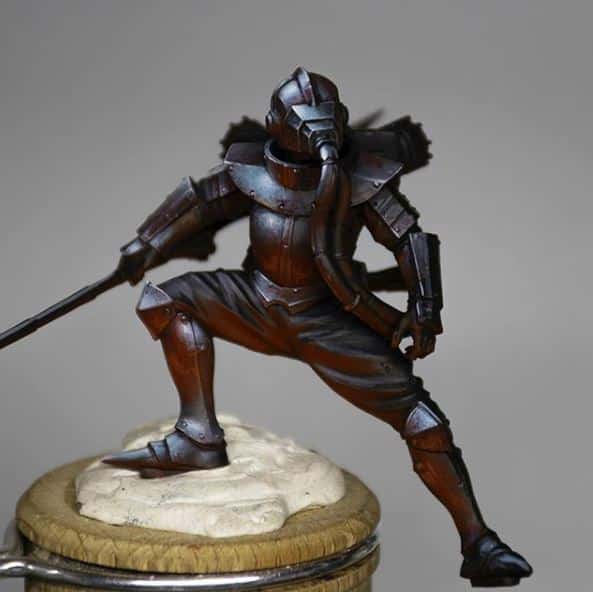
Garrett from Cult of Paint – Green Armour Version
This guide outlines the process of painting the Garrett model from Cult of Paint with non-metallic metal (NMM) armour featuring green reflections
Paints and Materials Used
The following paints were used:
Games Workshop: Balor Brown, Corvus Black, Baharroth Blue,
Vallejo: Neutral Grey (Mechanicum Standard Grey), Pale Grey Blue (Blue Horrow)
P3: Iosen Green (Warpstone Glow), Morrow White
Step-by-Step Guide
- Initial Base Coat: Begin with Vallejo Neutral Grey, roughly blocking in the highlight points on the armor. This grey serves as a foundation for building up the metallic look.
- Adding Depth with Corvus Black: Utilize Games Workshop Corvus Black for its translucency, blending it with the grey to create depth and shadows. This black adds a nuanced shading effect.
- Green Reflections: Apply P3 Iosen Green to areas facing downwards or horizontally, simulating reflections from a forest environment. These green accents provide a unique touch to the non-metallic metal effect.
- Detailing with Baharroth Blue: Use Games Workshop Baharroth Blue to enhance the sky reflections on upward-facing surfaces. This blue adds a cooler tone to the highlights.
- Warming with Balor Brown: Add touches of Balor Brown to the green areas for warmth, suggesting a lush, possibly tropical forest surrounding.
- Fine Tuning: Continuously refine and adjust the placement and intensity of highlights and shadows. This process involves blending and layering the colors to achieve a realistic metallic effect.
- Final Highlights: Finish with fine highlights using Morrow White for the brightest points, especially on edges and curves, to make them stand out.
All videos are recorded in HD 1080p or higher – use full screen for the full effect and let the video load completely.
“Garrett was a decorated pathfinder in the Colonial Rangers. Now, many decades later, he finds work for himself on the frontier as a tracker and specialist, dealing with the various megafauna the pioneers come across on each new planet. Armed with a laser lance and his old hostile environment equipment from his days in service to the Corps he’s a most welcome addition to Ana’s crew.” – https://www.cultofpaint.com/shop/garrett
Garrett from Cult of Paint – Red Armour Version
Paints and Materials Used
The following paints were used:
Games Workshop: Corvus Black, Baharroth Blue, Mephiston Red, Wild Rider Red, Troll Slayer Orange
Vallejo: Neutral Grey (Mechanicum Standard Grey), Pale Grey Blue (Blue Horrow)
P3: Morrow White
Step-by-Step Guide
- Initial Red Base: Start with Games Workshop’s Mephiston Red to cover areas previously painted green. Apply roughly to maintain existing highlights while eliminating the green.
- Blending Technique: Employ a circular brush motion to blend the red, allowing for variations in opacity and translucency. This creates a patchy yet cohesive red effect, representing different intensities of reflection.
- Strategic Repainting: Tilt the model to reach underside areas, focusing on spots where red glow from the environment would naturally hit. Consider environmental elements like nearby lava or volcanic landscapes to influence the red placement.
- Enhancing the Red Glow: Use Games Workshop’s Wild Rider Red and Troll Slayer Orange for more vibrant, intense areas of glow. Keep the shapes rough and blend the edges softly.
- Adjusting Mid-tones with Corvus Black: Transition the mid-tones to a darker shade by glazing with Corvus Black. This enhances the contrast, making the highlights and the red glow more prominent.
- Highlight Adjustments: Revisit and adjust the placement of highlights to suit the new red environment, ensuring they complement the model’s overall atmosphere.
- Finishing Touches: Add final touches by accentuating details like rivets with white highlights and red bounce light, and tweaking any areas that require further refinement.
If you don’t have an account, please sign up here! The website currently has over 350 video tutorials with steps and tips, plus a selection of PDFs. If you are not sure about joining, you can explore my free videos with a free membership, or take the plunge and become a full subscriber for full access.


If you’d prefer to support me on Patreon, please visit: https://www.patreon.com/RichardGray