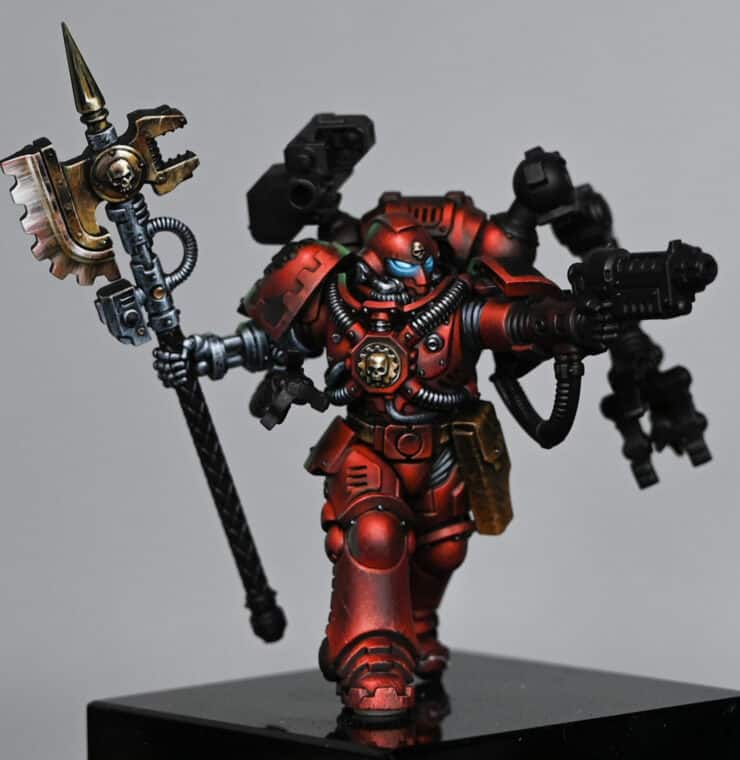
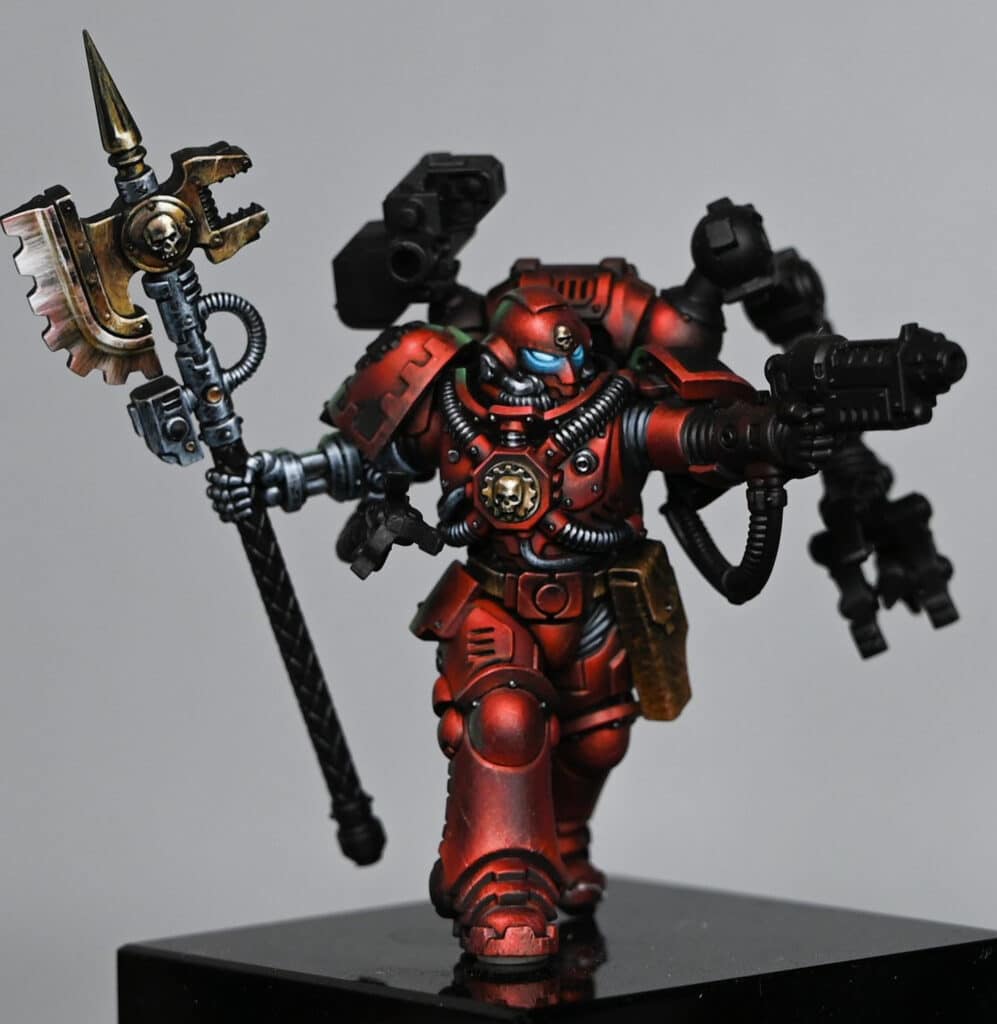
This how to paint a Red Techmarine NMM Axe guide aims to help you achieve a realistic non-metallic metal effect on your Techmarine’s axe, with a focus on contrast, texture, and light reflection.
For all of the videos on how to paint a Red Techmarine, follow the link below, or scroll down here for just the axe guide!
Video: How to Paint a Red Techmarine – NMM Axe
This guide aims to help you achieve a realistic non-metallic metal effect on your Techmarine’s axe, with a focus on contrast, texture, and light reflection.
Materials Needed:
- Fine detail brushes for precise application. (I use the Artis Opus range, but any decent quality brush works!)
- A wet palette to keep your paints hydrated.
- Vallejo and Games Workshop paints: Doombull Brown, Mournfang Brown, Balor Brown, XV-88, Ice Yellow, Pale Grey Blue, and P3 Morrow White (or any white).
Preparing the NMM Axe:
- Metal Pole: Begin by painting the metal pole using the same NMM techniques detailed in the previous video. This ensures consistency across metallic elements of the miniature.
Painting the Circular Detail on the NMM Axe:
- Base Colour: Start with the darker brown (Doombull Brown), applying it as the base for the small circular detail on the pole. This connects the colour scheme with the axe head, adding warmth and interest.
- Highlighting: Gradually build up the highlights transitioning from dark (Doombull Brown) to light (XV-88 to Ice Yellow) from the top to the bottom of the circular detail. Finish with a thin edge highlight at the top for definition.
Painting the NMM Axe Blade:
- Vertical Lines: Initially, paint vertical lines across the blade with a mixture of 50:50 water to paint. This underlayer softens the stark contrast between subsequent horizontal lines and the dark primer.
- Adding Texture: Apply horizontal lines over the vertical ones to create a cross-hatching effect. This technique adds texture and subtlety to the blade, avoiding harsh contrasts.
- Defining Highlights: Focus on creating a diagonal highlight across the axe head, marking the primary light reflection. This line should be brighter at the top edge of the blade, tapering and becoming more subtle as it crosses the blade.
Building Up the Blade’s Texture:
- Further Highlights: Use Mournfang Brown to add more texture and depth, emphasizing the top of the blade where the light is strongest. The aim is to make the top appear lighter than the bottom, enhancing the NMM effect.
- Ice Yellow Highlights: Progress to Ice Yellow for the highest highlights, concentrating on areas that would catch the most light. Ensure these lines are fine and precise to maintain the textured look.
Detailing the Axe Head:
- Base Texturing: With Mournfang Brown, create scribbly, textured marks on the flat of the axe head, focusing on creating a light to dark modulation from one edge to the other.
- Enhancing Texture: Progress through Balor Brown and XV-88, adding finer, more controlled highlights to build up the texture. These should be more focused and less extensive than the base texture, adding depth and interest to the surface.
- Final Highlights: Use Ice Yellow and Pale Grey Blue for the final highlights, paying particular attention to areas like the skull and the circle on the axe head. These colours should only be applied to the blade for differentiation, so don’t go too crazy with them, adding a cool tone to contrast with the warmer body of the axe head.
Finishing Touches:
- Neatening Edges: Go back and tidy up any overspill or overly broad lines with the base colours, ensuring the texture remains coherent and the contrasts sharp.
- Evaluation: Step back and review the entire piece, making any necessary adjustments to ensure the NMM effect is convincing and the textures and contrasts work together harmoniously.
If you can’t see the videos, please sign up here! The website currently has over 350 video tutorials with steps and tips, plus a selection of PDFs. If you are not sure about joining, you can explore my free videos with a free membership, or take the plunge and become a full subscriber for full access.
If you’d prefer to support me on Patreon, please visit: https://www.patreon.com/RichardGray


