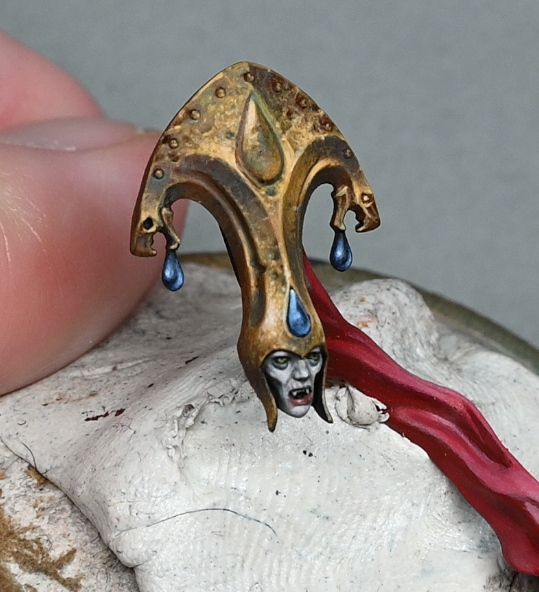
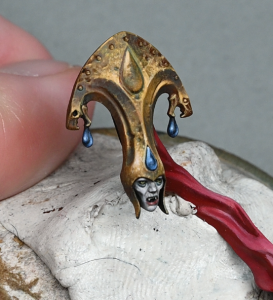
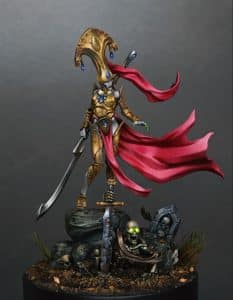
How to paint the skin, face, and eyes of Sekhar the Blood Queen, highlighting common pitfalls when painting tiny faces like hers, and how to rectify them. We’ll use a specific set of paints from Games Workshop, Vallejo, and P3 to achieve our desired effects.
Video Part Three: Sekhar the Blood Queen Face with Eyes, and Skin
Paints Needed
- Games Workshop: Bugman’s Glow, Sotek Green, Yriel Yellow, Evil Sunz Scarlet, Morghast Bone
- Vallejo: Ice Yellow, Neutral Grey, Black
- P3: Morrow White (or any white paint)
Step-by-Step Guide to Sekhar the Blood Queen Face, Eyes and Skin
Preparing the Base Mixture for Skin: Mix a 50/50 blend of Sotek Green and Bugman’s Glow to create the base skin tone. This unique combination provides a natural, yet distinctly fantastical, skin colour for our vampire queen.
Adding Highlights to the Skin: Gradually incorporate Ice Yellow into the base mixture for highlights. Start with small quantities and increase the Ice Yellow for each successive highlight layer. This technique helps achieve a smooth gradient in the skin tone, offering a more lifelike appearance.
Advanced Skin Highlights: For a creamy and realistic skin tone, mix Bugman’s Glow with Ice Yellow, carefully adjusting the blend to prevent the colours from becoming overly vibrant. Add a tiny amount of white to this mixture for the lightest highlights, aiming for an off-white shade that retains a hint of the base tones.
Painting Contrast and Metallic Elements: Apply a grey base to the collar, preparing it for a metallic silver finish. This step is crucial for setting up the contrast between the metallic textures and the skin, ensuring that both elements stand out without competing for attention.
Achieving Skin Texture and Smooth Transitions: Use thin layers for the skin, starting with a mix of approximately 1.5 parts water to 1 part paint, and adjust as necessary for smoother finishes. Ensure each layer is completely dry before applying the next to avoid any unwanted textures.
Highlighting Techniques: Focus on painting towards the highlights, lifting the brush at the brightest points for precise application. This method ensures that the highlights are sharp and well-defined, enhancing the model’s dimensional details.
Painting Facial Features: Pay particular attention to the face, adjusting features like the nose with shading and highlighting to ensure it fits naturally under any headgear. Avoid relying solely on box art for colour references, as this can mislead your perception of how facial features should be represented.
Painting the Eyes: Start with a solid base colour for the eyes, using black or a deep brown. Paint the iris in a striking colour, adding a small dot of white to each eye to simulate light reflection. This detail adds life and intensity to the figure’s gaze.
Enhancing the Lips: Choose a vibrant red for the lips, applying it carefully to add depth and dimension. This colour choice should complement the vampire theme, adding an element of allure and danger to the figure.
Overall Facial Harmony: Revisit the entire face to ensure all elements work together harmoniously. Adjust shadows, highlights, and colour intensity to achieve a balanced and realistic facial expression that suits the character’s persona.
More Soulblight, Undead and Vampire Tutorials!
If you don’t have an account, please sign up here! The website currently has over 350 video tutorials with steps and tips, plus a selection of PDFs. If you are not sure about joining, you can explore my free videos with a free membership, or take the plunge and become a full subscriber for full access.
If you’d prefer to support me on Patreon, please visit: https://www.patreon.com/RichardGray


