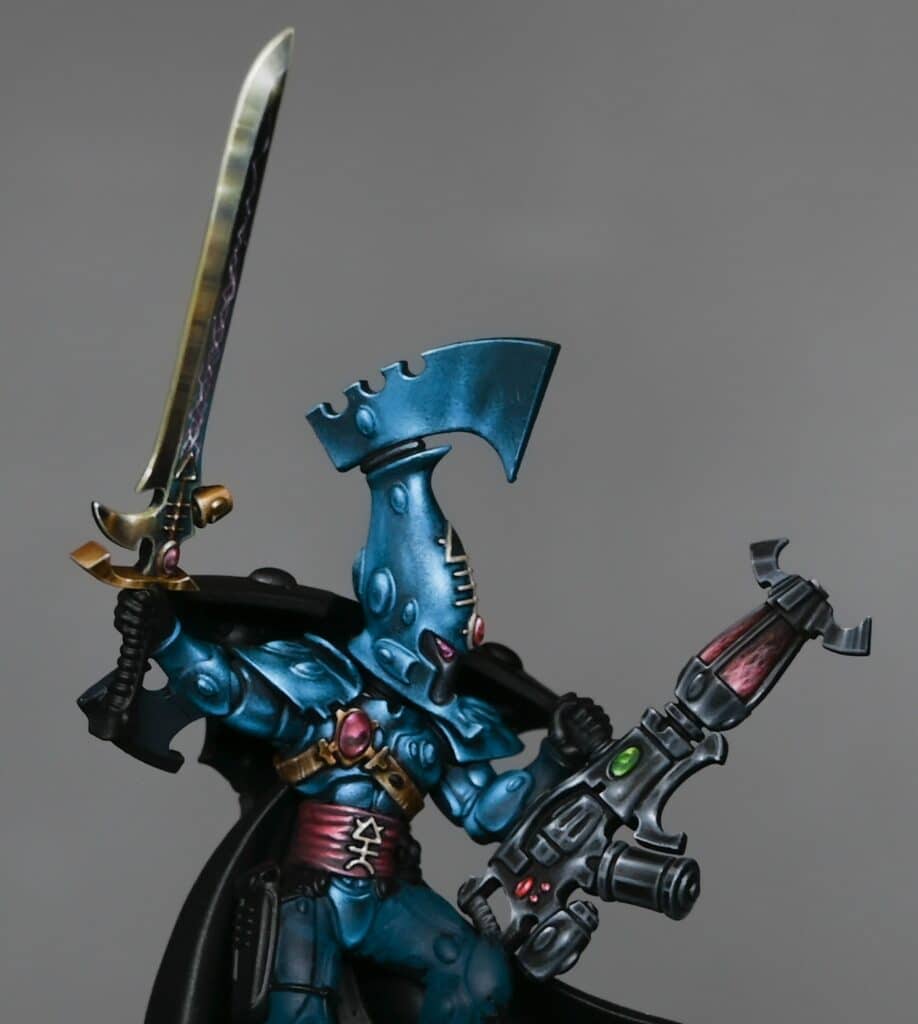
This video shows how to paint the Death Spinner in a wraithbone texture, for the new Aeldari Autarch. This guide will walk you through the entire process, from base coating to final highlights, using a range of Games Workshop paints. The goal is to achieve an ancient, weathered look reminiscent of bone, adding depth and character to your model.
Video – Autarch Death Spinner Wraithbone
Materials Needed
- Base Paints: Games Workshop Dryad Bark
- Layer Paints: Games Workshop Baneblade Brown, Karak Stone, Morghast Bone, Ushabti Bone, Screaming Skull
- Highlight Paints: Games Workshop Evil Sunz Scarlet, Sotek Green, Warpstone Glow, P3 Morrow White (or any white paint)
- Brushes: Fine detail brushes for texture and highlight application
- Palette: For mixing and thinning your paints
- Water: For thinning paints to the desired consistency
Step 1: Base Coating
- Start with a Black Base: Ensure your miniature is primed in black. This will deepen the subsequent layers of paint, adding to the aged effect.
- Apply Dryad Bark: Cover the entire weapon in a layer of Dryad Bark. This dark brown serves as a rich foundation for the wraithbone texture.
Step 2: Layering
- First Layer with Baneblade Brown: Apply Baneblade Brown over the Dryad Bark, focusing on the areas that will catch light. Don’t worry about perfect coverage; the slight translucency adds to the texture.
- Add Karak Stone Highlights: Layer Karak Stone over the Baneblade Brown, enhancing the lighter areas and beginning to define the wraithbone texture. Again, embrace the paint’s translucency to build depth.
Step 3: Texture and Detailing
- Fine Texture with Morghast Bone: Use Morghast Bone to start adding fine, squiggly textures resembling weathered bone. Use the very tip of your brush and light pressure to create jagged, circular shapes.
- Enhance Texture with Ushabti Bone: Increase the texture’s visibility by applying Ushabti Bone, focusing on shadowed areas and blending into the lighter sections for a smooth transition.
- Highlight with Screaming Skull: Apply Screaming Skull sparingly to the most raised areas and edges to simulate light reflecting off the bone’s surface. This layer should be thin and focused.
Step 4: Final Highlights and Corrections
- Bright Highlights with White: Use P3 Morrow White (or any white paint) diluted with water to add final touches to the texture, focusing on the highest points and sharpest edges. This step brings out the detail and adds a sense of dimension to the wraithbone.
- Adjust Texture and Contrast: If necessary, go back with previous colours to adjust the texture and contrast. This could mean softening too-bright areas with Screaming Skull or Ushabti Bone or deepening shadows with Morghast Bone.
Step 5: Adding Colour and Detail
- Apply Evil Sunz Scarlet: For the weapon’s energy filaments, start with a base of Evil Sunz Scarlet. Draw fine lines to mimic lightning or energy crackling from one end to the other.
- Mix in White for Highlights: Gradually add white to your Evil Sunz Scarlet to lighten the colour for the highlights. Focus these lighter shades towards the base (or top, depending on orientation) of the energy filaments, creating a gradient effect.
- Incorporate Sotek Green and Warpstone Glow: To add a unique touch and colour variation, introduce Sotek Green and Warpstone Glow sparingly into the wraithbone texture. This can simulate moss or growth, adding to the ancient appearance. Use these greens lightly to avoid overwhelming the bone texture.
Painting a wraithbone texture on your Aeldari Autarch Deathspinner involves a delicate balance of layering, texture creation, and strategic highlighting. By following these steps and adjusting based on your model’s specific details and your personal preference, you can achieve a beautifully aged, textured effect that stands out on the battlefield. Remember, the key to this technique is patience and layering; build your colours gradually for the most natural and detailed result.
Watch all the tutorials for my Aeldari Autarch

Aeldari Autarch (Eldritch Omens)
A series of videos on how I painted my Aeldari Autarch (Eldritch Omens). This includes the pearlescent NMM armour, the soulstones, sword and Death Spinner(s).
If you don’t have an account, please sign up here! The website currently has over 350 video tutorials with steps and tips, plus a selection of PDFs. If you are not sure about joining, you can explore my free videos with a free membership, or take the plunge and become a full subscriber for full access.
If you’d prefer to support me on Patreon, please visit: https://www.patreon.com/RichardGray


