


This step-by-step guide provides a comprehensive overview of the process for how to paint the Abraxia Mount NMM Armour Panel. By following these steps, you can achieve a stunning NMM (non-metallic metal) finish which you can use on your Abraxia, or anything that has this distinctive curved armour or carapace shape!
Video: How to Paint the Abraxia Mount NMM Armour Panel
Materials
- Games Workshop paints: Rhinox Hide, Mournfang Brown, XV-88, Abaddon Black, Sons of Horus Green, Barak-Nar Burgundy
- Vallejo paints: Ice Yellow, Neutral Grey, Heavy Grey
- Two Thin Coats paint: Dark Sun Yellow
- P3 paint: Morrow White
- Various Artist Opus brushes, including size 1 and size 2
Steps to Follow
Step 1: Block in the Colours
- Begin by roughly blocking in the colours on the entire model using a size 1 brush. This helps to establish the overall colour scheme and provides a base for the highlights.
- Use Neutral Grey for the armour plates and XV-88 for the gold trim.
- Apply Sons of Horus Green and Barak-Nar Burgundy to the skin areas.
Step 2: Refine the Armour Plates
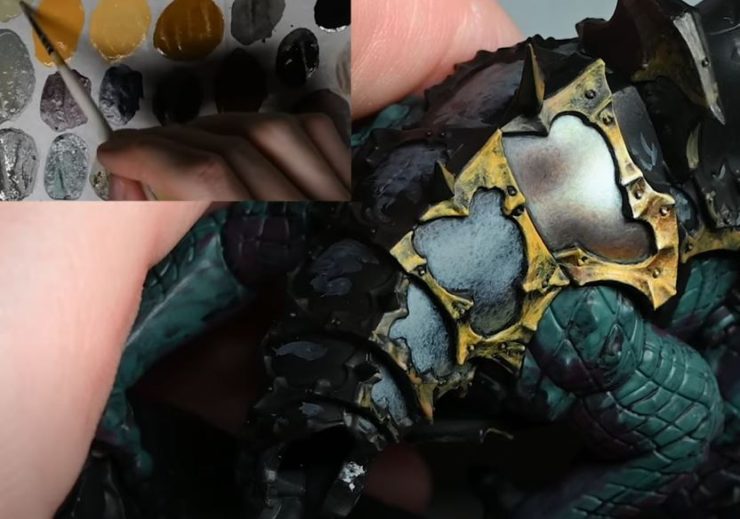
- Choose an armour panel to focus on and begin refining the NMM effect.
- Start with Neutral Grey and gradually add Ice Yellow to create a series of increasingly lighter highlights.
- Use a variety of brush strokes to create texture and variation in the reflections, ensuring a “micro texture” that is smooth and detailed.
- Consider the overall lighting of the model and place the highlights accordingly.
- Glaze with Mournfang Brown and Rhinox Hide to add depth and warmth to the shadows.
- Use P3 Morrow White for the final highlights, creating smooth transitions and a bright, opaque finish.
Step 3: Add Weathering and Details
- Use a smaller brush to add scratches, dents, and other details to the armour plates, turning the marks from the initial blocking in into realistic battle damage.
- Vary the colours of the weathering based on the surrounding area, using darker greys or black in shadowed areas and lighter greys or white in highlighted areas.
- Glaze with white to create a smooth, opaque finish on the brightest highlights, enhancing the illusion of reflected light.
Step 4: Repeat for Additional Panels
- Repeat the process for the remaining armour panels, adjusting the placement and intensity of the highlights to match the overall lighting scheme.
- Remember that the highlights should become smaller and darker as you move away from the main focal point of the model.
Additional Tips:
- Don’t be afraid to experiment with different colours and techniques.
- Consider the overall composition of the model and how the different elements will interact with each other – what will be on your base? Who will be around it? Colours will reflect off these objects onto the shiny armour.
Building your Abraxia
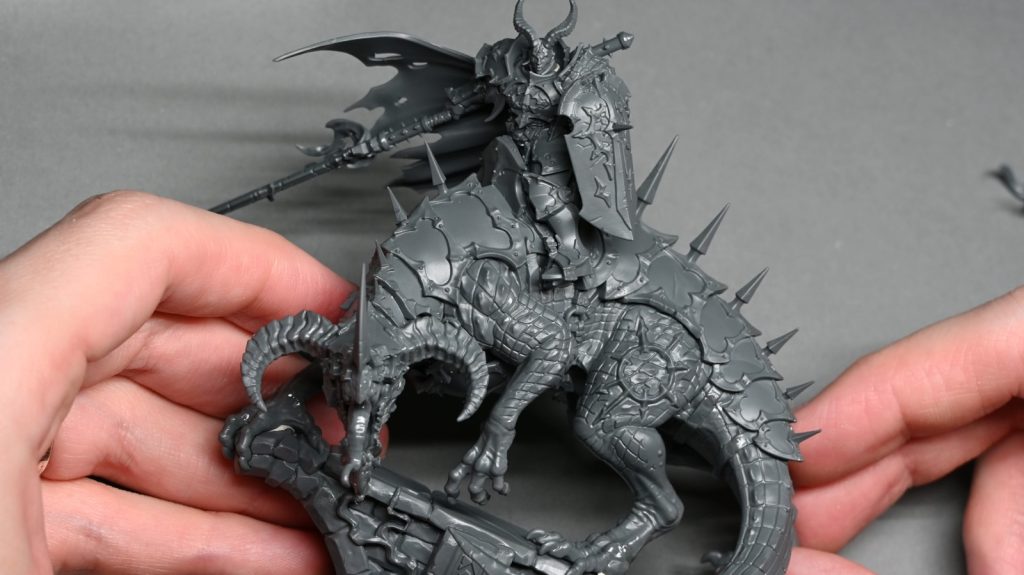
How to Build Abraxia, With Tips!
This video and step by step guide shows the whole process how to build Abraxia, building and cleaning up the new model from Games Workshop in preparation for painting. I go over lots of little tips and tricks to hide join lines, remove mould lines etc.
If you don’t have an account here on my website, please sign up here! I have over 350 video tutorials with steps and tips, plus a selection of PDFs. If you are not sure about joining, you can explore my free videos with a free membership, or take the plunge and become a full subscriber for full access.


If you’d prefer to support me on Patreon, please visit: https://www.patreon.com/RichardGray