


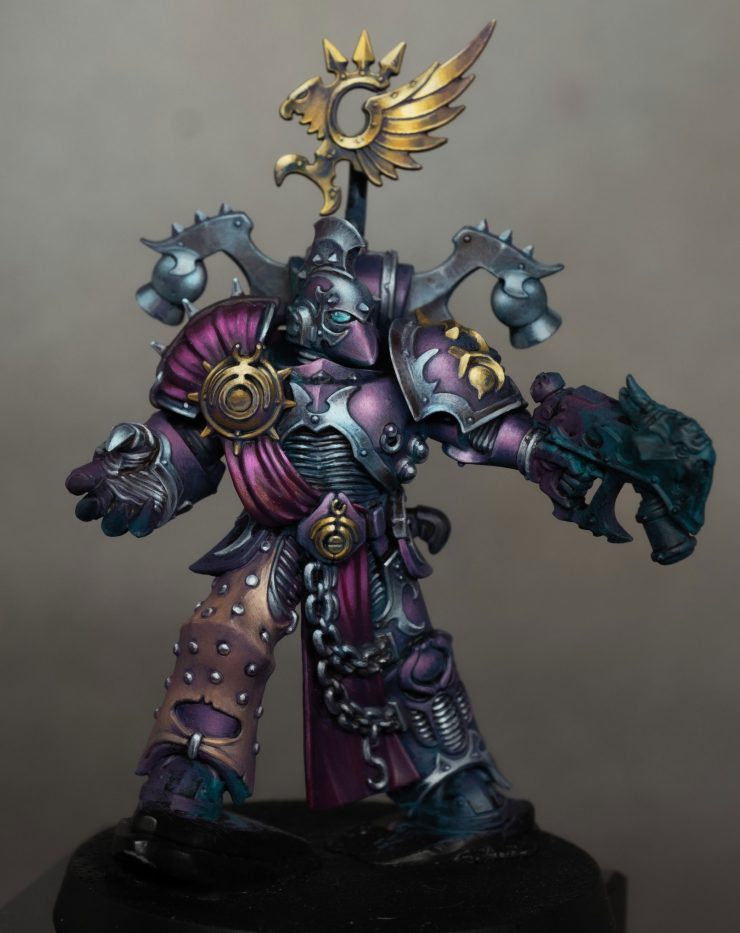
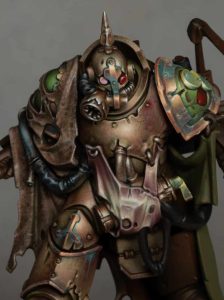
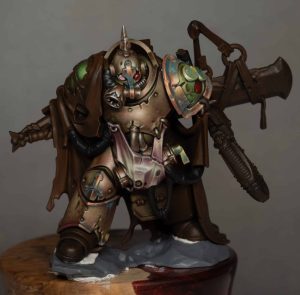
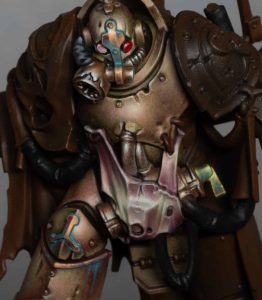
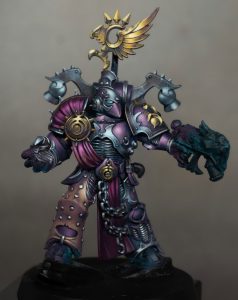
In this tutorial, I’ll take you through how to paint an Emperor’s Children Chaos Lord from the new Champions of Slaanesh army box, kindly sent to me as an early review copy by Games Workshop. The Emperor’s Children are infamous for their garish, opulent, and excessive aesthetics—making them great fun to paint.
- Video – How to Paint an Emperor’s Children Chaos Lord – Part One
- Step by Step – How to Paint an Emperor’s Children Chaos Lord
- Video – How to Paint an Emperor’s Children Chaos Lord – Part Two
- Non-Metallic Trim Highlights
- Armour Highlights
- Backpack Details
- Skin on Leg
- Metallic Studs
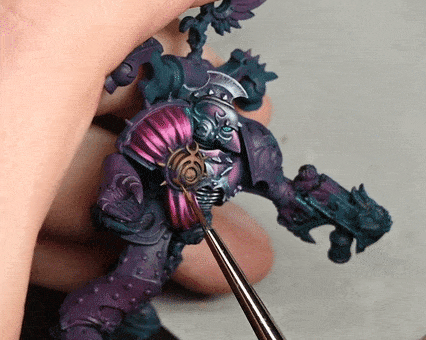
- Emperor’s Children Shoulder Symbol
Video – How to Paint an Emperor’s Children Chaos Lord – Part One
Step by Step – How to Paint an Emperor’s Children Chaos Lord
Establishing the Base Layers
To begin, I applied AK Violet Red and Emerald with a large brush, deliberately laying them down in a rough, loose fashion. These colours dry translucent, which allows the black primer to show through slightly—softening the intensity and creating a more natural undertone. While the initial result looks chaotic, it provides depth and variety that will later influence the armour’s highlights.
This method also prevents the armour from feeling flat or overly clean, which is especially fitting for the decadent, chaotic aesthetic of the Emperor’s Children.
Building Up the Armour Highlights
For the iconic purple armour, I used a layered approach, mixing the following shades:
- Base Colour: Xereus Purple
- Mid-Tones: Xereus Purple + Emperor’s Children
- Highlights: Emperor’s Children → Emperor’s Children + AK Pastel Pink → AK Pastel Pink
Rather than applying flat layers, I stippled and blended using a size 4 brush to establish soft transitions while keeping some texture. This technique ensures a more organic, high-contrast look, ideal for the dramatic shine seen on non-metallic armour.
I also used glazing techniques with Xereus Purple to subtly shift the tone and unify different parts of the armour, ensuring colour harmony throughout the model.
Non-Metallic Metal (NMM) Trim
The intricate trim was painted using a non-metallic silver technique with the following colours:
- Base: Vallejo Neutral Grey
- Mid-Tone: AK Pale Grey
- Highlights: AK Pastel Blue
To enhance realism, I avoided making the highlights too uniform. Instead, I varied the intensity in different areas, ensuring that the trim reacted naturally to imagined light sources. I also incorporated a subtle tint of Xereus Purple glaze to unify the trim with the armour, adding a subtle reflective colour shift.
For finer details, I switched to a size 00 brush to carefully place sharp specular highlights on raised areas.
What is Glazing & How to Use It?
What is Glazing?
Glazing is a technique where you use very thin, transparent layers of paint to subtly shift colour, create smooth blends, or enhance shadows and highlights. Unlike a wash (which settles into recesses), a glaze is carefully controlled to tint rather than fully cover the underlying layers.
Glazing in This Tutorial
In this video, I used glazing in a few key areas:
- Harmonising the Armour & Trim – I applied thin Xereus Purple glazes over the non-metallic trim to subtly reflect the armour’s colour, tying everything together.
- Deepening Shadows on the Cloak – I glazed with a mix of Xereus Purple + Wine Red (4:1 water-to-paint ratio) to push the shadows in fabric folds while keeping the overall colour rich.
- Refining the Gold NMM on the Slaanesh Icon – A light glaze of Xereus Purple over the mid-tones and shadows added depth and softened transitions.
How to Mix a Glaze
A good rule of thumb for glazing is a 4:1 or 5:1 water-to-paint ratio—but this depends on the pigment strength of the paint. If the glaze pools or streaks, it’s too wet; if it covers too opaquely, it’s too thick. Adjust accordingly!
Tips for Effective Glazing
- Use a Damp Brush – After loading your brush, wick off excess paint on a paper towel to prevent flooding the surface.
- Let Layers Dry – Glazing is a slow-build technique. Let each layer dry before applying another, or you’ll lift the previous one.
- Work in Thin, Controlled Strokes – Apply in the direction of the blend, pulling towards the shadow or highlight you want to emphasise.
- Glaze Over Mistakes – If a highlight looks too stark or a shadow is too dark, a well-placed glaze can soften transitions and unify the surface.
Refining the Face & Details
The face of the Chaos Lord is one of the most important focal points. To ensure it stands out, I focused on creating precise highlights on the trim and facial details. One trick I often use is to place a tiny white dot on the forehead or high points of armour to push contrast.
For the eye lenses, I wanted a muted, sinister glow rather than an overly bright finish. I painted them using:
- Base: AK Emerald
- Shadow: Xereus Purple (glazed into the upper edges)
- Highlight: AK Pastel Blue
- Shine Spot: A tiny dot of AK Pastel Blue at the upper left corner of the lens
This layering creates a convincing sense of depth while keeping the colour scheme cohesive.
Cloak & Fabric Elements
For the cloak, I used a rich, desaturated red palette:
- Base: Wine Red + Xereus Purple
- Highlights: Wine Red → Magenta → Magenta + Pastel Pink
I focused on building soft, blended transitions, making use of feathering and glazing techniques to create the illusion of light playing across the folds. To maintain realism and subtlety, I avoided taking the brightest highlights up to pure white, instead stopping at Pastel Pink.
For added depth, I glazed in Xereus Purple at the shadows, enhancing the rich tones and adding variation to the overall red.
Non-Metallic Gold on the Slaanesh Icon
The Slaanesh icon clasp follows the same non-metallic metal principles but with a golden palette:
- Base: XV-88
- Mid-Tone: Balor Brown
- Highlights: AK Sand Yellow → AK Pale Yellow
To increase depth, I applied glazed Xereus Purple into the shadows, creating a satin-like richness. The brightest highlights were carefully placed to create a metallic gleam, but I avoided overusing pure white, as that would remove the golden warmth of the piece.
Video – How to Paint an Emperor’s Children Chaos Lord – Part Two
In this detailed guide, we’ll continue painting the Emperor’s Children Chaos Lord. We’ll cover armour highlights, non-metallic metal trim, skin areas, metallic studs, and key techniques.
Paints Used:
- Games Workshop: Rhinox Hide, Xereus Purple, Emperor’s Children, XV-88, Balor Brown, Cadian Fleshtone
- AK: Sand Yellow, Pastel Yellow, Pastel Blue, Pastel Pink, Sky Grey, Neutral Grey
- Vallejo: Neutral Grey
Brushes: Artis Opus Size 4 and Size 00
Non-Metallic Trim Highlights
- Base: Vallejo Neutral Grey.
- Intermediate Highlight: Mix Vallejo Neutral Grey and AK Sky Grey (50:50). Apply as transitions.
- Final Highlights: AK Sky Grey and AK Pastel Blue.
- Contrast/Shading: Glaze Rhinox Hide into shadows and over highlight transitions to add depth and subtle colour.
- Bounce Highlights: Apply small bright reflections initially, then glaze Rhinox Hide (4:1 water:paint ratio) to soften and add warmth.
Pro Tip: Use Size 4 for smooth blending and blocking; switch to Size 00 for fine details and precise stippling.
Armour Highlights
- Base Colour: Mix Xereus Purple and Emperor’s Children (approx. 1:1).
- Mid Highlight: Pure Emperor’s Children.
- Top Highlight: Mix Emperor’s Children with AK Pastel Pink.
- Technique: Apply highlights using a stippling motion with a Size 4 brush for speed. For precision refinement, selectively use a Size 00 brush.
- Glazing: After highlighting, glaze Xereus Purple (4:1 water:paint ratio) from mid-tones into shadows for added richness.
Pro Tip: Keep armour highlights subdued to avoid competing visually with the brighter trim highlights.
Backpack Details
- Globes/Exhausts:
- Base with Neutral Grey.
- Highlight with Neutral Grey and Sky Grey mixture.
- Add brighter highlights sparingly with Sky Grey and minimal Pastel Blue. Keep less intense compared to head and chest areas.
- Flat Arms:
- Apply smoother transitions with more glazing to avoid flatness.
- Add scratches for texture.
- Incorporate Rhinox Hide for subtle colour and a weathered effect.
Pro Tip: Use larger brushes for smoother, opaque highlights and smaller brushes for precise textures.
Skin on Leg
- Base Colour: Mix Cadian Fleshtone with Xereus Purple to harmonise with overall colour scheme.
- Mid Highlight: Pure Cadian Fleshtone, applied gradually to areas catching most light.
- Top Highlight: Add a tiny amount of AK Pastel Pink to Cadian Fleshtone for brightest highlights.
- Technique: Block highlights first, then refine transitions by glazing back with the darker Cadian/Xereus mix.
- Glazing: Create a glaze (approx. 4:1 water:paint ratio) to smooth transitions.
Pro Tip: Avoid using pure white; rely on pastel pink for natural-looking highlights.
Metallic Studs
- Colours: Neutral Grey, Sky Grey, and Pastel Blue.
- Apply minimal transitions due to size limitations.
- Add bounce highlights using skin tones (Cadian/Xereus mix) on the lower-facing surfaces to reflect surrounding colour subtly.
Pro Tip: Adjust highlight placement individually for realism—don’t highlight every stud identically.
Emperor’s Children Shoulder Symbol
- Colours: XV-88, Balor Brown, Sand Yellow, Pastel Yellow (leaving hints of original base colour).
- Technique: Paint with primary viewing angle in mind rather than symbol-centred orientation.
- Edge Highlights: Use warmer colours like XV-88 and Balor Brown for definition, avoiding overly bright highlights.
Pro Tip: Paint edge highlights carefully to separate symbol clearly from armour; add bounce highlights (optional purple-tinted highlights) for realism.
This completes the second stage of painting your Emperor’s Children Chaos Lord. The final part will cover the gun, cloak, and backpack icon, providing additional refinement and finishing details.


Videos Not Showing?
To view any of my paid tutorials, you need to be a member of the website – please click below to log in or join the site.


Not sure about joining just yet? Check out my Youtube for all my free tutorials or sign up as a free “friend” member on this site and visit the free videos page!
If you’d prefer to support me on Patreon, please visit: https://www.patreon.com/RichardGray