


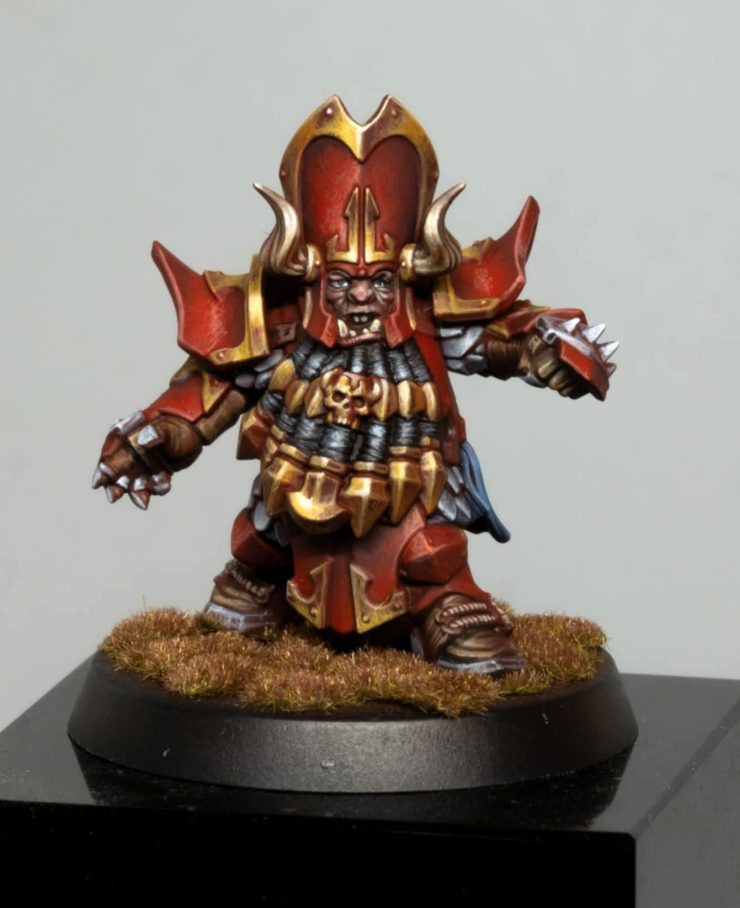
In this tutorial, I’ll be showing you how to paint a Blood Bowl Chaos Dwarf from the new Chaos Dwarf Blood Bowl box, provided by Games Workshop as an early review copy. We’ll be focusing on achieving a high tabletop standard, using a combination of classic paint colours and techniques to bring out the rich, detailed character of the model. Whether you’re painting for your next game or aiming for a display-worthy finish, this step-by-step guide will help you tackle everything from non-metallic metal gold to vibrant red armour, all while keeping the process efficient and enjoyable.
Video – How to Paint a Blood Bowl Chaos Dwarf
Step-by-Step Guide
Materials Required:
Games Workshop Paints:
Mephiston Red, Evil Sunz Scarlet, Mournfang Brown, XV-88, Morghast Bone, Bugman’s Glow, Night Lords Blue, Rhinox Hide
Vallejo Paints:
Model Colour Black, Neutral Grey
Two Thin Coats Paints:
Dark Sun Yellow
White Star
Brushes: Artis Opus Size 1 Brush, Artis Opus Size 00 Brush
Other Tools: Wet Palette, Lamp (for checking light placement), Water Jar
How to Paint a Blood Bowl Chaos Dwarf
Step 1: Priming
- Start by priming the model using Mephiston Red as the base coat. You can use an airbrush or a hand brush to apply it. This will form the base of the red armour and speed up the process.
Step 2: Painting the Beard
- For the beard, use Vallejo Model Colour Black to base coat it.
- Highlight the beard using Vallejo Neutral Grey. Apply this in parallel strokes to follow the sculpted lines of the beard.
- Add some final highlights by mixing Neutral Grey with a bit of White Star and pick out raised areas.
Step 3: Painting the Non-Metallic Gold Trim
- For the gold trim, begin with XV-88 as the base colour. This provides a solid foundation for the non-metallic metal (NMM) effect.
- Create your first highlight mix with Dark Sun Yellow. Layer this on top of the XV-88, leaving some of the base visible.
- Gradually lighten the gold by mixing Dark Sun Yellow with White Star. Apply smaller, more precise highlights with each layer.
- To give the gold a bit more warmth, you can glaze over areas with XV-88 or add subtle orange tints using Troll Slayer Orange in the shadowed areas.
Step 4: Painting the Red Armour
- After the Mephiston Red base, layer on Evil Sunz Scarlet. Use a stippling or scratchy technique to give texture to the armour.
- For shadowing, use Night Lords Blue in the recesses and shaded areas, being careful not to overwhelm the red.
- If needed, go back with Evil Sunz Scarlet to reinforce the red and add brightness.
Step 5: Shading and Highlighting the Face
- Wash the face with a thinned-down layer of Rhinox Hide (4 parts water, 1 part paint) to shade it and separate it from the rest of the armour.
- Highlight the face using Bugman’s Glow, focusing on the raised areas like the nose, cheeks, and brow.
- For brighter highlights, mix Bugman’s Glow with Ice Yellow (or White Star if you don’t have Ice Yellow) to add subtle highlights to key areas like the cheekbones and nose bridge.
Step 6: Painting the Eyes
- Paint the whites of the eyes using a light grey rather than pure white to keep it natural.
- Use black to paint the pupil and iris in one go, as these are very small details that don’t require too much fine detail.
Step 7: Painting the Teeth and Horns
- Base the teeth and horns with Morghast Bone. You can use the same colour for both areas to keep consistency.
- Add highlights using White Star on the tips of the teeth and horns, carefully placing small dots or lines for a shine effect.
Step 8: Painting the Leather Areas
- The gloves and boots can be painted with the same colours as the horns. Start with XV-88 for the base coat, then highlight with Morghast Bone, but don’t take the highlights up to white for these areas.
Step 9: Finishing Touches
- Once the main areas are painted, go back and refine any details that need sharpening, such as the edges of the armour or the highlights on the face.
- If the red armour starts looking too dark or the highlights become too muted, reapply Evil Sunz Scarlet in fine marks to bring the vibrancy back.
Step 10: Final Shading and Glazing
- For a final touch, glaze over the non-metallic gold areas with a thin mix of XV-88 to enhance the richness of the colour.
- You can add extra depth to the shadows by applying a thin wash of Night Lords Blue in the deepest recesses of the red armour.


If you don’t have an account here on my website, please sign up here! I have over 350 video tutorials with steps and tips, plus a selection of PDFs. If you are not sure about joining, you can explore my free videos with a free membership, or take the plunge and become a full subscriber for full access.


If you’d prefer to support me on Patreon, please visit: https://www.patreon.com/RichardGray