


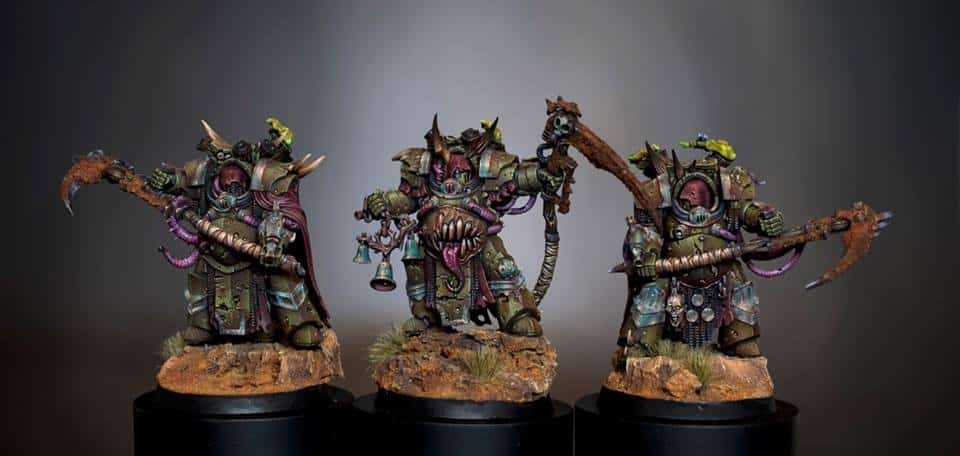
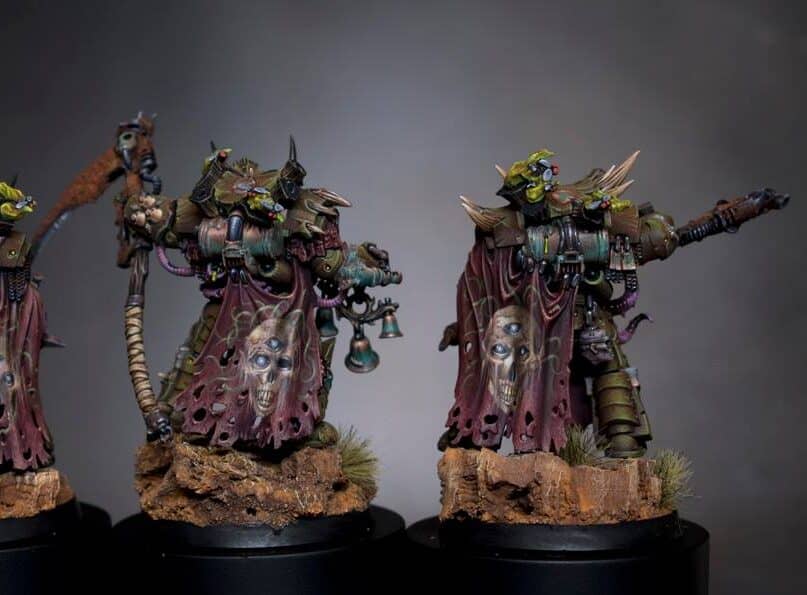
In this third part of the Lord of Poxes tutorial series, we shift focus to a small but visually rich section of the model: the belly pouch (affectionately dubbed the “ham pouch”) and the metallic canister it holds. This stage introduces new surfaces, tones, and NMM effects, offering a more fleshy, warm palette to contrast with the grimy armour shown in earlier parts.
“Even though it’s a small part of the model, I wanted this area to have its own identity. The fabric is unusually clean for Nurgle, but I offset that with colour variation and subtle staining. The canister gave me a chance to add another distinct metal tone, building contrast across the figure.”
– Richard
Video: How to Paint the Lord of Poxes Ham Pouch and Metal Canister
Paints and Materials
Games Workshop
- Mournfang Brown
- Mephiston Red
- Rhinox Hide
- Sotek Green
- Sybarite Green
AK Interactive
- Grey Green
- Ice Yellow
- Pastel Pink
- White
- Deep Orange
- Sahara Yellow
- Sand Yellow
Brushes
- Artis Opus Series M – Size 4, 1, 00
- Optional: 000 for final glazes
Step by Step – How to Paint the Lord of Poxes Ham Pouch and Metal Canister
Step 1: Basecoat the pouch
- Use AK Grey Green, thinned with water.
- Apply 3–4 smooth coats for an opaque, even finish.
- Aim for a clean look here to contrast with the rest of the gritty model.
Step 2: Build soft highlights
- Mix Grey Green with Pastel Pink in increasing amounts.
- Work up to almost pure Pastel Pink for the brightest areas.
- Apply with progressively smaller brushes (Size 4 → 1 → 00).
- Use fine feathered strokes to keep the transitions gentle.
- Highlight curved areas and raised folds with precision.
Step 3: Add soft glazing
- Make a glaze using Mephiston Red (around 1:5 paint to water).
- Apply it into the recesses and over highlighted areas for warmth.
- Follow with targeted glazes of Rhinox Hide and Mournfang Brown to deepen shadows and add richness.
- Always glaze towards the shadowed area, not over the highlights.
Step 4: Start the canister base
- Return to Grey Green, but this time allow some texture.
- Stipple and drag to create rougher texture compared to the pouch.
- Focus your light placement using the “golden angle” – where the viewer will mostly see the model.
Step 5: Highlight the metal
- Mix Grey Green with Ice Yellow.
- Use fine strokes and stippling to simulate worn NMM.
- Place a sharp bounce highlight on the underside and near reflective surfaces.
- For darker shadows, glaze in Rhinox Hide selectively.
Step 6: Paint the bronze nozzle
- Basecoat with a mix of Sahara Yellow and Mournfang Brown.
- Build up highlights with:
- Sahara Yellow
- Then Sand Yellow
- Finally Ice Yellow for edge brightness
- Use scratchy texture or layered lines to keep it metallic.
Step 7: Add verdigris
- Mix Sotek Green and Sybarite Green (50/50), heavily thinned.
- Stipple gently with a Size 00 brush.
- Optionally, add a touch of white for subtle contrast.
- Apply over darker bronze areas to simulate oxidised metal.
Pro Tips
- Use a hairdryer to dry glazes faster and prevent tide marks.
- Don’t glaze over pure white highlights – they’ll go chalky.
- Texture varies by surface – keep the pouch smooth, but add scratches and speckles to the canister.
- The “ham pouch” is a perfect place to test fleshy blends before using them on organic elements elsewhere.
Want to paint his armour?
Learn how to paint textured, grimy armour for the Lord of Poxes using a blend of warm greens and corrupted flesh tones.

Videos Not Showing?
To view any of my paid tutorials, you need to be a member of the website – please click below to log in or join the site.


Not sure about joining just yet? Check out my Youtube for all my free tutorials or sign up as a free “friend” member on this site and visit the free videos page!
If you’d prefer to support me on Patreon, please visit: https://www.patreon.com/RichardGray