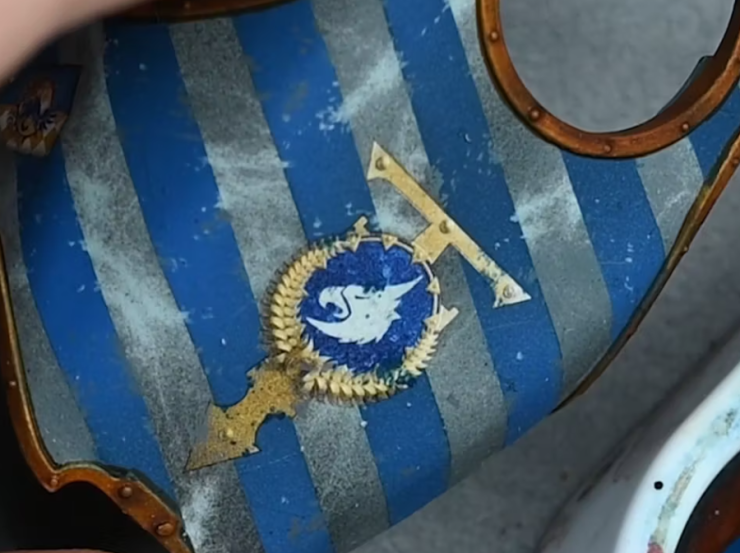
A beginners guide on how to apply Forge World decals and weather them so they look a natural part of the painting on your model. Painting and applying decals to your models adds significant details and realism, making it stand out during tabletop gaming. It’s also a lot easier than freehand! I still use decals a lot in my models, despite also enjoying freehand work.
This step-by-step guide, designed to be beginner-friendly, will walk you through applying decals, adding a gloss finish for protection, and executing weathering techniques to give your model a battle-worn appearance.
Video Tutorial: How to Apply Forge World Decals and Weather Them
Materials Needed:
- Vallejo Gloss Varnish
- Water for softening decals
- Micro Sol and Micro Set for decal application
- Tamiya 3mm Masking Tape or equivalent
- Games Workshop Kantor Blue
- Vallejo Neutral Grey, Ultramarine Blue, and Pale Grey Blue for weathering
- Games Workshop Matte Varnish
- Fine detail brushes
- Airbrush (optional for varnishing)
- Forge World Decals for Legio Gryphonicus
How to Apply Forge World Decals Steps:
Preparing the Surface:
- Apply Gloss Varnish: Begin by applying Vallejo Gloss Varnish to the areas where decals will be applied. This creates a smooth surface, reducing air pockets and imperfections. You can apply the varnish with a brush or an airbrush. If brushing, slightly dilute the varnish with water for easier application.
How to Apply Forge World Decals:
- Soften Decals in Water: Cut out your chosen decals and soak them in water until they easily slide off the backing paper. This typically takes a few minutes.
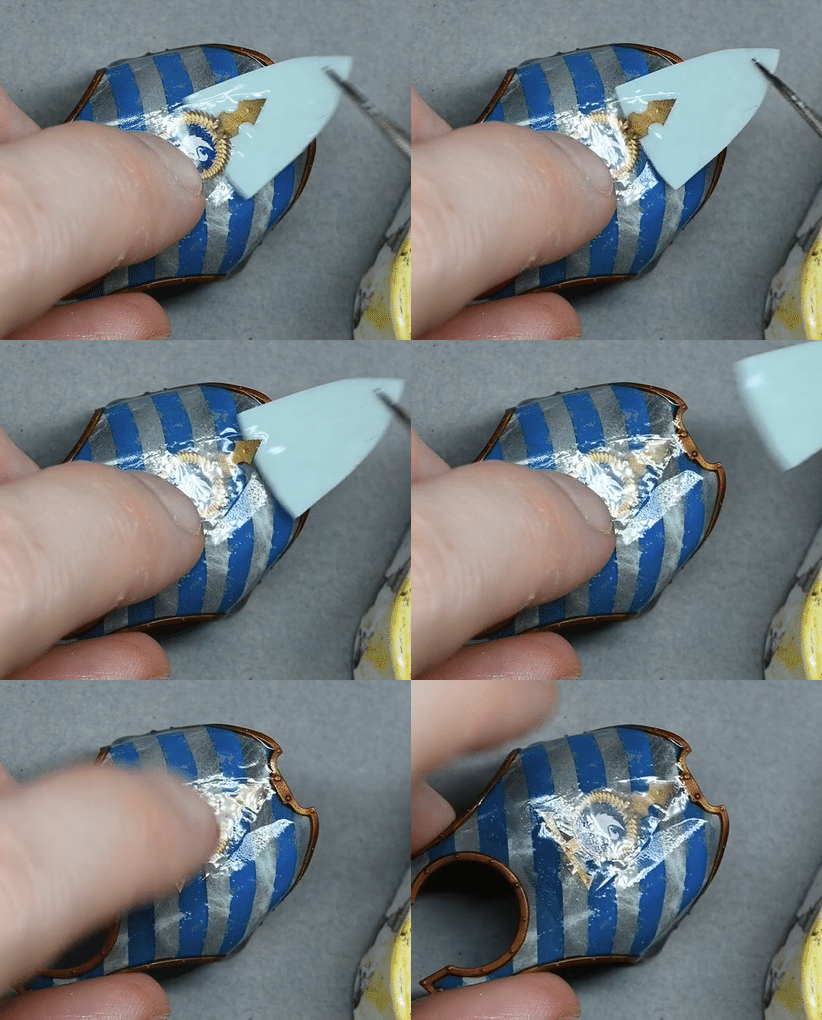
- Apply Micro Sol: Place a small amount of Micro Sol on the model where the decal will be applied. This softener helps the decal conform to the model’s surface.
- Position the Decal: Carefully slide the decal from the paper to the model. Use a soft brush to adjust its position accurately.
- Remove Excess Water: Gently dab a soft, dry brush or a paper towel to remove any excess water and air bubbles beneath the decal.
- Apply Micro Set: Once the decal is in place, apply Micro Set over it. This solution helps soften the decal further, allowing it to snuggle down into the model’s details. Let it dry thoroughly, ideally overnight. Don’t worry if the decal looks wrinkled at this stage; it will smooth out as it dries.
Sealing the Decal:
- Apply Additional Gloss Varnish: After the decal has dried, apply another layer of gloss varnish over it using an airbrush for an even coat. This step helps to seal the decal and even out the surface. If necessary, apply 2-3 coats, allowing each to dry thoroughly.
- Matte Varnish Finish: Once the gloss varnish is completely dry, apply a matte varnish over the entire model to give it a uniform, non-glossy finish. This also helps to further blend the edges of the decal into the model.
Weathering the Decal and Armour:
- Weathering with Paint: Use Vallejo Neutral Grey and Pale Grey Blue to add weathering around the decals and on the armour. Use a fine detail brush to apply small chips and scratches, focusing on edges and areas that would naturally see more wear. This adds realism and depth to your titan.
- Additional Weathering Techniques: For further realism, you can add streaks and rust effects using diluted paint or weathering powders. Apply these sparingly in areas where water and dirt would naturally accumulate and streak down the model’s surface.
Additional Tips:
- Take your time with each step, especially when applying and positioning the decals.
- Always allow each layer of varnish and paint to dry completely before proceeding to the next step.
- Practice weathering techniques on a spare piece before applying them to your model to get a feel for the effect.
By following these steps, you can achieve professional-looking results on your models, ready for display or tabletop gaming.
More Tools and Basics Tutorials
If you don’t have an account, please sign up here! The website currently has over 350 video tutorials with steps and tips, plus a selection of PDFs. If you are not sure about joining, you can explore my free videos with a free membership, or take the plunge and become a full subscriber for full access.
If you’d prefer to support me on Patreon, please visit: https://www.patreon.com/RichardGray


