


This is Part 1 in a series for building and painting the Death Korps of Krieg Marshal. The series will expand into a Krieg army, covering both assembly and detailed painting techniques.
This guide walks you through building the model, highlighting key tools, techniques, and best practices to ensure a clean and precise assembly.
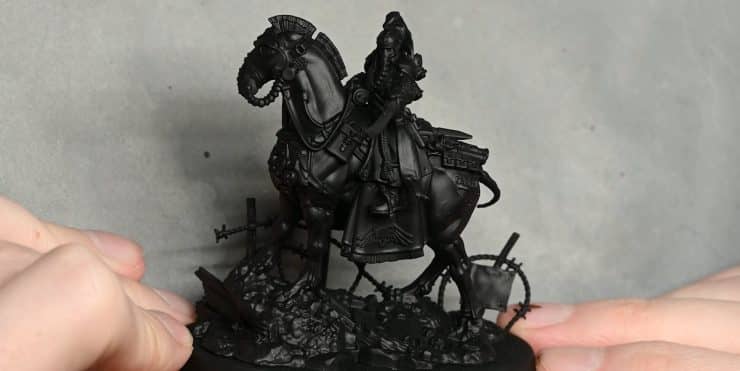
Video: How to Build the Krieg Marshal
Materials & Tools Required
- Clippers – GodHand (recommended for precise cuts)
- Scalpel/X-Acto Knife – For removing mould lines and refining details
- Mould Line Remover – Optional, but useful for larger areas
- Ultra Thin Polystyrene Cement – Tamiya Extra Thin (preferred for clean, strong joins)
- Sprue Goo – Tamiya Extra Thin mixed with sprue bits (for gap filling)
- Pin Vice Drill – Optional for drilling weapon barrels
Step-by-Step Krieg Marshal Assembly Guide
Step 1: Preparing the Pieces
- Identify and carefully clip out all pieces using GodHand clippers.
- Use a scalpel or mould line remover to remove excess plastic and mould lines.
- Pro Tip: A fresh scalpel blade allows for cleaner, controlled scraping.
- Check the assembly instructions to avoid build errors.
- Many Games Workshop kits have precise build orders to ensure all parts fit.
Step 2: Cleaning and Smoothing the Model
- Scrape off any visible mould lines using the scalpel.
- Keep the blade angled away from the plastic to avoid deep cuts.
- If needed, use extra thin glue to smooth minor imperfections.
- This helps melt plastic shavings and leaves a clean finish.
Step 3: Assembling the Krieg Marshal
- Begin with the horse body, assembling both halves using Tamiya Extra Thin Cement.
- Dry-fit pieces before gluing to ensure proper alignment.
- Add legs and hooves to the base.
- Issue: The hooves are sculpted onto the base, creating an unavoidable ankle gap.
- Solution: Apply Sprue Goo to blend the joints seamlessly.
- Attach armor plates, saddle, and reins.
- Some rein parts may be slightly damaged from sprue connection – gently reinforce with glue.
- Assemble and attach the rider torso and head.
- The belt is split into two halves, which requires extra care during assembly.
- Glue arms and weapons.
- The model comes with two weapon options:
- Power Sword (chosen for this build)
- Las Pistol (drill the barrel for added realism)
- The model comes with two weapon options:
Step 4: Fixing Gaps & Final Cleanup
- Check for gaps around key join areas, especially the ankles and belt seams.
- Apply Sprue Goo or plastic putty to any visible seams.
- Use a scalpel to gently scrape excess filler once dry.
Step 5: Priming
- Once assembled, ensure the model is free of excess plastic shavings.
- Prime with a suitable undercoat based on your painting plan.
- For realistic shading: Use a black primer.
- For brighter, high-contrast painting: Use white or grey primer.
Pro Tips & Extras
- Avoid Fingerprints: Extra Thin Cement can leave fingerprints if touched too soon, make sure you leave your model to dry completely and avoid touching it in the meantime!
- Mould Line Positioning: Always drag the scalpel backwards, not forwards, to avoid cutting into details.
- Drilling Barrels: If you lack a pin vice, a scalpel tip can be used in a spinning motion.
- Smoothing Plastic with Glue: Running Tamiya Extra Thin Cement over mould line removal areas helps dissolve plastic shavings.
- Build in Sub-Assemblies: While this build required a fully assembled approach, consider keeping the rider separate for easier painting.
Next Steps
With the model fully assembled, we move on to Part 2: Painting the Horse Base Colours & Fur…
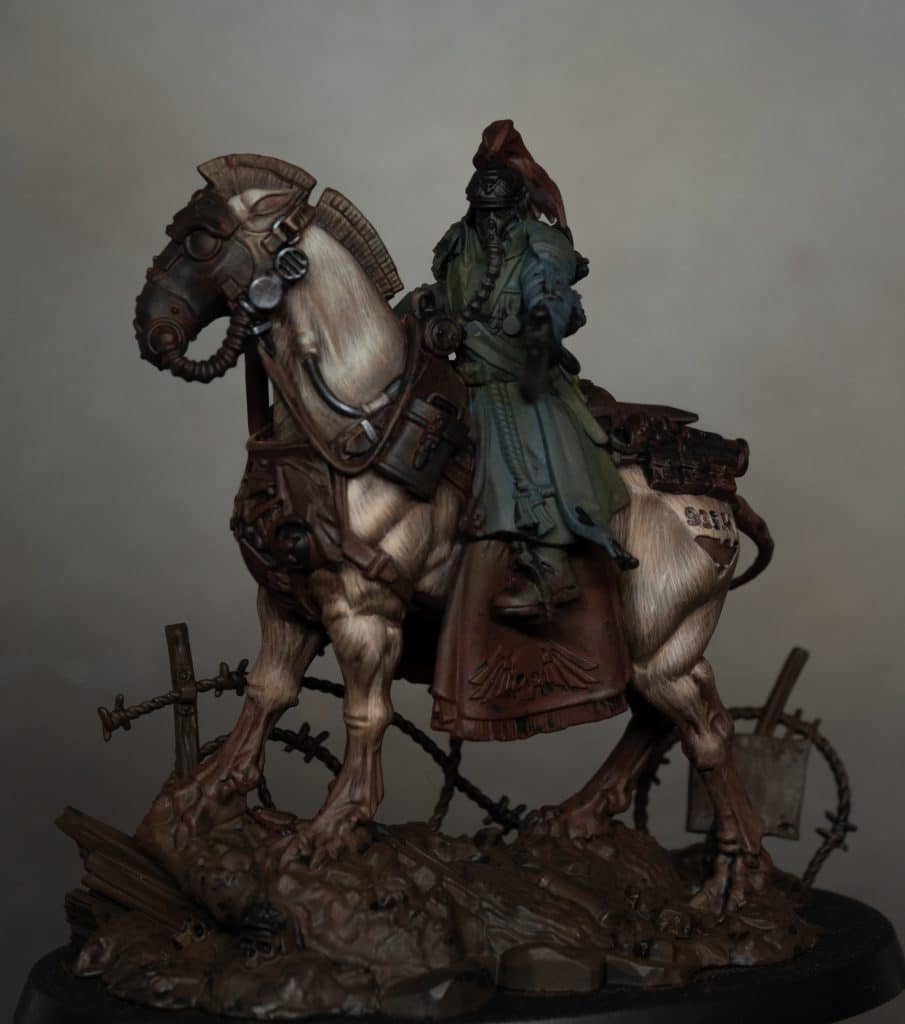
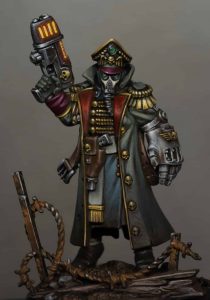
Death Korps of Krieg Marshal
The Death Korps of Krieg Marshal is a striking centrepiece model, embodying the grim determination of the Astra Militarum’s most unyielding warriors. In these tutorials I show you how to prime and assemble him and his steed, plus how to paint his base colours and horse, with more to come!
More Krieg Tutorials? Oh, go on, then.


Videos Not Showing?
To view any of my paid tutorials, you need to be a member of the website – please click below to log in or join the site.


Not sure about joining just yet? Check out my Youtube for all my free tutorials or sign up as a free “friend” member on this site and visit the free videos page!
If you’d prefer to support me on Patreon, please visit: https://www.patreon.com/RichardGray