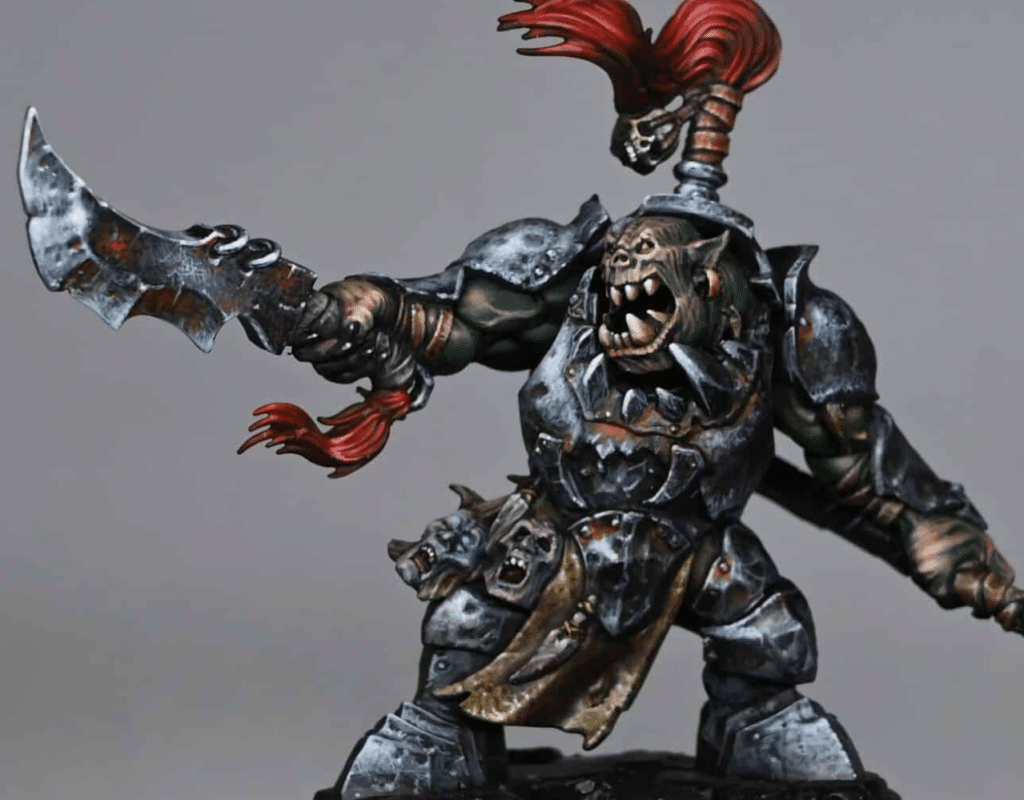
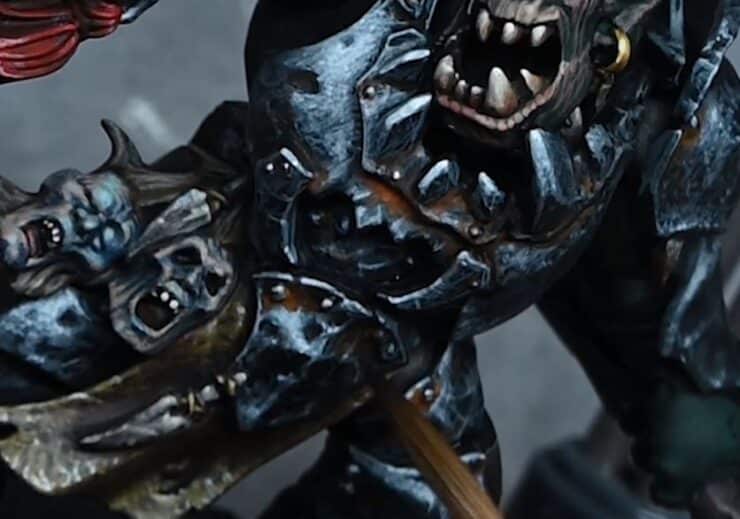
The final painting Morgok video, with kill trophies, highlights, cloth, leather and just those lovely finishing touches.
Video – Kill trophies, highlights, cloth, leather and more on Morgok!
Materials and Paints
The following paints were used:
Games Workshop: Cadian Fleshtone, Balor Brown, Morghast Bone, Kantor Blue, XV-88 (Or Balor Brown mixed with black), Rhinox Hide
Vallejo: Neutral Grey, Pale Grey Blue
P3: Morrow White
Step-by-Step Guide
To finish painting Morgok from Morgok’s Krushas, focusing on the kill trophies and final touches to the armour, here’s a step-by-step guide:
- Painting the Trophy Heads:
- Basecoat: Start with Vallejo Neutral Grey to outline highlight areas. This grey base helps to convey the deceased look of the heads.
- Highlighting: Apply Cadian Fleshtone, which appears pinkish on the palette but turns pale when applied. Mix it with two parts water to one part paint for translucency, allowing underlying grey to show. This creates a dehydrated, mummified look. Focus on prominent features like cheekbones, forehead, upper lip, and nose.
- Adding Cool Tones: Use Kantor Blue, heavily diluted (about four parts water to one paint), to add a cold, lifeless tone to the flesh. Be cautious as it’s strong and can overpower other colours. Apply sparingly and touch up with Cadian Fleshtone where needed.
- Painting the Hair:
- Basecoat: Use Rhinox Hide for a dark base.
- Detailing: Apply a mix of Balor Brown and black (or XV-88) for the texture. Water down slightly for a smoother finish. Follow with Morghast Bone for finer details and strands. Apply these colours in thin lines to represent the texture of the hair.
- Painting the Skull:
- Basecoat: Apply Balor Brown over black primer. Don’t aim for a smooth finish; a bit of messiness adds to the worn look.
- Highlighting: Use Morghast Bone for highlights, focusing on raised areas like the brow. This creates the effect of a weathered, unpolished skull.
- Final Touches to the Armour:
- Secondary Bounce Highlights: Use Neutral Grey for less bright areas, ensuring the main highlights are brighter. Apply these highlights on areas like the underside of the armour, keeping in mind the light source and overall weathered look.
- Refining Highlights: Use Pale Grey Blue and Morrow White for hard edges and minor details. Apply Morrow White sparingly to maintain focus on the model’s main areas.
- Adding Rust and Grime:
- Base Layer: Start with Mournfang Brown for rust and grime, focusing on areas like the belt.
- Secondary Layer: Apply Troll Slayer Orange for a more saturated rust effect. This colour is strong; use it carefully to avoid overpowering other elements.
- Glazing for Cohesion:
- Mixing the Glaze: Create a glaze with Abaddon Black, diluting it heavily (approximately five parts water to one part paint).
- Application: Apply the glaze carefully to mid-tones and shadows, avoiding the brightest highlights. This unifies the armour’s look, enhancing shadows and reducing the intensity of mid-tones for a cohesive finish.
Throughout the process, maintain a balance between detail and the overall look of the model. The aim is to create a realistic, battle-worn appearance with attention to the finer details, especially on the trophy heads and armour.
Morgok from Morgok’s Krushas – All Videos

Painting Morgok from Morgoks Crushas
Morgok and his mob of Ironjawz brutes once hunted down and fought the greatest prey they could find amongst Ghur’s trackless wastes. Whether they ran down spiny nephrodiles or fought the storm-warriors of Sigmar, Morgok’s Krushas sought the mightiest trophies in the name of their bellicose deity, Gorkamorka.
Here is the full series of videos on how I painted him!
If you don’t have an account, please sign up here! The website currently has over 350 video tutorials with steps and tips, plus a selection of PDFs. If you are not sure about joining, you can explore my free videos with a free membership, or take the plunge and become a full subscriber for full access.
If you’d prefer to support me on Patreon, please visit: https://www.patreon.com/RichardGray


